by Scott Ammerman
Quadratec Channel Correspondent
Communication on the trail is important. That may seem like a common-sense statement, but you'd be surprised how many people show up at off-road events with no way to communicate with their fellow drivers.
If you’re in a line of vehicles off-road, you can’t put a value on the ability to let others know if there are difficult obstacles ahead, or even to make sure everyone is prepared to go down the trail you’ve selected. Sometimes turning around isn’t an option, so making sure everyone is 'good to go' is essential. Making calls or sending texts with a cell phone isn’t always possible, or fast enough. The last thing you want to hear is the ping of a text saying “stay to the left in that mud hole” when you’re already stuck on a submerged tree trunk.
The evolution of citizens band radio communication began in 1945, the same year the first civilian Jeeps rolled off assembly lines. The Federal Communications Commission set aside certain frequencies for individuals to utilize, and these early radios were put into use by private citizens as well as truckers and tradesman looking to communicate with each other. Back in those days, personal over-the-air communication was groundbreaking. With the advent of affordable VHF radios, cellphones and other communication devices, CB radios have since fallen by the wayside for all but a few specific uses.
Most modern CB radios can operate on 40 different frequencies, with channel 9 used exclusively for emergency communications and calls for roadside assistance as regulated by the FCC. Many local emergency services monitor this channel, so calling for help is still possible even without cellular reception. Truck drivers (and highway travelers) generally use channel 19 to talk about traffic delays, speed traps, construction, and the like. That gives you 38 stations that are - more or less - unused, perfect for people looking to talk with each other (or in a group) over short distances. In the past, the various numbered stations were used for specific purposes, but as the popularity of CB communication waned, these restrictions were dropped. Channel 16 has been informally adopted by many off-road people as the channel of choice, since 4x4=16. Math jokes, hah!
Many of Quadratec's audio and electronic products are custom engineered specifically for Jeep models by a West Chester, Pennsylvania-based company, Chadds Ford Electronics. With over 40 years in the business, the guys at this small shop are experts when it comes to working with CB radios, which is really a lost art in many areas of the country.
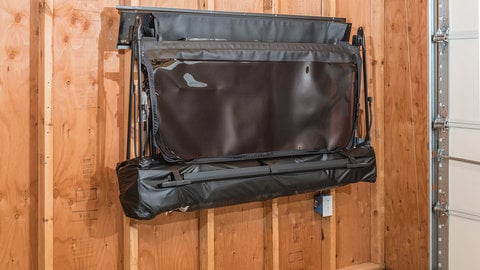
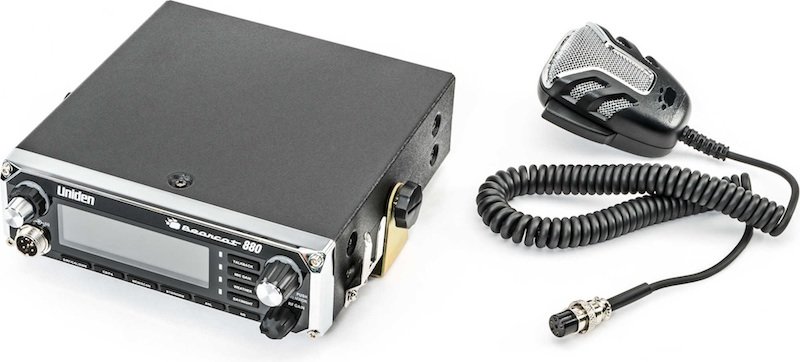
For my 2008 JK Rubicon, I decided to go with a Uniden Bearcat 880 radio. This radio came highly recommended by Bob Samuelian, the owner of Chadds Ford Electronics, so I knew it was a solid choice. I also like that both the antenna and radio will be easily removable without tools for added security if I leave my Wrangler parked with the top or doors removed.

Keep in mind, many steps of this guide can be used to install the other models of CB radios Quadratec sells, and the variety of radio mounts available will work with everything from the compact Uniden Pro 510XL to the full-sized Uniden Bearcat and Cobra models. The Quadratec Complete CB Combo includes a Uniden 510XL radio as well as the same antenna, mount and cable I’ll be installing - all for one low price. It’s the most cost effective way to get a basic trail-ready setup in your Jeep, and can be mounted on either the driver or passenger side of the factory center console with an optional Quick Disconnect CB Radio Mount.
For this installation, I’m using the following products:
- Uniden Bearcat 880 CB Radio
- Quadratec 12 Volt Power Adapter
- Quadratec Quick Disconnect CB Radio Mount
- Quadratec Extreme Duty Stainless CB Radio Antenna Rear Tailgate Mount with 48" Antenna
- Quadratec Stainless Steel Quick Disconnect For CB Antennas & Trail Flags
The whole procedure is pretty straightforward, but there are quite a few steps and the entire process took me less than an hour and a half. However, more time will be required on 2011 and up Wranglers due to the amount of plastic panels that need to be removed - particularly in the dash area to install the power tap. If installing this same setup in a 2-door Wrangler, the radio must be removed from the Quick Disconnect Mount before the seat can be moved forward, but this only takes a matter of seconds. We’ll start with the tailgate antenna mount and work our way forward to the dash.
A quick note on The Quadratec Stainless CB Antenna Rear Tailgate Mount: this mount is offered in two different kits, both including 18’ cables. The one I’m installing also adds a 48” FireStik antenna that is pre-tuned for Jeep Wranglers. The mount's stainless steel material also ensures proper grounding and will not corrode. A solid ground connection is extremely important when it comes to CB antennas and range; many other mounts are manufactured in regular steel with a powdercoated finish to prevent corrosion. While this will keep your mount looking nice, the powdercoat is not a conductive coating. A proper connection is possible at installation by cleaning some of the coating, but the bare steel underneath will eventually corrode. If you have a CB installed with a regular steel mount, your range and performance may deteriorate as time passes. The initial investment in the Quadratec Stainless Mount is higher, but you won’t need to worry about this vital connection being compromised by rust.
What you will need to complete the whole procedure:
- 13mm socket to remove the spare mount bolts
- T-27 Torx bit to remove the bolt in the console to mount the CB bracket
- 7mm socket to loosen the bottom of the dash panel
- A plastic interior trim prying tool (or a flathead screwdriver wrapped in electrical tape)
- 10 cable ties
- A pair of wire cutters, utility knife or razor blade for cutting the tailgate grommet
- 7/16” (you actually need this size, or a small adjustable) wrench to tighten antenna mast
- ½ (or 13mm) wrench to tighten quick release
- ⅝” (or 16mm) wrench to hold antenna base
- A mini flat head screwdriver
- #10-32 x ½” bolts and nuts for mounting CB bracket to Quick Release Mount (if nothing came with your CB)
Quadratec Extreme Duty Stainless CB Radio Antenna Rear Tailgate Mount and Antenna:
Start by removing your spare tire, then the two upper left 13mm bolts on the tire carrier where the antenna mount will be installed. Longer stainless steel bolts with washers have been provided in the kit. Install the bolts and washers through the antenna mount with the included stainless steel shims between the mount and the tire carrier.


Remove both plastic panels with your trim tool, paying attention to the location of the clips as shown in these two pictures. Pry from the bottom upwards on the long trim that goes the length of the tailgate, and towards the right on the vent cover. Once the vent cover is removed, unplug the third brake light connector.

Uncoil the cable and remove the twists in it - this will make it easier to route through the tailgate. The antenna connector is too large to go through with the brake light wiring, so the tailgate grommet will need to be modified.
Remove the tailgate grommet with your fingers, and pull the wiring and connector (the one you just unplugged) completely out. Route the antenna cable through the hole and pull it all the way through. After it is completely through, route the connector up to the channel that goes across the top of the tailgate with all the other wiring. There is a sharp edge inside the tailgate that could damage the insulation of the antenna cable, so do it in two steps rather than trying to pull it through in one go.

Cut the grommet part way through, but do not cut all the way down to the channel for the third brake light wiring - stop just short of that tube. Cut the cable tie off the back of the grommet, then put the antenna cable in the slice you just created. This will allow the grommet to still do its job, but with the antenna cable passing through it. Replace the cable tie going around the back part of the grommet tube and the antenna cable. Insert the grommet back in the tailgate, and reconnect the third brake light wiring inside. Once installed, it should look like this:

With the tailgate fully open, attach the antenna cable to the wiring harness going across the tailgate with additional cable ties, and behind the tailgate check strap.

Routing the cable is actually the easy part with a Wrangler. Since I have a soft top on the Jeep right now, all I needed to remove was the passenger side tailgate retainer bracket and rear edge of the top to get the cable around the corner towards the passenger side rear window. Once to that point, the cable just goes behind the carpet over the rear wheel well, then along the floor of the passenger side. Since I have a 4-door, I tucked the wiring under the sill plate for the rear door, then under the plastic B-pillar trim. From that point, I went under the passenger front seat towards the center console, being careful not to route the cable anywhere near the seat rails or other moving parts of the seat that could possibly cause damage.
NOTE: Once I got to the front, I had about 18” of cable to spare. With a 2-door model, you’ll have several feet. It is very important to hide this under the carpet in long loops, as a tangled coil of antenna cable can act as an inductor and have a negative effect on your CB’s performance. In my case, I just ran it up a little farther forward, then back to the area where the radio will mount so it wasn’t crossing.
Head back to the tailgate and reinstall your two plastic covers. Tighten antenna into the base using a ⅝ and 7/16 wrench.
If you’re using a quick release antenna mount (strongly recommended!), screw the antenna into the quick release sleeve (you’ll need a ½” wrench for this), then thread the whole antenna assembly into the mount. Tighten with ½” and ⅝” wrenches. To use the quick release, simply pull down against the spring in the quick release and turn clockwise a quarter turn. This is particularly useful for removing the antenna quickly to get into a garage, or under other obstacles.
Quadratec Quick Disconnect CB Radio Mount:
This step is simple. Remove the T-27 Torx from the passenger side of the center console, and slip the lower bracket behind the edge of the console. Reinstall the T-27 bolt. Install the provided carriage bolts facing upwards, then spin the wing nuts down on top. 2011+ Wranglers have another small plastic trim part in the way, this is noted in the provided installation instructions.


The Uniden Bearcat only came with self-tapping screws (for mounting directly into sheet metal) in its hardware kit, so I had to grab small nuts and bolts to attach the Uniden bracket to the radio mount. Surprisingly, I didn’t have anything that would work in the ol’ junk drawer. With those two parts attached and the radio mounted in the bracket, simply loosen the wing nuts and the entire assembly slides right into place. Leave it out for now, it will give you more room to work on the final steps. With a 2-door Wrangler, using this quick release is necessary to move the passenger seat forward to get into the back seats.
Quadratec 12 Volt Power Adapter:
This part of the installation was a lot easier than I thought thanks to this ingenious little power adapter. It taps into the back of the cigarette lighter plug on the drivers side, adding an additional power input that is switched off with the key. No cutting or splicing of wires is required, and it adds a mini fuse to protect the circuit. There are two power adapters available and the one I used for this installation is the plug-and-play version - it costs a bit more, but is the easiest to install.

Using your plastic trim tool, pry the top of the lower dash cover down - paying attention to clip locations as pictured. Remove the two 7mm bolts holding the climate controls into the dashboard, and gently pull towards you until you feel the 4 clips release.


Unplug the connector from the back of the drivers side cigarette lighter (the passenger side one is NOT switched with the ignition). Plug one side of the adapter into the connector you just removed, and the other side into the back of the cigarette lighter. Tuck as much of the wiring as you can behind the power ports, allowing the additional wiring loom and power tap to hang down behind where the lower dash panel is installed.

Route your power cable for your CB radio from your mounting location up into the lower dash. Using a mini flat head screwdriver, tighten the screws down on the bare wire ends. Give them a slight tug to make sure the connection is tight. Clip the lower dash panel back in place.


Note: This portion of the installation takes a lot longer on the 2011+ JK models with the new interior, and detailed instructions are included. Several additional panels have to come off to get at the back of the power ports, including the vents, radio bezel and upper dashboard. If you have a 2011+ JK, it is recommended that you run the additional power tap up through the dash to the area behind the glove box - that way any fuse replacements or changes to your setup won’t require disassembling the dash again. With the 07-10 JK interior, it only takes a few seconds to access, so this isn’t really required.
Plug in your radio power connector, and tighten the antenna cable end into the back of the radio. Slide the quick release mount back over the wingnuts and tighten them down. Plug in your mic, and now you’re ready for your first radio check! If you don’t have a friend nearby with a CB, try reaching a truck driver on channel 19 close to a highway.

Now, a note on tuning: The 48” Firestik antenna Quadratec sells was pre-tuned at the factory. When used with the Quadratec Stainless Antenna Mount and 18’ cable, your tune should be dead on right out of the box. Further tuning should not be necessary. I stopped by Chadds Ford Electronics and had them double check with an SWR (standing wave ratio) meter and the tune was perfect. If you have a local CB shop, they can probably check this for you for a small fee if you don’t want to buy a meter. The tuning process involves changing the length of the antenna's upper coils by removing the tip and rotating the knurled screw with pliers. This can’t be done “by ear” like the guy who grew up down the street and always insisted on adjusting his engine timing without a light. The Uniden Bearcat 880 also has an SWR meter built in, but many radios do not. As far as range, 1.0-1.5 SWR is ideal for maximum signal making its way out of the top of the antenna. You should check SWR readings on channel 1 and 40 to ensure readings stay close across the entire bandwidth.