Featuring Premium Parts from
Episode 1: Bumpers, Tire Carrier, Winch and Side Steps
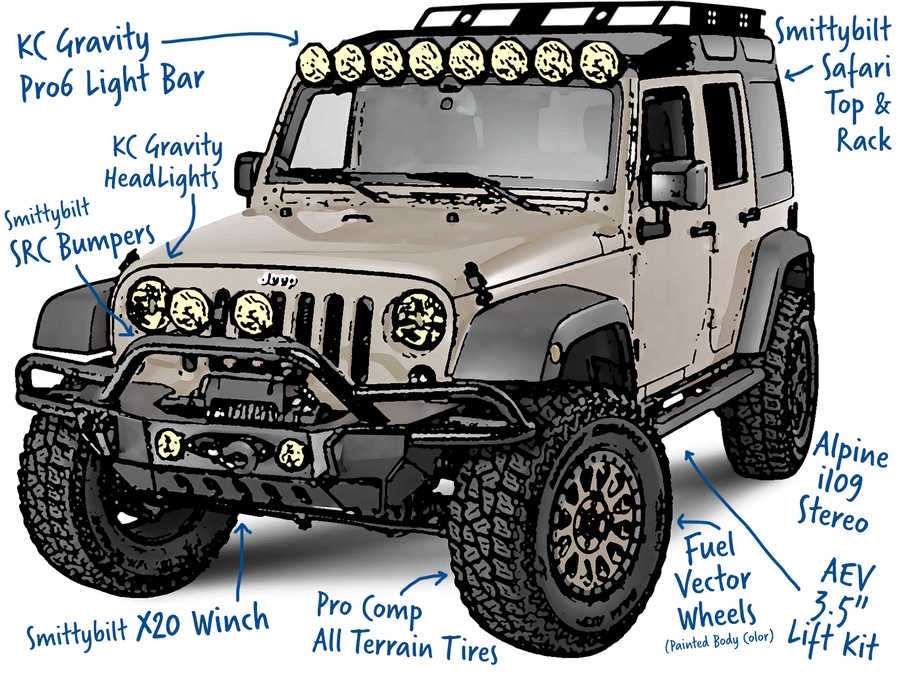
Like this build? Here are the parts:
Design
Savanna is the result of my dream to create a vehicle that blends the looks of an African Safari off-road truck with the modern conveniences you'd want in a daily driver. This project started on the back of a napkin with my Quadratec catalog in hand. I love the look of the 1980's Defender 90 vehicles. Their primitive style shouts "adventure". Add to that Jeep's Africa concept and you'll see the design cues that went into the sketch for Savanna.
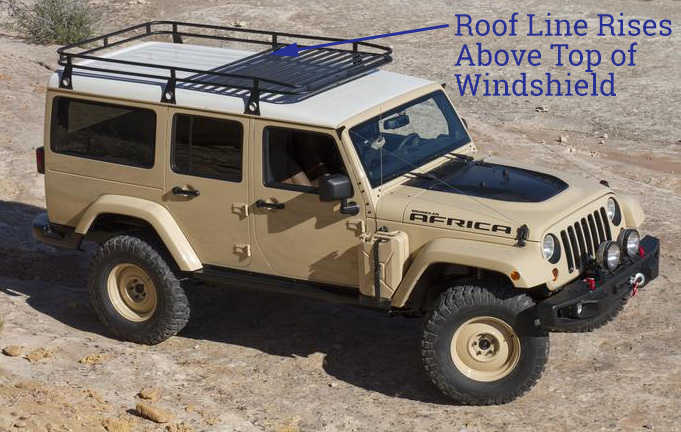
In order to get the right look, there are several visual cues that must be present. I have to change the roofline so it rises above the top of the windshield. If you look at old Land Rovers, the flat top flows into a curve down into the side panels. The only top that provides that look is the Smittybilt Safari Hard Top. By itself, it looks completely different than any other hard top for the Wrangler. I'll have it repainted so the top is white and the sides are body color. After the paint, it should look just like an old Defender.
Any proper Safari vehicle has full width bumpers so Savanna needs bumpers that will stretch from fender flare to fender flare. Most full width bumpers decrease your tire approach, but the Smittybilt SRC bumpers are built off of their stubby XRC bumper. The full width coverage is provided by tubes protruding from the ends of the bumper. The SRC Bumper will give me the coverage I want, without killing the approach angle and as a bonus I get the old school appearance of the tubes. It turns out to be a perfect design for this build.
Lights are especially important to a design. They're prominent on the front of your Jeep, so they really change how it looks. This throw back design needs all of it's lights to be round, since those Safari trucks typically had giant 9 inch halogens on the front. Savanna will also only have round lights on it. So the light bar, auxiliary lights and fogs all need to follow suit. KC Hilites is currently the only company that steers away from the long rectangle of small LED's in favor of eight round lights on it's 50 inch light bar. KC is also a premium quality brand so I quality of light output will be excellent and they'll be extremely durable.
Concept
If you’re like so many people, you work all day, and try to make the most of the few hours of daylight at the end of the day. When winter comes, those after-work hours are even shorter, so you have to make the most of every one.
Savanna was designed for the working man who uses his daily driver for wheeling on nights and weekends. It’s built to provide both driver comfort for long commutes and excellent off-road capabilities. It’ll get you through your daily commute, then stand up to the abuse of rocks, mud and sand.
Savanna will provide many hours of extra playtime at the end of the day. Long distance lights are combined with rock crawling lights for the ultimate one-two punch of illumination.
Build Goals
Night time visibility
Since daylight is valuable to an outdoor enthusiast, you sometimes have to create your own. Savanna needs to provide light for off-roading, mountain biking and backpacking.
A good balance of off-road and on-road handling
This has always been the white whale for Jeep owners. Most of us drive our Jeeps on-road more than off-road. Finding the right lift kit will get me more ground clearance for 35 inch tires while still handling well on the road.
Driver comfort and convenience.
Purists may laugh at the notion that a Jeep can be comfortable to drive. Savanna is a daily driver after all, so you’re going to spend several hours a day in the driver seat. Savanna has to handle itself just as well on the road as it does off-road.
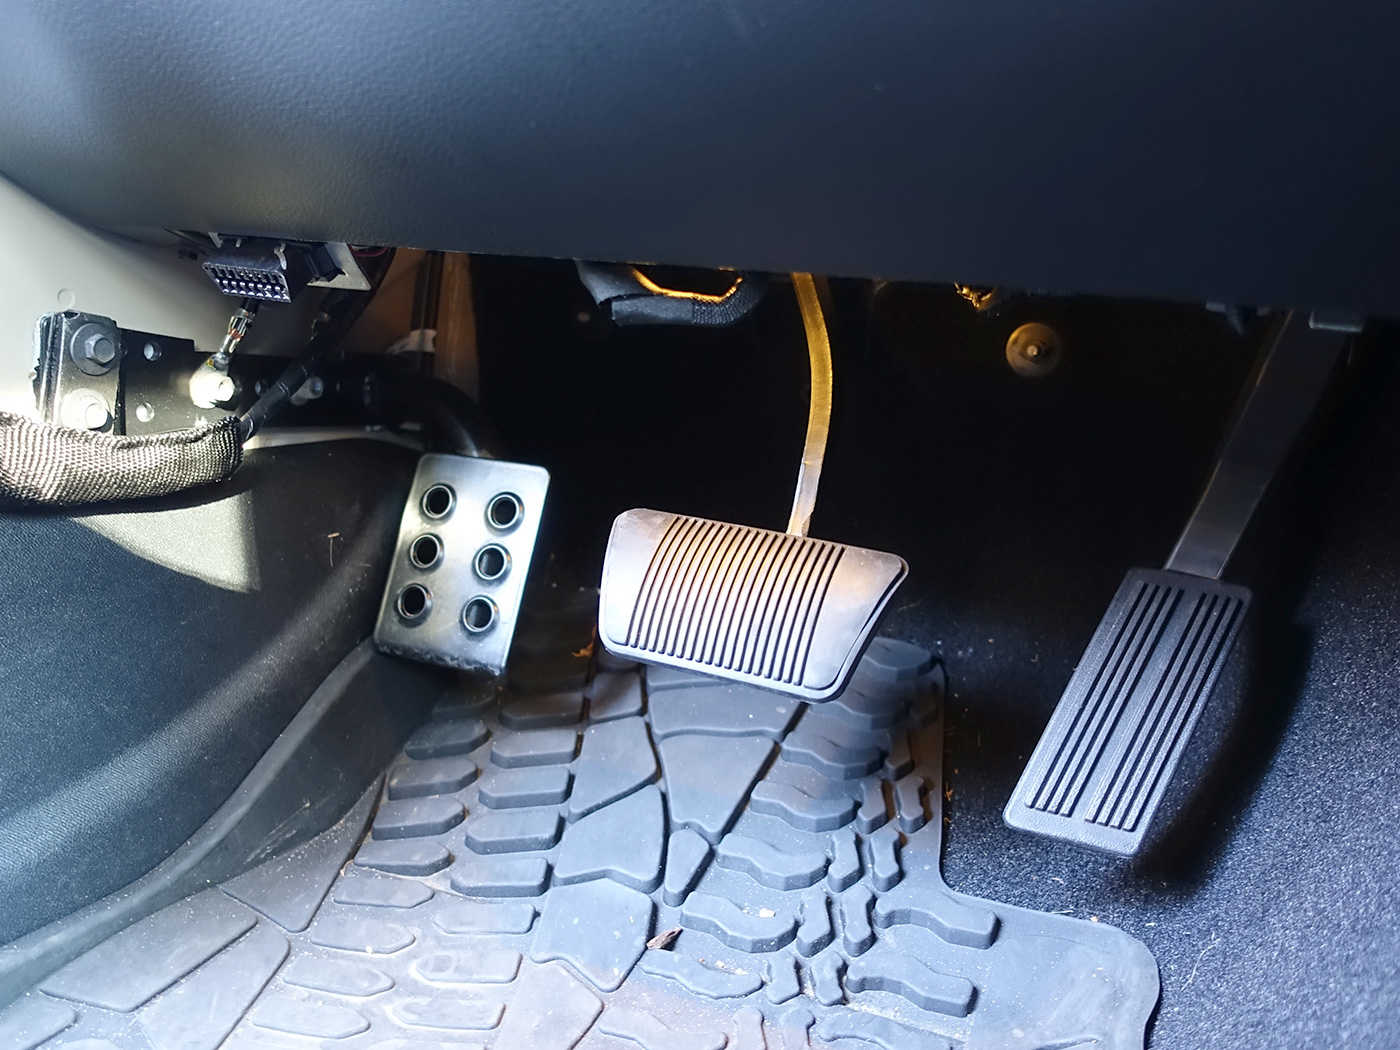
There’s no question in my mind that my favorite modification is the MORE Dead Pedal. Some people have asked me “Why bother?”. I can tell you that there’s no other modification I’ve used more than this.
When purchasing this JK, I traded in a JK. The morning I took delivery of this new vehicle, I drove my old JK to the lot and hopped in my new Rubicon. The moment I sat in the driver seat, I knew something was wrong. It wasn’t the firmer seat cushions, the different floor mats or the tight door seals. It was the lack of a dead pedal. My left foot had nowhere to go and nothing to do. It didn’t have a firm place to rest. I couldn’t cinch myself comfortably back in the seat.
If you have an automatic transmission, you should have a dead pedal. When you’re on the highway, your left foot has a place to rest. When you’re off road, you’ll have more control because you can brace yourself firmly in your seat when the trail gets rough. Once you get one, you’ll never want a Jeep without one.
Before I took delivery of this new Jeep, I asked my salesman for a socket wrench. I promptly removed the dead pedal from my trade and placed it in my new Rubicon. As simple as it is, I guess you can say my first modification was the addition of a dead pedal.
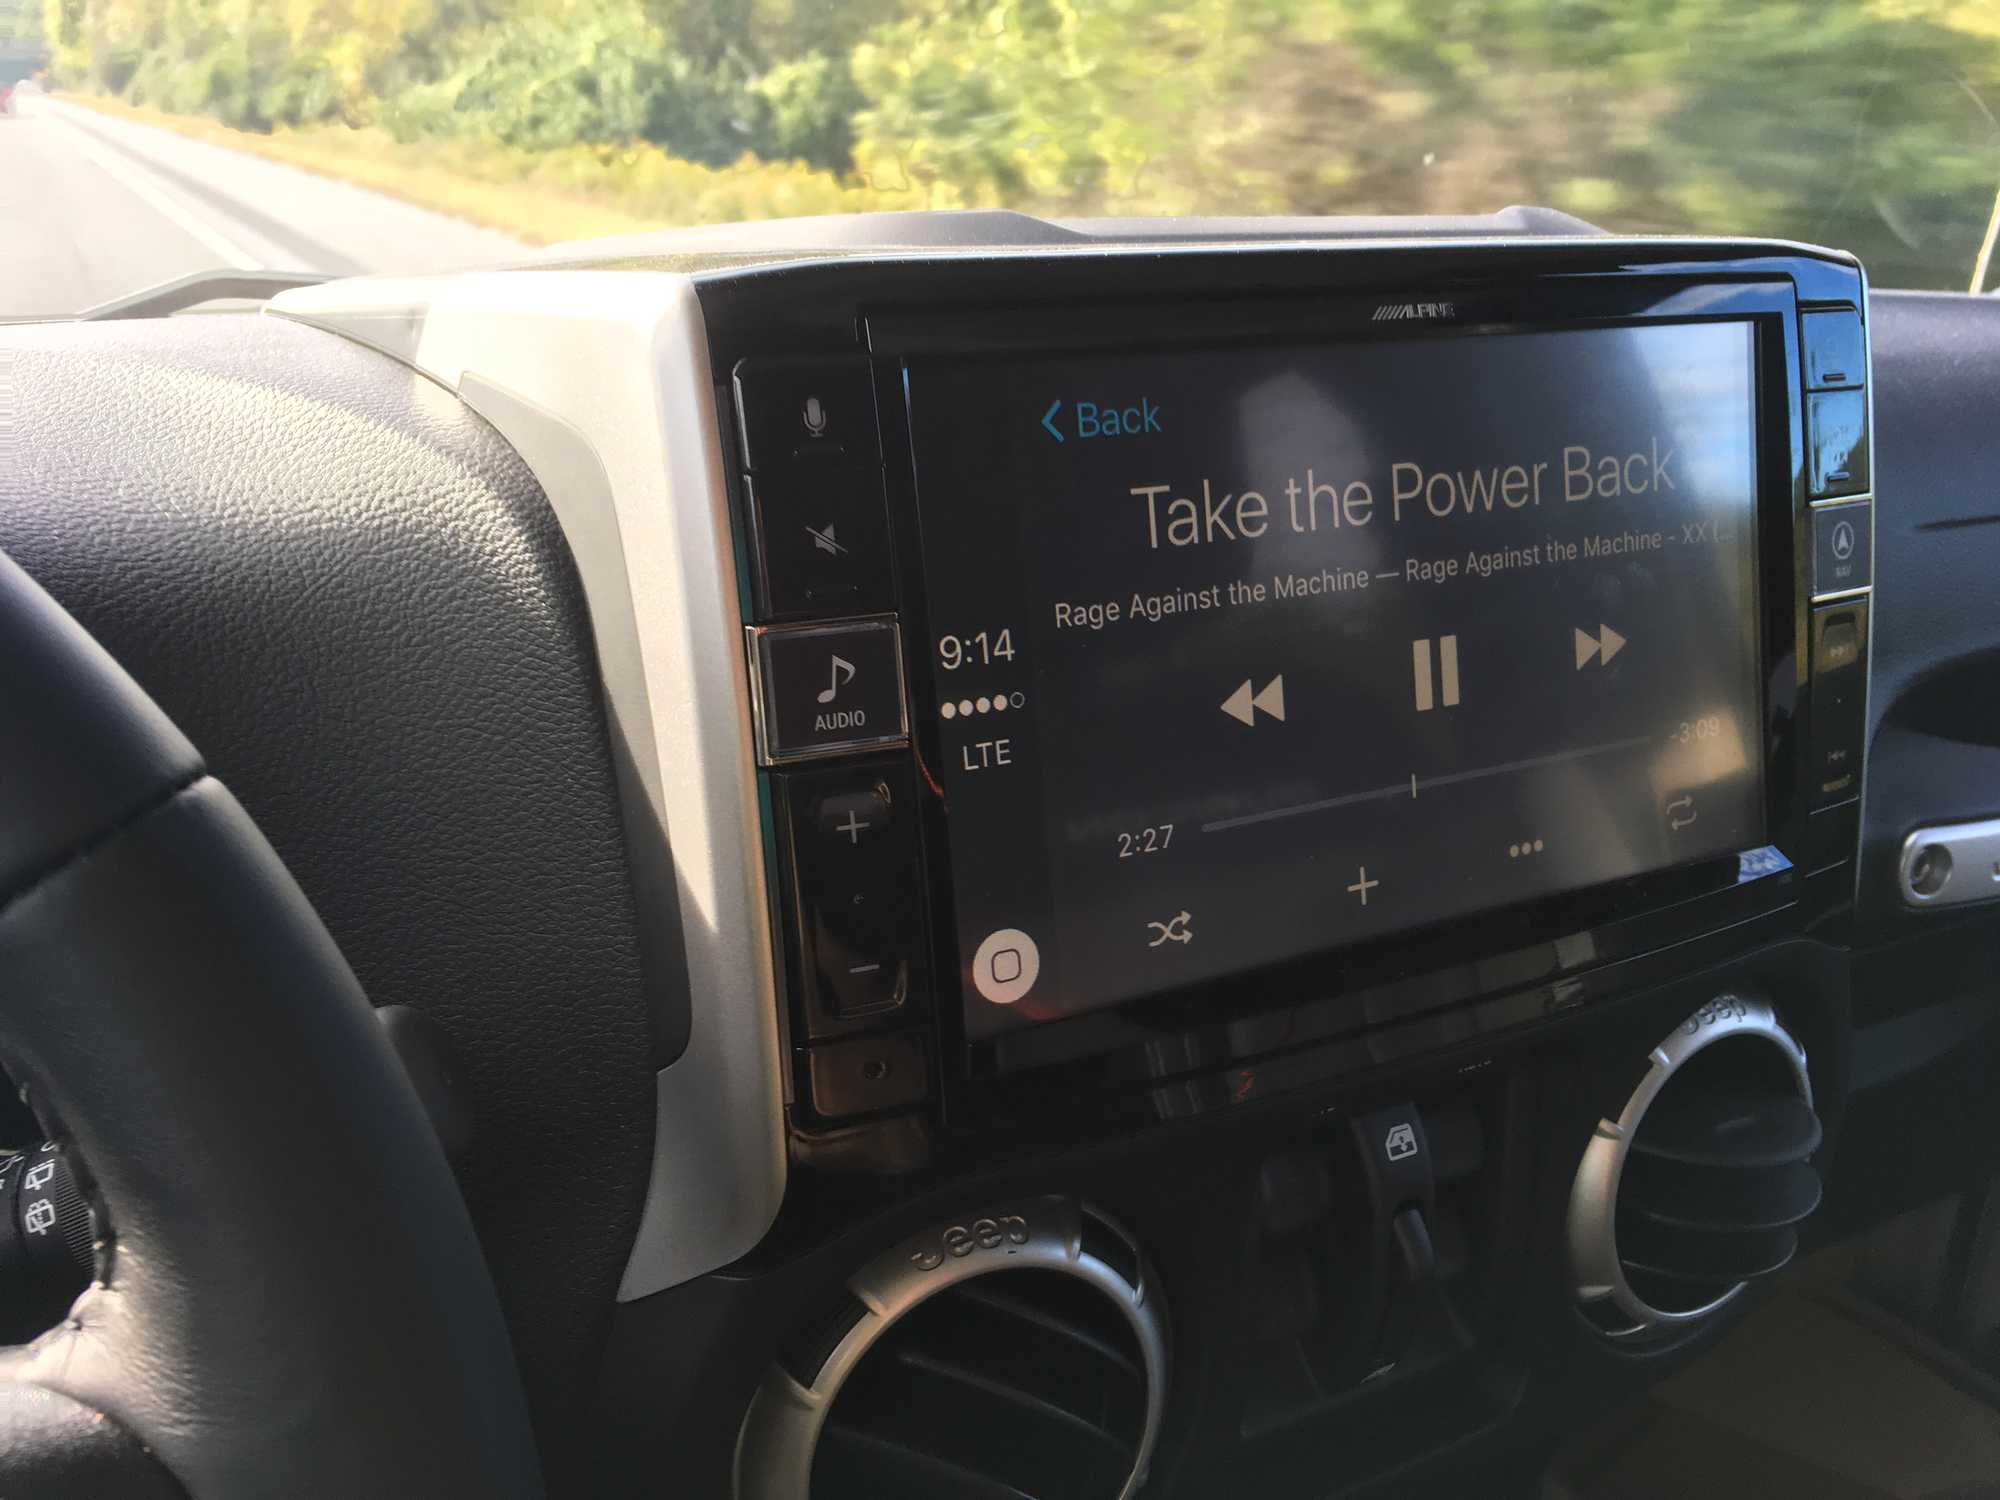
Let's face it, there's nothing in your Jeep you interact with more than the stereo. (Except the steering wheel and gas/brake pedals). Every single time you get in your Jeep, you've got the stereo on. You're listening to sports radio. You've got the Red Hot Chili Peppers pumping. Maybe you're using it for navigation too, maybe not. My point is, for a device that's used as much as the radio, why not have the best? That's why I chose the Alpine i109 Radio. Is it a little pricy? Yes. Is it the most premium radio you can put in a Wrangler? Yes. Will other Jeep owners stop you and ask, what's that? Yes.
As an Apple fanboy, I loved the idea of a pure CarPlay solution. What is "pure" CarPlay? It means that every feature in the radio was built around CarPlay. It depends on your iPhone for navigation and text messages and iTunes. In fact, the only functions the radio has on it's own without an iPhone attached is an AM/FM radio and backup camera. Every other feature comes from your iPhone. At first, I thought it was a little strange because every radio I've had previously had a CD player built-in and even Satellite radio and a hard disk drive. This has none of that. But there's another truth to it... I'm never without my iPhone. Ever. And traditionally I've always plugged my iPhone into a car charger every time I get in my Jeep. Now with the CarPlay, I still plug in my iPhone every time I hop in. And now it charges my iPhone while I use the CarPlay system. It's really quite natural.
Many people have looked at the design for Savanna and asked, why would you bother upgrading the radio first? Why not do the lift first or the wheels and tires? The fact is, I could have done any of those first, but I'm glad I chose the i109 and TCAM out of the gate. Immediately it gave me a back camera, steering wheel Siri operation and access to my iTunes Music subscription. I benefit from it every day I drive to and from work. As an investment
Moving beyond the creature comforts, it's time to beef up Savanna's off-road prowess. The first big step... a lift kit.
Choosing a lift kit is a process that takes careful consideration. Some people want flex. Some people want height. Project JK Savanna is meant to be a daily driver, so my first priority in a lift kit is on-road handling. Beyond that, I wanted to get some extra ground clearance for rocks and mud and have enough lift to clear 35 inch tires.
There are a number of ways you can run 35 inch tires. MOPAR makes a high fender kit that clears 35's without a lift. Many JK's do it with just a 2 inch spacer lift, but 2 inches isn't enough to open up the wheel wells for my liking. In my humble opinion, 3.5 inches is the perfect amount of lift for 35's. There's plenty of clearance for wheel flex, it sits and looks right to the eye and there's no rubbing with the right wheel offset. Quadratec offers a variety of 3.5 inch lifts, but I narrowed it down based on my requirements for drivability.
I've learned quite a bit about lift kits over the years, and I know that the key to on-road handling is making sure the steering geometry is right. There are a couple of factors at play here.
First, you need to have the caster angle set as close to 4 degrees as you can. If you go higher than that, you run the risk of wearing out your drive shaft. Run lower than that and your Jeep will wander all over the highway. For me, the one surefire way to get the caster right is with geometry correction brackets. You can purchase them separately, or get them as part of a complete lift kit. Geometry correction brackets are a requirement for me.
Second, the steering linkages should be kept as close to parallel to the ground as they can be. Keeping them parallel ensures smooth steering with no bump steer. The best way to do that is with a high steer kit. The high steer kit moves the drag link connection to the top of the steering knuckle and moves the front track bar up to be parallel. This new alignment makes the steering geometry more like stock, and therefore a better ride. A high steer kit is my second requirement.
Now I've got my three requirements for my lift: 3.5 inches, high steer and geometry correction brackets. Since I want all these features in one complete kit, it narrows my choices. Ultimately, I chose the AEV DualSport SC 3.5 inch lift kit. It includes my three required features, plus progressive rate springs, Bilstein shocks and an incredibly strong rear track bar relocation bracket. AEV is known for quality, so this is the perfect kit for Savanna.
I'm lucky enough to work at Quadratec, where I have dozens of co-workers who are willing and able to help with a lift kit install. It was suggested that we install this lift kit during the annual Quadratec Tent Sale, and so that's what we did. Watch this video where Rob installs the lift kit. It's good to have friends like Rob :-)
AEV 3.5 DualSport SC Lift Kit Install
The next step in my plan is wheels and tires. To give Savanna the look of an old school safari truck, I need a throw back design that looks like it's from that time. For me, that means a simple, understated design. Some old Rovers used solid steel wheels, and others used a spoked wheel. The Fuel Off-Road Vector Wheels pay homage to an old look with their spokes and flat surfaces, but also have modern cues with simulated beadlocks and recessed lugs. They're perfect for Project JK Savanna.
Later on, I'll paint the wheel spokes Mojave Sand to match the body of the Jeep and leave the beadlocks black. This should make it look more like those wheels on the safari trucks. Many times, those old trucks were painted with a brush, and everything steel got the same color paint. Look at the Jeep Africa concept I posted earlier and you'll see what I mean.
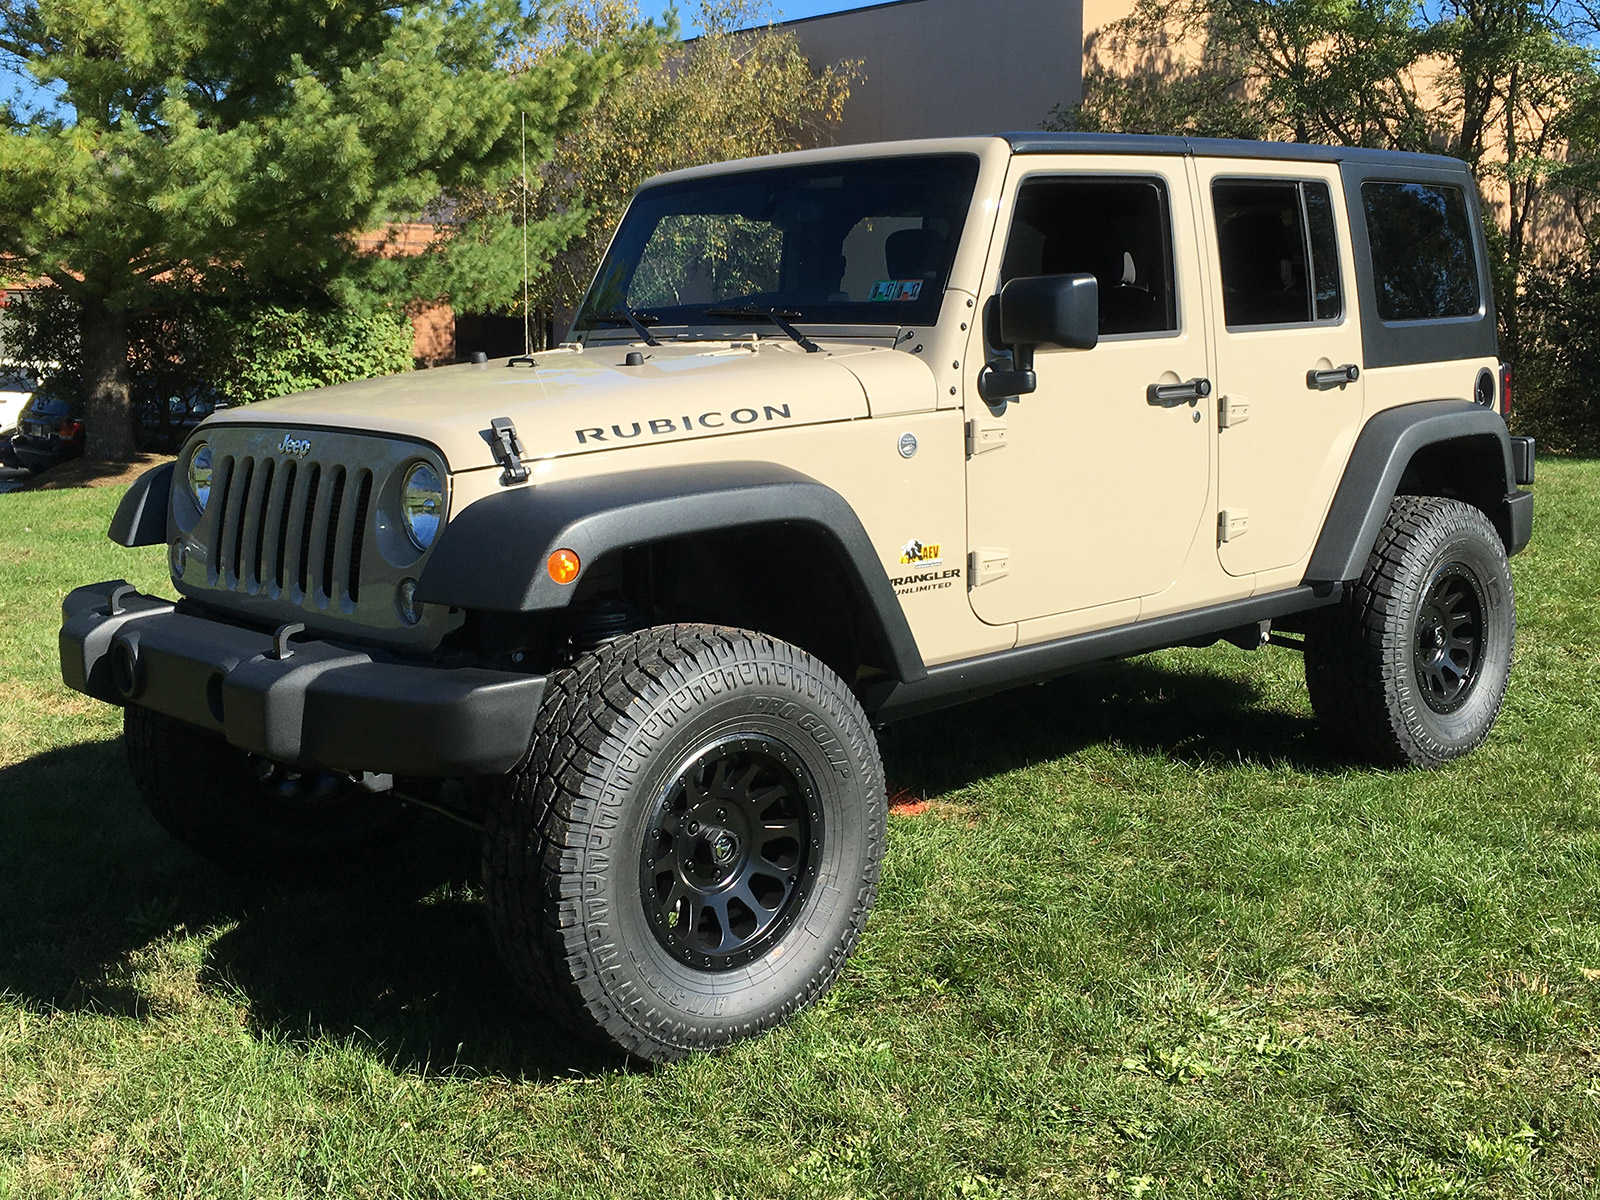
Fuel Off-Road has always impressed me with their variety of designs. Plus, they offer a choice of 4.5 or 5.0 inches of backspacing on their JK wheels, so you can choose the look you like. If you're a fan of your tires sticking out past the fender flares, then go with 4.5 inches of backspacing. If you're like me, you want the tires to sit under the flares with just a little sticking out so I chose the 5 inch backspacing. I took a photo so you can see how it sits.
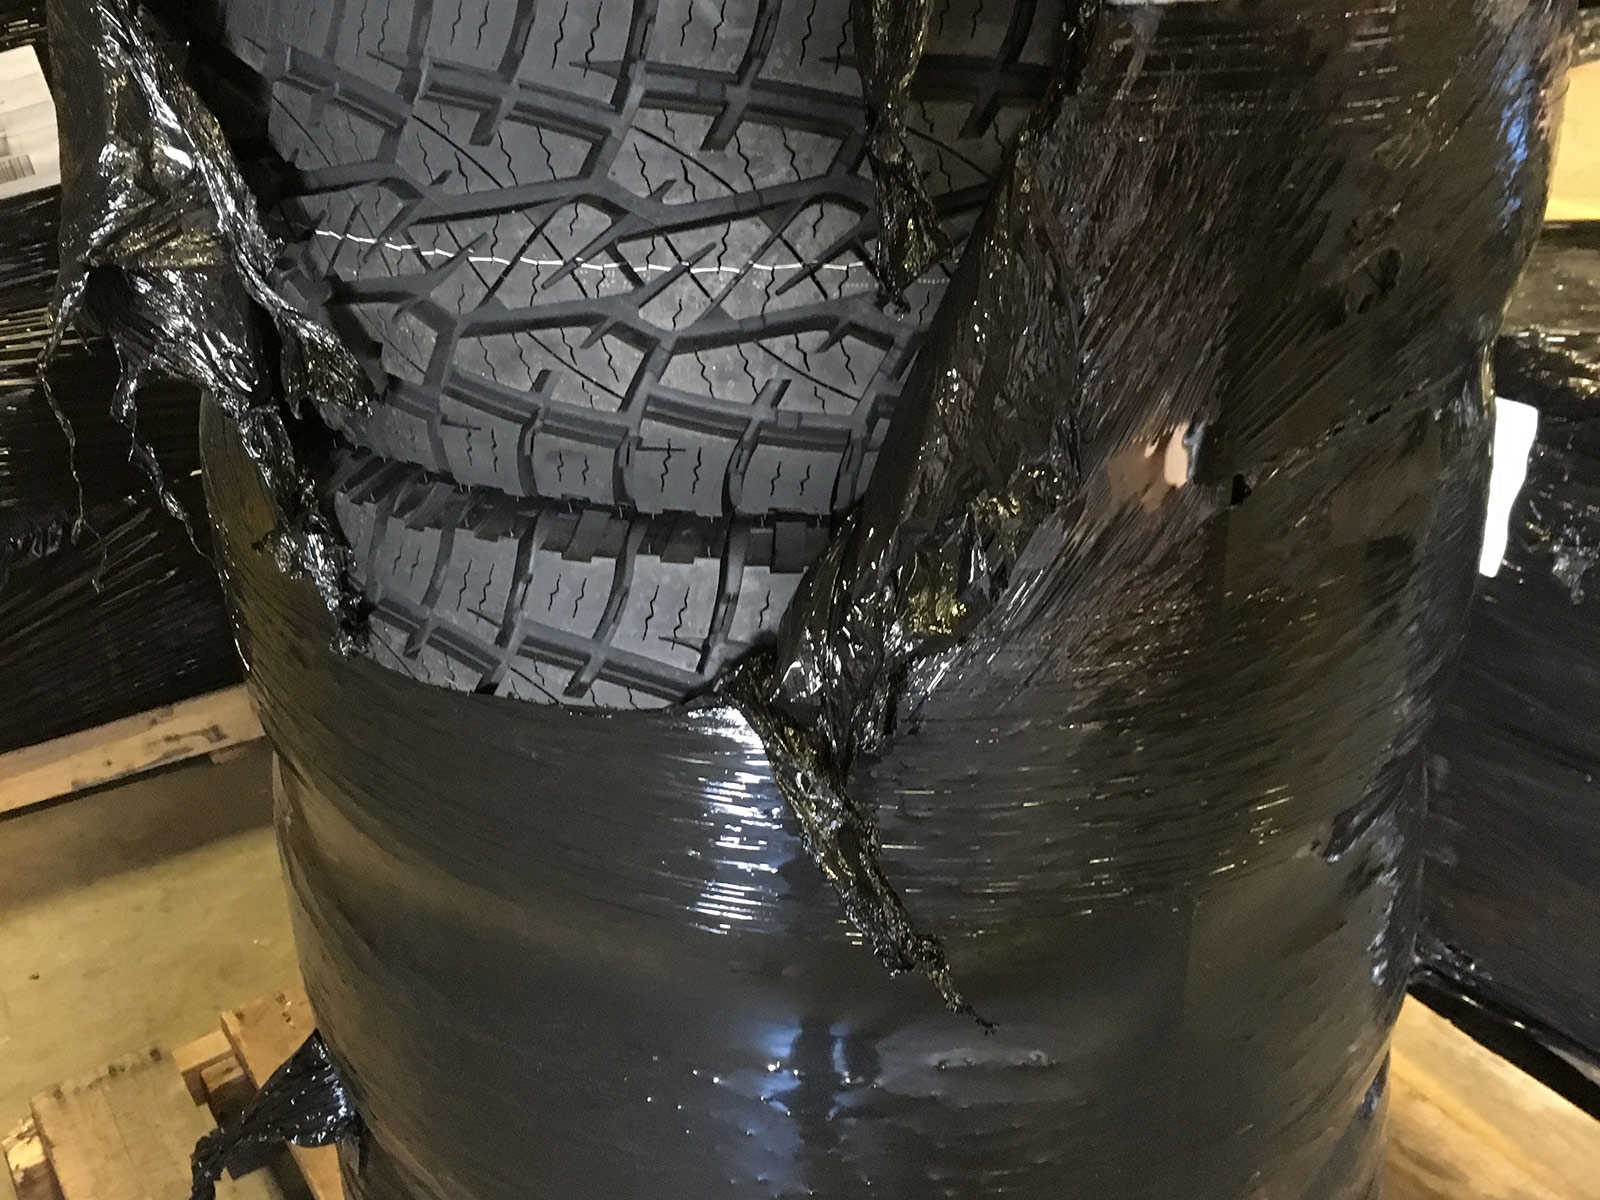
For tires, All Terrains are a must for me. I've had many Jeeps with Mud terrains in the past, and there's no argument that M/T's provide better traction off-road but for Savanna, my goal is drivability. An A/T will always do better on-road than an M/T, so I'm going All Terrain.
Ultimately I chose the Pro Comp All Terrain Sport Tires for this build. The tread pattern on the Pro Comps is best designed for a good balance of on-road handling and off-road traction. The lugs are heavily siped for excellent wet-weather driving and they're deep enough to grab the terrain when the pavement ends. Since they're E rated sidewalls, I should be able to run pretty low pressure off-road (maybe 6 psi) to allow them to spread out and get even more traction. I'll post a full review later once I've had some time driving on them.
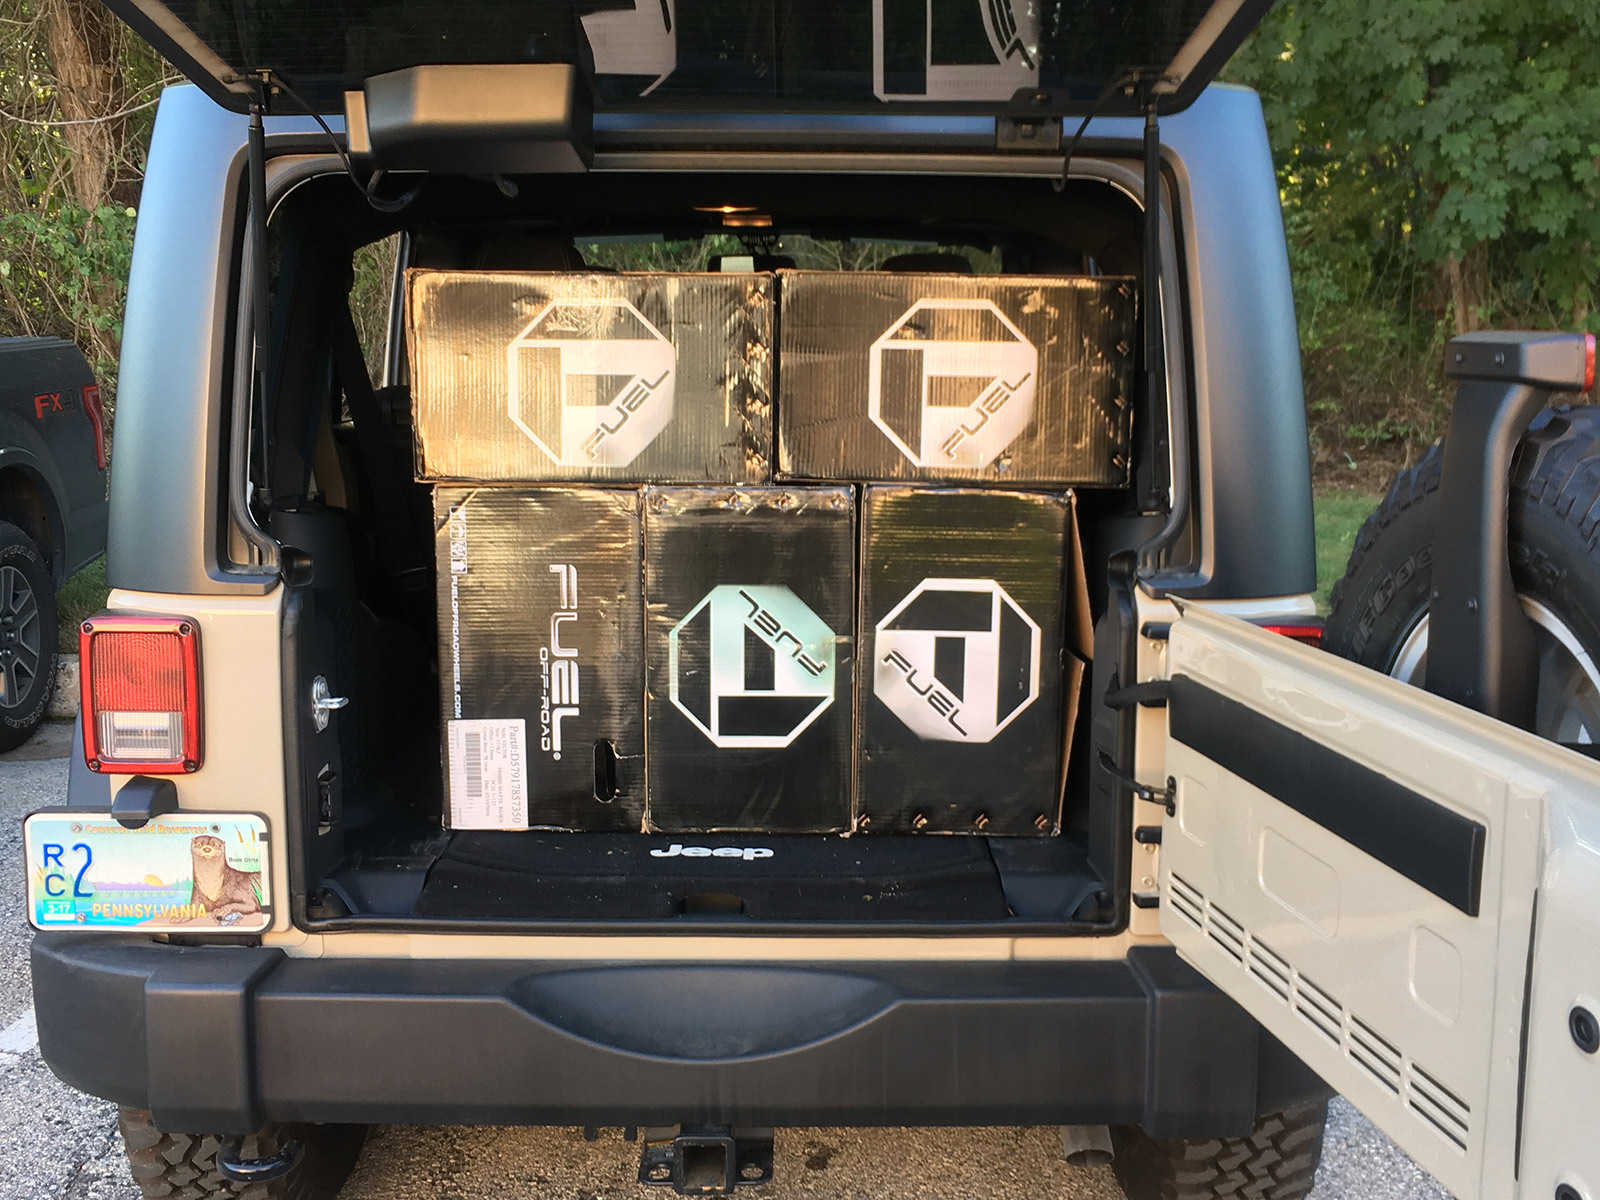
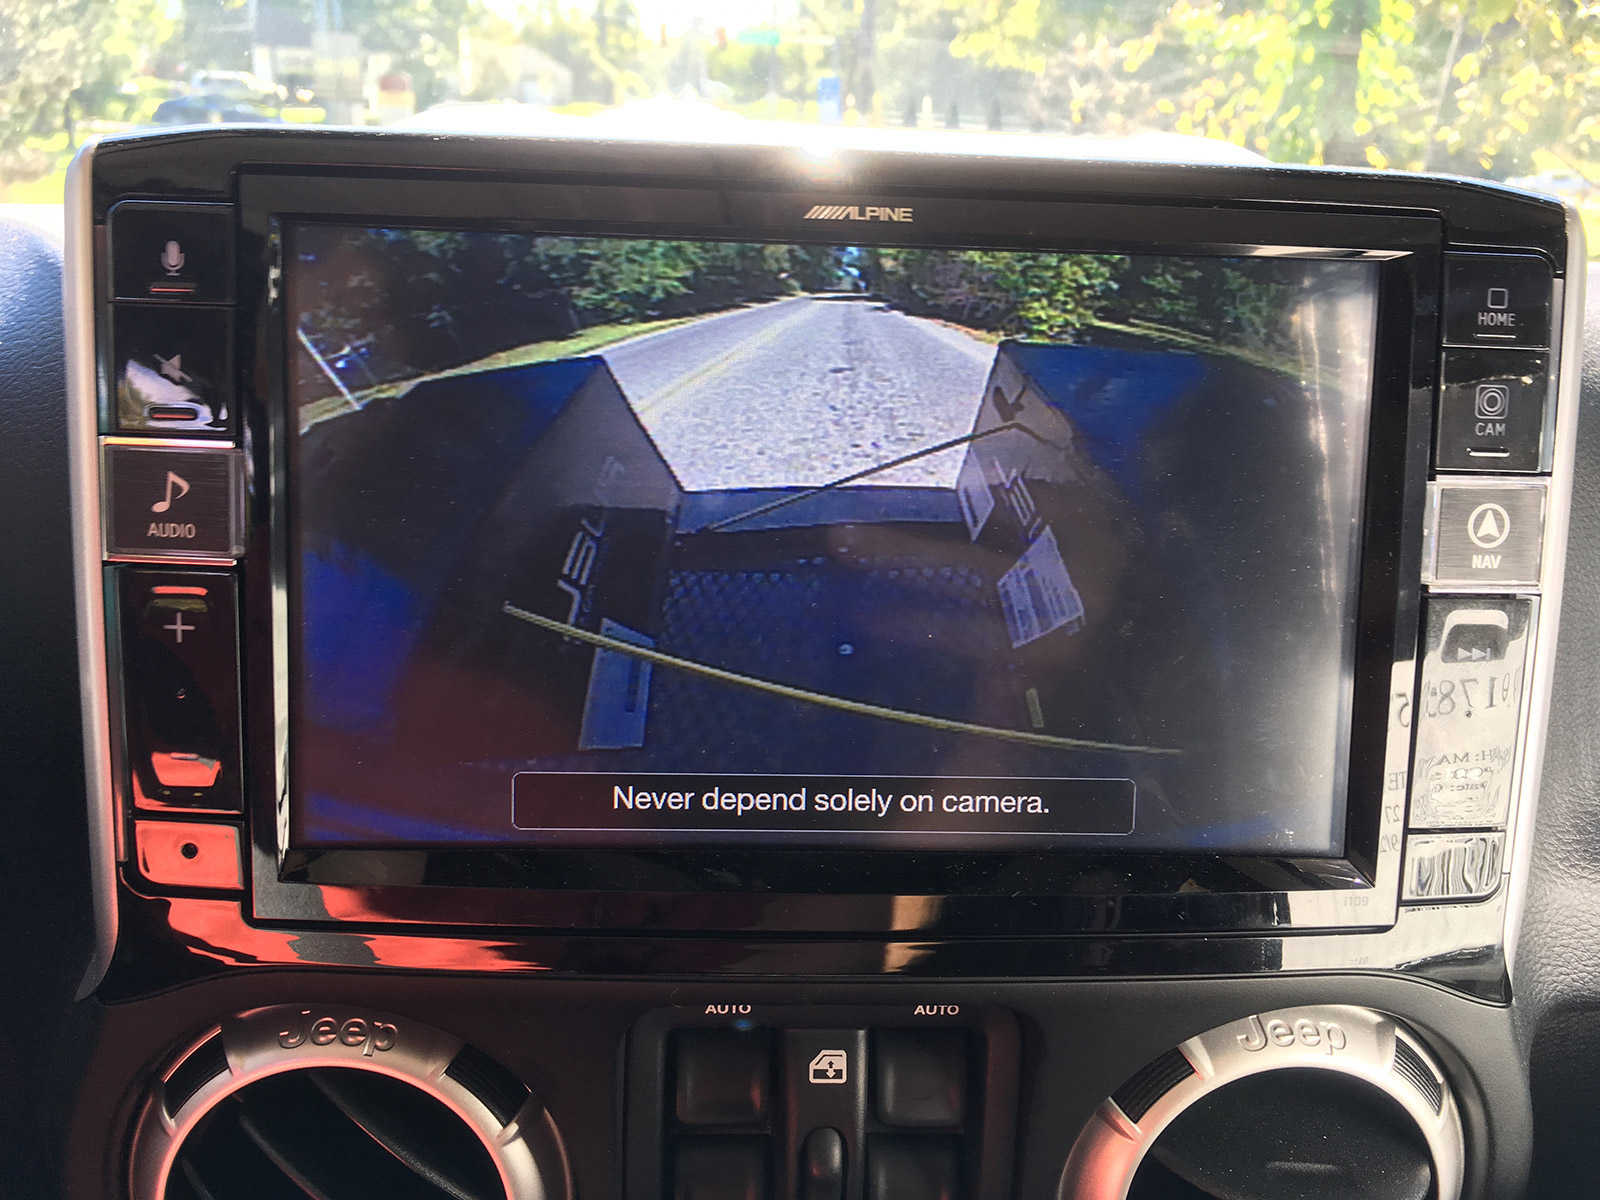
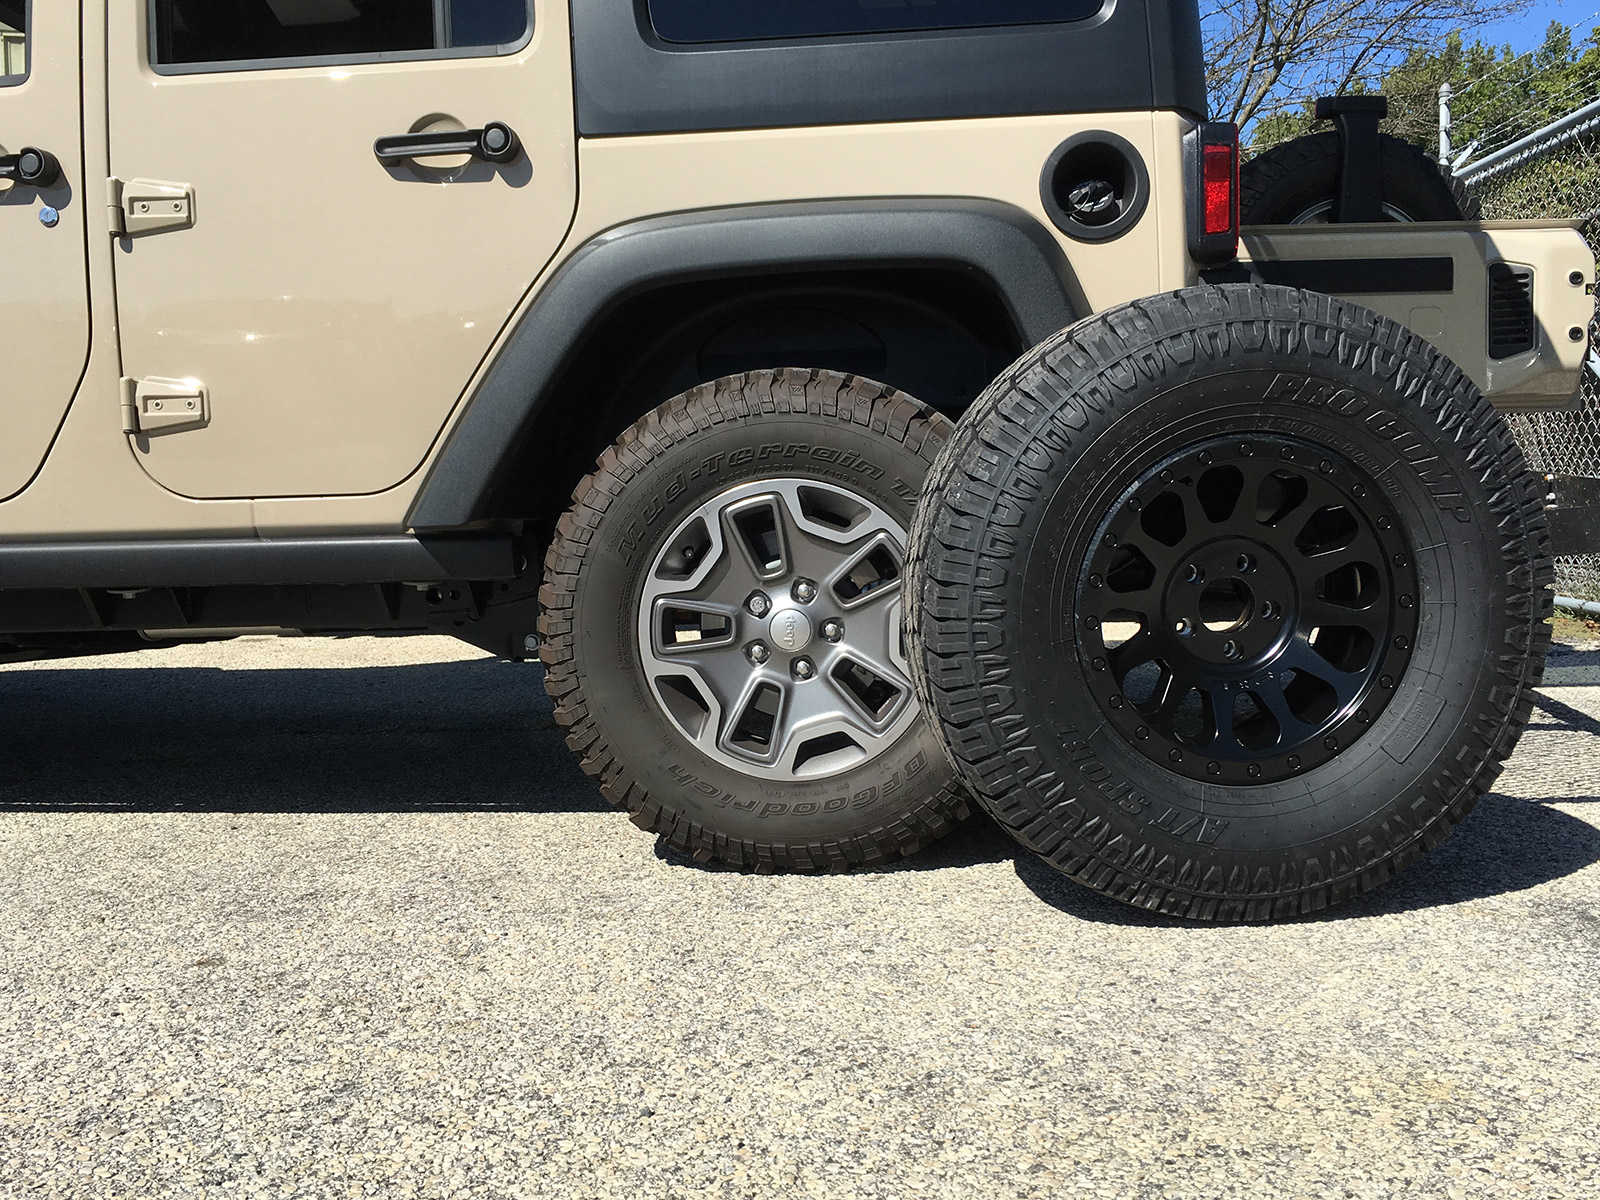
When the wheels and tires arrived, I took them to the tire shop to be mounted and balanced. This wouldn't have been possible in one trip without my trusty receiver hitch cargo rack. One of the great features about the Alpine i109 radio and T-CAM: you can turn on the rear camera while you drive. So I was able to watch the wheels stacked on the cargo rack to make sure there were no surprises along the way. After getting the tires mounted up, I had to take the obligatory new-tire-next-to-stock-tire photo.
The Smittybilt Safari Hard Top is really the centerpiece that inspired this entire design. When I first saw that hard top in the Quadratec Catalog, it started the wheels turning about how I could elaborate on that and build a Jeep worthy of the wildest parts of Africa.
Think about throwing some gear up top in the rack when strapping down some tents and backpacks. This top screams to be built into an overland rig.
The top arrives painted black, but I'm going to take it up a notch. There's a body line molded in the top that extends rearward from the top of the doors. I plan to have the top painted white above that line, and body color below it. That will allow the Mojave Sand color to carry through the doors and to the rear of the vehicle. The white up top will pay homage to the safari trucks that inspired this design, and to the Jeep Africa design.
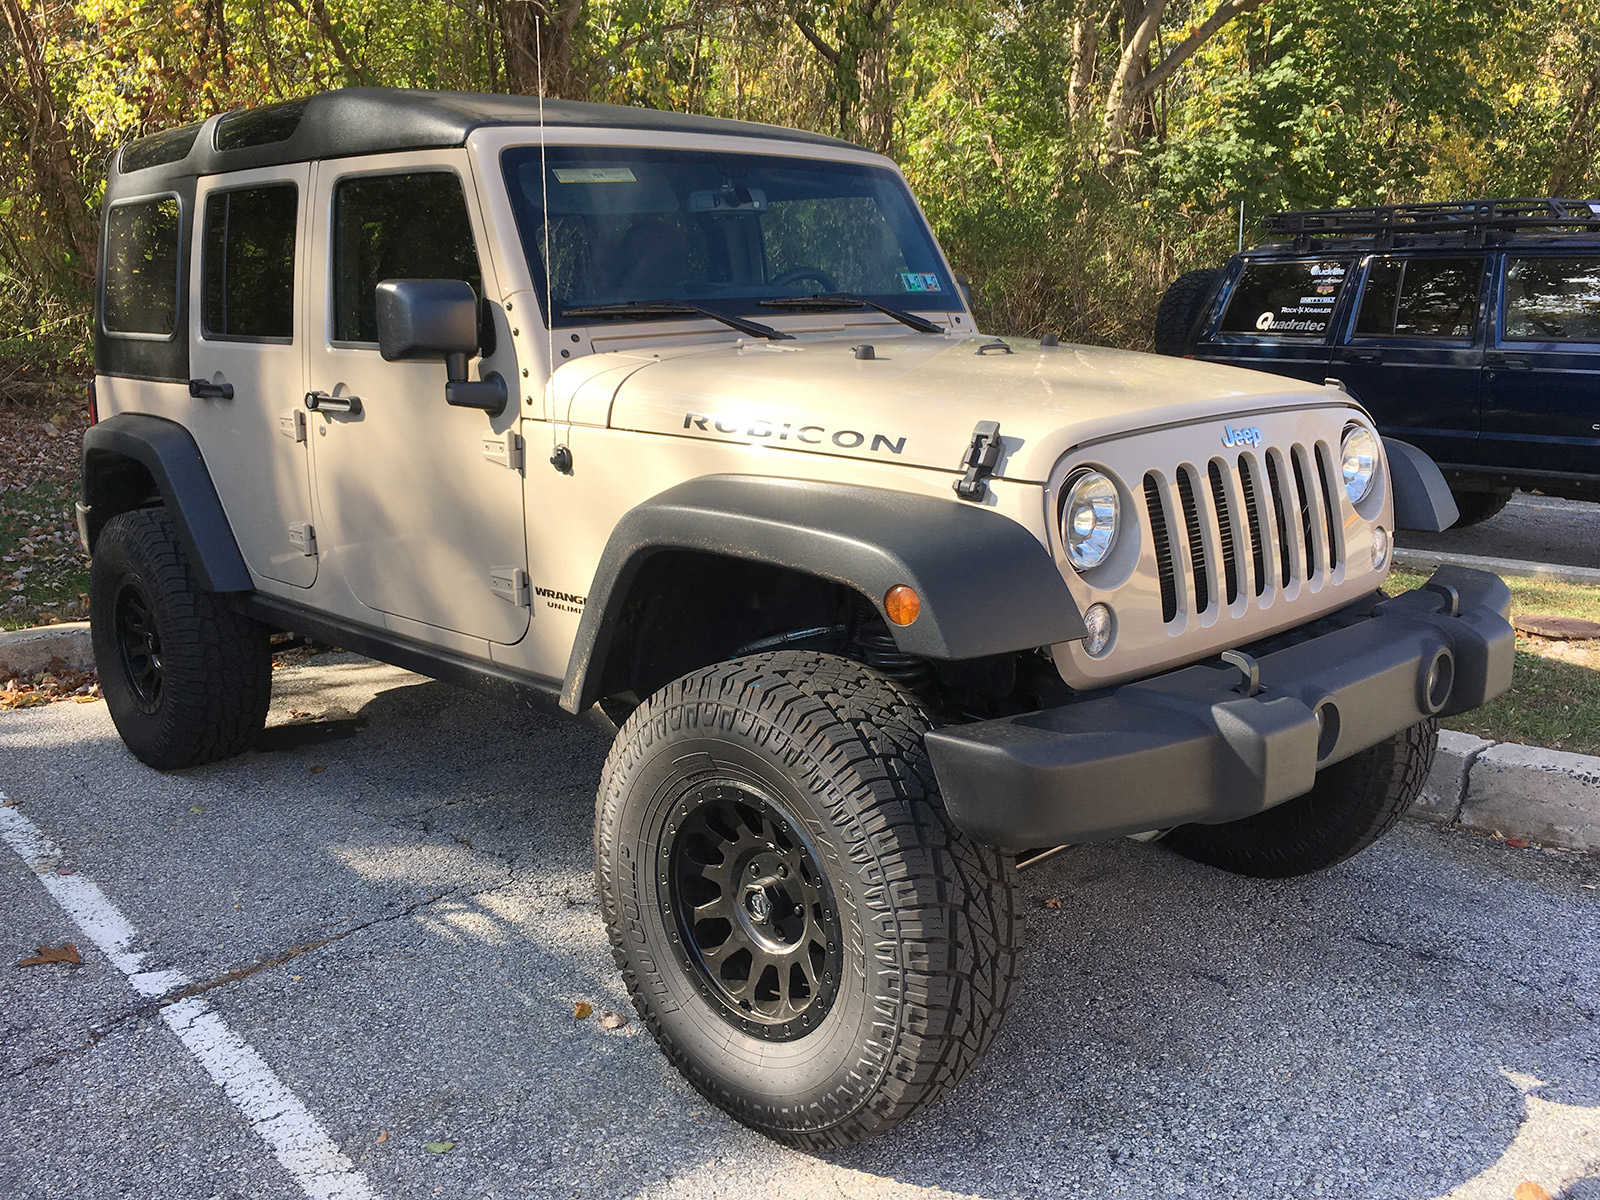
For now, the top is black. And it looks good... Really good. Day one after installing it, I was stopped by not one, but two fellow Jeepers in the parking lot who asked "What kind of Jeep is that?" I can't tell you how many times I've seen other drivers rubbernecking as they drive by to get a good look at the Jeep. It's not too surprising though, this top gives the Jeep a whole new look, and virtually no other Jeep on the road has one.
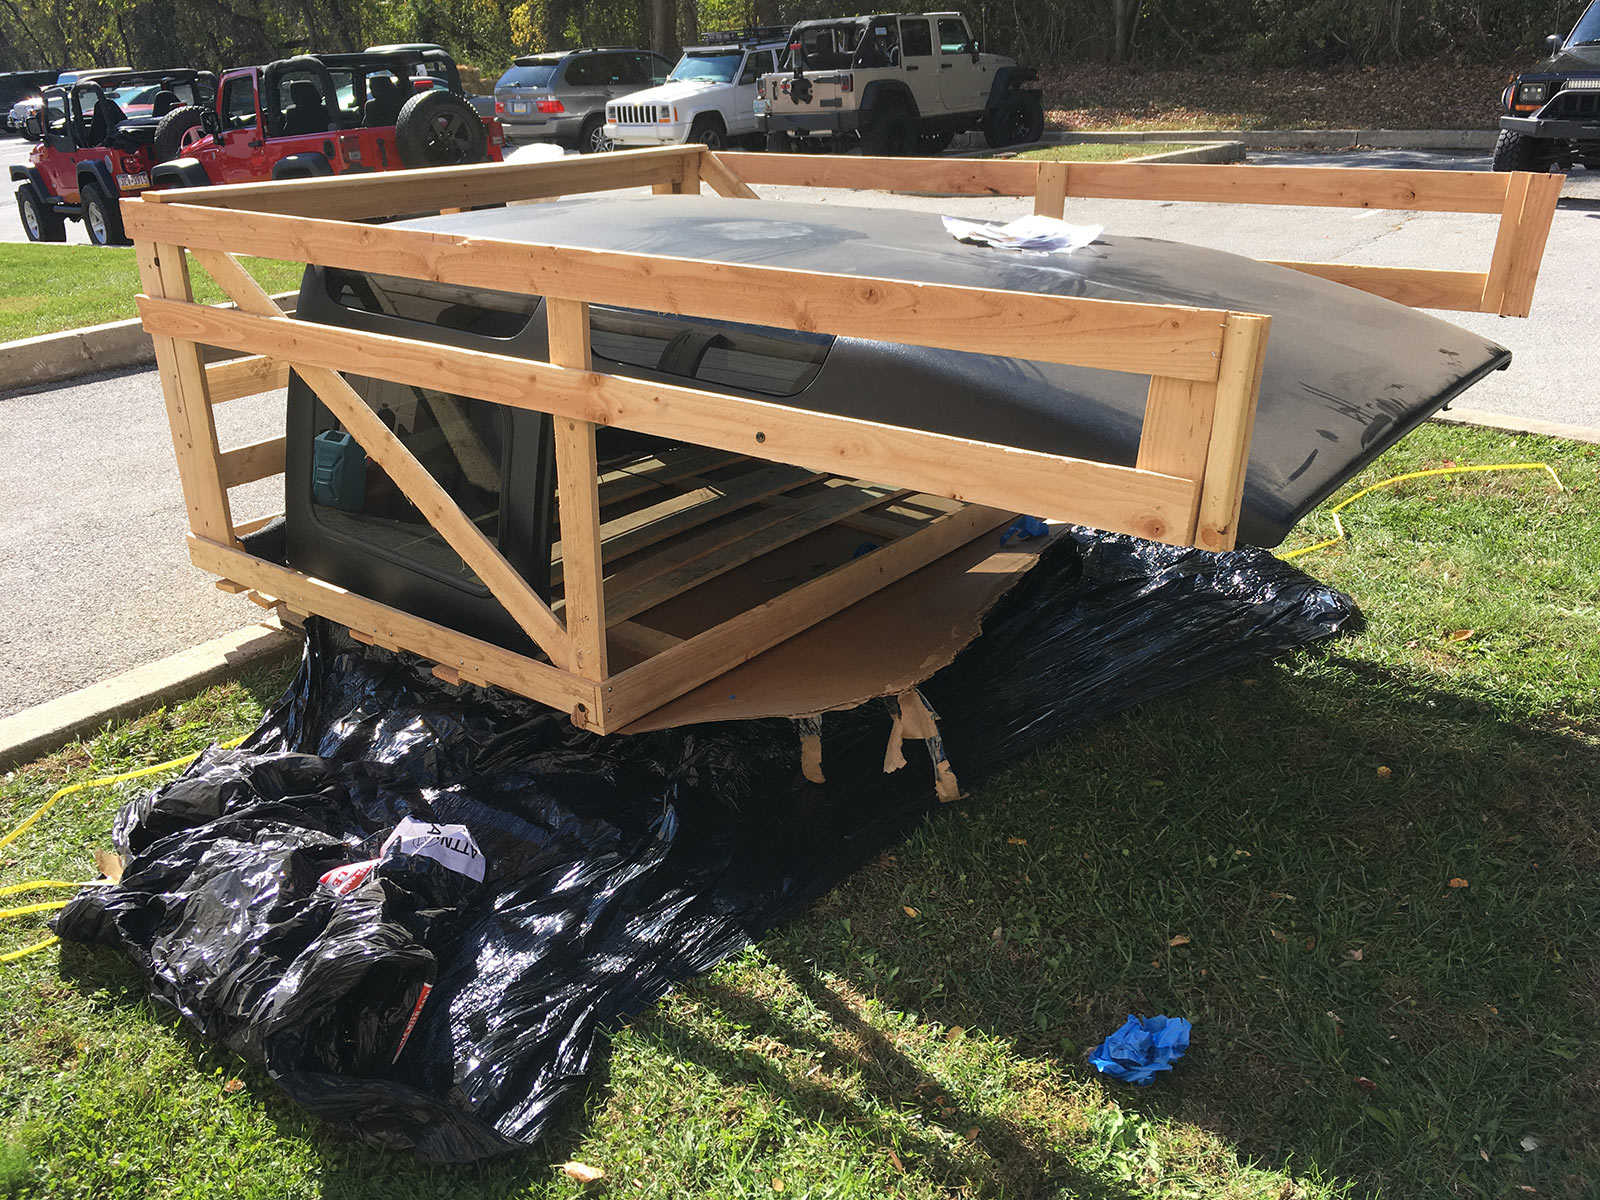
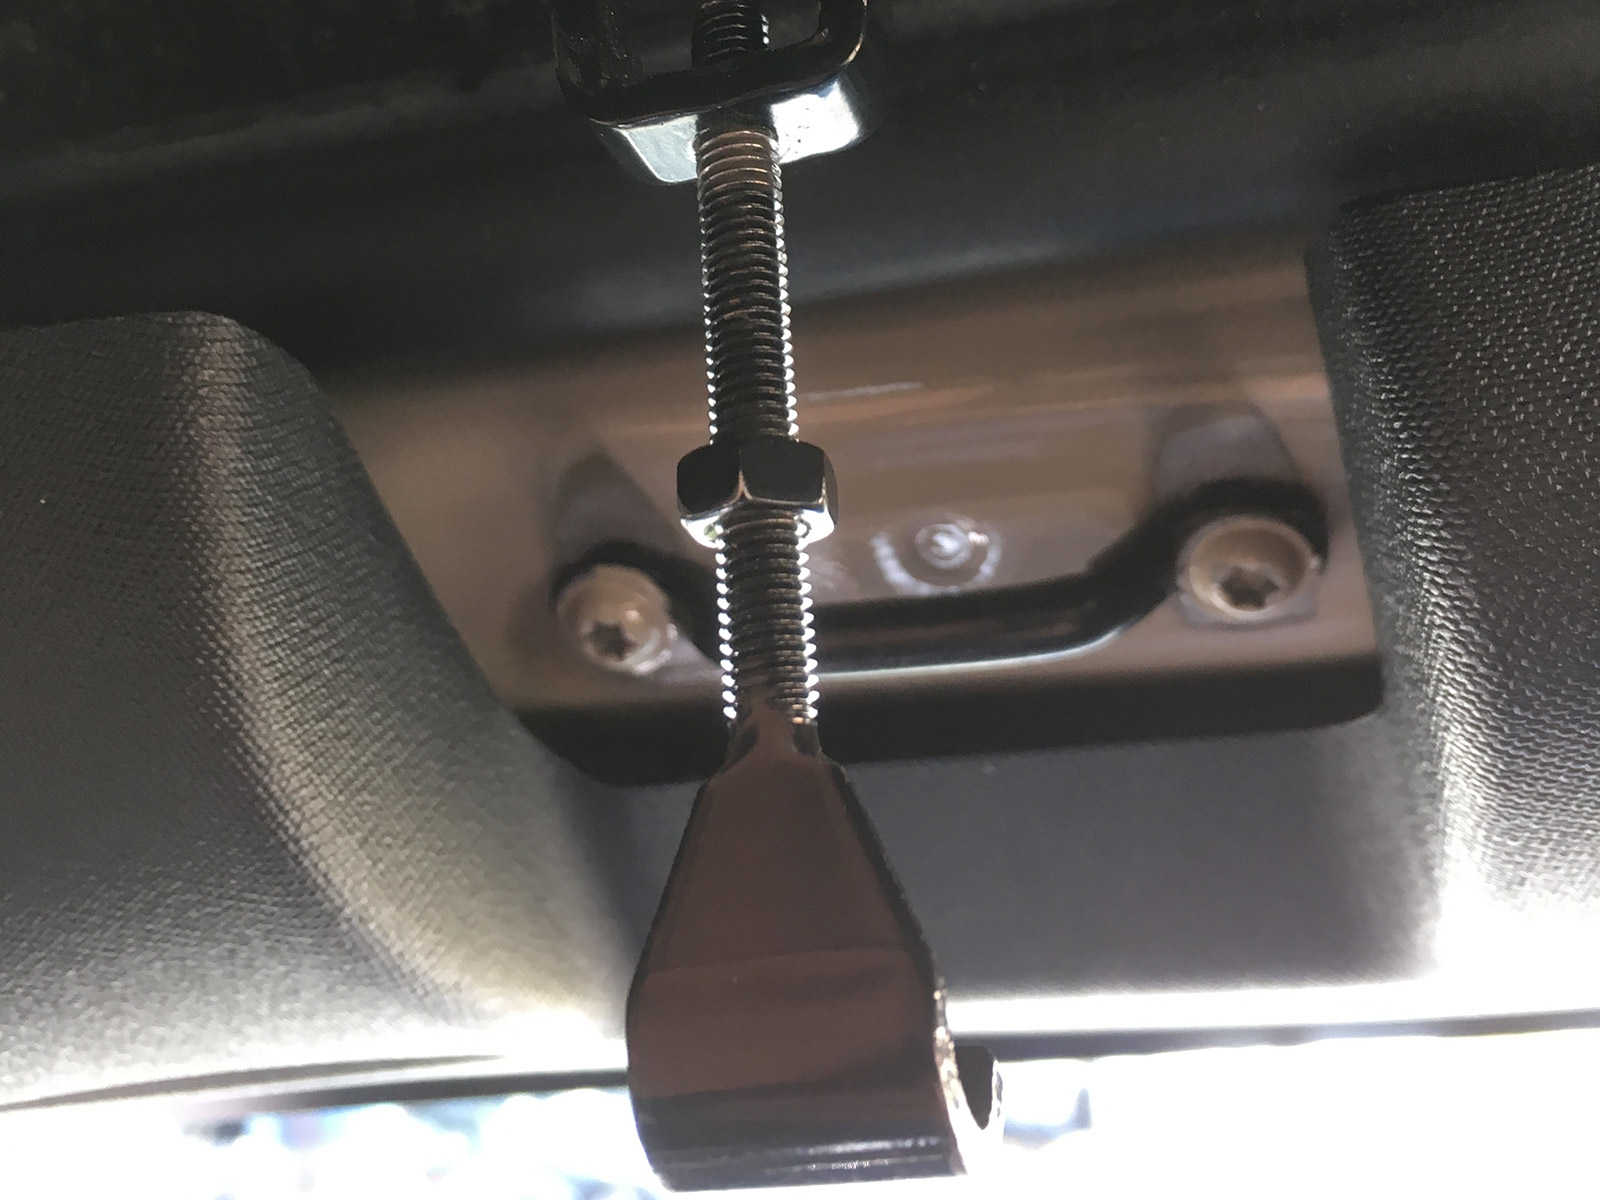
The Safari Top arrives in a wooden crate. All the hardware is inside a bag taped to the back window. It includes all the hardware necessary for installing it. The front clamps to the windshield using two outer footman loops provided in the hardware bag. There's no drilling or cutting at all.
If you have a look at the photo with the top installed, you'll see that more than anything else, Project JK Savanna gets it's look from this hard top. With stock bumpers and lift, wheels and tires, this design is really starting to take shape. Later I'll post some thoughts on how you might recreate the Savanna design with fewer parts. The key is really in the top.