


It's been a long time coming but RockCrusher has finally got their Dana 30 differential covers available for sale!! Just like their Dana 44 differential cover, this thing is extremely well built, super beefy, affordable, has a machined mating surface for a flat fit, look fantastic and unlike their competition, RockCrusher Heavy Duty Differential Covers can support the weight of a 110,000 lb. excavator!! Need I say, when you're ready to provide maximun protection for your Dana 30 front differential, look no further than RockCrusher.
What You will Need- RockCrusher Differential Cover
- 3 Quarts Synthetic SAE 80W-90 GL5
- 12 Point - 1/2" Socket
- H-14 Hex Bit For those who need to know, this is what an H-14 Hex Bit looks like and you should be able to find it at most auto parts stores or even at Sears.
- 3/8" Ratchet
- Torque Wrench
- Flat Wood Chisel
- Hammer
- Gasket Scraper
- Brake Cleaner
- Paper Towels
- Oil Pan
- Newspapers

Now Lets Begin!

Here is a pic of everything you will get with your new RockCrusher heavy duty Dana 30 differential cover. As you can see in this photo, it comes unpainted but complete with a tube of RTV gasket maker, fill bolt, new mounting bolts and a sticker!
The cover arrives in it's raw casting so it's a good idea to prepair, prime and paint your new RockCrusher differential cover to the color of your choice before installing it on your Jeep. If you do not paint it, it will start to rust over time.
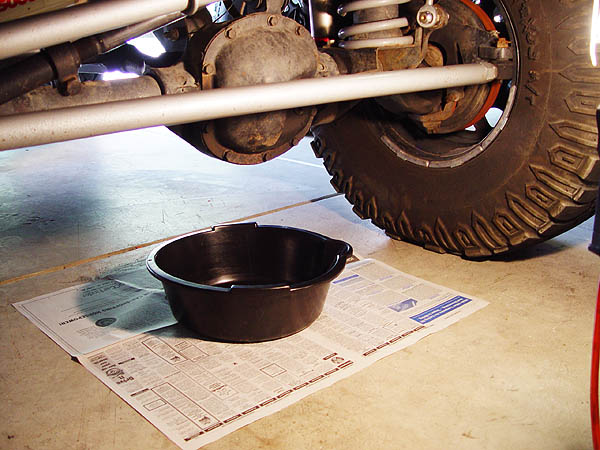 1. Park your Jeep on level ground. Then, place some newspaper and an oil catch pan underneath the differential.
 2. Use the square drive head of a 3/8" ratchet to remove the fill plug on your differential cover.
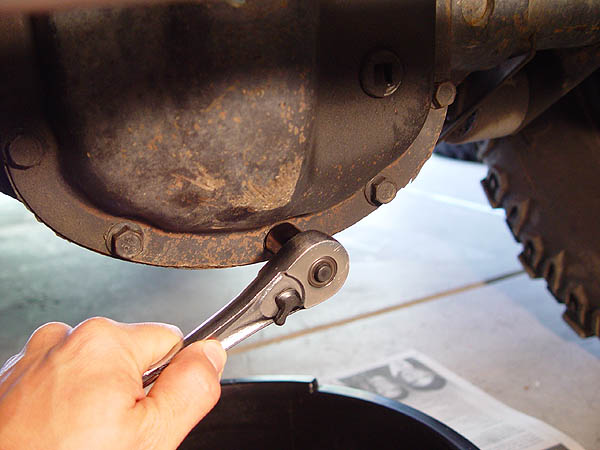 3. Using a 1/2" socket, remove all but the very top bolt on the differential cover. This bolt should loosen but not removed so that when the cover comes free, it does not fall into the oil catch pan.
 4. Place a flat chisel between the differential and cover and then carefully tap it with a hammer until the cover separates just a bit. Carefully pry open the differential cover just enough from the bottom and let the fluid drain slowly into your oil catch pan. Sometimes rapping the cover with a dead blow or a rubber mallet can help break the bond so that you don't gouge the material prying on the cover.
This is a good time to break for lunch or dinner to give the fluid ample time to drain.
 5. Once drained, remove the remaining bolt holding your differential cover and carefully pry the whole thing off. Wipe up as much of what ever oil remains in the differential with paper towels. Use some brake cleaner to help you clean things and then wipe everything down thoroughly. Don't forget to take your old gear oil to your local recycling center once your done.
 6. The differential mating surface must be completely clean to insure a proper seal. A gasket scraper works really well here and can be bought at your local auto parts store for only a few bucks. Be careful not to scratch or score the mating surface while cleaning it.
If your simply changing the fluid then you must also clean the gasket surface on the stock differential cover in the same manner.
 7. Thoroughly clean the inside and mating surface of your new RockCrusher Differential Cover with the same brake cleaners and paper towels. Then applya continuous 1/4" bead of RTV along the mating surface of the RockCrusher differential cover as shown in the pic to the left. Be sure to go outside of the bolt holes.
 8. Carefully place the RockCrusher differential cover onto your differential making sure not to move it around too much.
 9. Fasten the RockCrusher differential cover in place using the new bolts provided with the cover. Make sure to bolt them on in a criss cross pattern and then tighten them to 25-30 ft. lbs. of torque. It is very important that you do NOT over torque these bolts and that installation of the cover should be done within a 5 minute after applying the RTV.
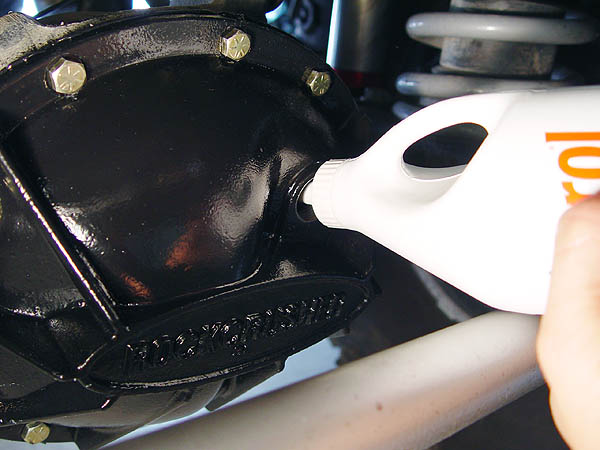 10. Now, fill up your differential with SAE 80W-90 GL5 gear oil until gear oil starts to ooze out of the fill hole. With the fill hole on the RockCrusher cover being higher than stock, this should take about 2 and a half quarts to do.
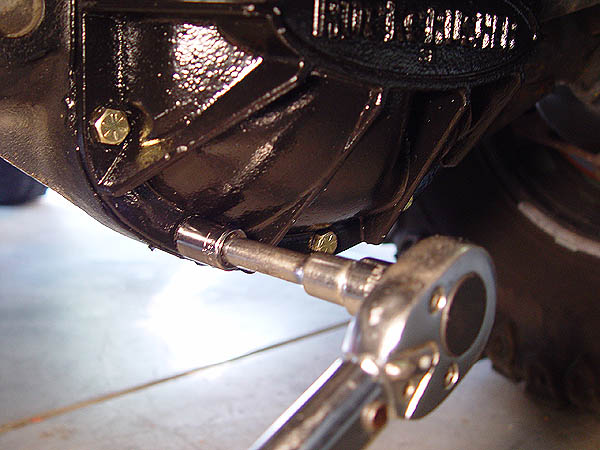
 11. Using an H-14 hex bit, install the new fill bolt provided with the RockCrusher differential cover. Tighten this bolt to 25 ft. lbs. of torque.

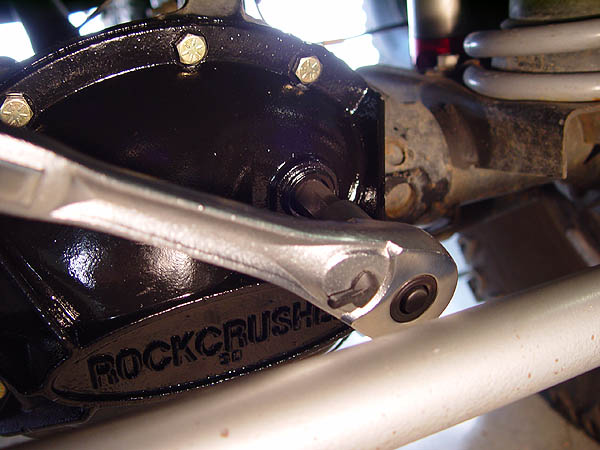
That's it! This is what everything will look like when all is said and done. Not only will your axle look great now, your differential will be seriously protected from the rocks too!