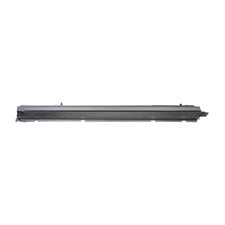
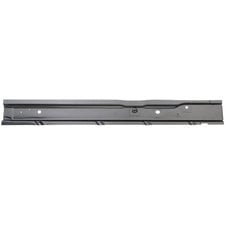
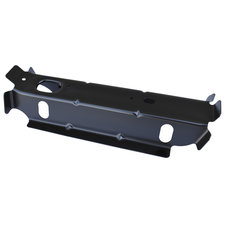
Key Parts 1/2 Floor Pan for 84-01 Jeep Cherokee XJ


Description
Just because the floor pans on your Cherokee XJ are rusting out doesn't mean it is the end of the road for your Jeep. With Key Part's 1/2 Front Floor Pan you can repair your vehicle and get back on the trails for fun and excitement for years to come.


Details
Factory: Designed to OE specs for a simple replacement.
Durable: Made from high-quality, OE gauge steel.
Installation: Welding is required for installation so we recommend it being done by a professional.

- Location: Front Floor Section
*Please make a selection above to view weight, dimensions, specs of a specific product
Jeep Cherokee (XJ)
- 2001 Jeep Cherokee (XJ)
- 2000 Jeep Cherokee (XJ)
- 1999 Jeep Cherokee (XJ)
- 1998 Jeep Cherokee (XJ)
- 1997 Jeep Cherokee (XJ)
- 1996 Jeep Cherokee (XJ)
- 1995 Jeep Cherokee (XJ)
- 1994 Jeep Cherokee (XJ)
- 1993 Jeep Cherokee (XJ)
- 1992 Jeep Cherokee (XJ)
- 1991 Jeep Cherokee (XJ)
- 1990 Jeep Cherokee (XJ)
- 1989 Jeep Cherokee (XJ)
- 1988 Jeep Cherokee (XJ)
- 1987 Jeep Cherokee (XJ)
- 1986 Jeep Cherokee (XJ)
- 1985 Jeep Cherokee (XJ)
- 1984 Jeep Cherokee (XJ)
Jeep Wagoneer (XJ)
- 1990 Jeep Wagoneer (XJ)
- 1989 Jeep Wagoneer (XJ)
- 1988 Jeep Wagoneer (XJ)
- 1987 Jeep Wagoneer (XJ)
- 1986 Jeep Wagoneer (XJ)
- 1985 Jeep Wagoneer (XJ)
- 1984 Jeep Wagoneer (XJ)
Key Parts 1/2 Floor Pan Options
| Part Number | Catalog # | Options | Price | ||||||
|---|---|---|---|---|---|---|---|---|---|
| 0482-219 | 72608-8504 | Driver Side | $227.69 | ||||||
| 0482-220 | 72608-8505 | Passenger Side | $227.69 |
Share Your Thoughts
- Shared By Others
- Share a Photo
- Ask a Question
- Write a Review

Key Parts 1/2 Floor Pan Reviews
David B.
6/5/2024
Great fit and working well!
Jody R.
6/27/2023
These xj 1/2 floors are great, fit well and made fixing my rust a breeze.
Jody R.
6/27/2023
Good fitment, solid factory approved parts.
Questions
Mike C.
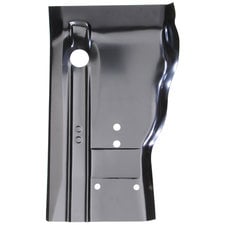
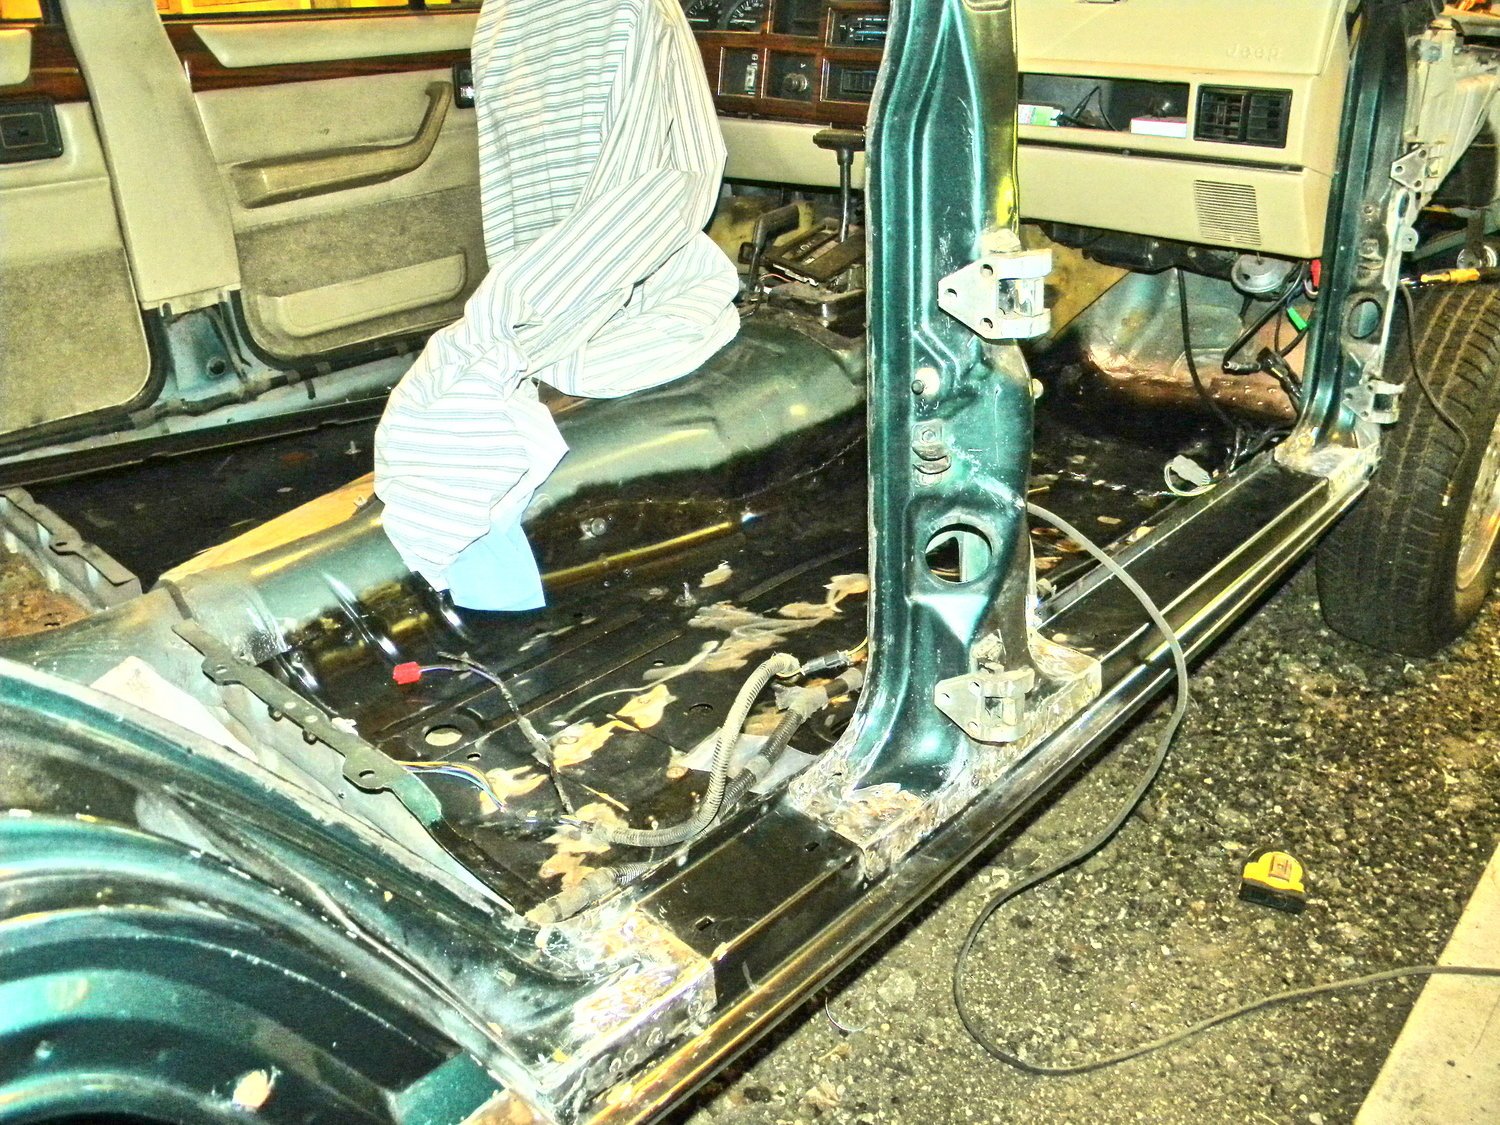
I have the half floor pan and front seat mount channel. How do I address the rear mounts on the front seat?
In the Jeep Cherokee XJ, the front seat mounts at four points: two on the front channel brace you already have, and two at the rear. Here is how to address the rear mounts:
1. Reuse the Original Brackets
The most common method is to carefully drill out the spot welds on your old floor pan to remove the factory rear mounting brackets.
Clean and Prep: Use a wire wheel to remove rust, then prime them with a weld-through primer.
Positioning: Bolt the brackets to your seat, set the seat in the Jeep (bolted to the new front channel), and mark exactly where the rear brackets sit on the new floor pan.
Welding: Weld the original brackets onto the new Key Parts Floor Pan.
2. Fabricate Reinforcement Plates
If your original rear mounts are too rusted to save, you must fabricate new ones. You cannot simply bolt the seat through the thin sheet metal of the new floor pan; it will eventually crack or pull through in an accident.
Steel Plate: Use 1/8-inch or 3/16-inch thick steel plate (roughly 3" x 3") as a reinforcement "sandwich" on the underside of the floor.
Weld Nuts: Weld a nut to the reinforcement plate so you can bolt the seat in from the top easily.
3. Replace with a Rear Floor Support
If the area behind the front pan is also soft, some owners install a Rear Floor Section or a specialized seat riser support. This provides a fresh, thick metal surface designed to handle the stress of the seat.
Installation Pro-Tip
Always bolt the seat to the mounts before final welding. Sheet metal warps slightly when welded; if you weld the brackets down without the seat "jigged" in place, you might find the bolt holes are off by a fraction of an inch when you try to reinstall the interior.
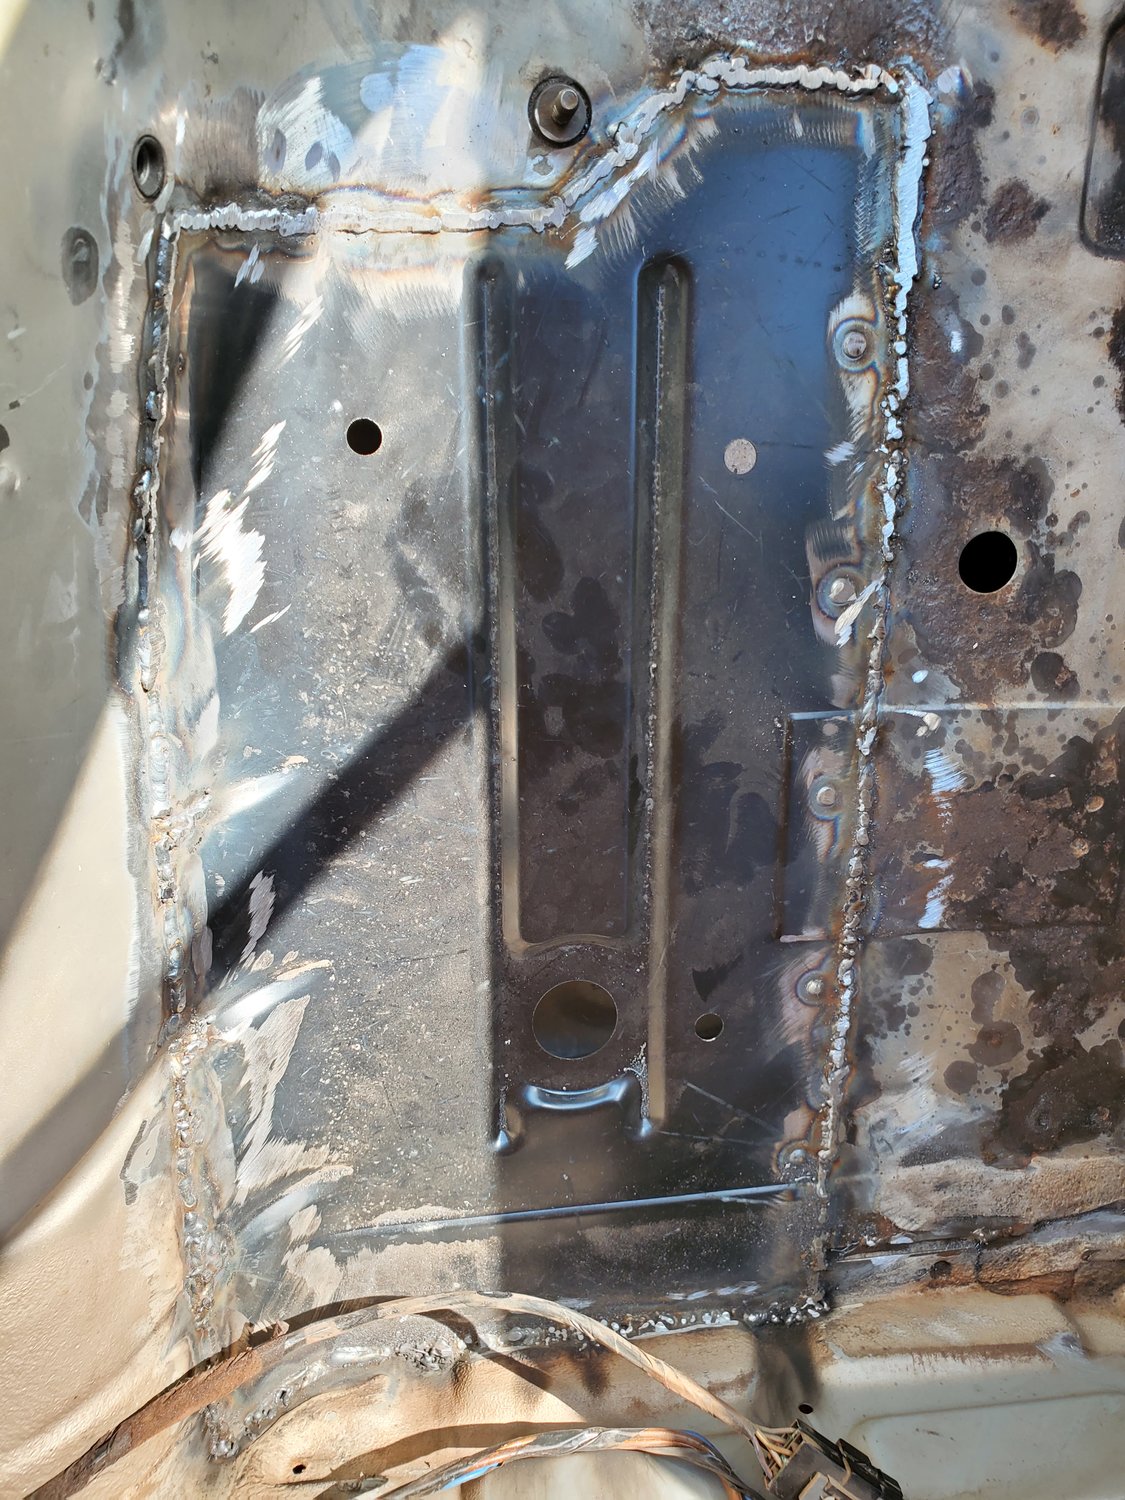
Rhonda S.
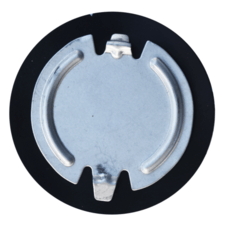
May I have the part numbers for the plugs for the passenger side floor pan? You gave the part numbers to someone's question about the driver side. Or are the same plug numbers for both sides? Thank you
The following link OE 04586052 or Quadratec Part Number 55005-0064 is a cross reference for OE 04586052 and is used on driver or passenger side closest to the firewall. A 1.50"' diameter plug J4000499 we cannot source at this time. The oval floor plug is model 55360966AA Floor pan Plug. They can also be used on driver or passenger side. Thanks for your inquiry.
OLIVIER P.
72608.8504.07 driver floor cherokee xj -1995
What parts are needed to plug the 3 holes in the driver's side floor?
please give me the references with precision
The rear plug is OE 55006579 and we don't have an active supplier. It measures 38.1 mm. Midway up the pan of same plane as the shifter lever, this model55006578 Floor grommet based on OE 55006578 it is 35 mm. The front of the floor pan will use this model from key parts based on OE 4586052. Plug closest to firewall up front. Thanks for your inquiry.