Featuring Premium Parts from
by Scott Ammerman
Quadratec Channel Correspondent
When your off-road adventuring morphs from simply a relaxing afternoon in the dirt or mud into something more demanding, then your equipment really needs an upgrade (or five) to keep up with those increasingly unforgiving conditions.
Since the 1970s, ARB has answered that issue by making durable parts for 4WD vehicles. First, it was for those brave souls blasting around Australia in some of the most hostile terrain imaginable. Conditions where a mechanical breakdown is a good deal worse compared to one at your off-road area.
These days, ARB parts are available everywhere and, yet, are still manufactured to the same stringent quality control standards as always. In a lot of ways, ARB is really a one-stop shop for numerous items on your modification list—they absolutely know a thing or two about keeping a vehicle reliable.
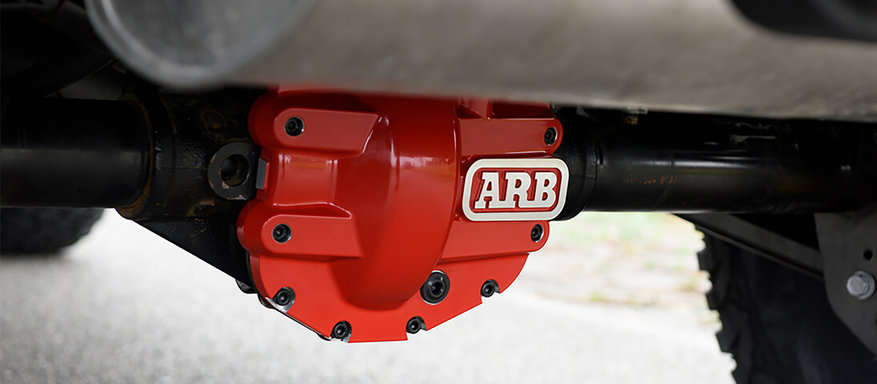
One of ARB’s most popular products is something that covers the front and rear differential housings—the lowest hanging parts on your Jeep. These housings are stuffed full of some essential and expensive components, so a solid and durable covering is absolutely necessary.
It's not difficult to imagine the heartbreak you’d feel from smashing the front factory steel differential cover into your ring gear thanks to an unintended impact with a rock, particularly in a remote location.
It doesn’t need to be that violent a strike, either.
Sometimes trail damage to a differential can be less noticeable—like a rear cover peeling back slightly after dragging over a rock. This is more common than you think, and often hard to spot unless you see fluid leaking. For example, after only one trail day the rear cover on Project Rattler had taken this type of hit, but thankfully hasn’t yet lost any gear lube due to leakage.

So ARB Competition Differential Covers for Dana 44 Axle Assemblies in Black should be a modification pretty high on your list. As pictured, these are also available in red, as well as for Dana 30 front axle housings on non-Rubicon models, in addition to other applications. The included high tensile cap screws are recessed into the cover to prevent impact damage.

You’ll see a drastic increase in durability following installation, and I like that they have a powerful magnetic dipstick that could be used to check gear oil level quickly on the trail if required, as well as a magnetic drain plug to capture any metallic debris trapped in the oil. Many aftermarket covers do not include these additions.

Cast from high tensile strength nodular iron, the sideways ‘H’ bracing is designed to strengthen the axle housing by preventing deformation during extreme stress, and the internal shape is similar to the factory housing ensuring proper flow of gear lube while in motion. Both of these features serve to prolong carrier-bearing life.

Although they were burning a hole in the garage shelf waiting to be installed (not literally of course), I put off installing them while researching another upgrade that had a lot of different potential solutions.
The factory differential vent tubes, designed to allow the differentials to ‘breathe’ due to temperature variation, were in need of improvement. Heat is generated as you drive down the road, and even a splash in standing water can cause an abrupt change in temperature. This rapid change in a system with no ventilation could cause the seals to weaken, so an external vent is added to allow the pressure deviation to resolve itself.
However, these vents can be a problem if they end up under water during a stream crossing, and they don’t sit very high off the ground from the factory (only a few inches above the frame). When you lift your Jeep above factory ride height, these short tubes get pulled lower on the body, effectively decreasing your safe fording depth.
Getting water inside your differentials can quickly ruin expensive components like selectable lockers, while also hindering the lubrication of other mechanical components—particularly the ring and pinion, and carrier bearings.

Your transmission (both manual and automatic) and transfer case have breathers like this, with the same little ‘splash resistant’ rattle cap. If water were to make it inside any of these components, even in smaller quantities, damage could occur well before it was noticed. In the rear, the vent hose barb is screwed into the axle tube, while in the front it is a press-in fitting. I purchased new fittings both front and rear to do the research for this project for around $10 from the local Jeep dealer, but could easily have reused my factory ones now that I’ve come up with a solution.
For this upgrade, I purchased two ARB 170112 Differential Breather Kits You could absolutely get away with one, and mount the breather in either of the two places I mounted mine, with one caveat: none of the breather lines should have a downward dip at all across their length. This could create a fluid trap, effectively blocking the breather from doing its job.
For my setup, I bought two with the intention of running one in the front with the front differential, transfer case and automatic transmission breathers, and a second one for just the rear differential. The surplus ⅛” BSP push-lock fittings from the rear kit were used in the front. I probably ended up with around 40 high quality ARB brand UV-resistant cable ties as well.
For those of you familiar with ARB products, the lines and fittings used are very similar to air-locker lines (although 8mm in diameter instead of 6mm), and the filter is identical to the one used on ARB’s on board air compressors—the cartridge is cleanable and made from sintered bronze.
Tools and materials required for differential cover replacement:

- 13mm socket
- ⅜” ratchet and short extension (for drain plug removal)
- 8mm hex key
- ¼” hex socket
- Low range torque wrench (15-26ft/lb. range)
- Gasket scraper
- Die grinder with Scotch Brite pad (recommended)
- Creeper
- Drain pan
- Cardboard to prevent spills from staining the driveway or garage floor
- Funnel or quart bottle twist spout
- Chainsaw file, rat tail file or knife (for marking dipstick)
- 5 quarts of gear oil for your axles (limited slip additive may be needed, see manual)
- Lubelocker differential gaskets or high temp RTV sealant
Additional tools for ARB vent installation:
- 8mm socket (or whatever your self tapping screws require
- 13mm box/open end wrench
- 14mm wrench
- 14mm deep socket
- Medium sized circle nosed pliers (grabbers)
- ⅜” drill bit
- 5/16” drill bit (drill bit stop collar recommended)
- Electric drill, or drill press
- Flat file
- Hacksaw
- Bench vice
- Diagonal cutting pliers or tubing cutter
- Compressed air and blow gun (or something to clean the lines out)
- Correct temperature range plumbers contact cement
Adding in the transmission and transfer case breathers:
Two VIAIR 90001 ¼” NPT male to ⅛” BSP adapters (Quadratec special order)
Two ¼ NPT female to 3/8” hose barb adapters (plumbing supply or hardware store)
Differential cover installation procedure:


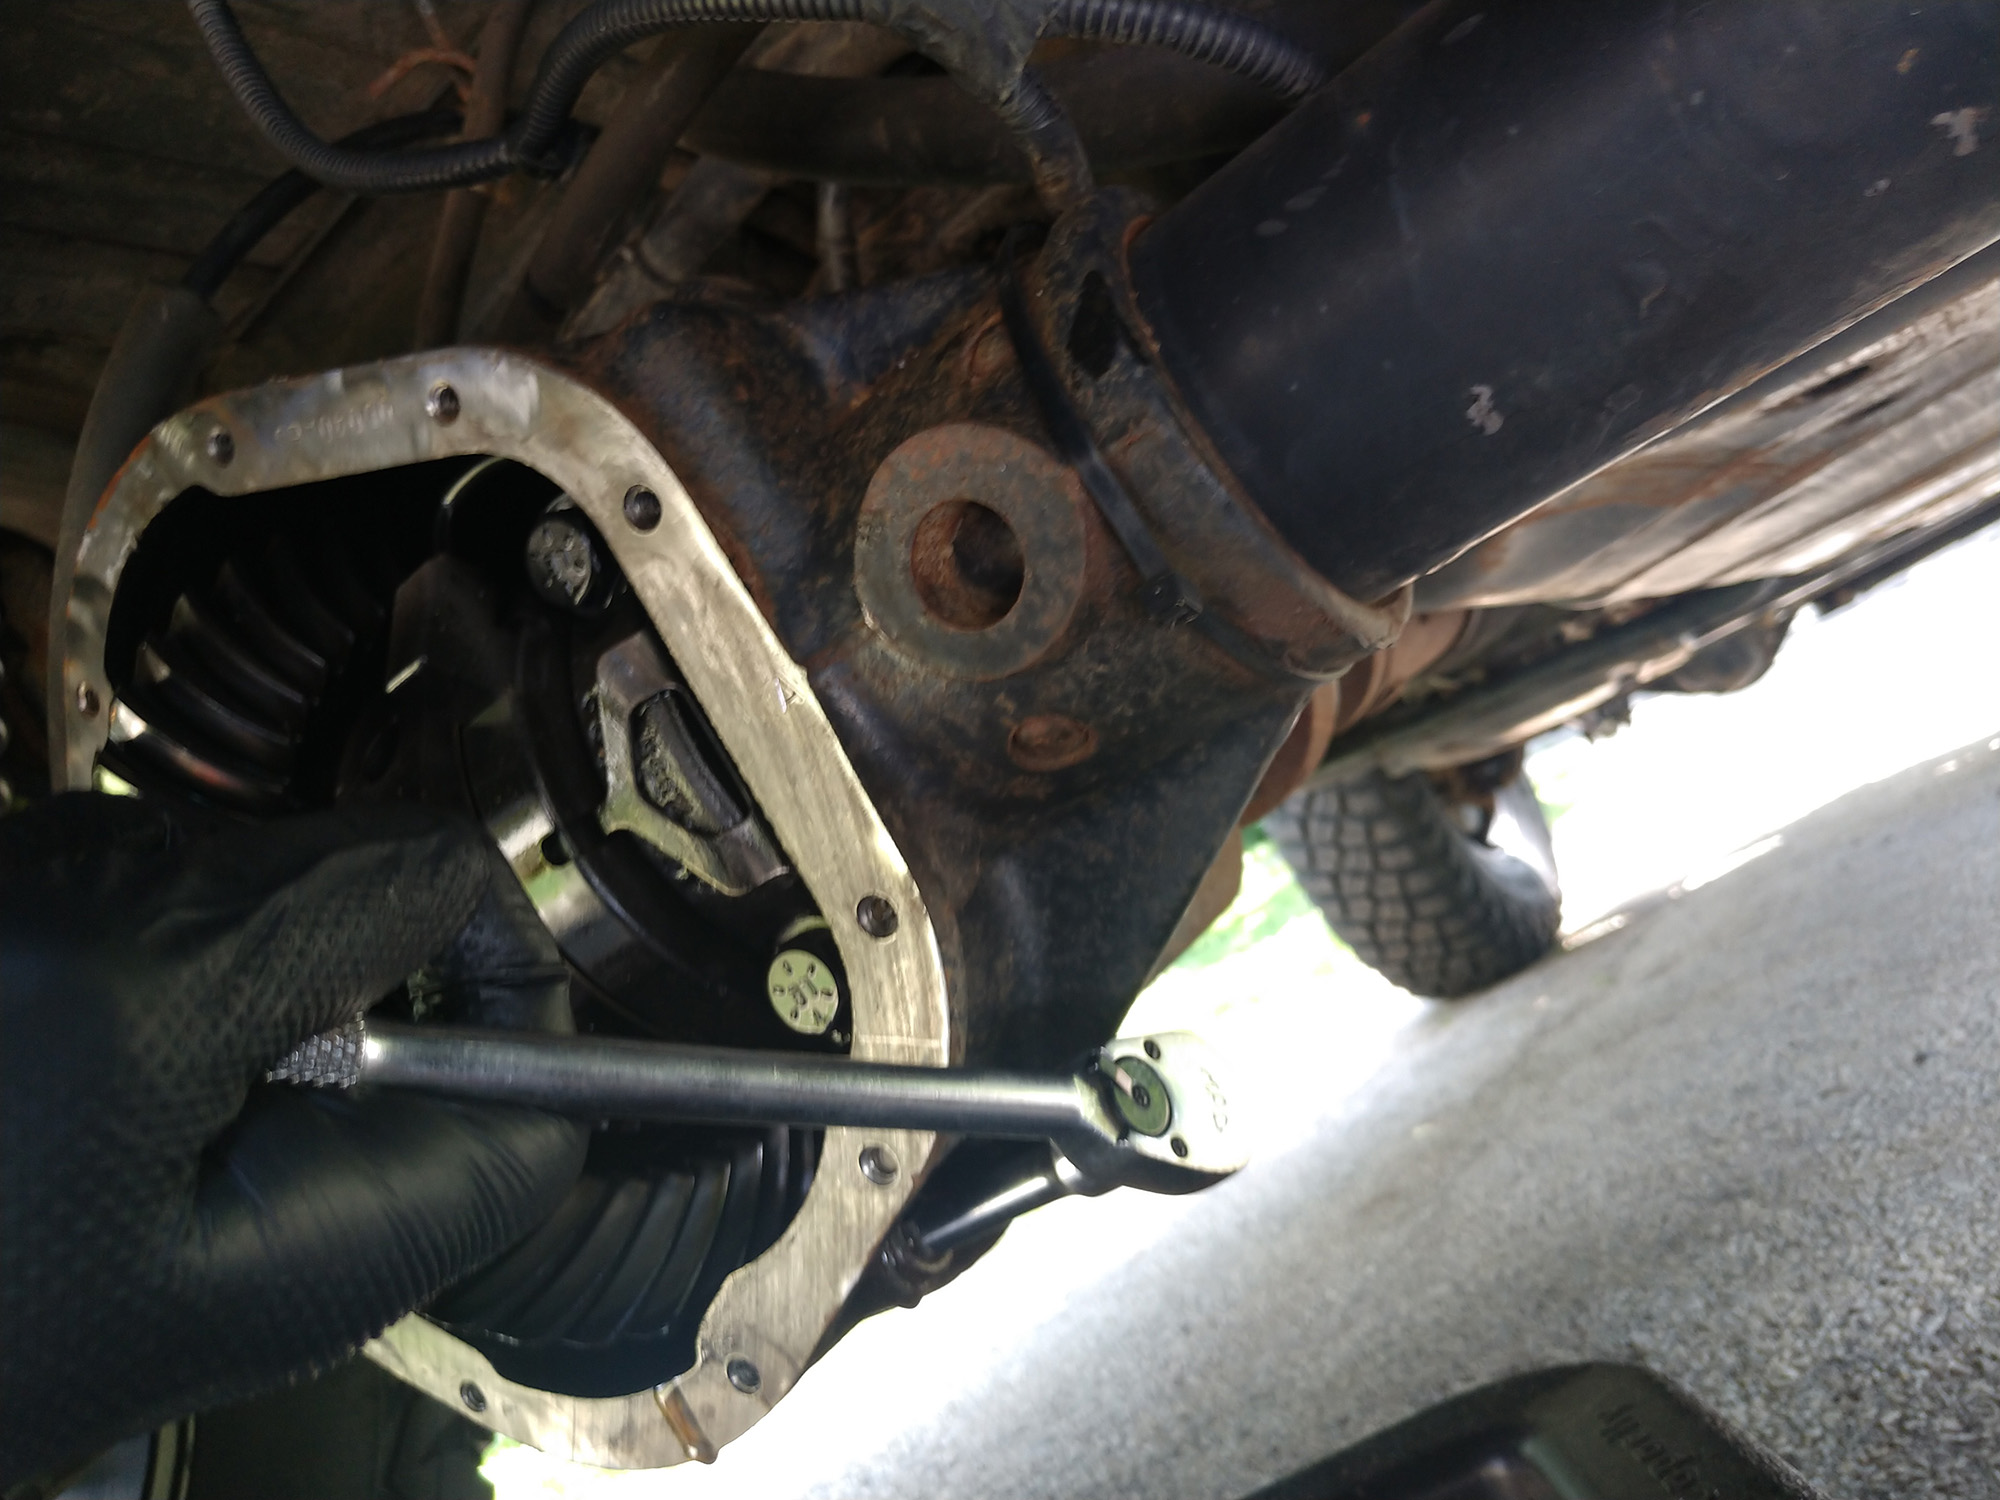
Remove drain plug from the differential housing using a ⅜” ratchet and extension. On the rear, this is the small square on the front side of the housing (as in towards the front bumper).
While the fluid drains, pull the wiring harness for the rear lockers free from the wiring bracket above the differential. This bracket will not be reused.

After the fluid leaking from the drain plug hole slows to a trickle, remove all 10 bolts using a 13mm socket, leaving at least one partially threaded in to keep the cover from falling when it breaks loose.

The rear cover can then be removed by prying, or possibly tapping with a soft faced hammer to break the sealant free.


As I mentioned earlier, the very slight peel my rear differential cover experienced in mid-winter actually broke through the RTV sealant almost to where fluid could have leaked out. It wouldn’t take much to cause a leak. Salt water crept into the void causing rust on the differential cover as well as the cast steel differential housing.

Using a gasket scraper, remove all large chunks of sealant still on the mating surface of the differential housing.
Using a die grinder with a Scotch Brite pad will remove all other surface irregularities, thus ensuring a good seal.

The cover is wrapped in plastic before shipping, and has a separate hardware pack and instructions.

The cover drain plug and dipstick both have high quality rare earth magnets on them, designed to remove metal particles floating in the gear oil that could cause issues with bearings and gears.

Because the differential cover is designed to work with many Dana 44 applications, the fill level can be slightly different and needs to be marked on the dipstick. To determine that fill line, lay the factory and ARB covers next to each other, and use something with a straight edge to line up the level where the bottom of the factory fill hole should sit. To determine how deep the dipstick will be inserted, do not thread it in, but fully seat it in the ARB cover’s fill hole.

Using a rat-tail or chainsaw file (or a utility knife, scribe, engraver or similar device) and mark where the oil level should be situated.

With this marked, all you have to do is insert it in the fill hole to check the level.
Put the drain plug back in the factory hole with the ⅜” ratchet and extension. While you are doing that, install the drain plug on the ARB cover with an 8mm hex key or socket.
.jpg)
Lubelocker gaskets keep you from having to use RTV sealant on your differential covers, and can be reused if they are in good shape. On my previous JKU Rubicon, I had to remove a differential cover to check the internals after 5 months of use, and upon reinstallation I never had any leaks. I think they are worth the money. Of course, RTV is cheaper, but it my experience it is also a whole lot messier.

Speaking of RTV and the associated mess, remove all the old sealant from the bolt holes on the differential. This extra squish is something that needs to be removed to keep the new bolts from having trouble during installation.

Lay everything out like this before you start final installation. Keep it close, as the first few bolts will be installed while you are supporting a bunch of weight—so the closer to you the better. Also have the gasket oriented correctly over top of the cover so you know which way it goes.

Start the first couple of bolts by hand, using the ¼” hex key. After all the bolts are tightened to snug, move on to torquing them down.

Tighten all bolts using the criss-cross pattern on the back of the Lubelocker gasket package—initial torque is 15 ft/lbs, then final is 26 ft/lbs.

Installing the front cover is nearly identical in procedure, aside from the drain plug being located on the driver’s side of the differential housing.
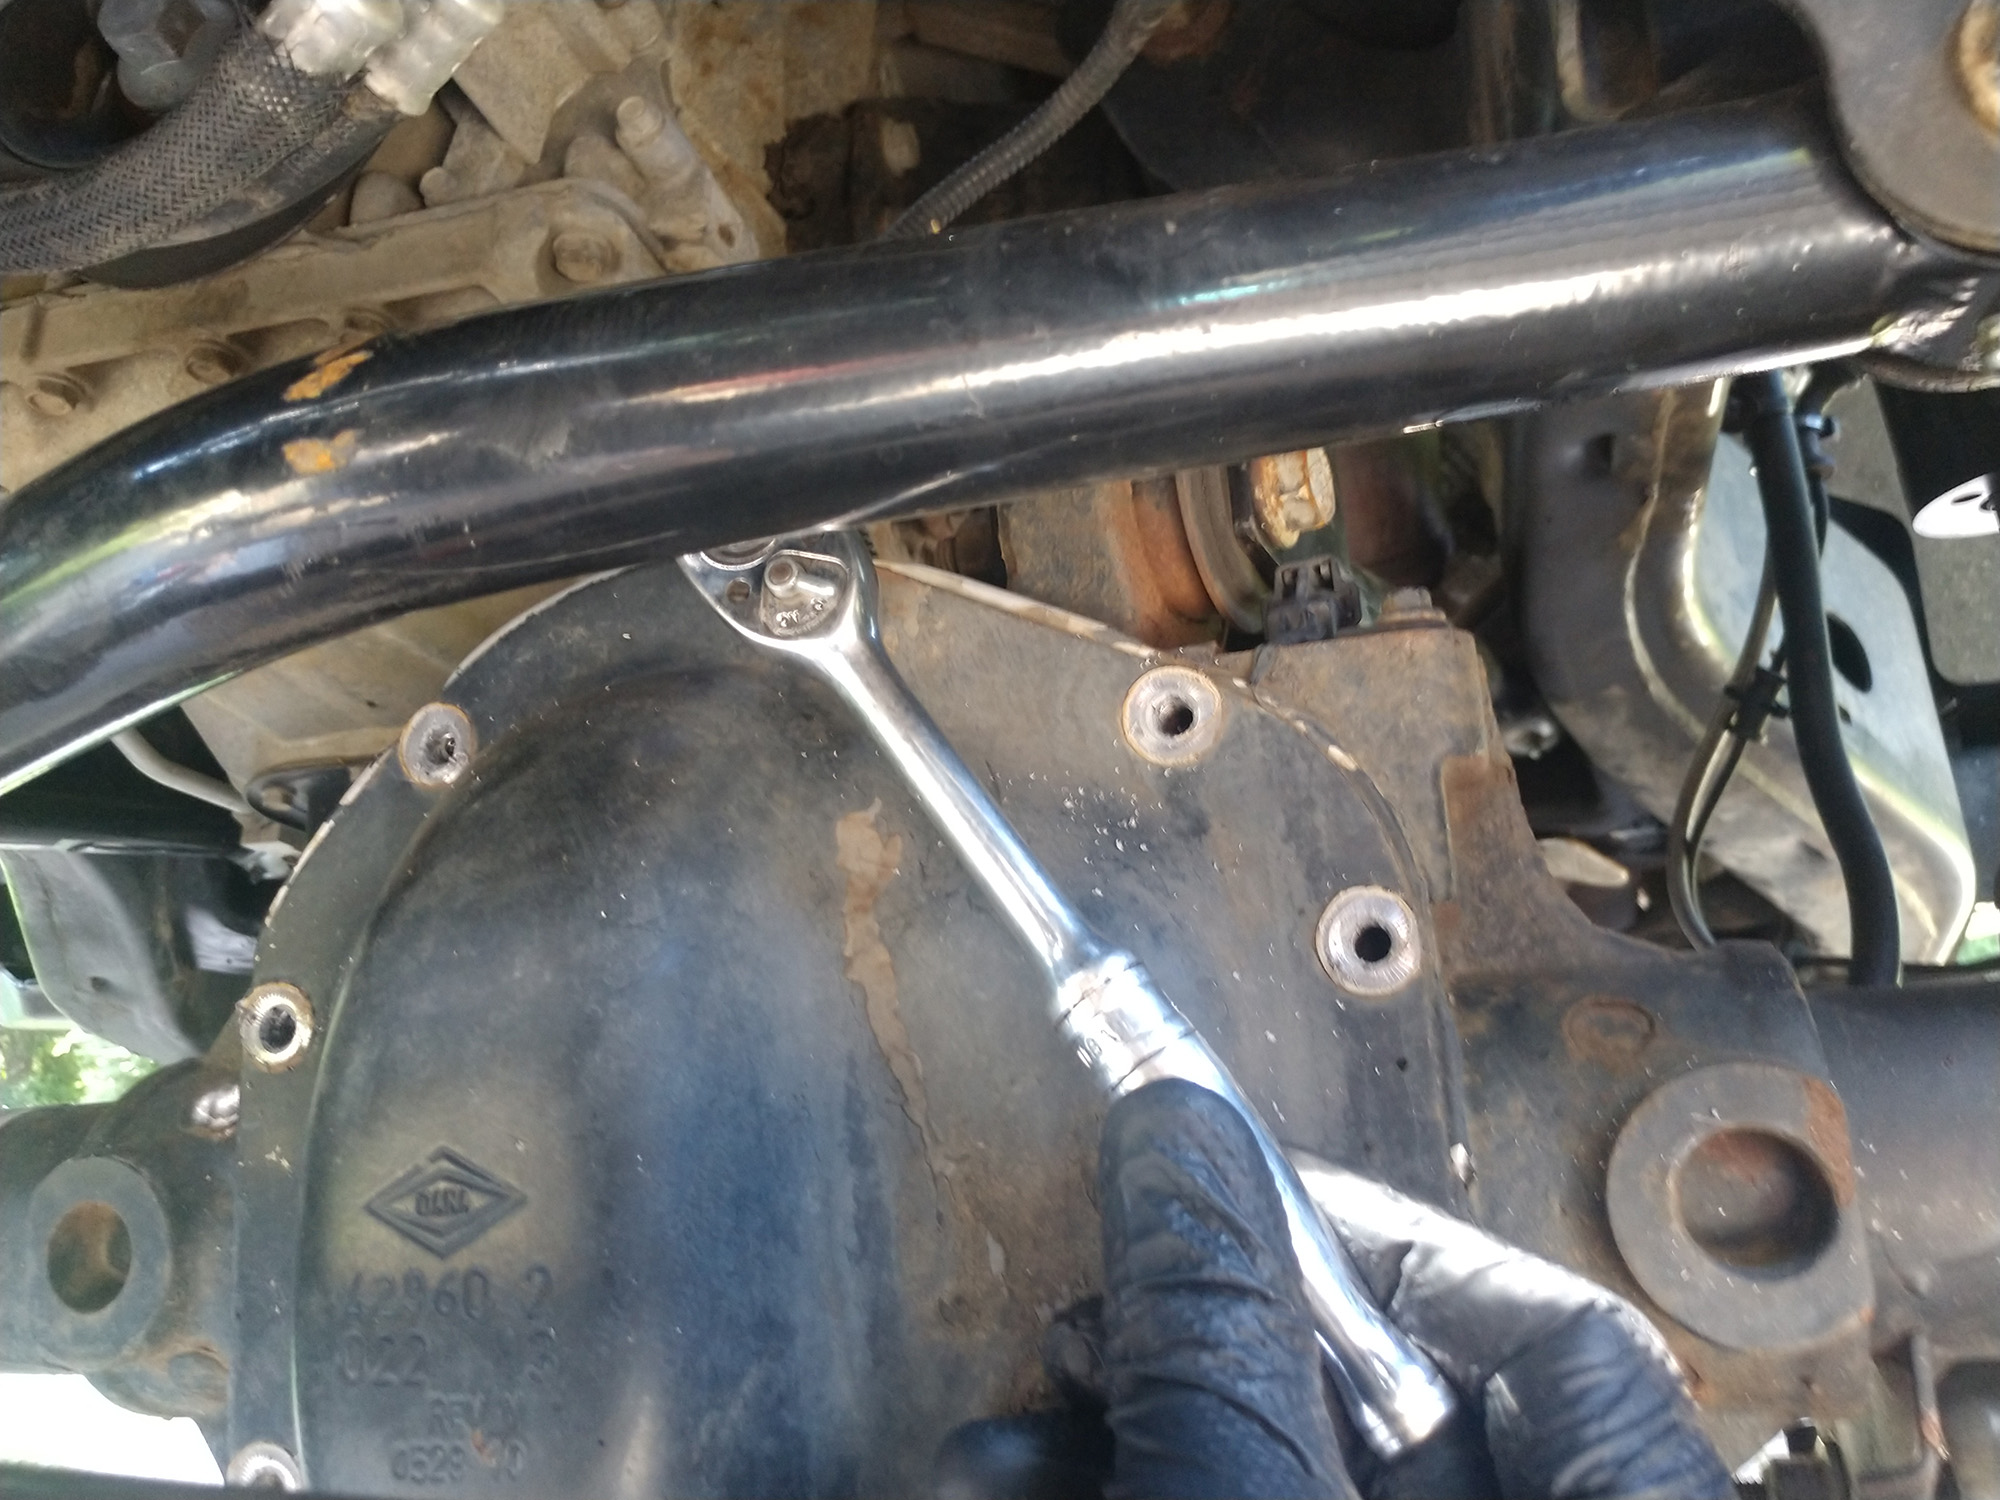
Also, the front track bar is in the way, making it slightly harder to get to all the fasteners.

Also note: the front cover has a lower fill hole than the rear. In my case, I did not have to mark the front dipstick, as the line would have been right at the magnetic tip. In this picture the front cover is on the right.

Use the dipstick port to fill the differentials up with the correct gear oil for your Jeep. I used Mopar 68218041AA Gear & Axle Lubricant SAE 80W-90. The rear used a little over 2.5 quarts, while the front took about 1.5 quarts. That capacity is a shade over the factory specifications, so definitely use your dipstick to determine when you’ve added enough lubricant. If you have a Trac-Lok axle (as with a Willy’s edition) you need to add a limited slip additive, so make sure to consult your owner’s manual for the correct process.
Now, for the ARB Differential Breather Kit installation:
We go a little off the instructions here. For research purposes, I spent $10 on new fittings. For one step of this process, I used plumber’s contact cement to bond the two fitting halves together. Total cure time for this adhesive is 24 hours.
Once this stuff cures, it is strong enough to be sanded and painted, and I then used it to fill the slight gap between the two fittings, as well as keep them together. If you were using your factory axle fittings, plan on keeping your Jeep off the road for that long. Of course, other sealants could also be used. I just don’t know how well that would work.

The front JK differential vent is a press fit, whereas the rear is threaded into the axle tube. Since the fittings included in the ARB vent kit are actually ⅛ BSP (a British pipe thread standard, also used on many European and Australian 4WD vehicles) they won’t thread correctly into either differential.
Using a micrometer on my brand new fittings, I noticed that the flat part behind the hose barbs on both fittings was almost exactly 5/16”.
There is just about that much material behind the threads on the BSP fittings, so I thought it easiest to modify both sides to a press-fit.


I clamped the two ARB fittings in the vice, and cut them off with a hack saw. I believe a cut off wheel could also work, but I’m not sure how hot the plastic portion of the fitting should get with that process.
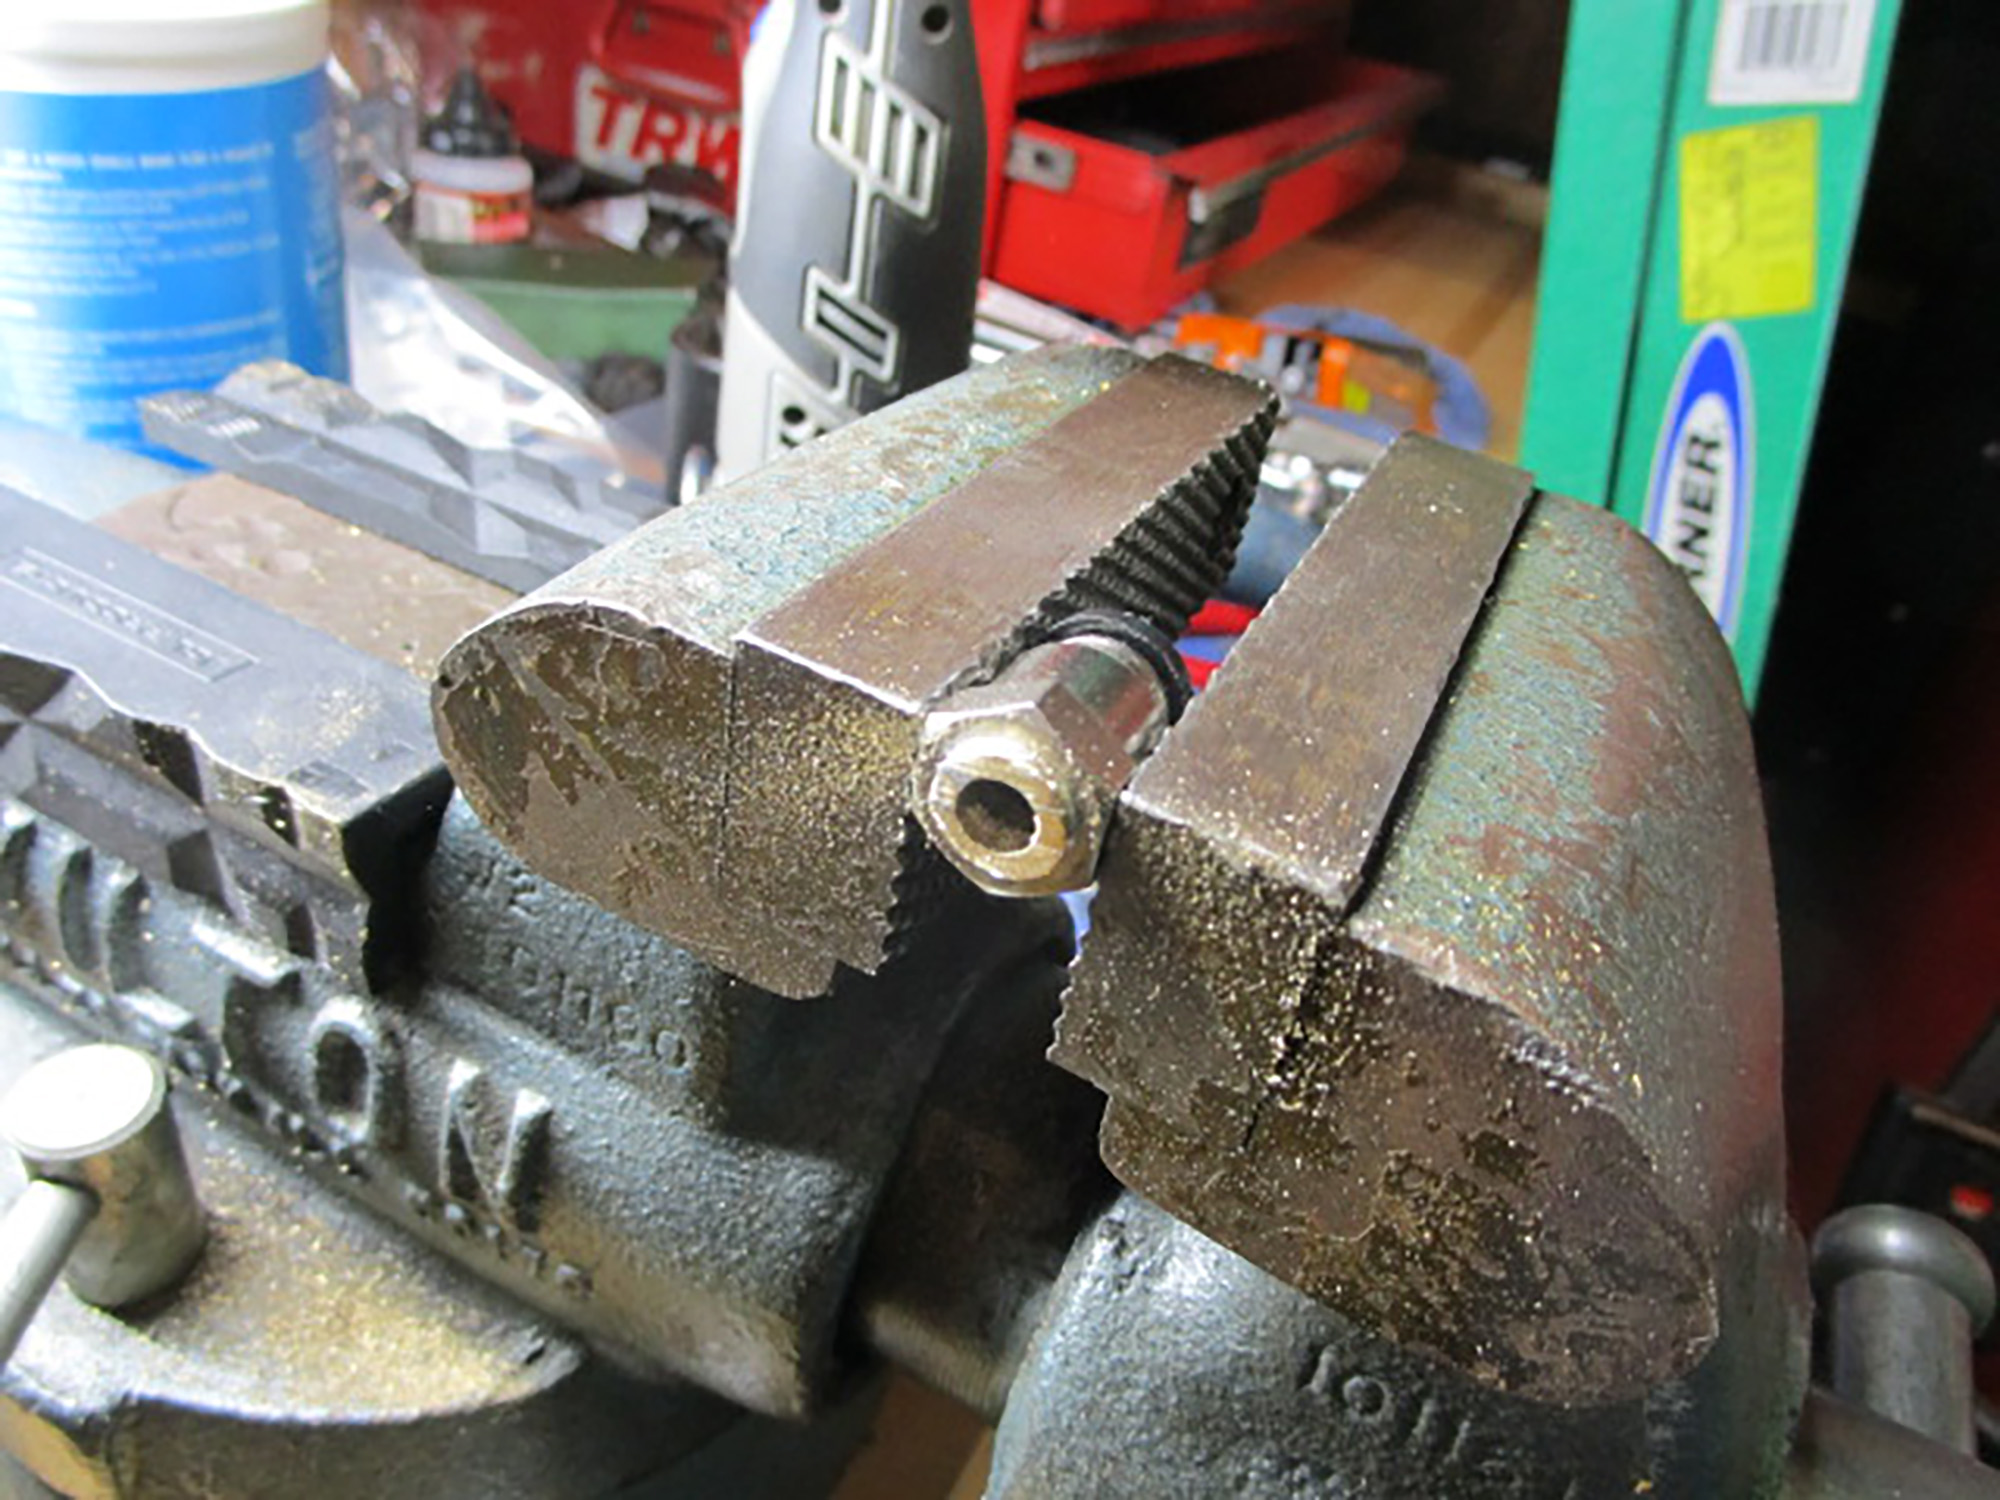
The end result should leave a little material behind the threads in case the drill bit wanders slightly.

Reposition the fitting to be clamped vertically.

You do not want to really drill past the hex portion of the fitting, as there are mechanical parts in there that hold the 8mm plastic tubing in place. I recommend using a drill stop on the bit to keep from going too deep.

After drilling, file the top of the fitting with a flat file.

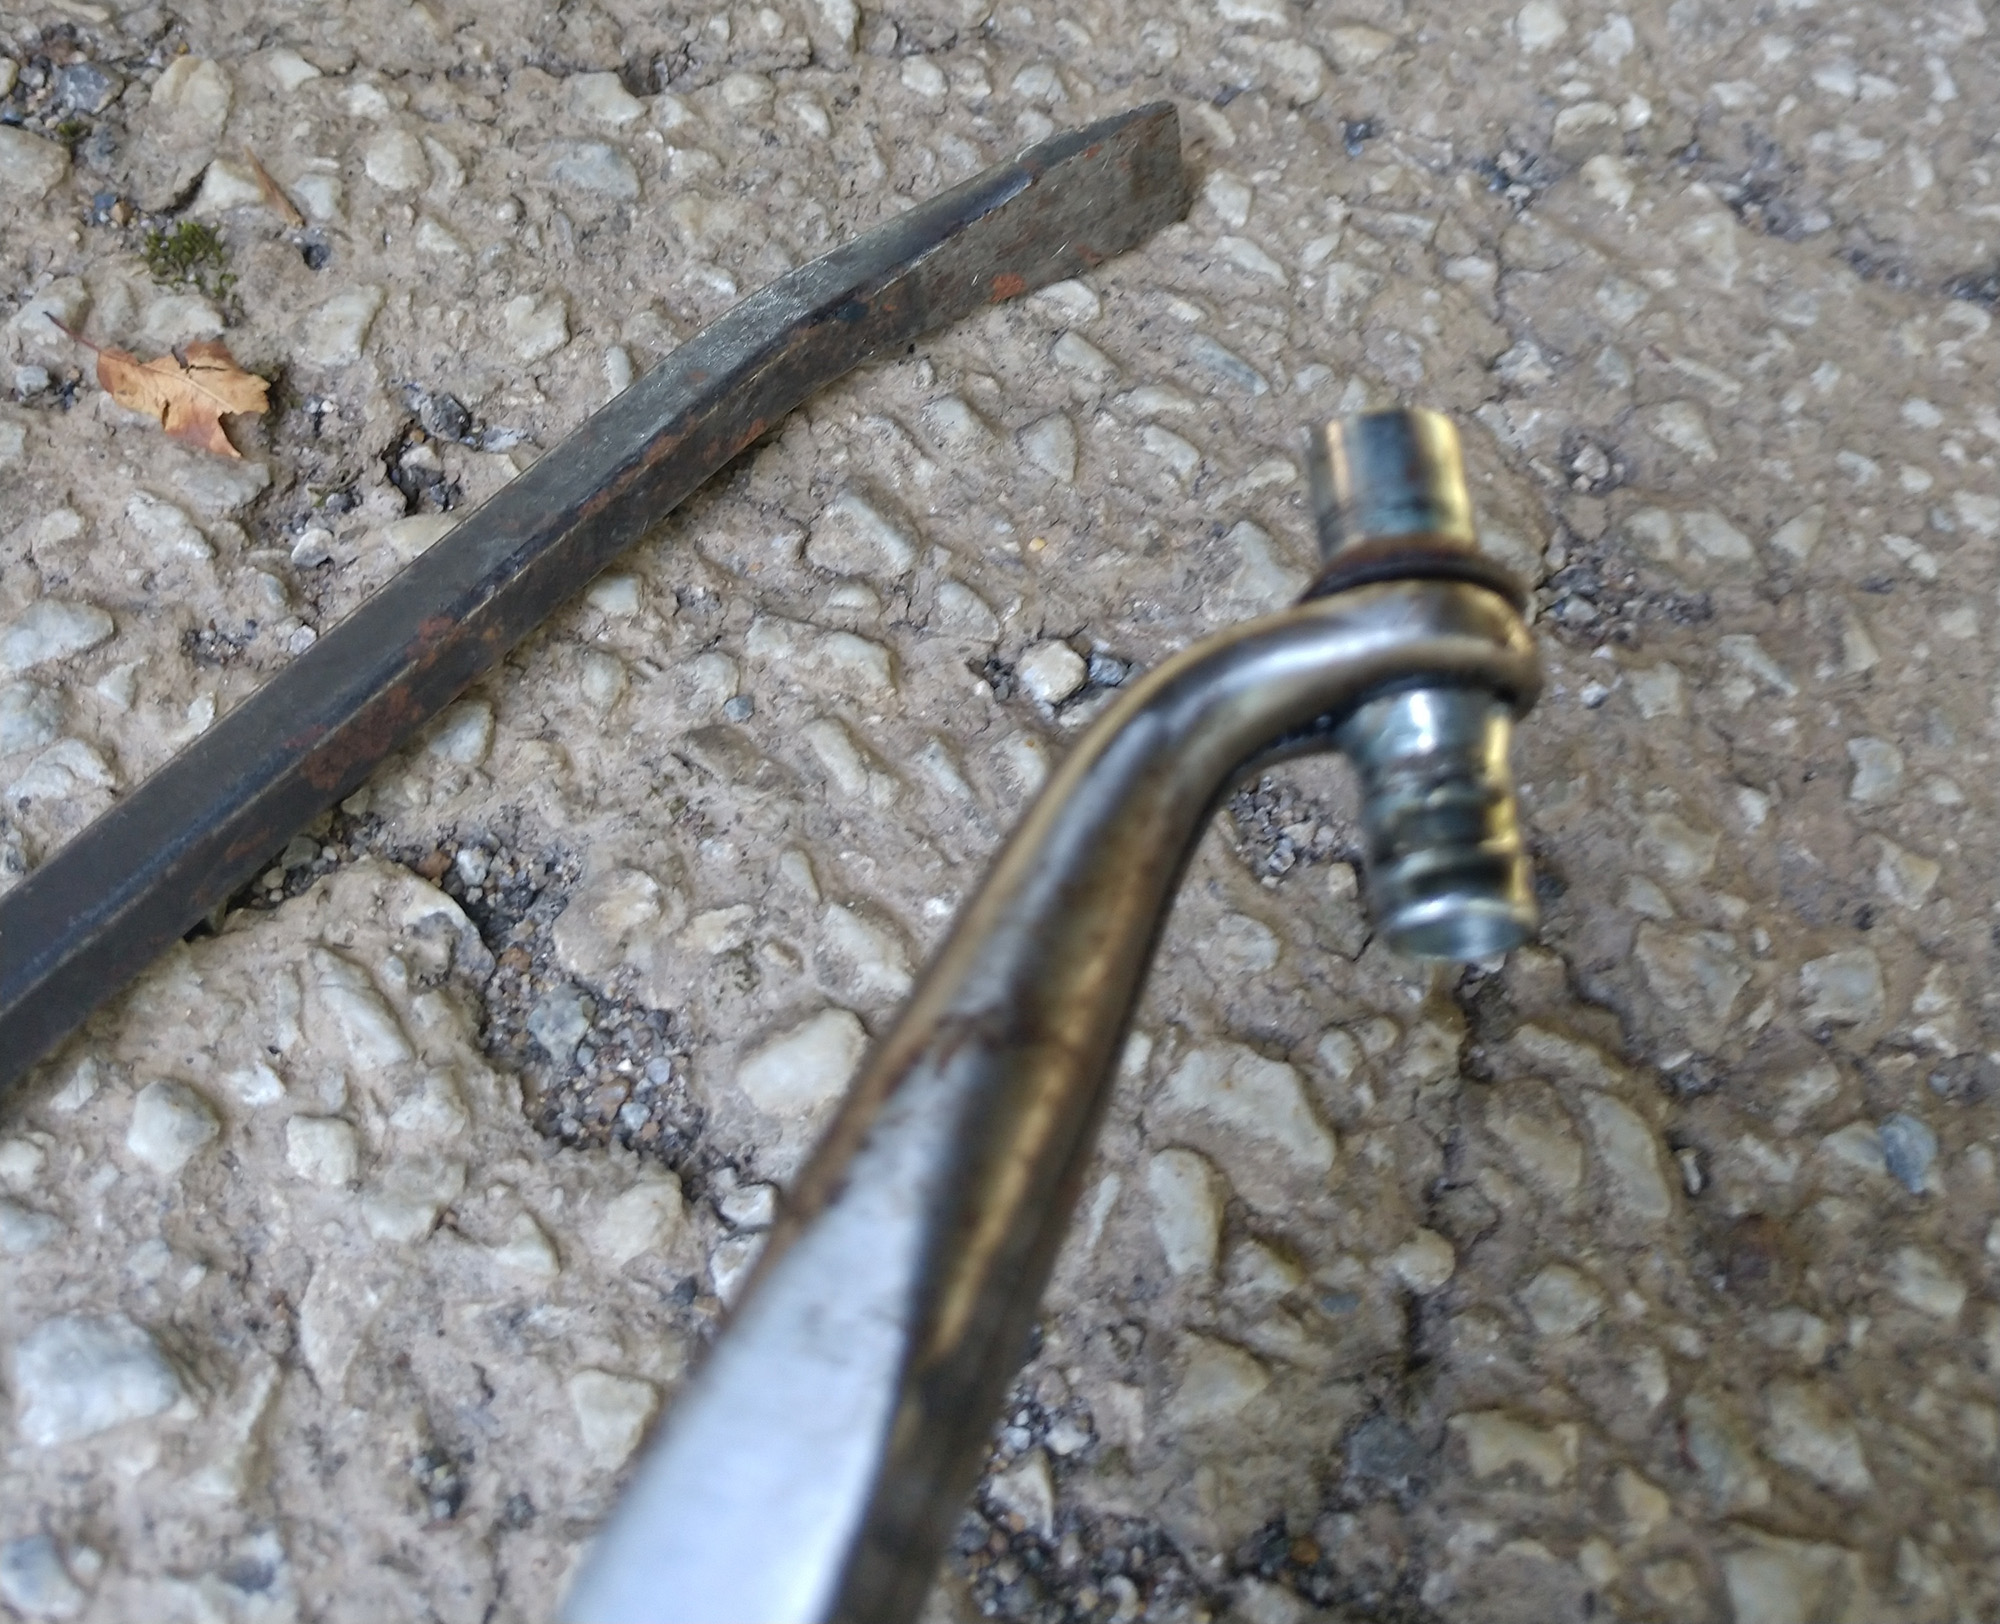
The end result is a slight shoulder on the Mopar fitting and a hole almost exactly the same size on the ARB fitting.
If you do this same thing with the rear Mopar fitting, you end up with these:
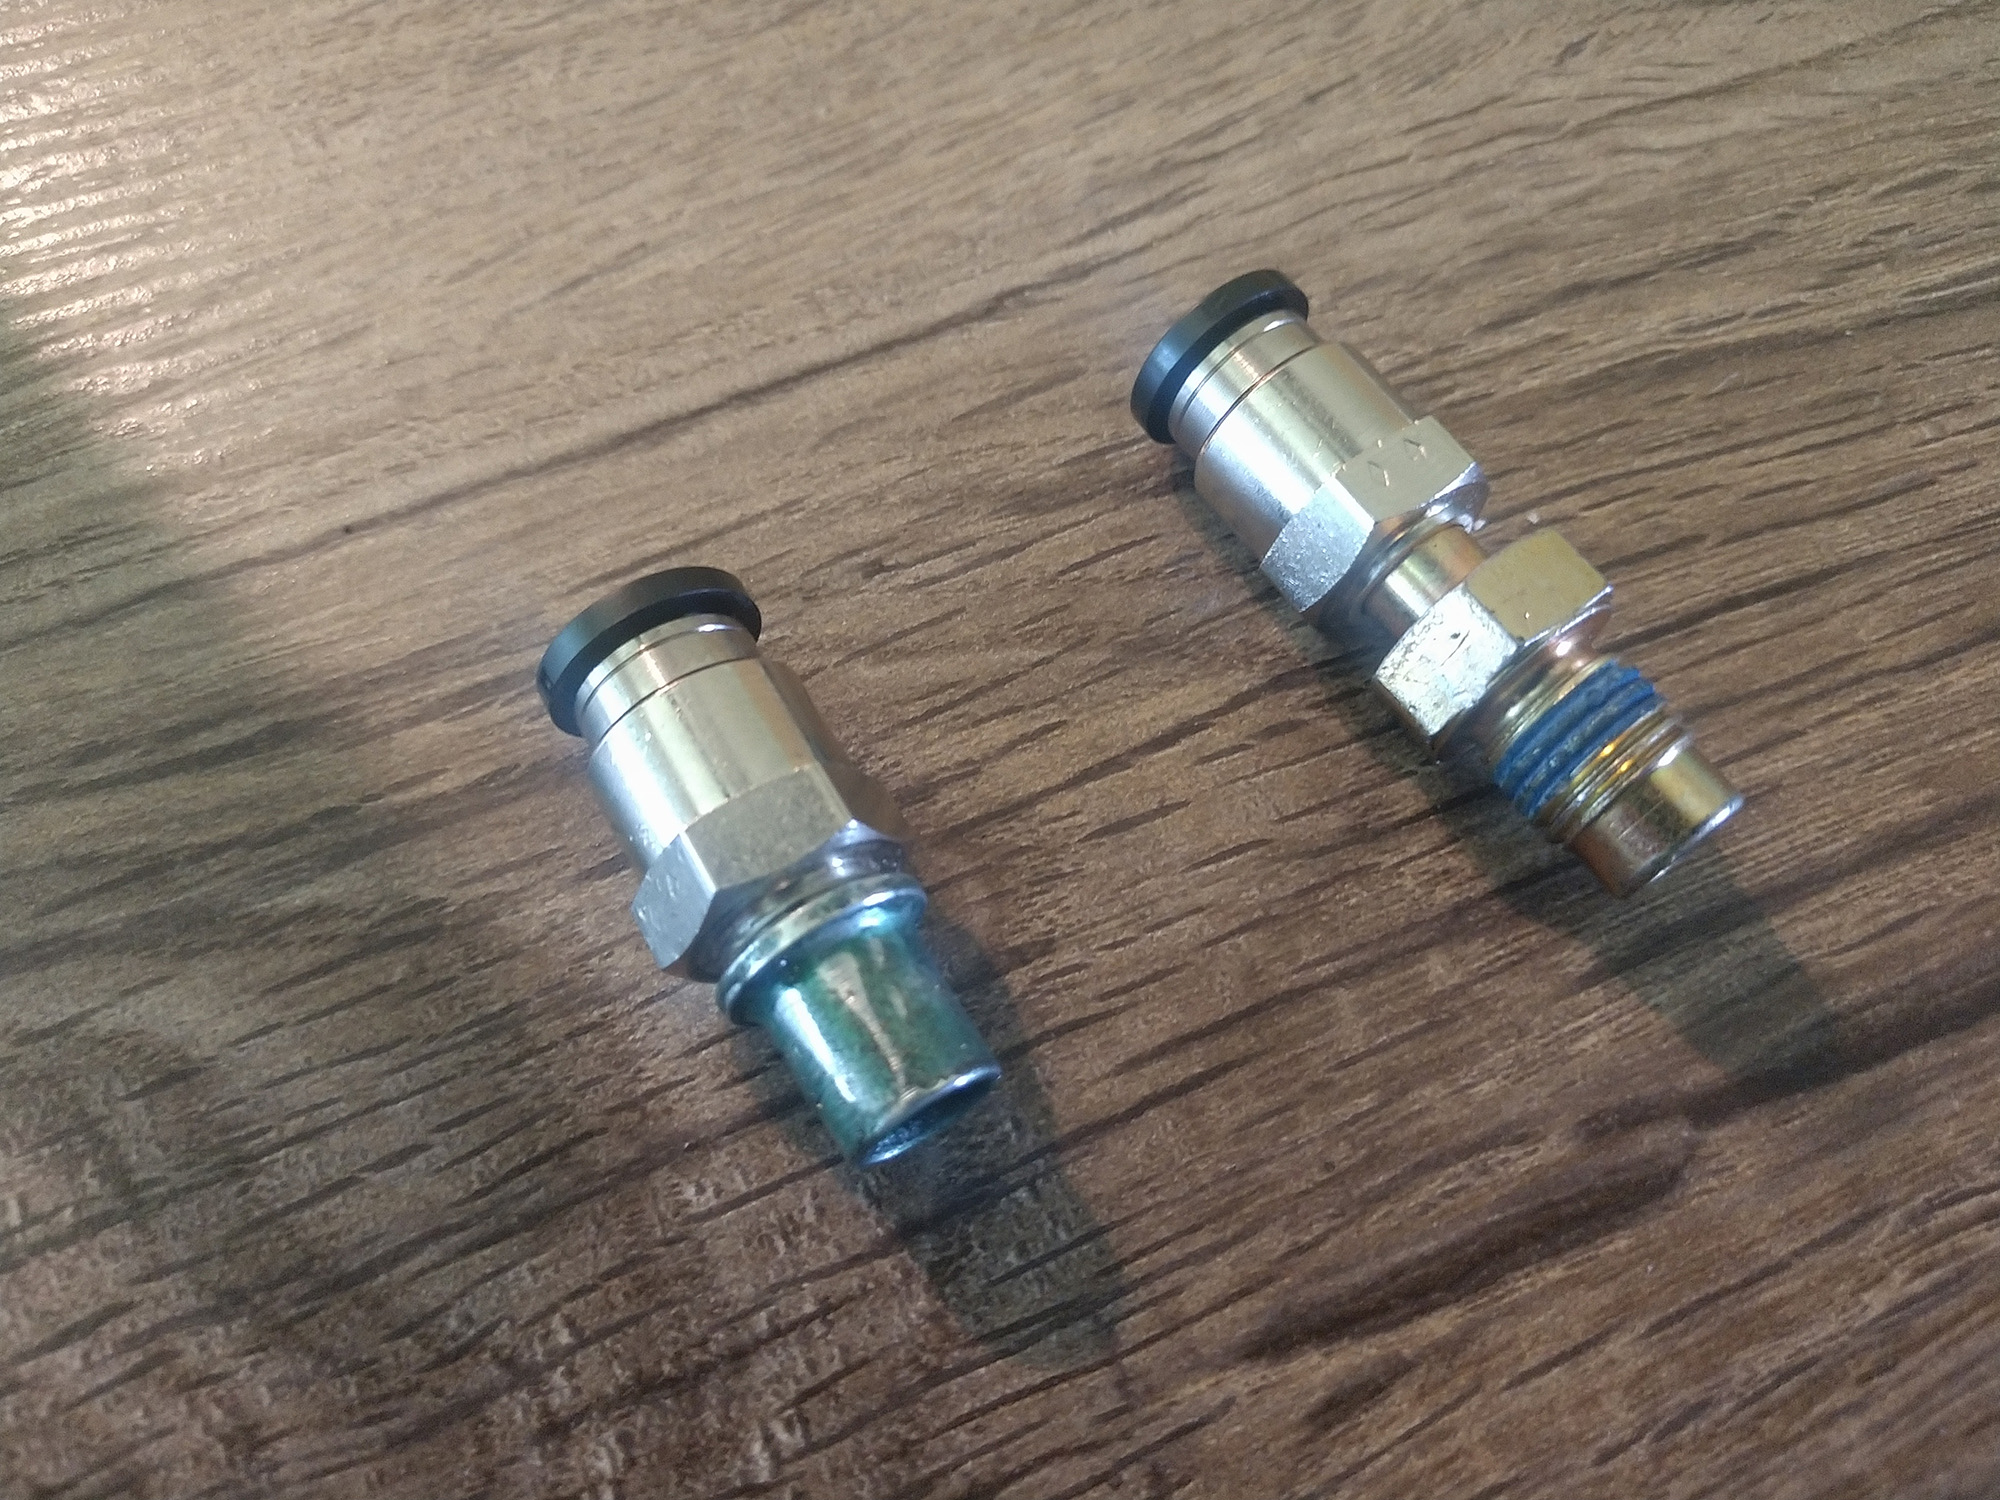
Using a thin coating of the plumber’s cement on the shoulder of the Mopar fittings, wait two minutes after application and press the two together. LEAVE THEM ALONE FOR 24 HOURS. I tried the front one after waiting nine hours and it still wasn’t fully cured, so I had to start over.
The end result looks like these, and they’re totally ready to be reinstalled on the differentials.

Now, pick where you want the breather manifolds to live. For my application, I drilled one into the plastic bracket under the hood near where my vacuum canister was relocated. This will be used for both the transmission and transfer case breather as well as the front differential. The rear one will be used behind the passenger side tail light.

I had some self tapping stainless steel screws left over from another project that I used in place of what ARB included in the kit. Mostly, I wanted the ability to use an 8mm socket to tighten them in place of a Phillips head screwdriver. The manifold mounting holes are not tapped, and are designed to be used with any M6 or ¼” fasteners you want, including anything you can find in the engine bay (or some other spot on your Jeep) that is already using those bolts.

Install three push lock fittings using a 13mm wrench, and one plug with an o-ring using a 3mm hex key. Using a 1/8" bit (or whatever size is appropriate with your hardware), drill two holes to mount the front manifold.

Both the transmission and transfer case breathers have green caps on top of them, and can be tricky to locate. The transmission one on my model (automatic 2013 Rubicon JKU) was right behind the intake manifold on the passenger side, and the transfer case one was against the firewall behind the transmission dipstick tube. That last one was a real jerk, and required the hood to be folded completely back against the windshield frame. Also, did you know that the fuse panel could support the weight of an adult human (your mileage may vary).

Since these are not easy to work with, and the fittings on the actual transmission and transfer case are just about impossible to get to without complete removal, I opted to extend these lines to the ARB manifold rather than replacing their entire length. With all three terminating in the same place, water intrusion will now be far more obvious.
![]()
For this, I used a few additional parts, two VIAIR 90001 ¼” NPT male to ⅛” BSP adapters that I special ordered through Quadratec, and two ¼ NPT female to 3/8” hose barb adapters I picked up at a local plumbing supply store.
![]()
Fully assembled, the hose barb is the same size as the factory vent hoses, and the adapter reduces it to the ⅛” BSP to 8mm line fitting from the ARB kit.
Cut the factory lines below the rattle cap, and stick the barbs into the hose. We now have pushlock fittings for the ARB hoses. Make sure all plastic hoses are trimmed straight, and are not crimped.


Route the lines away from all excessive heat sources, keeping in mind that you want a gradual upwards trajectory with no sagging (remember, fluid traps are very bad) towards the manifold on the driver’s side of the engine compartment.
![]()
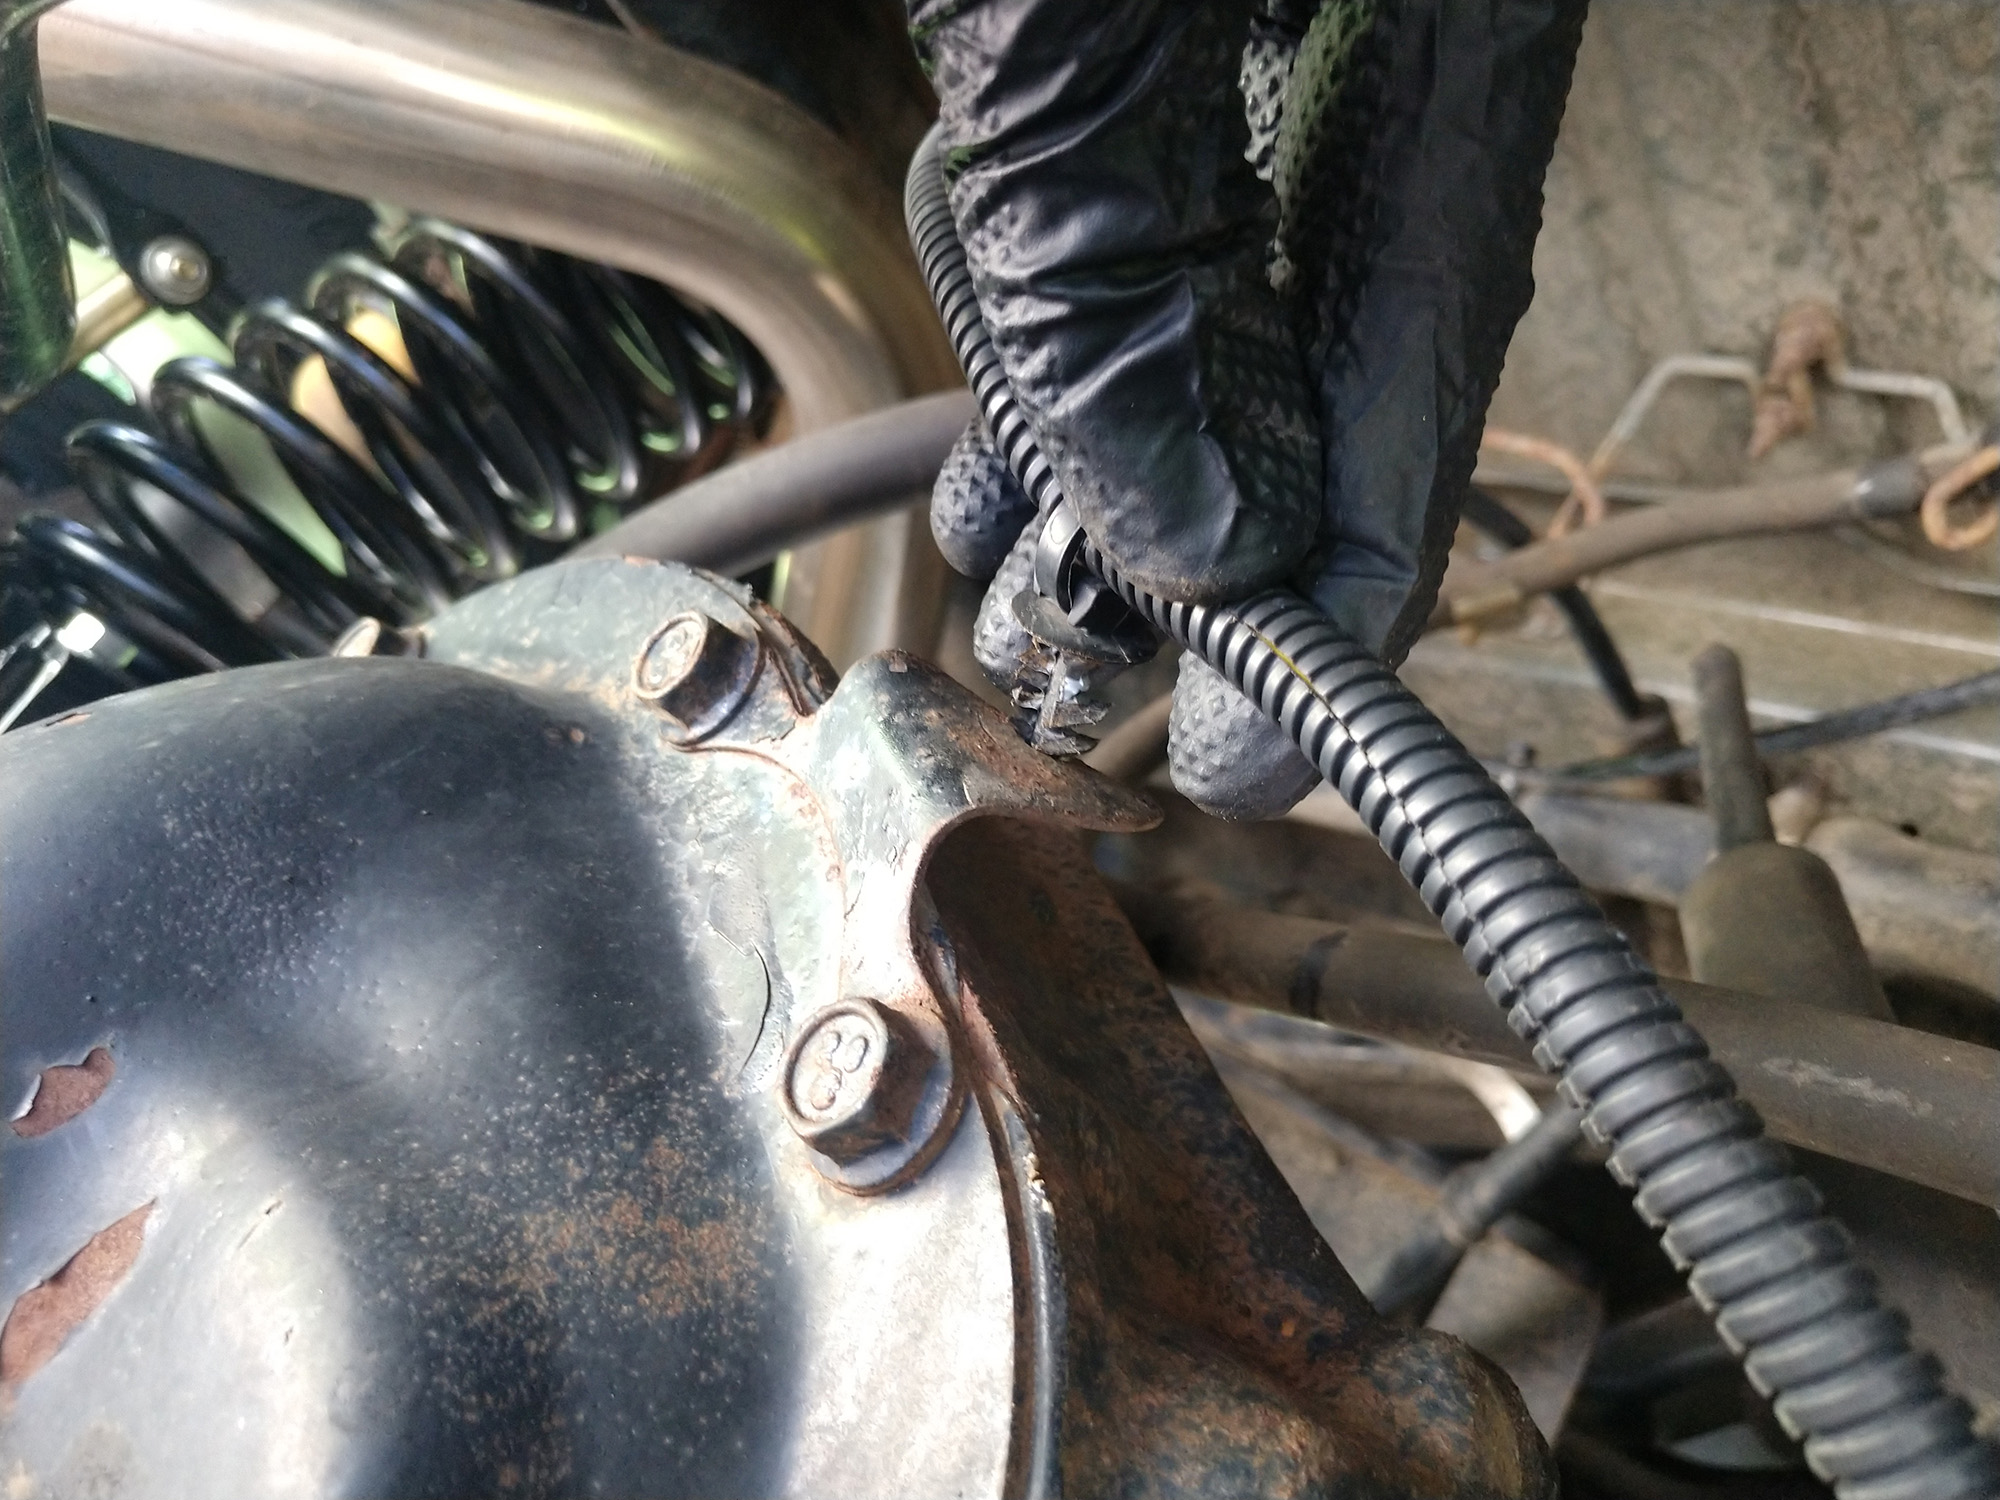
Back below at the front axle housing, locate the breather hose mounted behind the differential.

Pull the hose off the barb, and unclip from the back of the driver’s side shock tower.

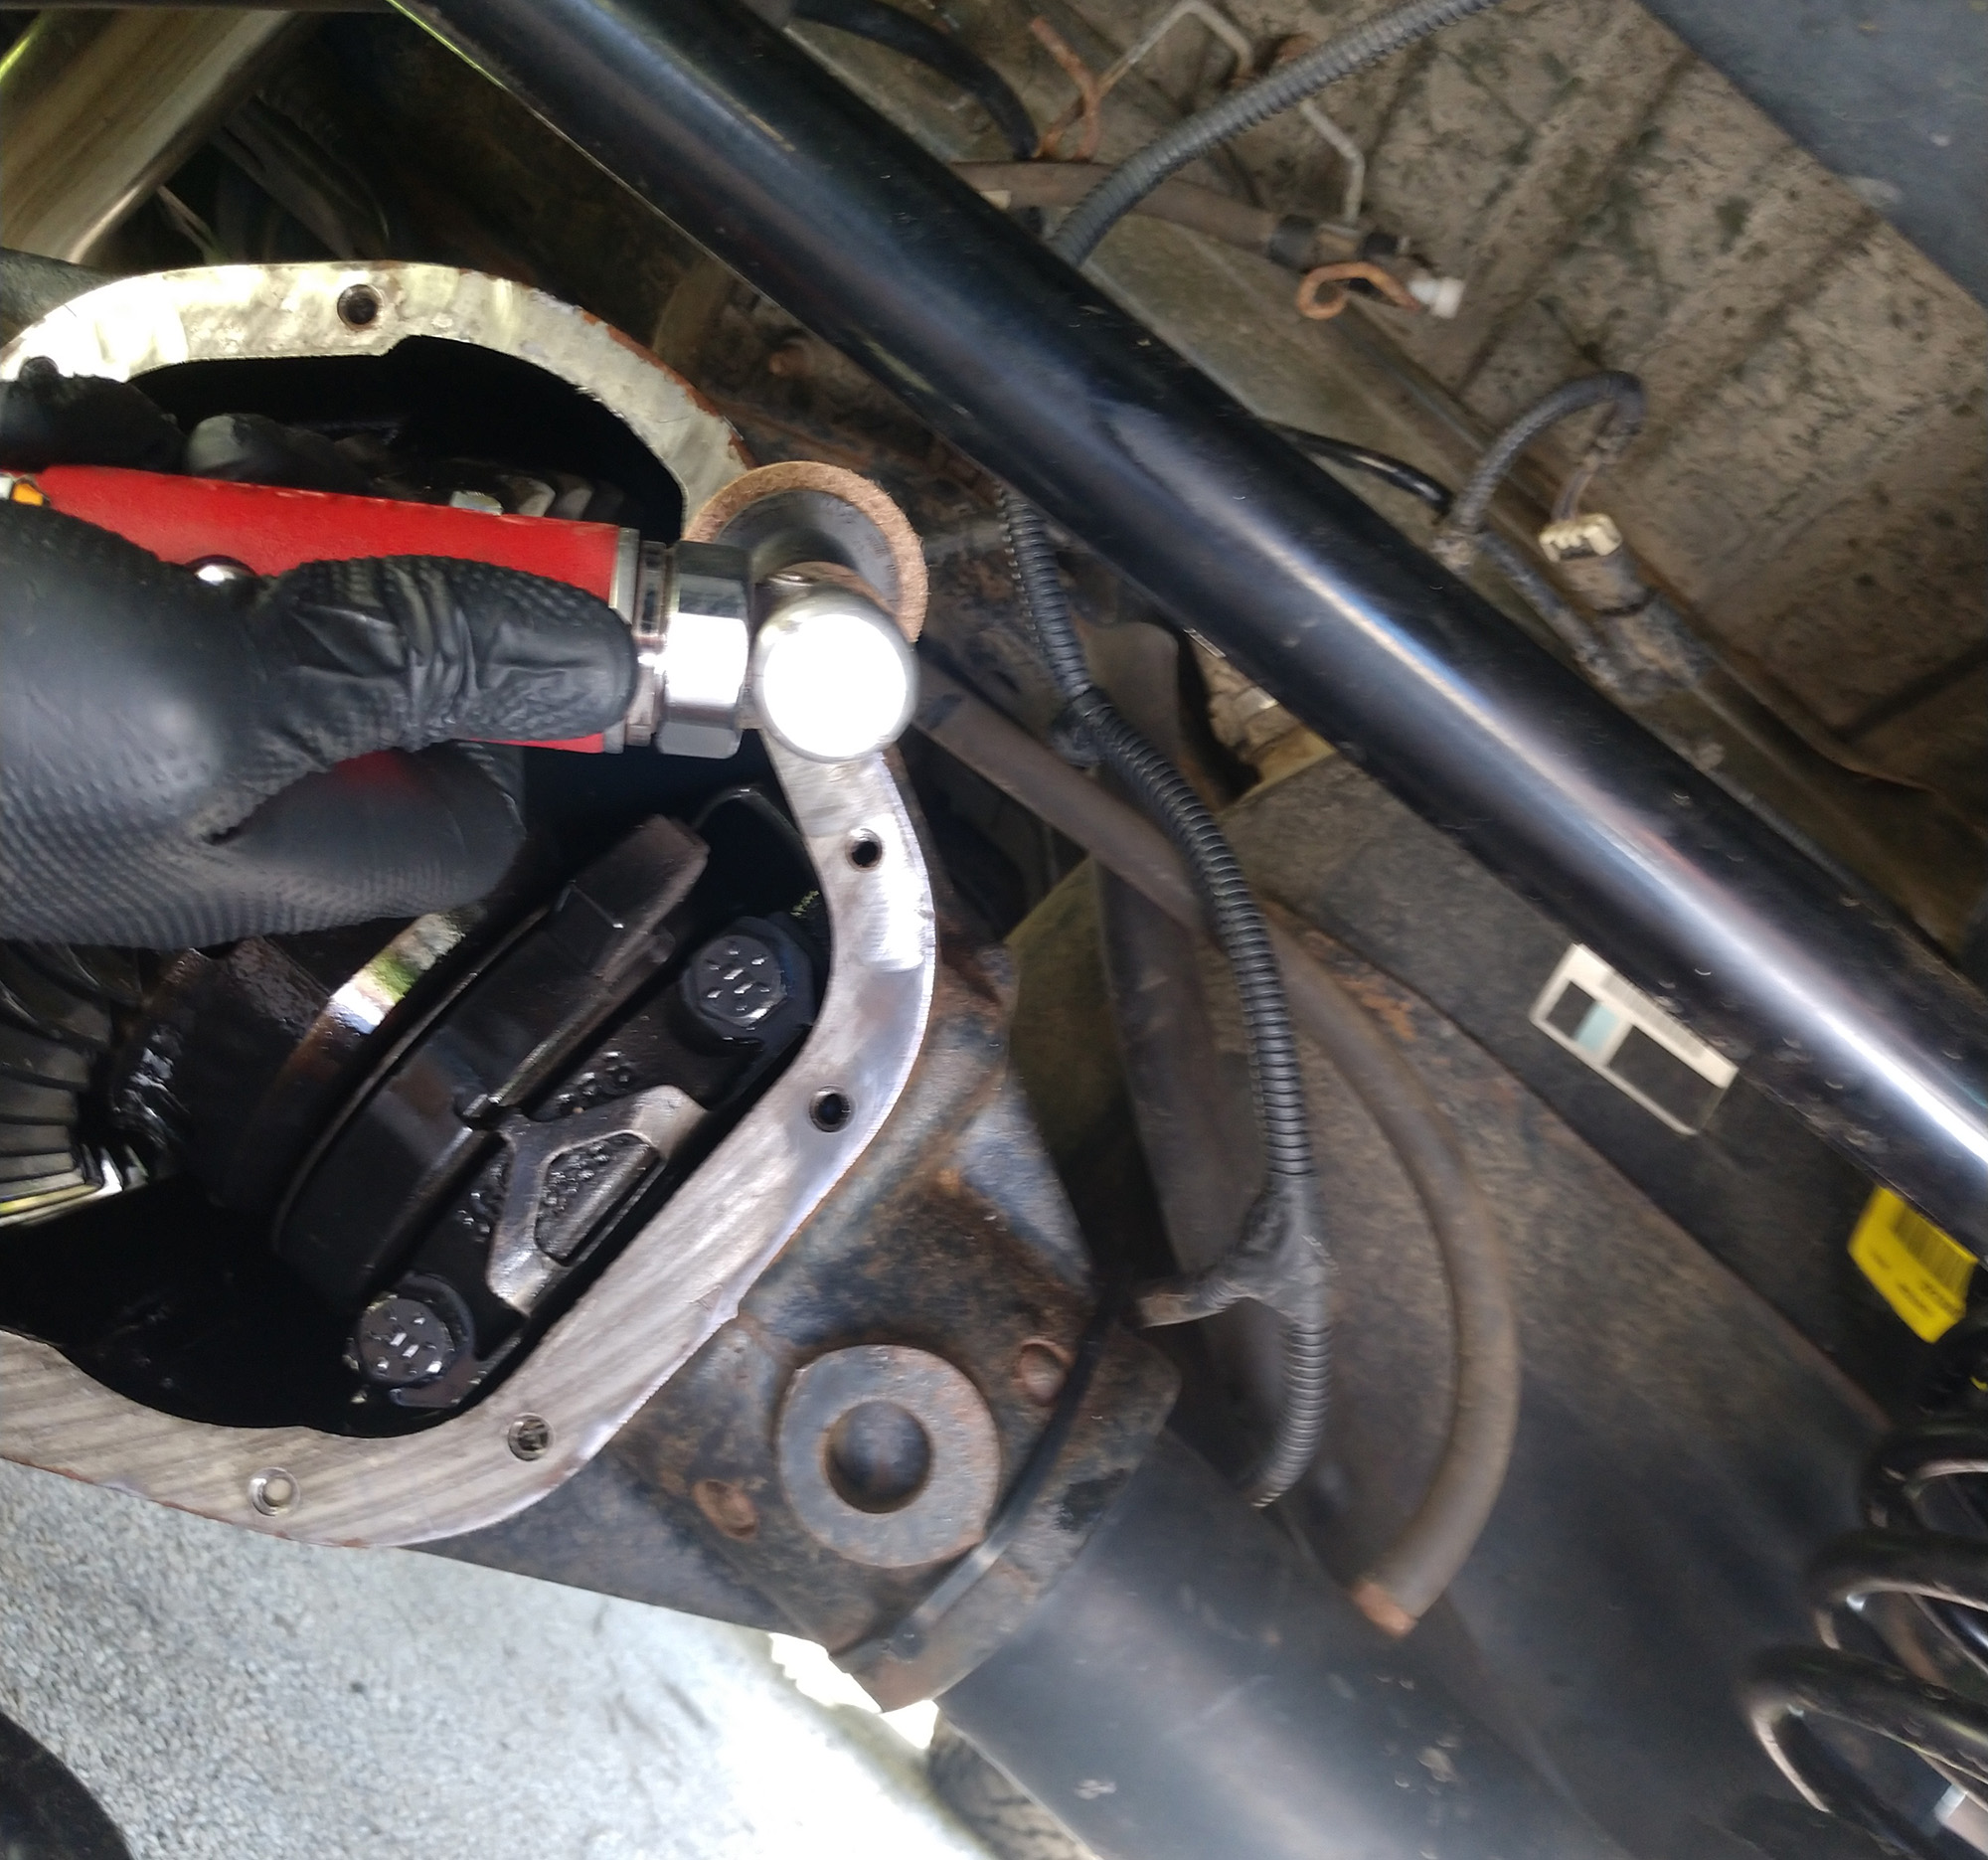
Grab the vent with the circle-tipped pliers (this actually removed the vent fitting without damage) and use a pry bar to work it free. This is just pressed in with a little gunk, so it should come loose pretty easy. I also sprayed a little penetrating oil on the location about five minutes before starting.
With that removed, the modified version must be pressed in. It's a tight fit, but I found that a 13m 12pt box end of a wrench, and a 14mm deep socket would protect the fitting enough so it could be tapped in with a hammer.

Route the hose to mirror the factory version, attaching cable ties periodically to prevent chafing against sharp edges. Terminate all hoses at the manifold in the engine bay.

The filter comes apart into three pieces, forming a high flow, splashproof vent. The top and bottom of the filter are plastic, while the center is bronze with tiny holes.

Spin the filter base into the manifold first.

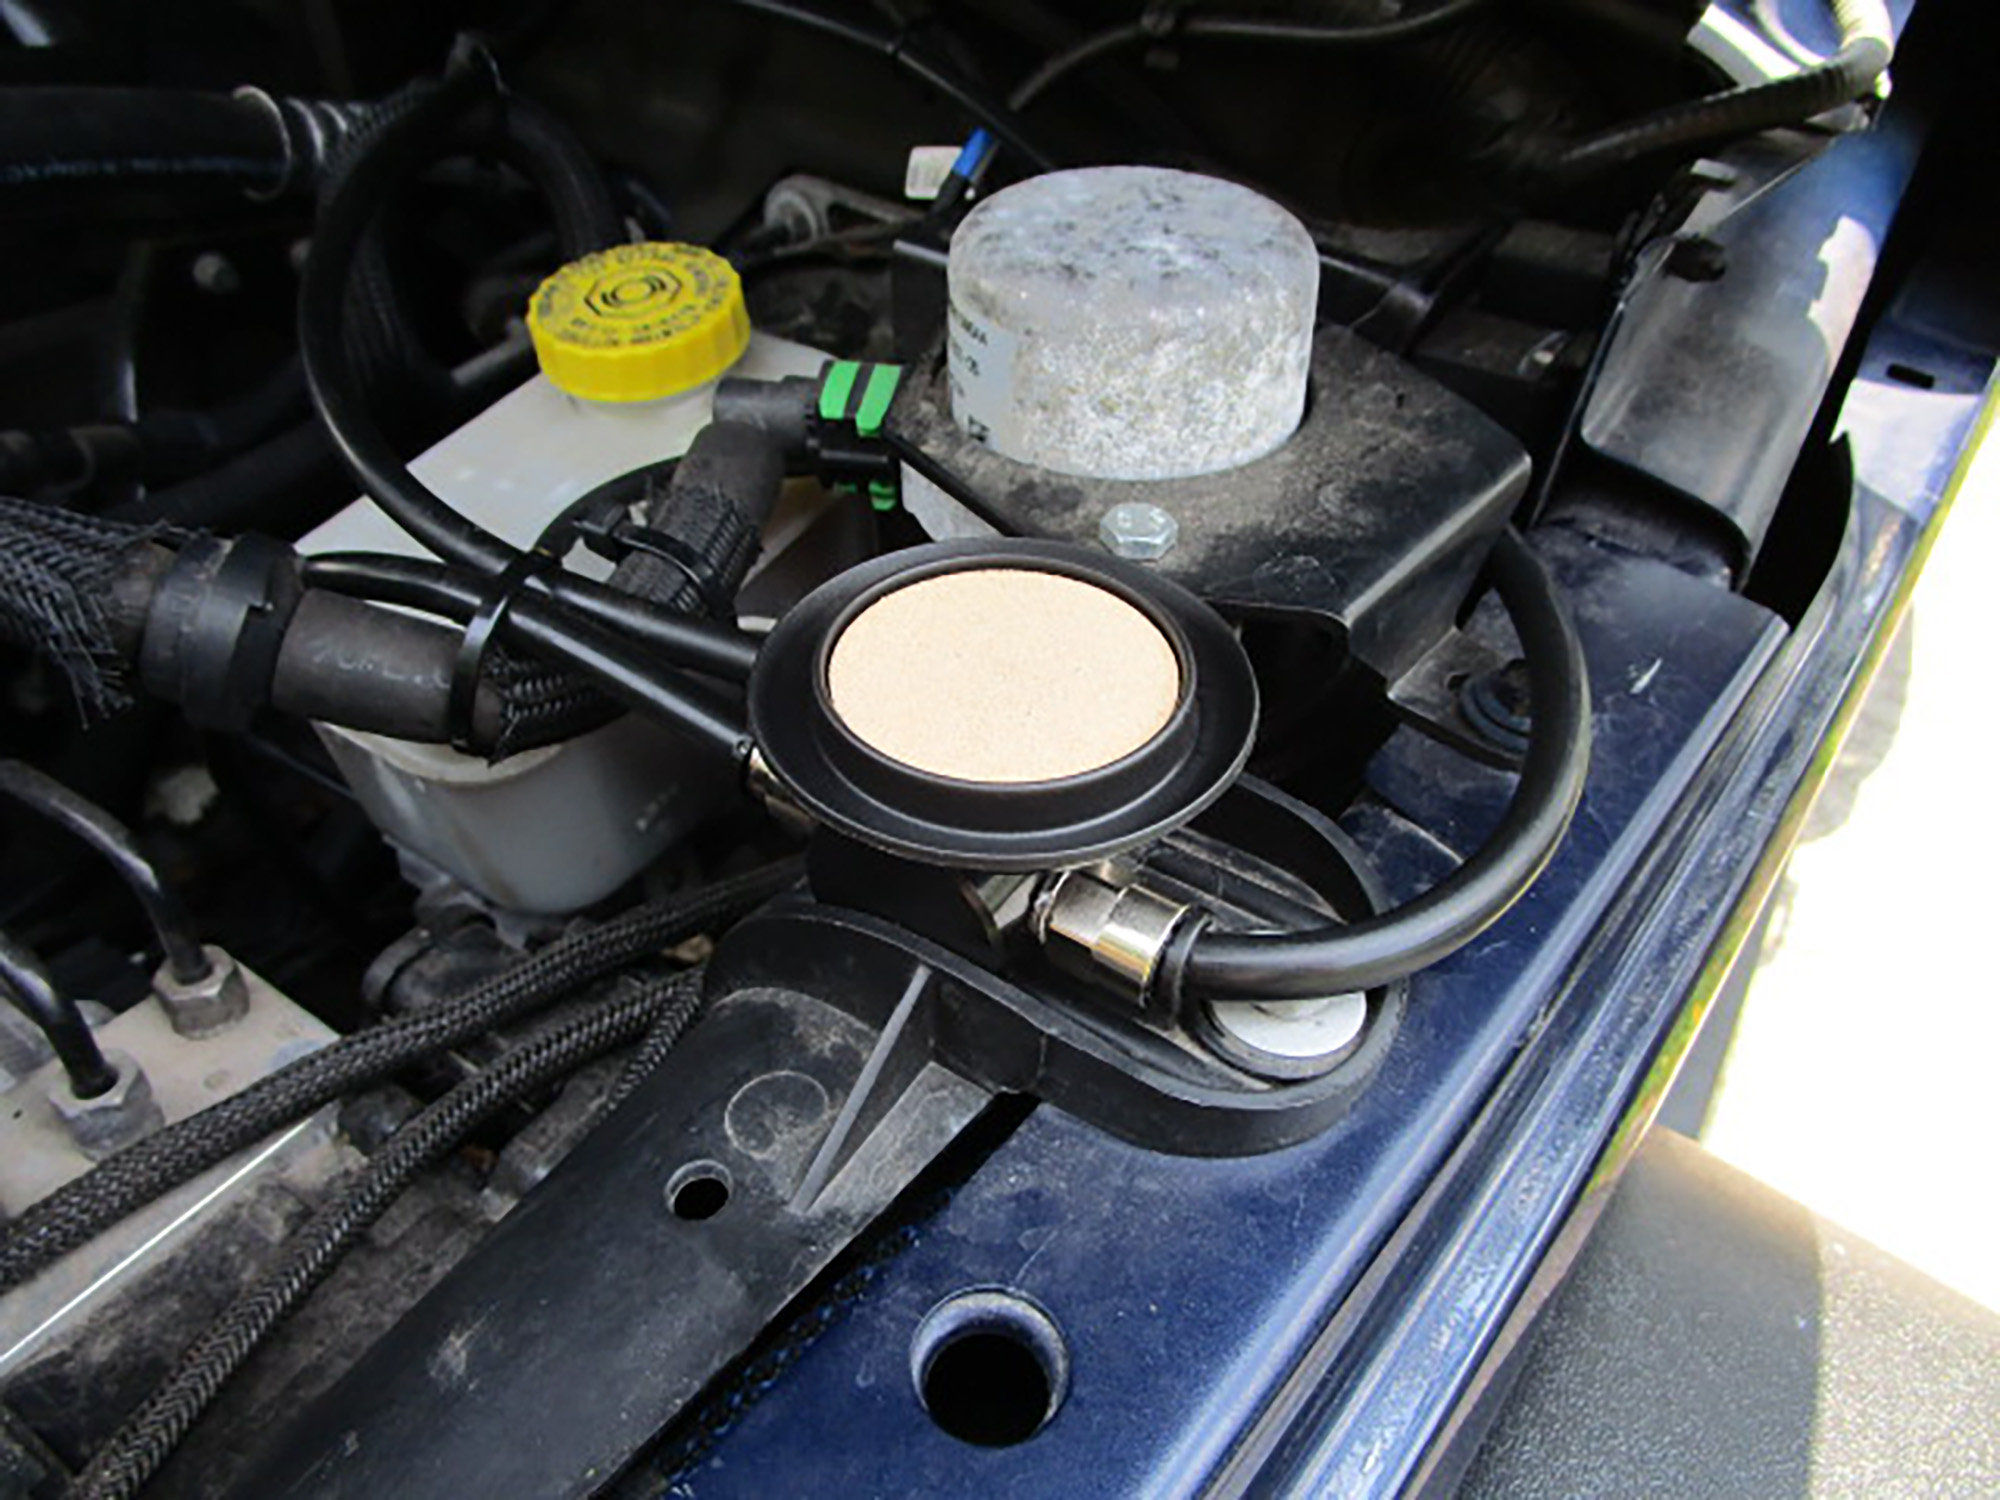
Insert filter element into the base, and clip the top cap in place. Now that you know how easily this is disassembled, you should probably check the condition of the filter if you have an ARB compressor, and clean it if needed.

This completes the entire front breather installation. Now, on to the rear.

With the tail light removed, check for placement of the rear manifold, keeping in mind that the filter has to be installed upon completion, and no lines should be draped across things like LED heat sinks or sharp edges.
With that out of the way, mark and center punch the holes in the sheet metal—drill to 3/16” (or whatever diameter you need with your self tapping fasteners).

Assemble the manifold, installing the three o-ring plugs with a 3mm hex key, and a single push lock hose fitting using a 13mm wrench. Bolt the manifold to the inner sheet metal.
From below the Jeep, look up to the plastic ‘almost triangular’ piece of plastic covering over the bottom of the body tub corner.

Using the 5/16” drill bit, make a hole in this cover.

Above this panel is about 6” of liberally-applied factory expanding foam. Now, I had the same differential breather setup in my 2008 Rubicon, and this was not the case. Here is what the inner tub area floor looked like this the earlier model:

Like I said, on my earlier JK model foam was not an issue. A corrugated panel was used to ‘seal’ the bottom of this void, and you can see how ‘well’ it functioned by the amount of silt and dust behind the tail light. The hose could push past the corner of this panel, so no drilling was required.

Back to my 2013—the spray foam isn’t very hard to work around. The 8mm ARB line is rigid enough to punch right through the stuff.

Push the hose up through the hole you just drilled and through the foam. It will actually hold in place, making it very easy to locate the other end inside the void with a little light.

Blow the line out with compressed air (or in this case, CO2) to make sure there is no foam debris trapped in the line.

Cut the hose as clean as possible and install into the manifold.
Assemble the rear filter the same way as the front.

Remove the factory vent with a 13mm wrench and install the ARB-compatible one you created earlier.

Again, run the line so there is no drooping, and secure to prevent rubbing with the supplied cable ties. Trim the end and plug into the fitting on the axle tube.

With these ARB Differential Breather kits, the breather vents have now been raised 15” in the front, and 16” in the rear. The transmission breather sits at about the same level, and the transfer case breather is about 6” above its original location.