On a 2012 and newer Wrangler, when installing a lift kit of 3 inches or more, the exhaust system needs to be modified to prevent the front driveshaft from contacting the crossover y-pipe. If not corrected, the hot exhaust can melt the boot on the driveshaft and eventually lead to costly damage of the front driveshaft. Luckily there is a relatively inexpensive and easy fix for this problem.
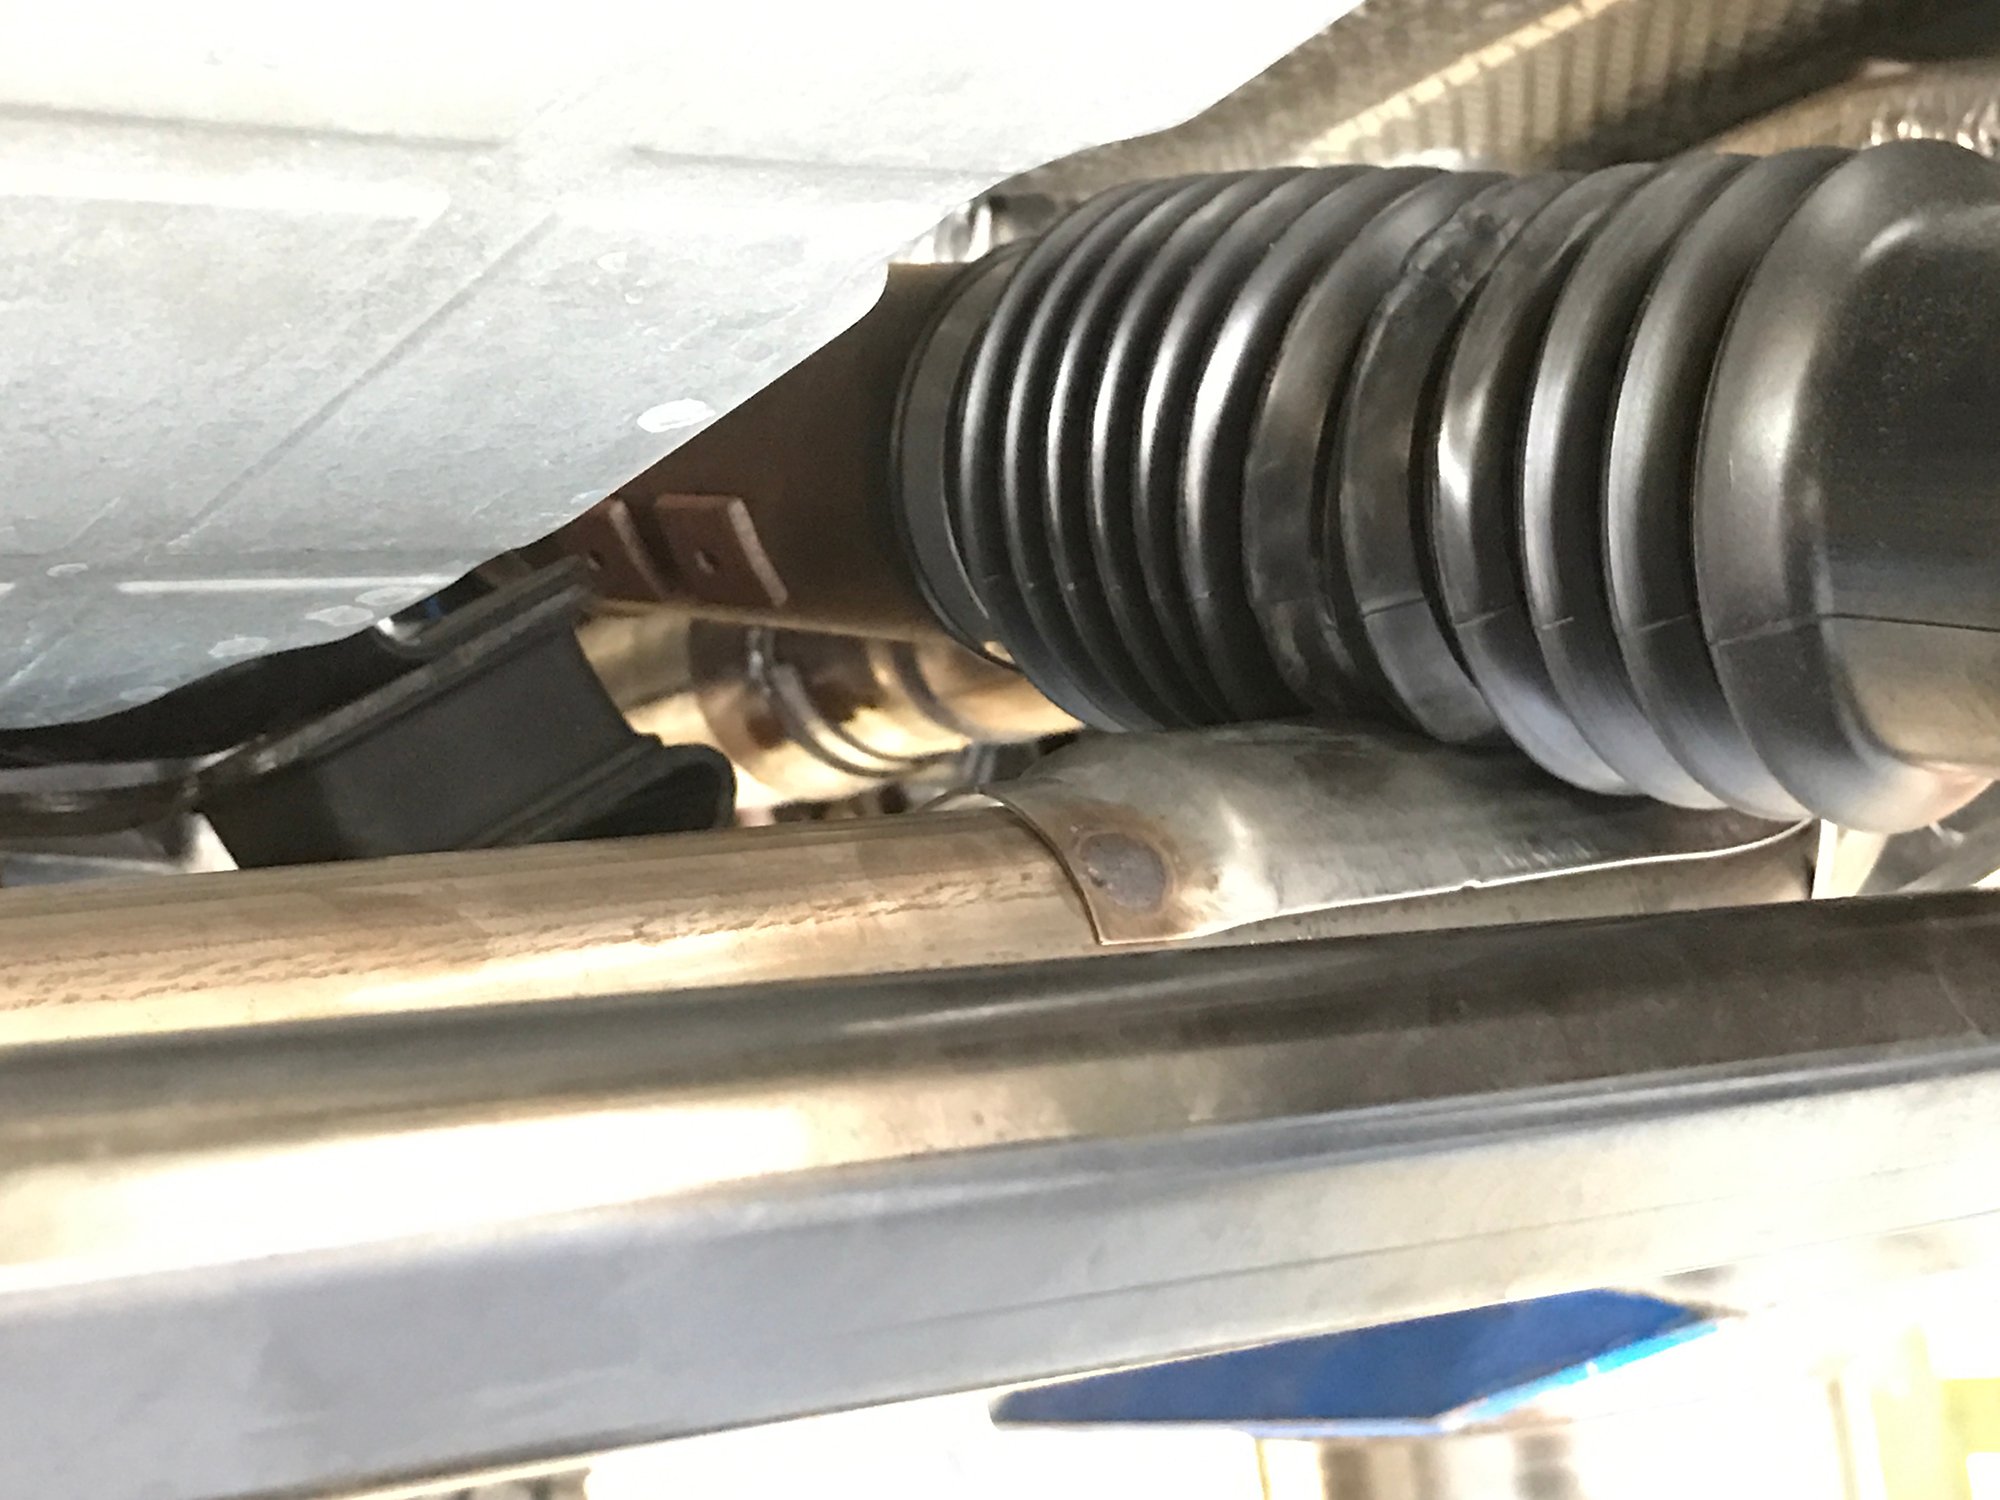
There are exhaust spacer kits available that are installed at the connection between the exhaust manifolds and the front exhaust crossover pipe. Consisting of 2 spacers and new hardware, these kits effectively move the front crossover pipe of the exhaust system down and rearward to provide the extra clearance needed for the front driveshaft.
What you will Need
- Teraflex Exhaust Spacer Kit for 12-17 Wrangler - Quadratec part 16191.9203 / Teraflex part 2610000
Or Similar Exhaust Spacer Kit - Shop all exhaust spacers here! - Impact Wrench (electric or air - not absolutely necessary, but will make the job easier)
- Sockets / Wrenches: 13mm, 15mm
- Chisel & Hammer or Air Hammer
- Grinder or Cutoff Wheel
- Wire / Bungee
- Rust Penetrant (Mopar Rust Penetrant, PB Blaster, WD-40, etc.)
- Anti-Seize Lubricant
Instructions
1. Park your Jeep on a level surface, put it in gear or park and set the parking break. It's always a good idea to chock the wheels to be extra safe whenever working under your Jeep. A liberal coating of your favorite rust penetrant before getting to work will help to remove stubborn rusted bolts.
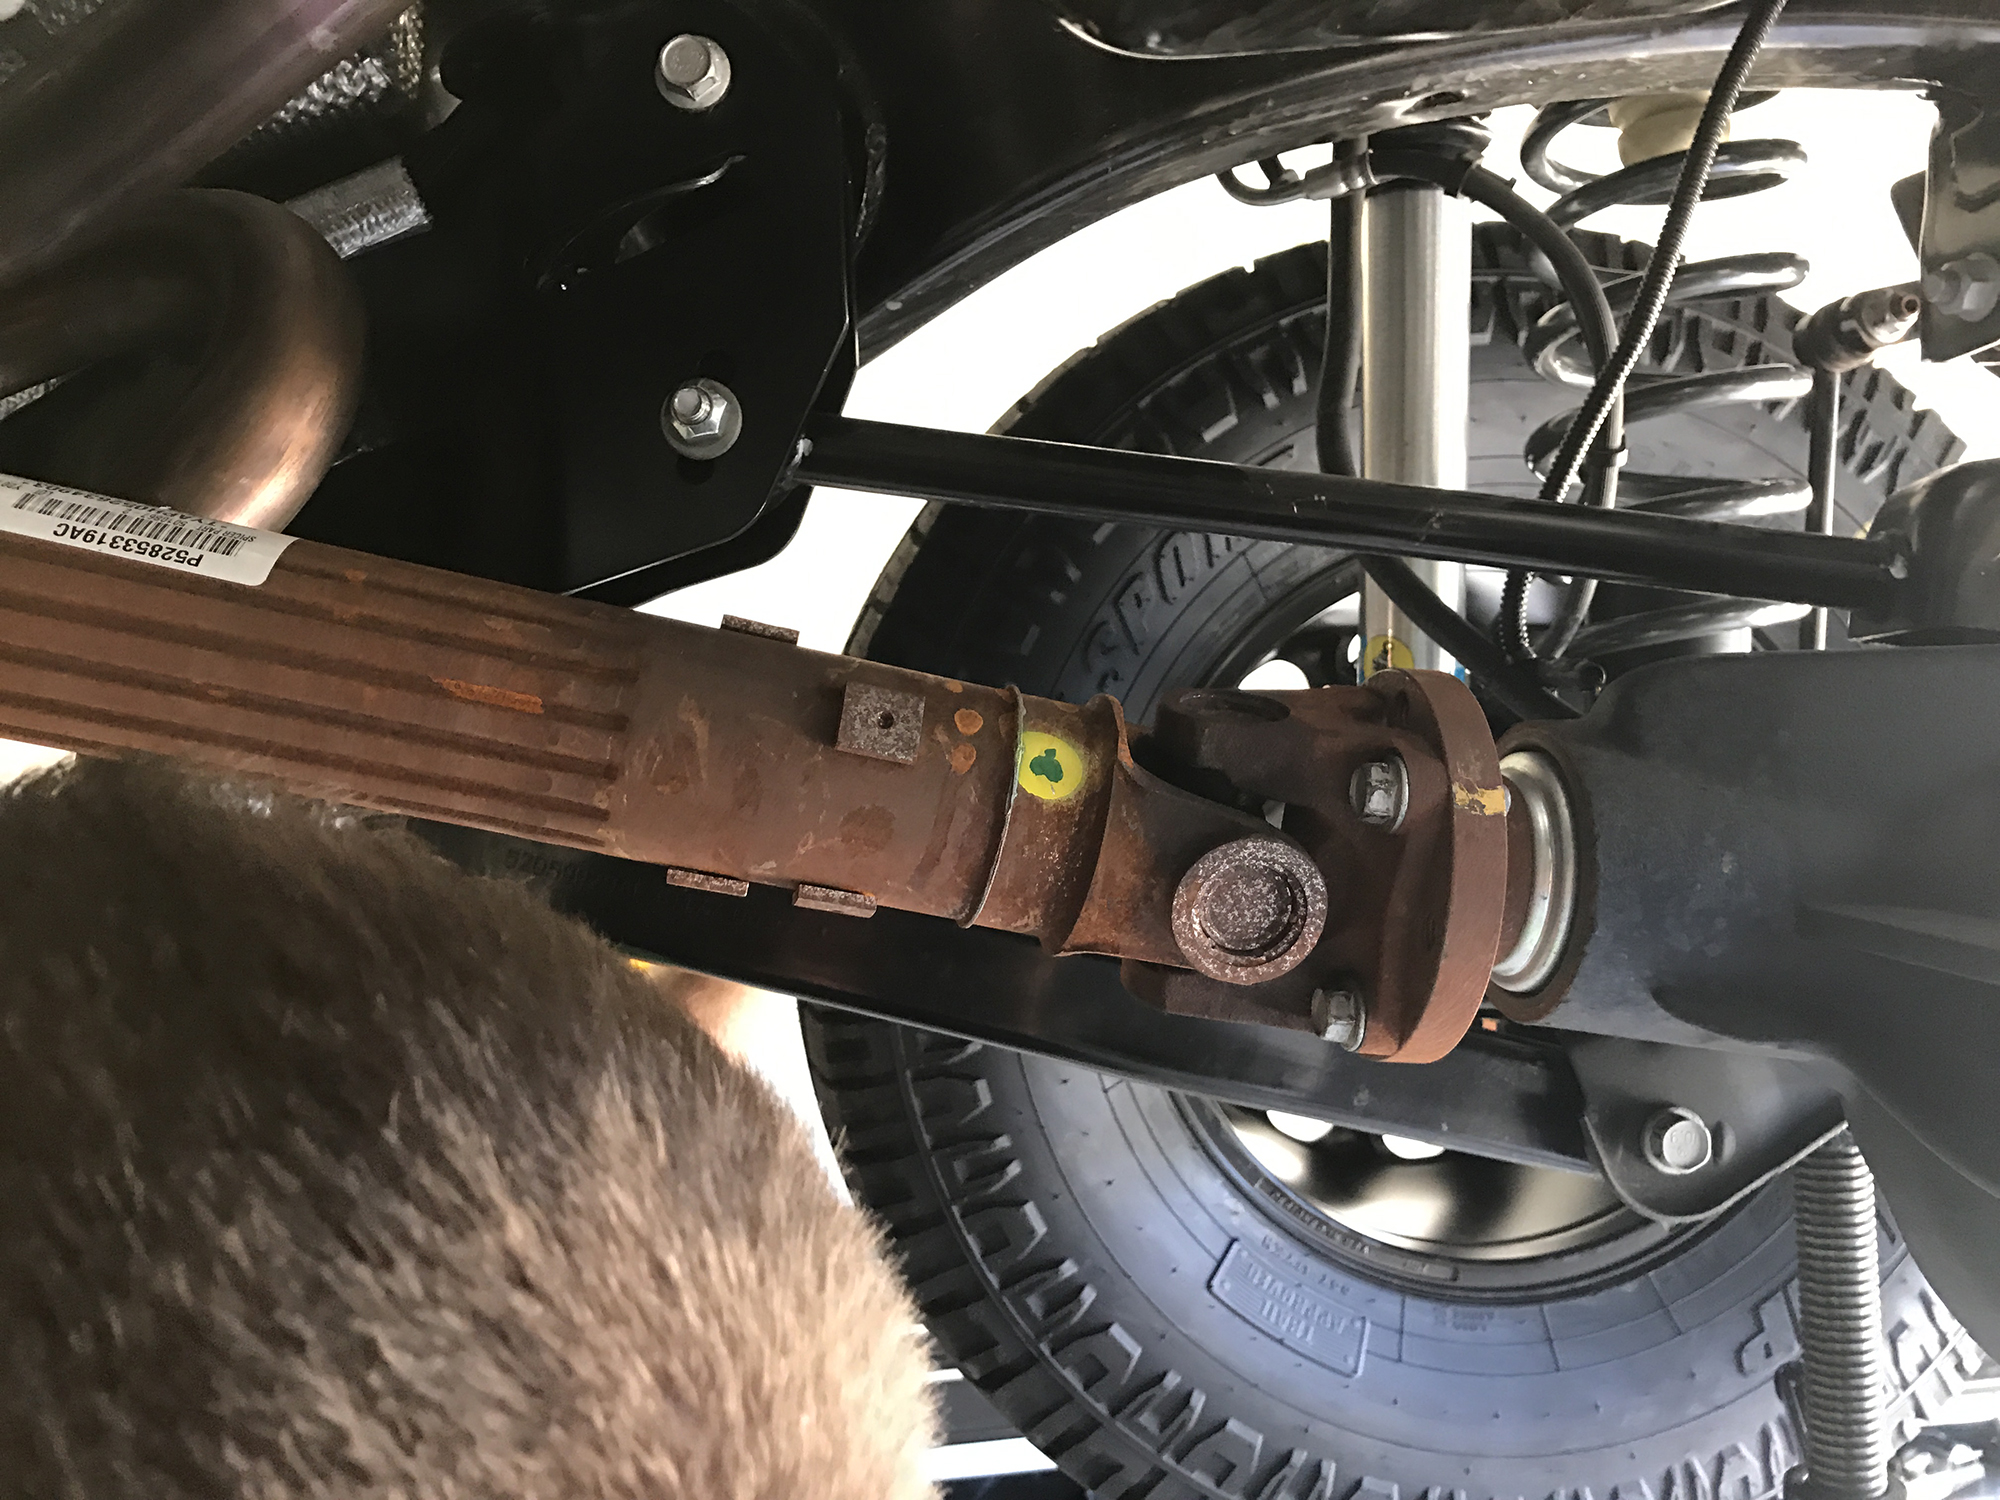
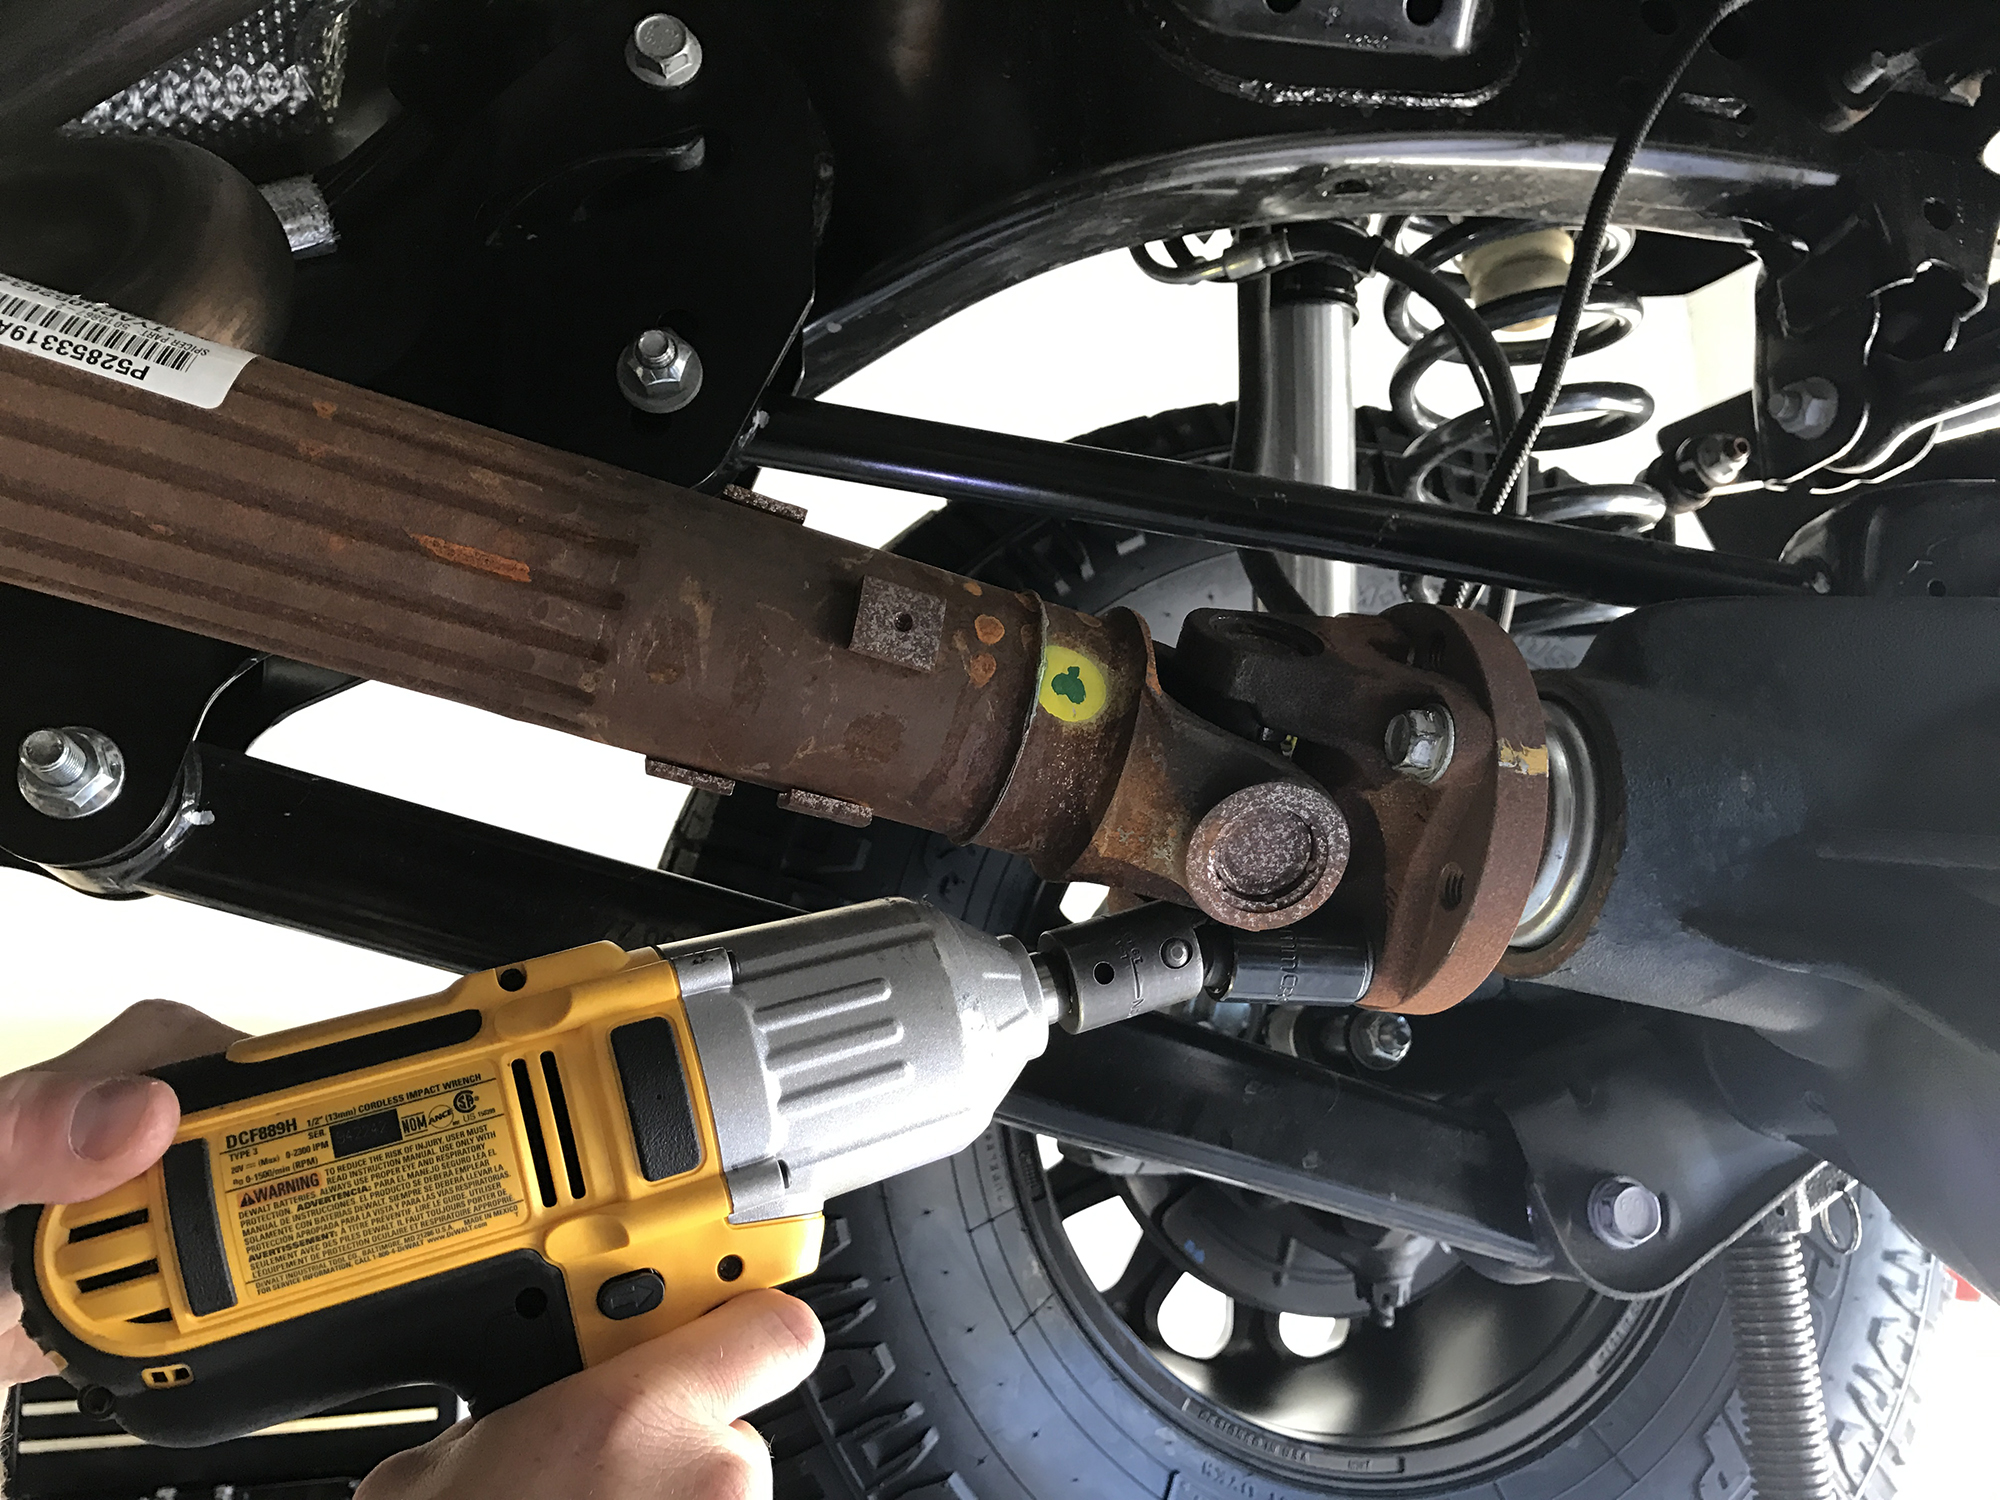
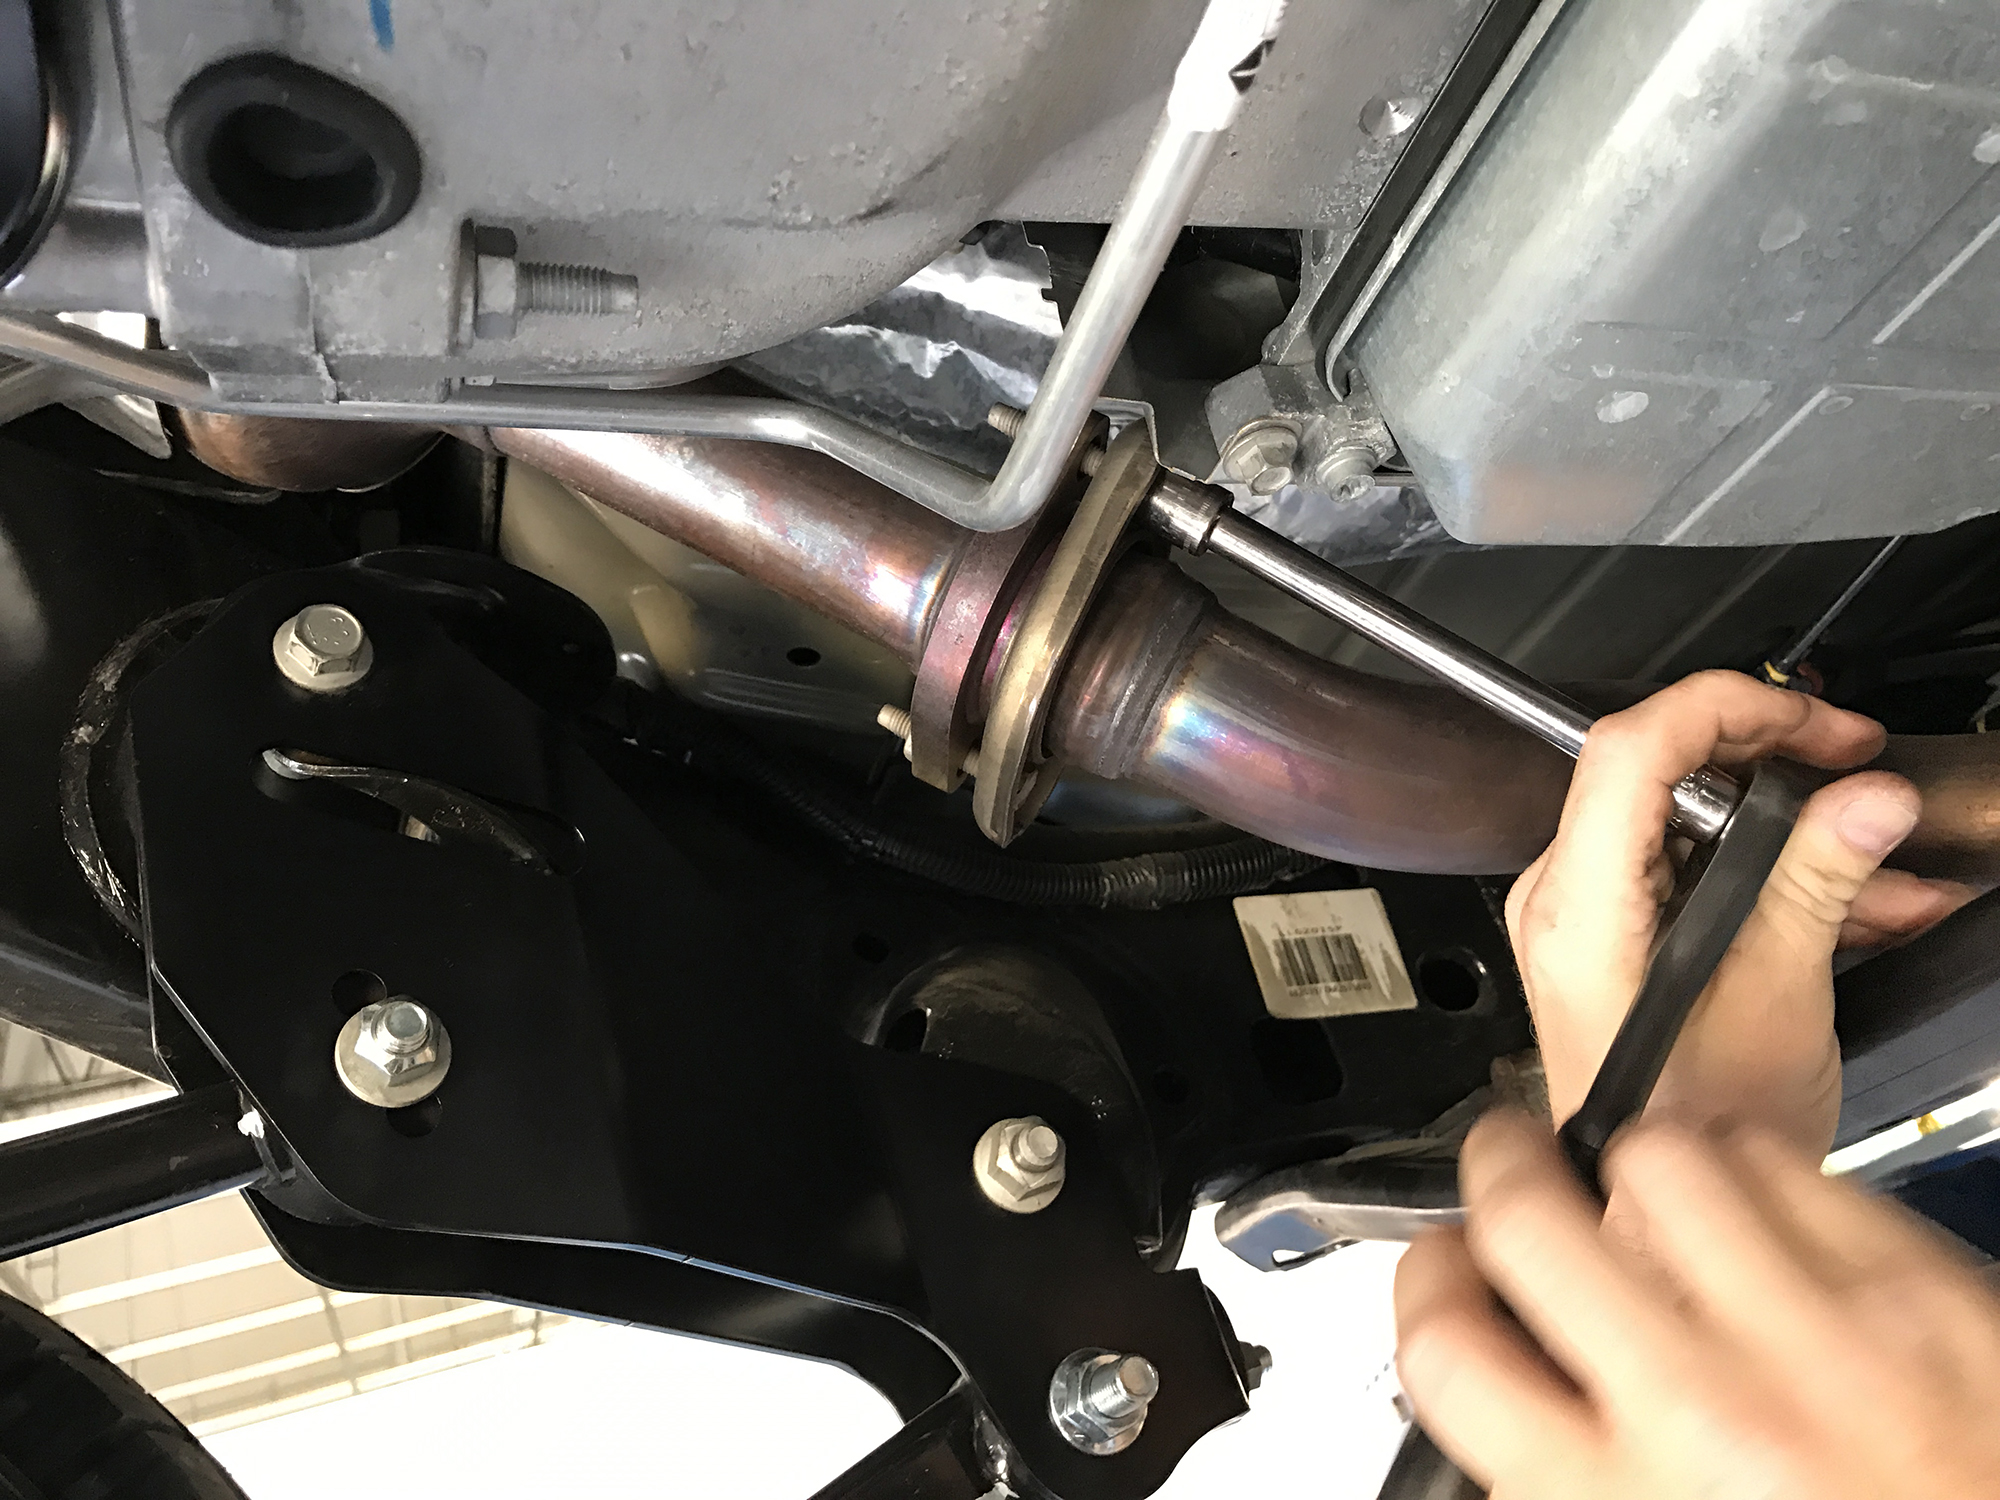
2. Disconnect the driveshaft at the axle by removing the 4 bolts with a 15mm socket or wrench. We used a socket with a swivel adapter on an impact gun, but a wrench will work as well. It's a good idea to mark the driveshaft and the pinion flange so you can re-connect the driveshaft in the same orientation. Note, our driveshaft already had a yellow paint mark on the the flange and the shaft, that we'll line back up when re-installing. If yours doesn't, you can use a paint marker, or even a chisel to make a small mark on both halfs to help re-align them.
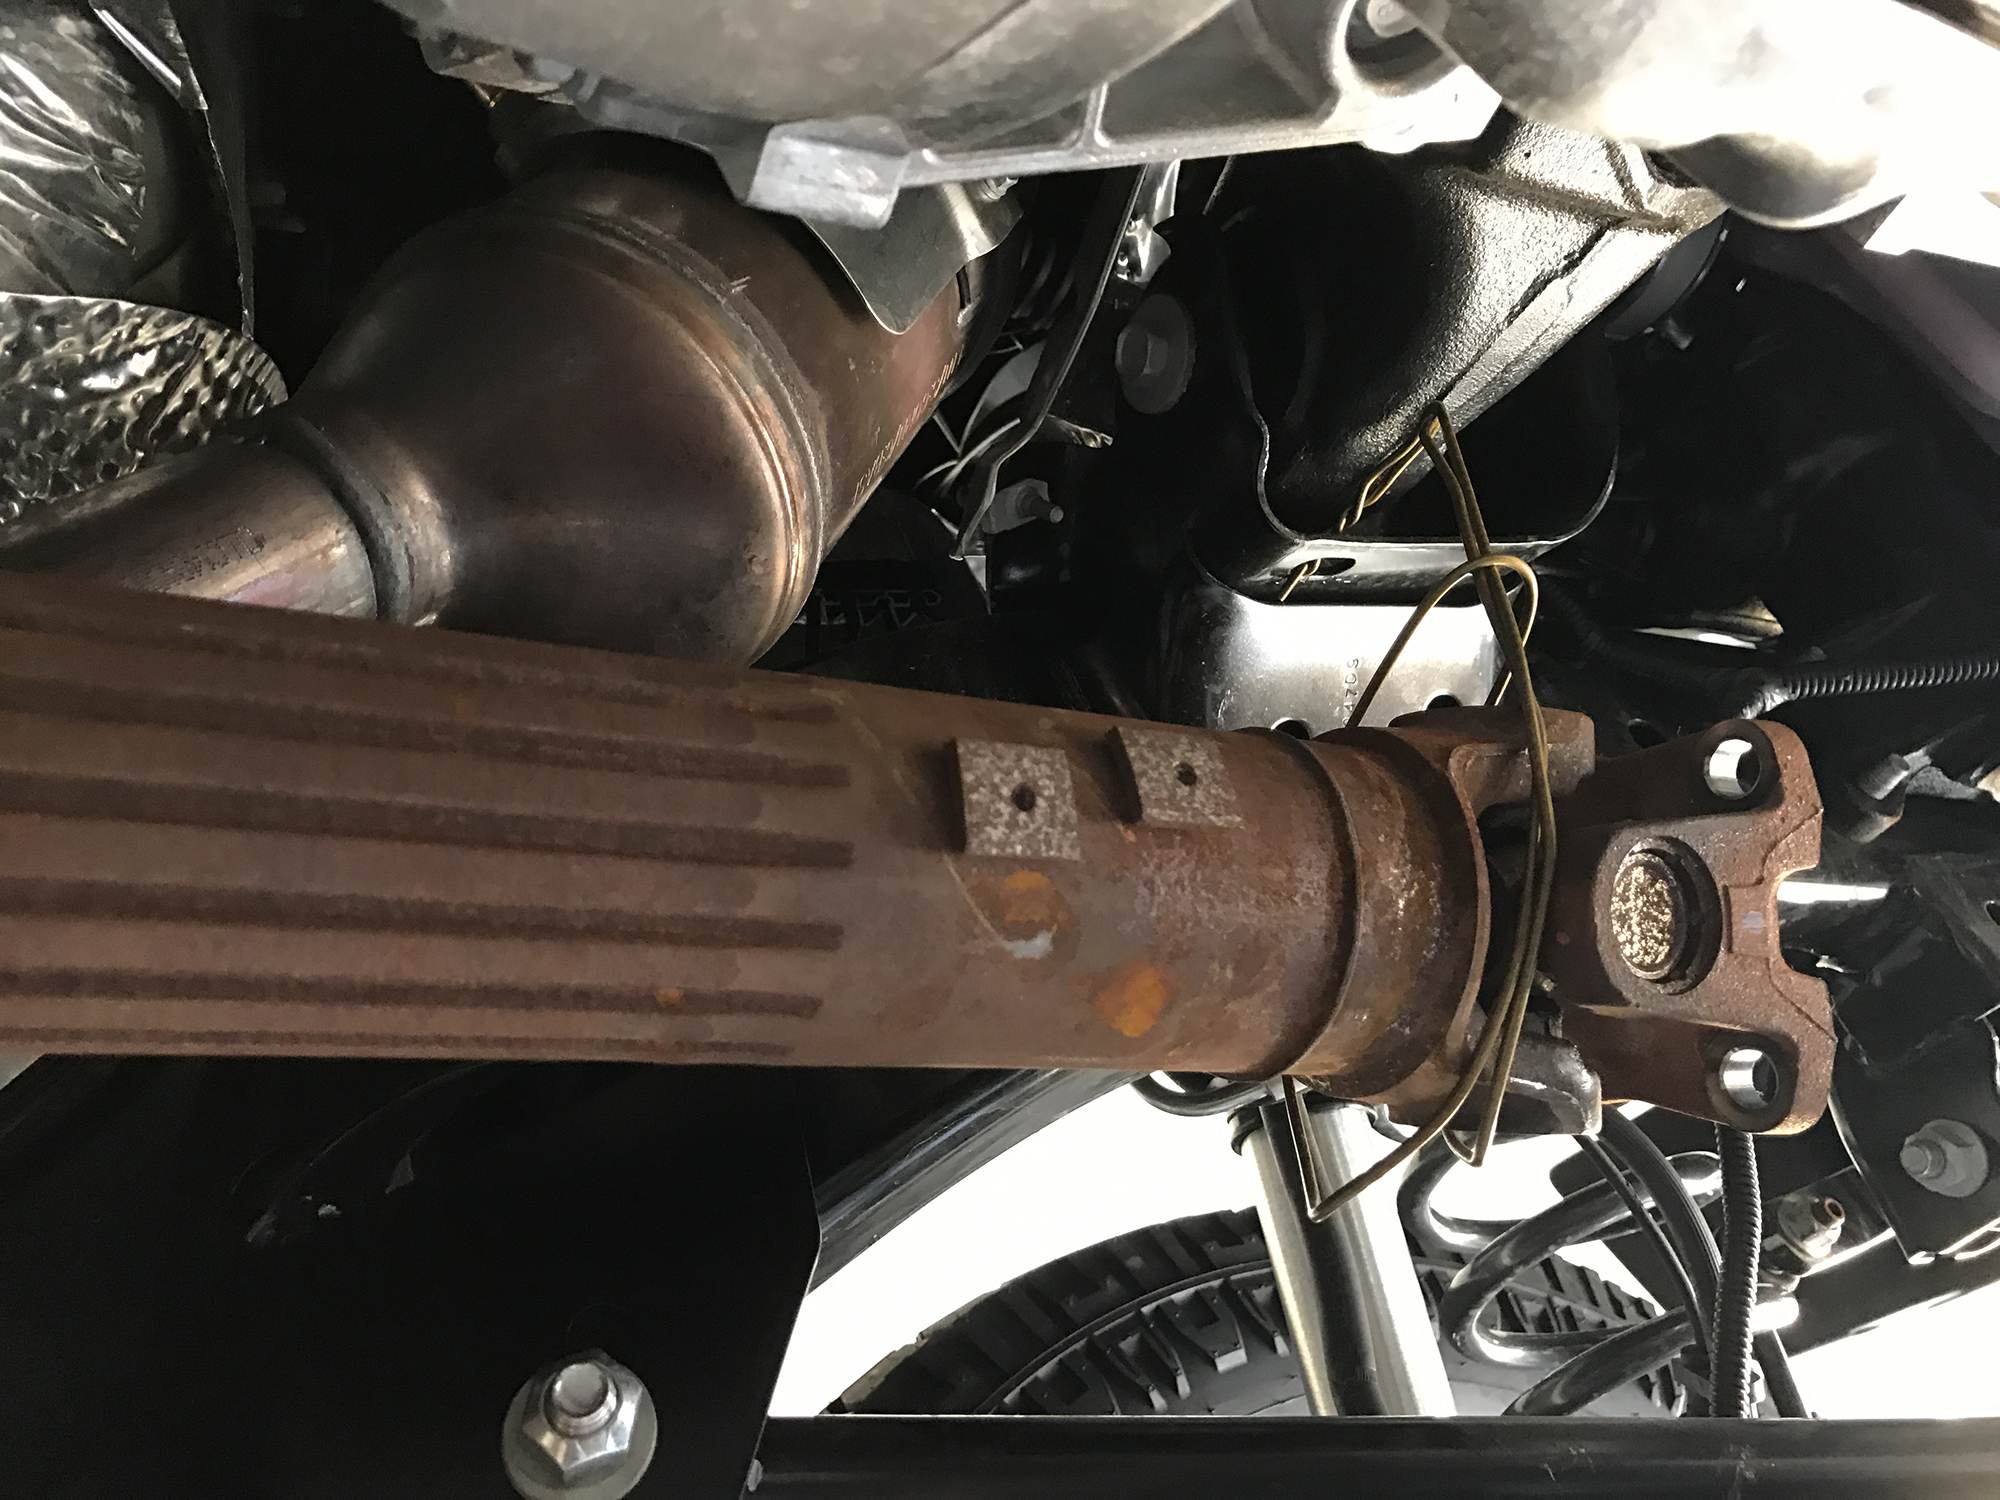
3. Secure the driveshaft up with a piece of wire to keep it secure and out of the way.
4. Using a 13mm wrench remove the 4 exhaust flange bolts that hold the exhaust crossover pipe to the exhaust manifolds on each side of the engine. There are 2 bolts at each exhaust flange.
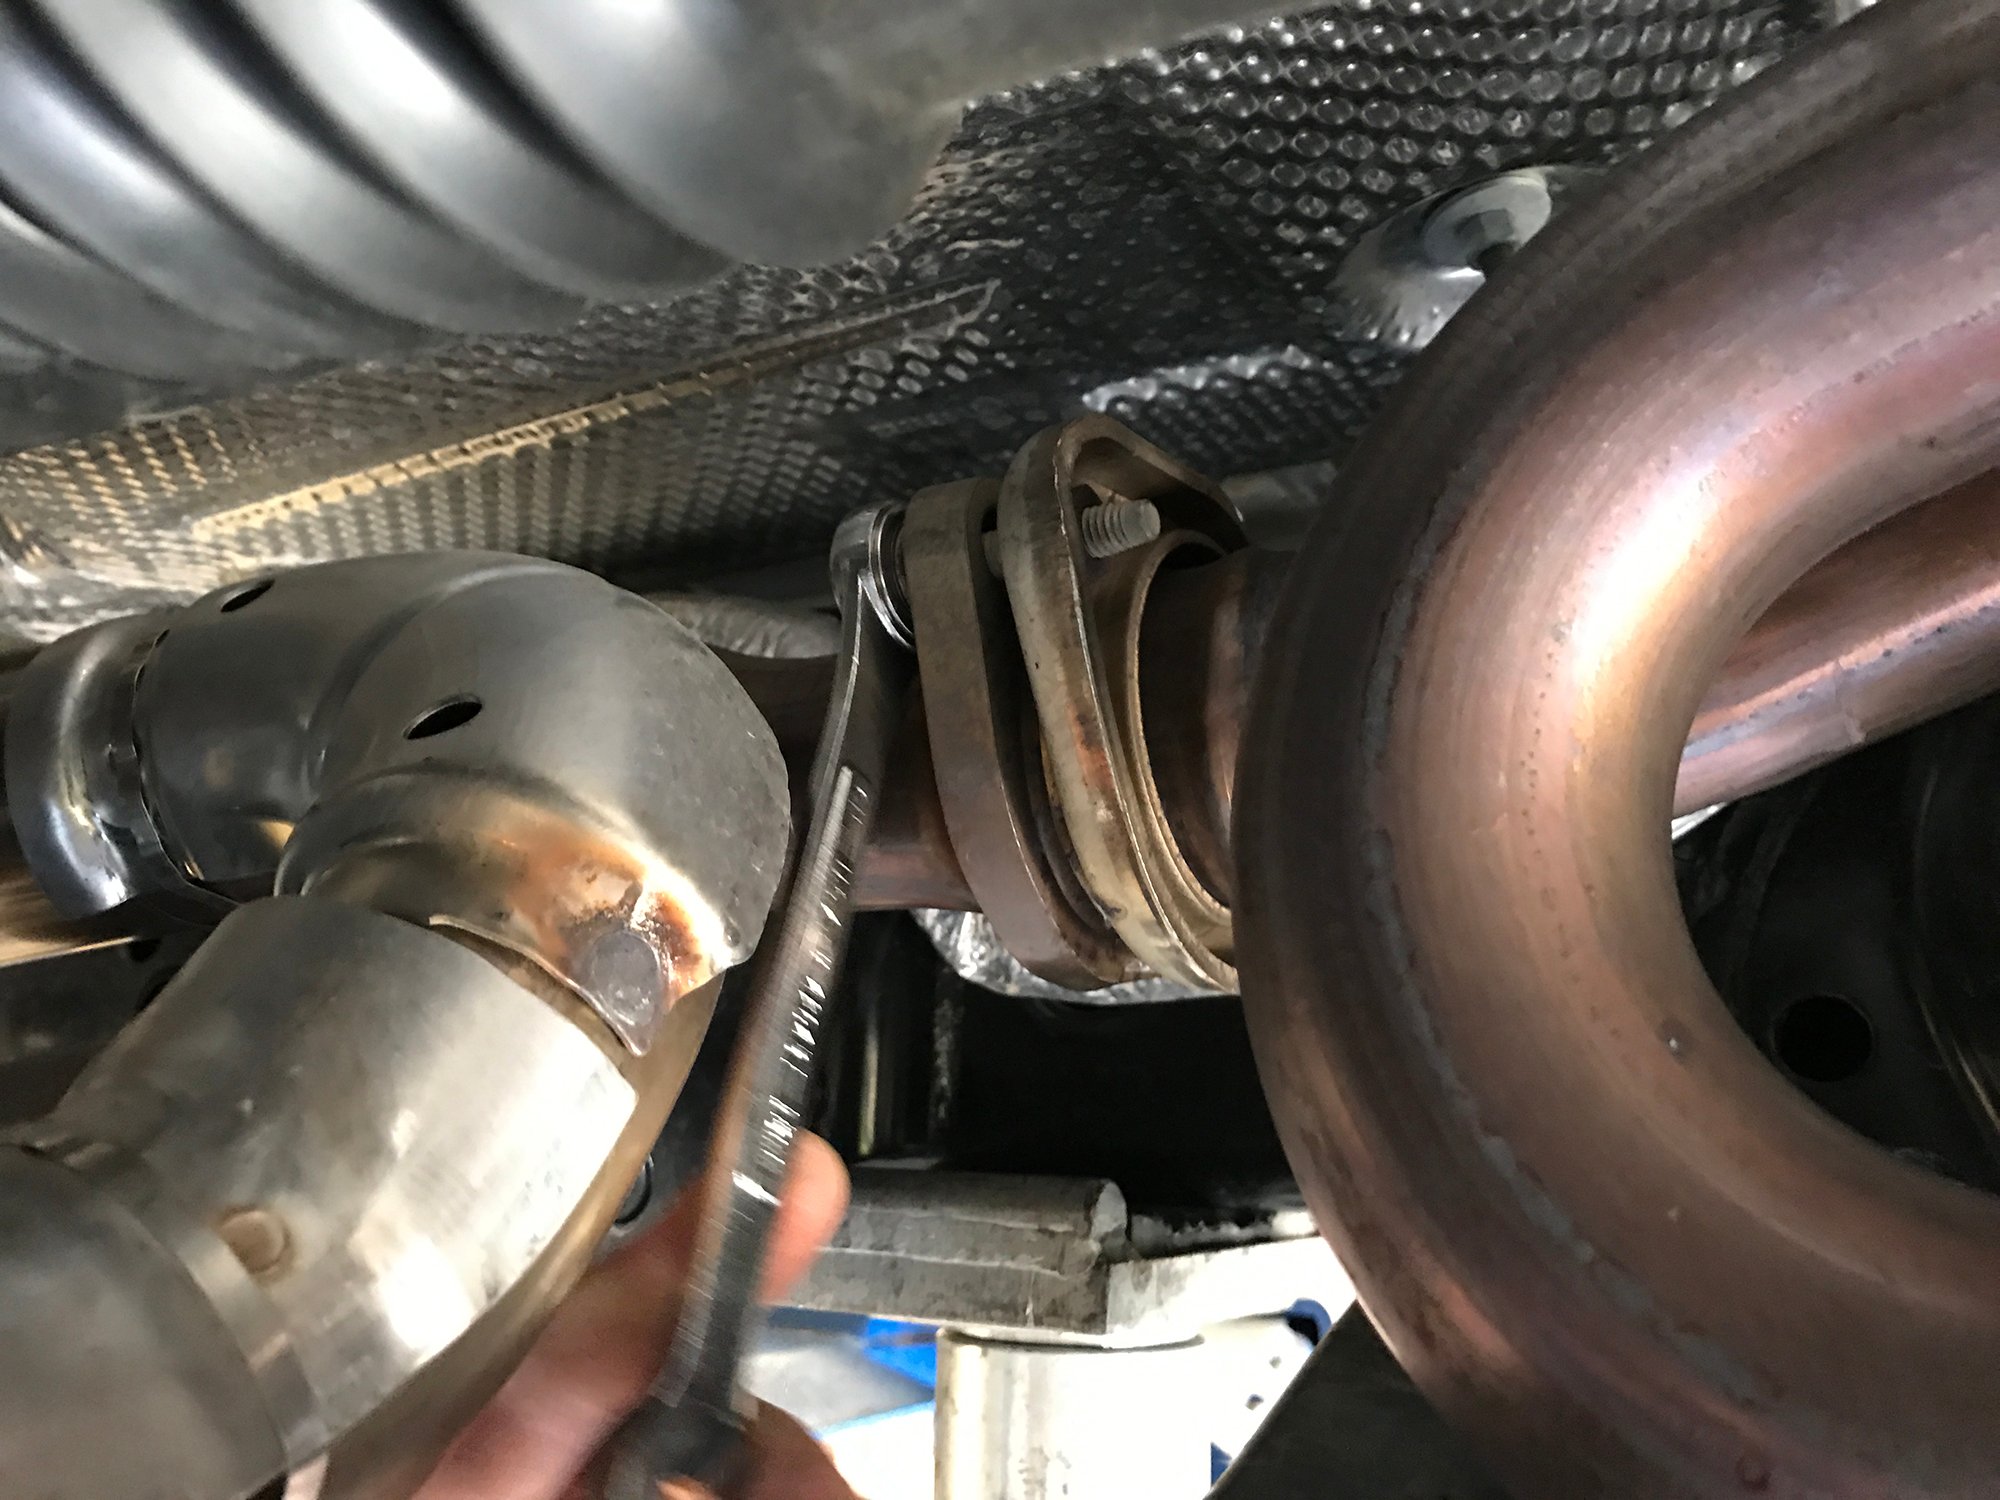
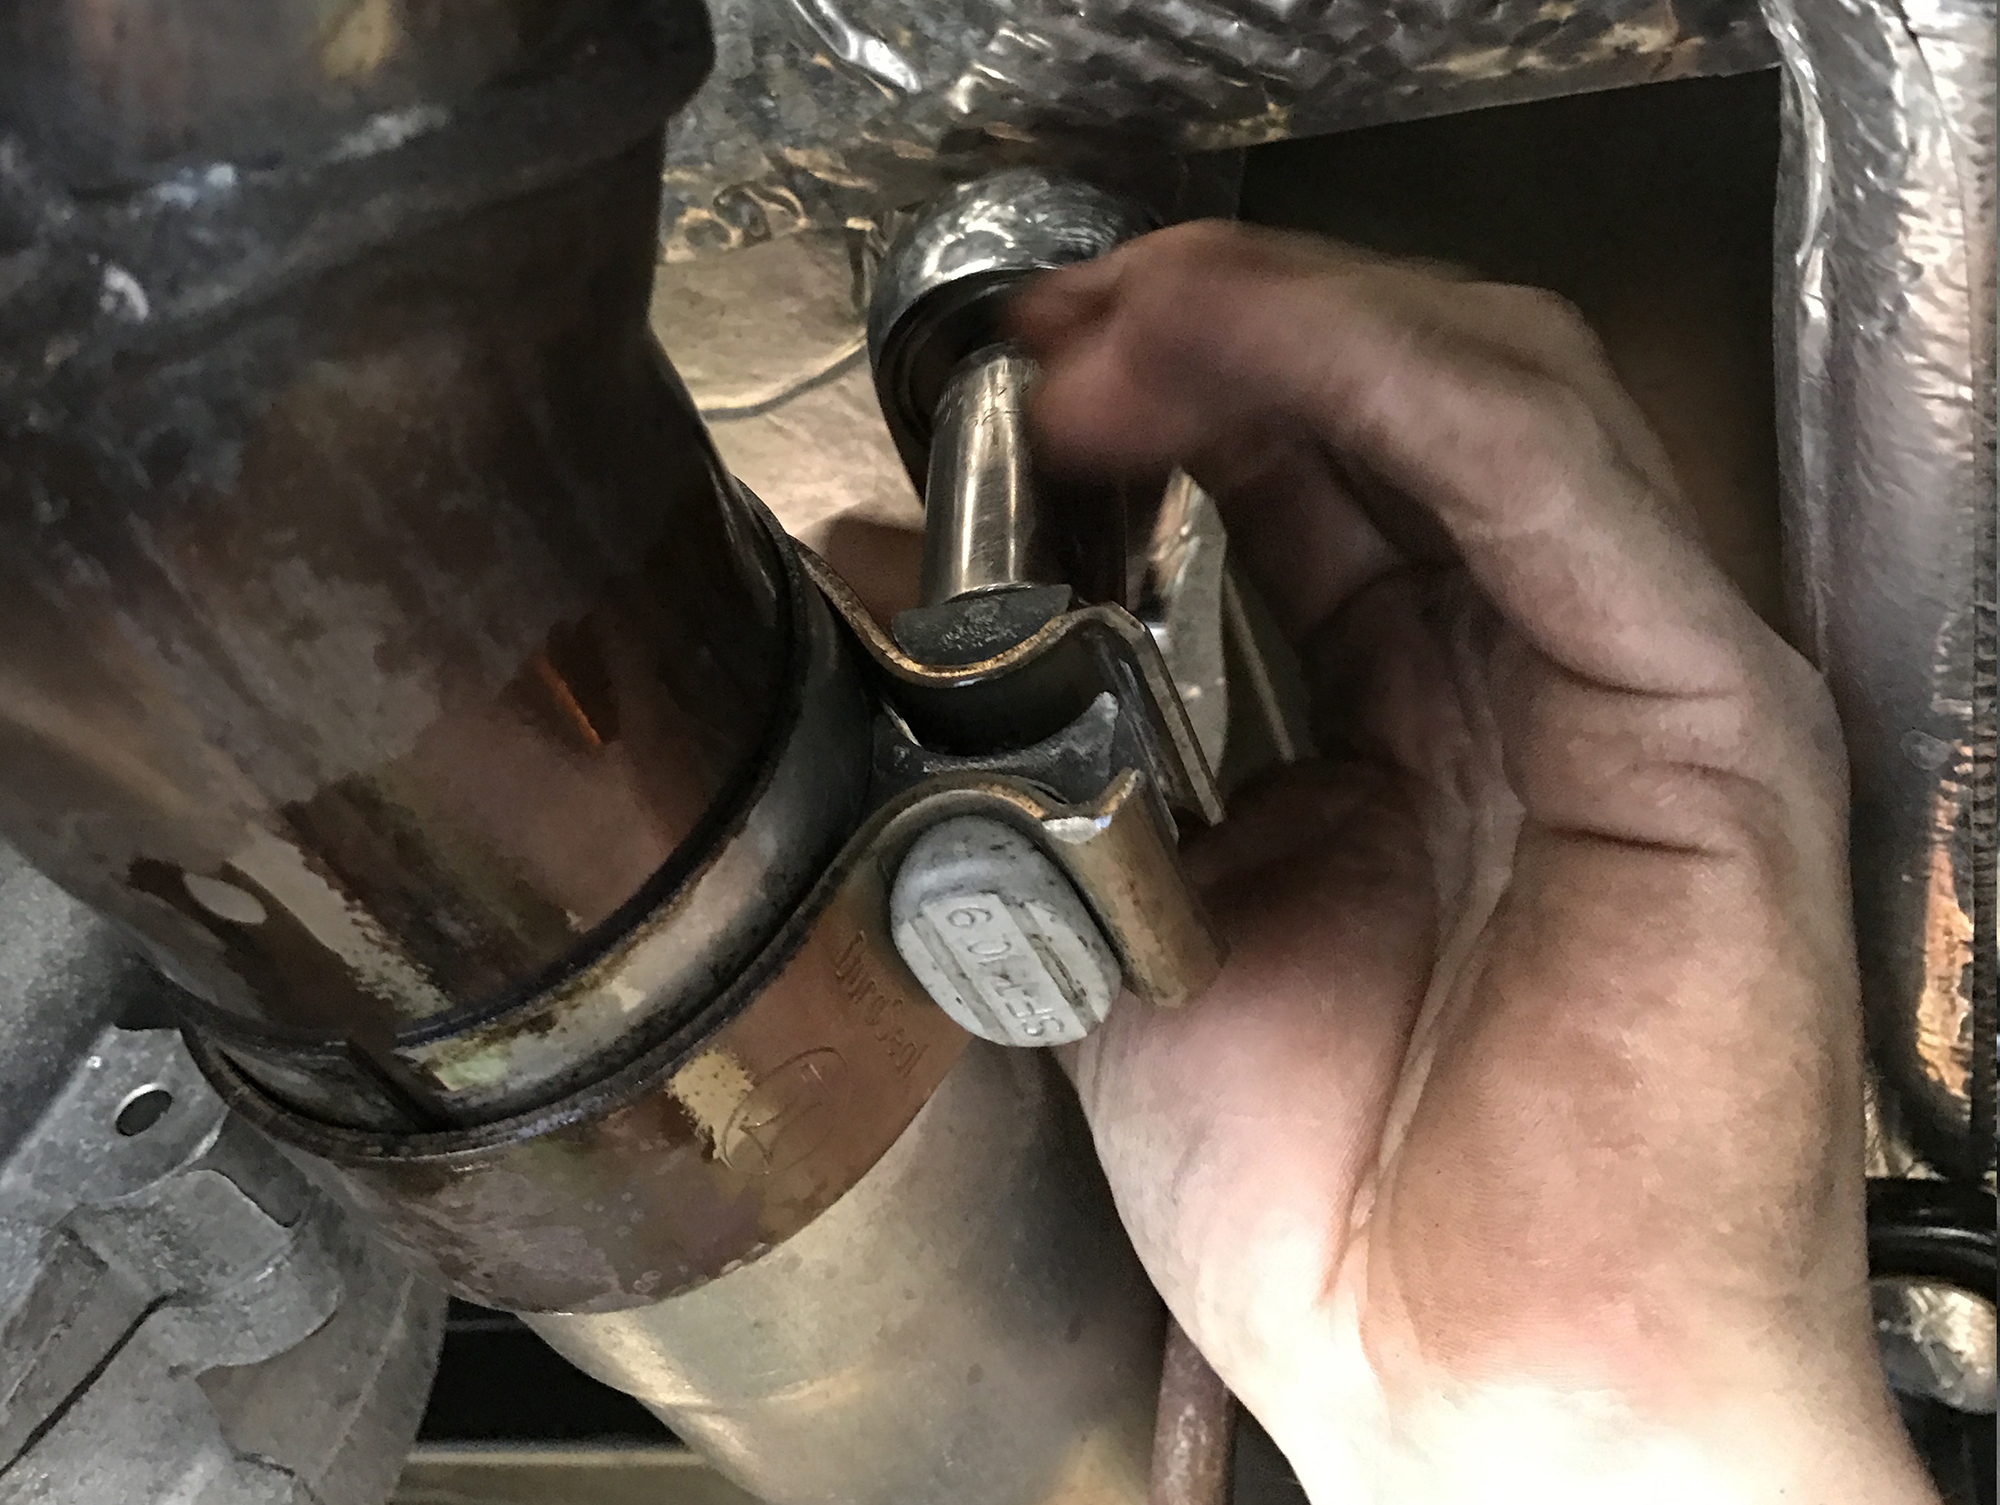
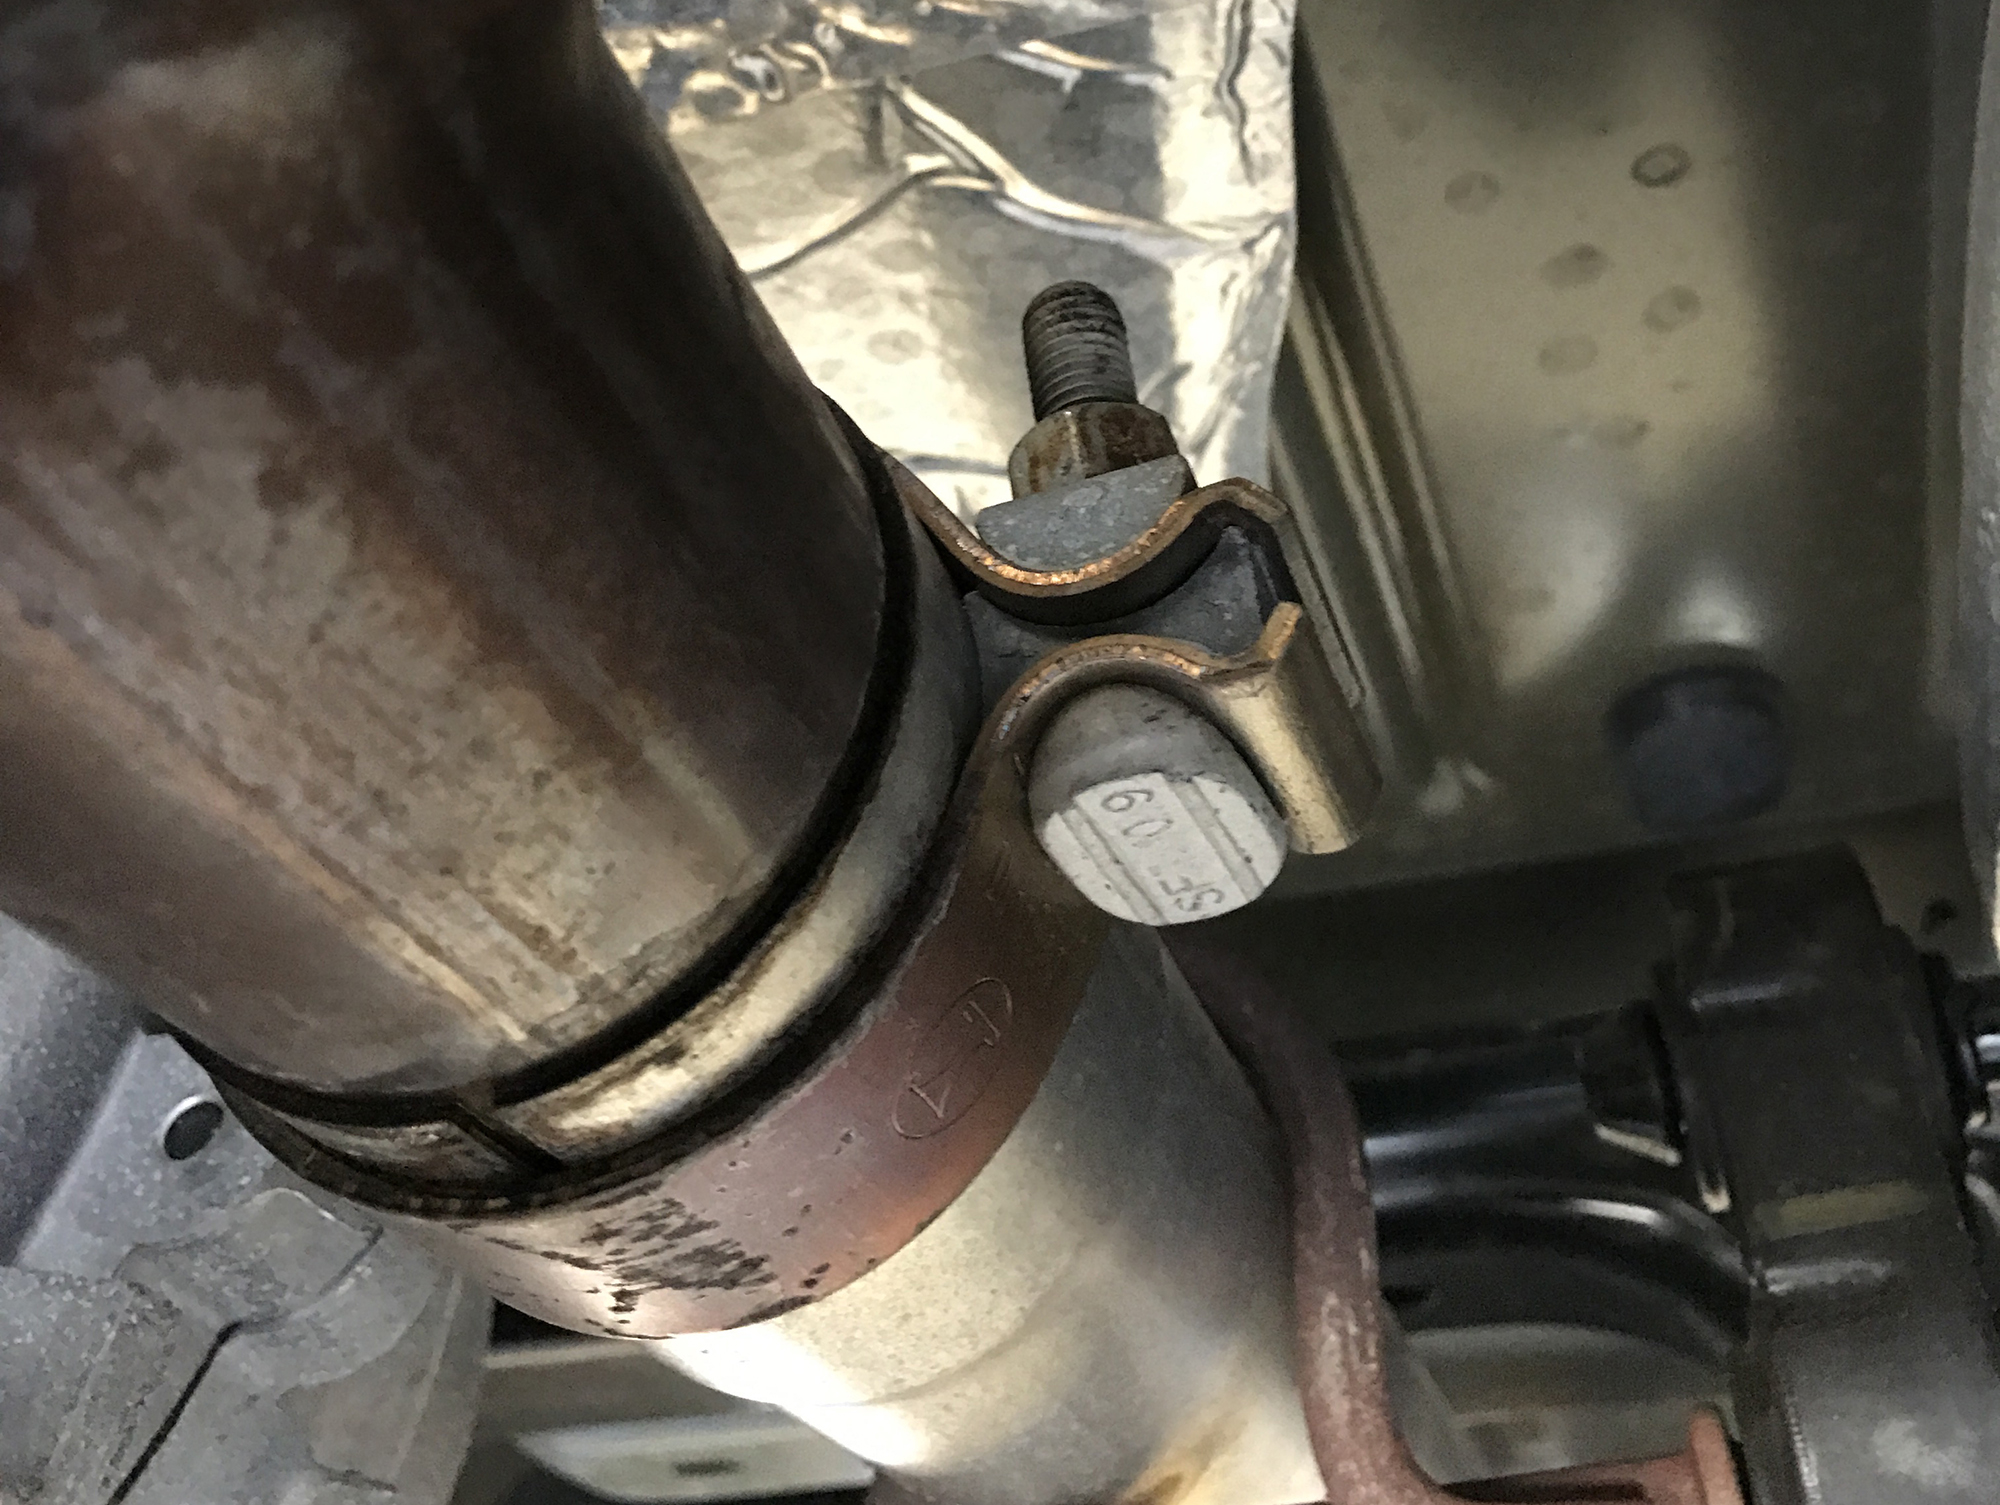
5. Loosen the exhaust clamp where the front crossover pipes meets the rear exhaust pipe using a 15mm socket or wrench.
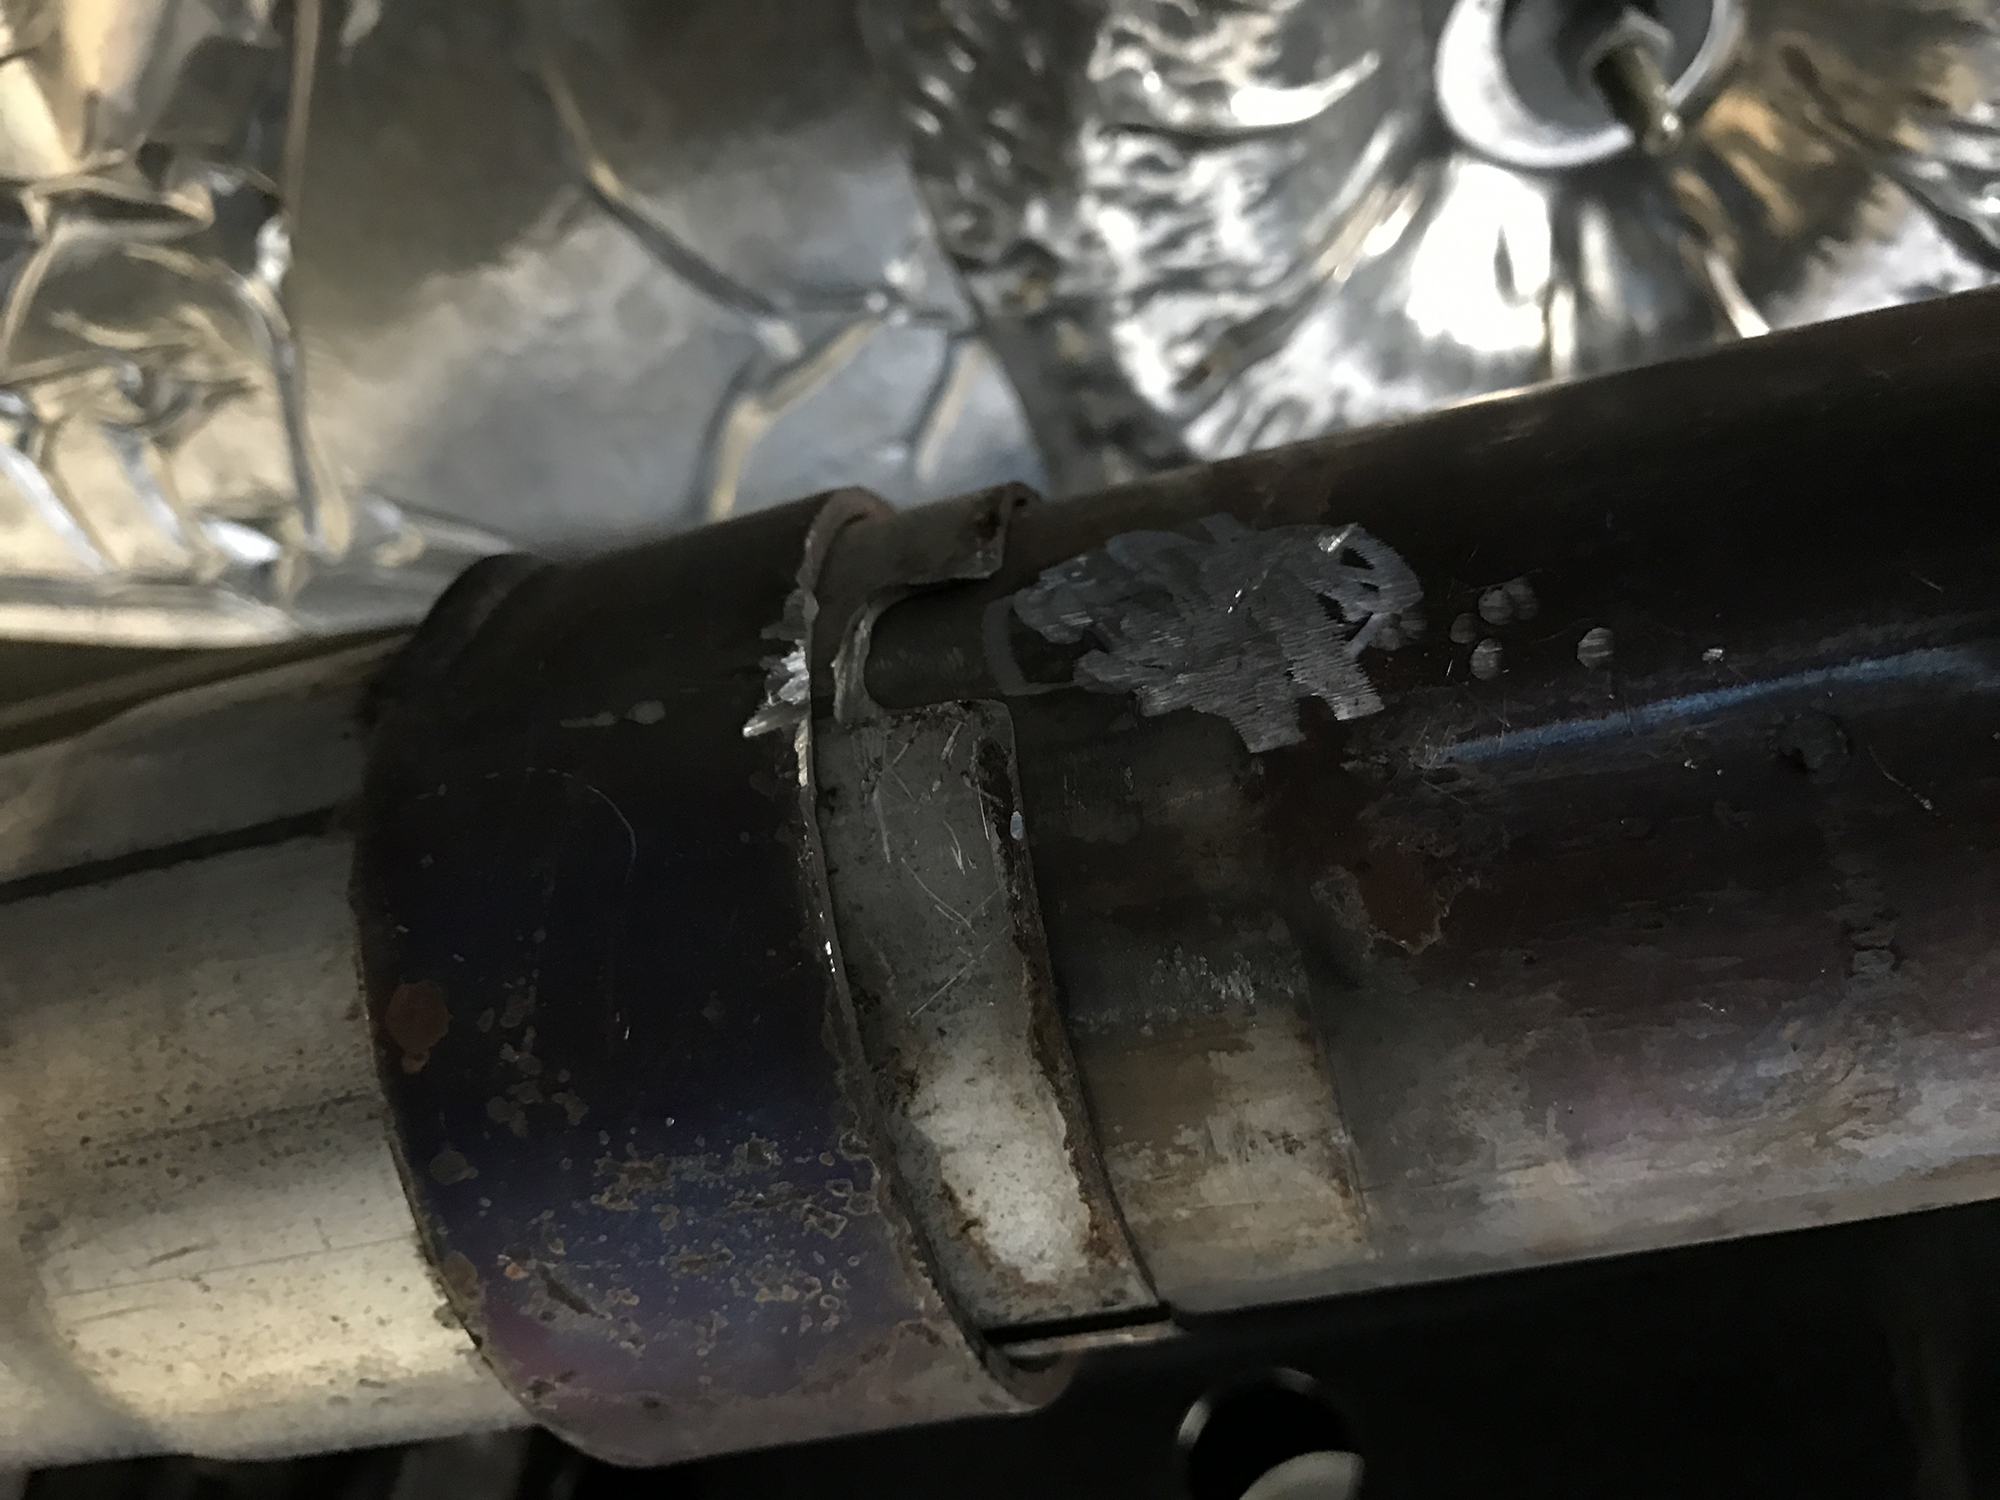
6. Using a chisel or cutoff wheel, remove the indexing spot weld on the crossover y-pipe.
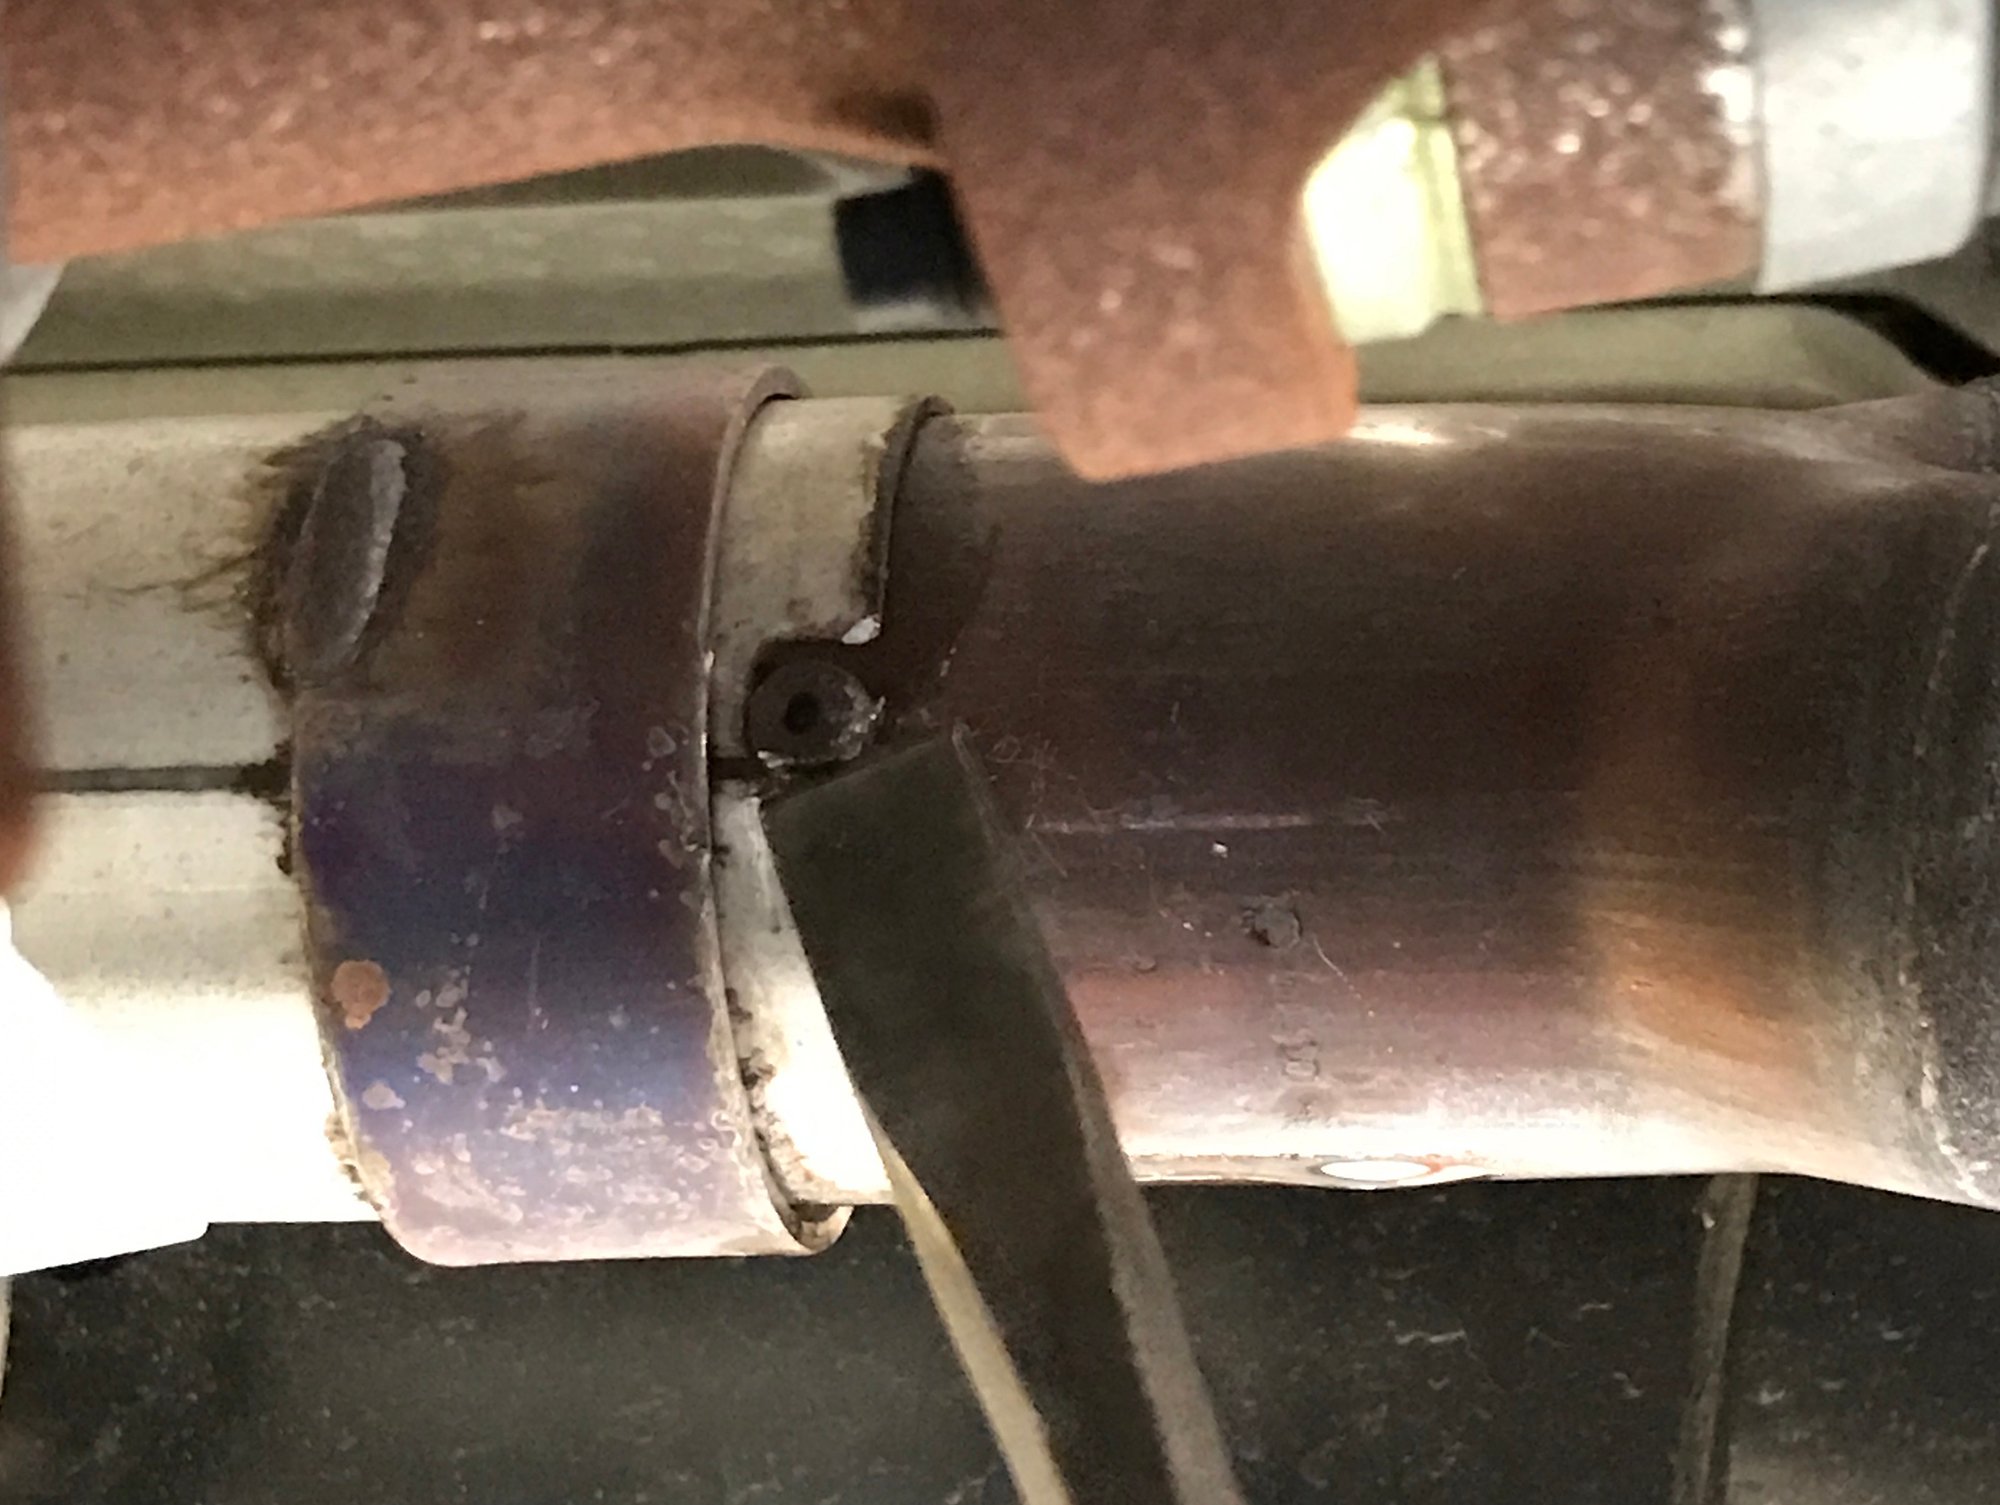
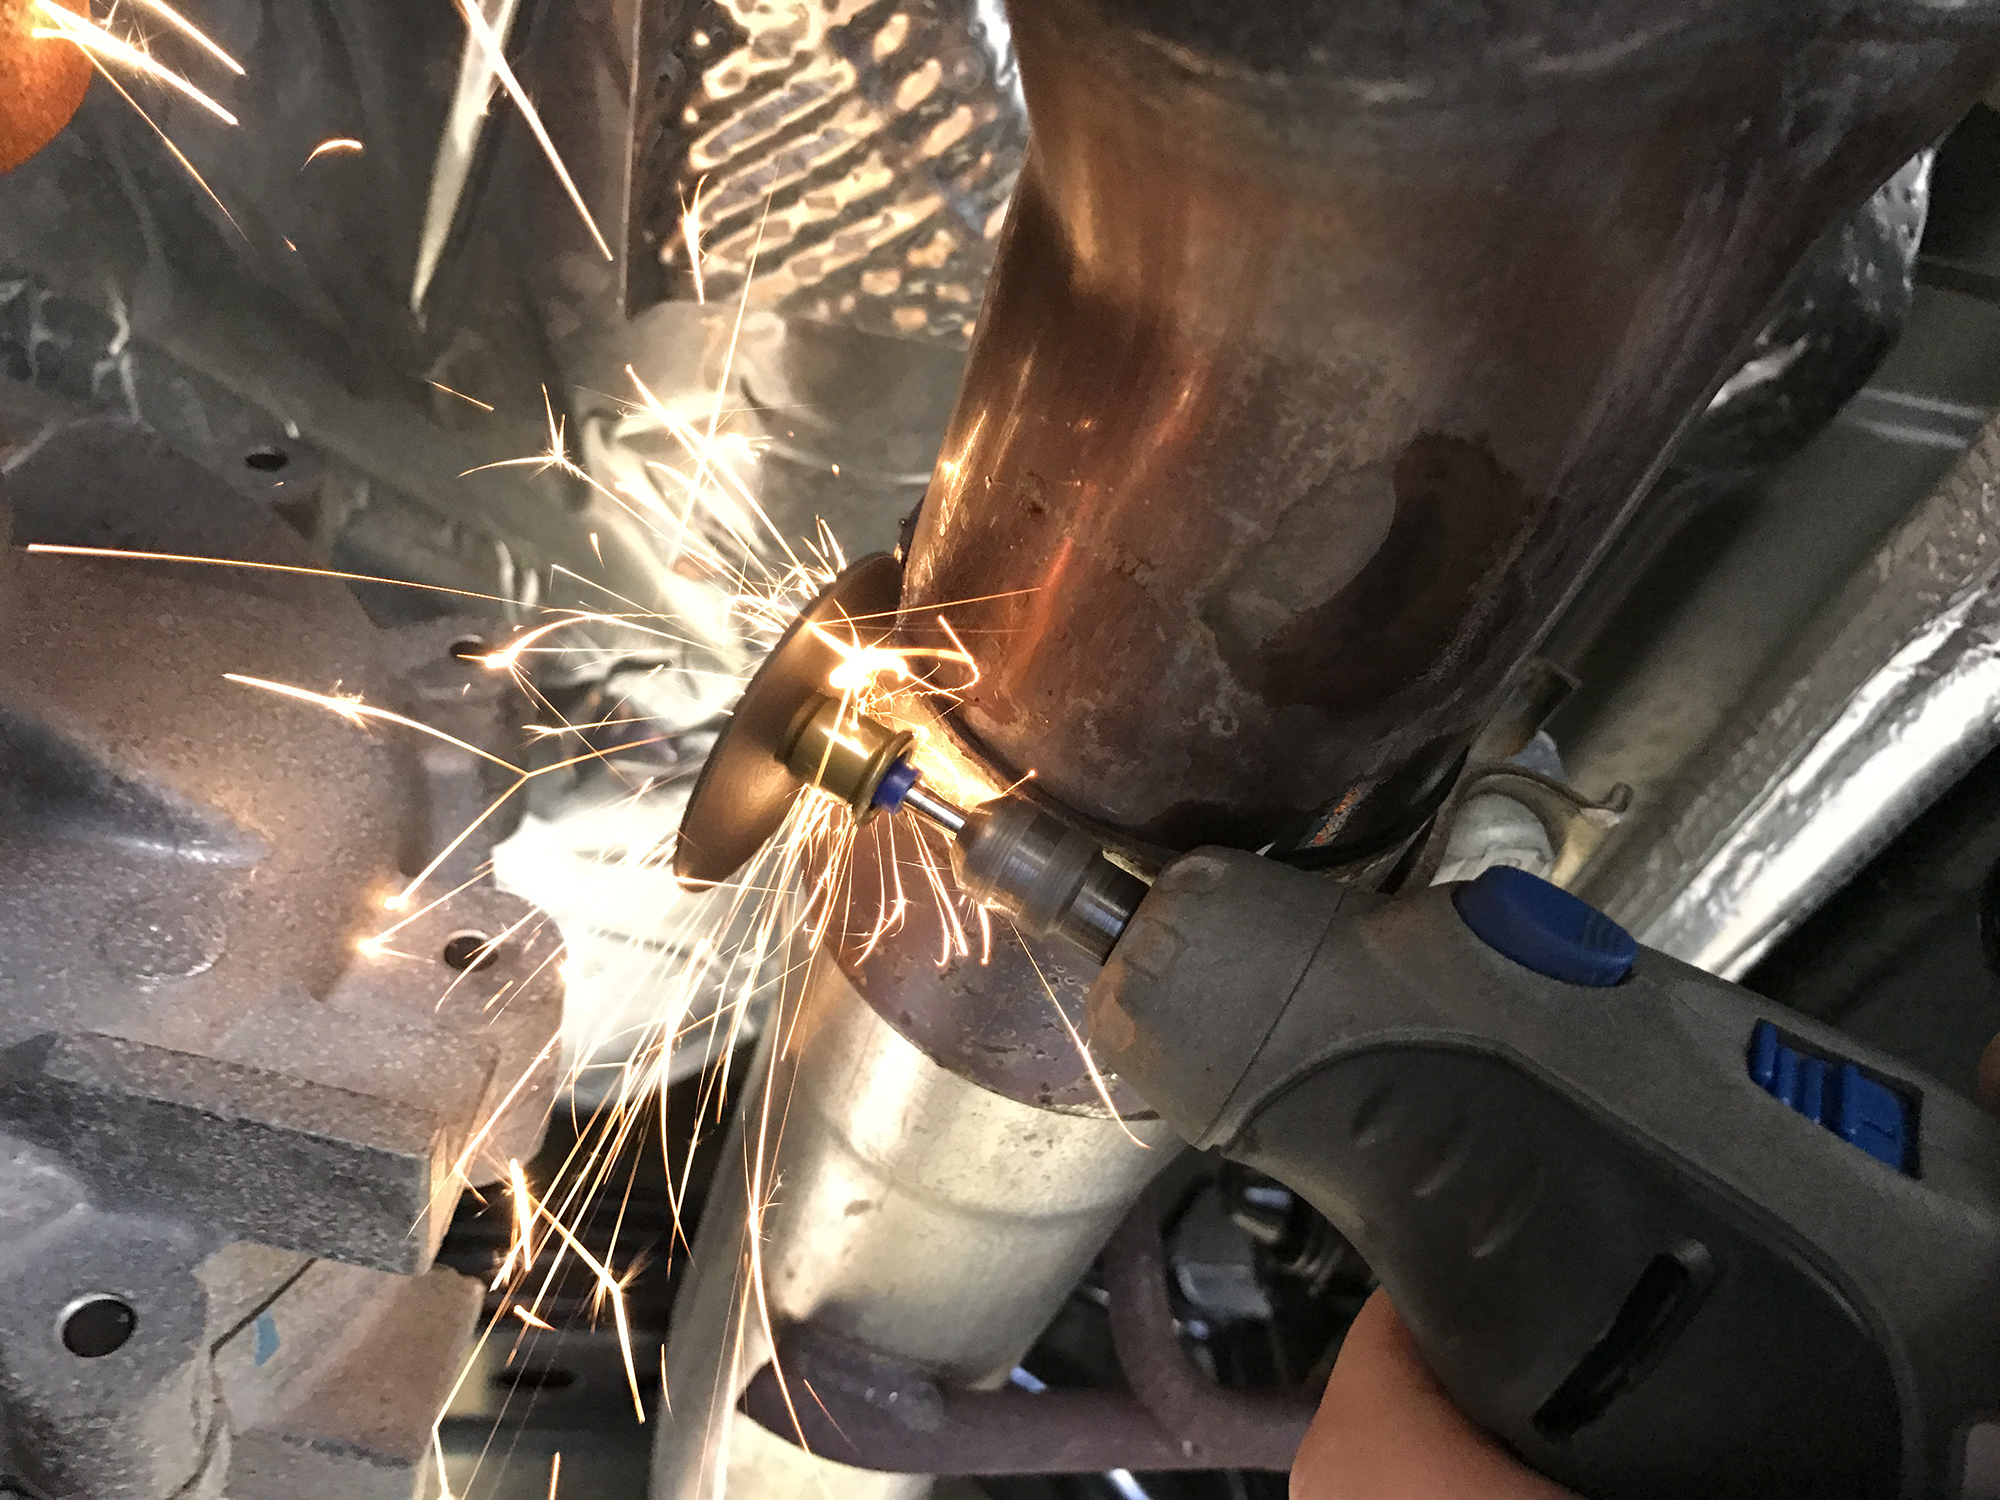
7. The tab needs to be completely removed. This will allow us to slide the front exhaust crossover further into the rear exhaust pipe to compensate for the new spacers.
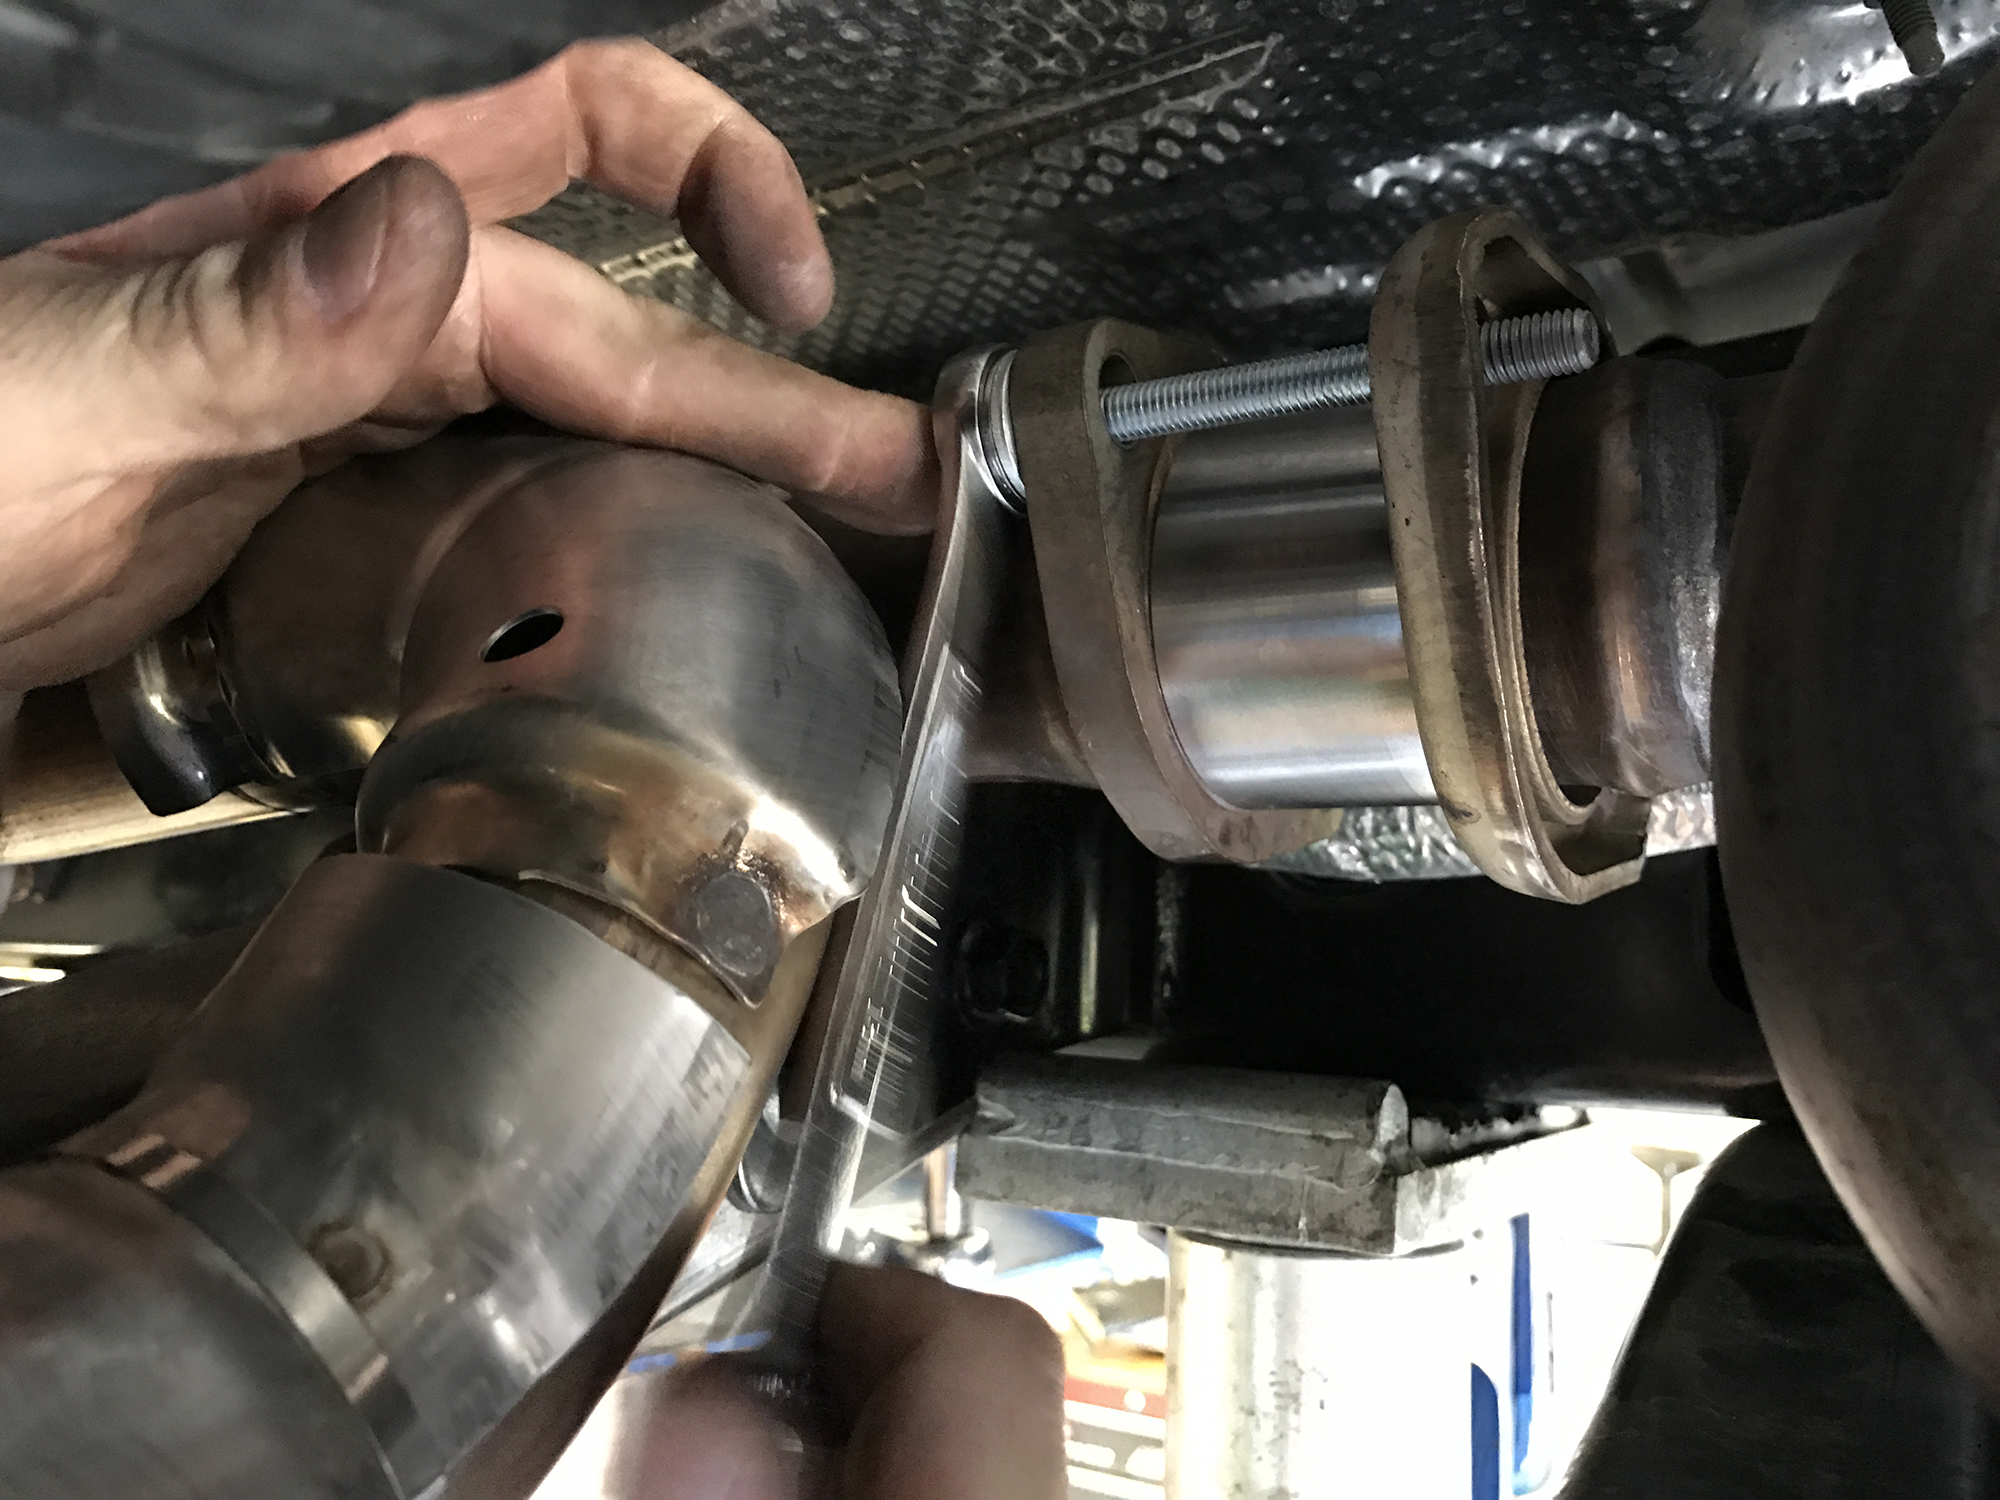
8. Pry the exhaust system apart and install the long spacer on the passenger side.
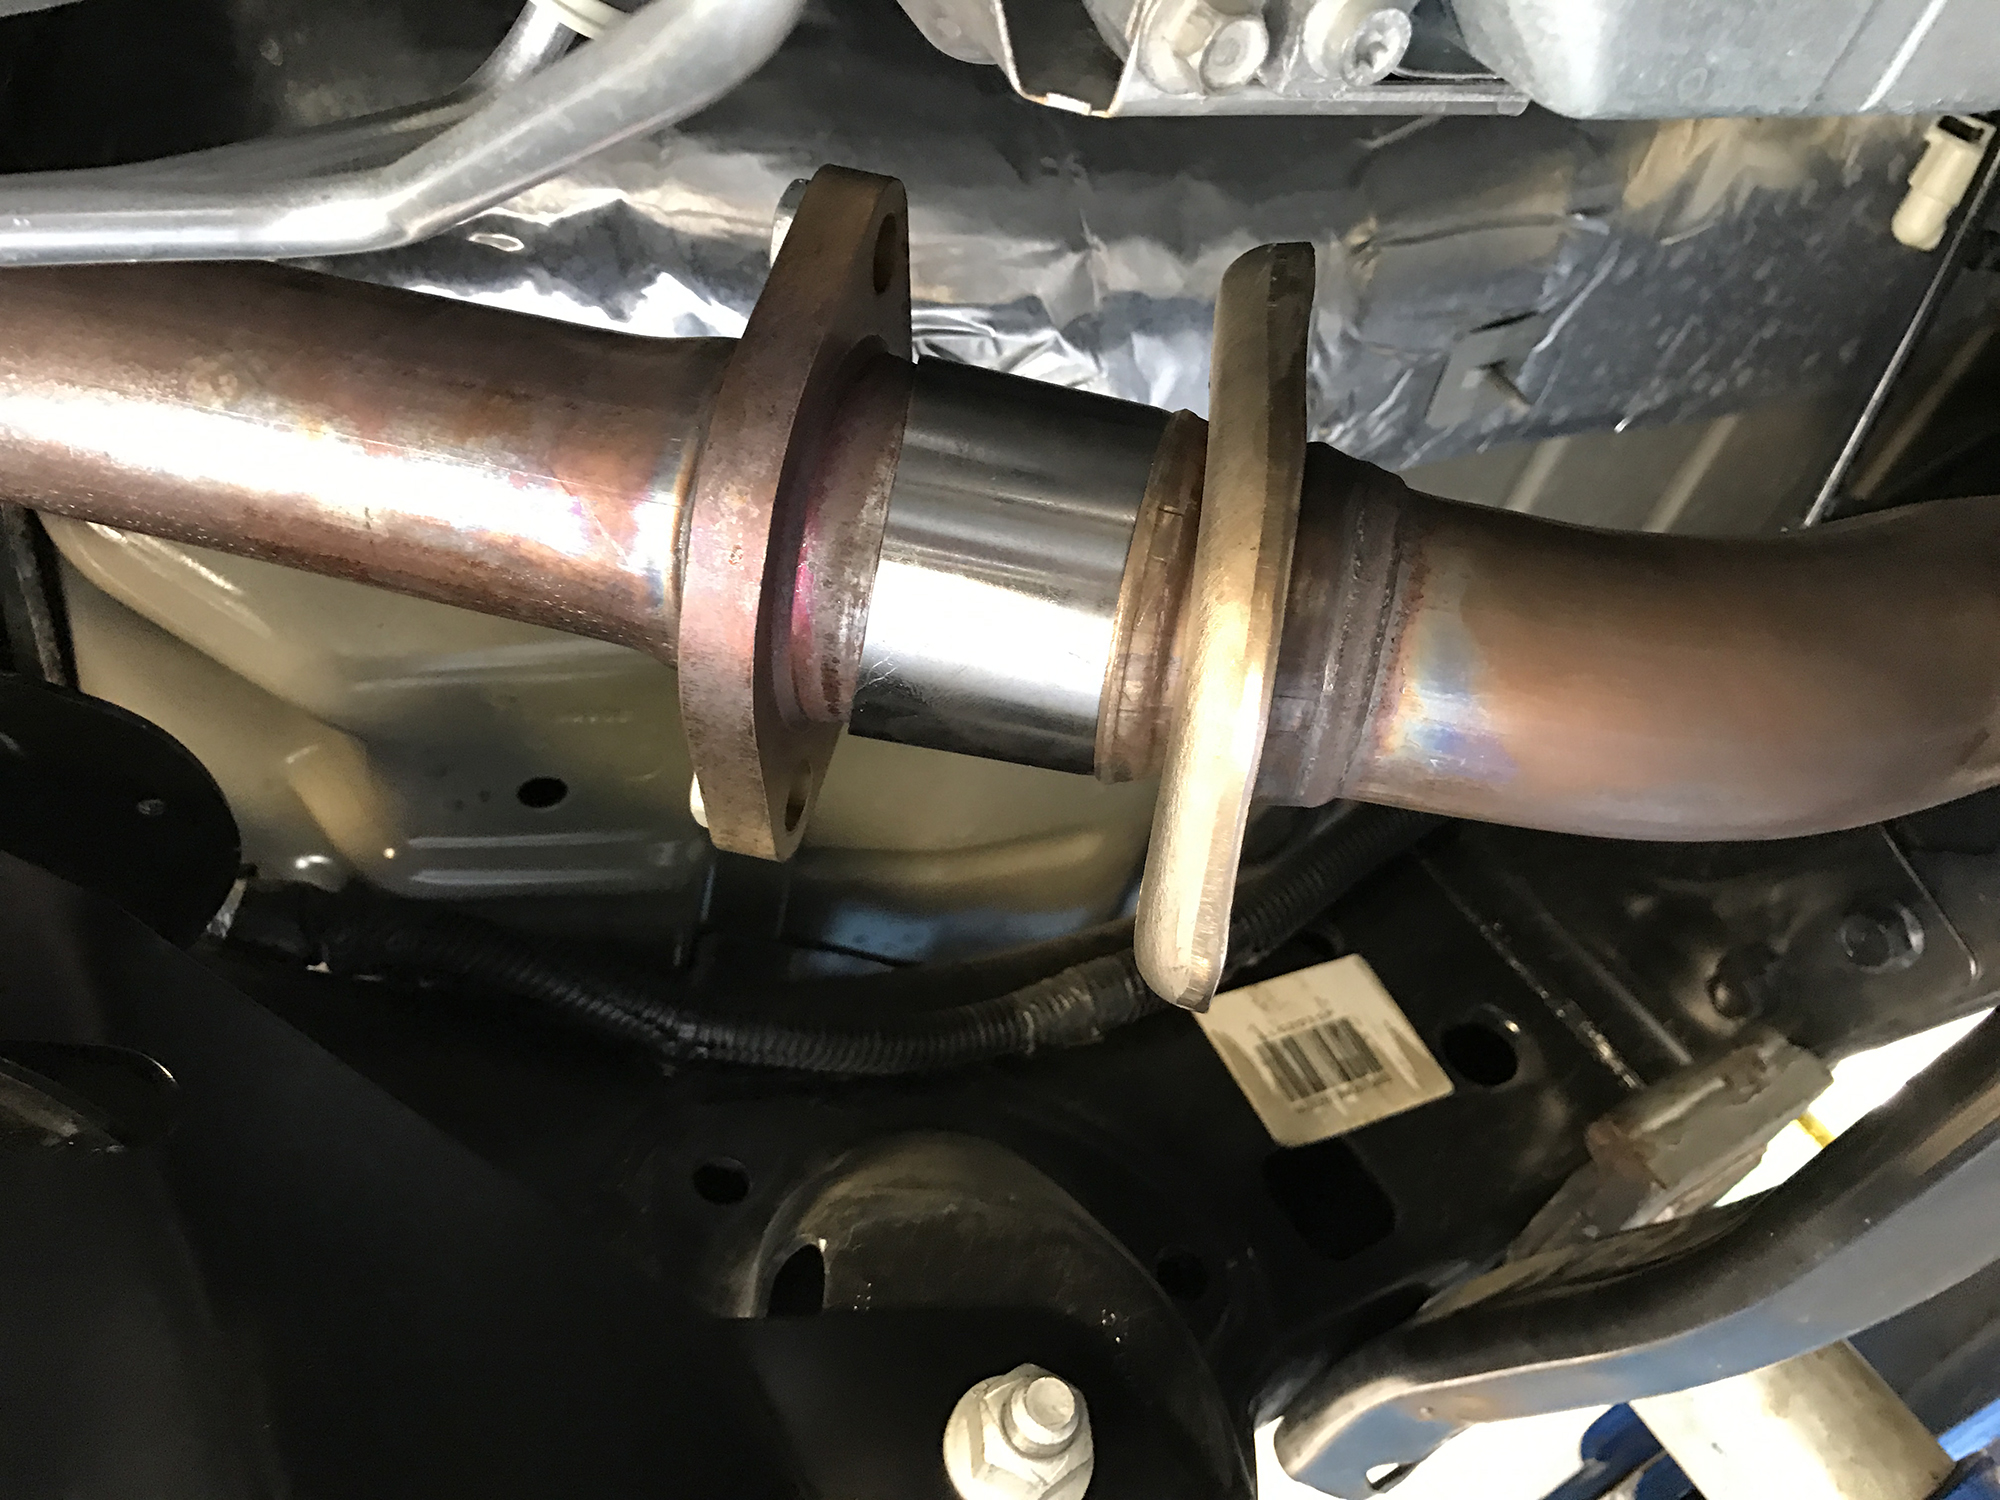
9. Pry the exhaust system apart and install the short spacer on the driver side. Be sure to install both spacers before moving on to the next step.
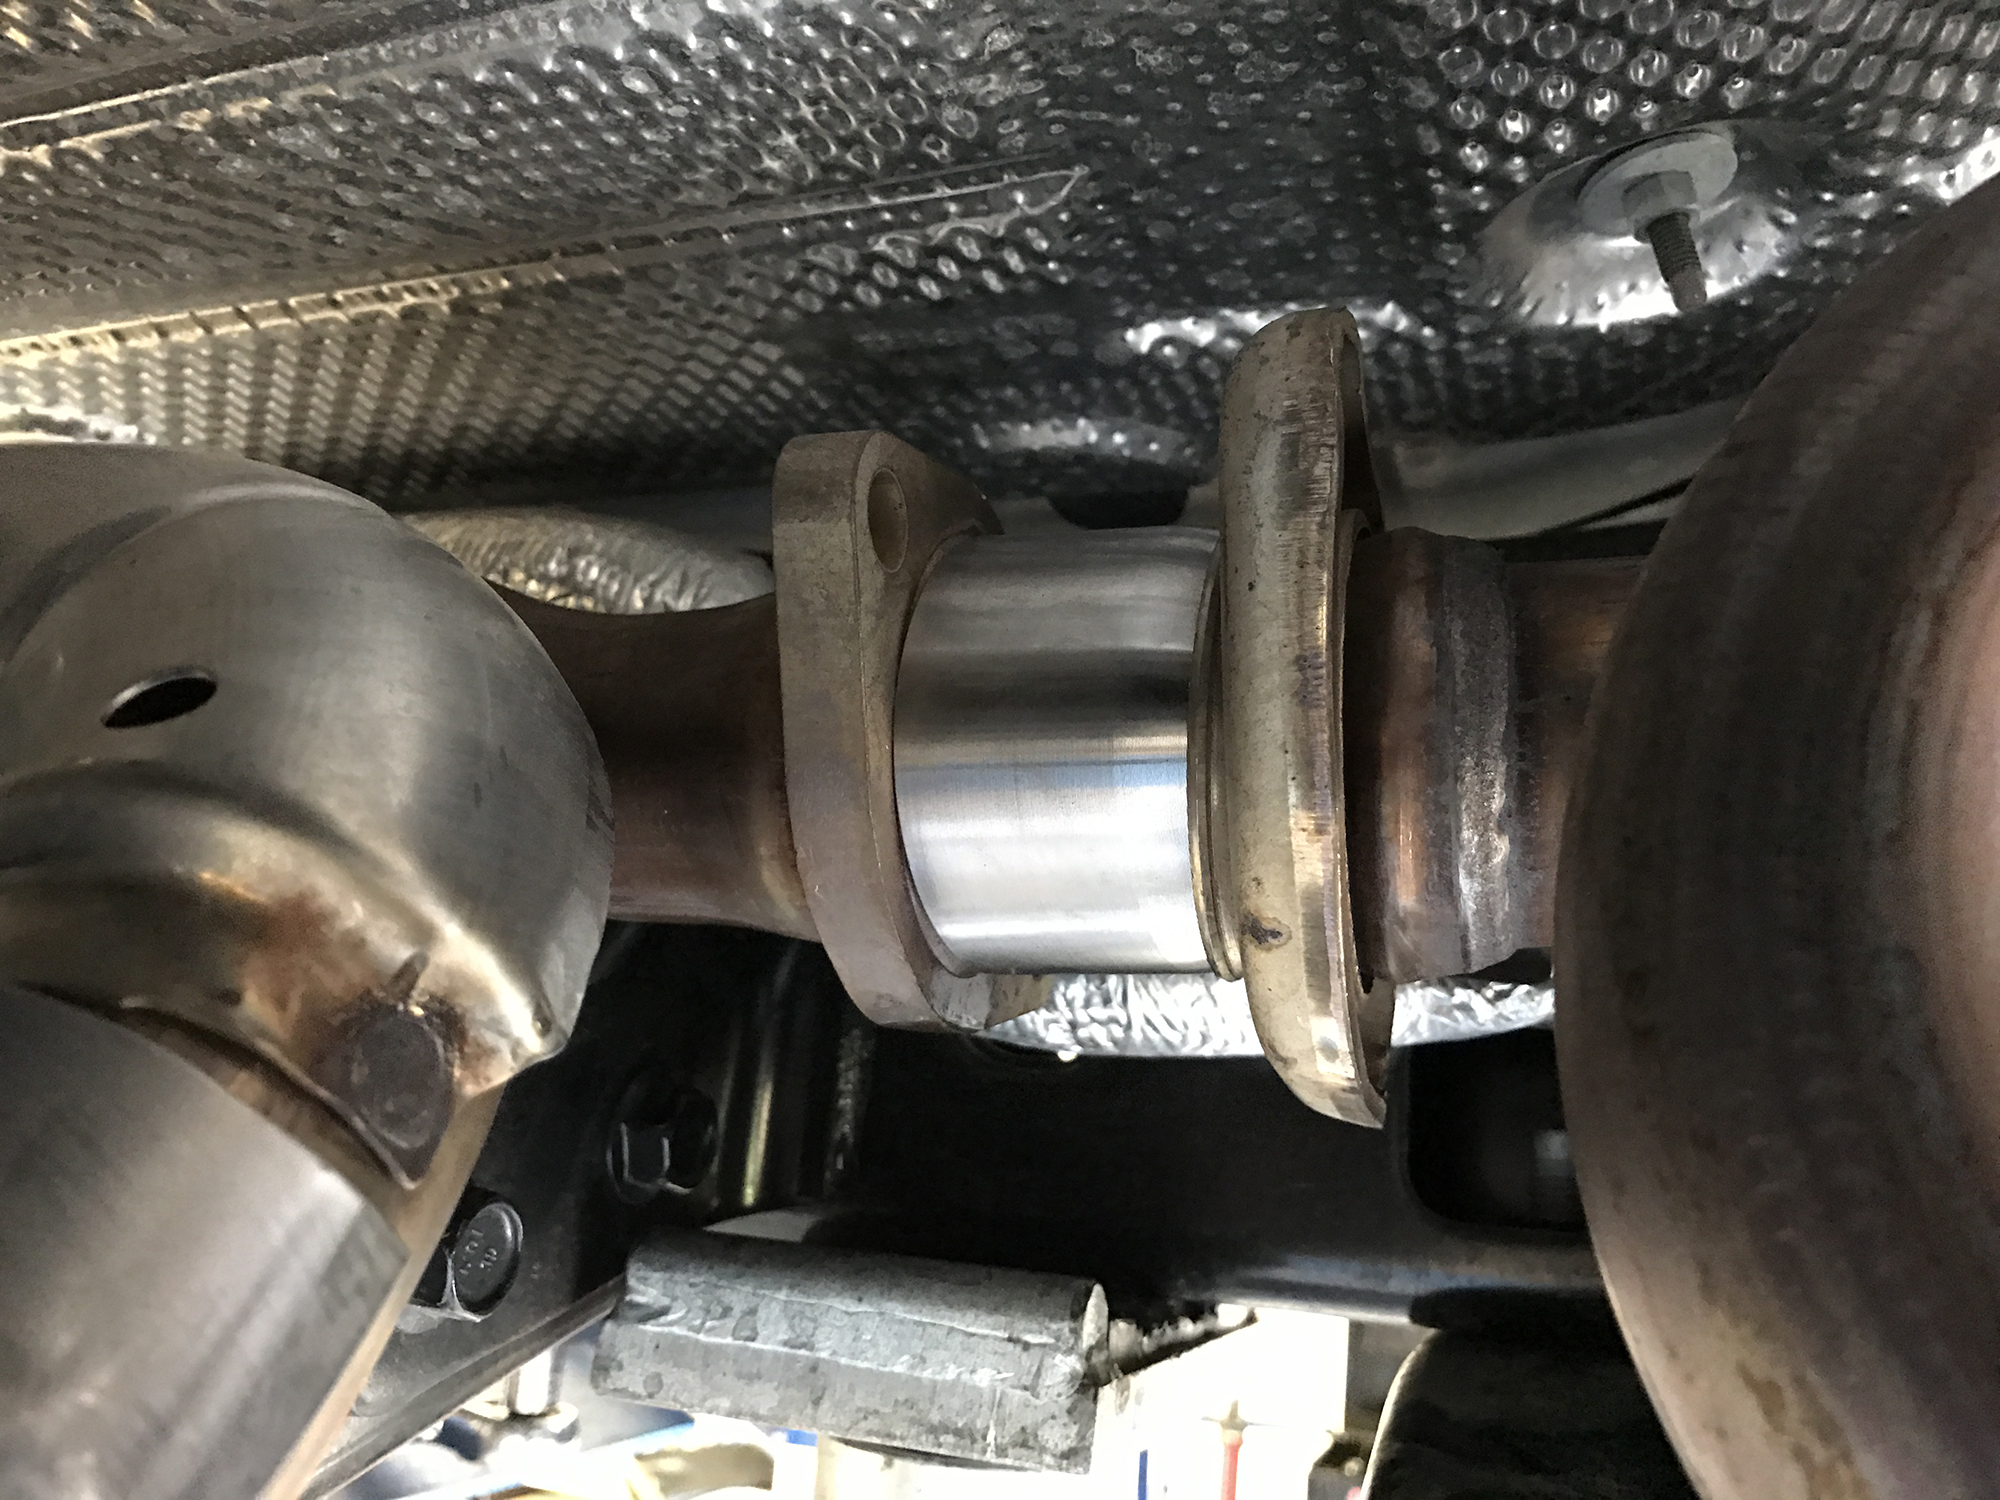
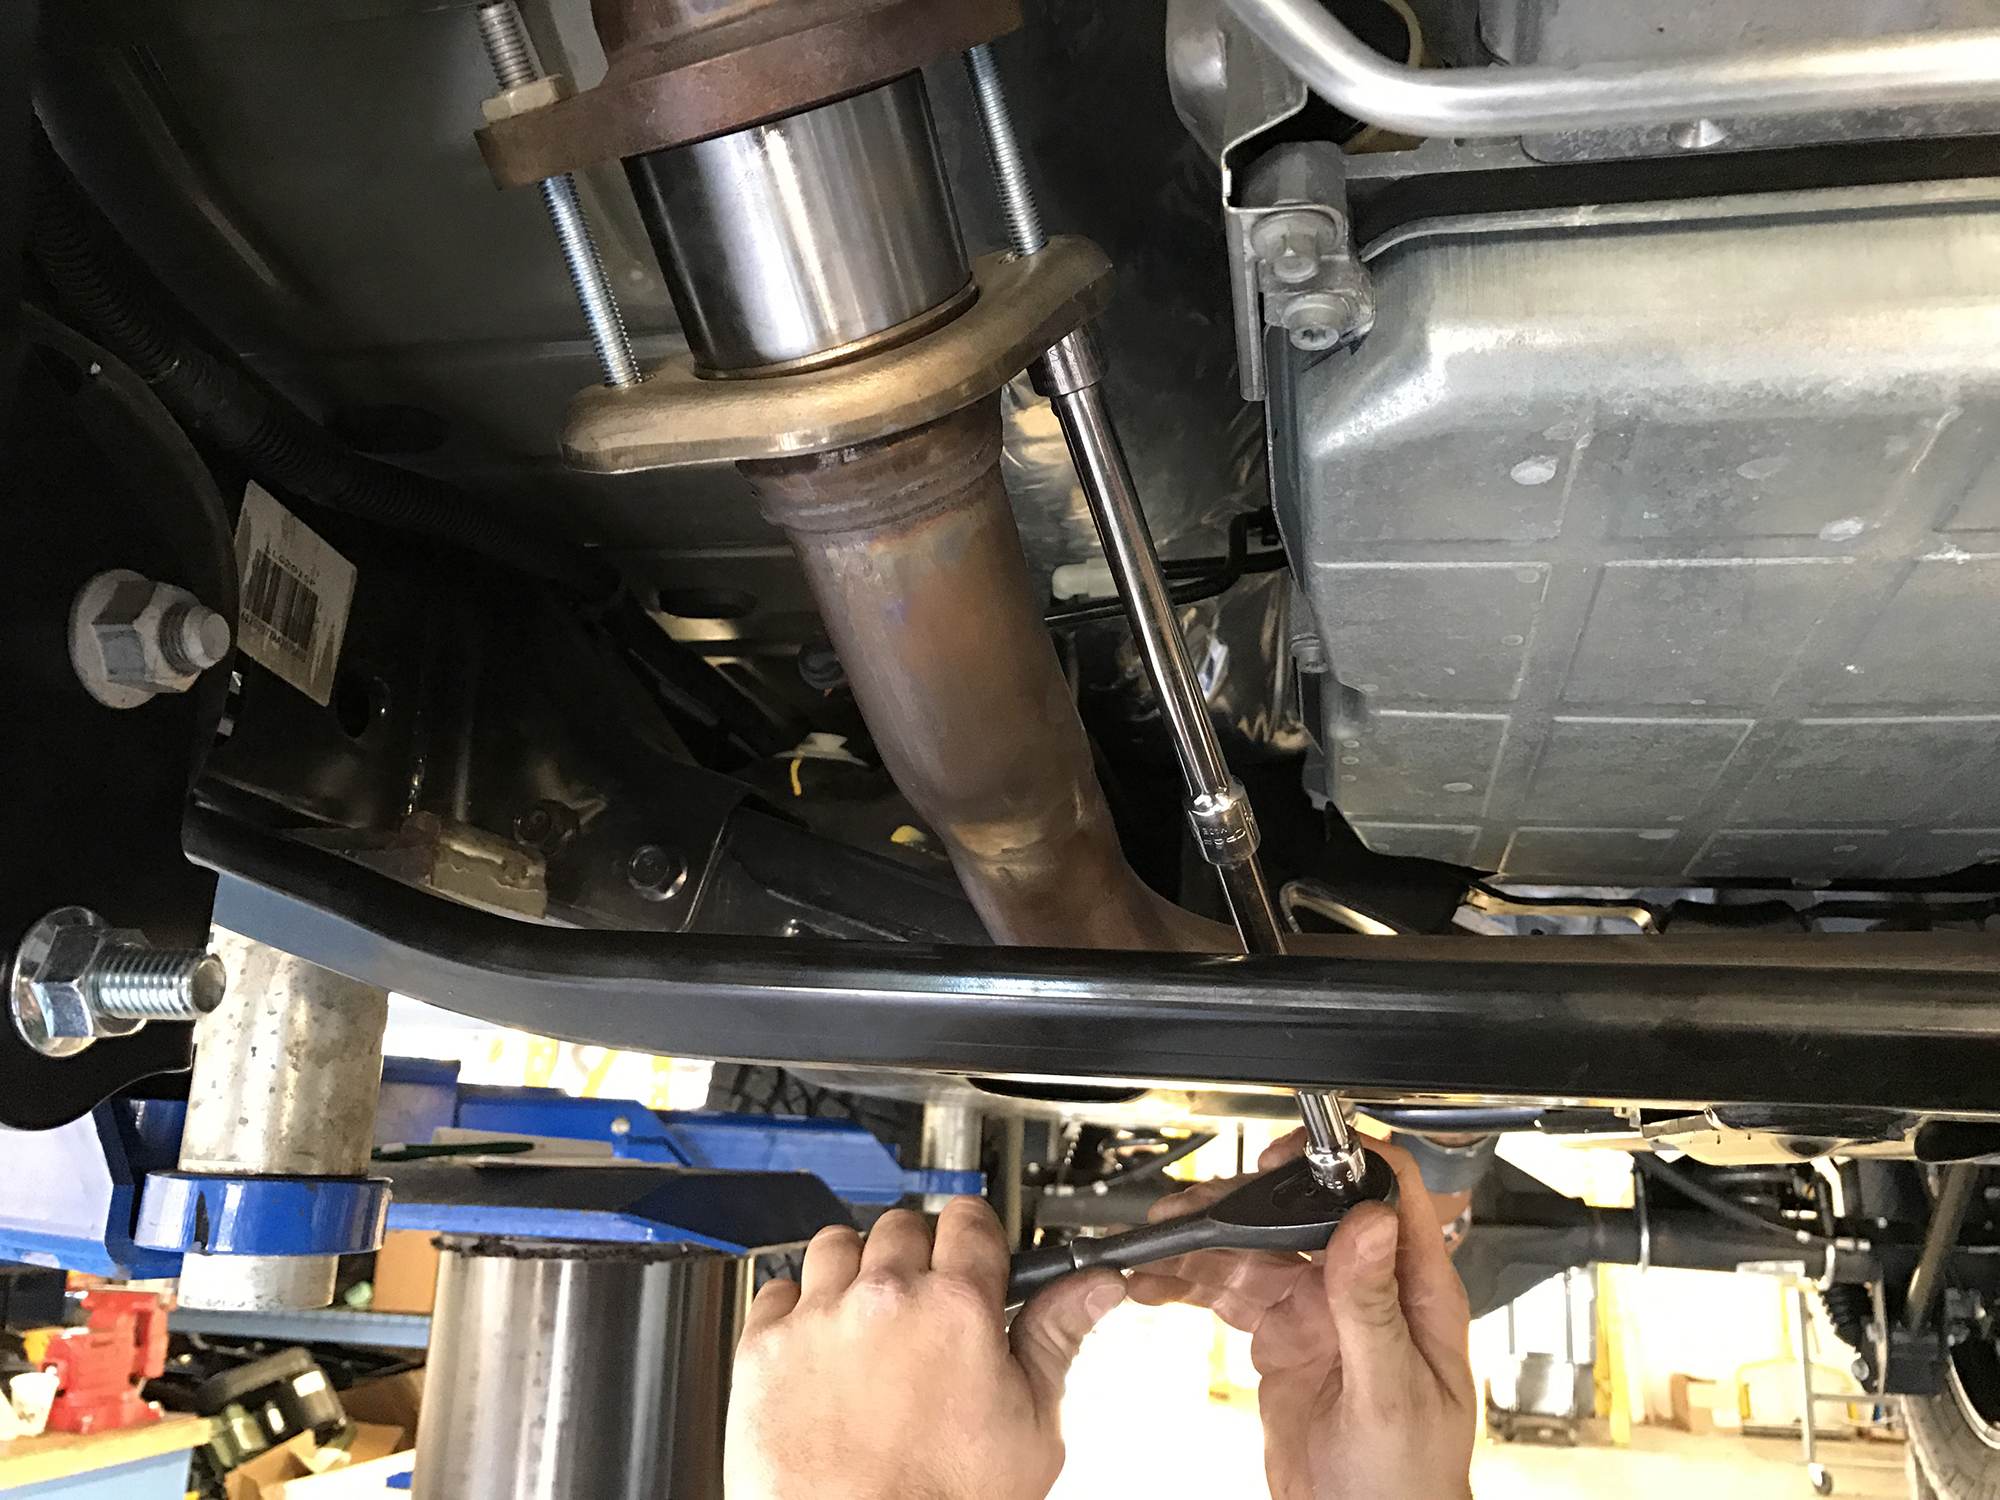
10. Re-secure the exhaust pipe to the exhaust manifold on the driver side using the longer 8mm bolts provided with new spacers using a 13mm wrench or socket. A ratchet wrench works great in this location.
11. Re-secure the exhaust crossover pipe to the exhaust manifold on the passenger side using the longer 8mm bolts provided with new spacers using a 13mm wrench or socket. A few long extensions can make tightening these bolts easier.
12. Check all of the exhaust clearances and be sure that none of the exhaust hangers are being pushed too far rearward, then tighten the exhaust clamp. You may have to push the front crossover pipe further into the rear exhaust pipe. Some rust penetrant or lubricant can be helpful. That takes care of installing your new exhaust spacers. Your driveshaft should no longer make contact with your exhaust crossover pipe.