


Featuring Premium Parts from
Introduction
April 20, 2017
The Jeep Wrangler has always been my passion. Since the age of 14 years old I knew that I was going to own a Jeep vehicle for pretty much the rest of my life. In August of 1994 i purchased my second Jeep, a brand new Wrangler YJ (previously I owned an 87 Wrangler) which is currently being rebuilt into a big, heavy duty off road machine in my spare time. So in the interim I wanted to build a Wrangler more versatile; one that could be driven on a daily basis but yet taken to the trails and have some fun on the weekends.
Enter Project Copperhead. After searching the internet high and low for the perfect platform to start this build, I found this beautiful 2002 Wrangler TJ. Copperhead has a 4.0L powertrain with a 5 speed manual transmission. The bones of this rig are perfect, but as with any used purchase just needs some updating, so before I make this Jeep "Fun" i have to make it Functional. I've started with the basic "Essentials" that can be conquered in just one weekend and are easy to do with just basic hand tools.
Enter Project Copperhead. After searching the internet high and low for the perfect platform to start this build, I found this beautiful 2002 Wrangler TJ. Copperhead has a 4.0L powertrain with a 5 speed manual transmission. The bones of this rig are perfect, but as with any used purchase just needs some updating, so before I make this Jeep "Fun" i have to make it Functional. I've started with the basic "Essentials" that can be conquered in just one weekend and are easy to do with just basic hand tools.
QuadraTop Premium Replacement Soft Top
April 24, 2017
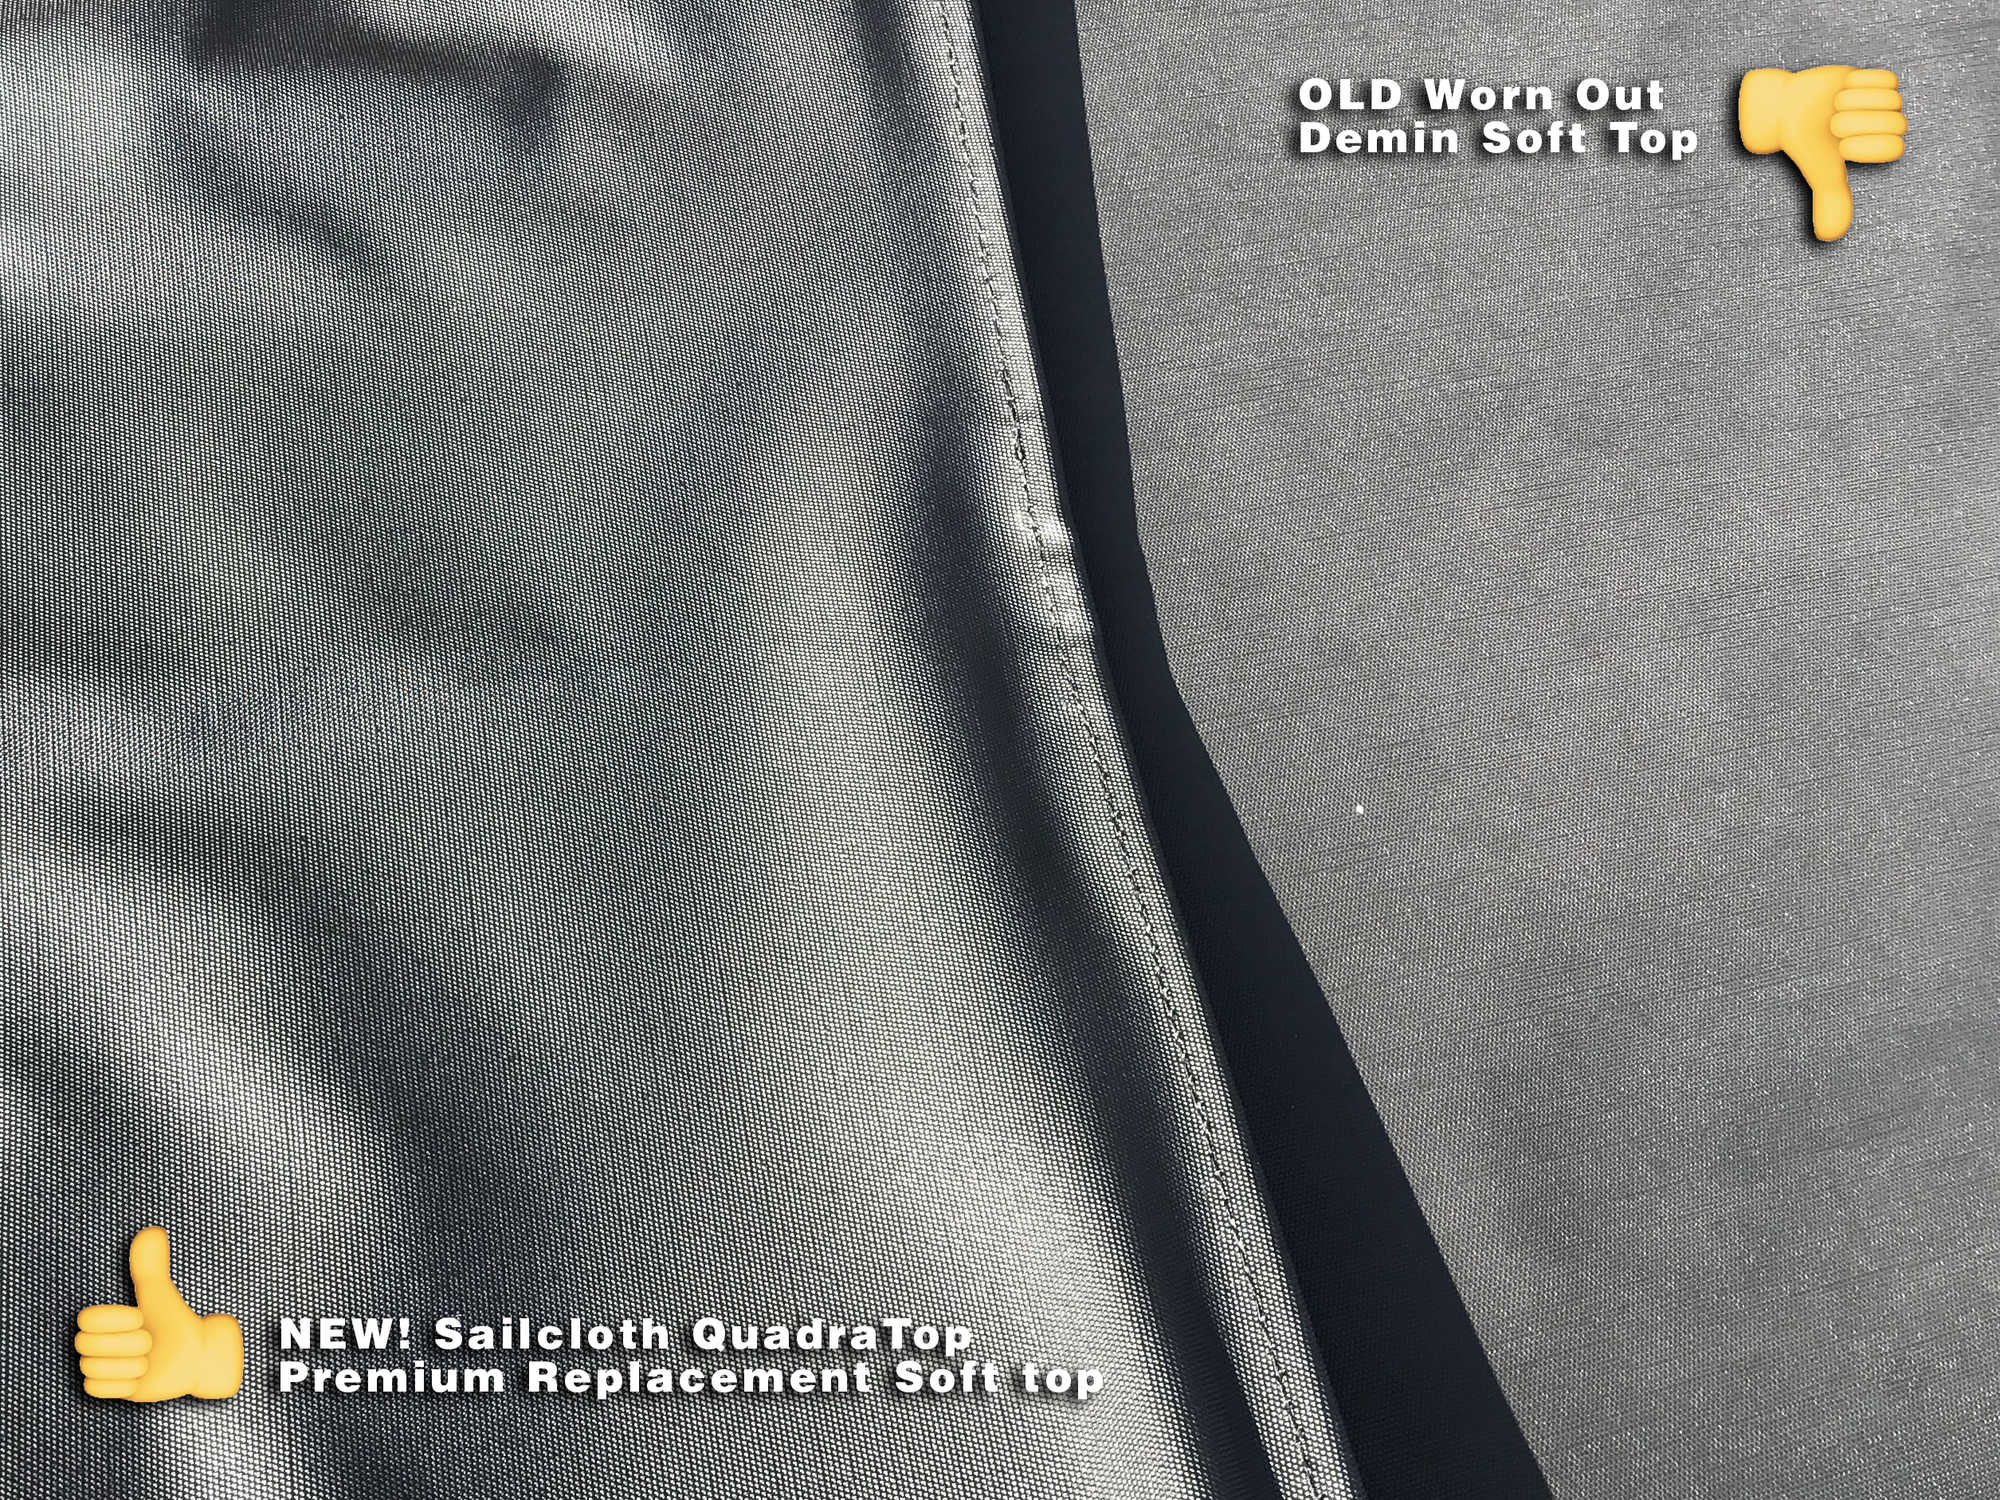
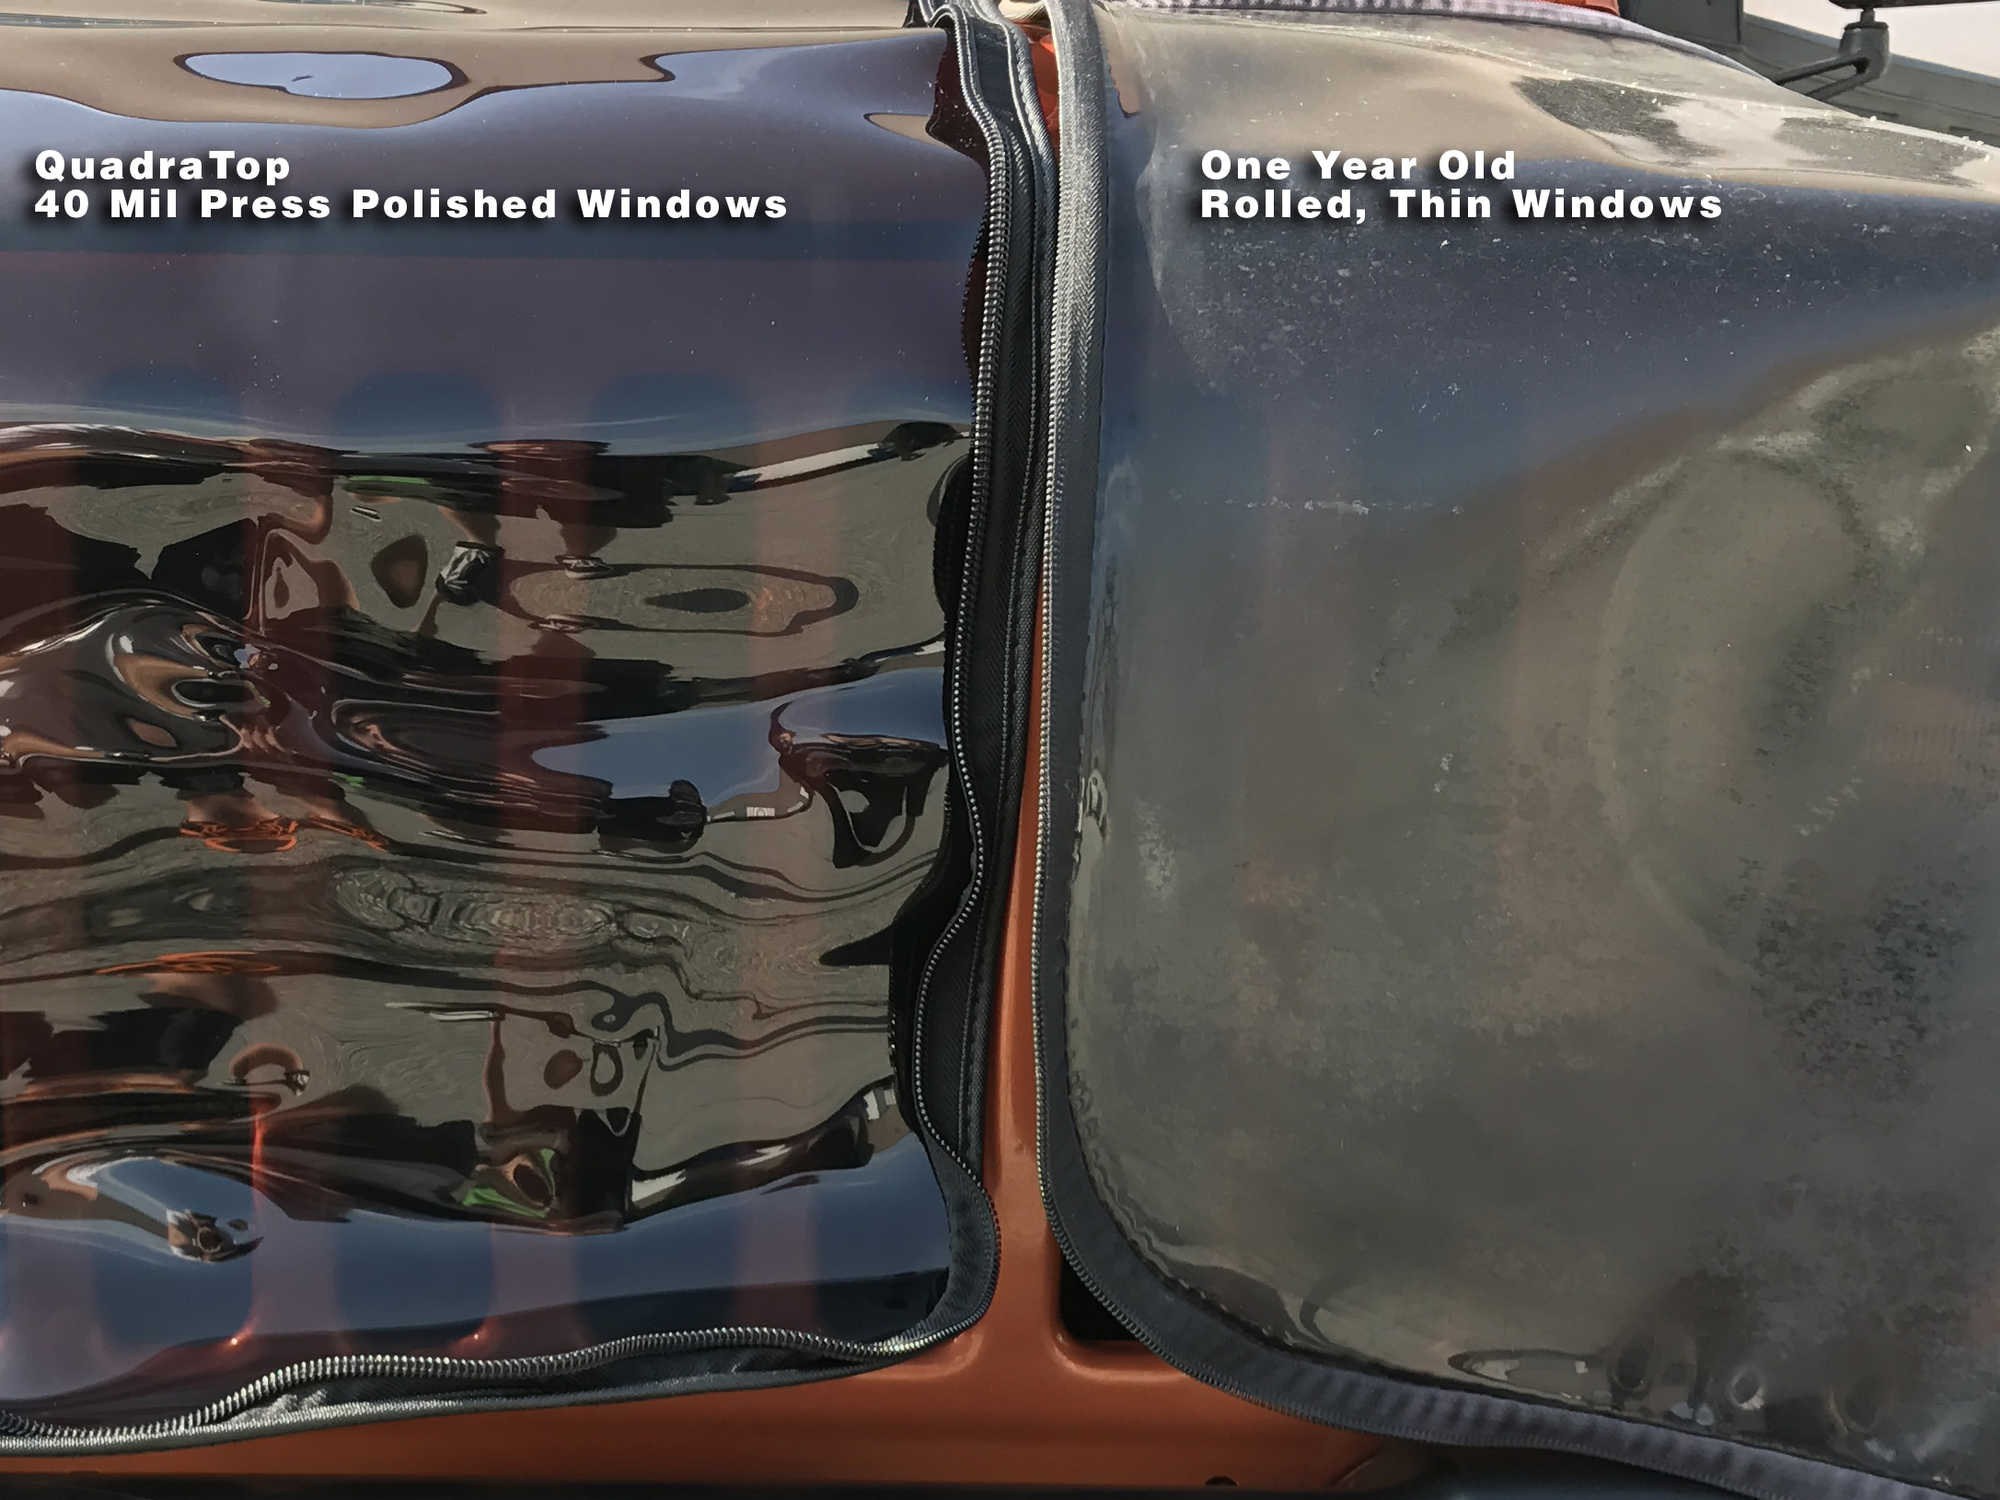
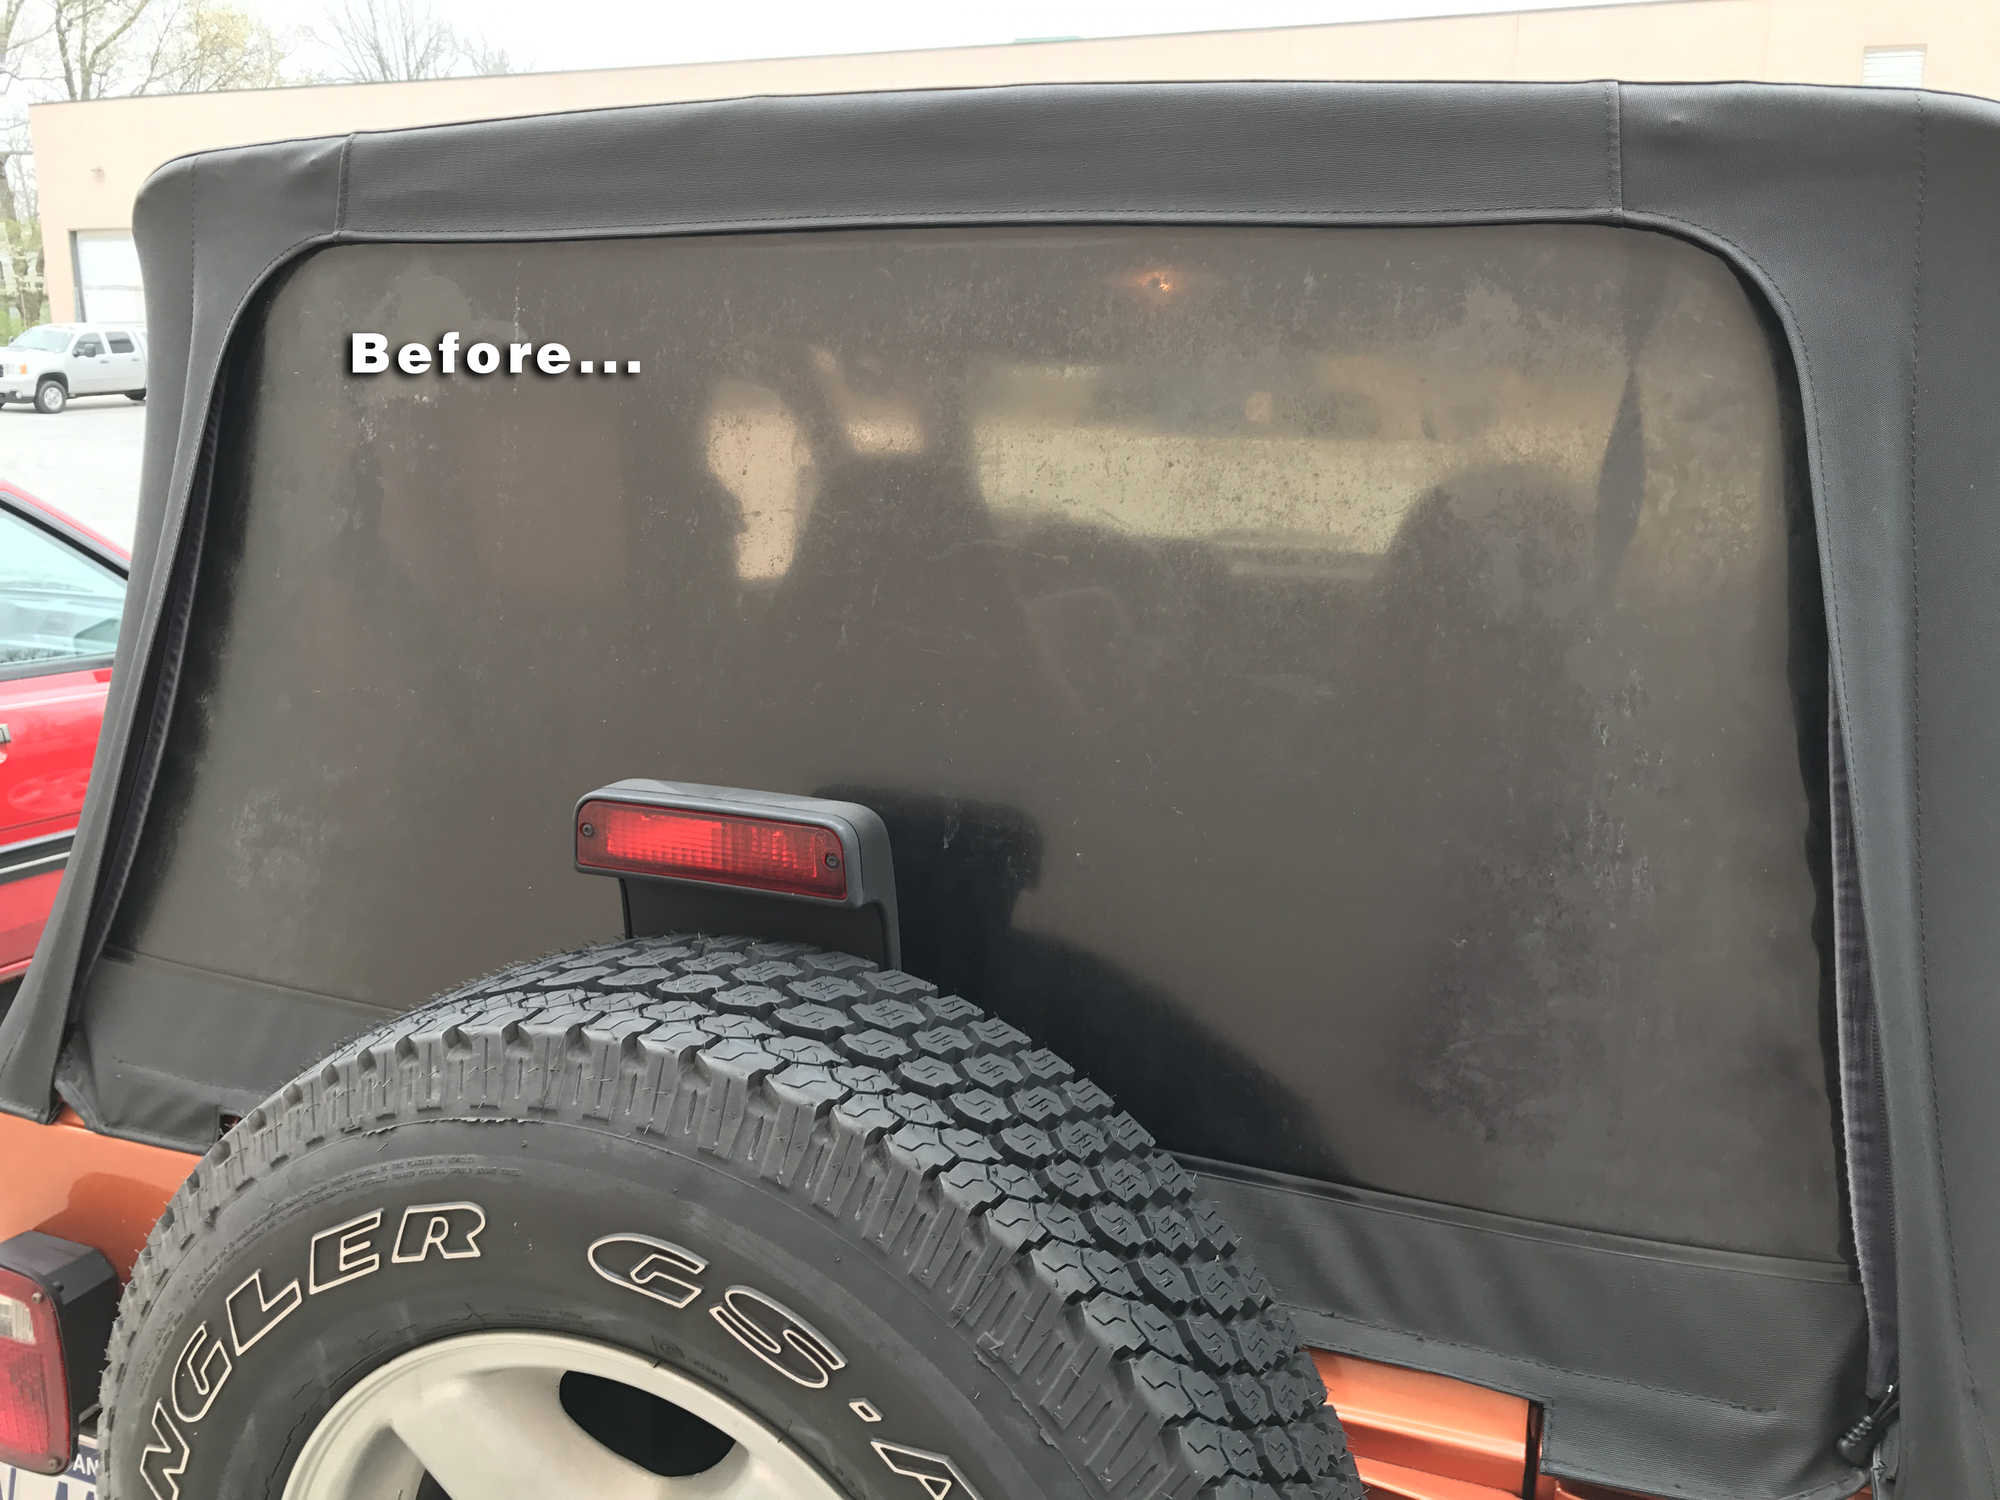
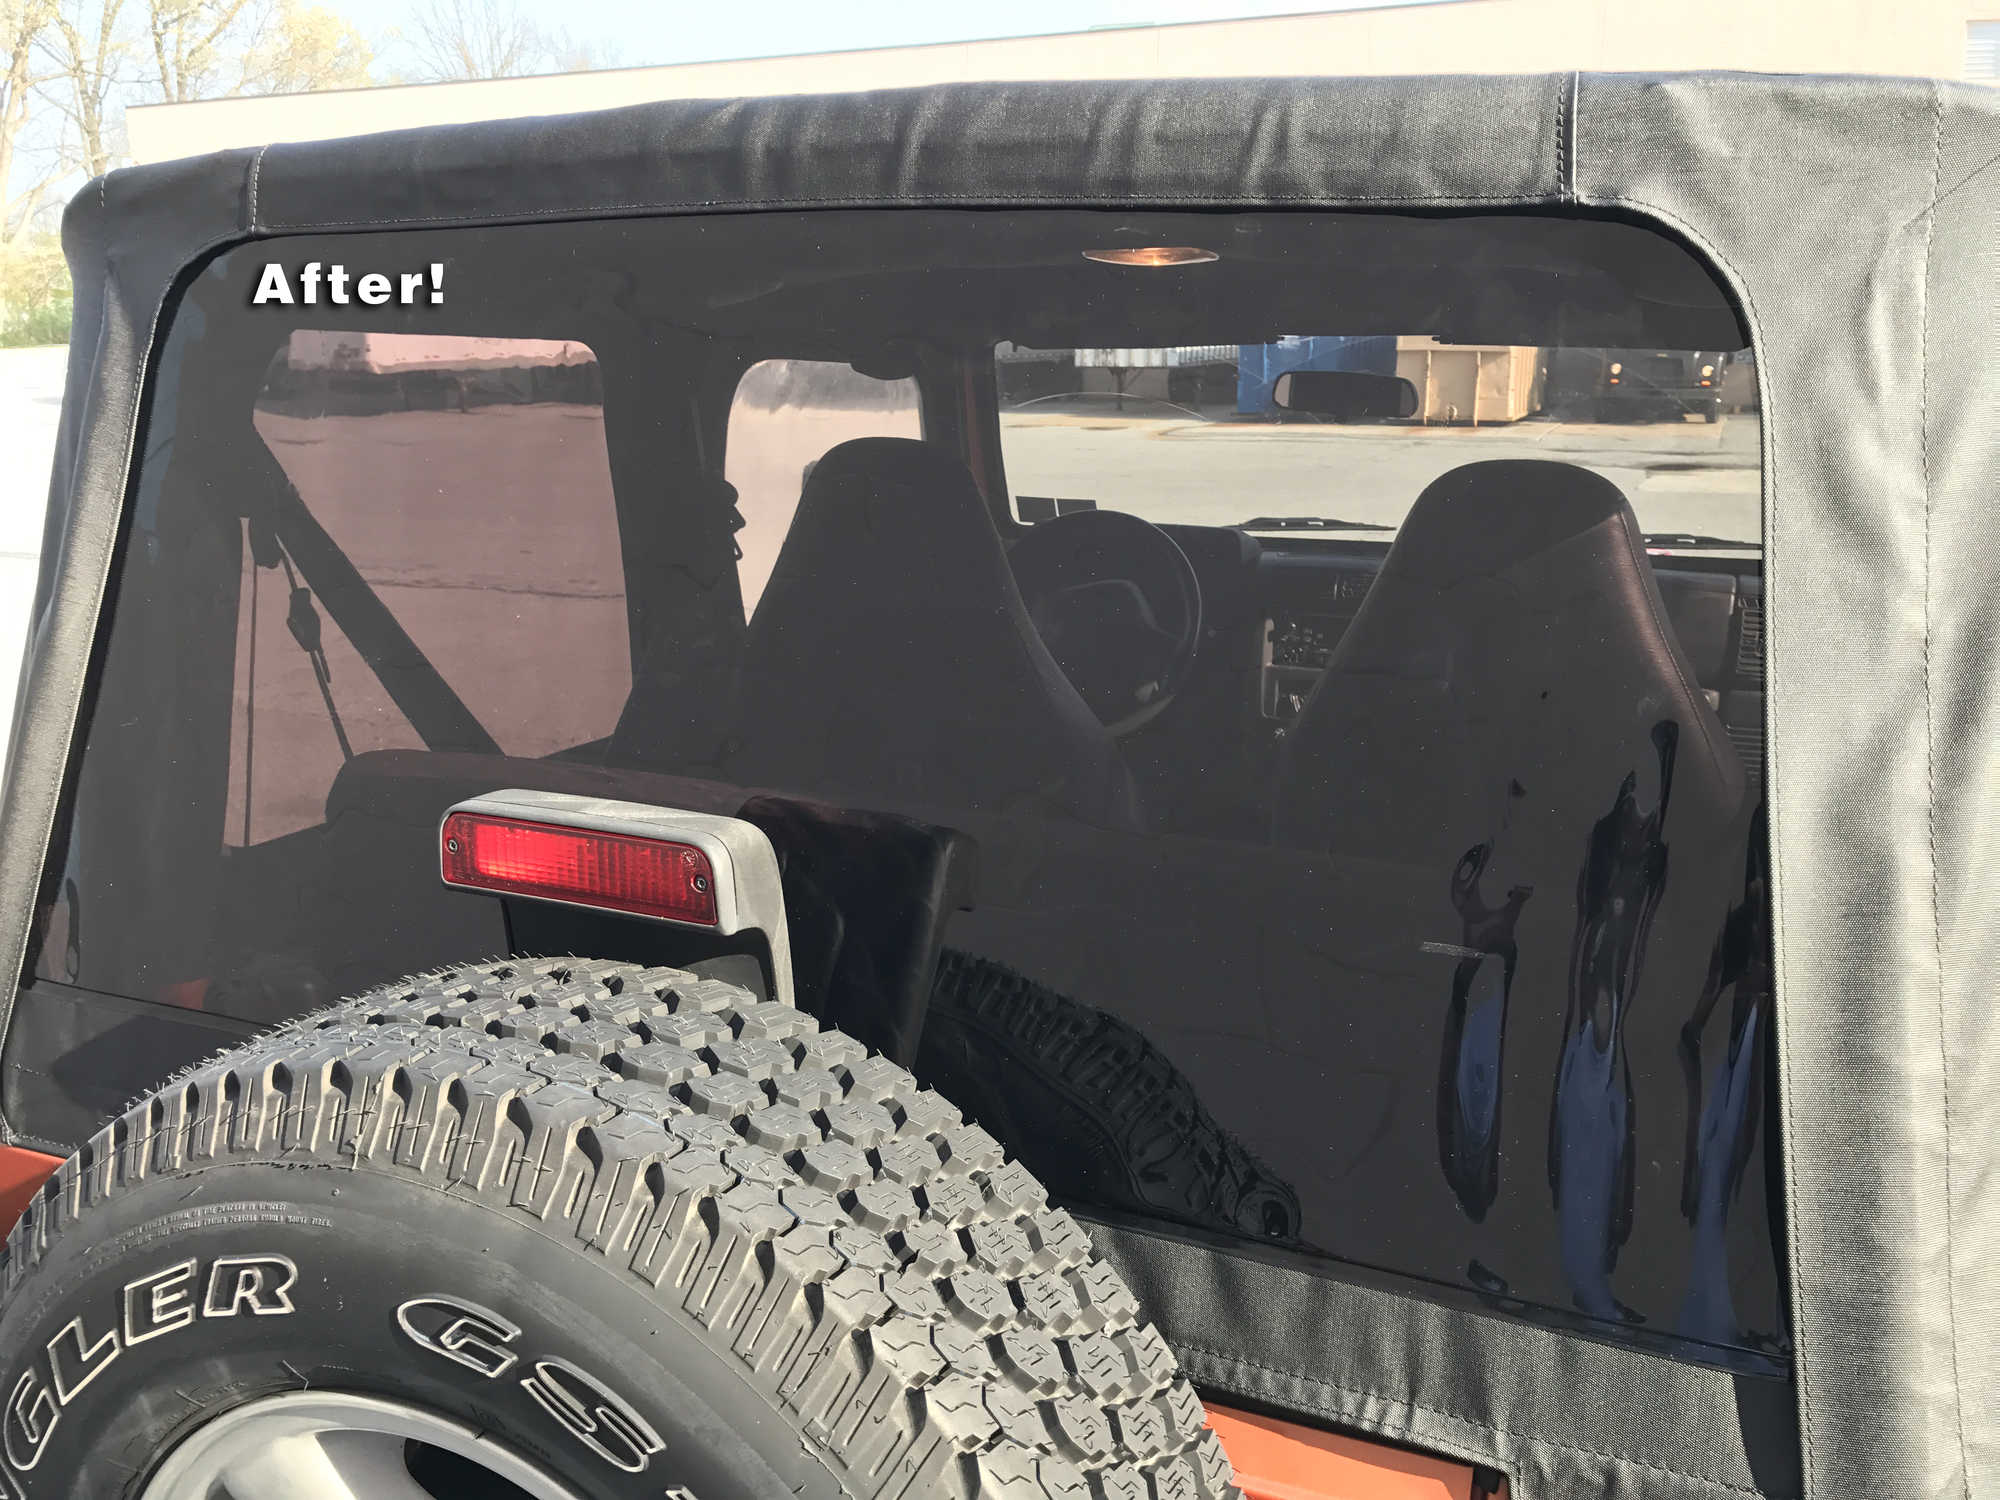
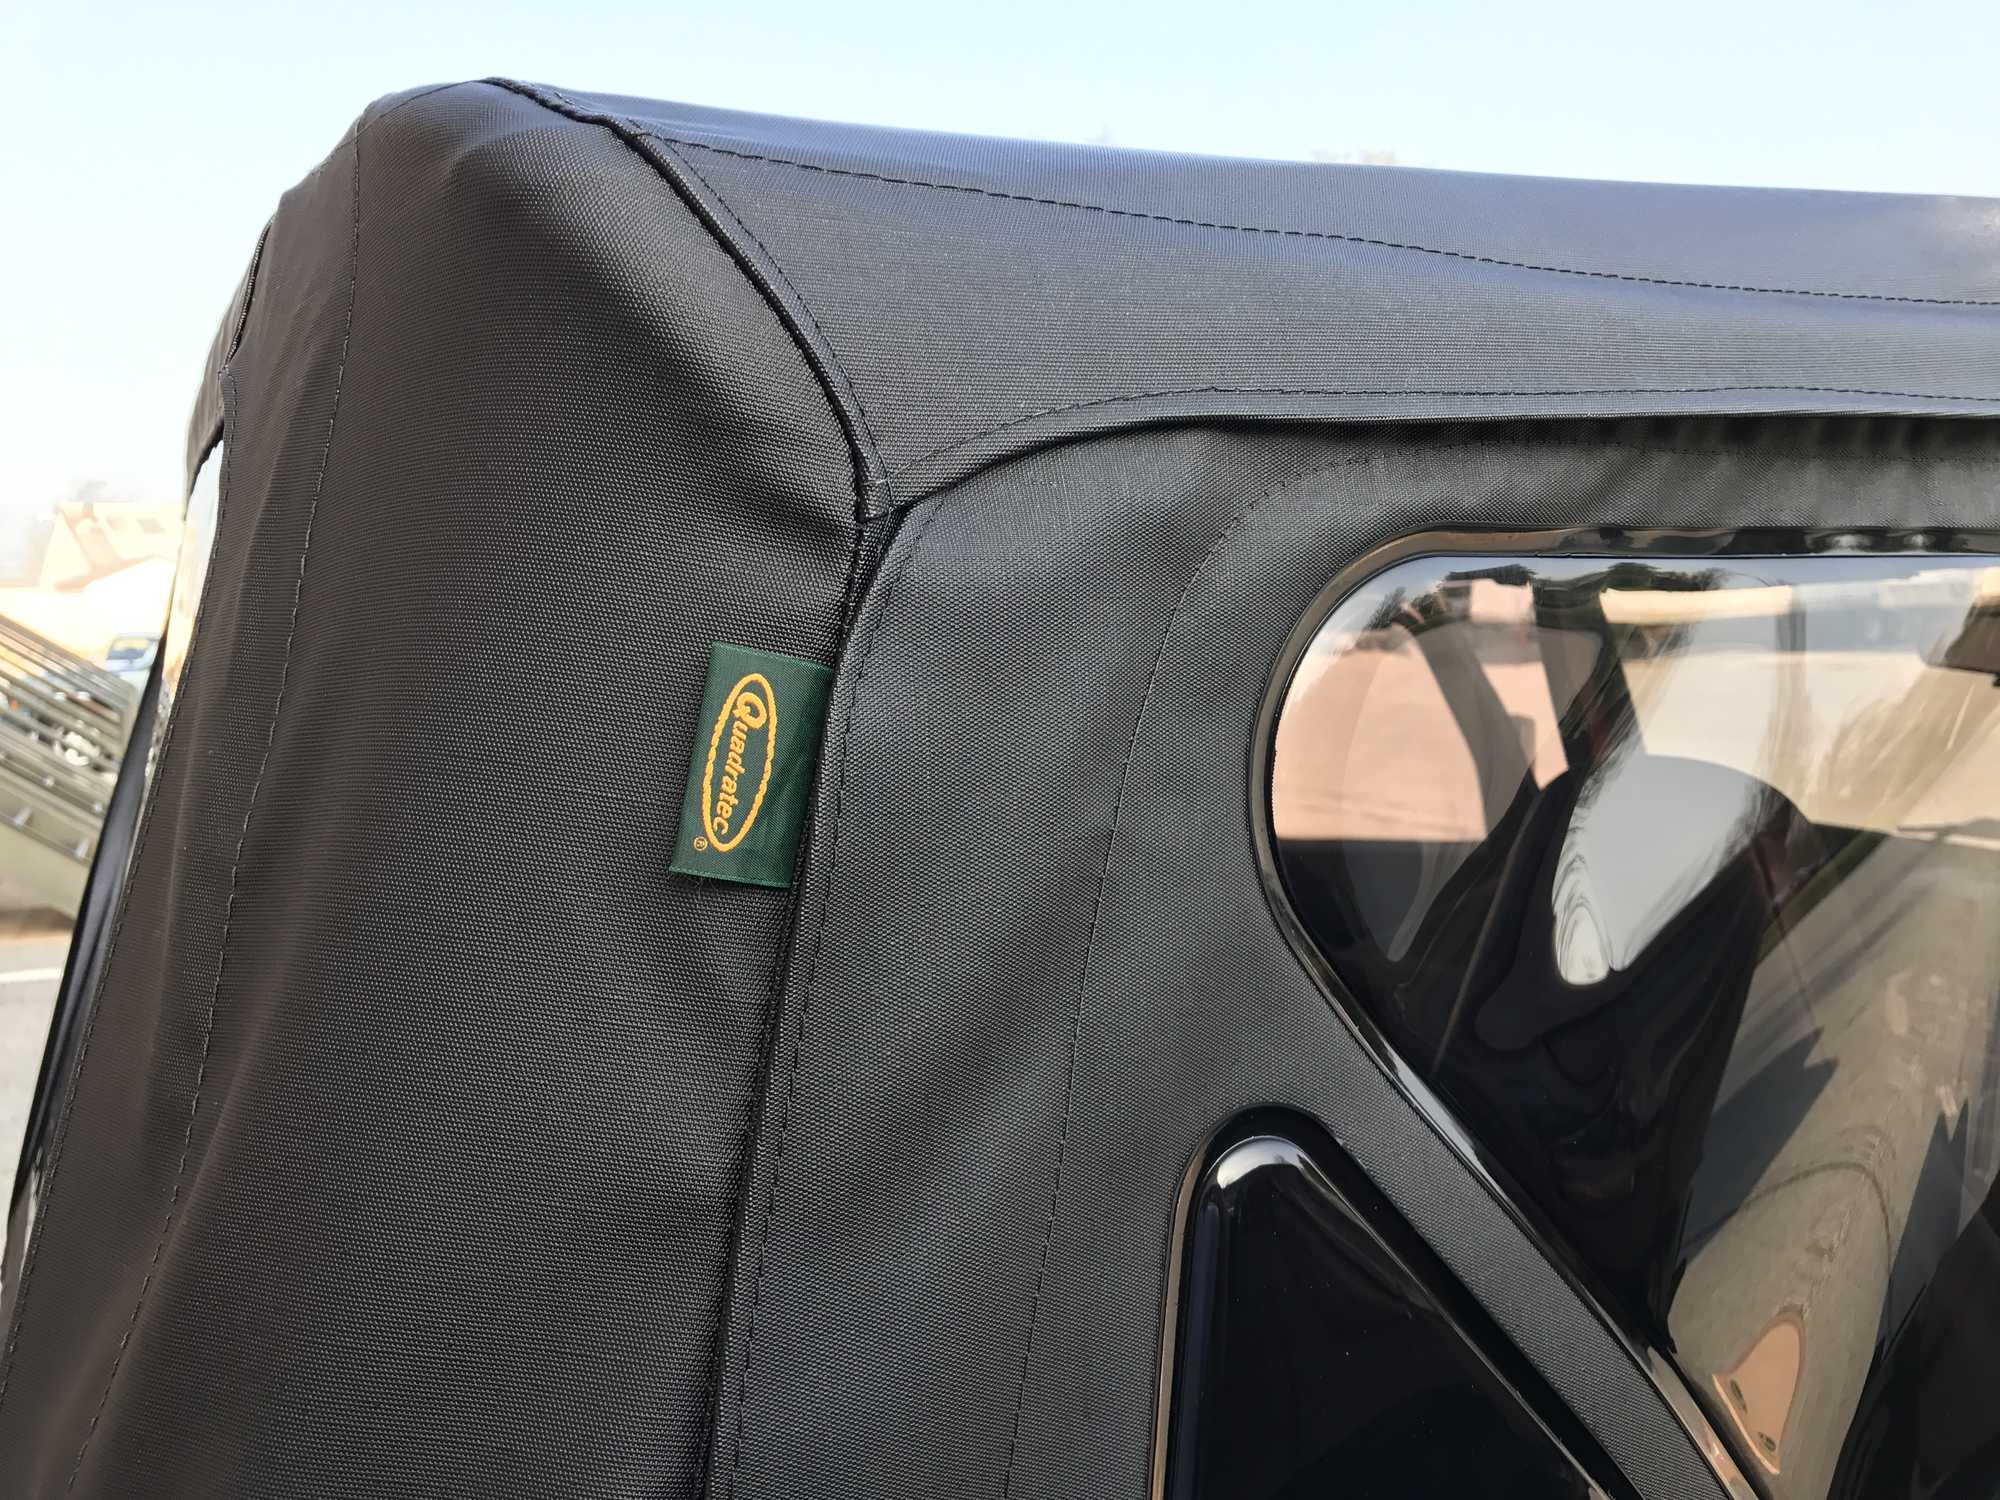
Being a 15 year old vehicle it's in desperate need of some long overdue updates. The first update that was a MUST was to upgrade the worn out soft top. The previous owner installed a replacement top but the rear window was so bad that it became a hazard on the road by not being able to see traffic through it. I decided to upgrade it with a QuadraTop Premium Replacement Top. The heavy duty sailcloth material and press, polished tinted windows made this the perfect choice! This easy to install top went on in about an hour with just a phillips screwdriver. Simply just unzip the old window, convert the top and remove the header screws from the header channel and discard the old material. The QuadraTop includes such detailed instructions that it was a incredibly easy install. The result, a tight fitting soft top with ultra clear windows and it only cost me $399.99!
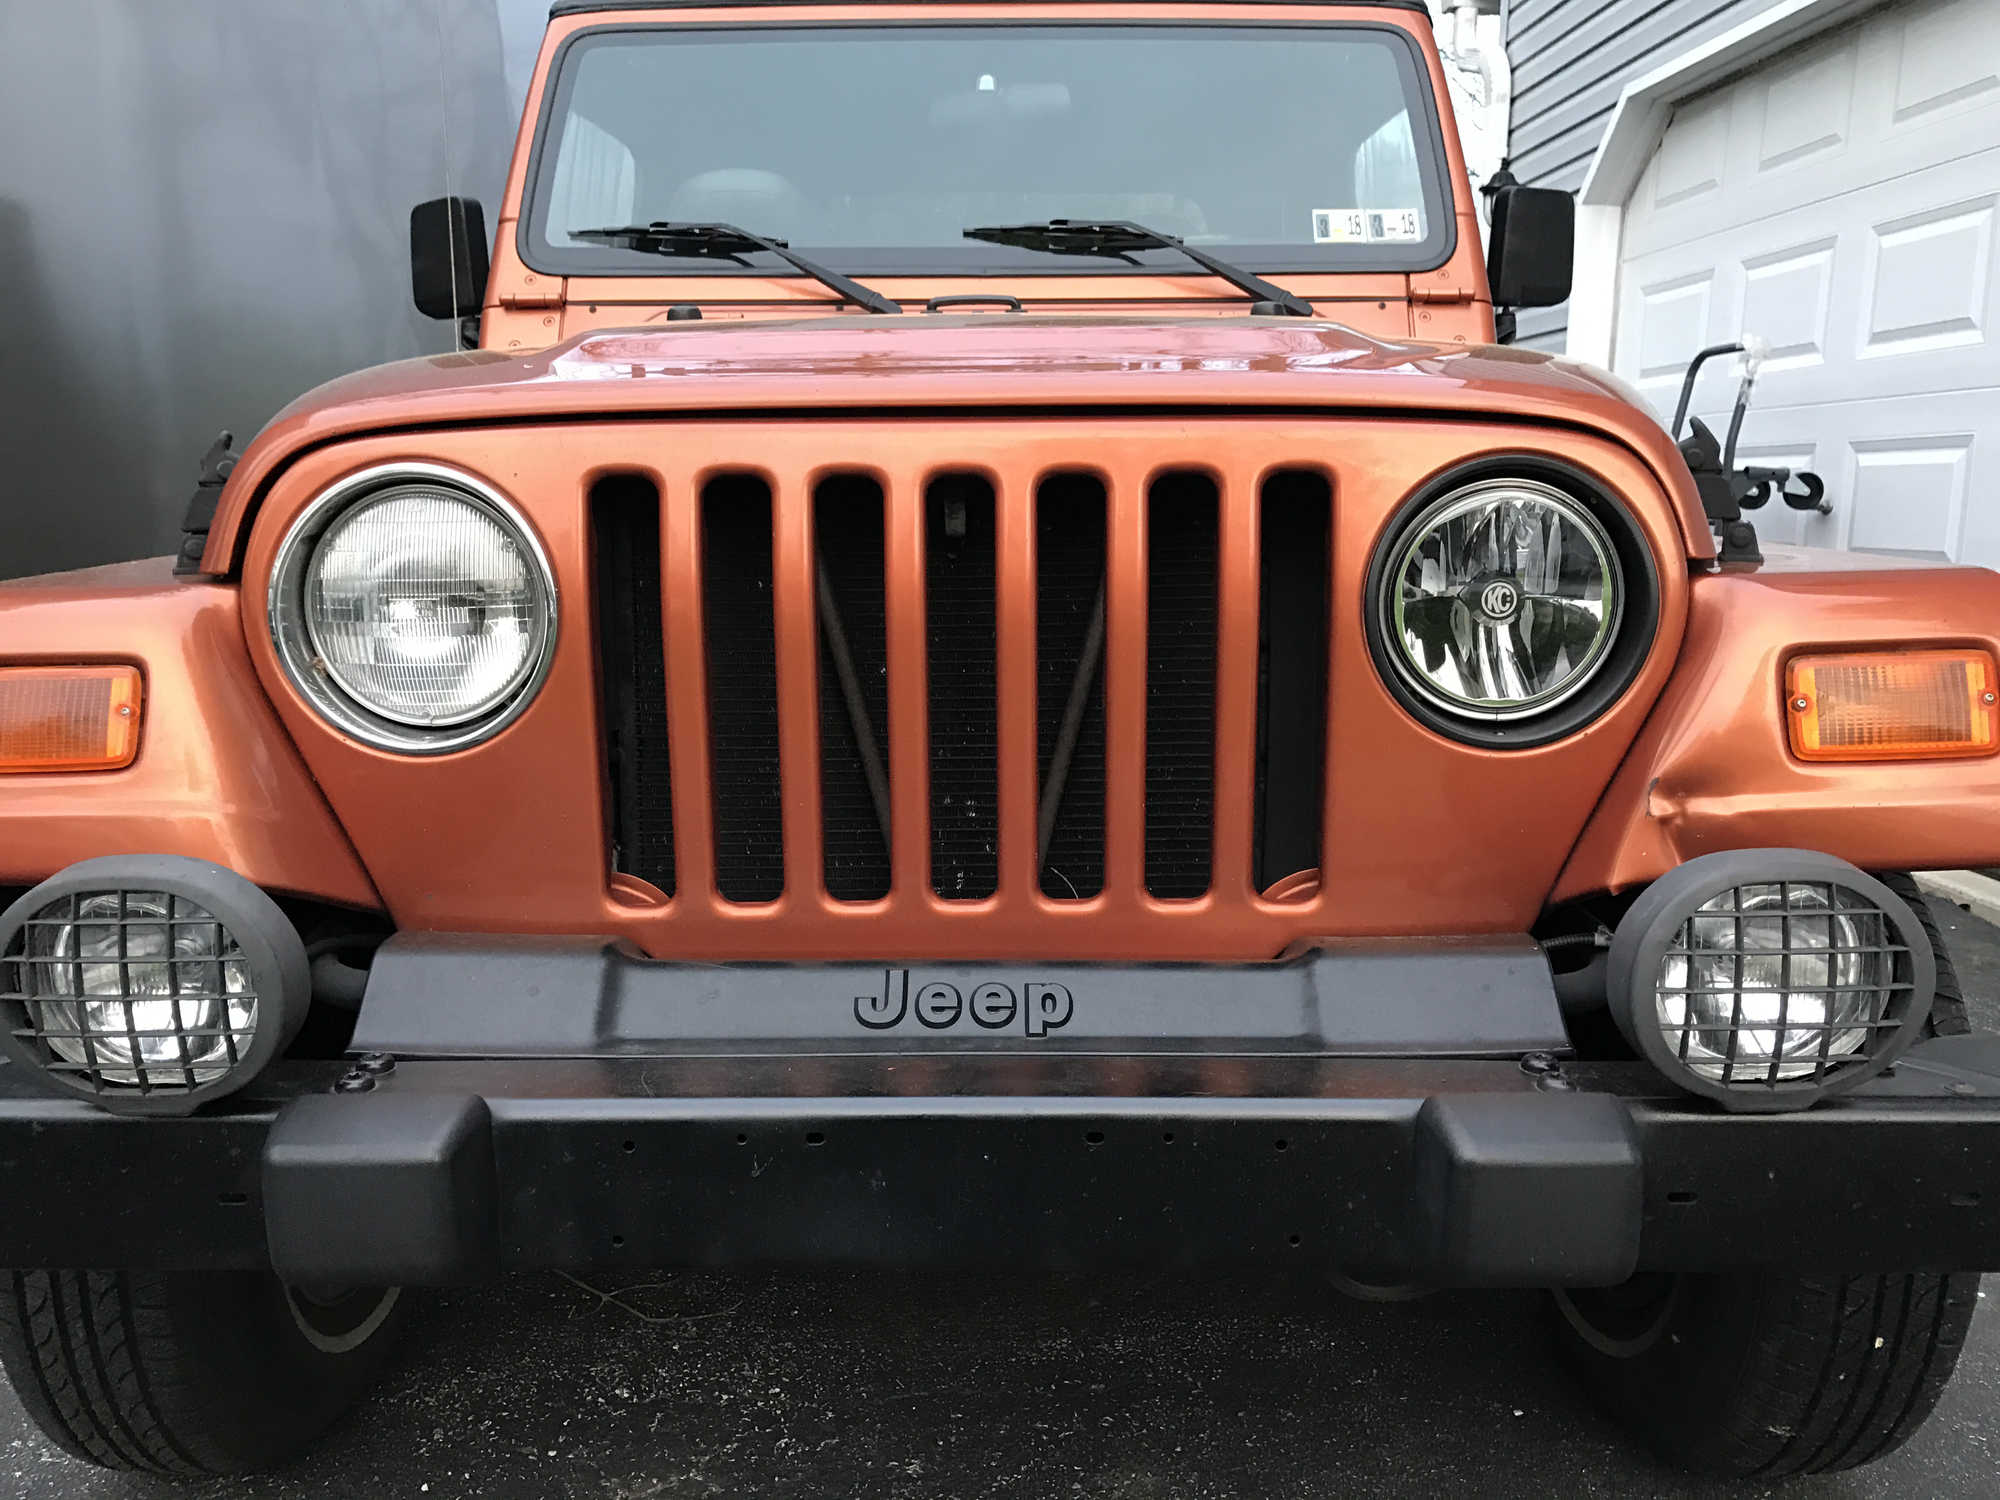
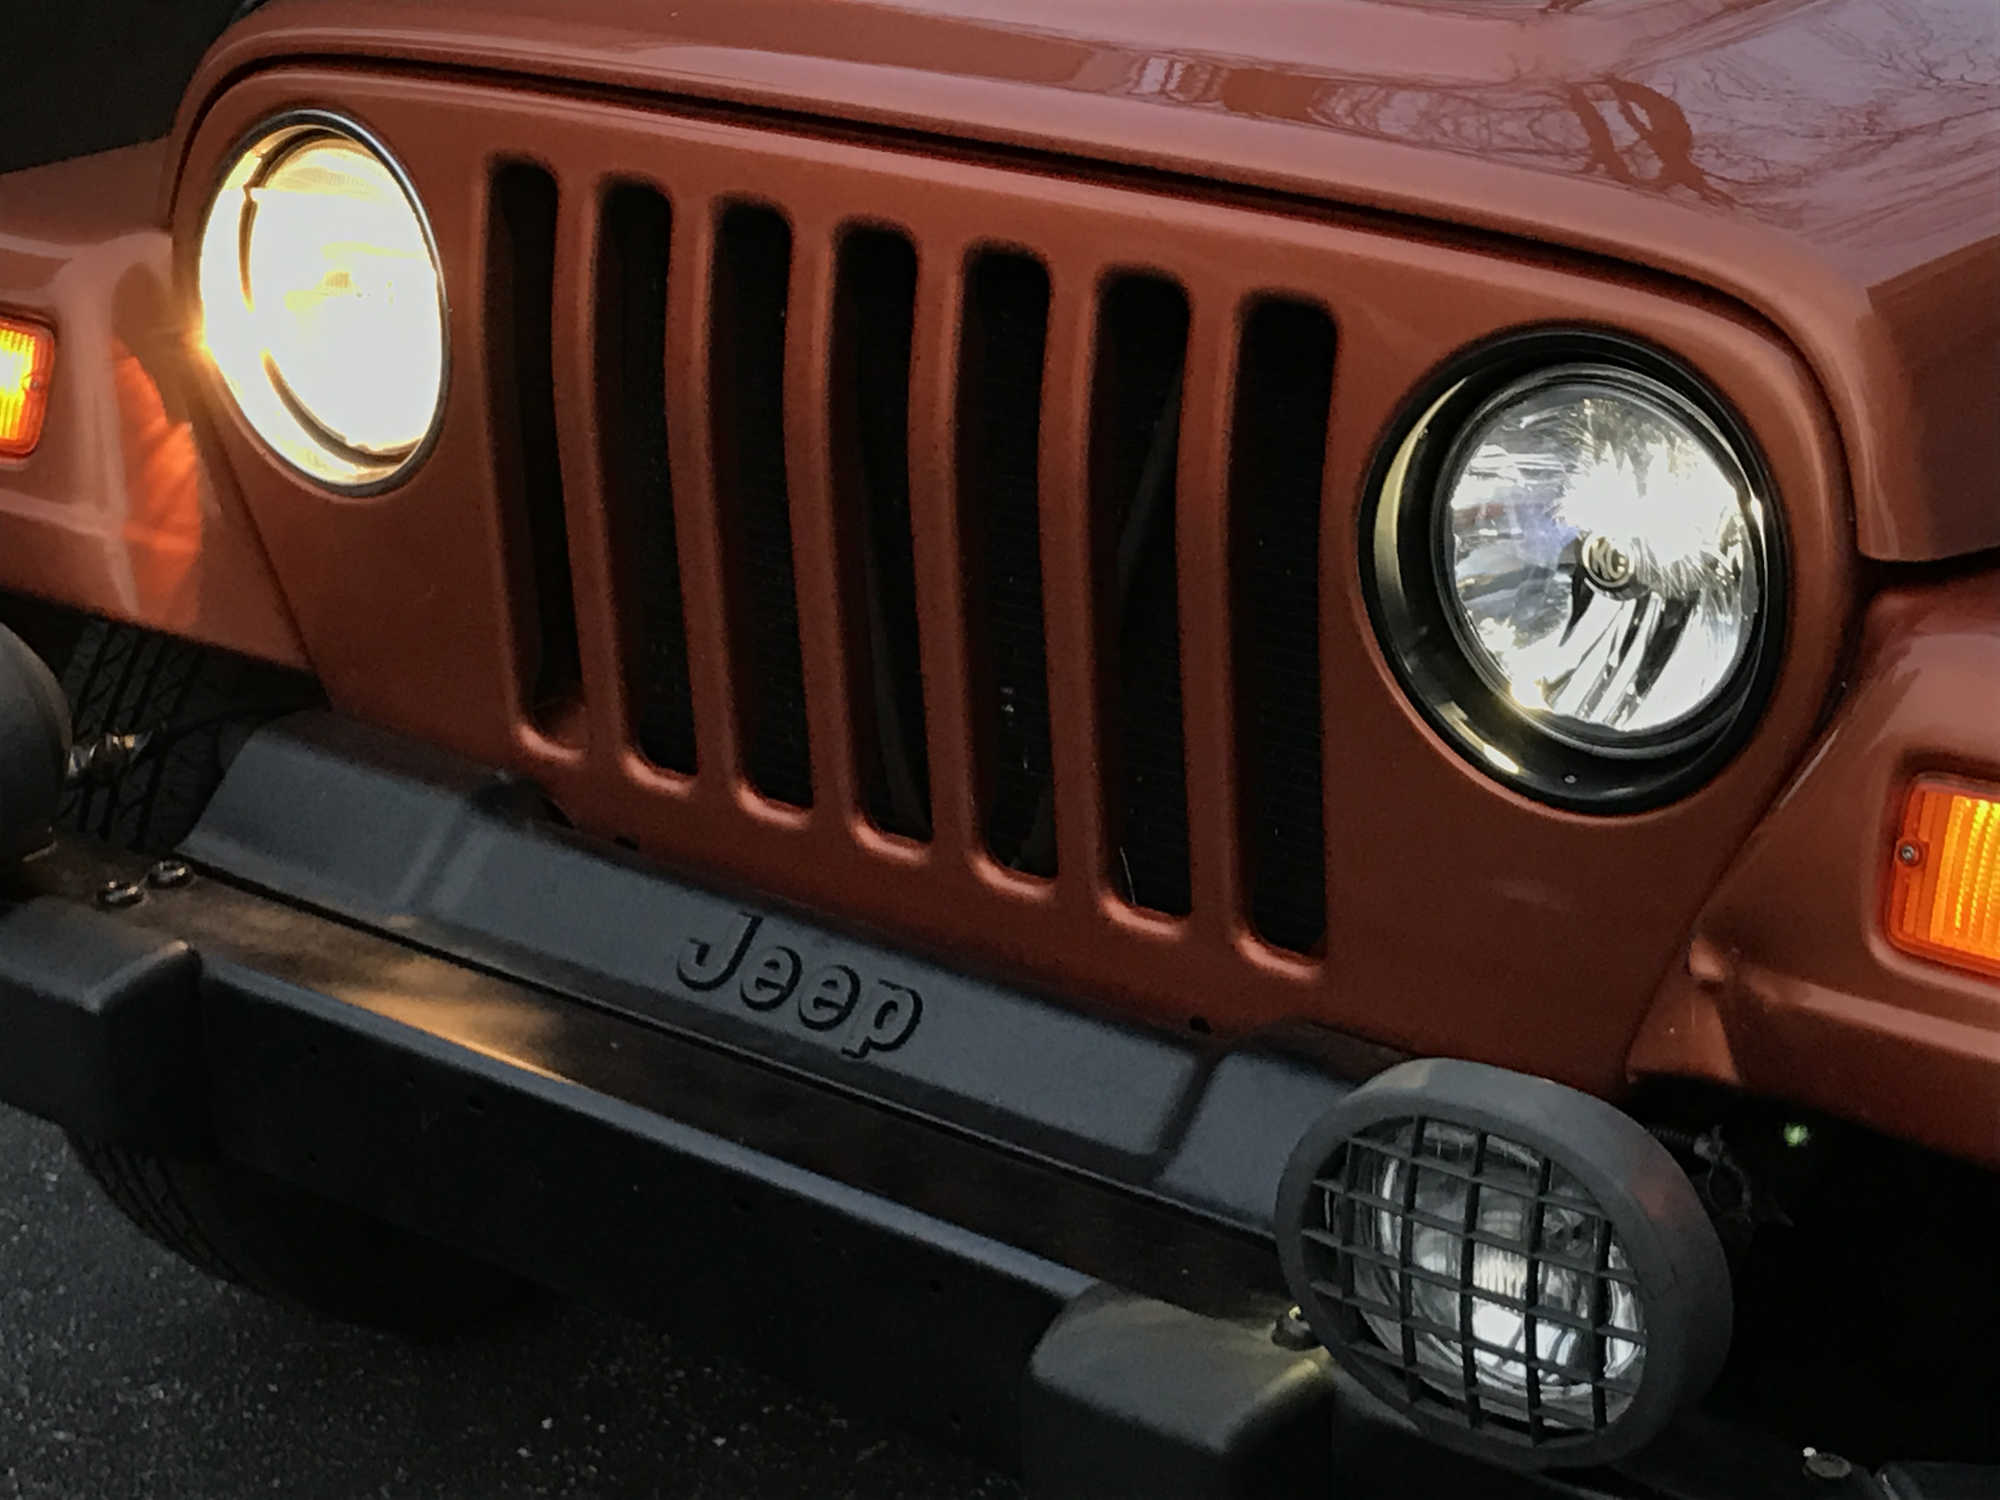
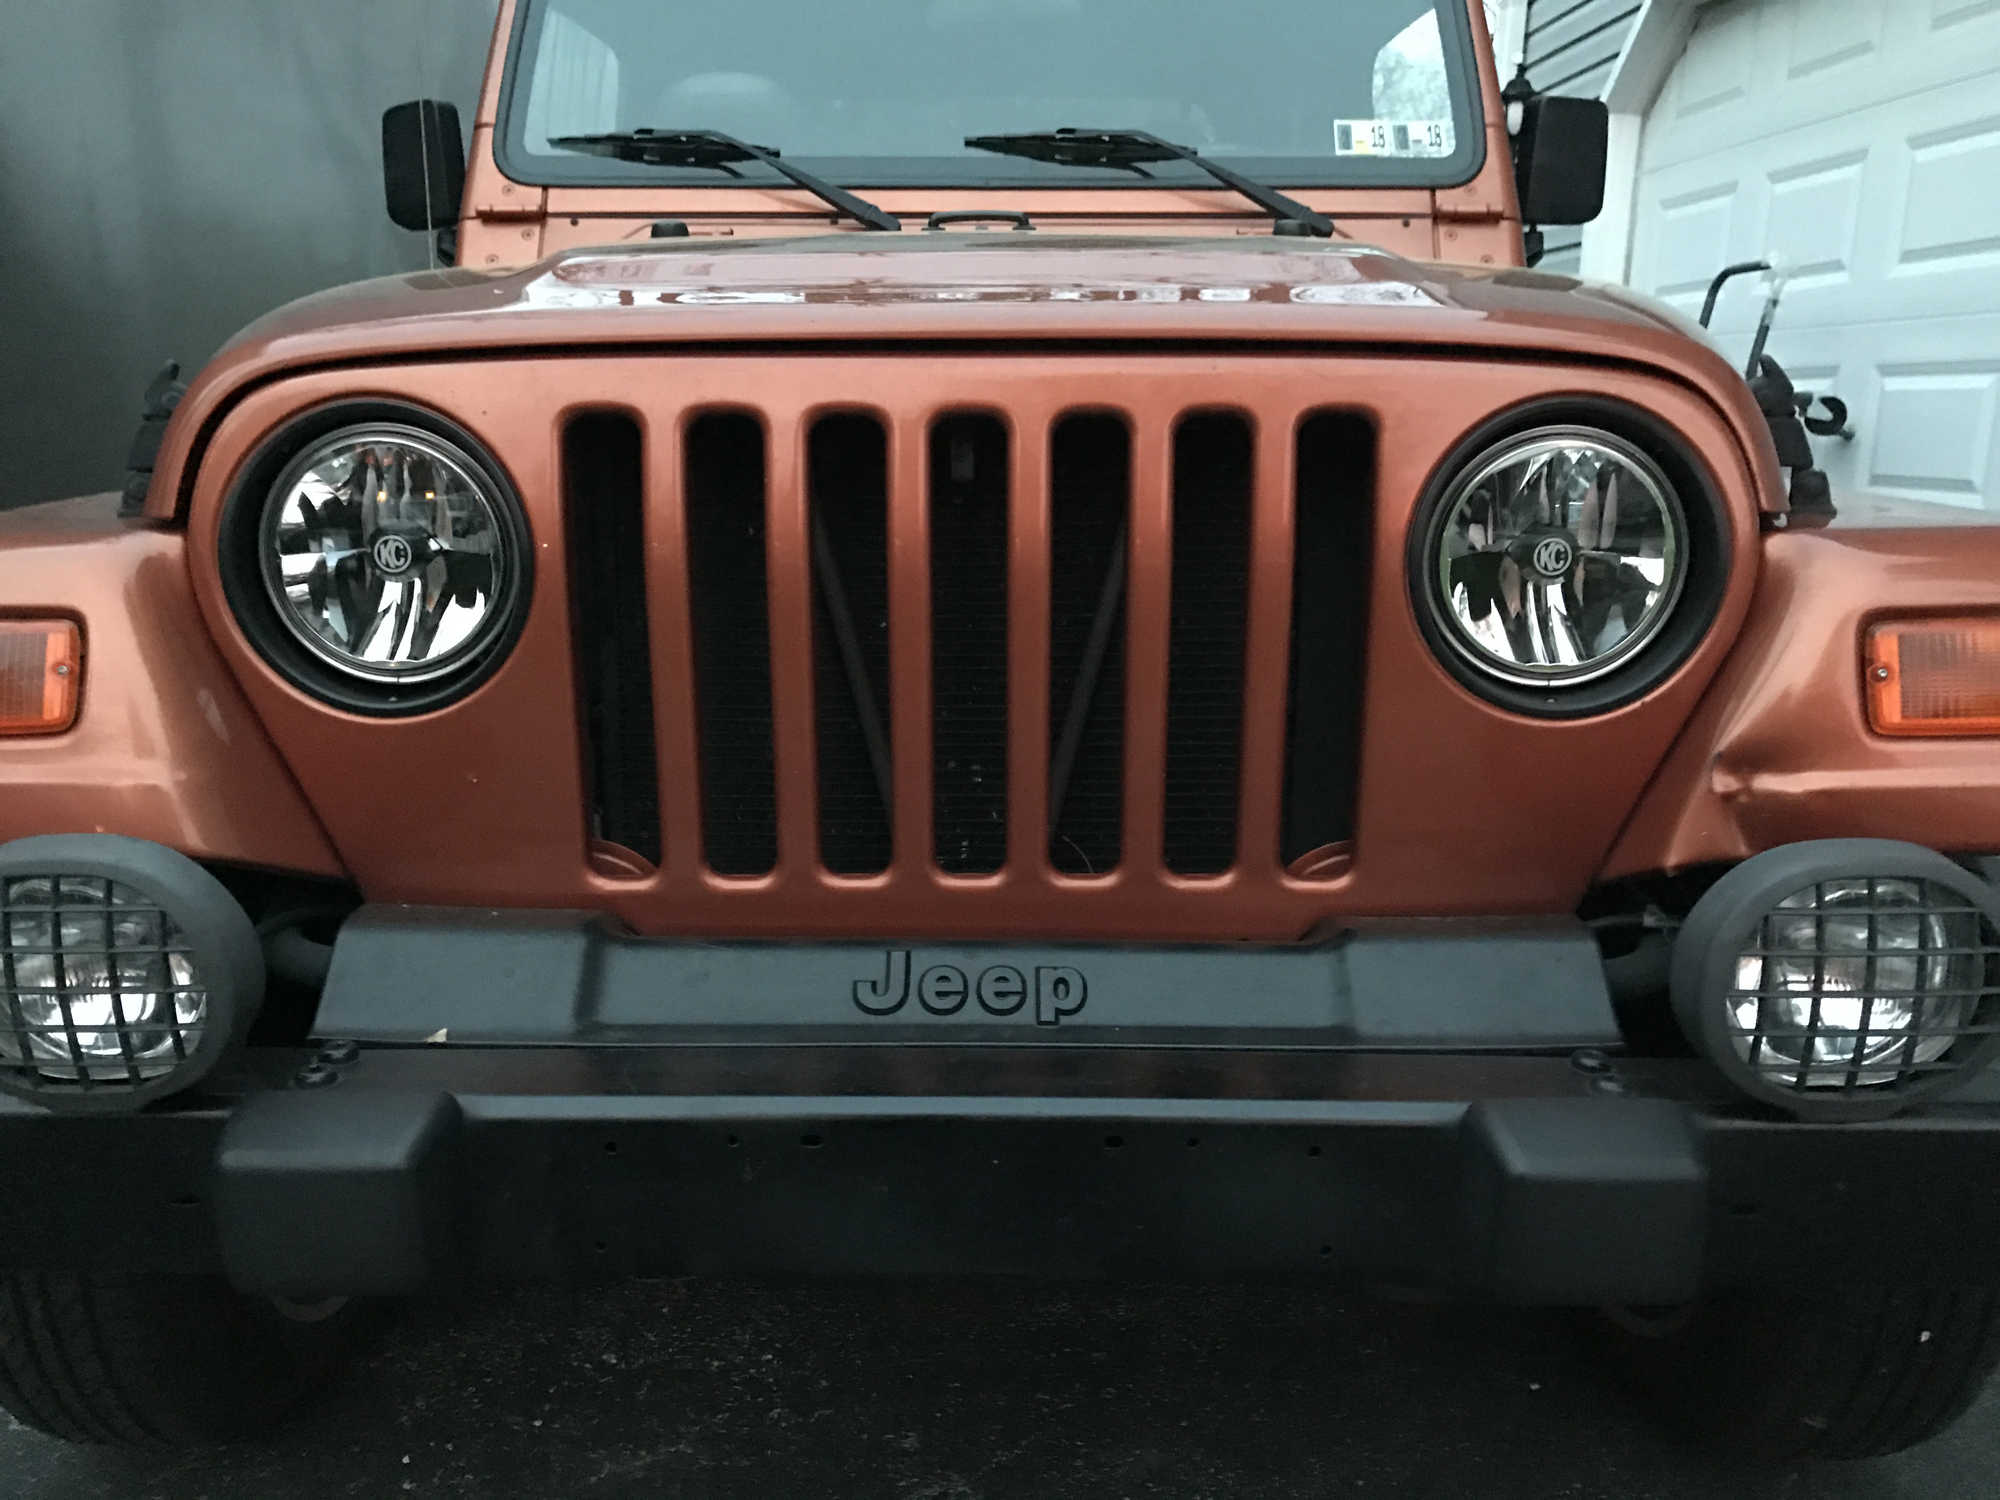
KC Gravity LED Headlight Upgrades
April 24, 2017
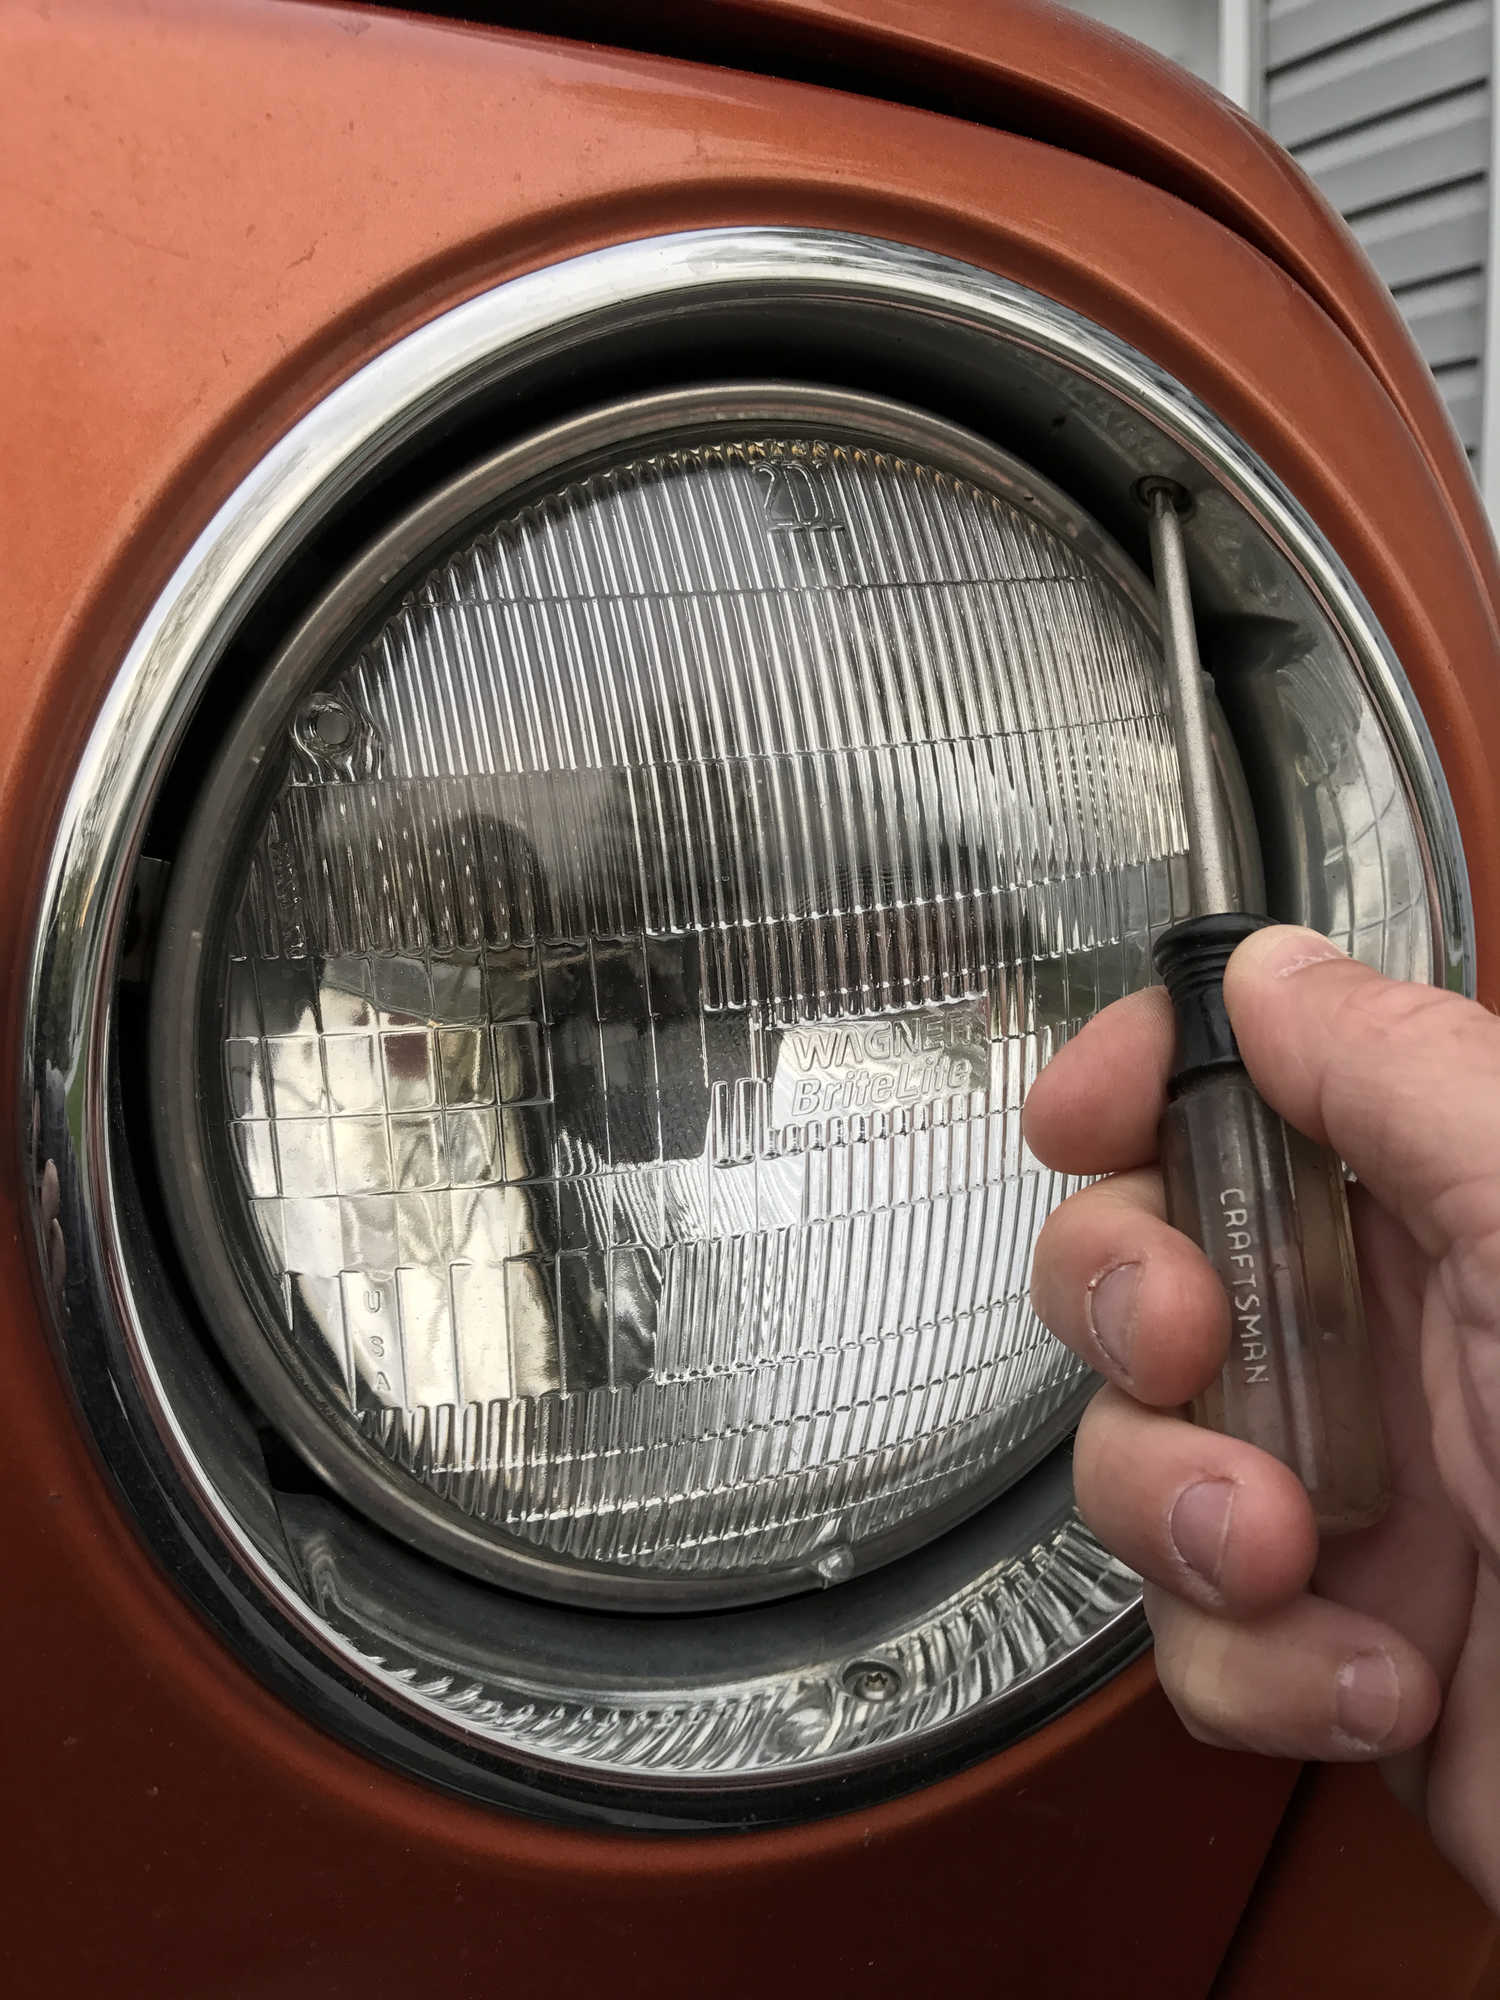
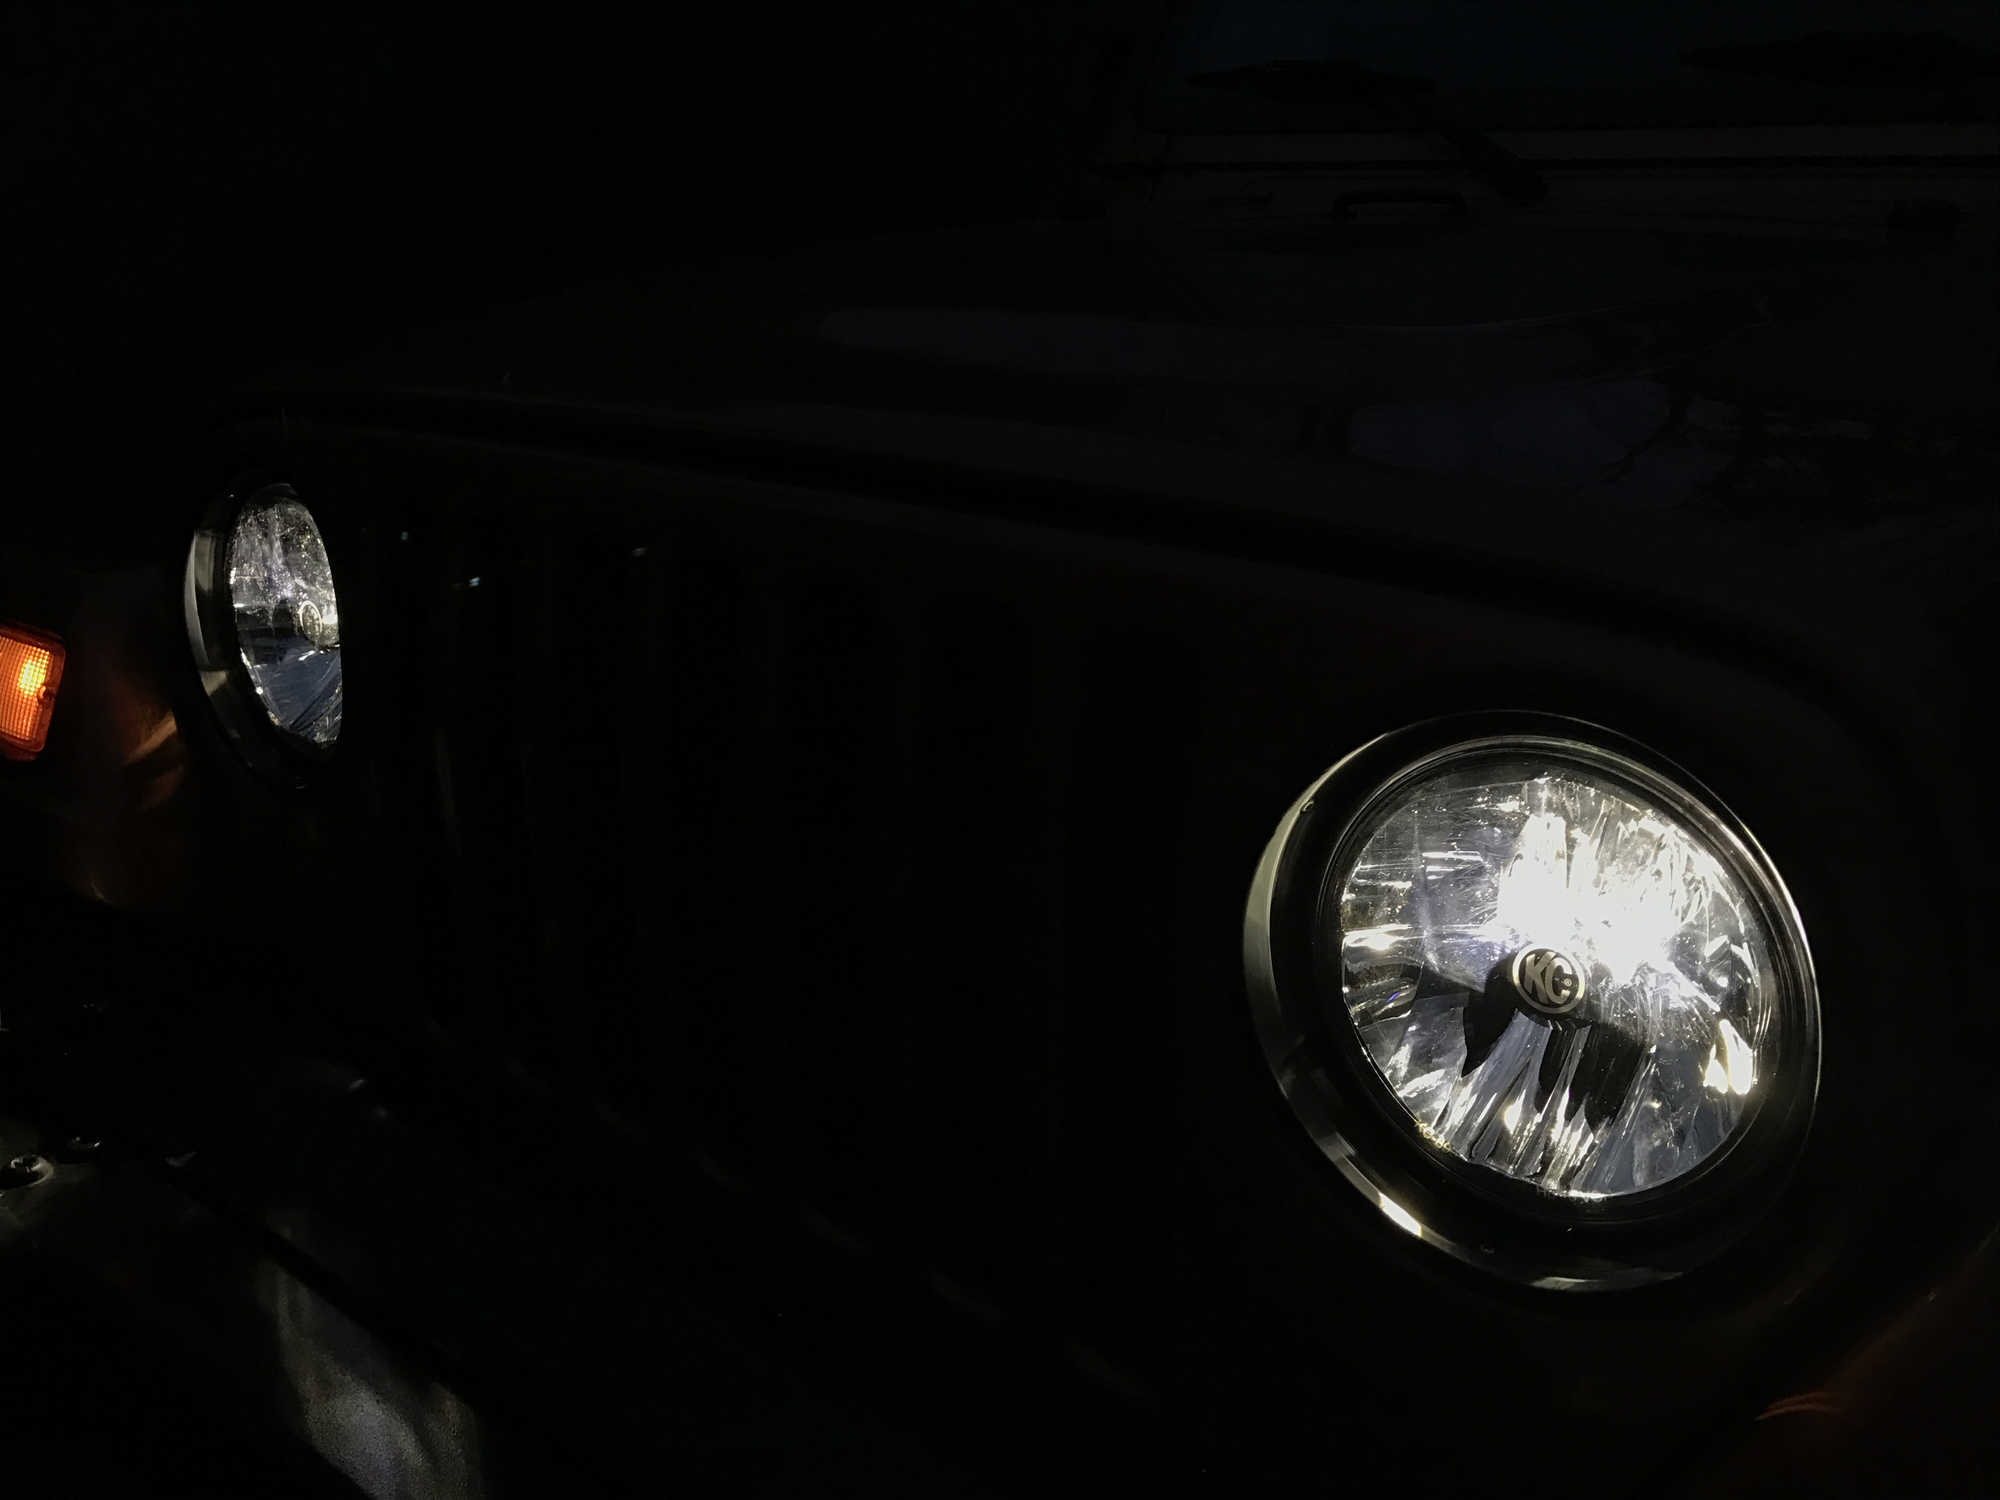
Lighting. The dim halogen headlights just don't illuminate the road as much as i'd like them too. Do they work? Sure, but adding LED headlights will definitely provide much needed vision for night time driving, not to mention they look really cool too! With all the LED options out there, the choices can be overwhelming. Style is great but functionality is better. For Project Copperhead I chose to run the new KC Gravity LED Headlights. Why you ask? Being a Jeep owner for over 25 years, I've always run KC lights on my vehicles. I've even installed a C20 LED light bar on my 07 Dodge Ram! Outside of Quadratec, I am also a country music singer, and well those who listen to country music know all too well that we all sing about KC lights on our vehicles from Florida Georgia Line to Rascal Flatts. So KC Gravity LED Lights are the natural choice for this project.
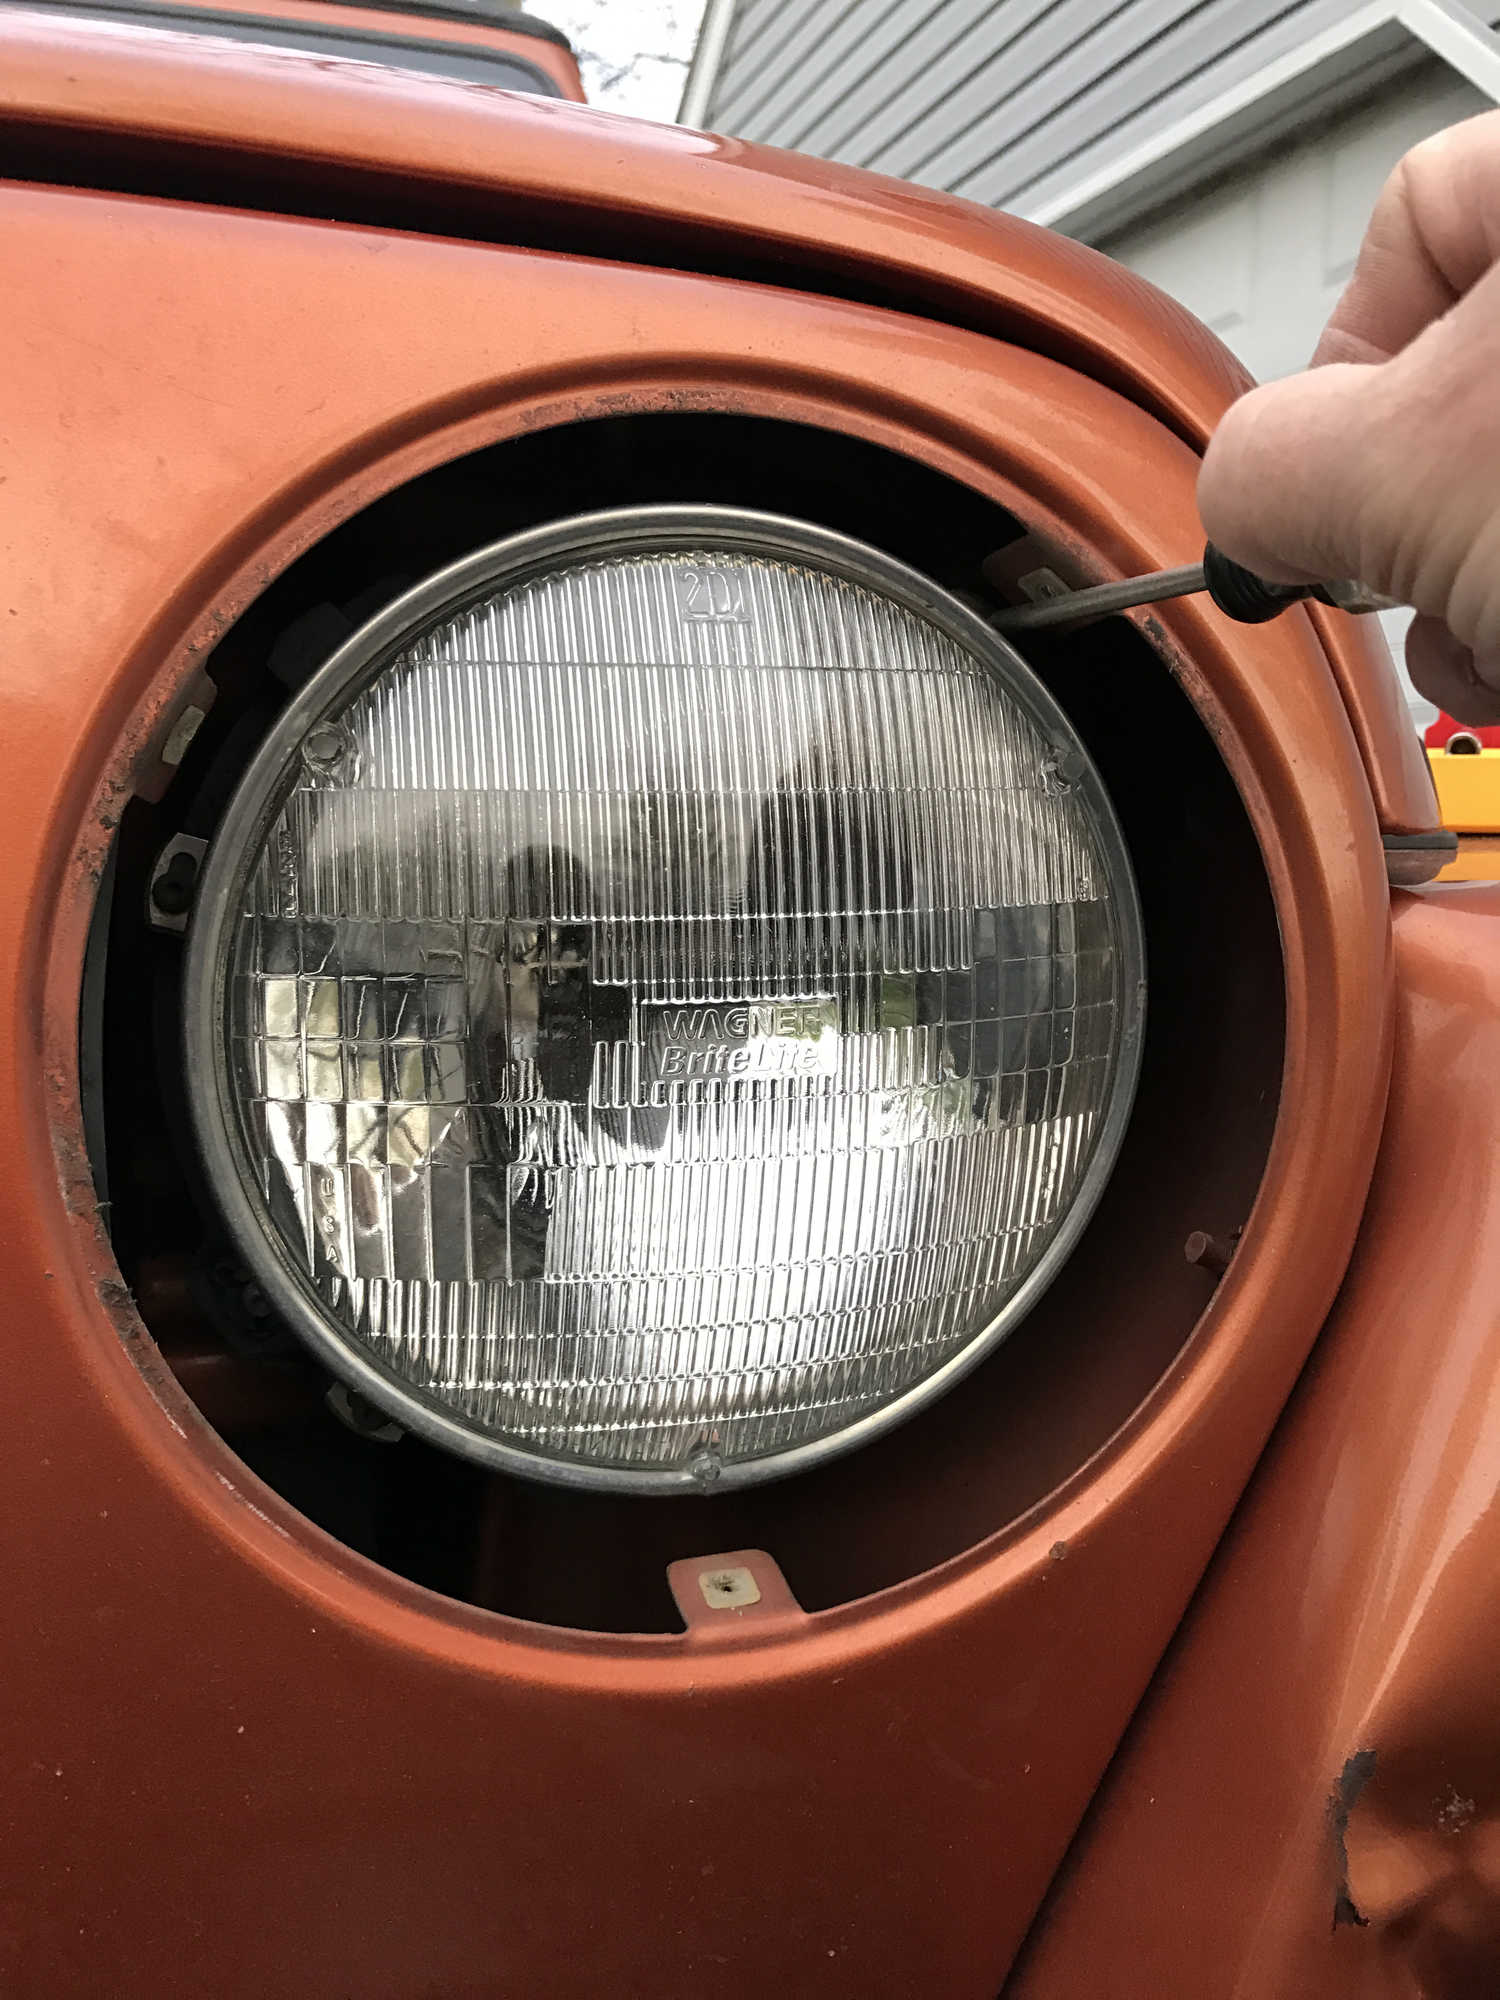
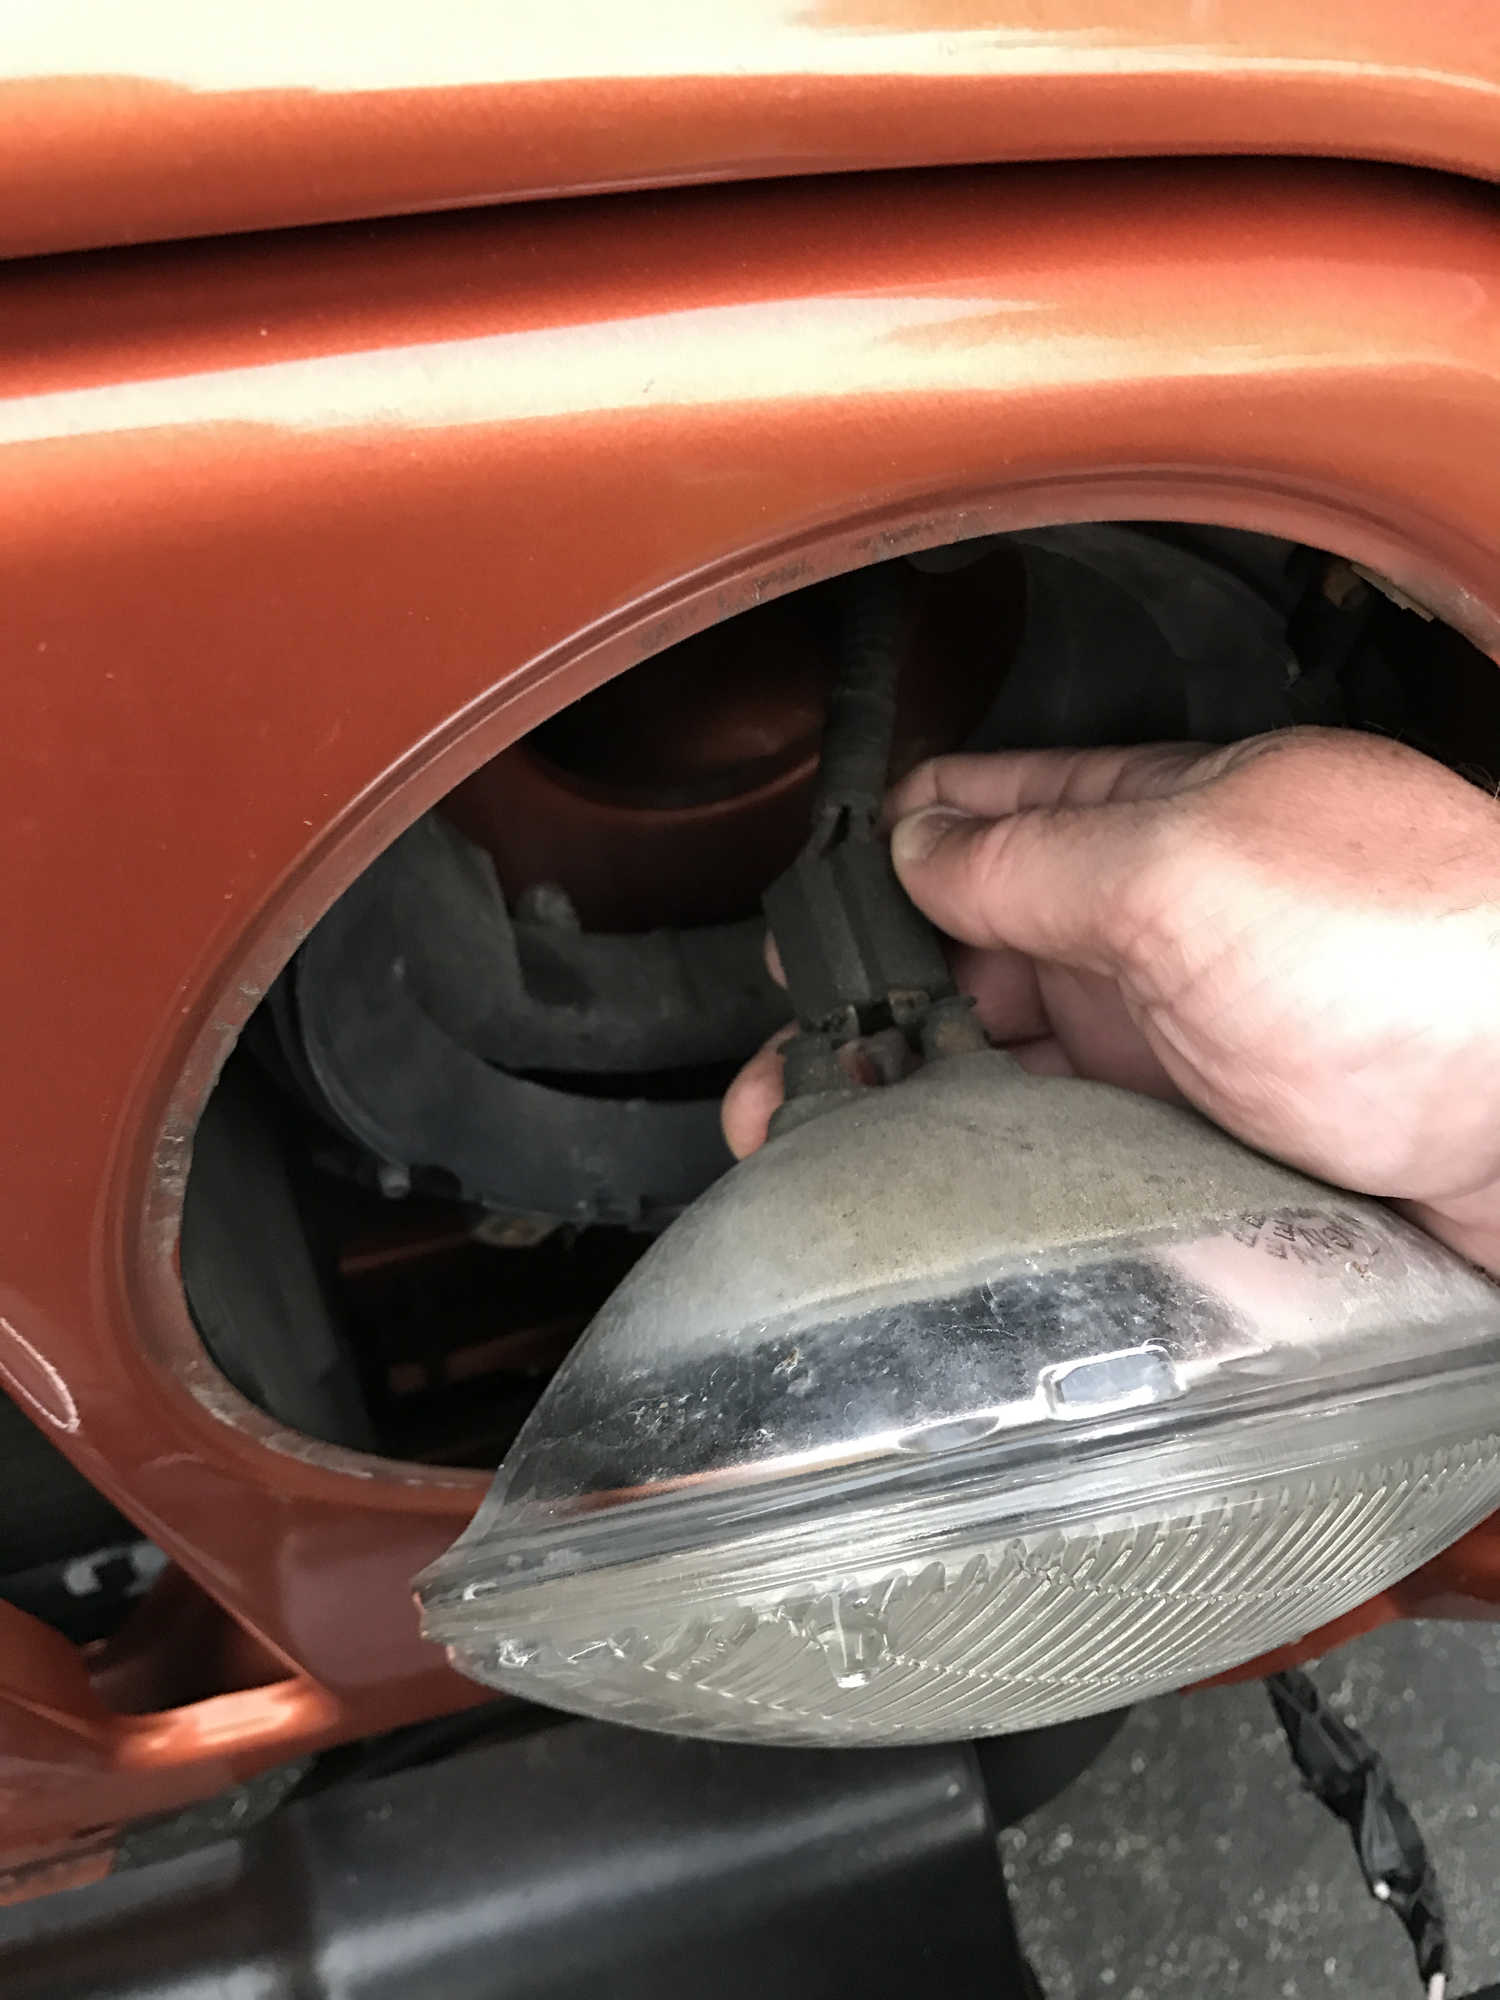
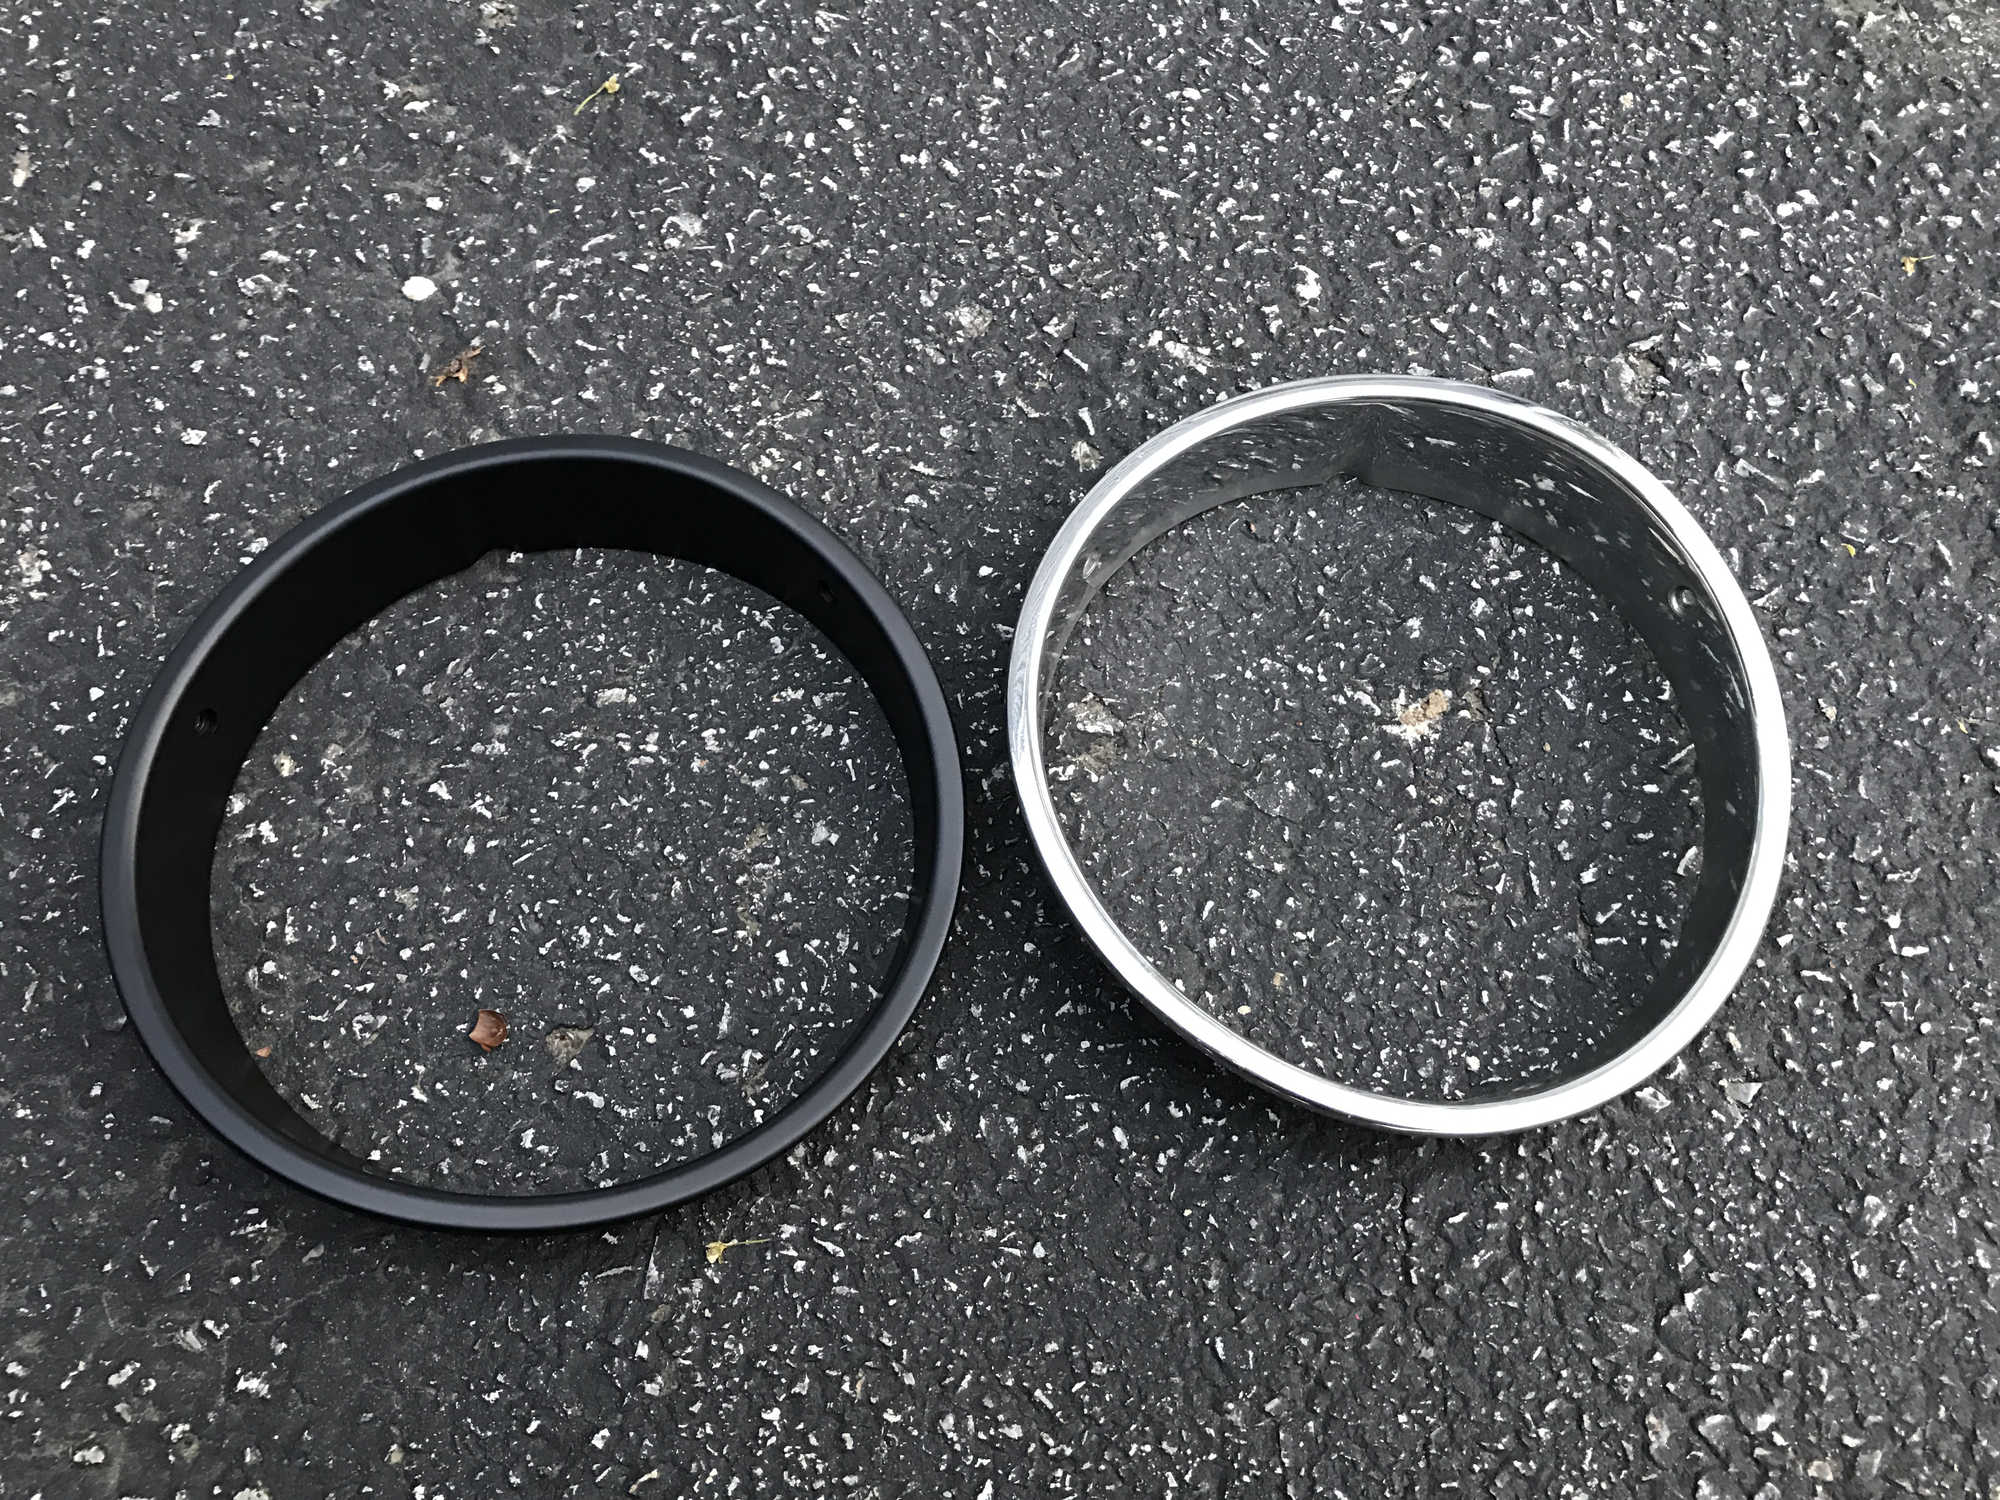
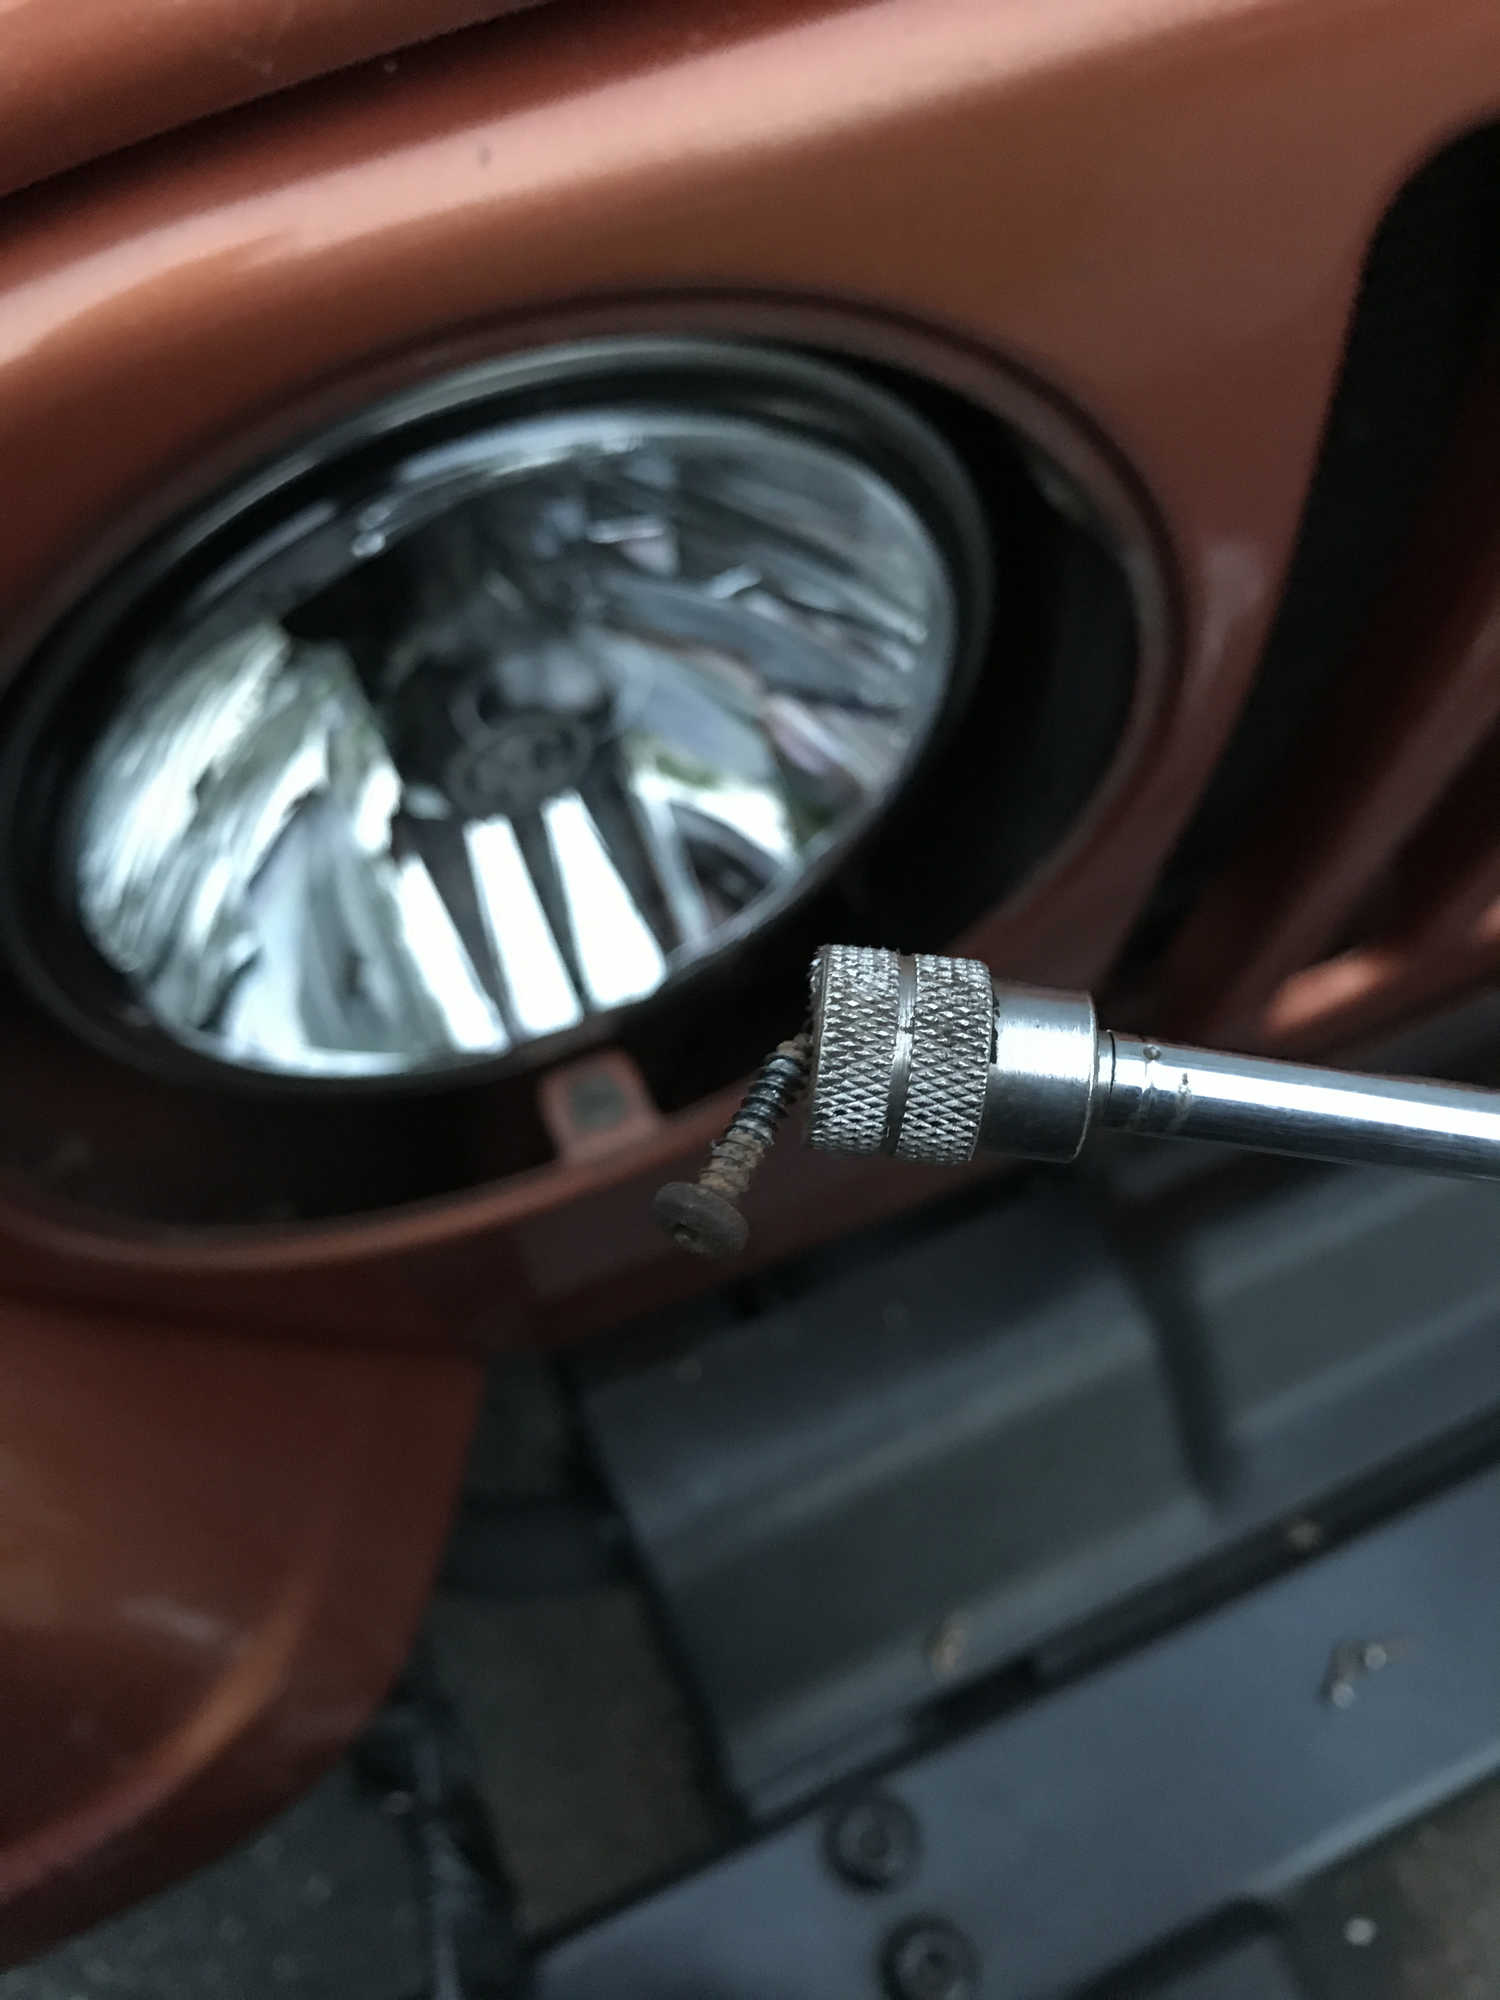
Installation was a breeze and only took 20-30 minutes. The only tool needed was a T15 Torx screwdriver and well if you're anything like me and drop a screw from time to time an extension magnet is a good tool to have handy! For the factory headlights, simply remove the three T15 bezel screws, then the four T15 retaining ring screws and remove the from the grille and unplug the harness plug. Repeat this for the other side and you're done! Installing the KC Gravity LED Headlights install using the factory screws, retaining rings and outer bezels. The KC LED Headlights come with a small packet of dielectric grease that is dabbed on the H4 prongs to protect the electrical connections. For this installation I decided to add the Rugged Ridge Black Headlight Bezels to better match the LED lights while giving a new fresh look to the front of Copperhead. DONE!
Installation was a breeze and only took 20-30 minutes. The only tool needed was a T15 Torx screwdriver and well if you're anything like me and drop a screw from time to time an extension magnet is a good tool to have handy! For the factory headlights, simply remove the three T15 bezel screws, then the four T15 retaining ring screws and remove the from the grille and unplug the harness plug. Repeat this for the other side and you're done! Installing the KC Gravity LED Headlights install using the factory screws, retaining rings and outer bezels. The KC LED Headlights come with a small packet of dielectric grease that is dabbed on the H4 prongs to protect the electrical connections. For this installation I decided to add the Rugged Ridge Black Headlight Bezels to better match the LED lights while giving a new fresh look to the front of Copperhead. DONE!


Kentrol Replacement Hood Hold Downs
May 09, 2017
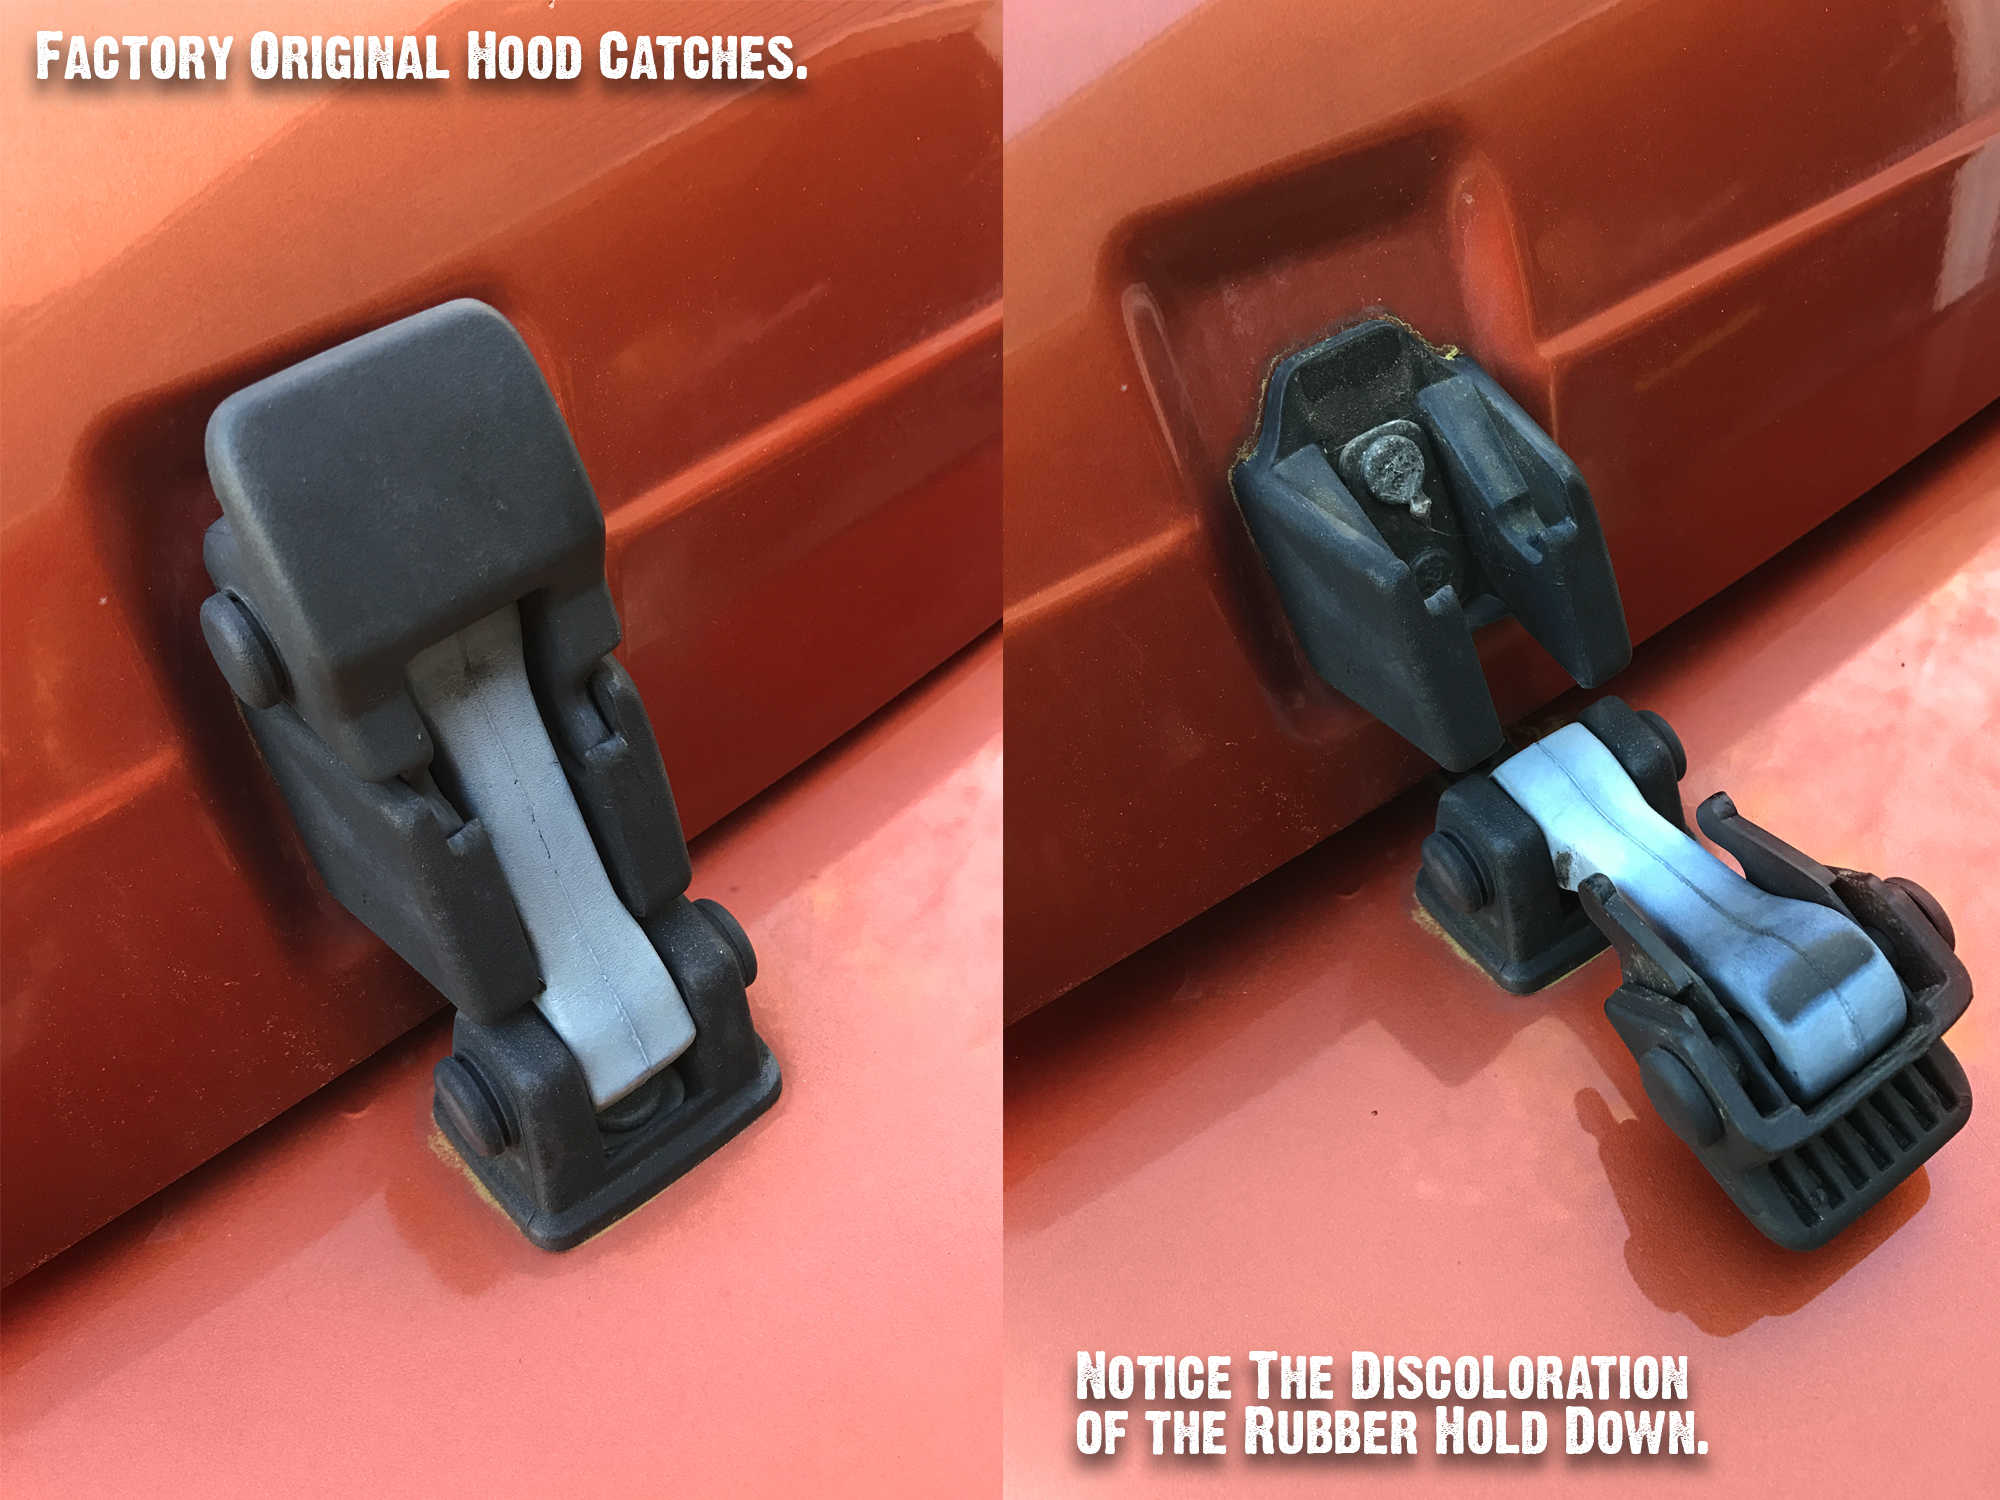
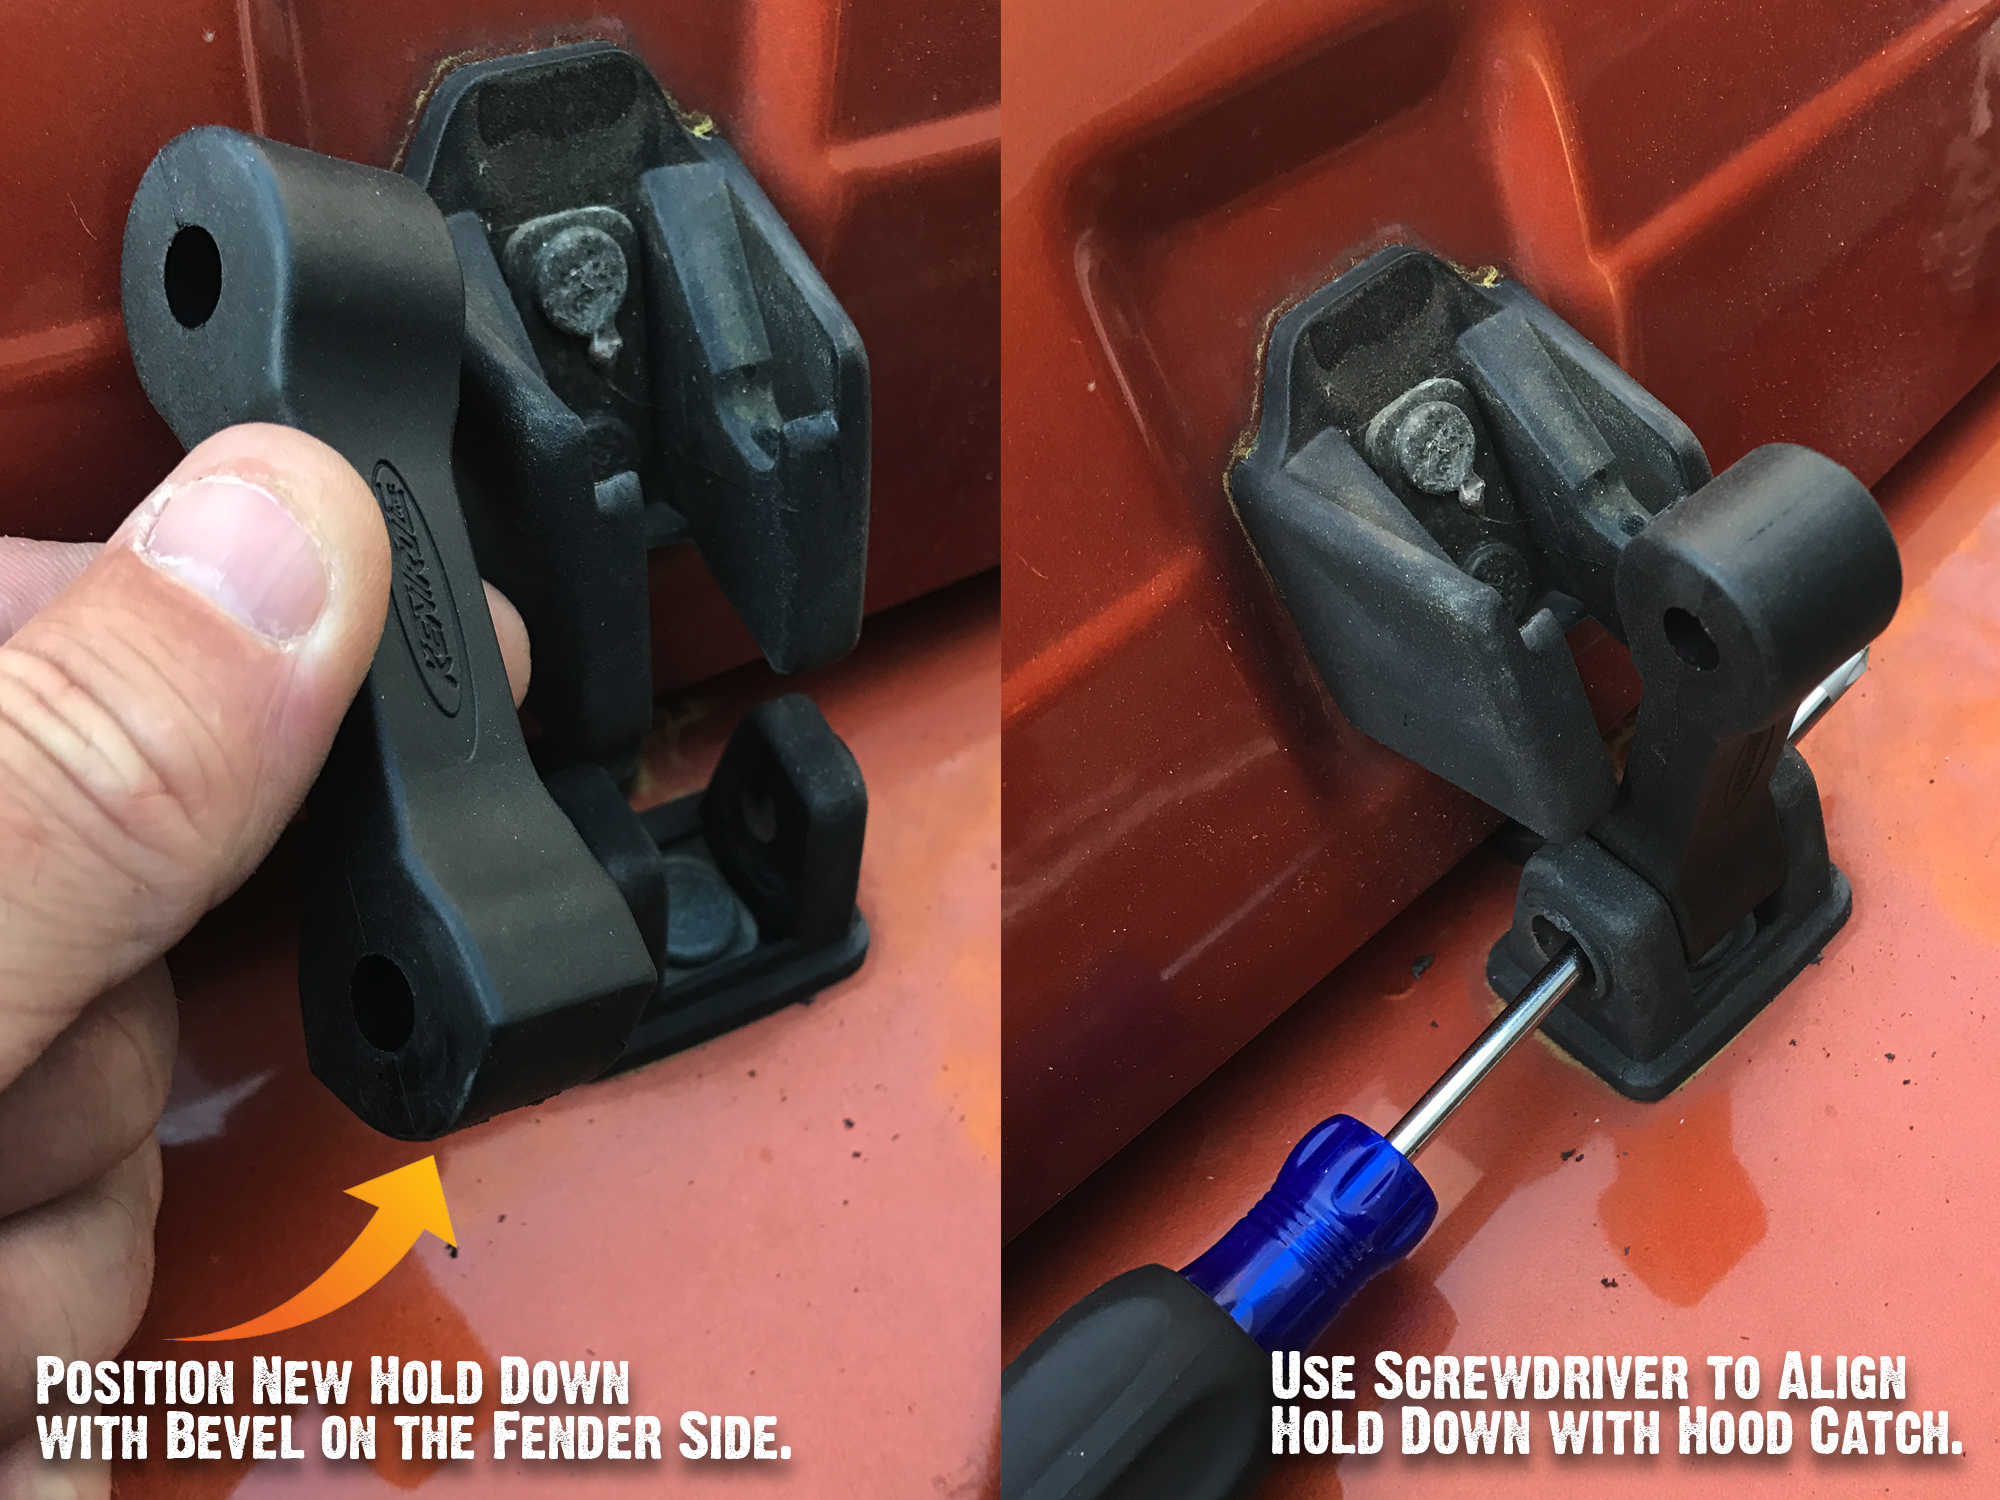
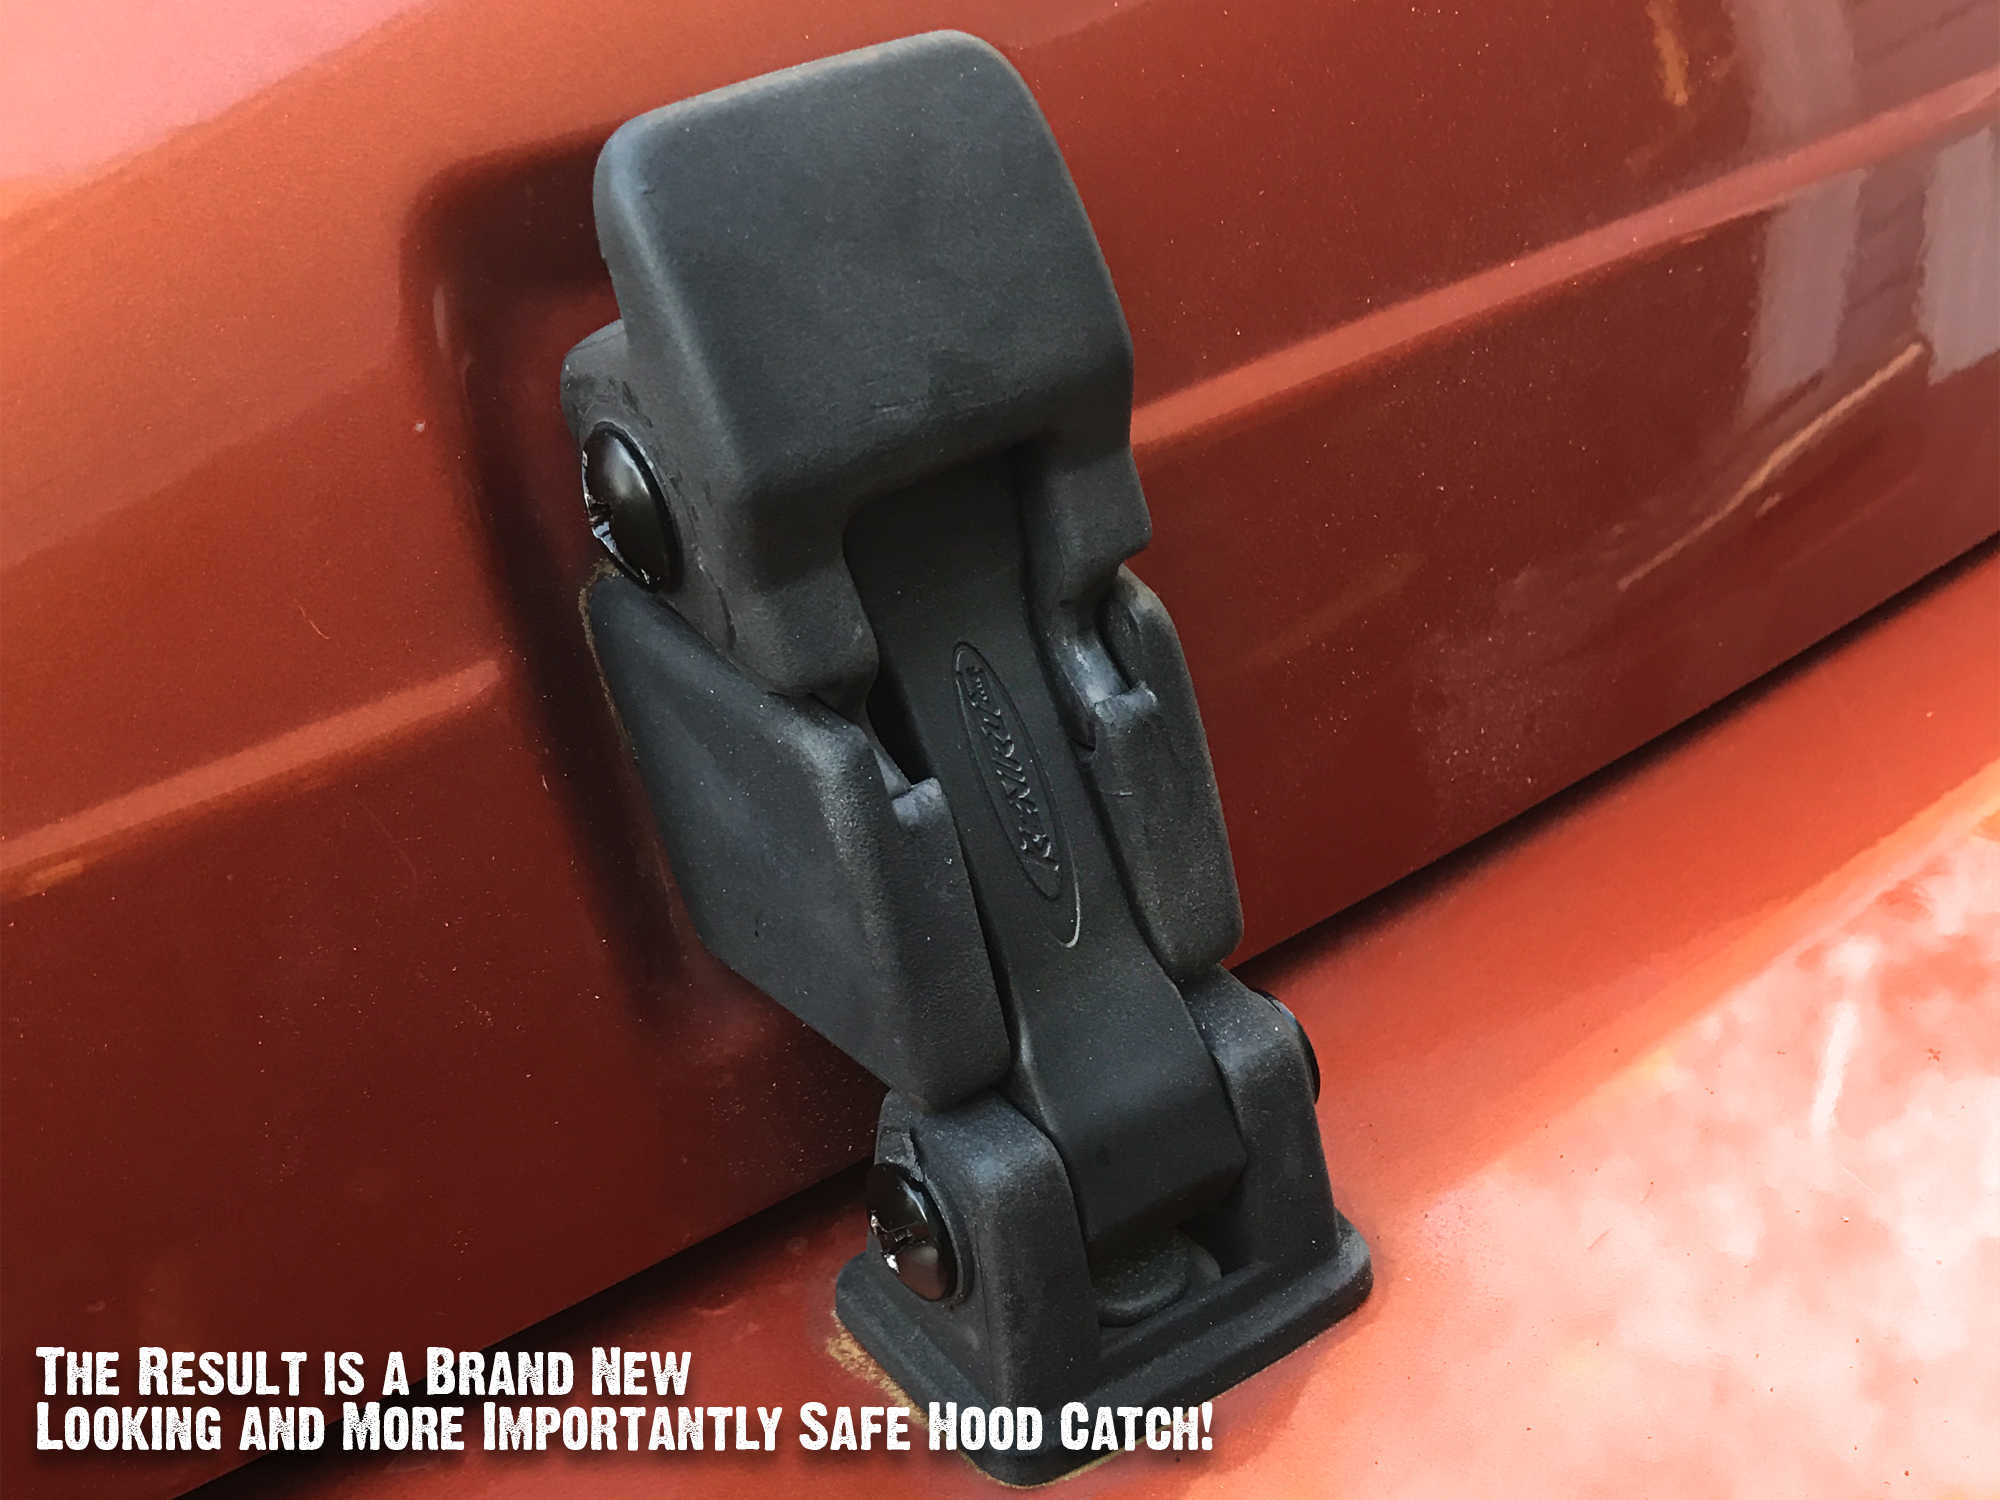
Keeping my hood closed is kind of a big deal and just looking at the factory rubber “dog bones” that make up the Hood Catches I knew it was only a matter of time they would fail. The question was to upgrade the entire hood catch, or replace the “dog bones”. Since my hood catches are in decent shape I opted for the Kentrol Replacement Hood Hold Down Set. These durable black polyurethane rubber hold downs are an great upgrade and easy to install!
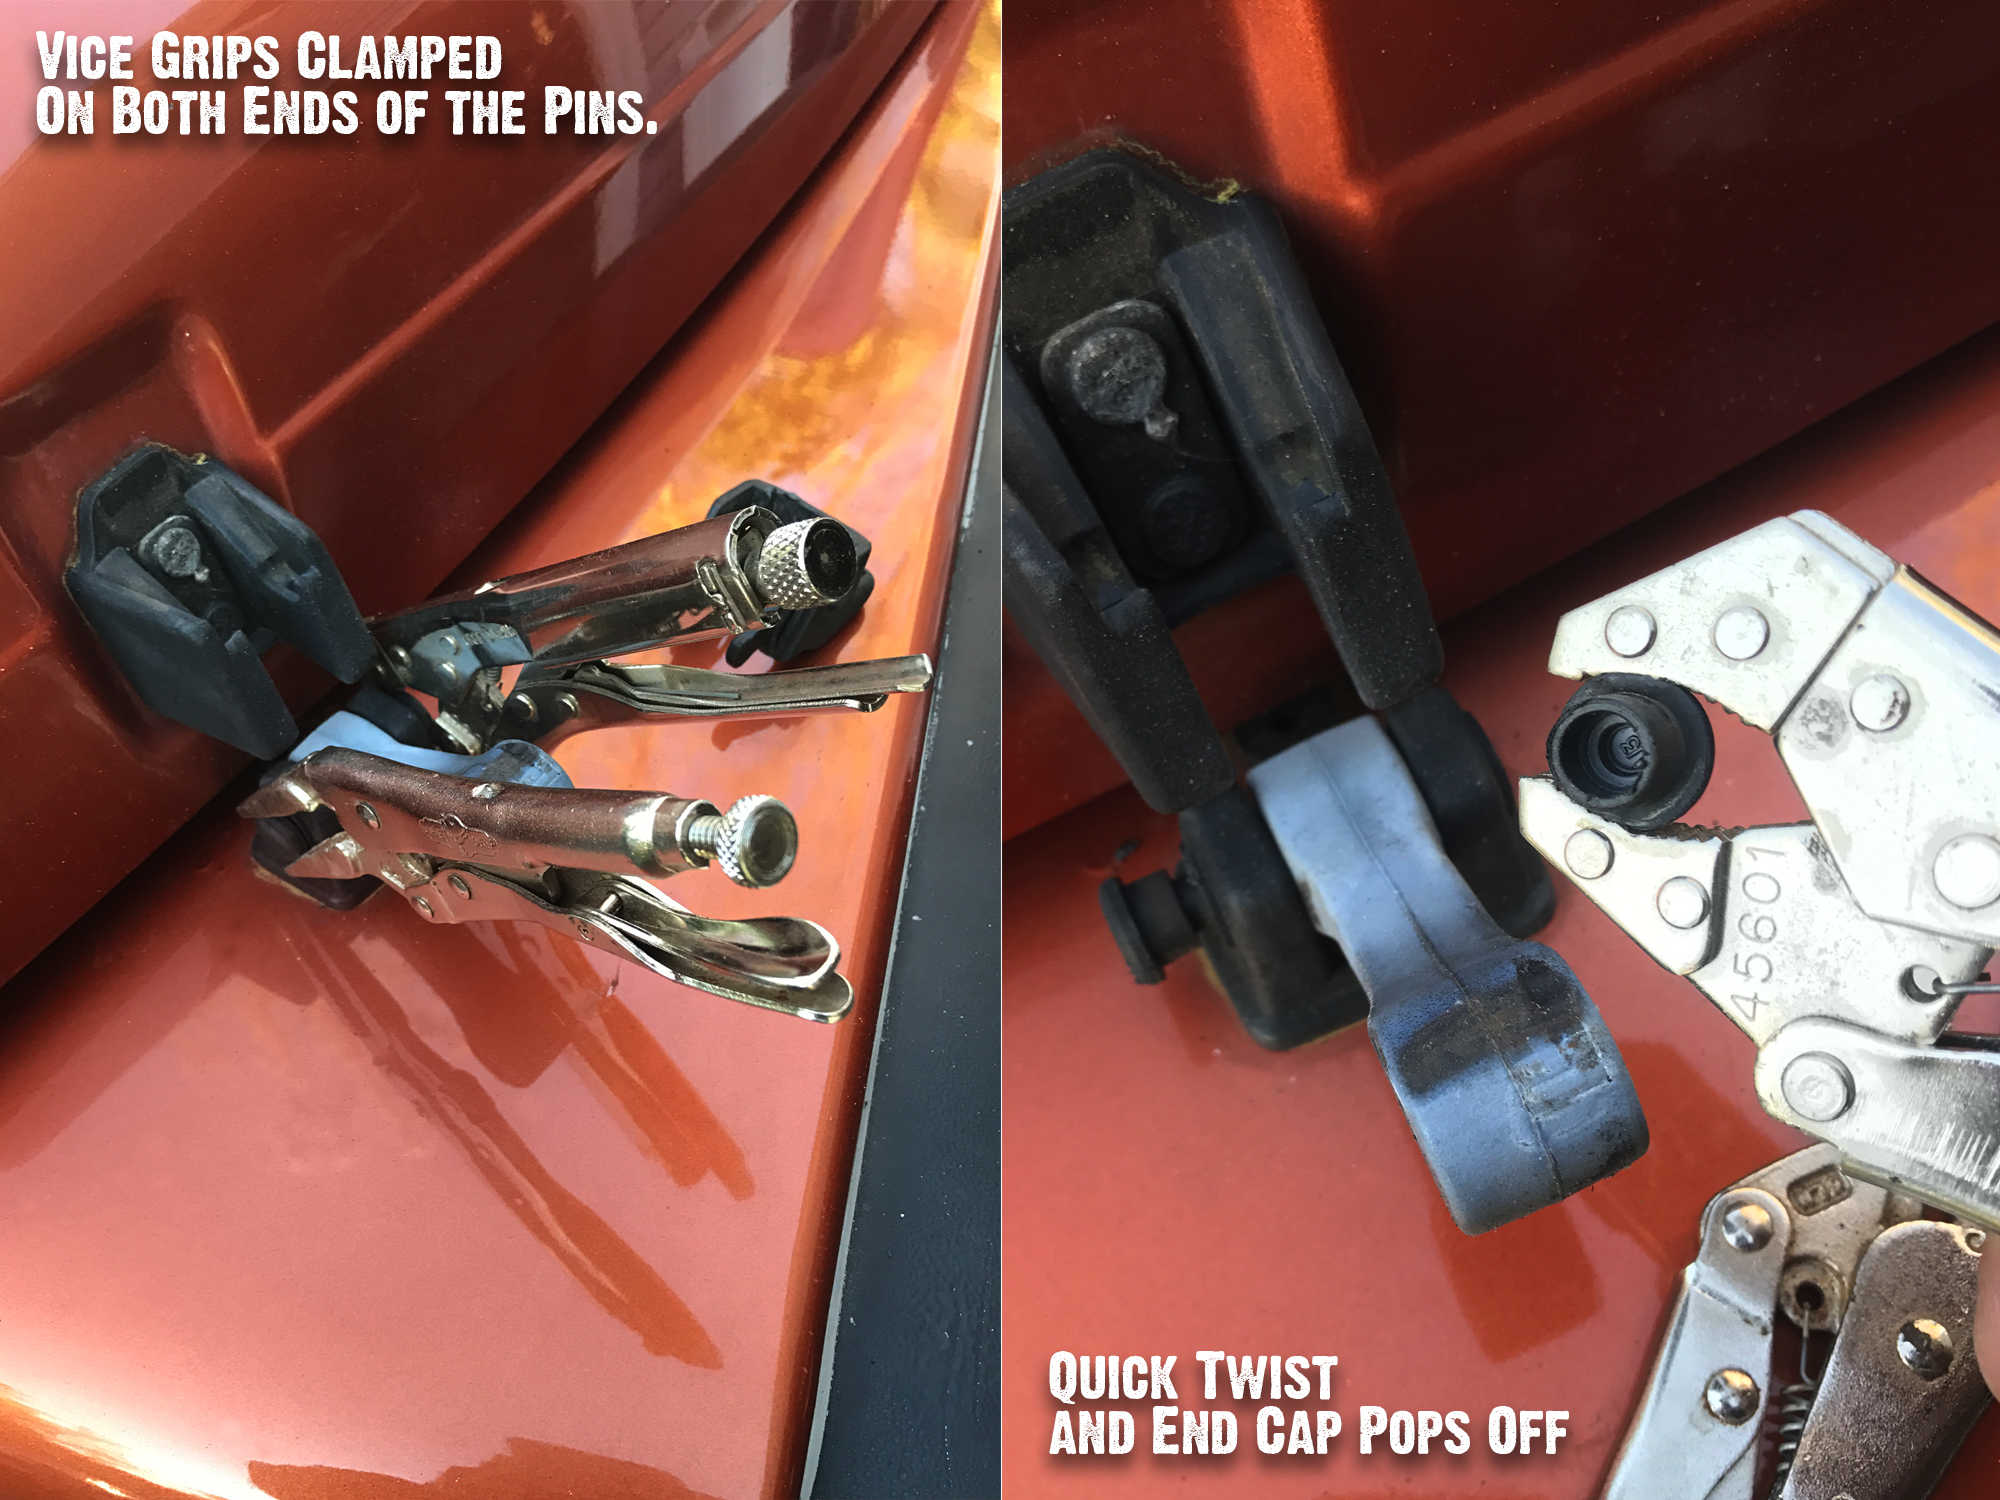
Installation only took a couple minutes with a pair of Phillips screwdrivers and I opted used a set of vice grips to remove the hold worn out rubber hold downs. The factory pins have to be broken off to be removed, this is where the vice grips came into play. Simply clamp down on each end of the pins (see photos) and break off the end cap and they slide right out. As you can see from the side by side comparison, this was a much needed upgrade! Be sure when installing the new hold downs, the beveled edge attaches to the fender side of the hood catches. They are a tight fit, so I just used a screwdriver to align the hole for the new pins. Once aligned, just simply slide the new pins through and tighten with a pair of Phillips head screwdrivers. Repeat this process for all four pins, and within no time you’ll have “like new” hood catches!
Installation only took a couple minutes with a pair of Phillips screwdrivers and I opted used a set of vice grips to remove the hold worn out rubber hold downs. The factory pins have to be broken off to be removed, this is where the vice grips came into play. Simply clamp down on each end of the pins (see photos) and break off the end cap and they slide right out. As you can see from the side by side comparison, this was a much needed upgrade! Be sure when installing the new hold downs, the beveled edge attaches to the fender side of the hood catches. They are a tight fit, so I just used a screwdriver to align the hole for the new pins. Once aligned, just simply slide the new pins through and tighten with a pair of Phillips head screwdrivers. Repeat this process for all four pins, and within no time you’ll have “like new” hood catches!

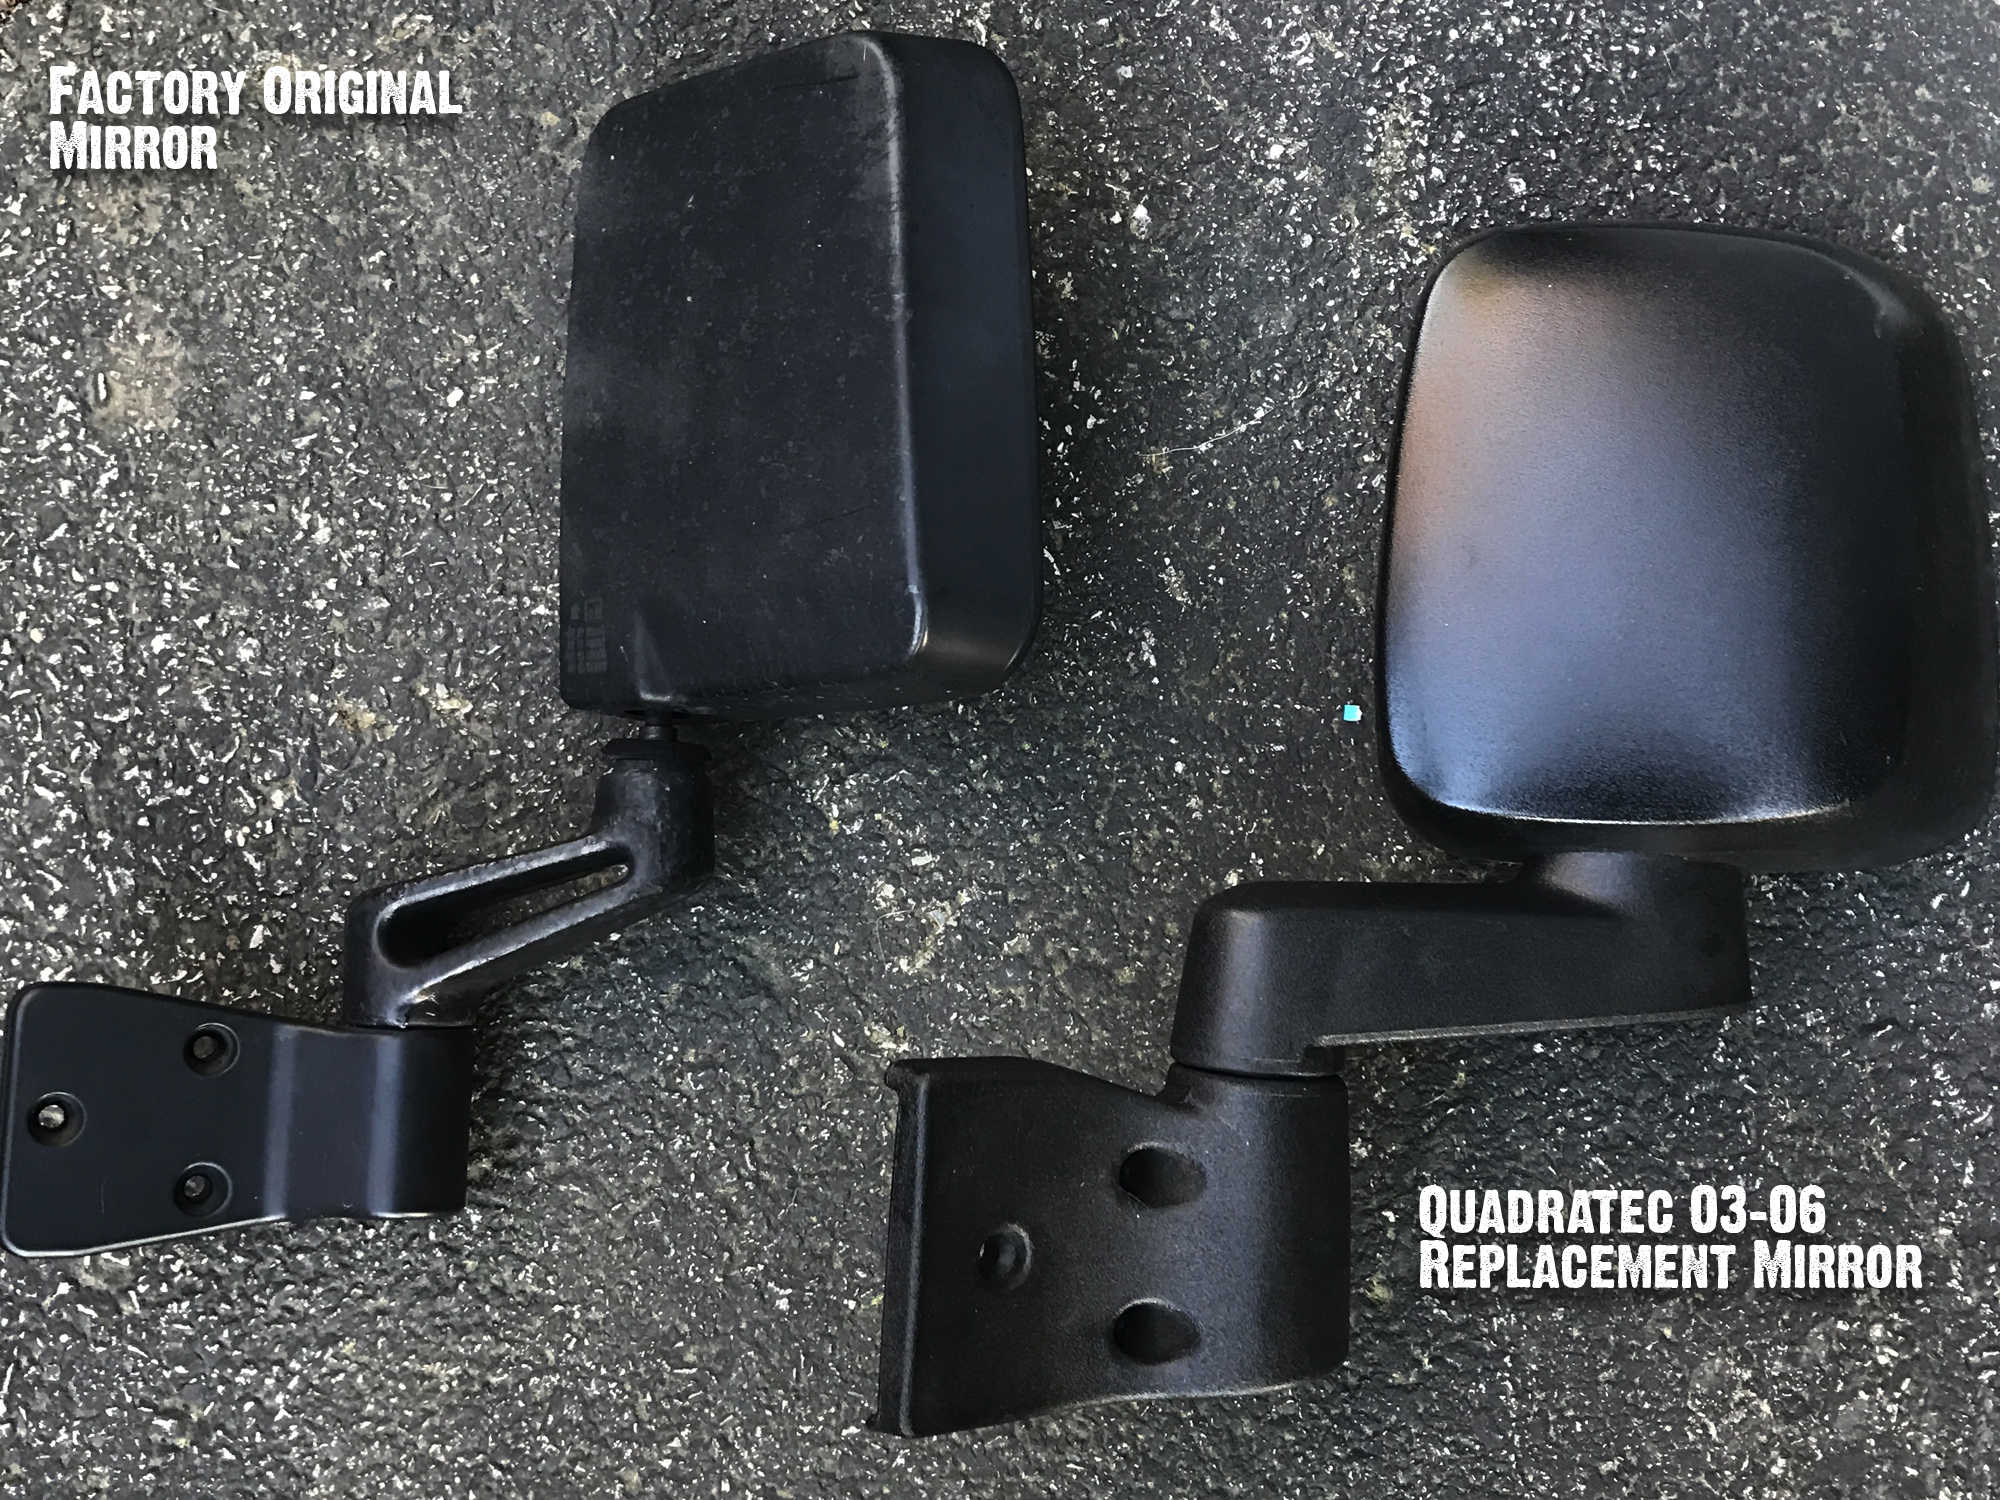
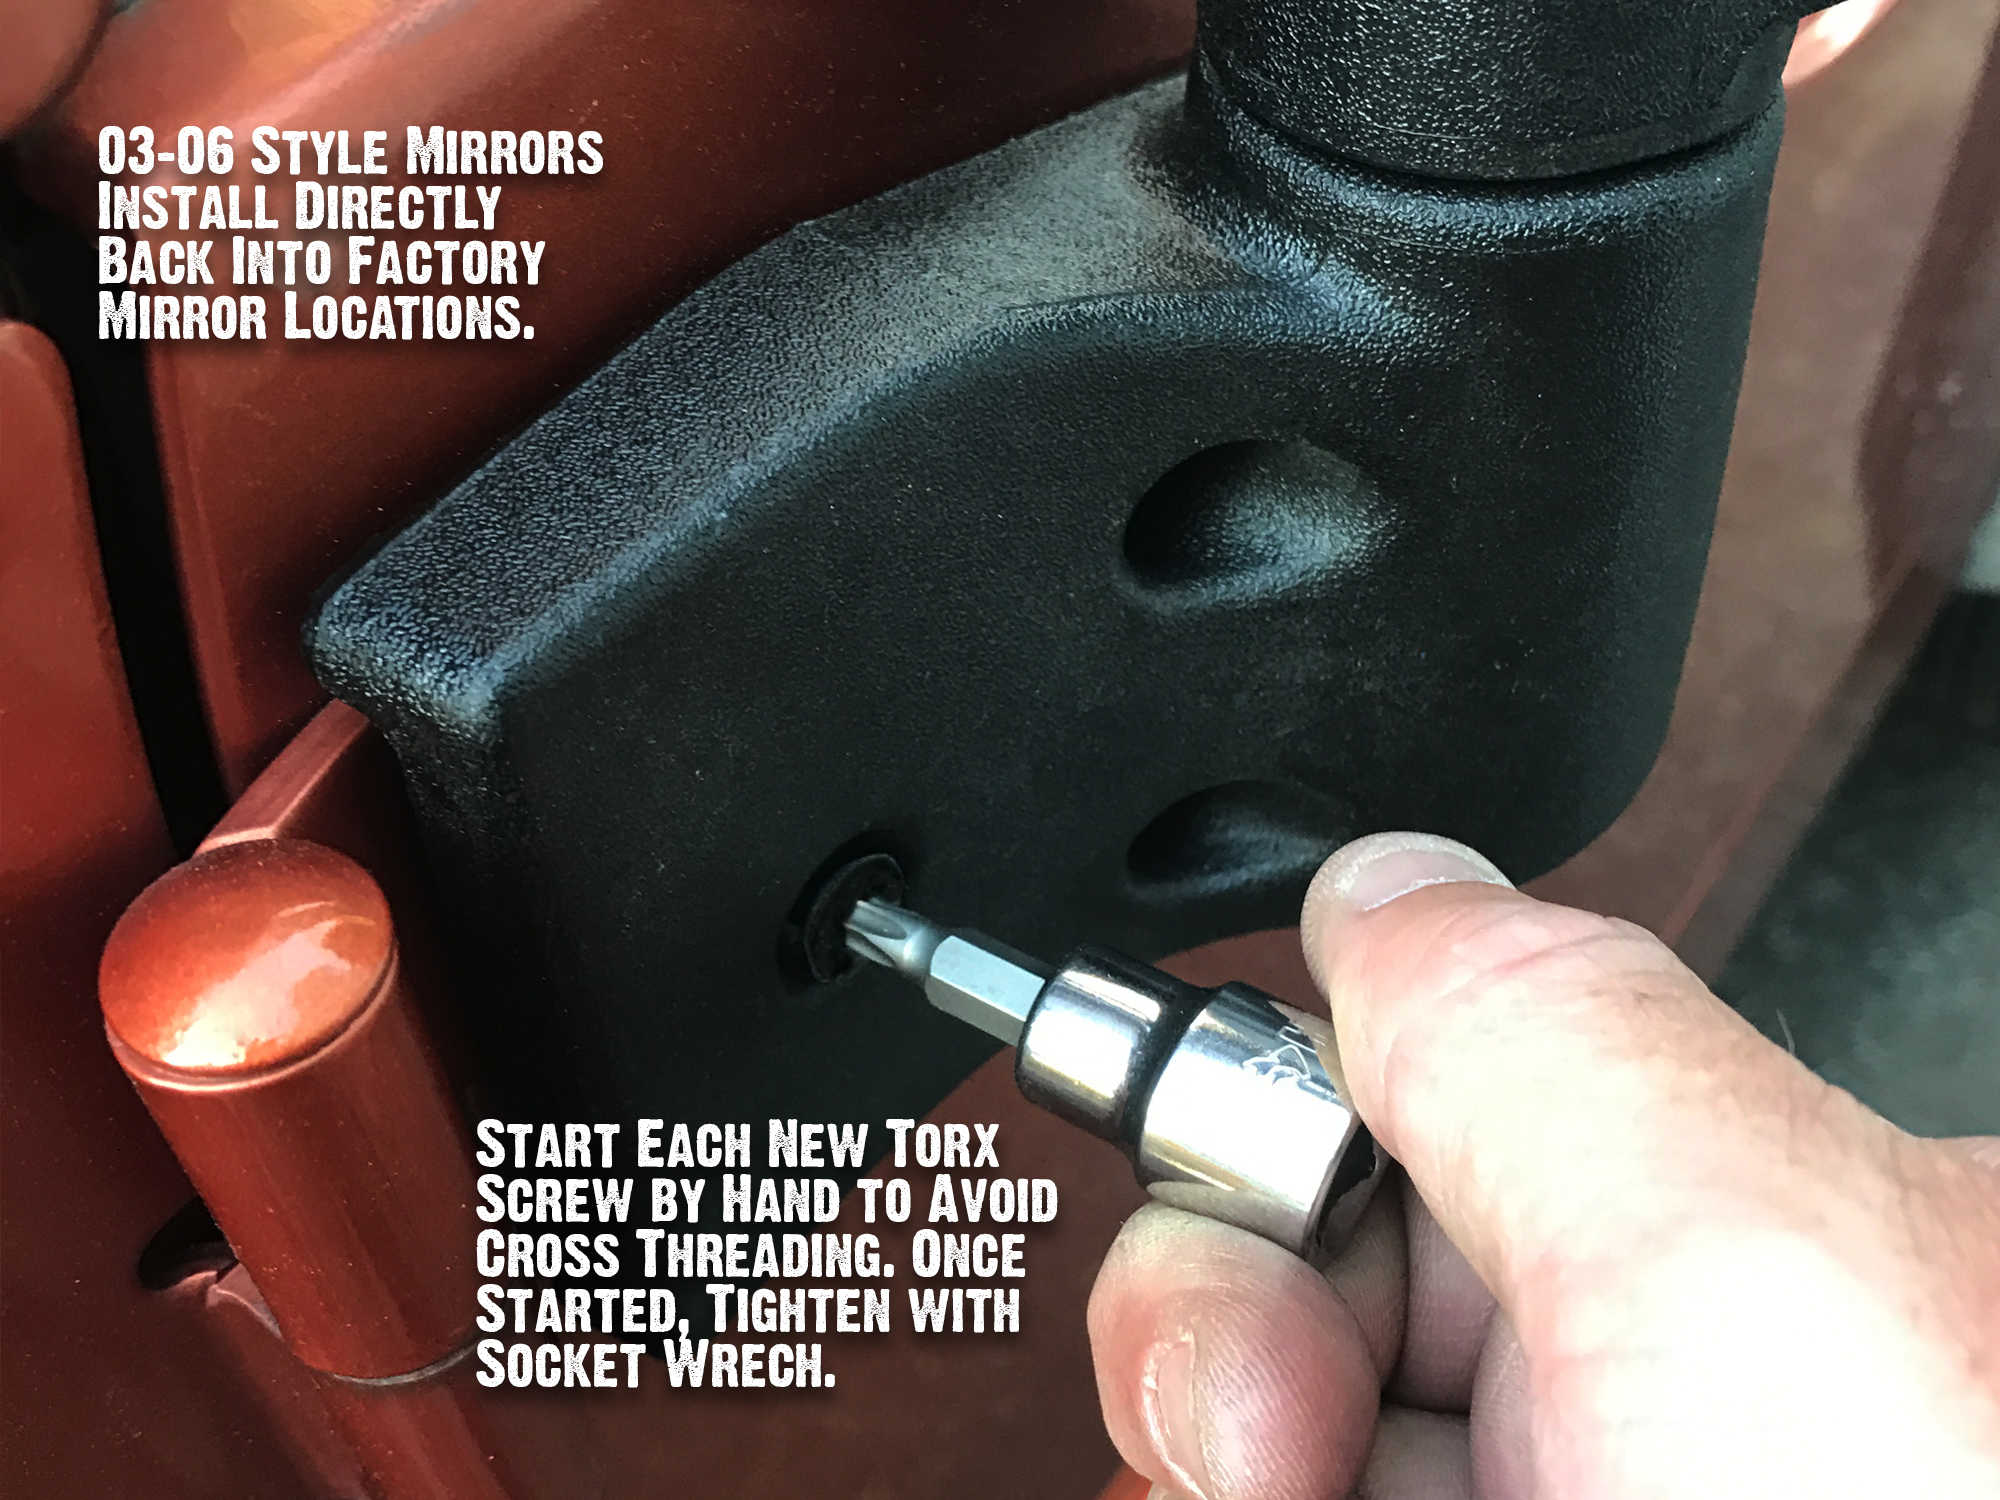
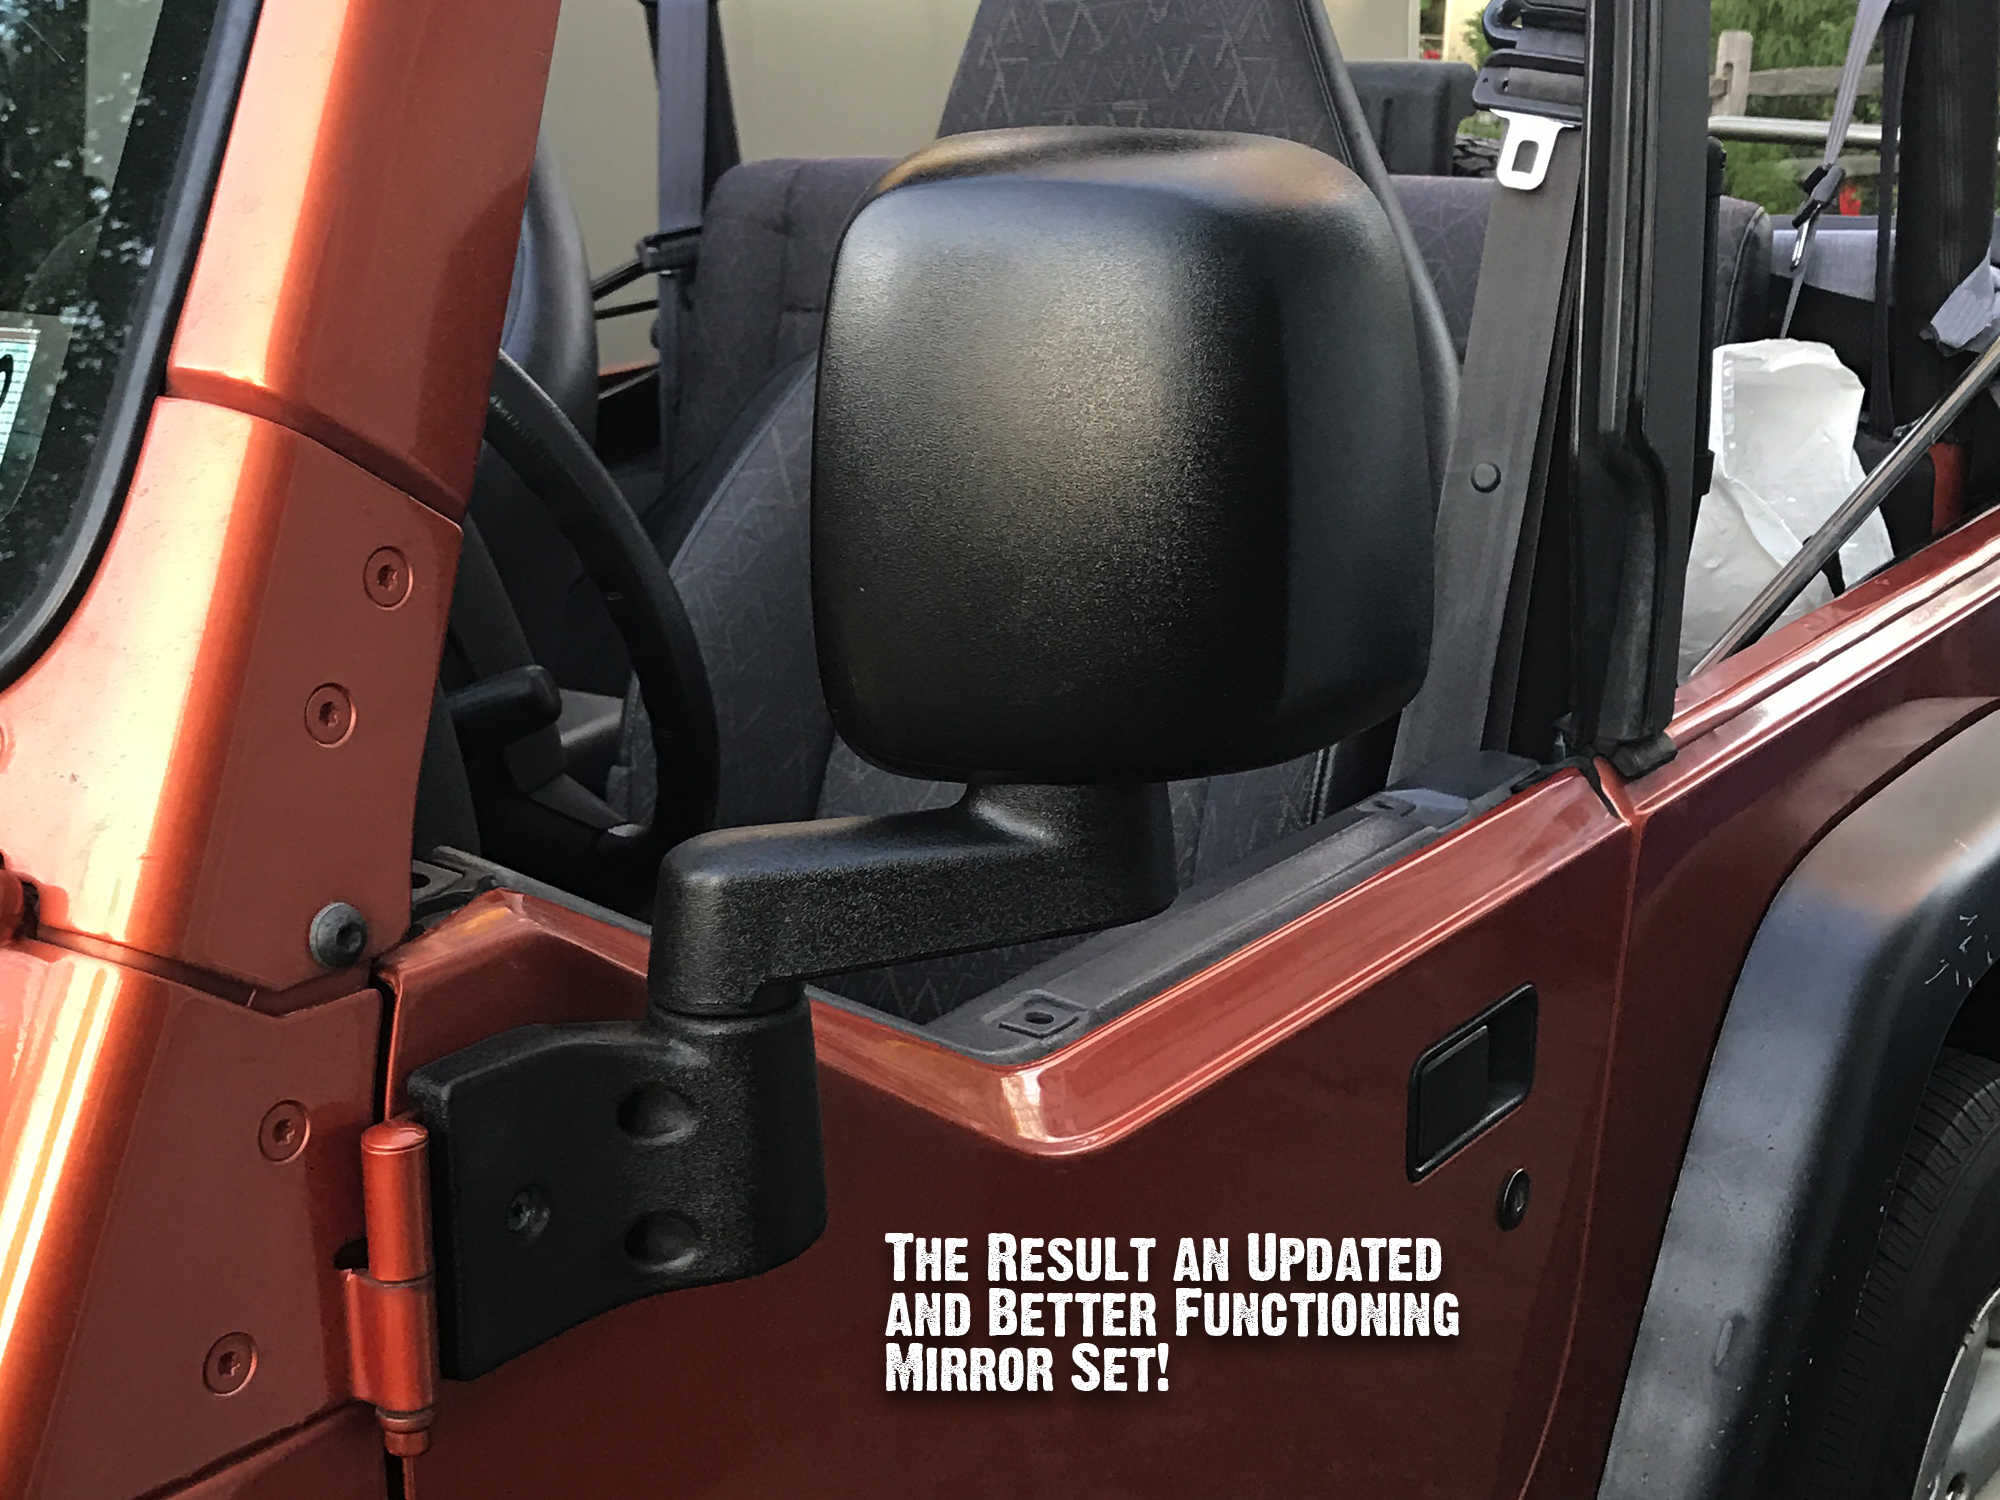
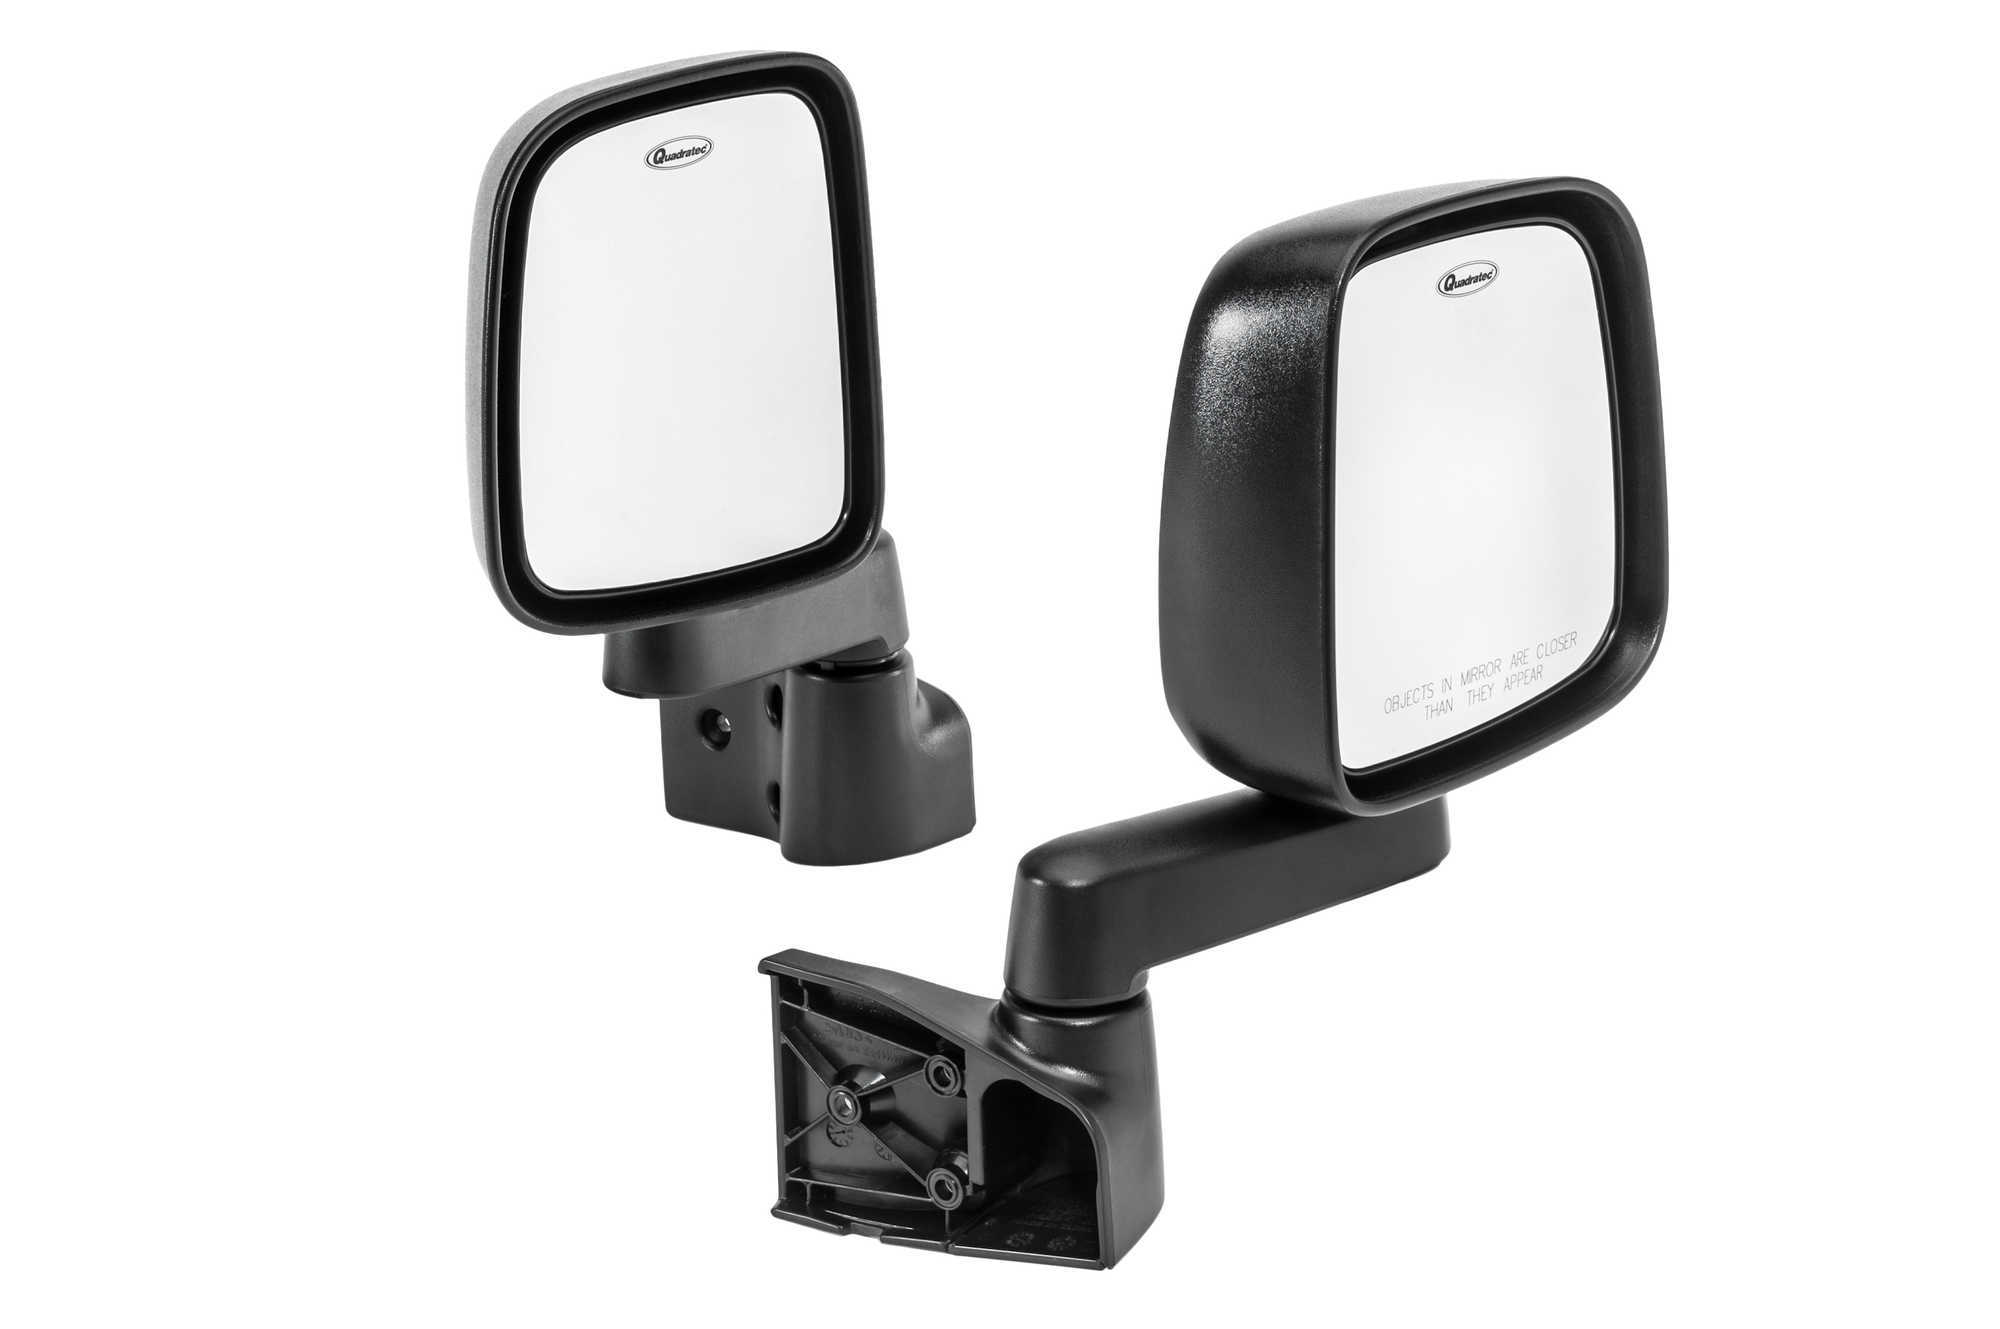
EASY Mirror Upgrade!
May 09, 2017
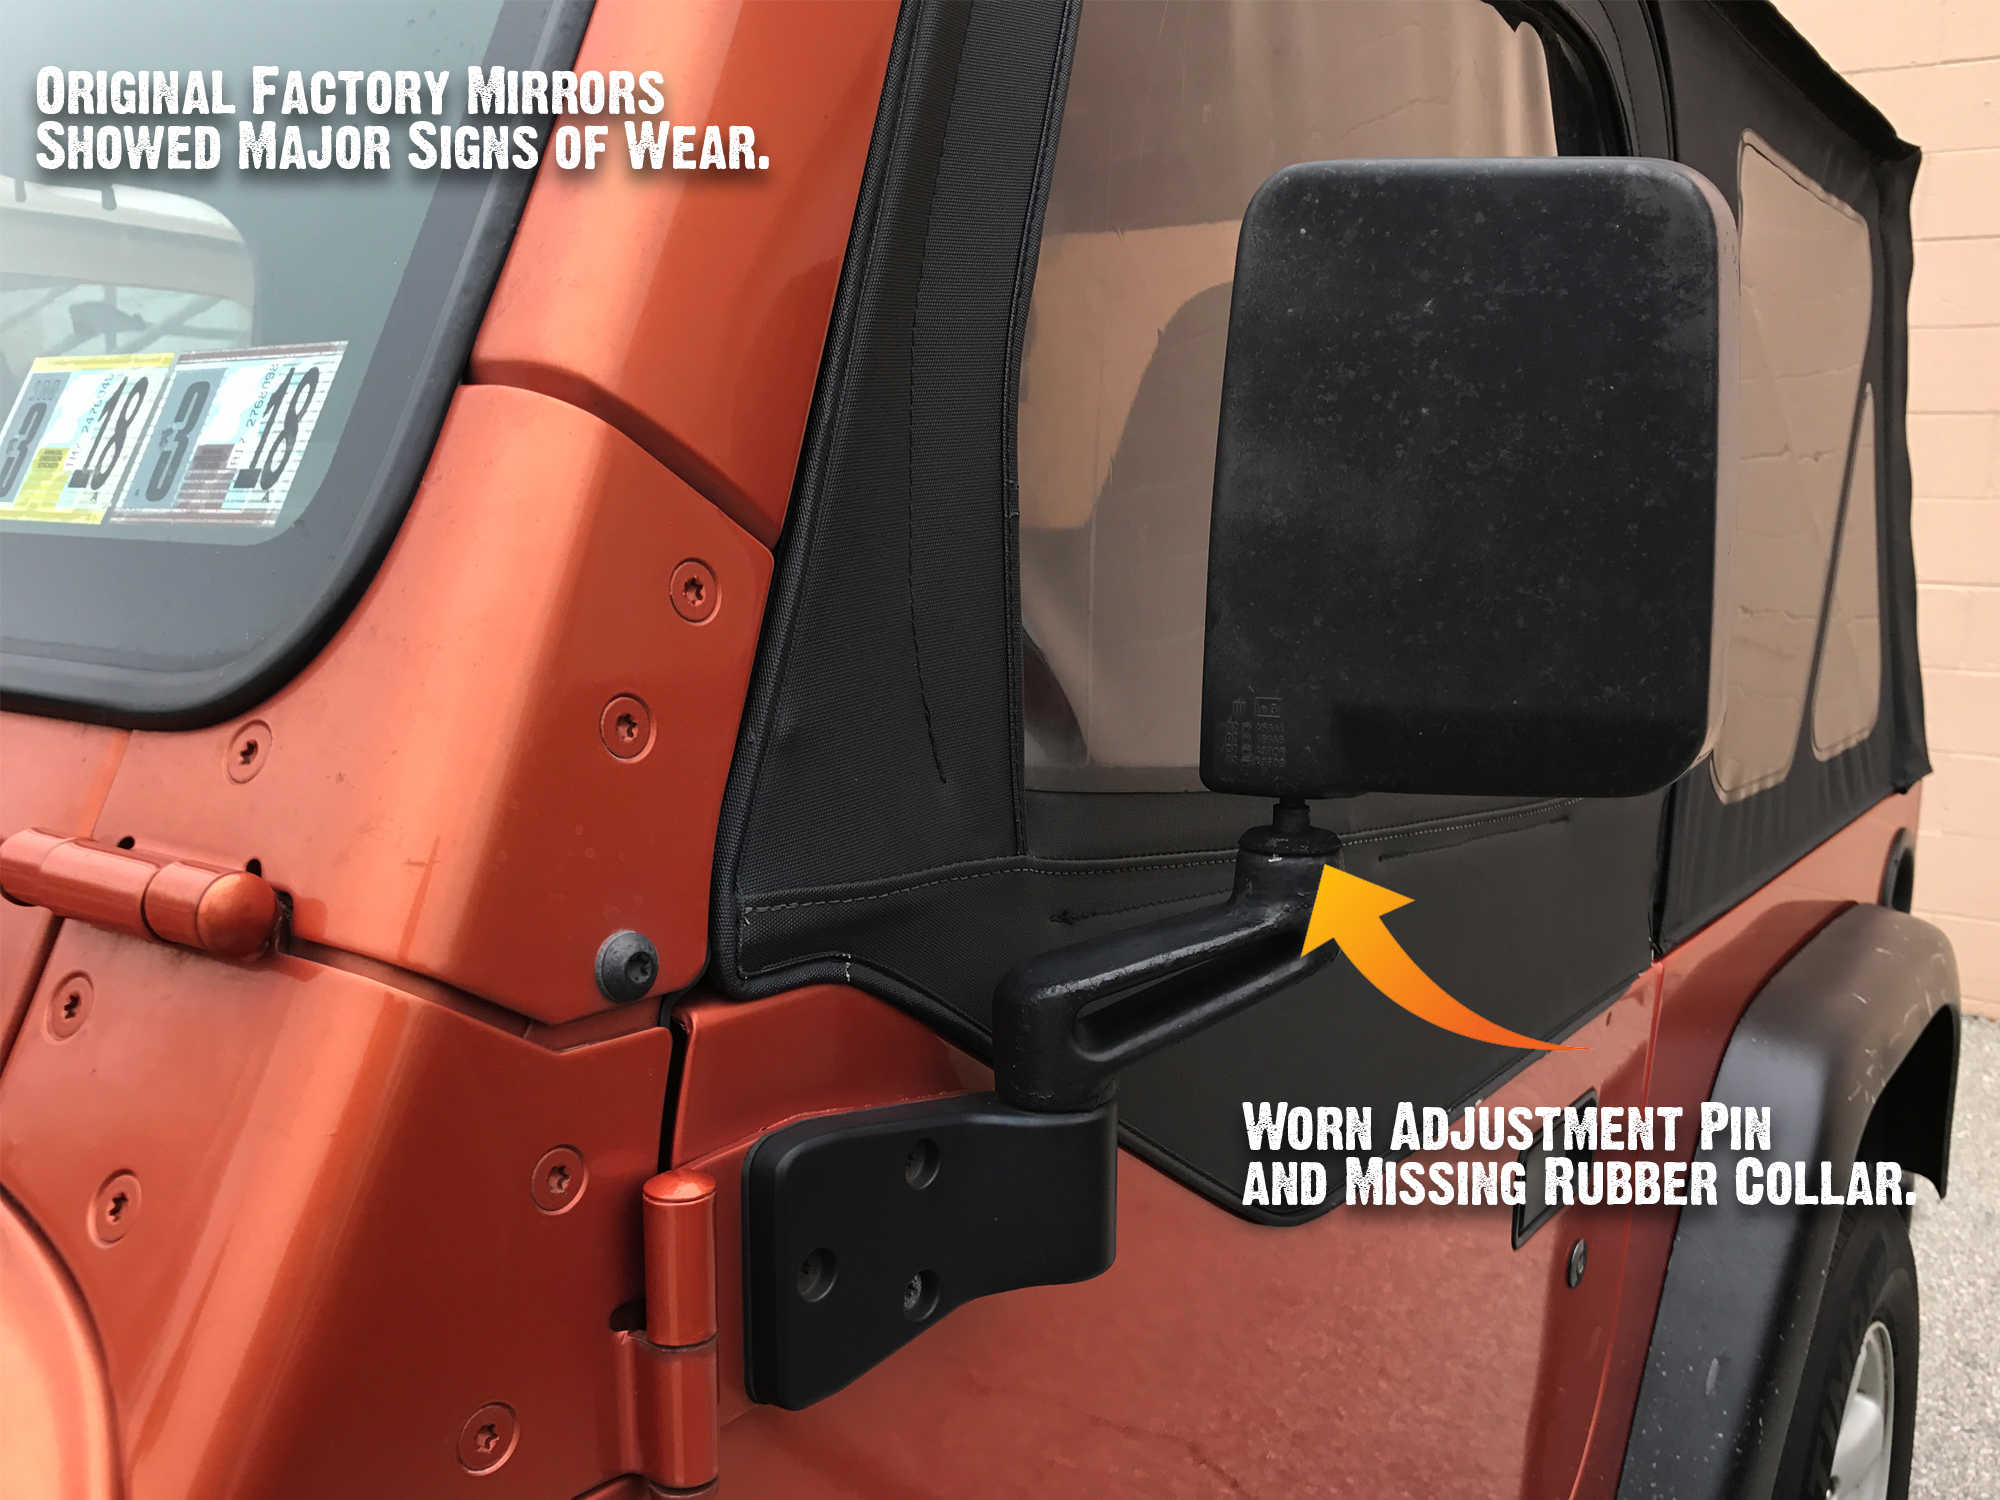
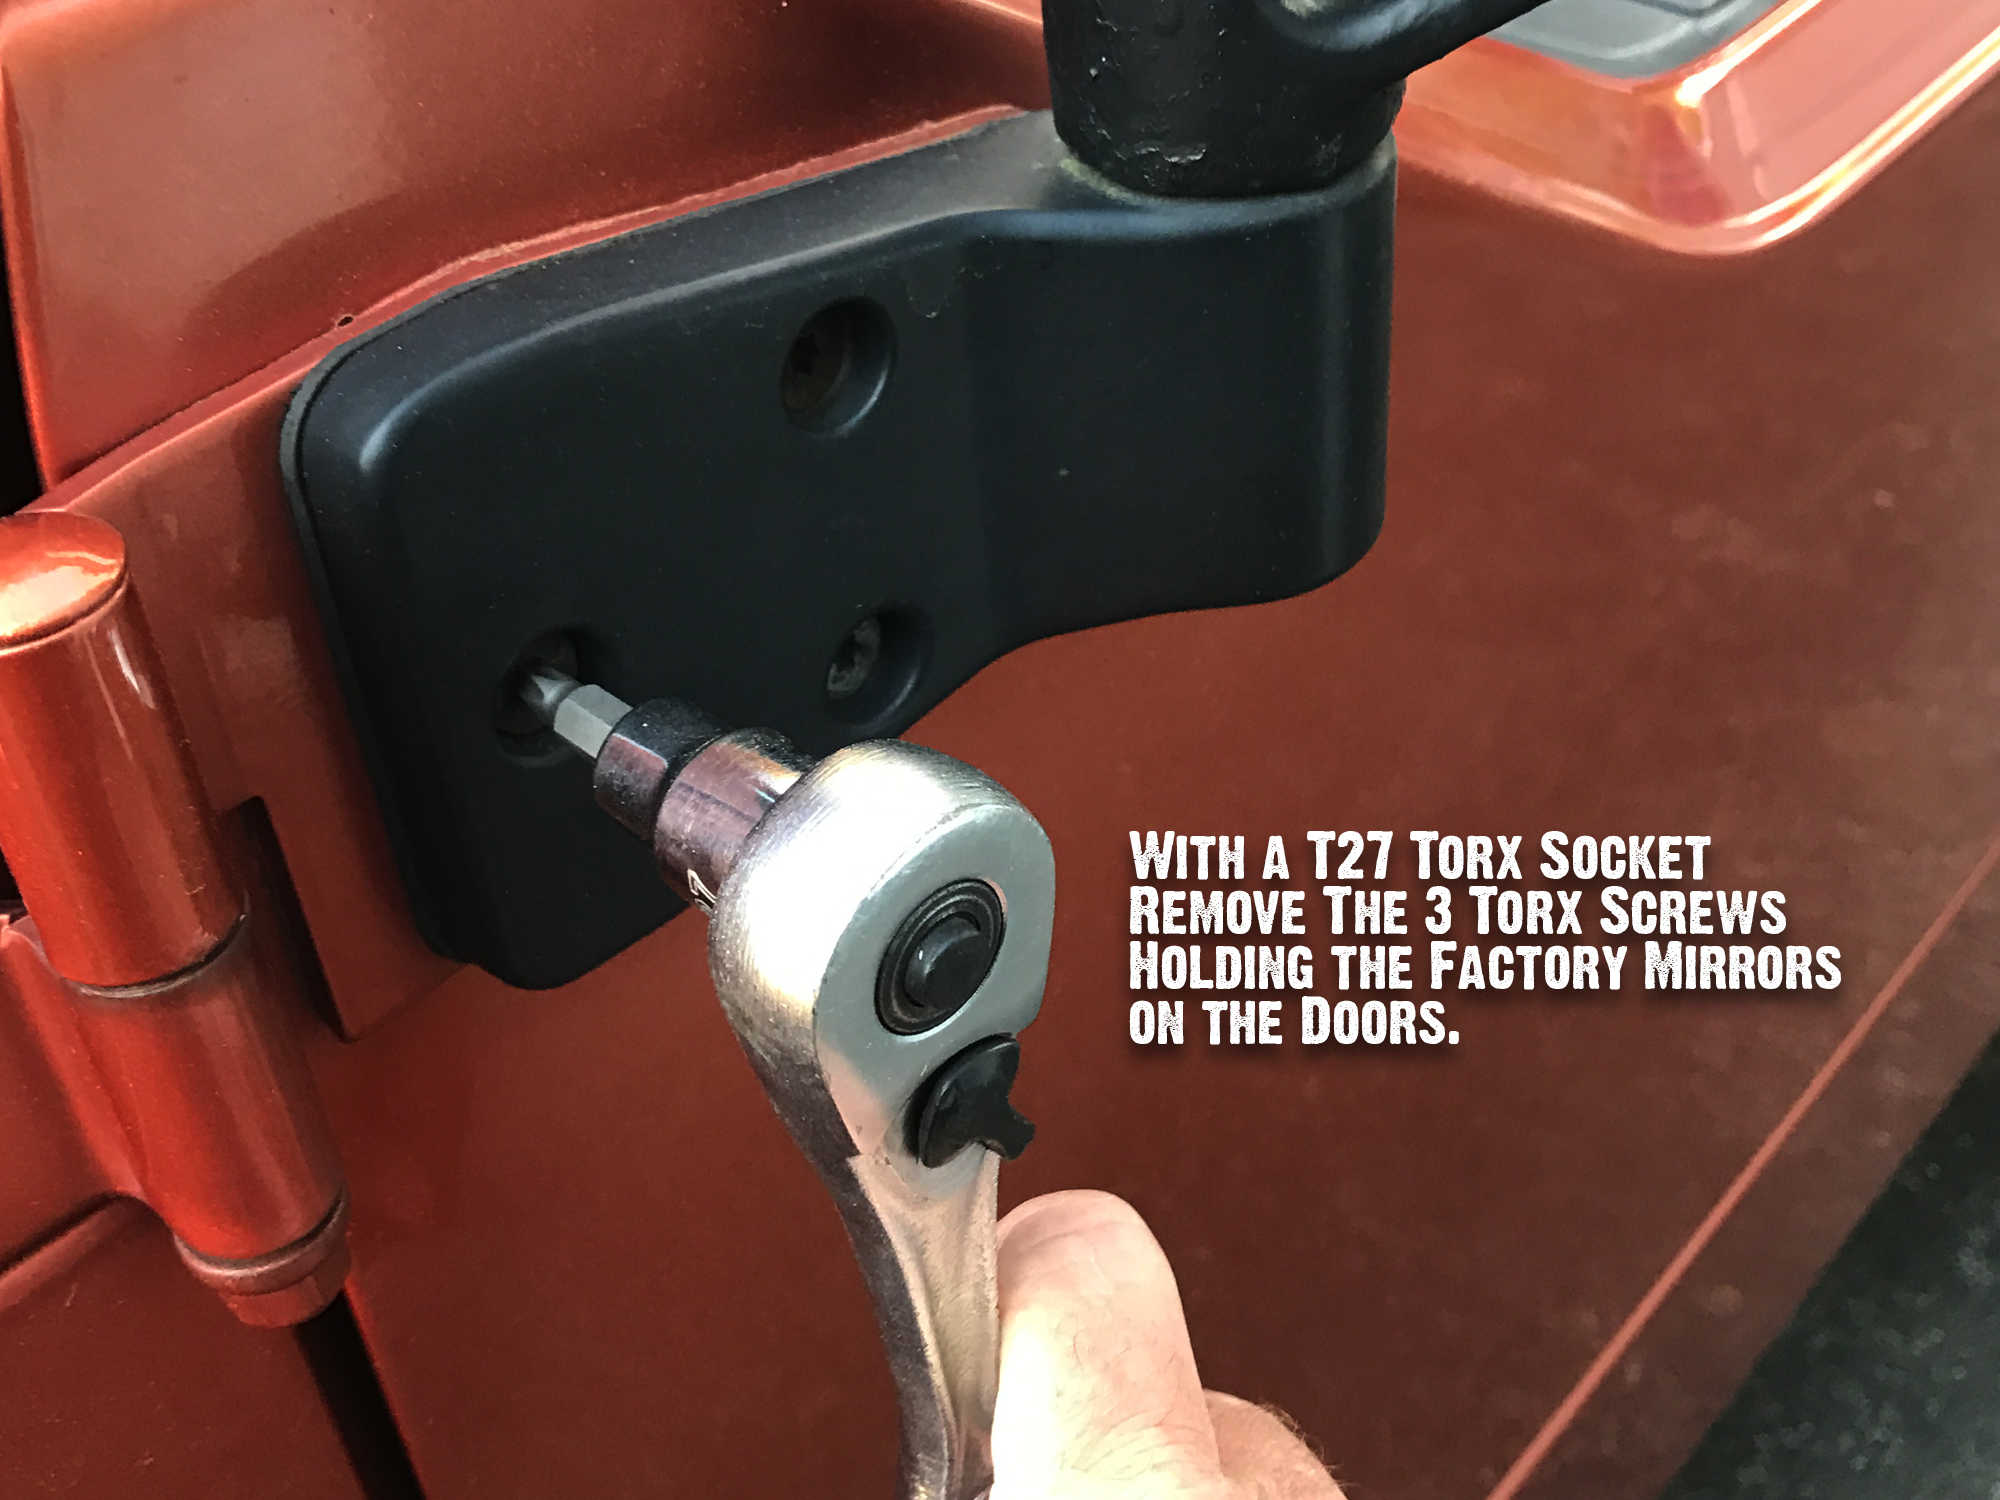
Hard to believe but the side mirrors on this 2002 Wrangler has been used from the factory since 1988! So what does that mean? Well that means it’s long overdue for a quick mirror makeover! Since this Wrangler is a half door model, I don’t plan on removing the doors that often so just a factory replacement mirror set is all that I need. With Just a T27 Torx Socket and a 3/8” Ratchet Wrench this upgrade could not be any easier! In just MINUTES I was able to give my mirrors the modern look they deserve with The Quadratec 03-06 Style Replacement Mirror Kit!
Comments