Featuring Premium Parts from
by Scott Ammerman
Quadratec Channel Correespondent
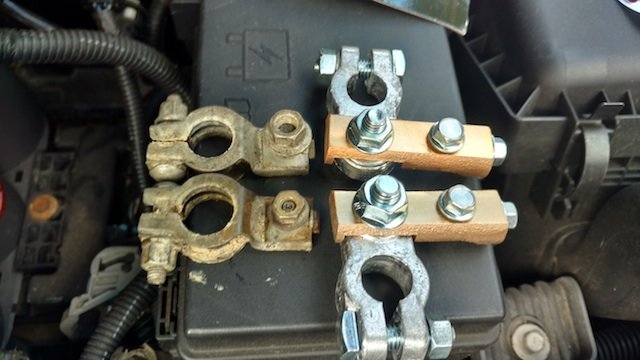
So my battery decided to give up on life recently, which just happened to be the first cold morning of the fall. No worries. I ordered an Optima Red Top battery from Quadratec to upgrade, but while I was replacing the battery, I noticed that the factory terminals weren’t very thick and had a decent amount of fuzzy corrosion. Since I’m planning on adding a winch and other electrical accessories soon, it was a good idea to upgrade the weak OEM JK terminals with something more reliable.
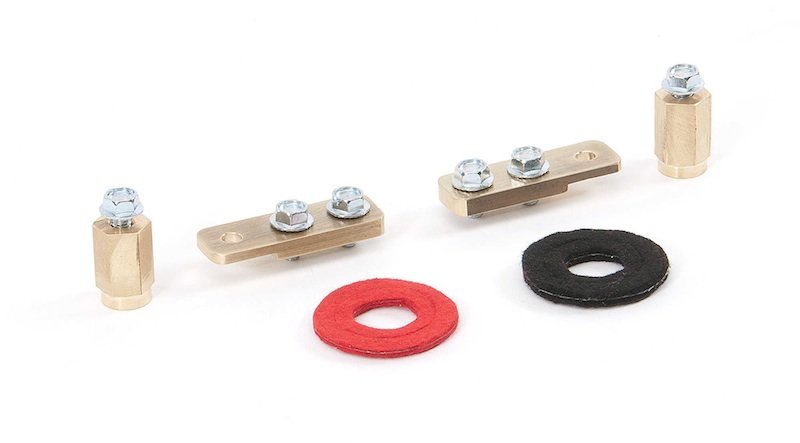
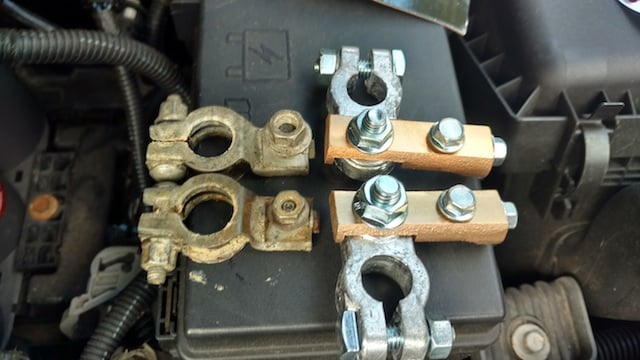
The Quadratec Extreme Duty Battery Terminal Kit includes everything you need to replace those thin metal terminals with ones made of solid lead, but also adds solid brass accessory rails. The best part is, they’re adjustable for angle - so even with the shorter spacing between the terminals on the Optima battery, they can still be adapted to work.
What you will need:- 10mm wrench for removing factory terminals
- 12mm wrench for removing nut holding the negative cable
- A wire brush to clean the cable end terminals
- 10mm socket with long extension if you’re replacing your battery
- A battery terminal cleaning tool if you’re reusing your battery
- ½” wrench (13mm will work) for tightening nuts to close around battery posts, negative terminal to brass rail
- 9/16” wrench (14mm will work) for tightening positive terminal to brass rail
- ⅜” wrench or socket to tighten down factory cable ends on new terminals
- A flat head screwdriver to spread new terminal clamps open
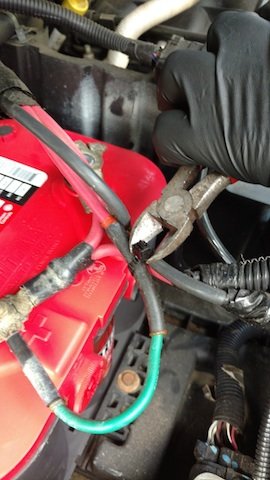
I started by cutting the cable tie around the battery cables, as I needed a little more adjustment than I could get with it there. A standard wide post battery might not need that extra movement, so you can leave it in place if you wish, or cut and replace if your garage is full of extra cable ties like mine.
Note: When disconnecting the battery, always start with the negative side first. Also keep in mind that, if you are dealing with an old and possibly leaky battery, the acid seeping out can do nasty stuff to your skin and clothing. The longer it stays on you, the worse it can be, so wash your hands with soap and water soon after touching anything that could have acid on it, including your old terminals. Or, you know... Wear gloves.
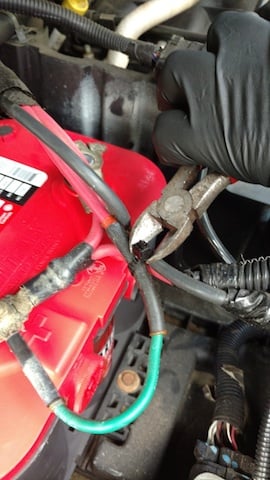
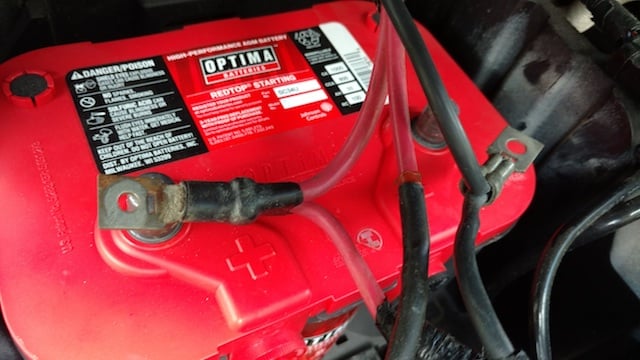
Remove the 12mm nut holding the negative cable end, and then move these cables out of your way as much as you can to avoid arcing across the positive side with those shiny metal tools you’re going to use. Then, remove the 10mm nut from the positive side terminal holding those cables down, and push them out of the way. Loosen both 10mm nuts holding the factory terminals onto the battery, and remove the two terminals as you won’t need them any longer.
If you’re replacing your Jeep battery with a new one, take the 10mm bolt out of the hold down clamp in the lower front and remove it entirely. Drop the new battery in place, center it, and tighten the clamp back down.
If you’re reusing your battery, clean all corrosion off the tops of the posts with a terminal cleaning tool.
In either case, clean the cable end terminals with a wire brush to remove any nasty stuff stuck to them, and then install the two battery terminal protectors included in the kit on the battery posts. Make sure the red one is on your positive post, and the other one (either green or black, depending on kit contents) is on the negative post.
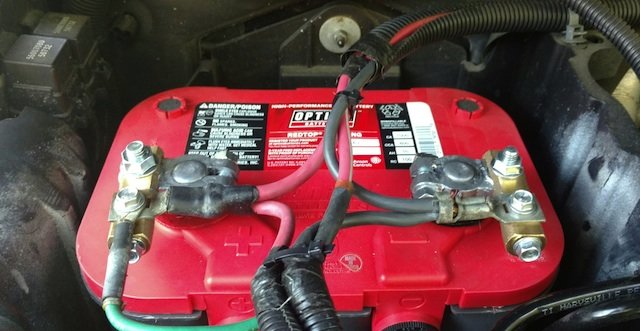
Spread the clamps on the Heavy Duty Battery Terminals and open slightly with a flat-head screwdriver. The terminals look very similar, but the positive side has a larger bolt where the terminal connects to the brass rail. For the Optima, I had to reverse both brass rails to spread the cables out enough. With a standard wide post battery, you want them pointed inwards and to the front as indicated in the included instruction sheet.
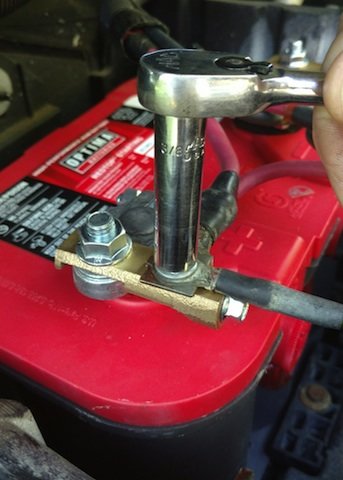
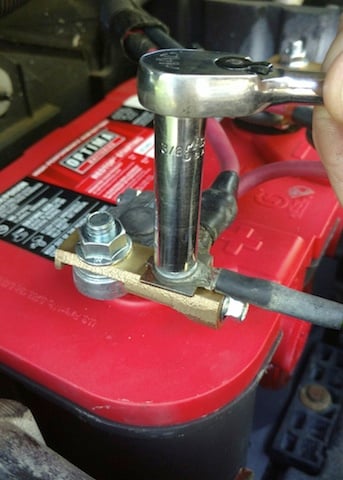
Fully seat the terminals in the correct orientation for your battery, and tighten the ½-inch nut on each to close the clamp. Remember, these are electrical connections, so get them nice and snug.
Next, move on to tighten down the two nuts that hold the brass down onto the terminals. The positive side is 9/16-inch, but you can use a 14mm. The negative side is ½-inch, or 13mm. They’re actually standard fasteners, but these metric sizes are close enough to to work.
The factory cable ends go under the next ⅜-inch bolt down the rail. A 10mm is close, but will not be small enough to fully tighten these connections.
Note: Pay attention to the direction the cables point to ensure they aren’t able to rub against each other (or anything else). These heavy gauge wires have an ample amount of insulation, but vibration from driving can cause abrasion, and an increased risk of fire.
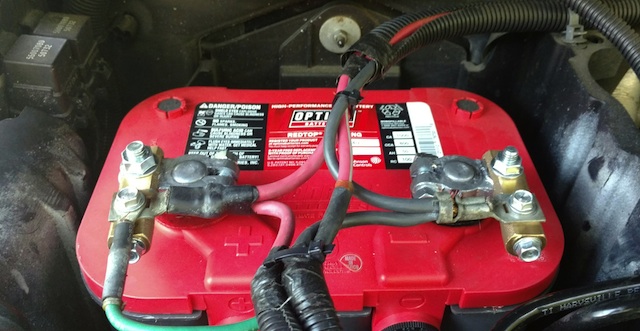
Now that these are fully installed, you have two additional options to add electrical accessories:
Wires for medium to low amperage accessories can be added to the end of the rail
Higher current items (like winches) can be added to the larger studs that connect the terminal to the brass rails.Note: The ⅜-inch bolts holding the factory cables down should not be used for anything else.