by Scott Ammerman
Torque Correspondent
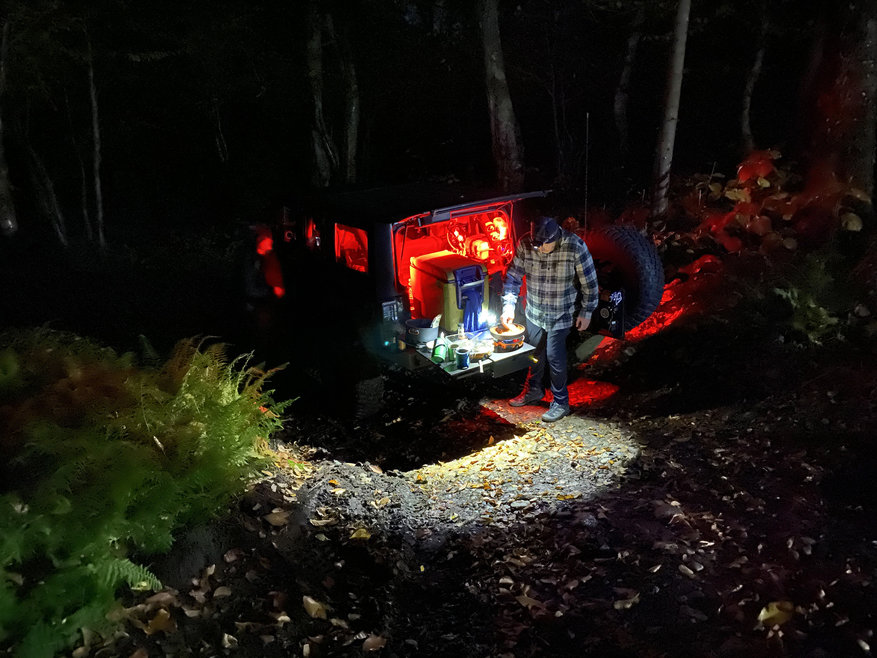
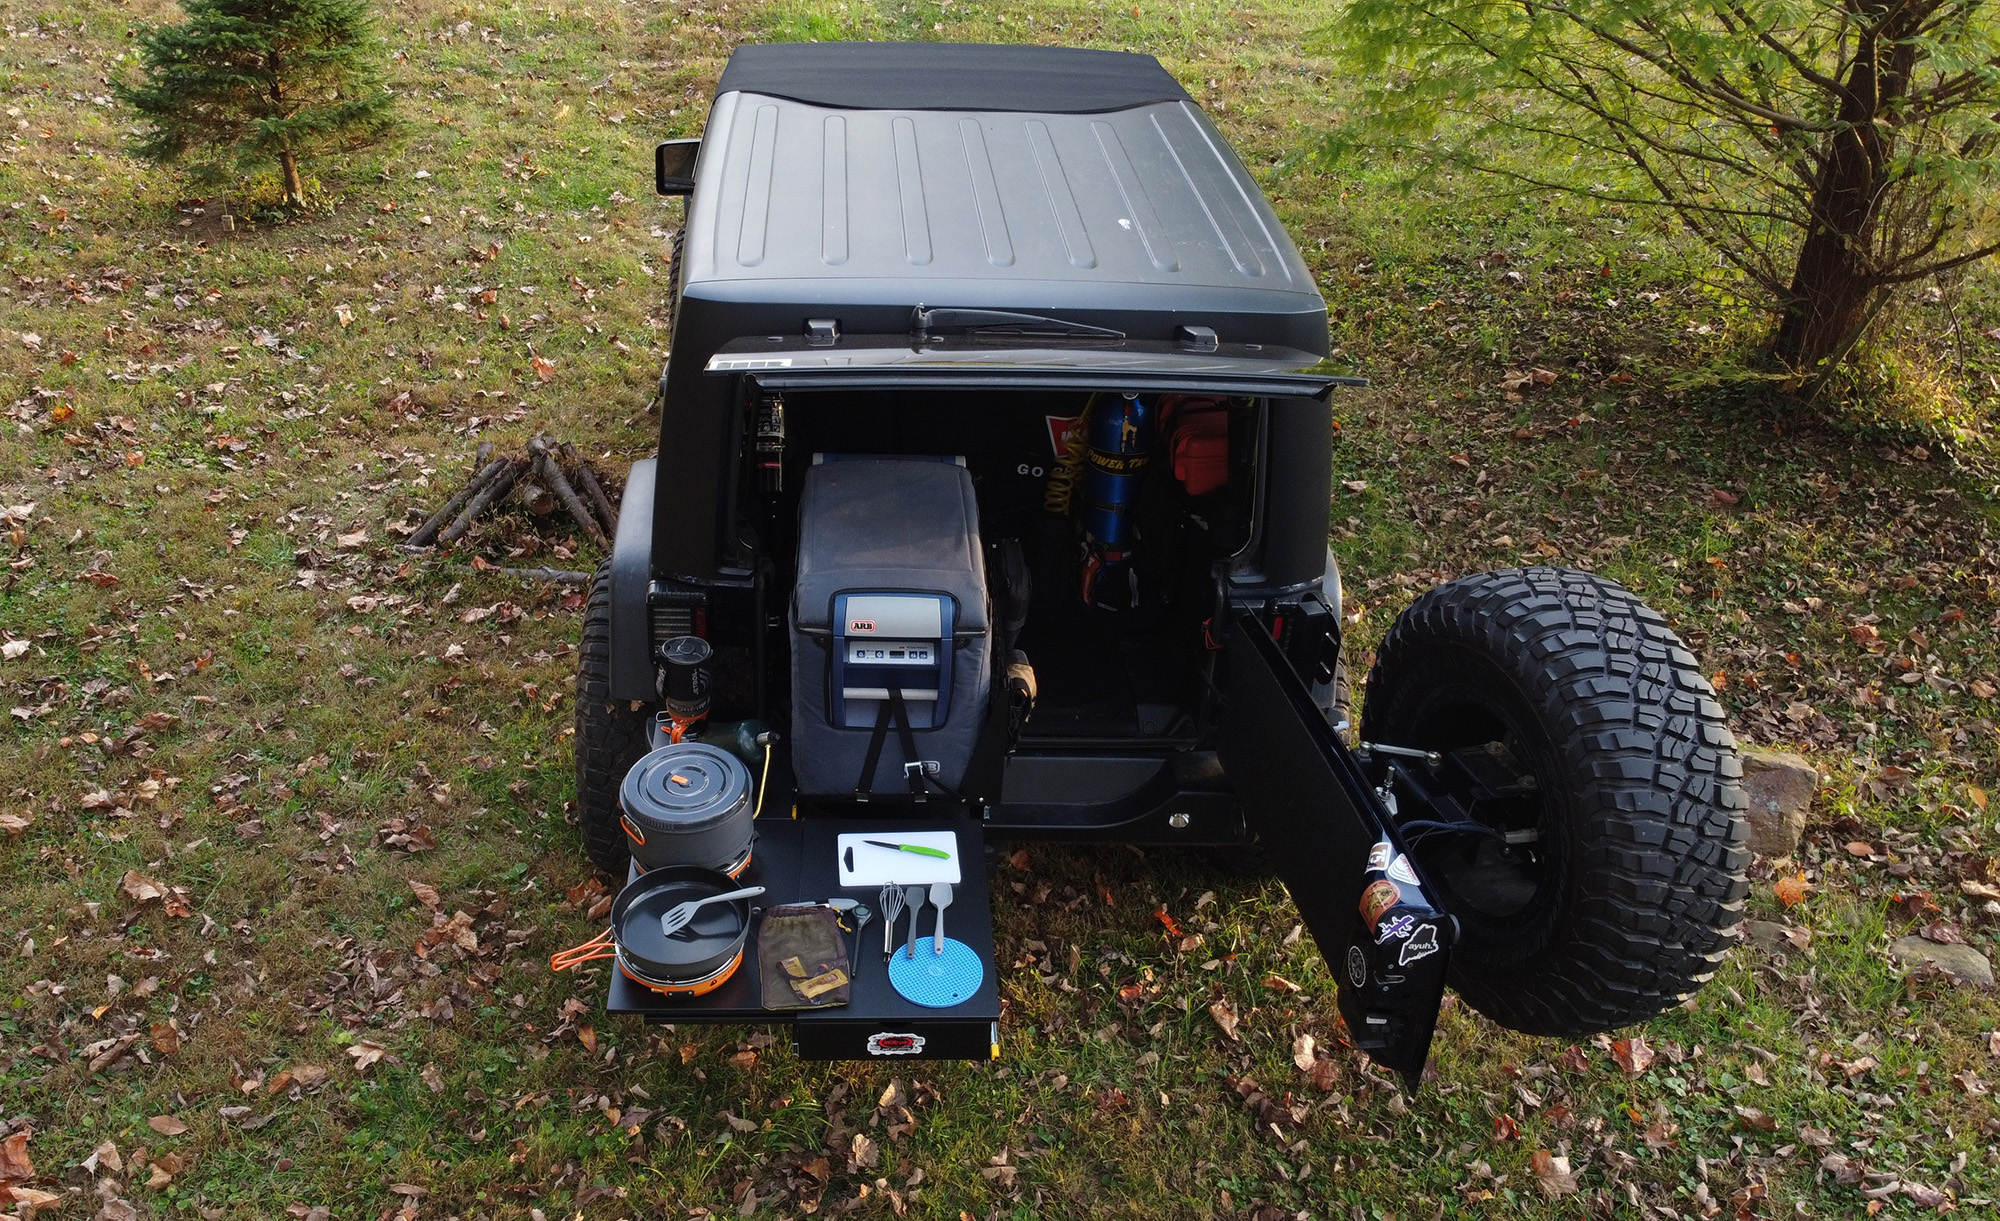
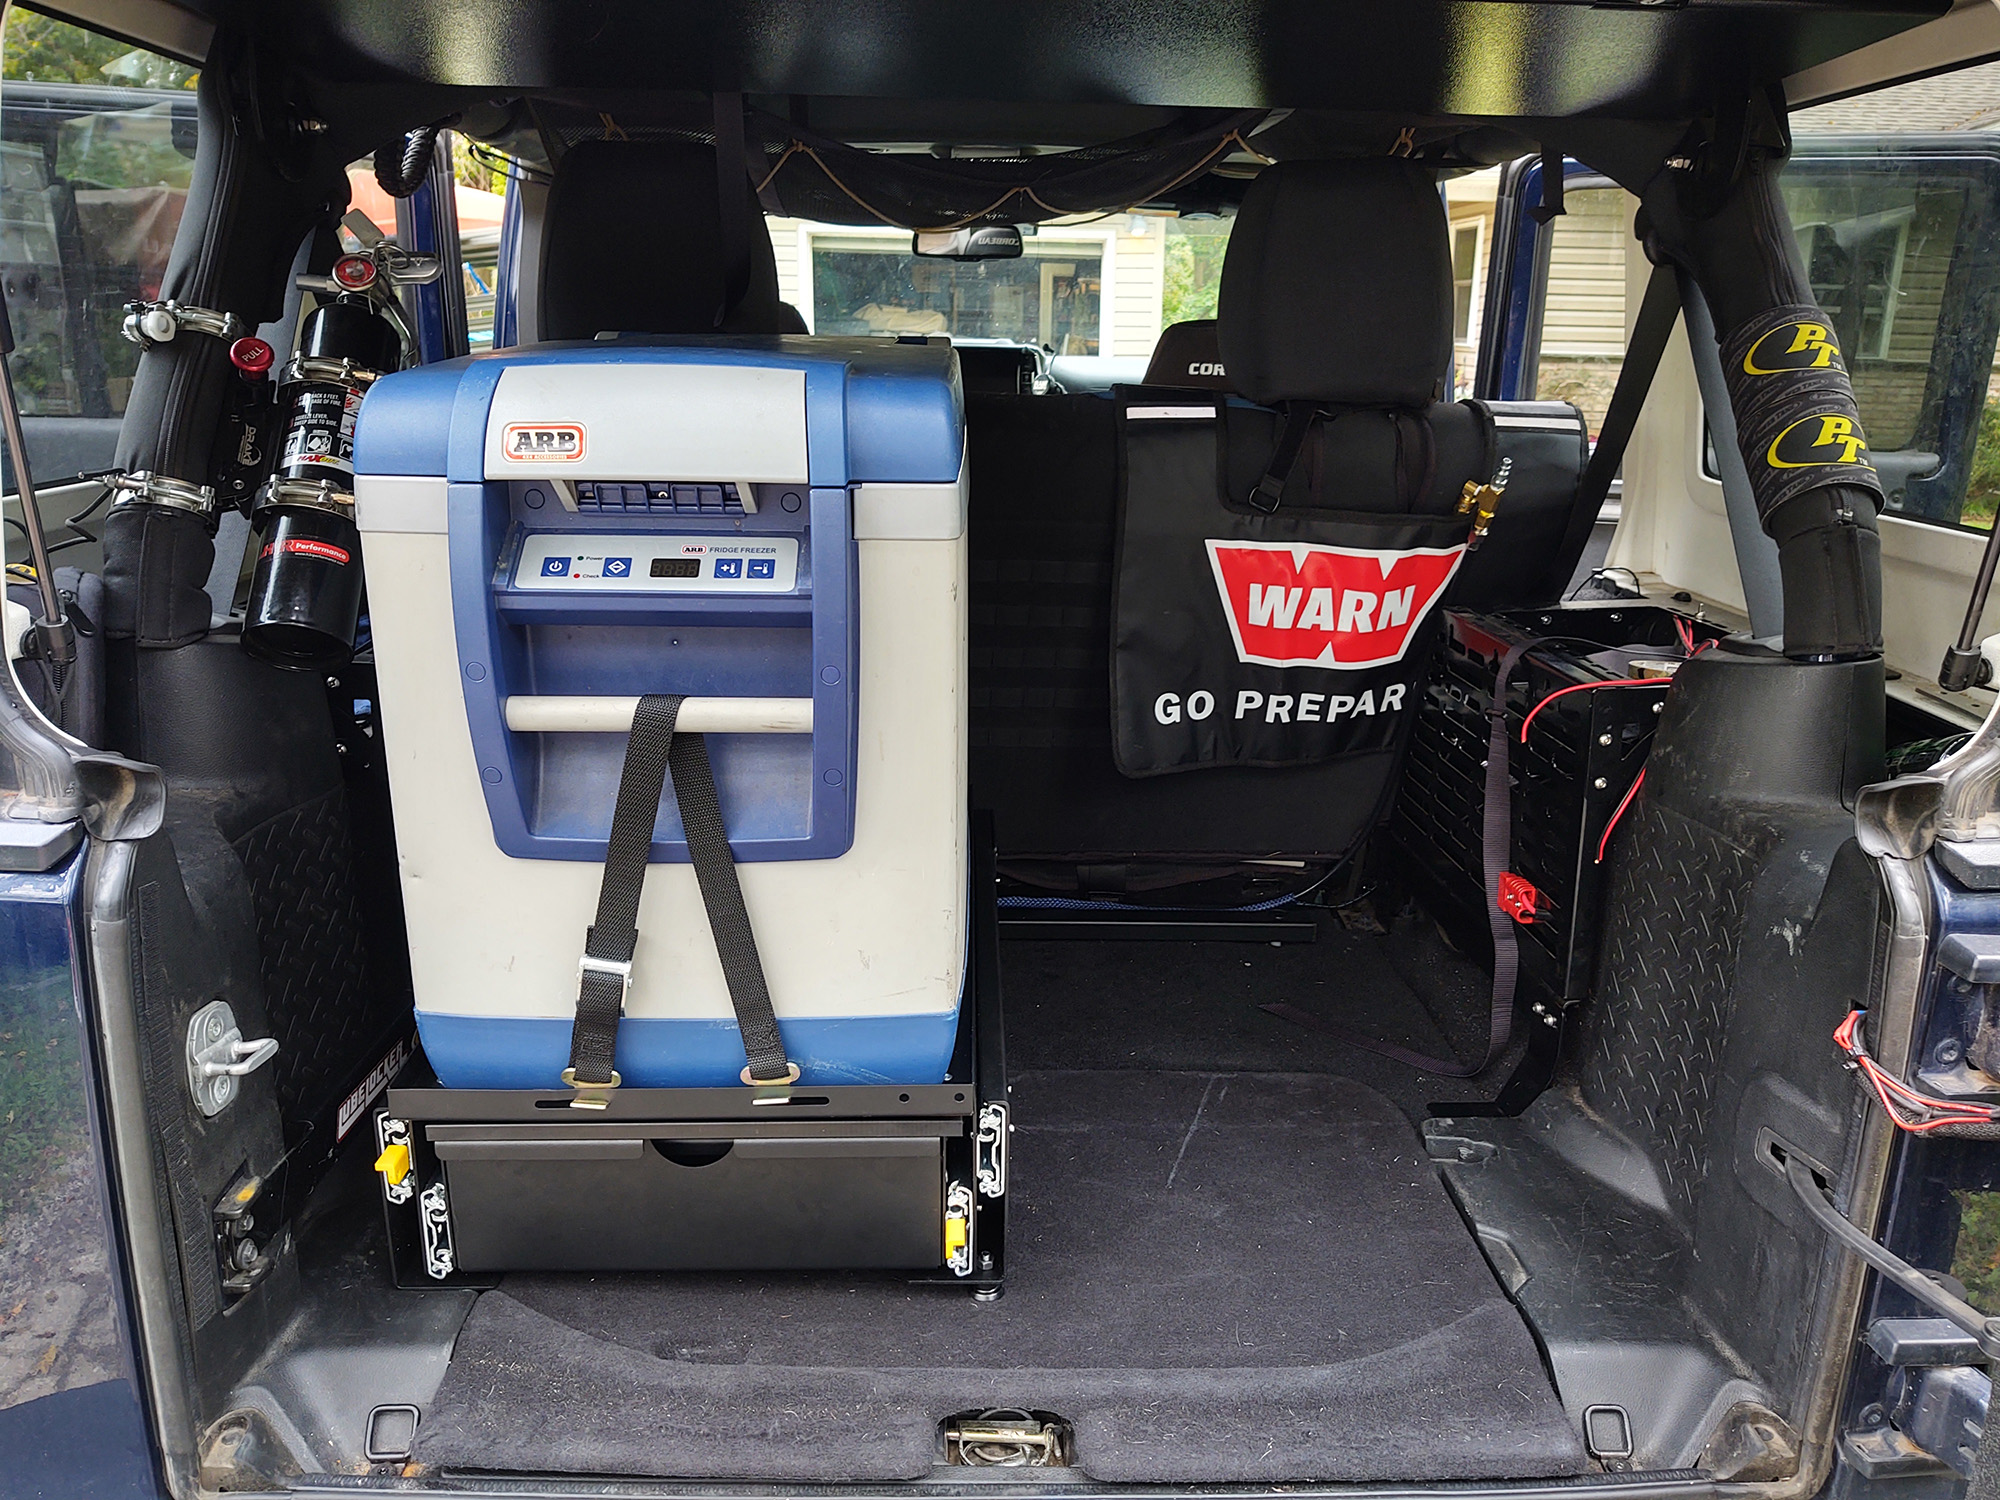
During this past summer, I found I relied on Project Rattler far more heavily than in recent years for camping and overlanding duty. Several week long trips to West Virginia and New England were already in the books, and the shortcomings in my storage strategy began to be more obvious — my ARB Classic Fridge Freezer had to be stored in the back of the trunk sideways against the back seat to have any storage capacity, and in that location it was impossible for any of the shorter members of our party to access.
Additionally, the lack of a decent work surface for food preparation was becoming more than an inconvenience. While MCE Flat Fenders are great in the woods, they really do not make a very good countertop, particularly when covered in mud.
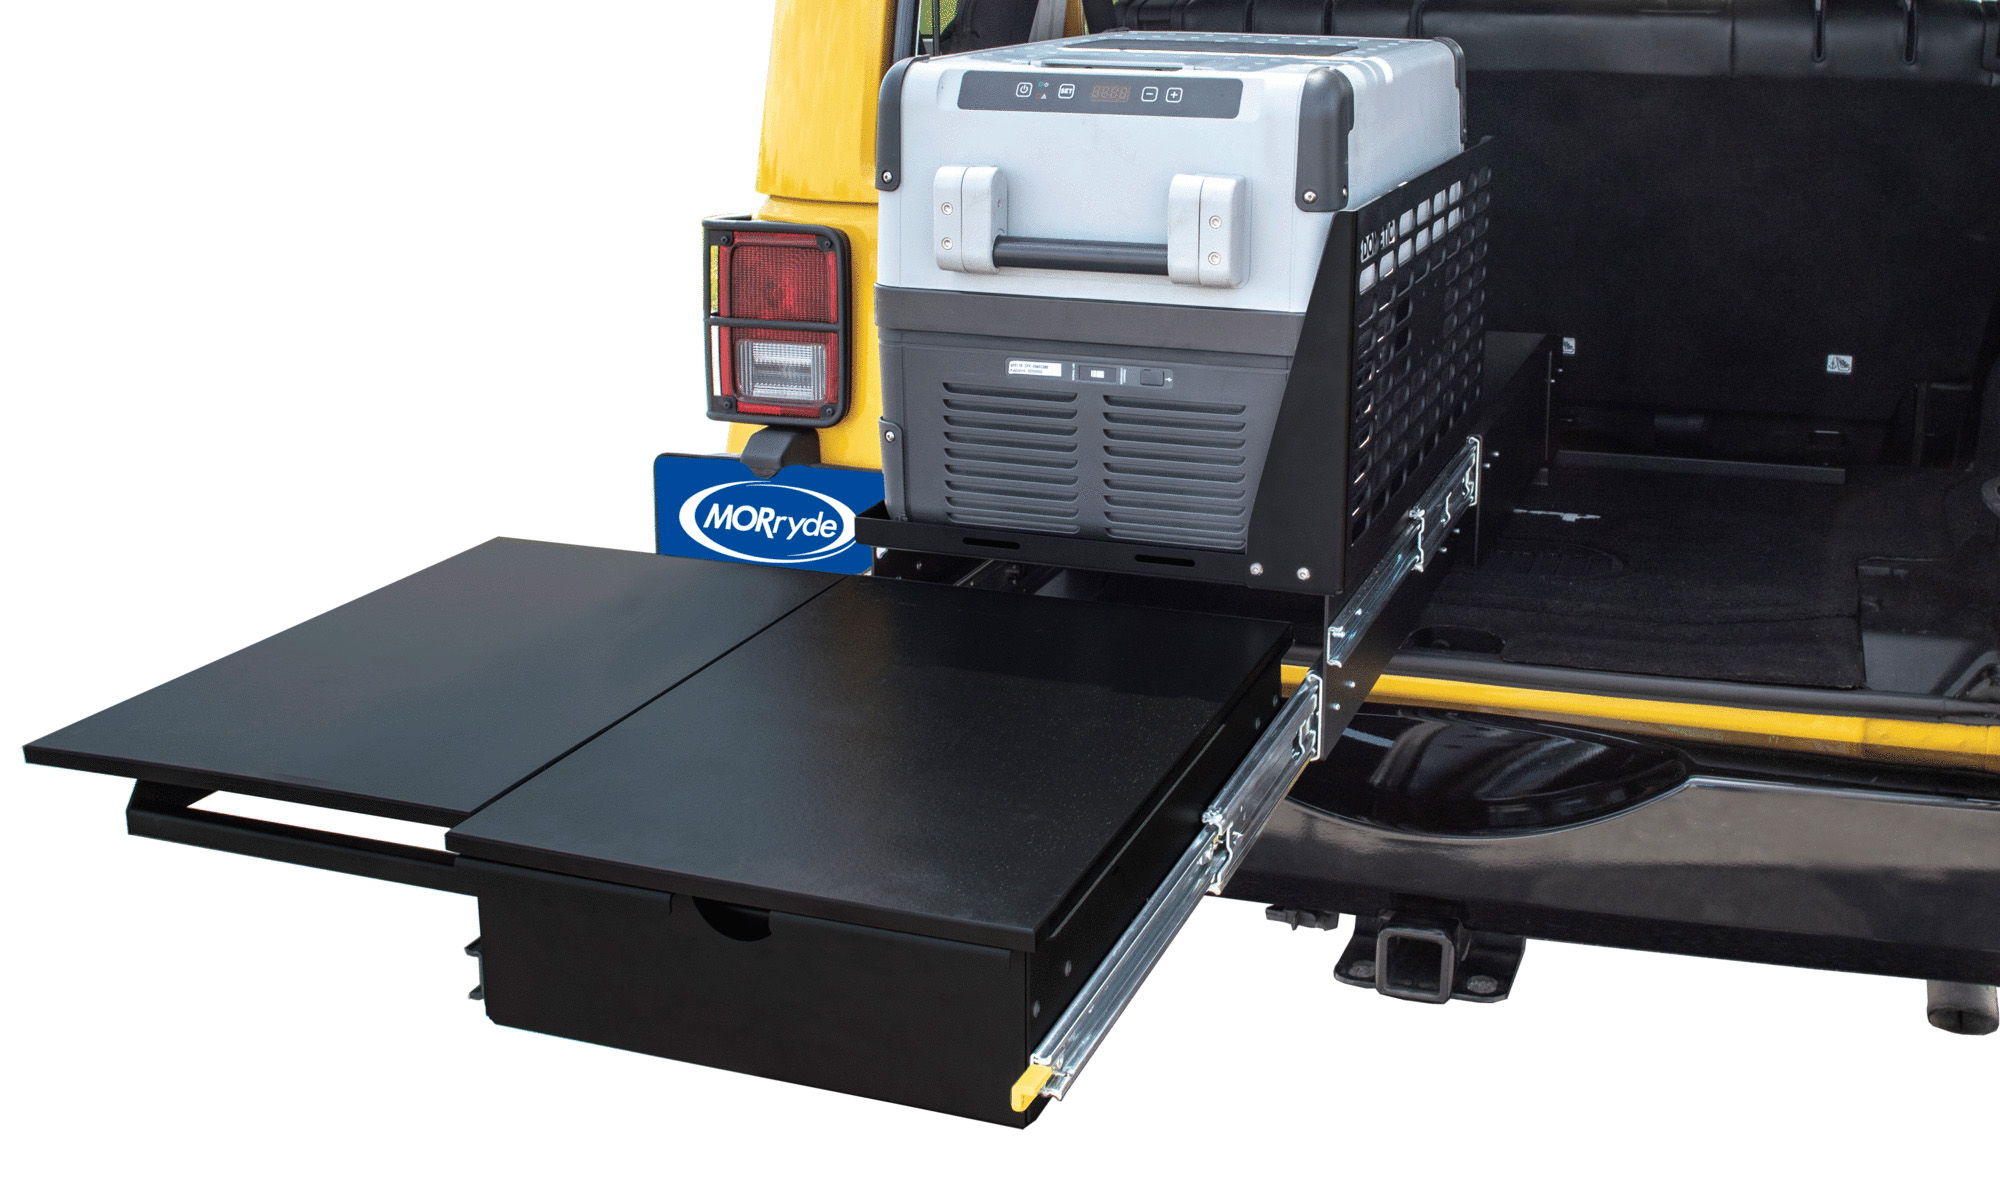
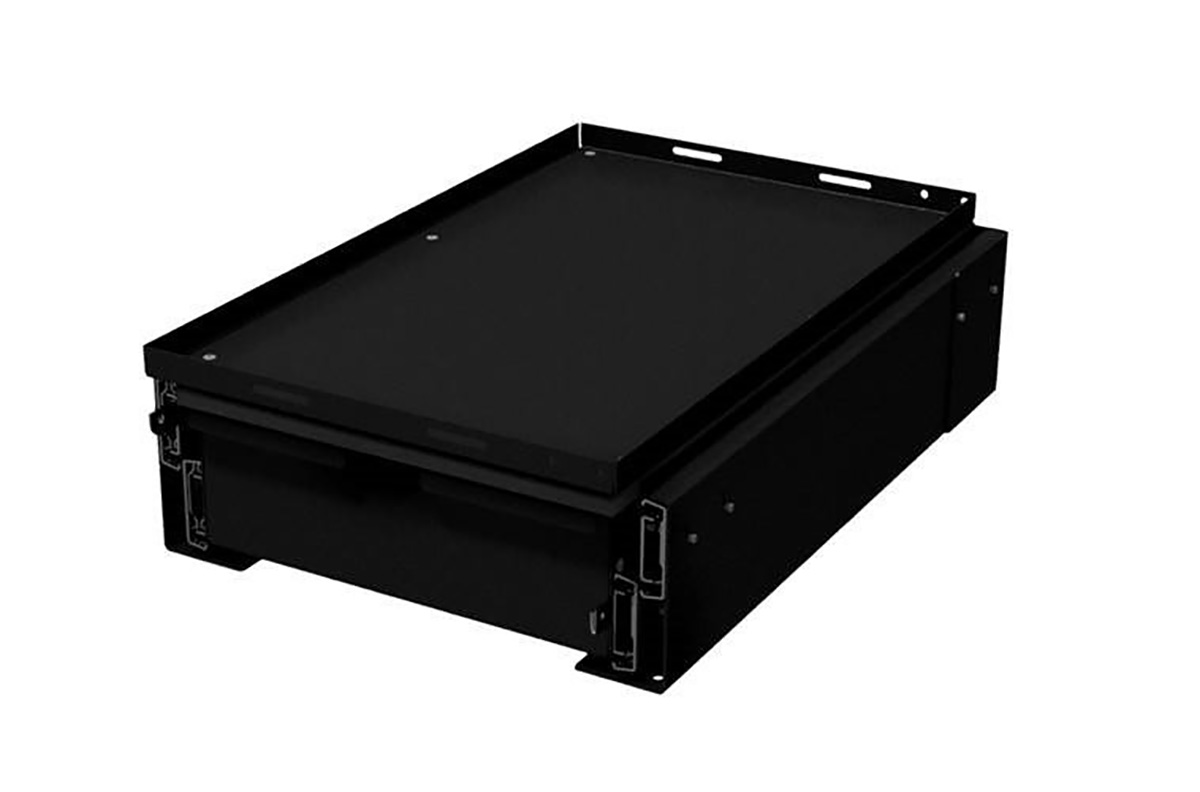
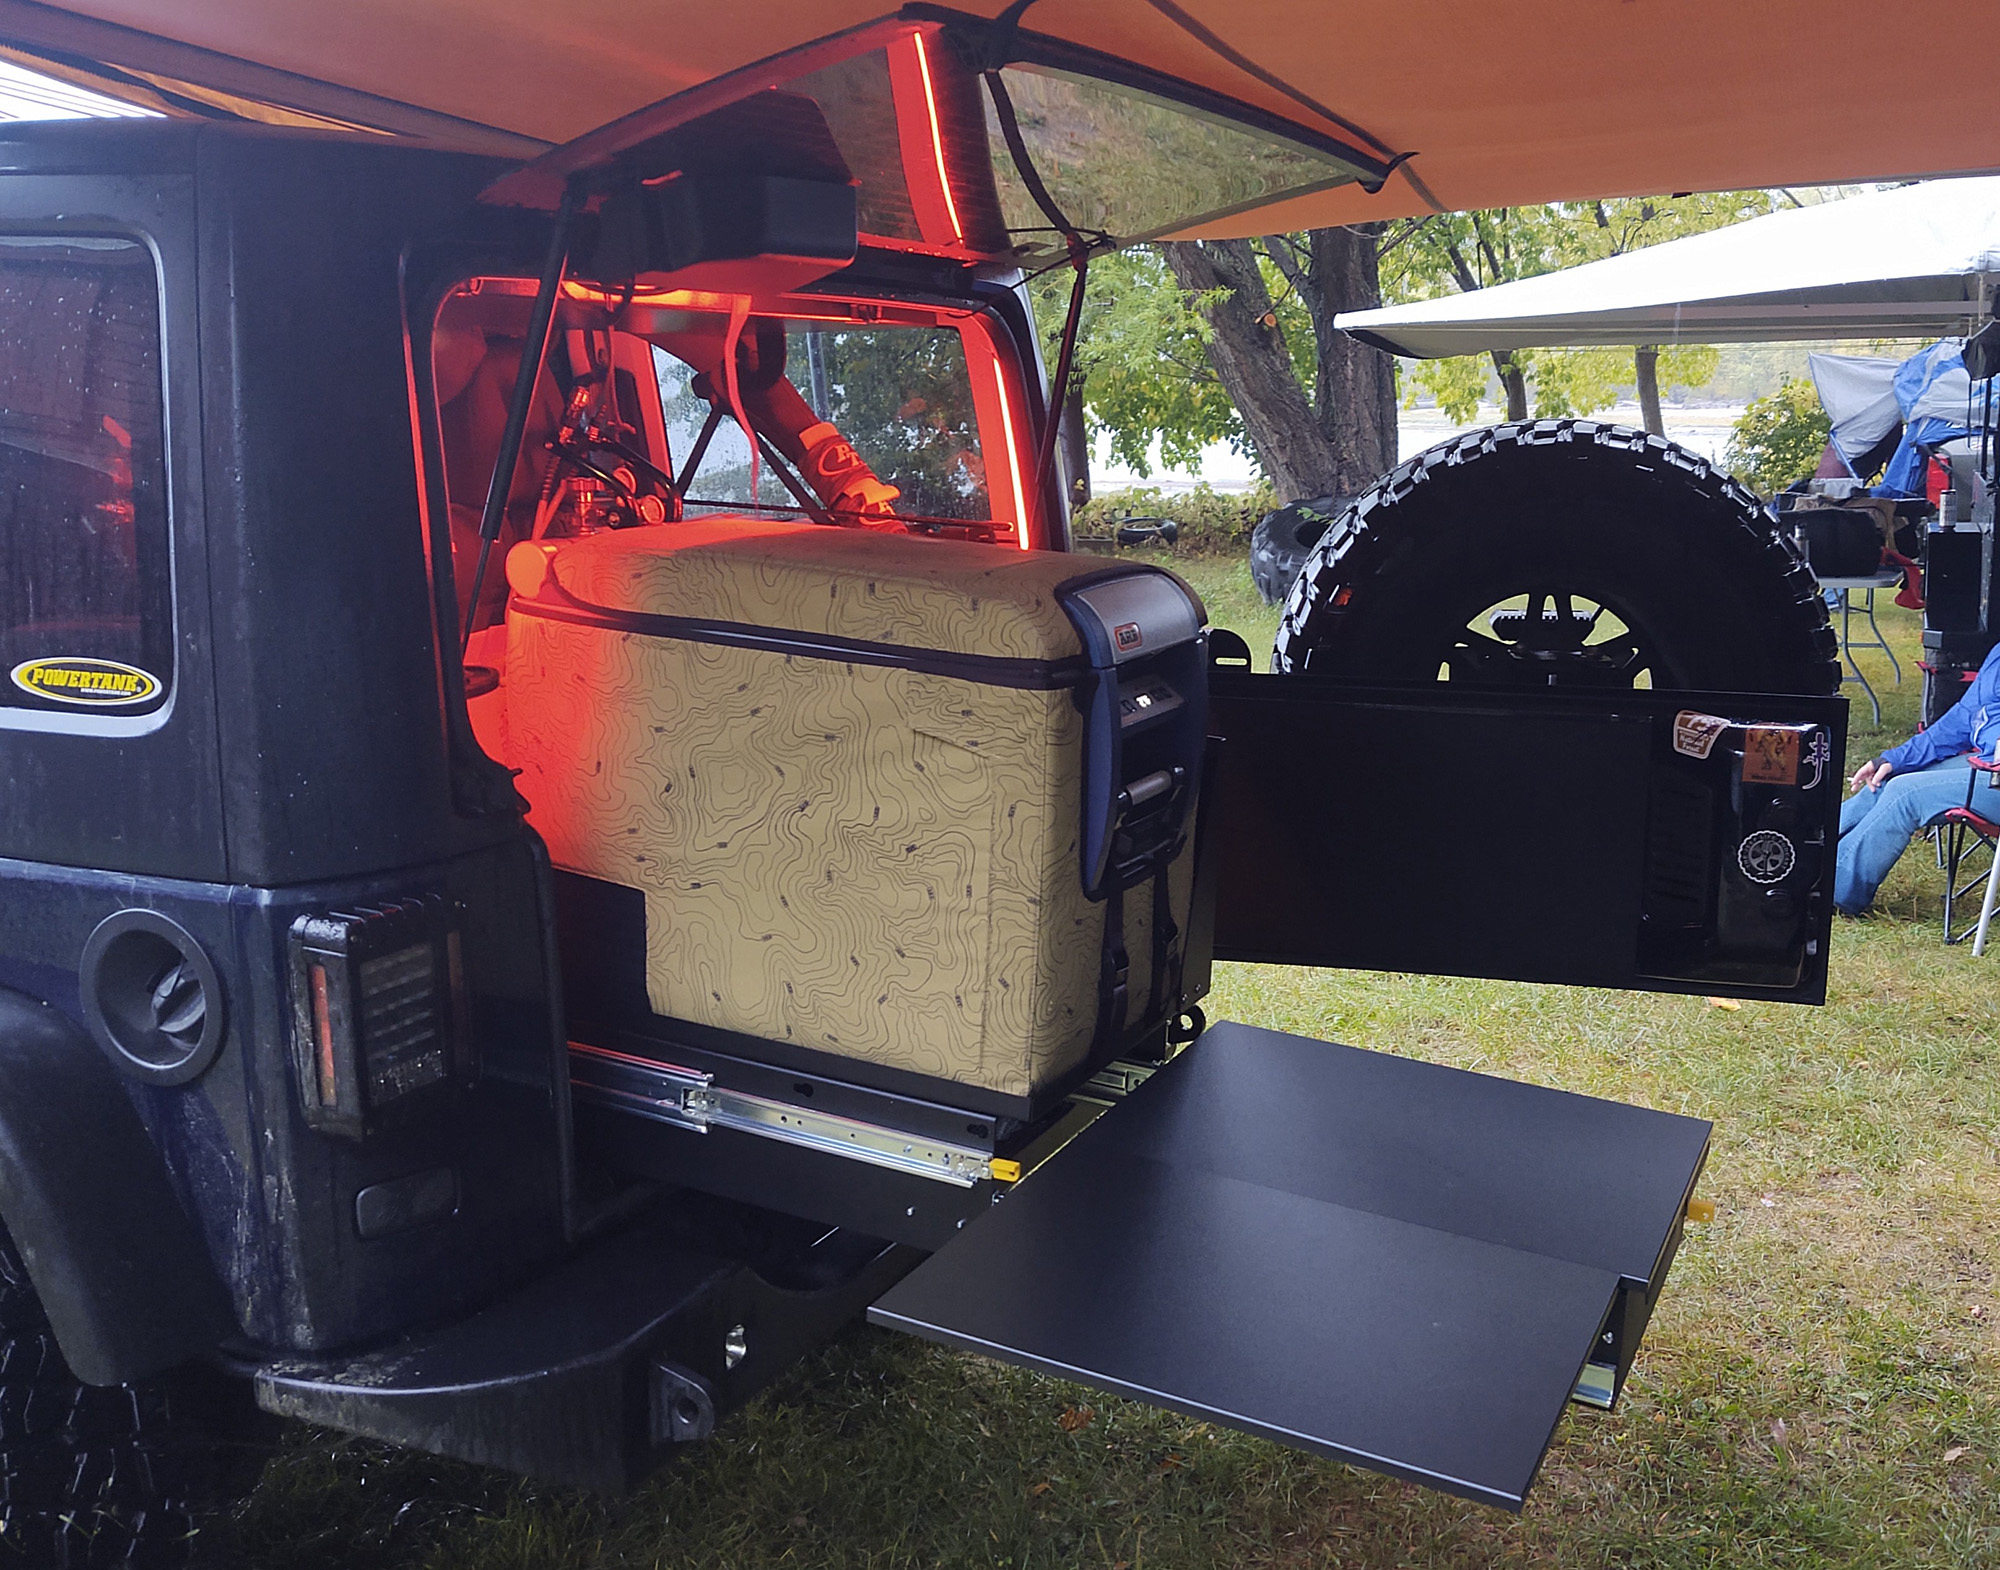
The MORryde Trail Kitchen system solves both of these problems with remarkable efficiency, while increasing storage space below the fridge. Not only does it have a slide out to gain access to the refrigerated food and drinks, it also features a drawer for kitchen essentials storage, as well as a work surface.
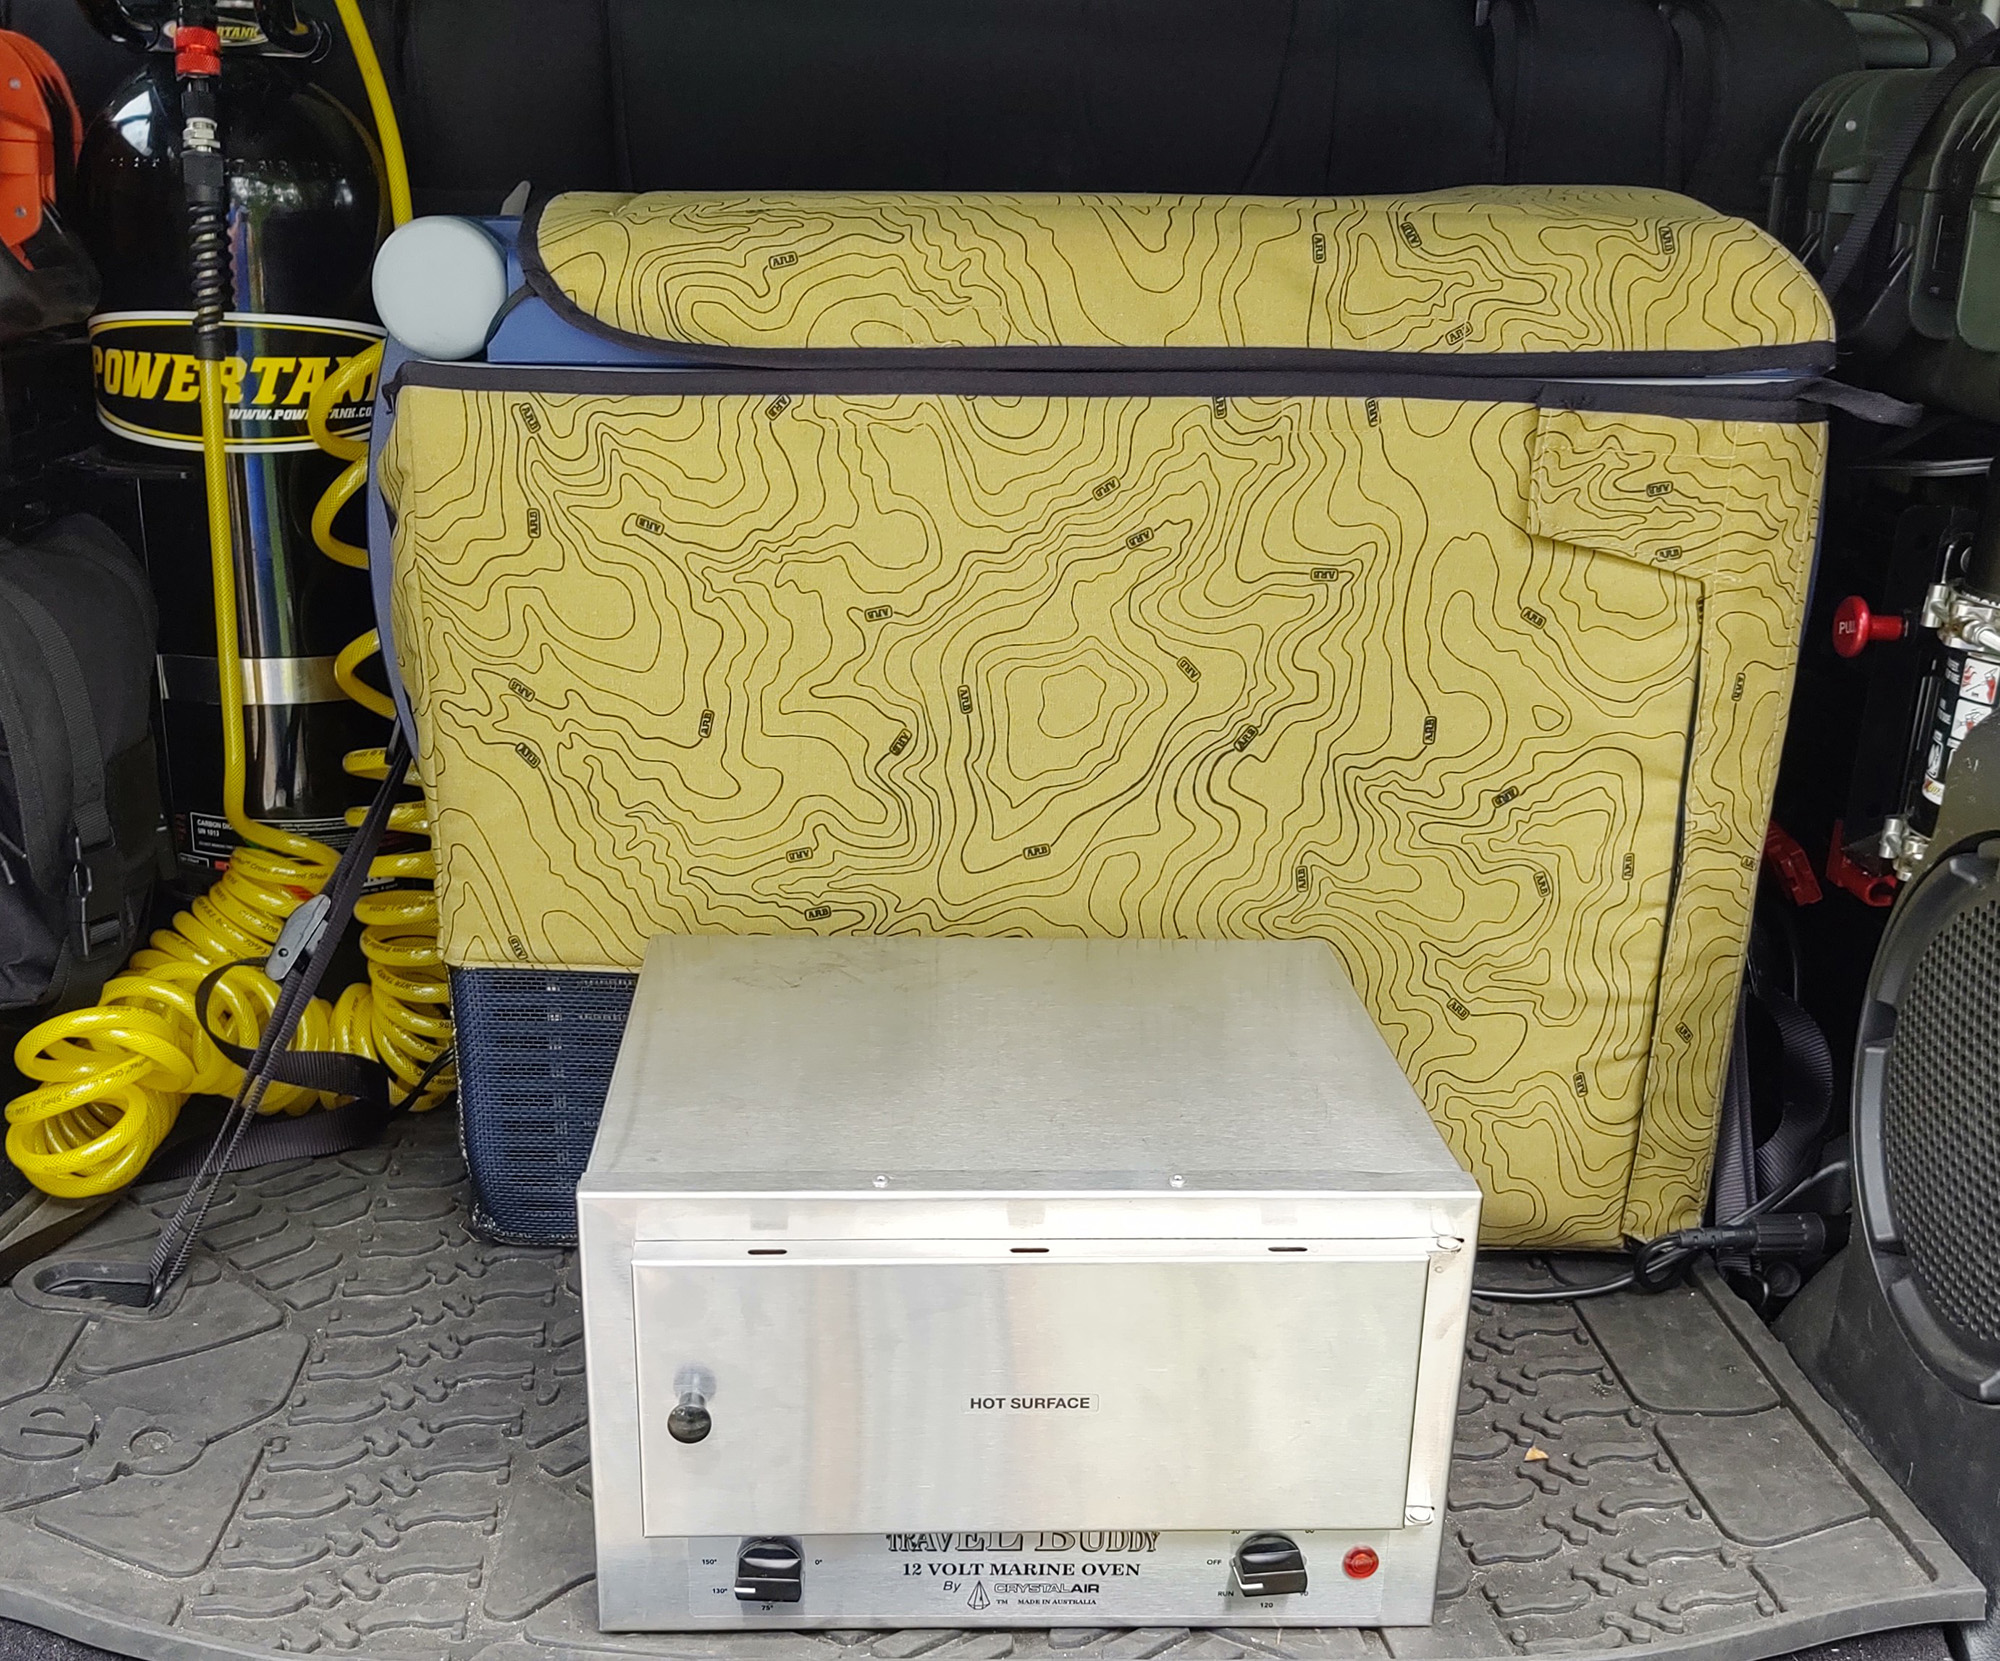
It will fit a wide range of fridge freezers, as long as the footprint of your unit is within 25.5” x 15.7”. This meant the ARB Classic 50 Quart I currently have would work perfectly (as would the new Classic II variety). The 27.8” length of the fridge in the product specifications includes protruding handles, which can overhang the tray.
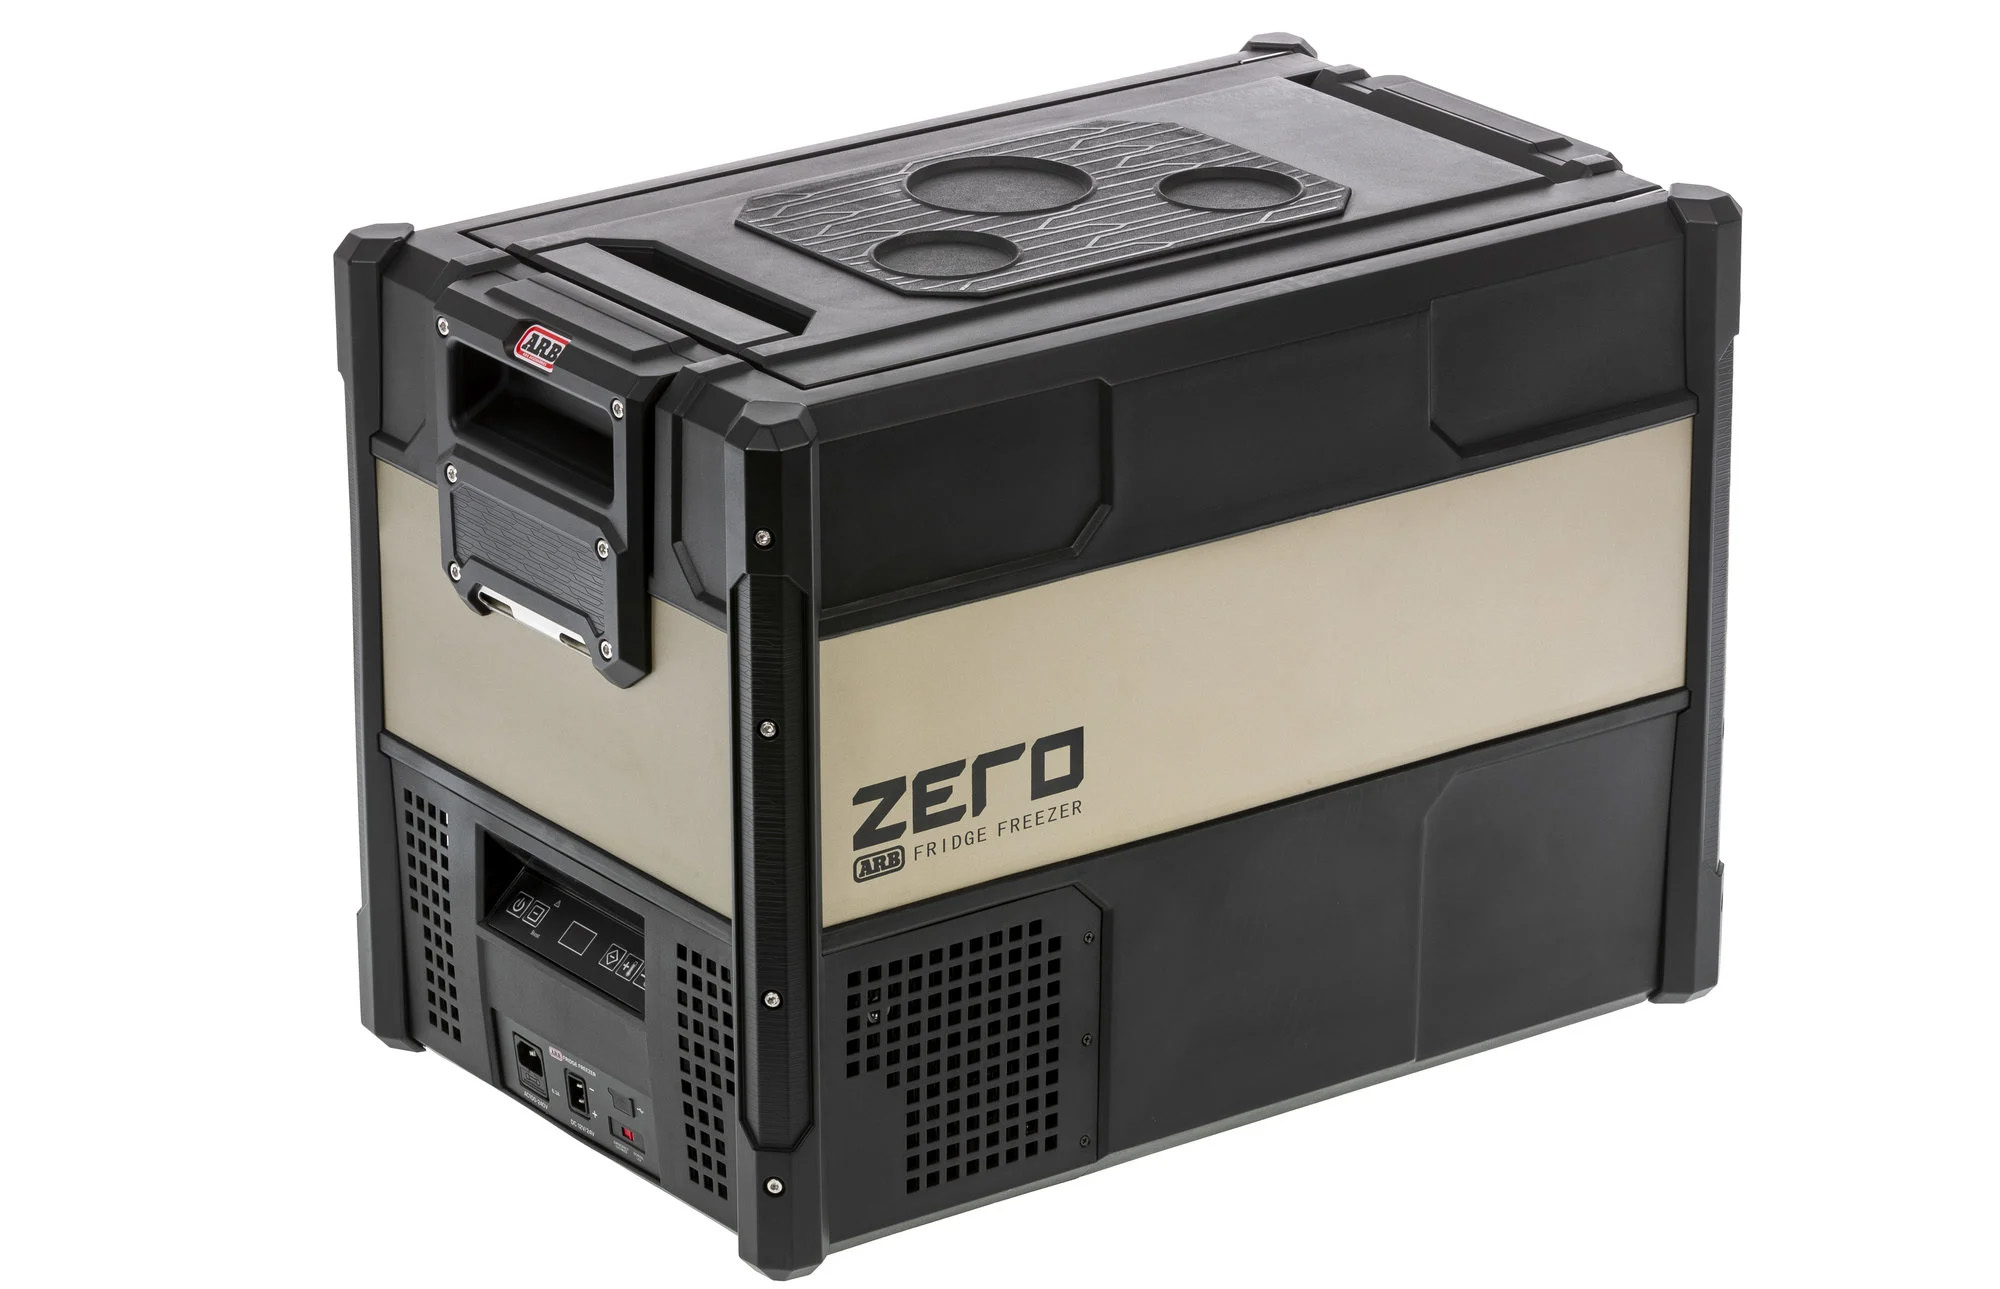
I also knew the ARB Zero 47 Quart model I have in transit would work.
I believed this Trail Kitchen system would be a game changer in the back of my JKU, but MORryde wasn't done with potential upgrades in this system. Not even close.
Hey, sometimes you have a bunch of friends with you along for the ride. And if you've got the reputation of using this Trail Kitchen to crank out some seriously gourmet meals, even in the outdoors, sometimes you'll get conned (or possibly bribed) into making big meals for everyone.
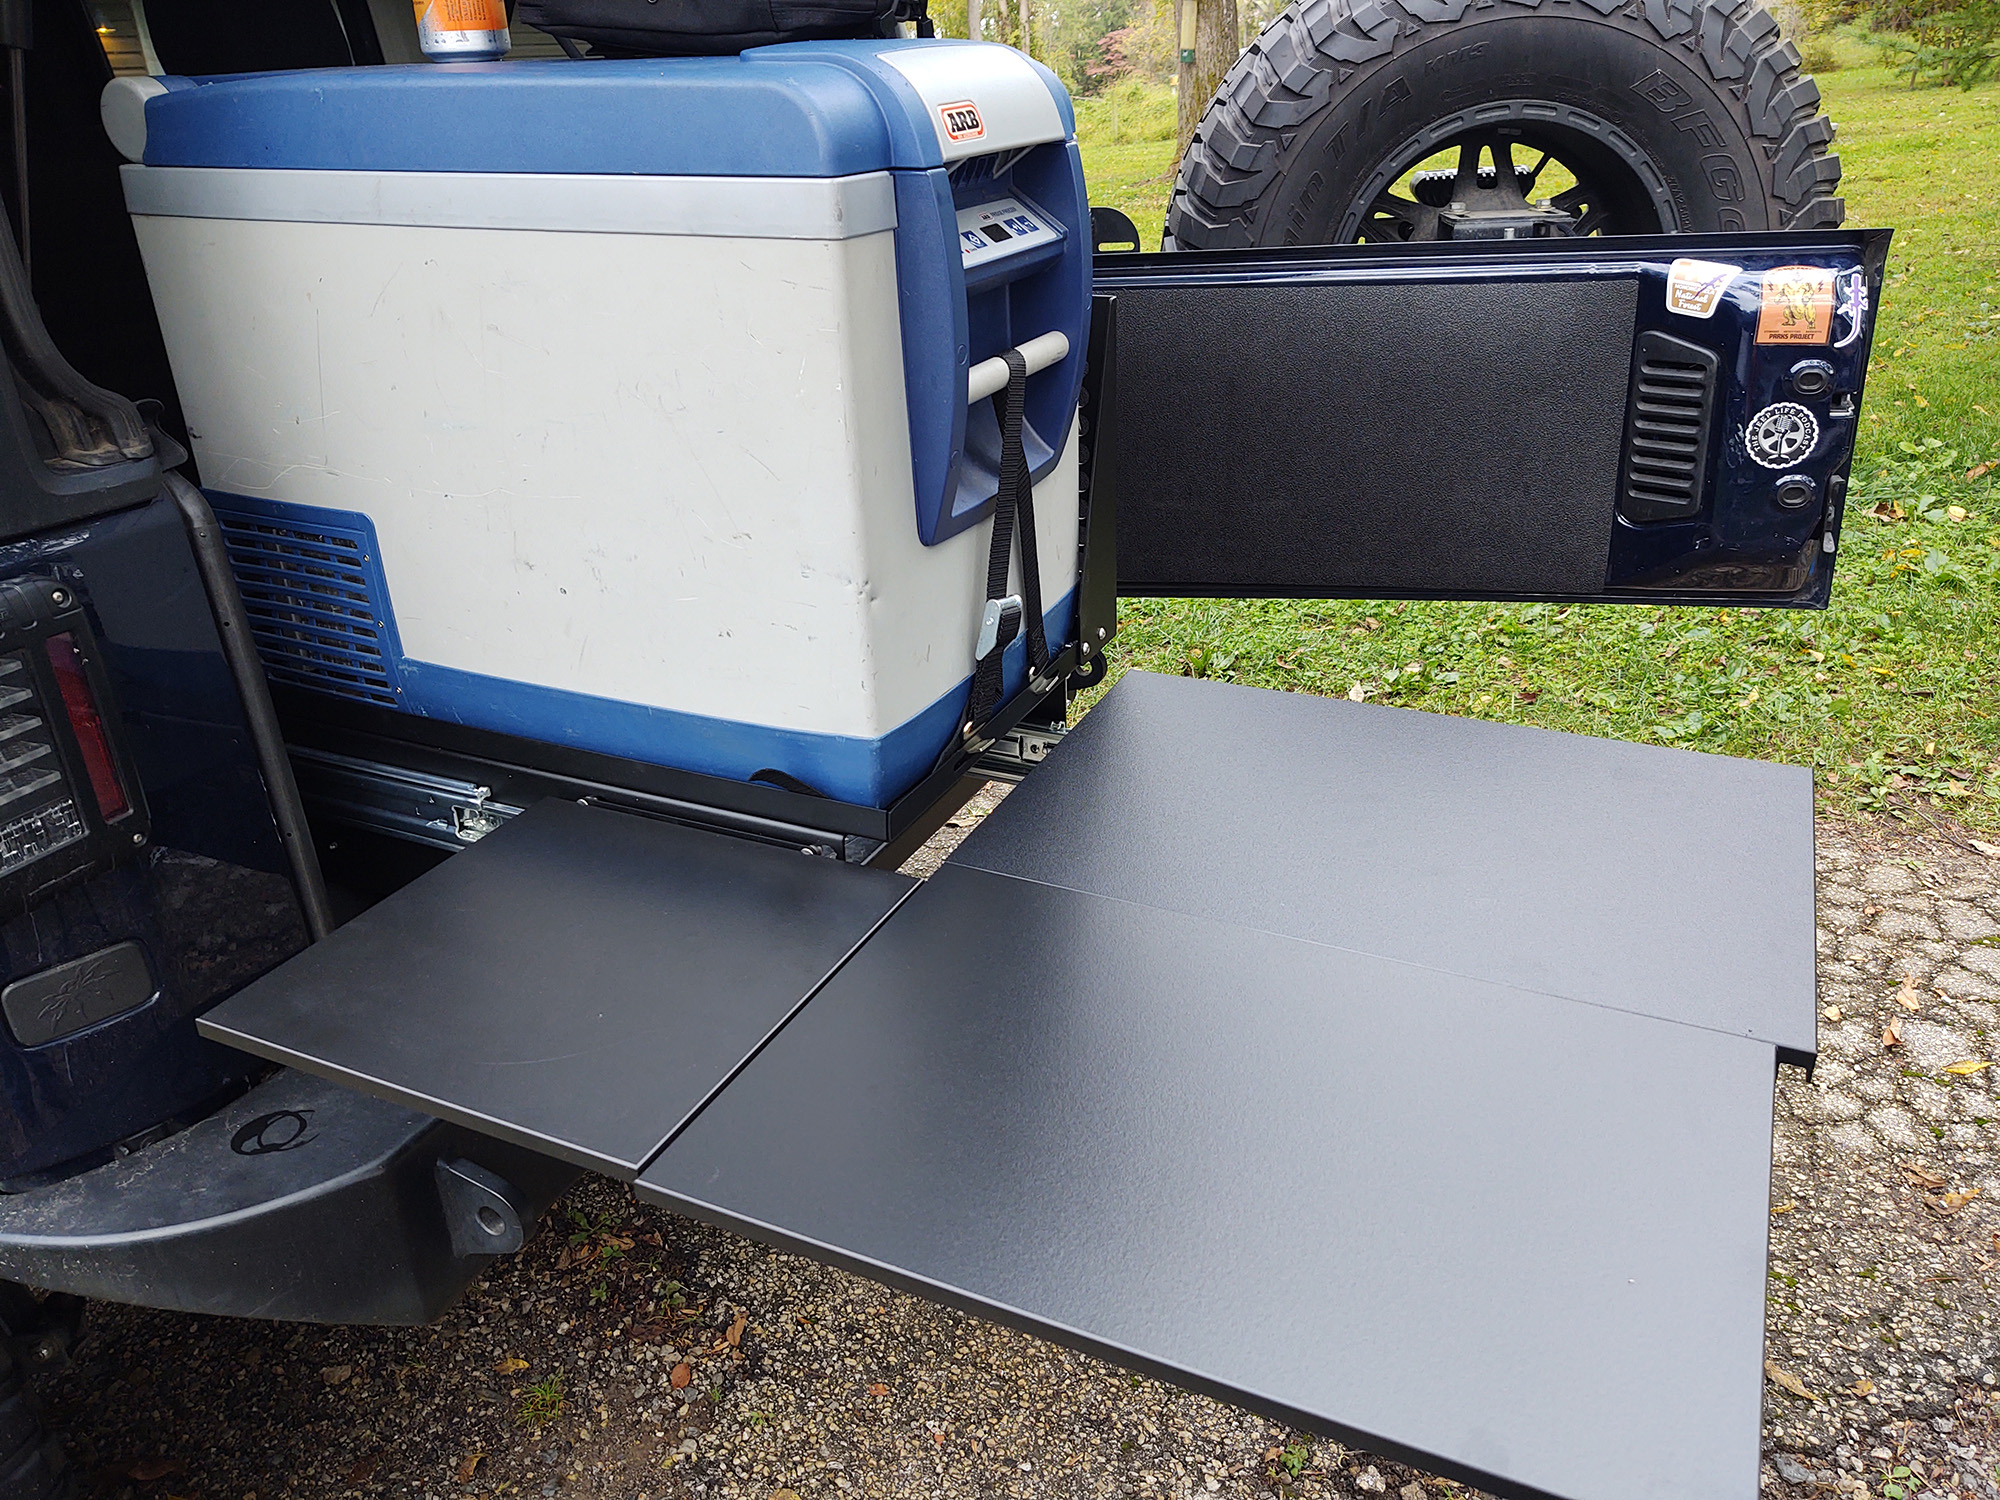
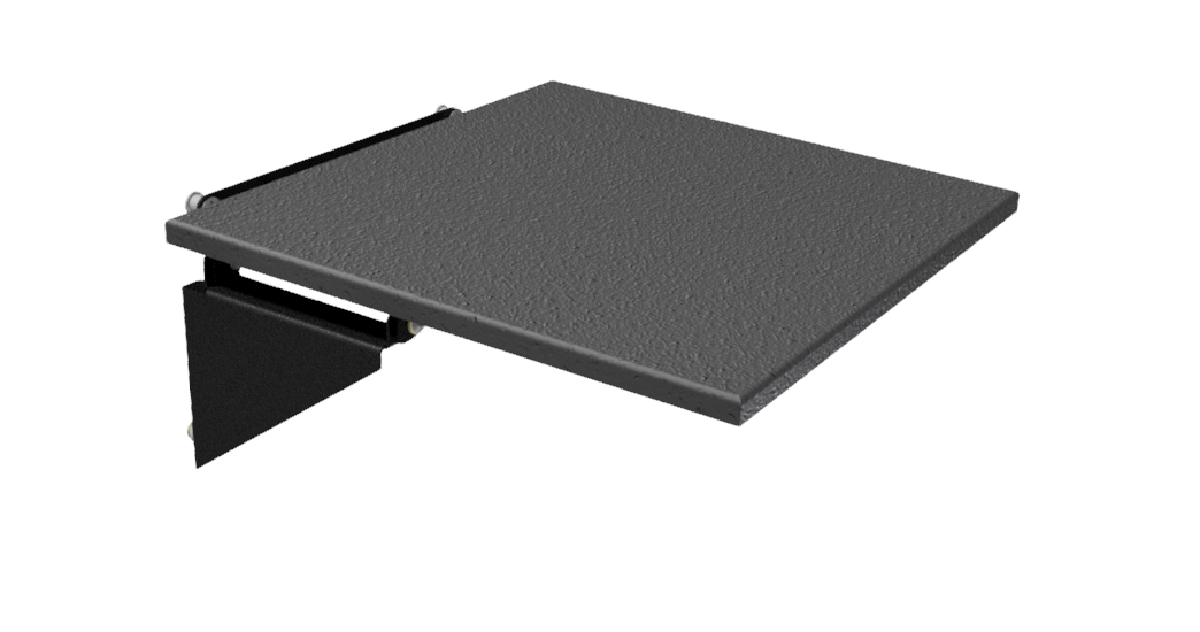
For this type of situation, MORryde designed not one, but TWO auxiliary countertop options to increase your preparation area. The kitchen’s Flip Out Counter stores neatly inside the slide out drawer, and the Slide On Counter fits inside that Flip Out unit. There is nothing worse than running out of countertop space and dropping your ingredients (or hot food) in the dirt, and both of these units together provide plenty of that space.
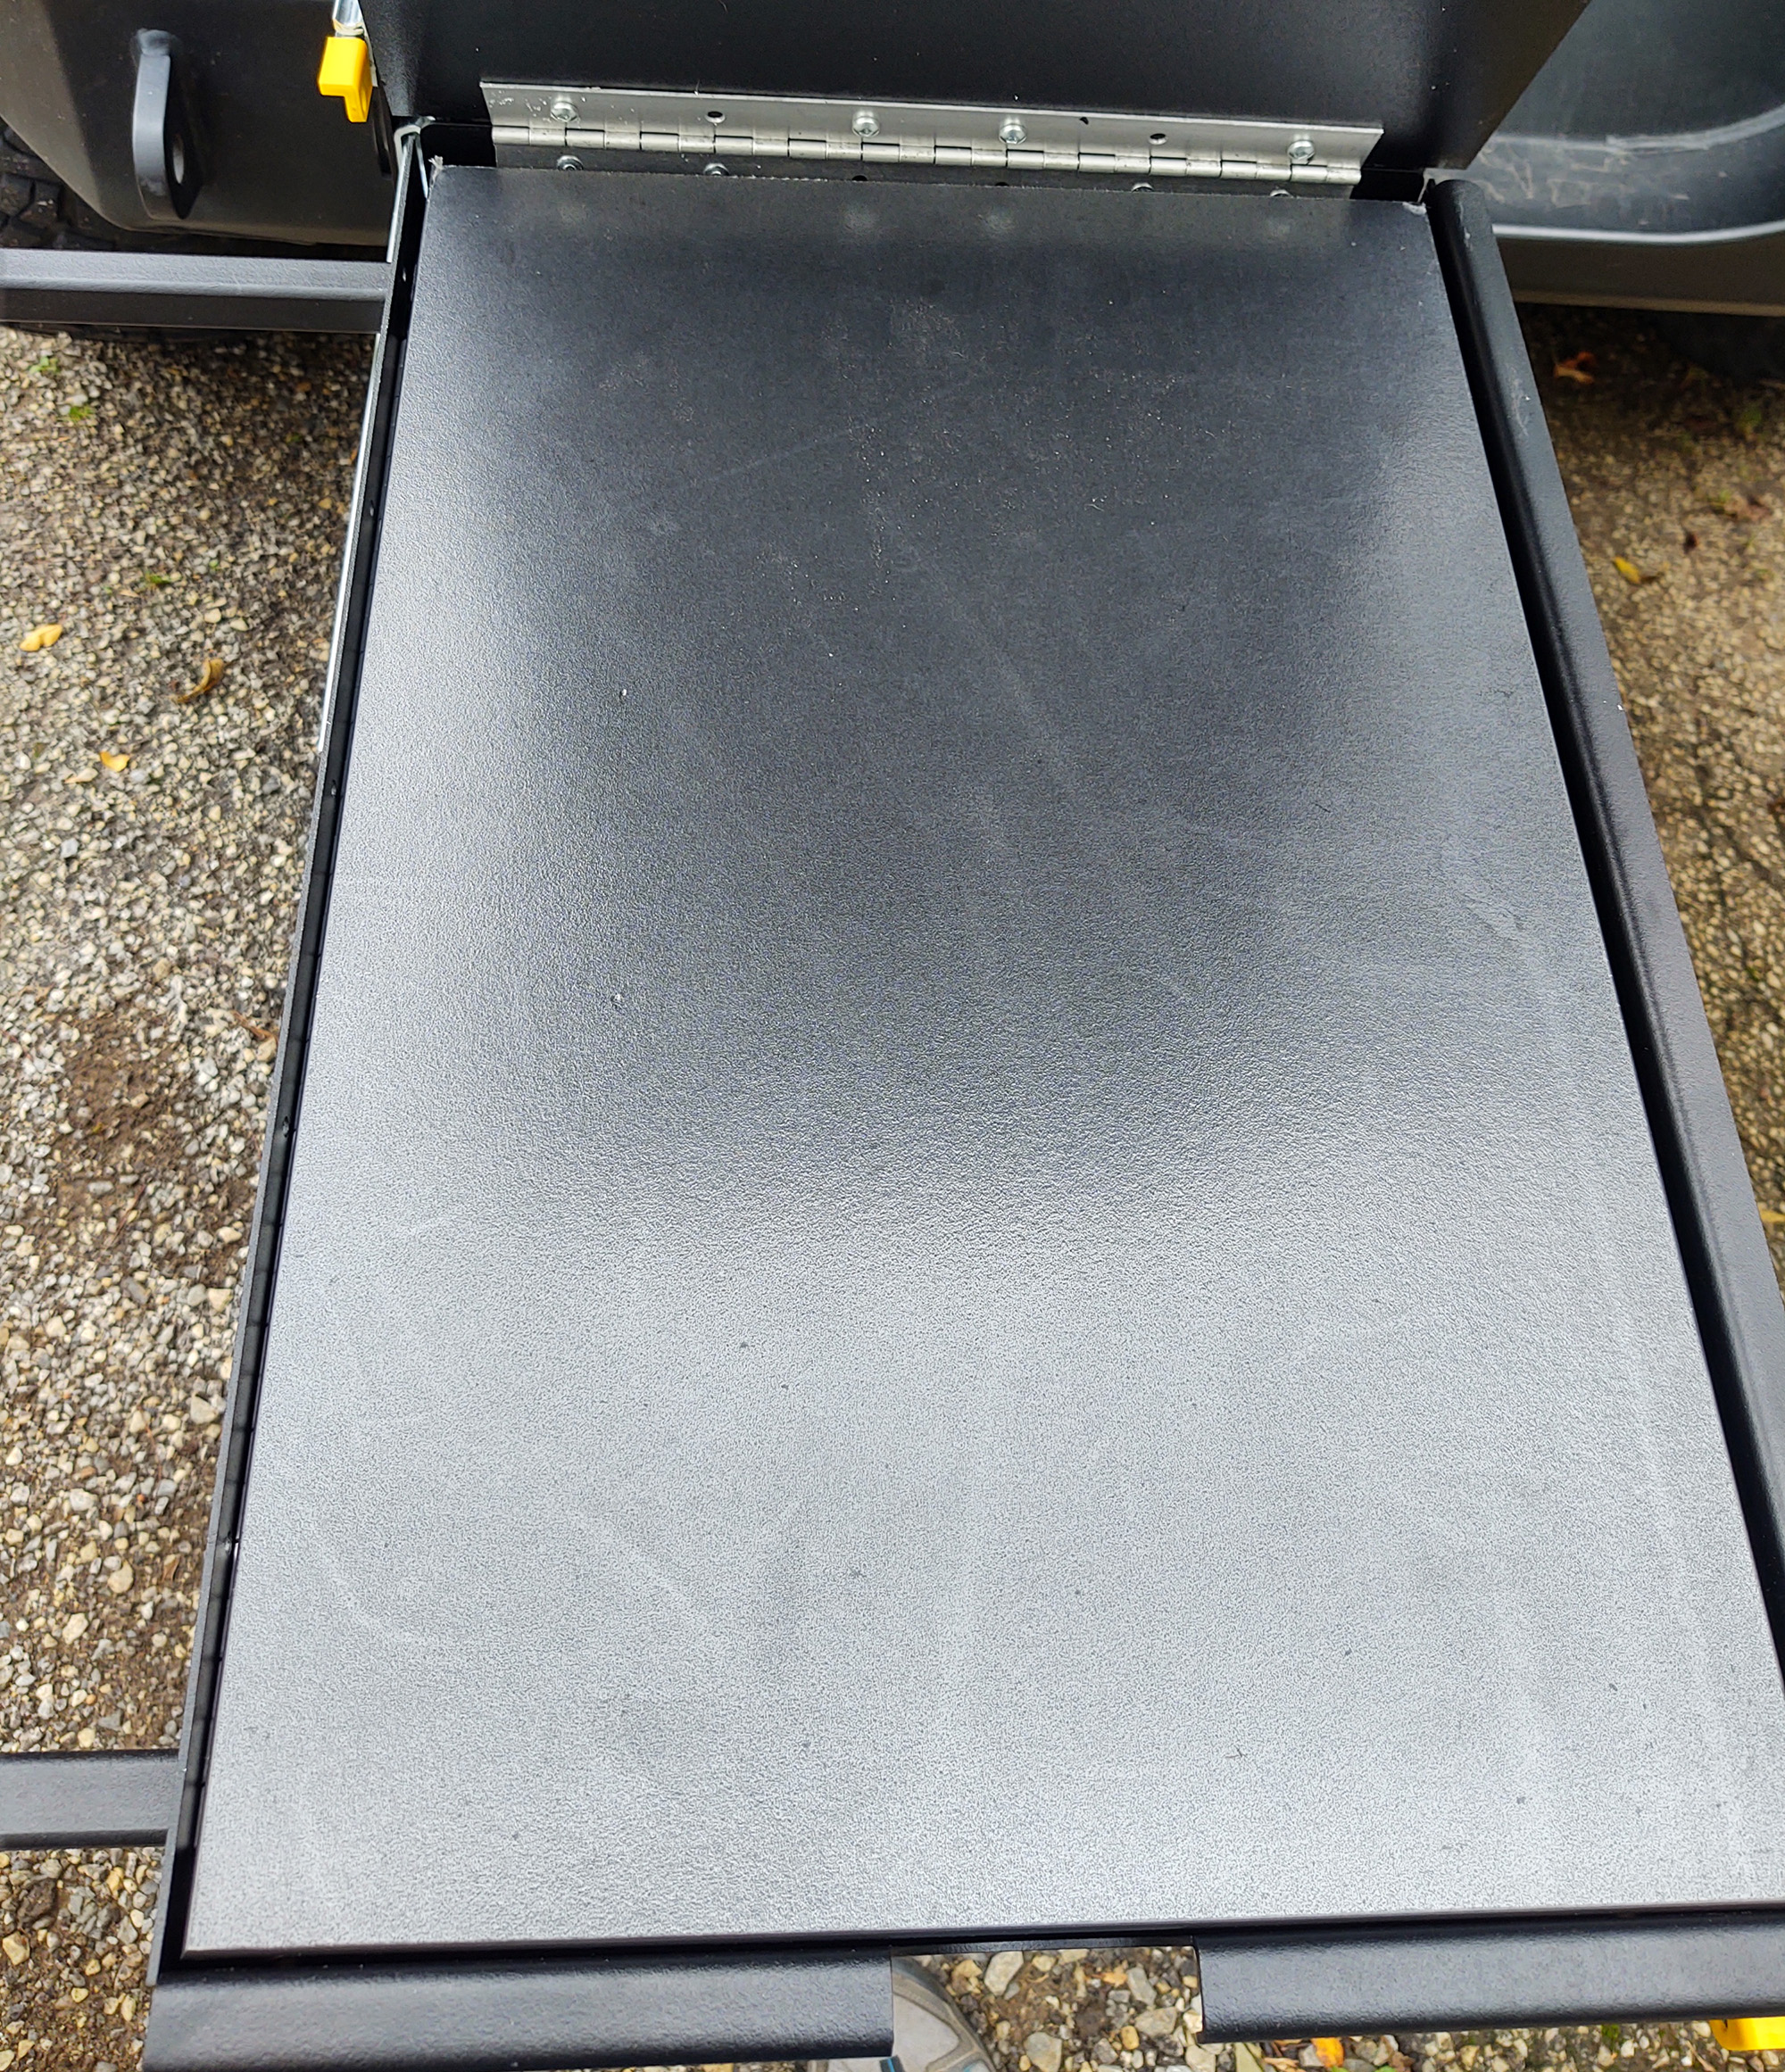
All of the countertops included in this system are made of HDPE (high-density polyethylene) which is food safe, does not absorb moisture odor or bacteria and is FDA compliant.

Finally, for even more storage, a MOLLE Grid Panel is available for the side of the fridge tray — giving you the ability to add any compatible pouches or mounting panels for fully customizable gear organization.
With the bolt-in bracket kit, this full installation becomes quite simple. Utilizing three of the factory cargo tie-down bracket bolt locations, the forward bracket allows for an adjustable fit while still allowing easy removal if you need your cargo area for something else, such as helping a friend move. We won’t tell anyone how easily it comes out though, just in case you need an excuse. It all depends on how good of a friend he or she is, right?
The trail kitchen can be mounted without this bracket, but it would involve drilling into the trunk floor and using rivnuts as the mounting points. In addition to making sure your measurements are correct the first time, this method also involves cutting your carpet and making sure there are no critical parts on the back side of the sheet metal that could be damaged.
I helped a friend install the trail kitchen in the back of his JKU without this bolt in kit a few months ago, and the experience was very different in terms of overall frustration. As such, I would strongly recommend spending the extra money on this bracket unless you absolutely need to mount it in another location — like centered in the cargo area, or on the passenger side. When using the Bolt-In Kit, you end up having to follow two sets of directions, and you will end up with extra hardware.
The trail kitchen unit comes fully assembled and ready to bolt to the bracket, using supplied hardware. This makes the entire installation less than an hour without add-ons. There are three mounting depths possible with the Bolt-In Kit, so adjustments can be made forward and backward depending on the size of your fridge, or if you have any additional accessories mounted to the tailgate.
Bolt-In Kit and Trail Kitchen Installation
Required tools:
- T-45 Torx socket
- ½” wrench or socket
- 5mm Allen wrench or socket
Starting with the instructions for the Bolt-In Kit:
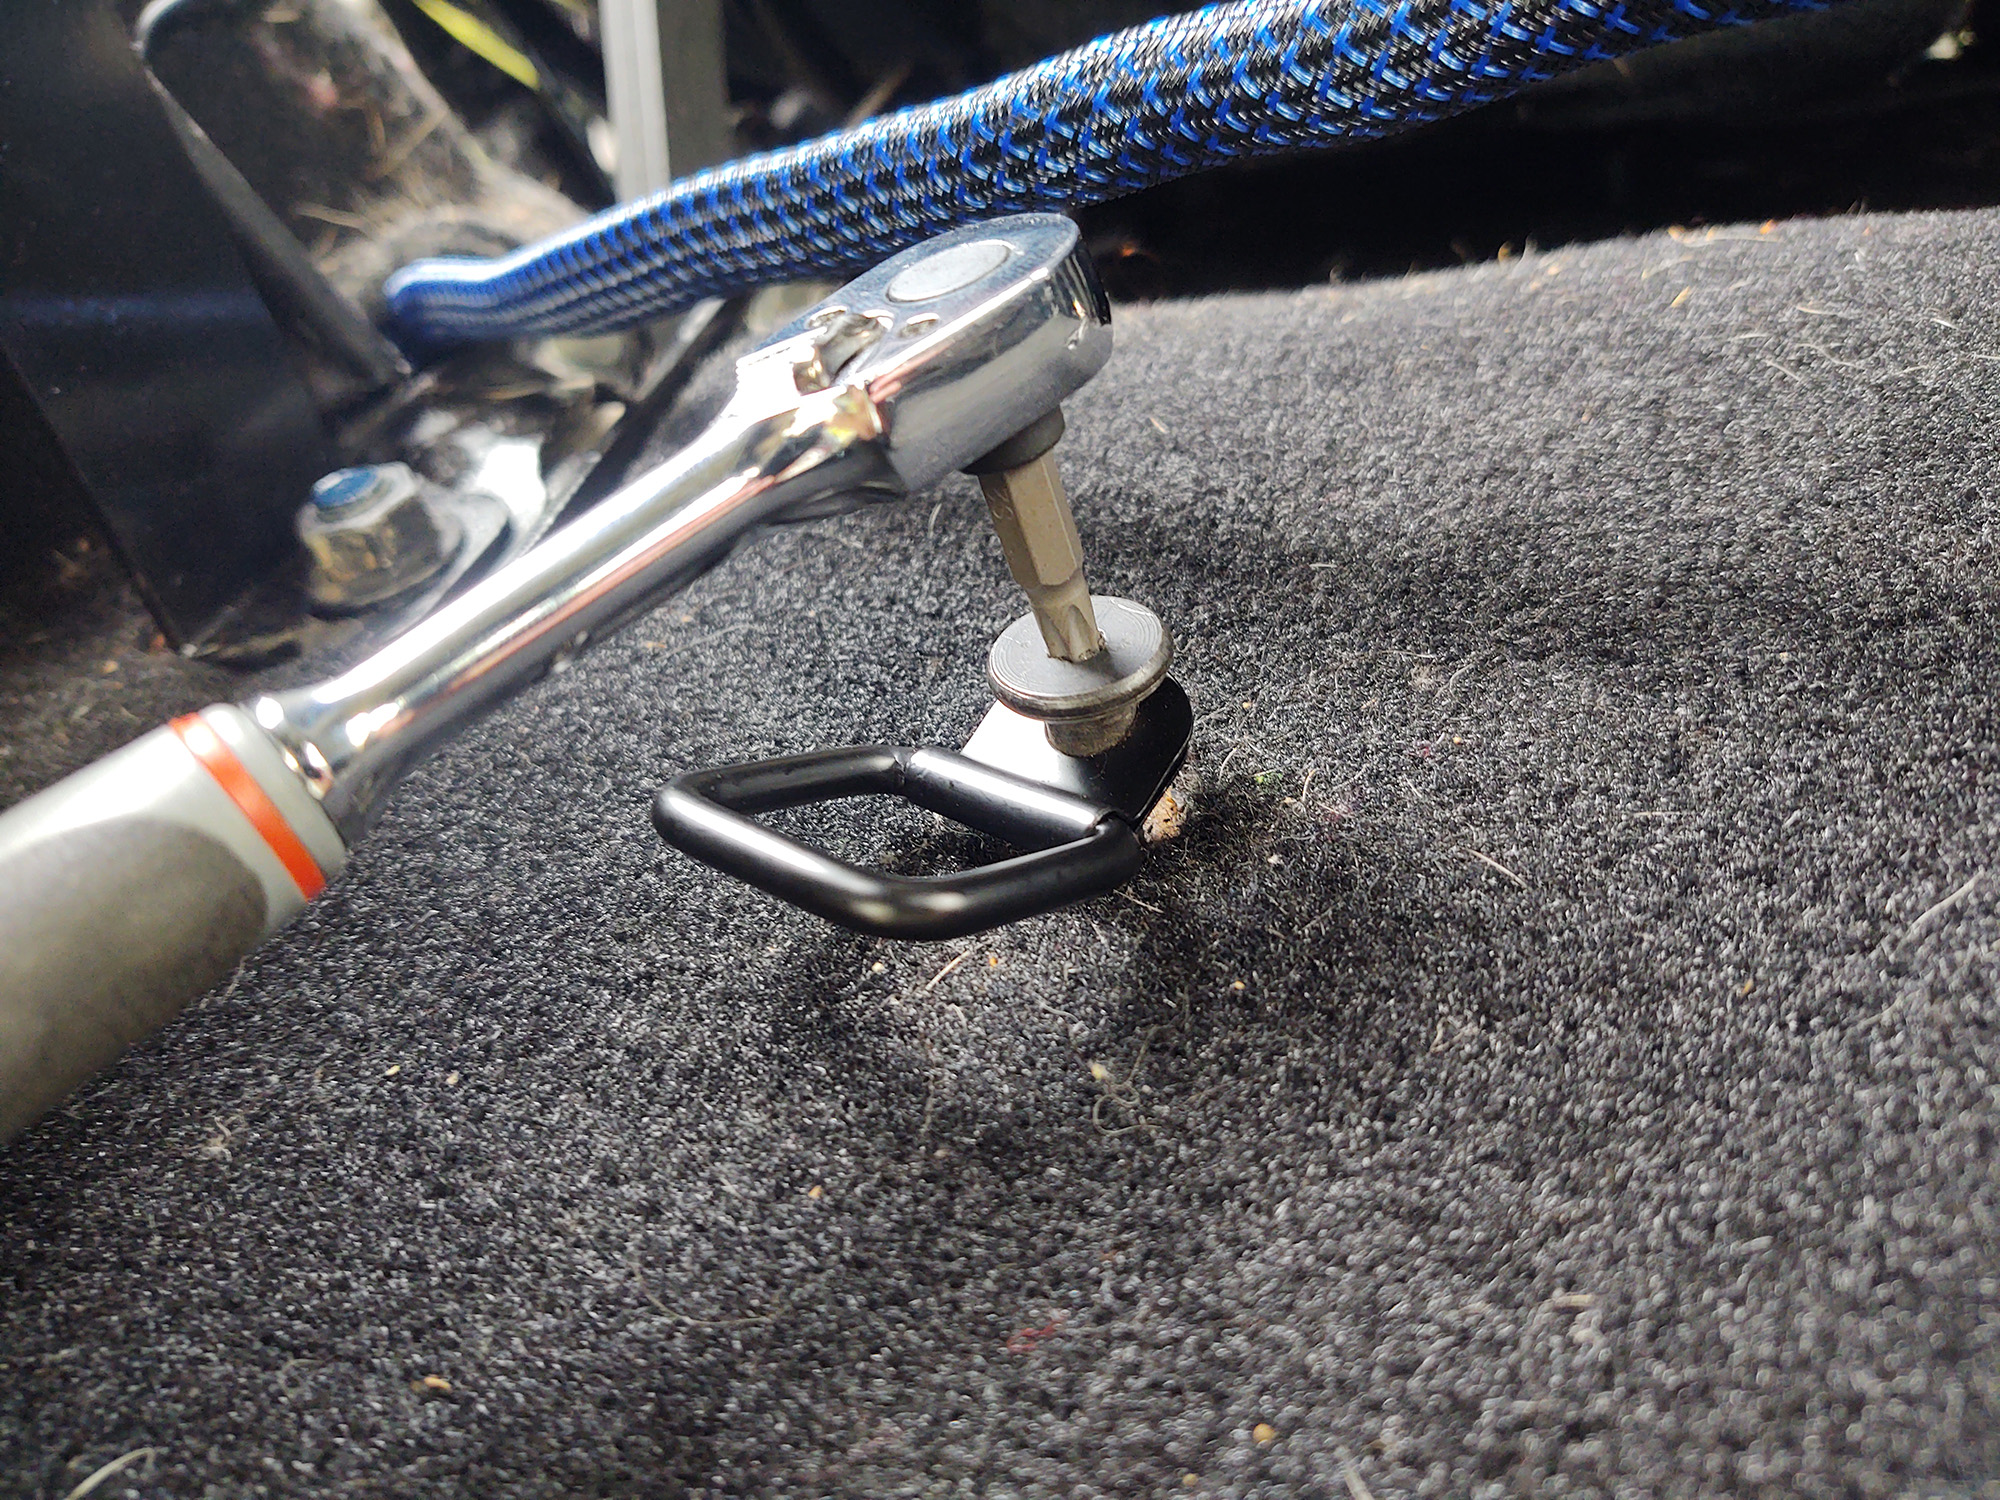
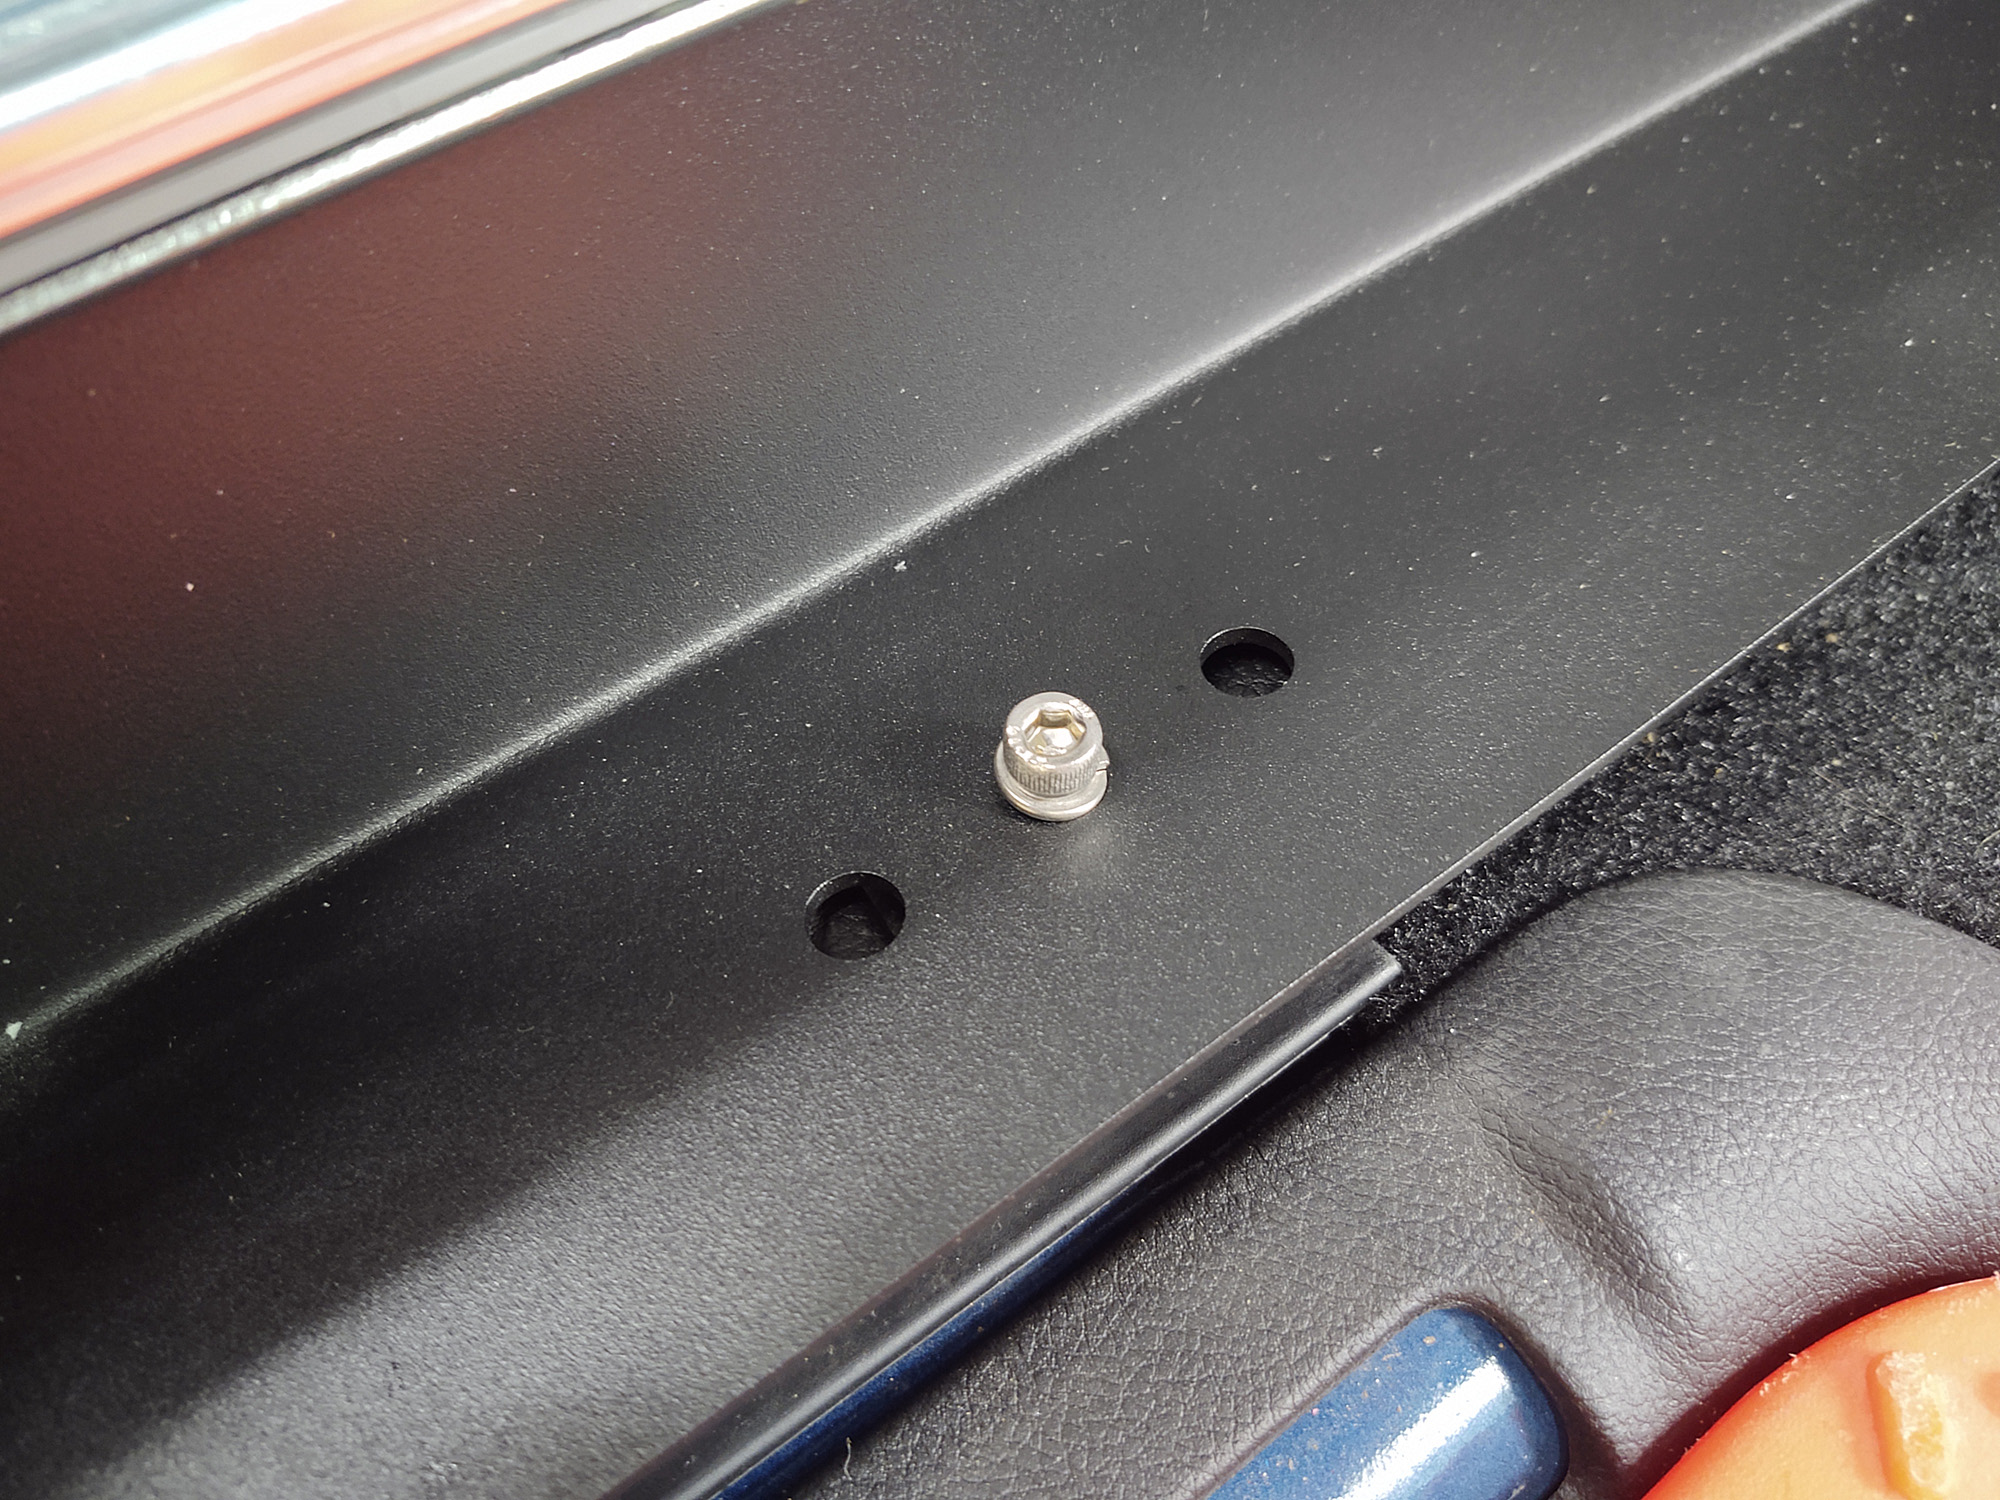
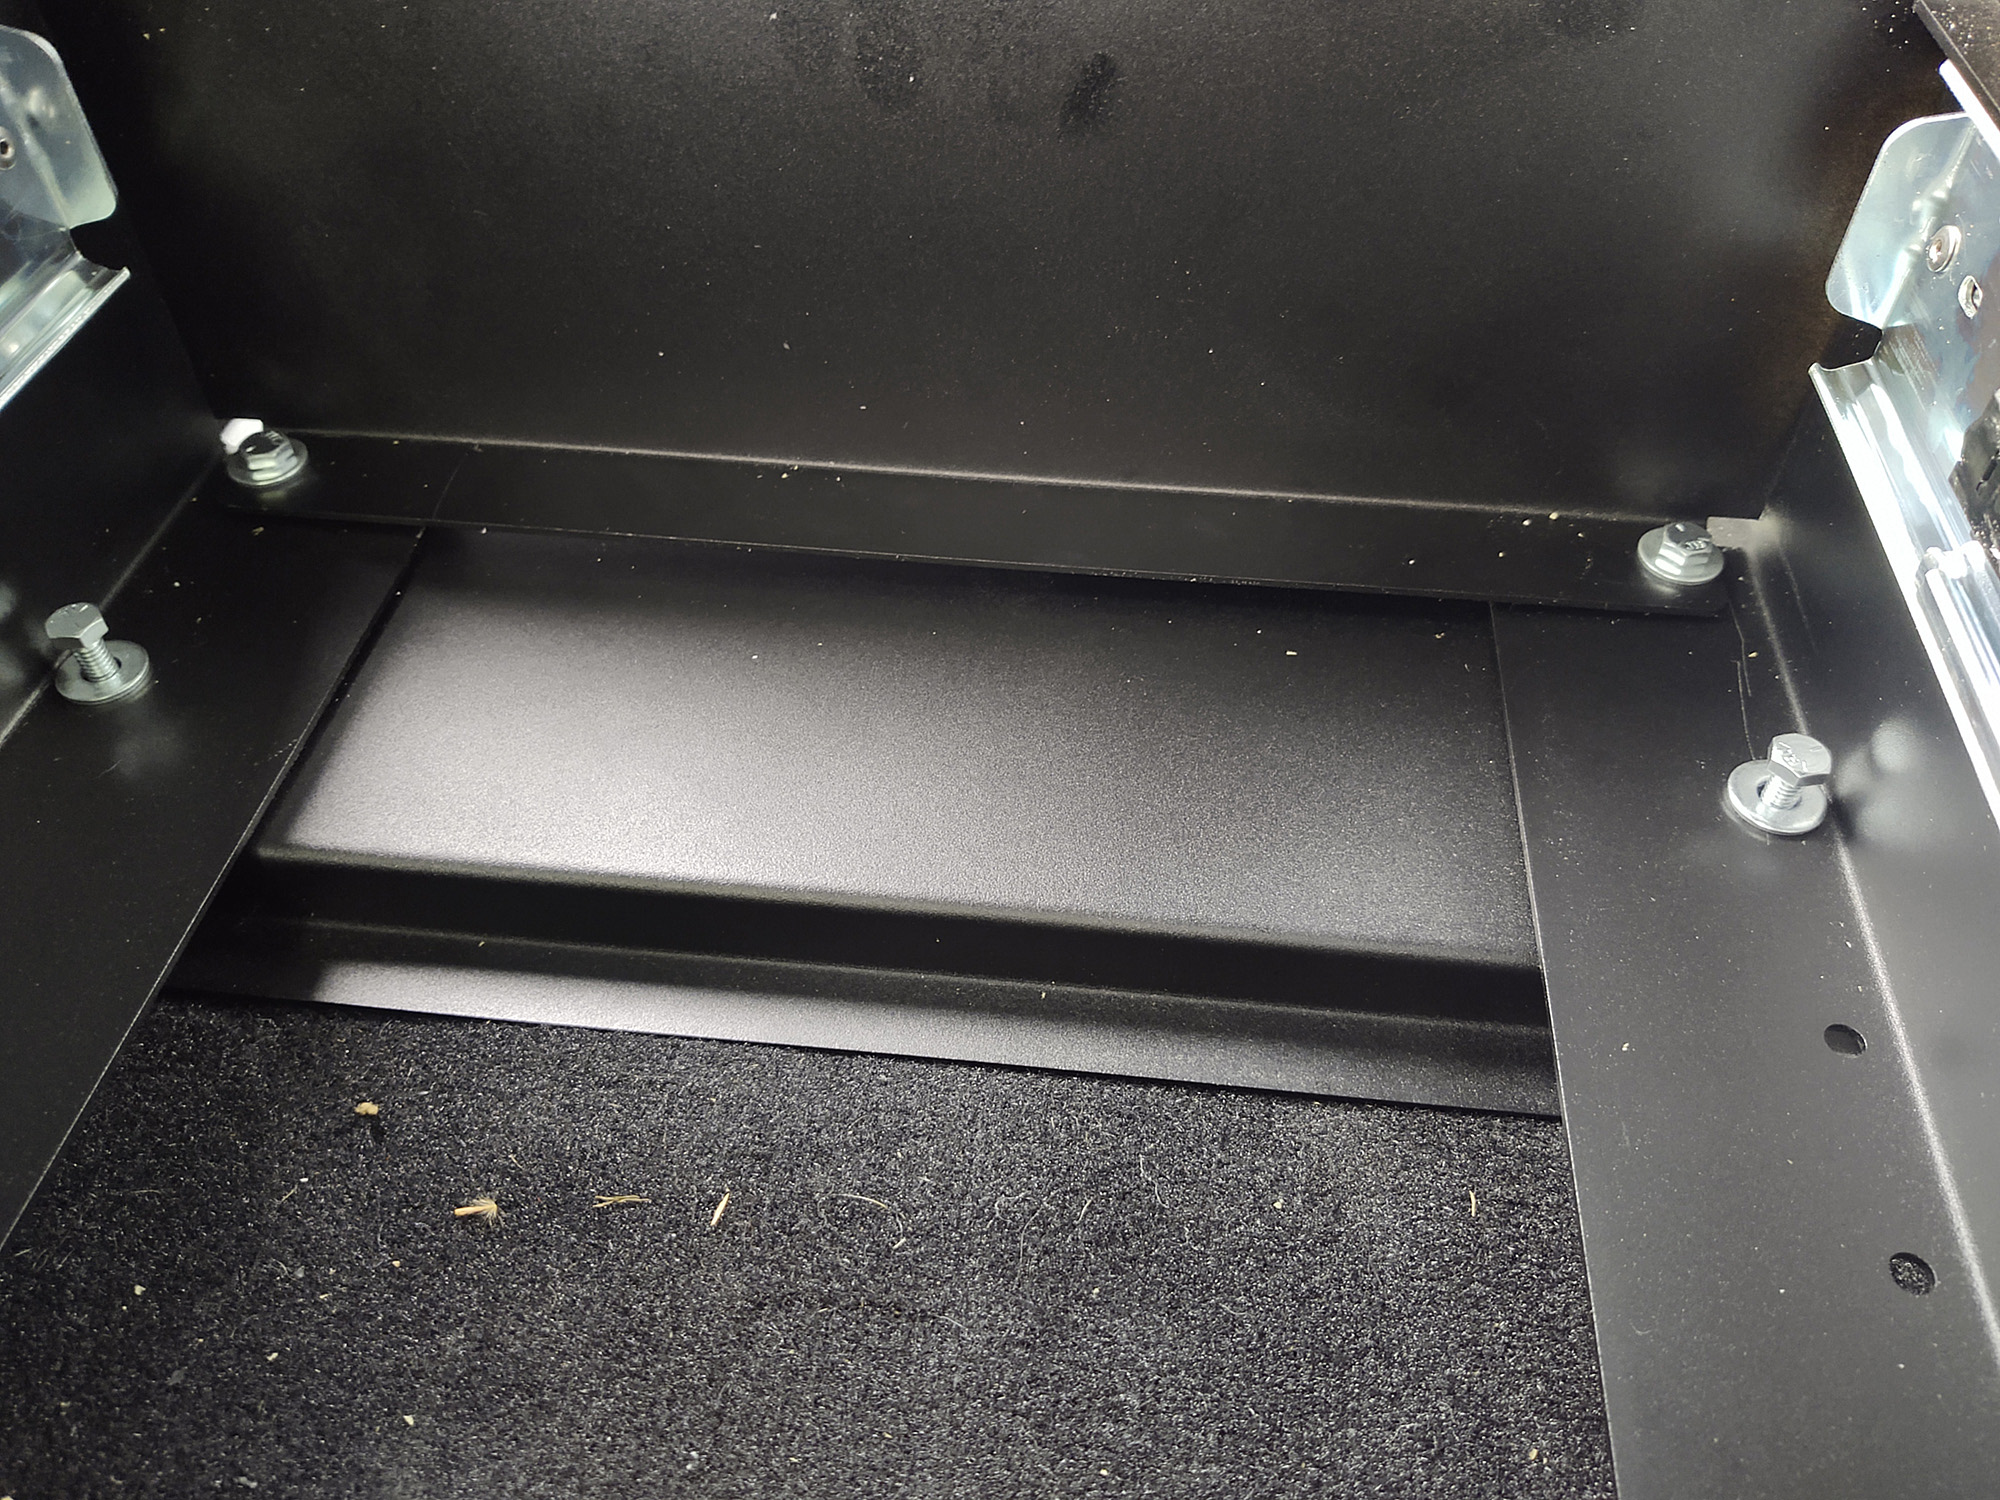
Using the T45 Torx socket, remove the factory cargo tie down anchors on both sides in the rear of the trunk, and on the drivers side in the middle of the trunk.
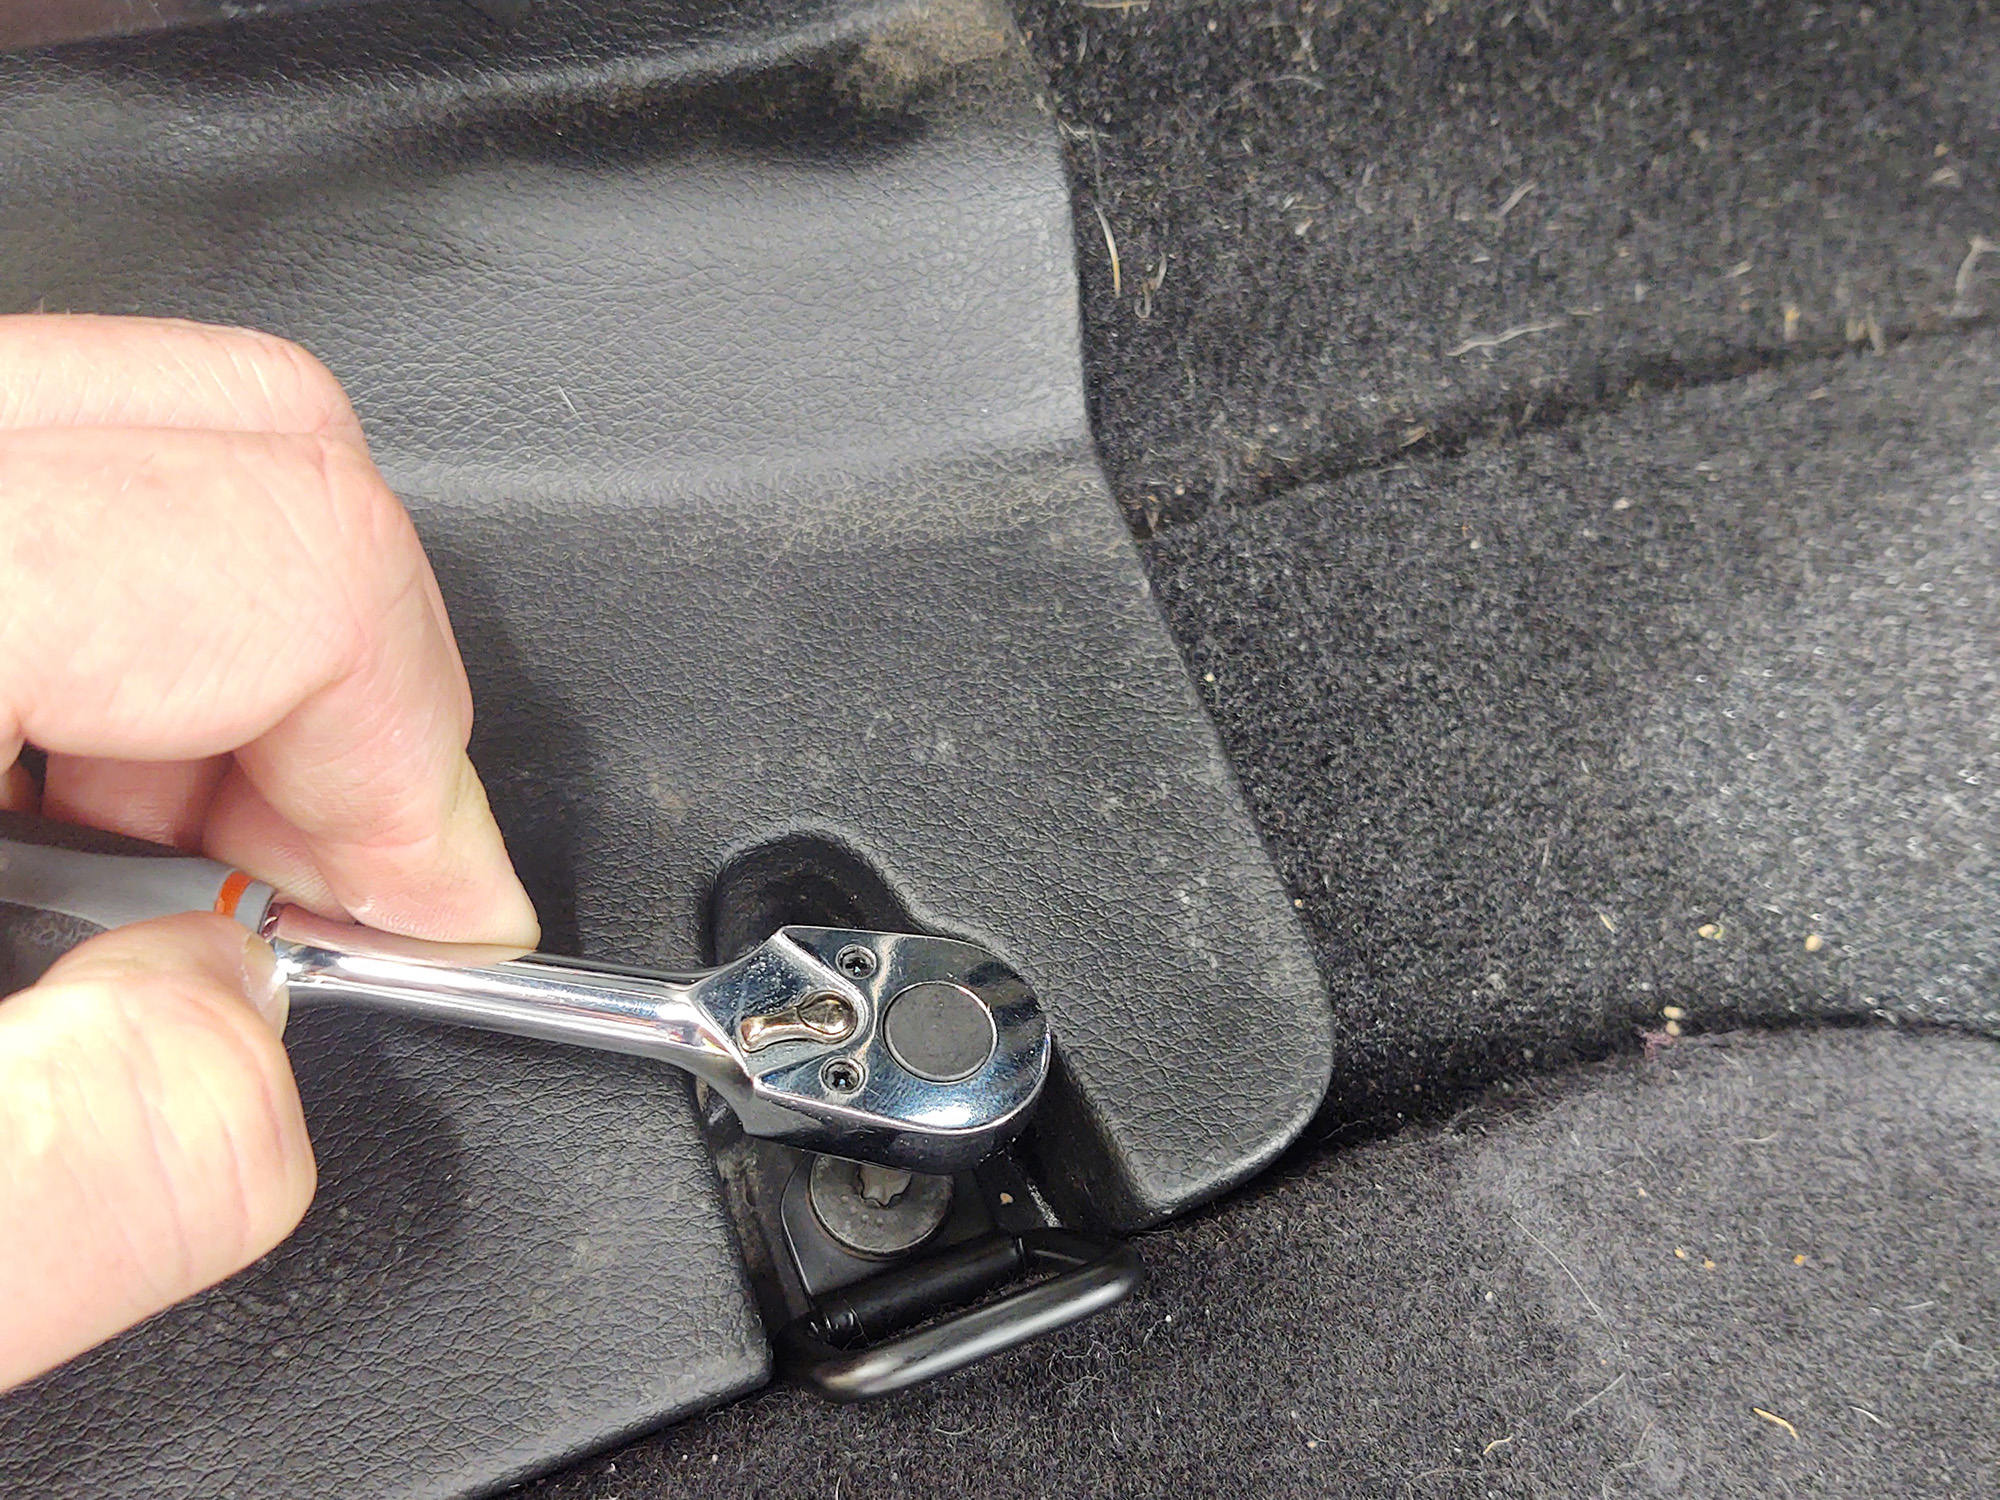
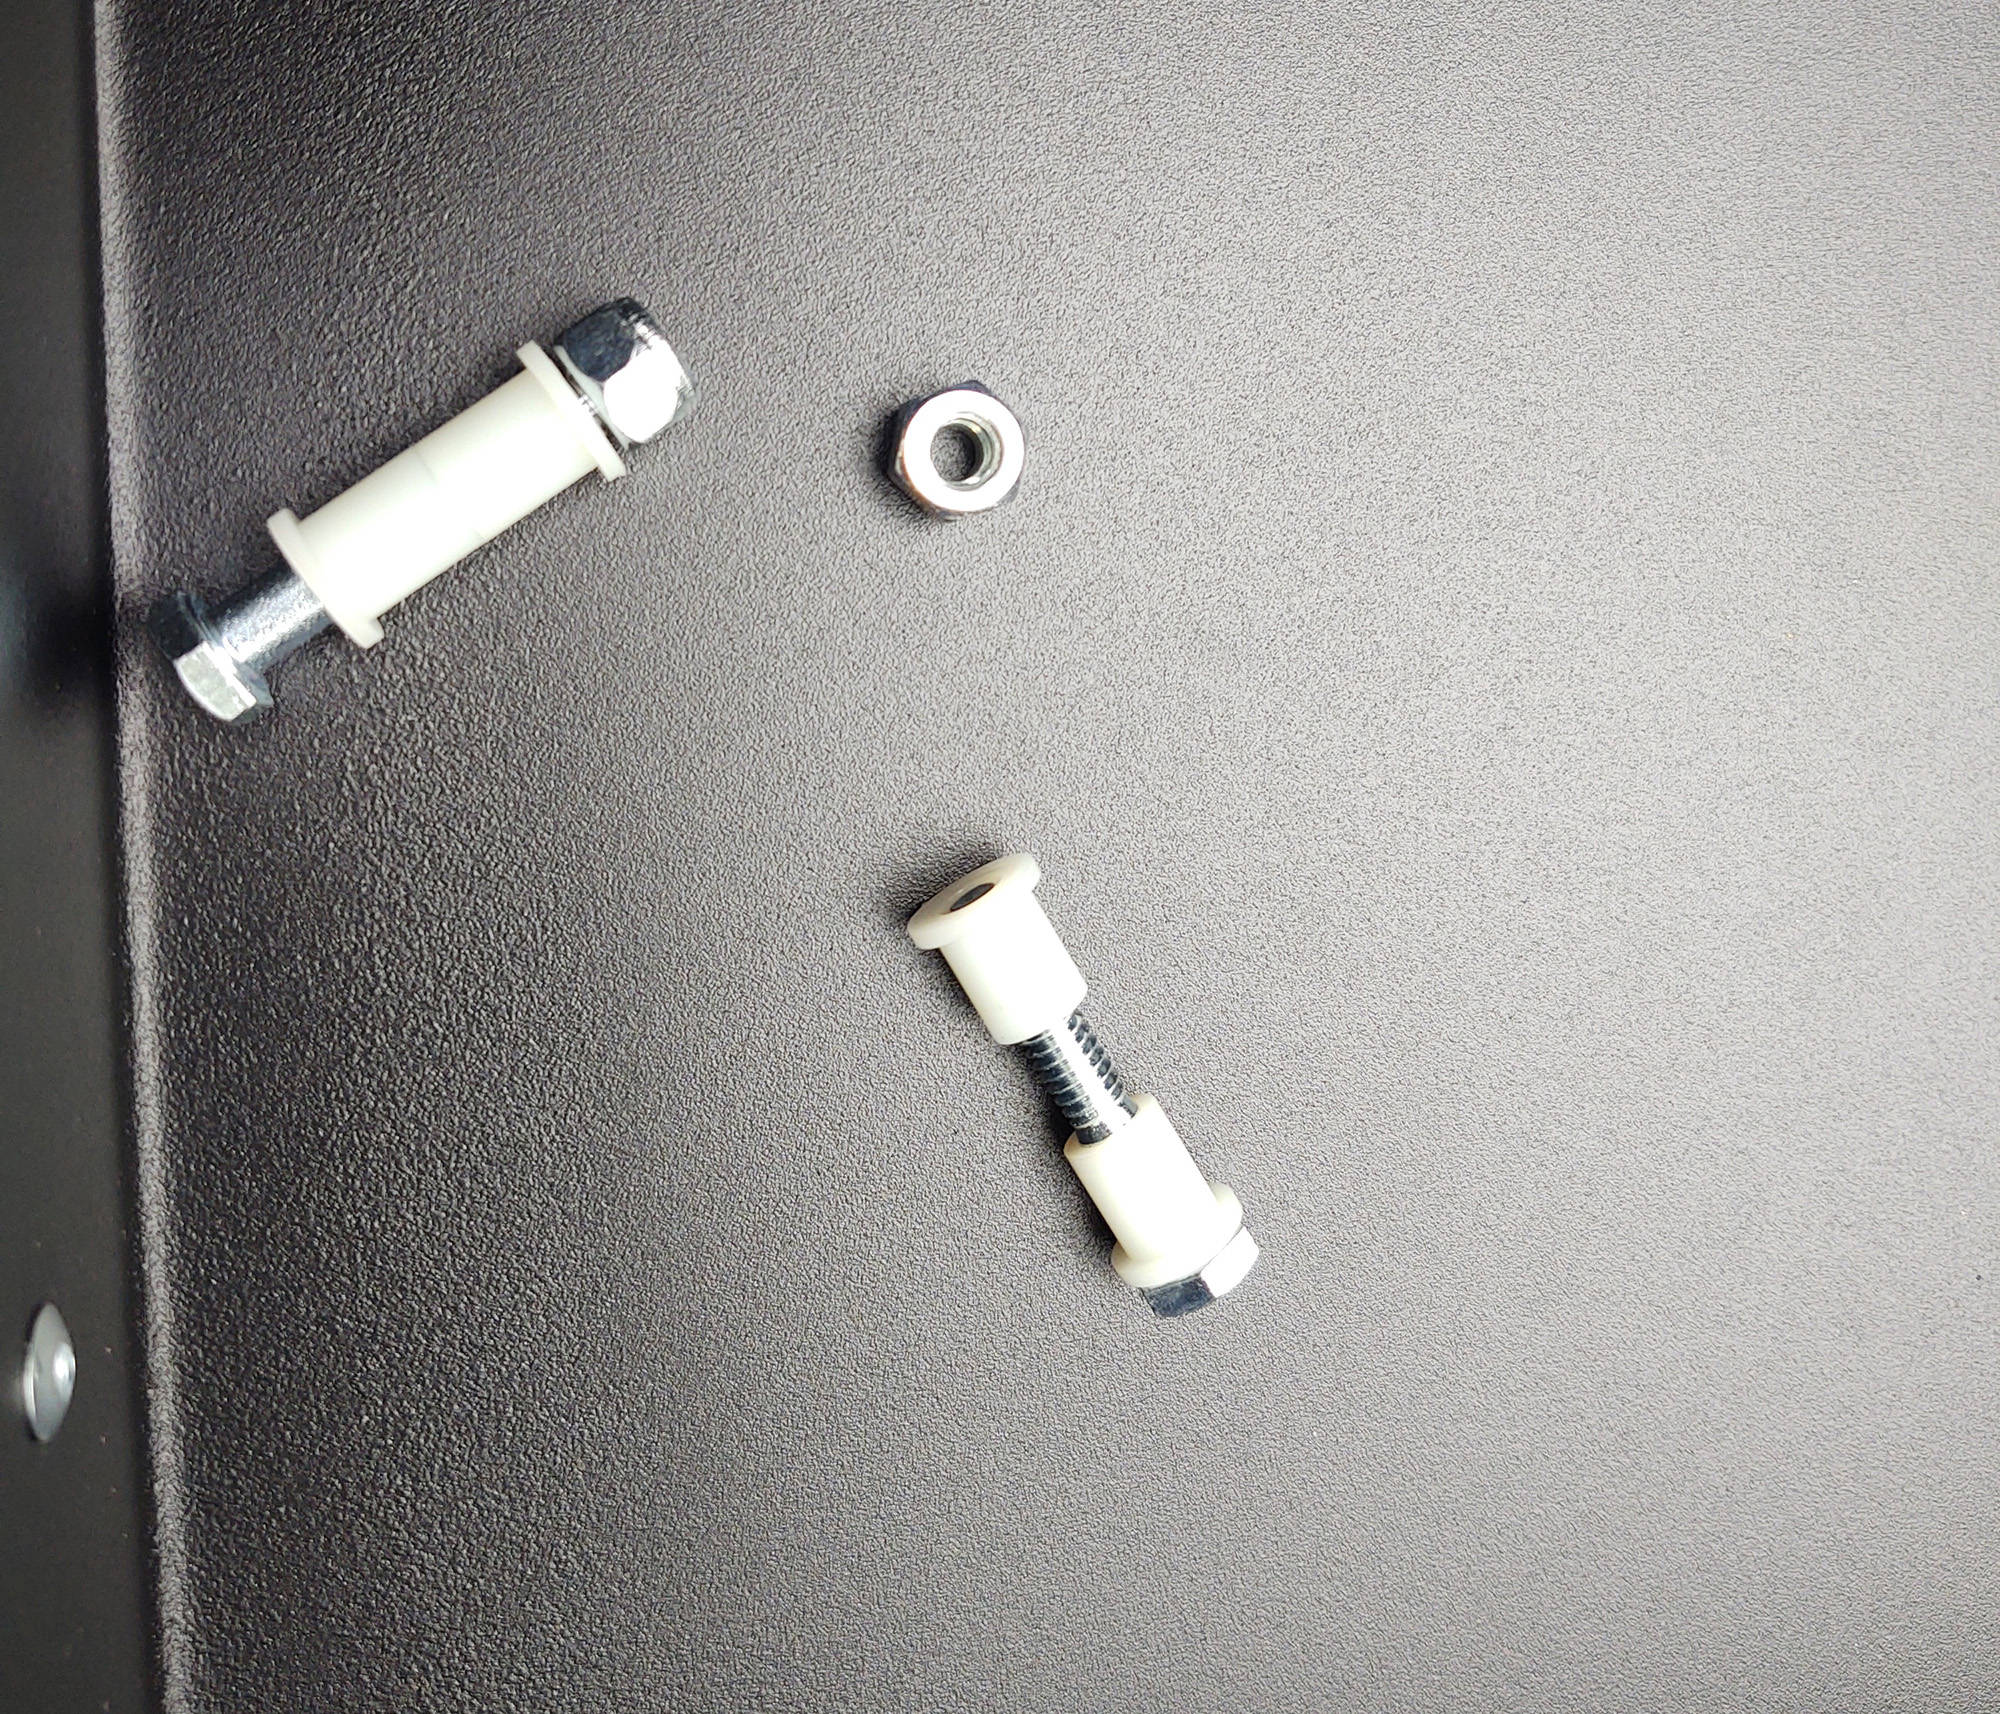
Place one 3/4 inch white spacer over top of each of the rear nutserts nearest to the back seat. These will be used to space out the rear section of the Bolt-In Kit bracket.

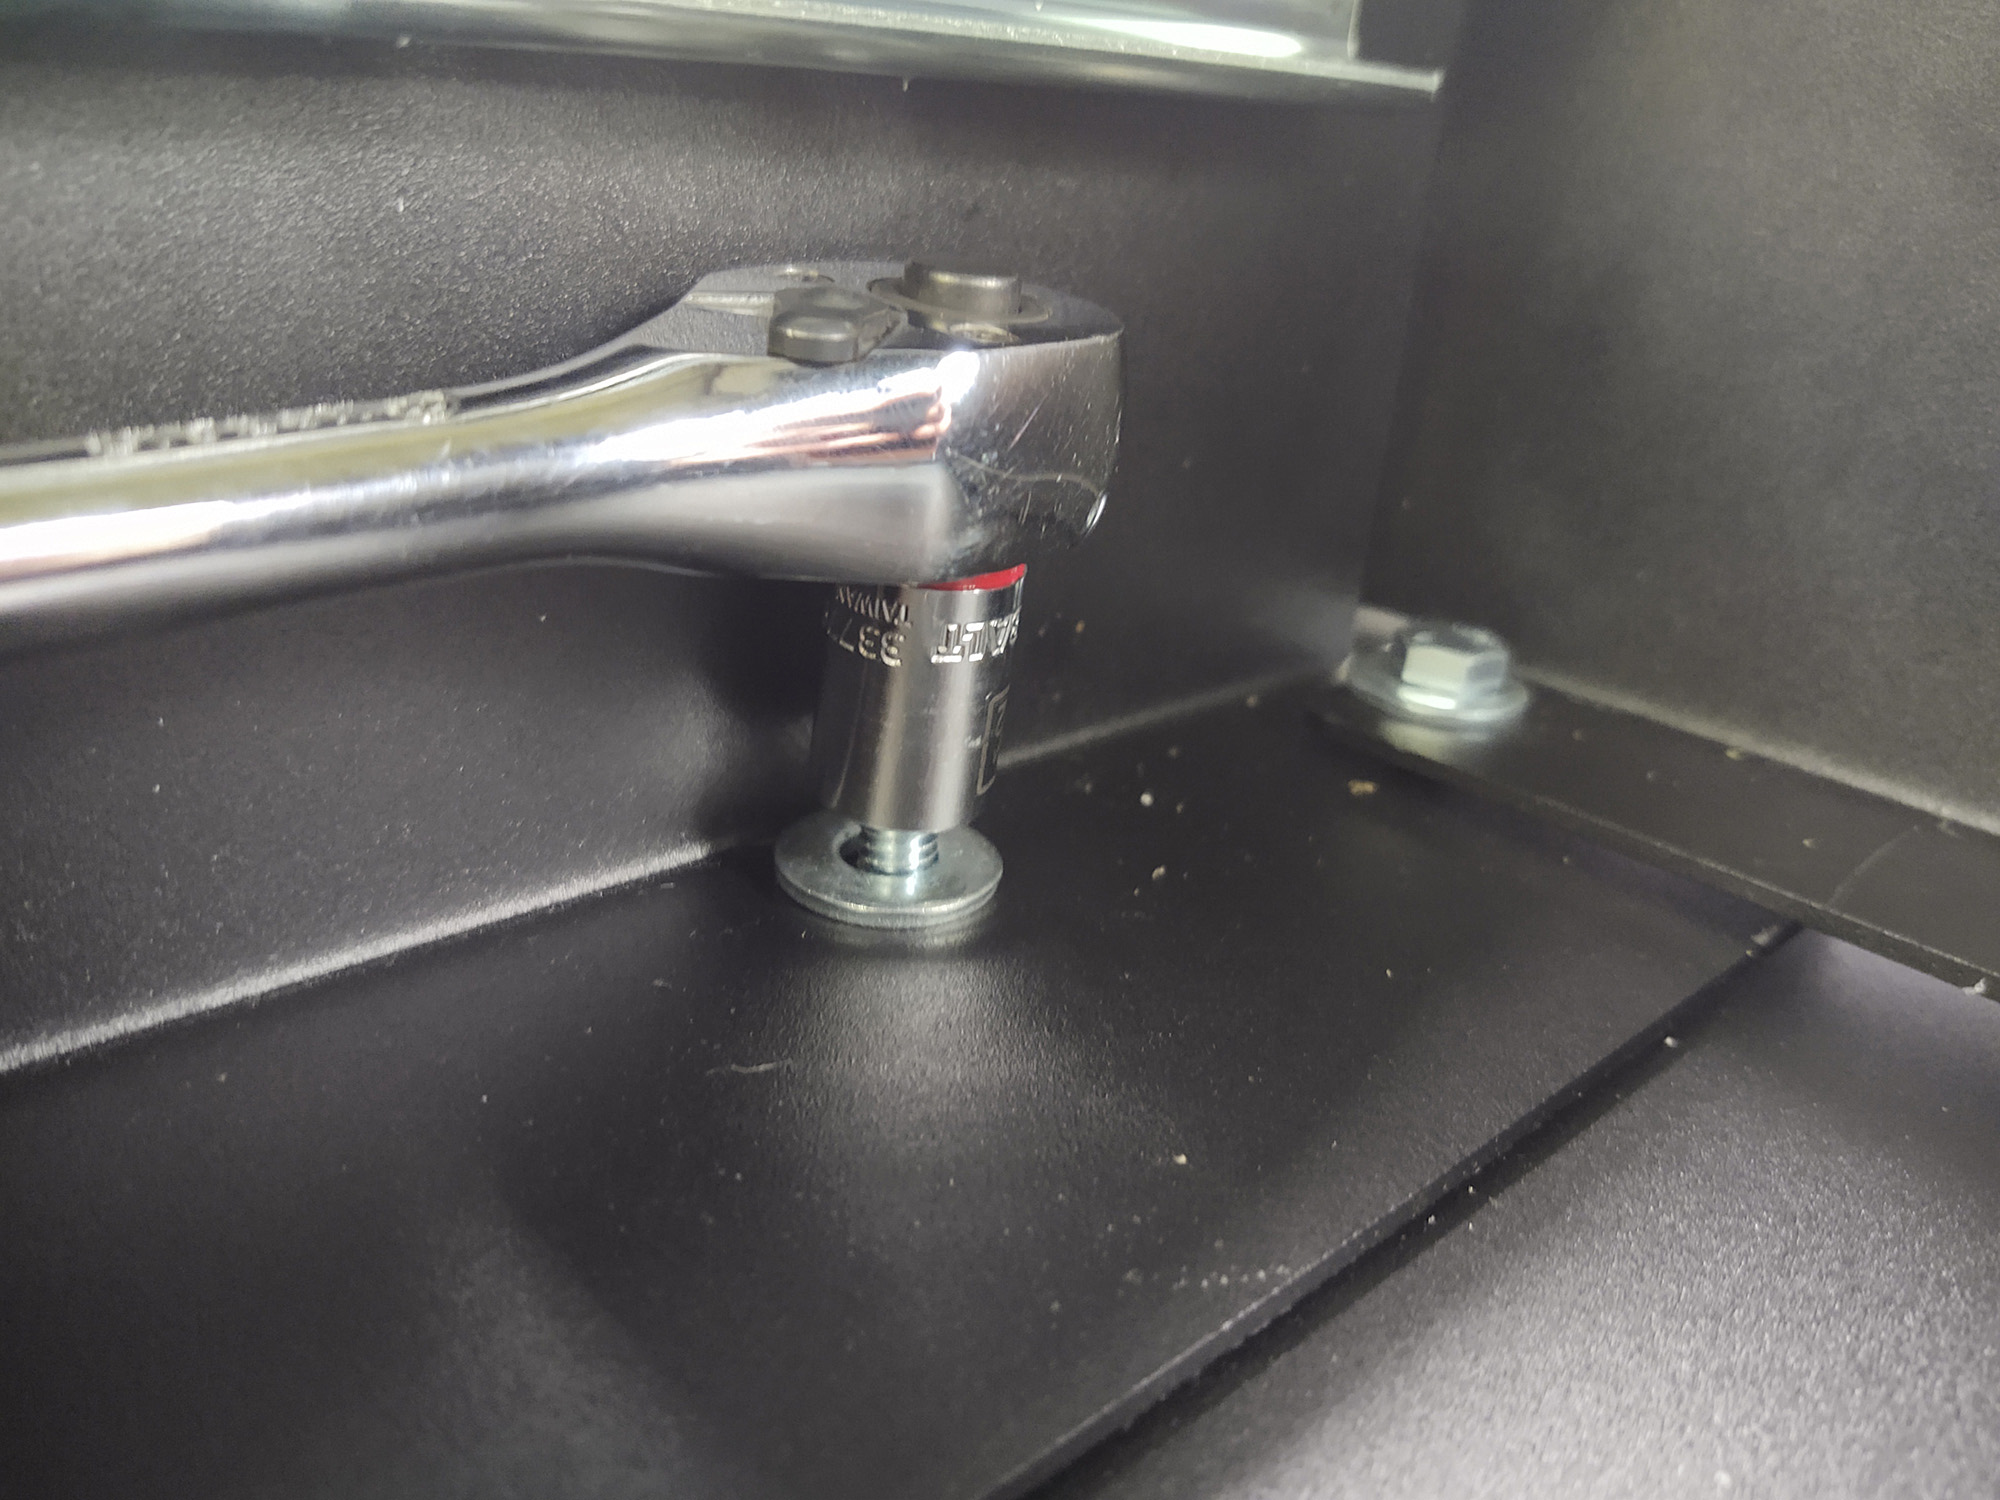
Use one Allen head cap bolt and lock washer on each side of the Bolt-In Kit bracket, making sure to go through the spacers. Tighten down with the 5mm Allen head tool.
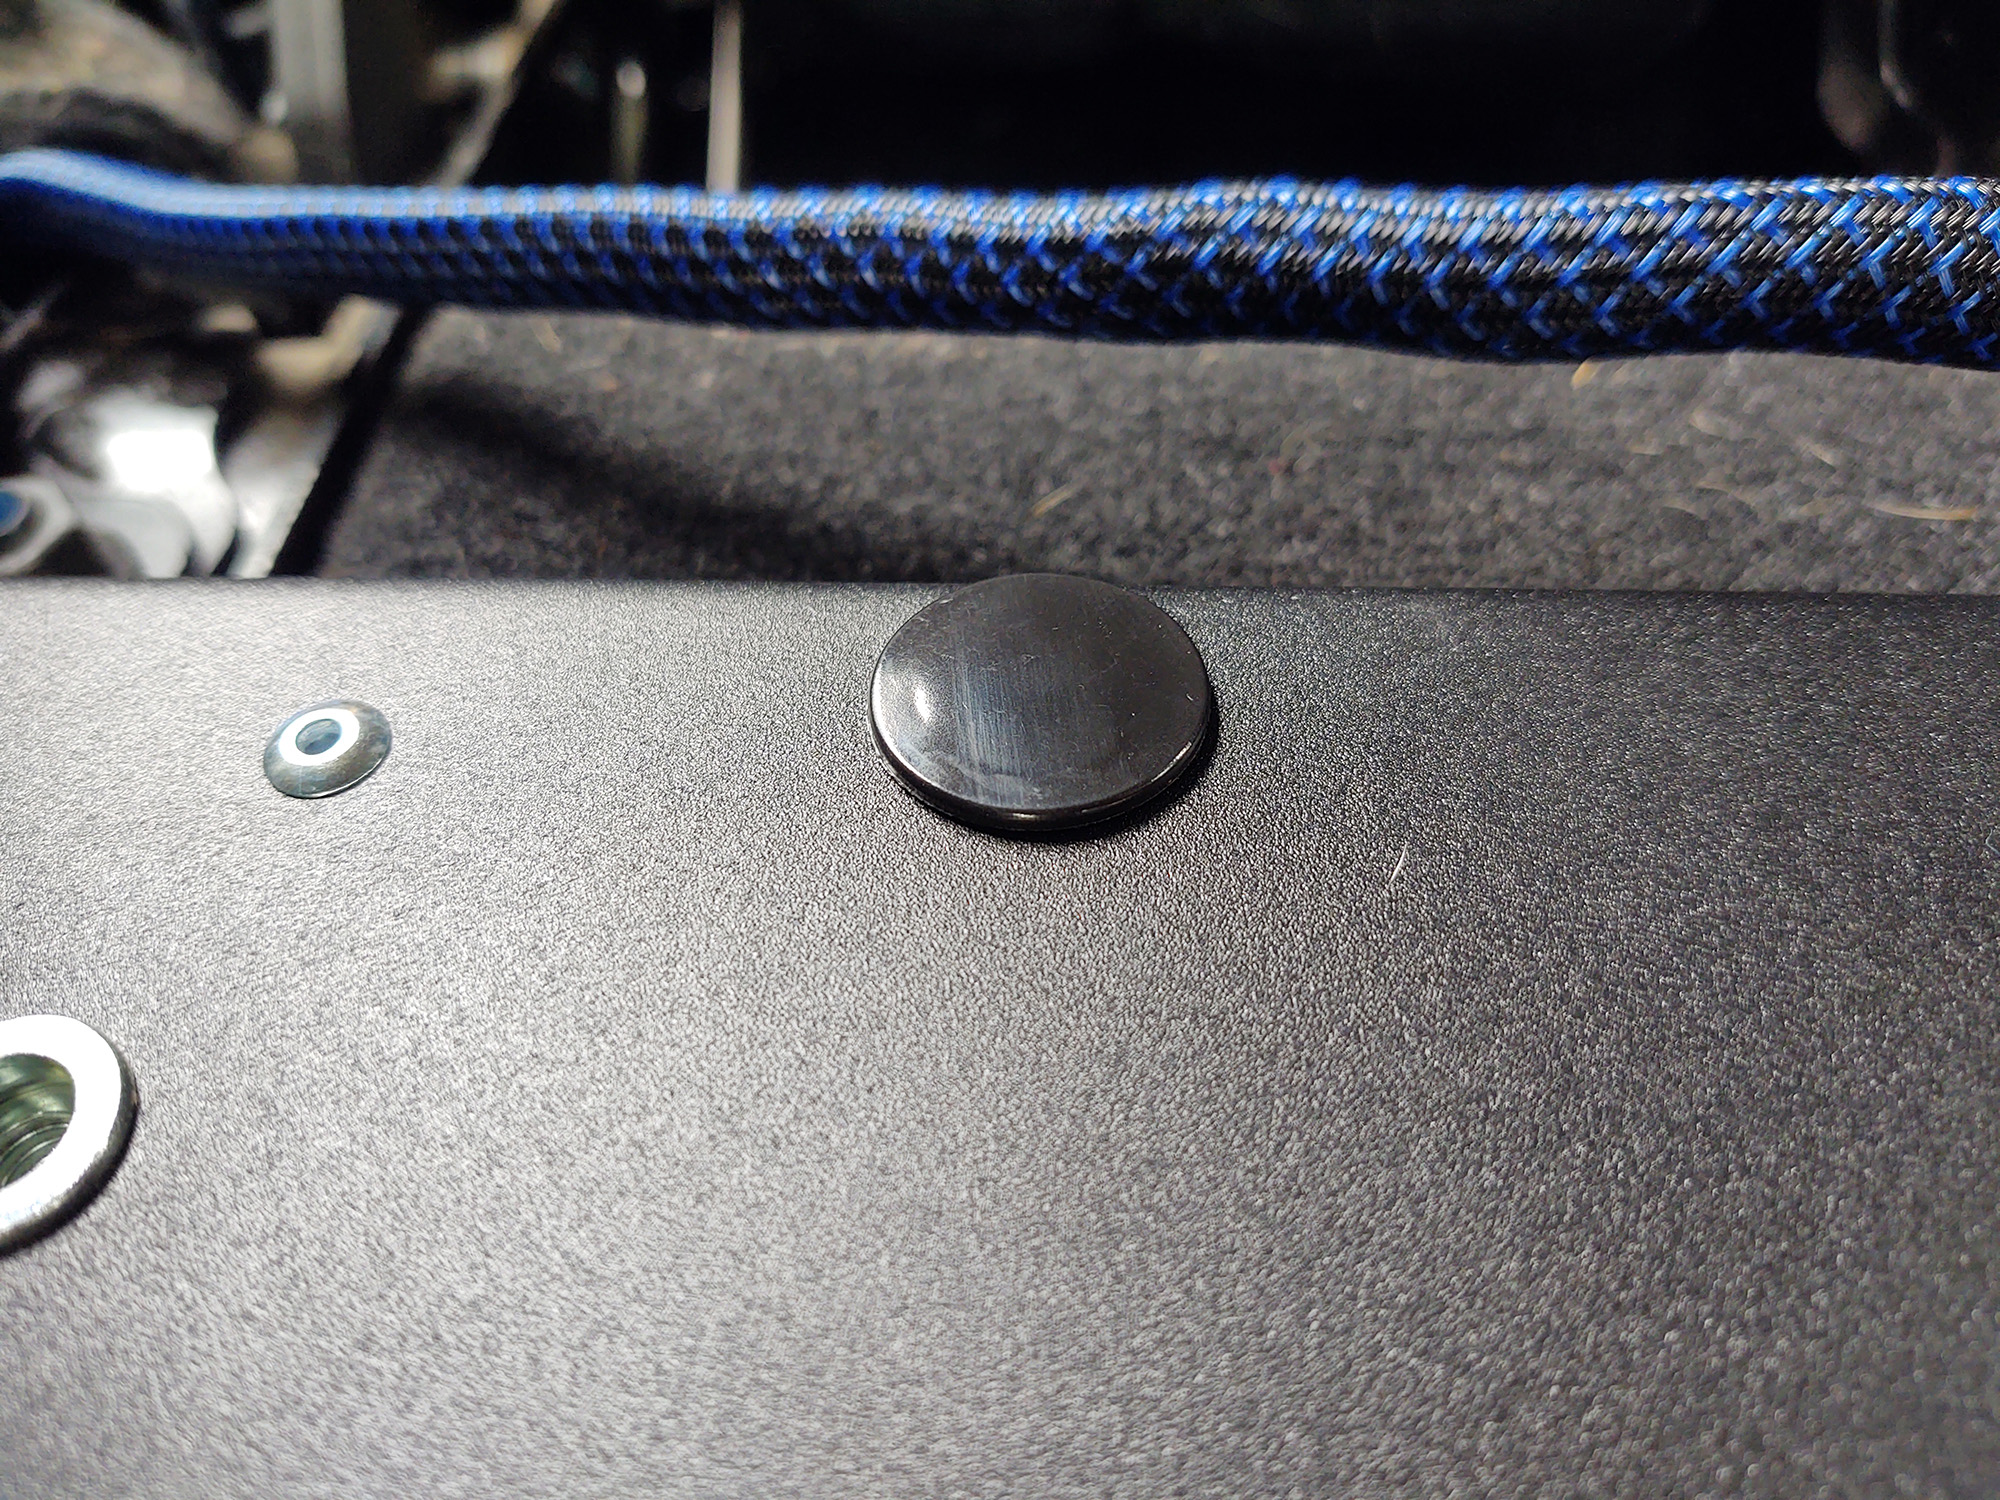
Insert the two plug caps into the hardware holes of the Bolt-In Kit to cover up the recess.
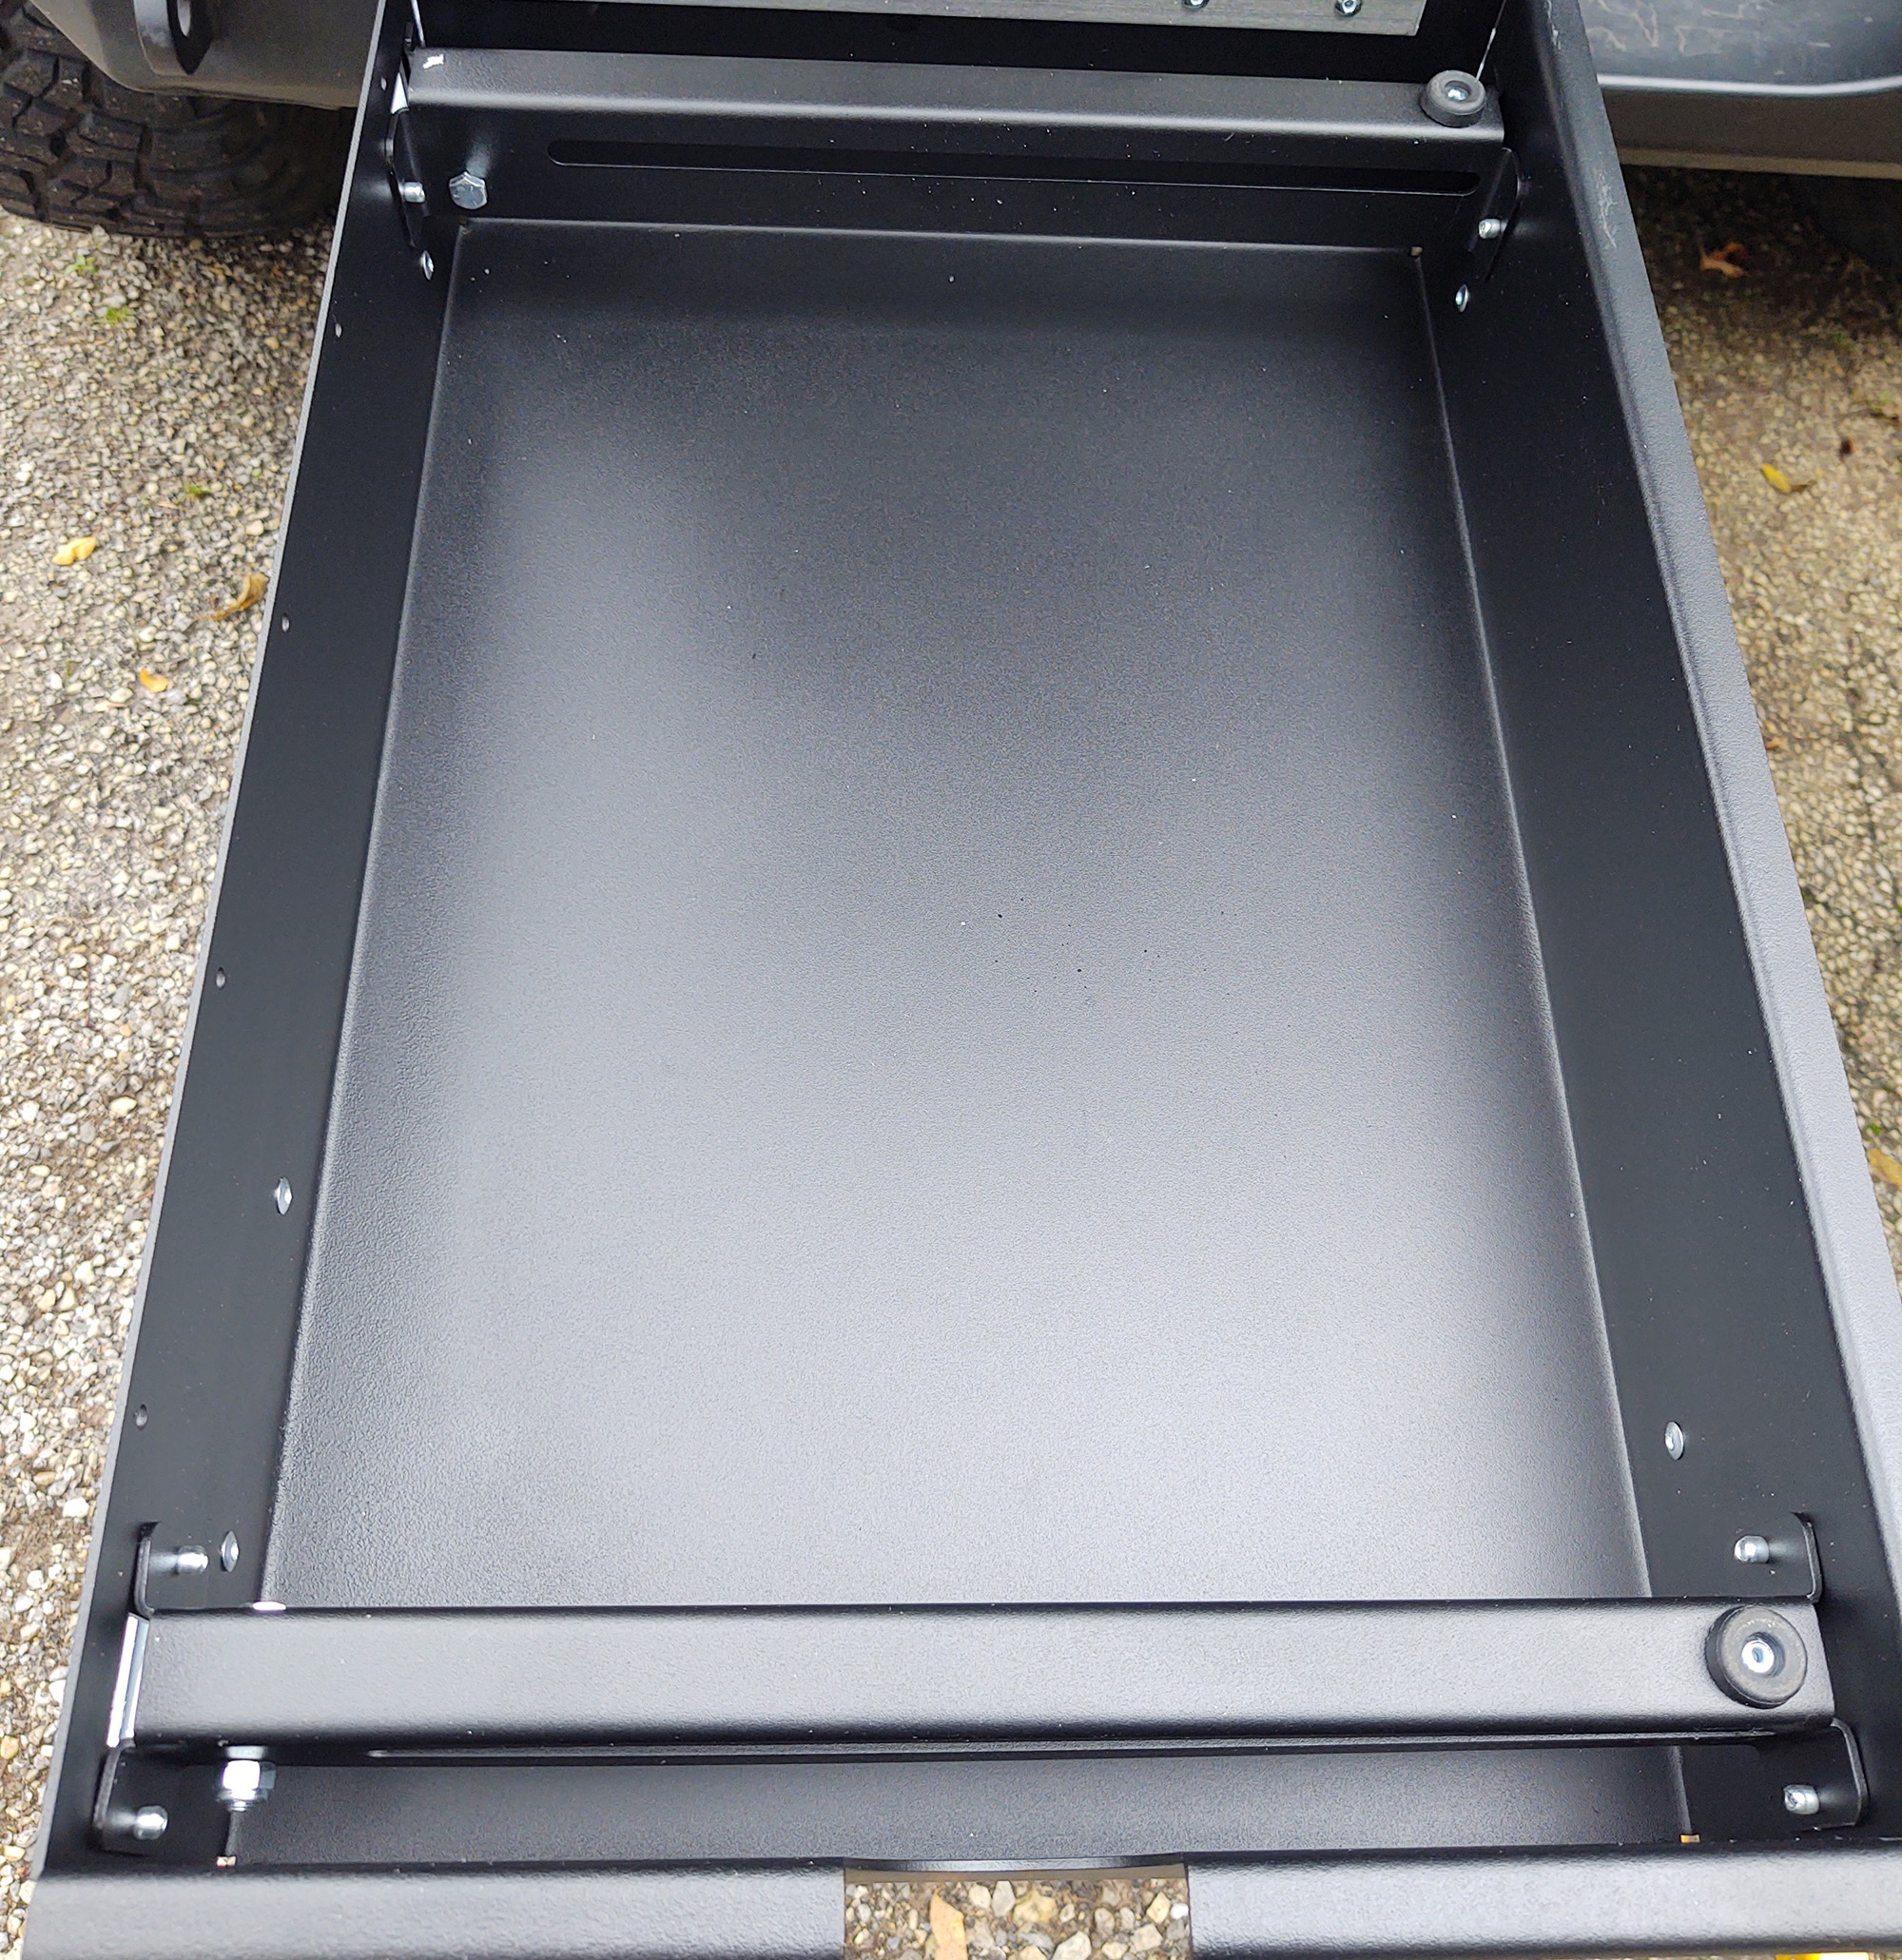
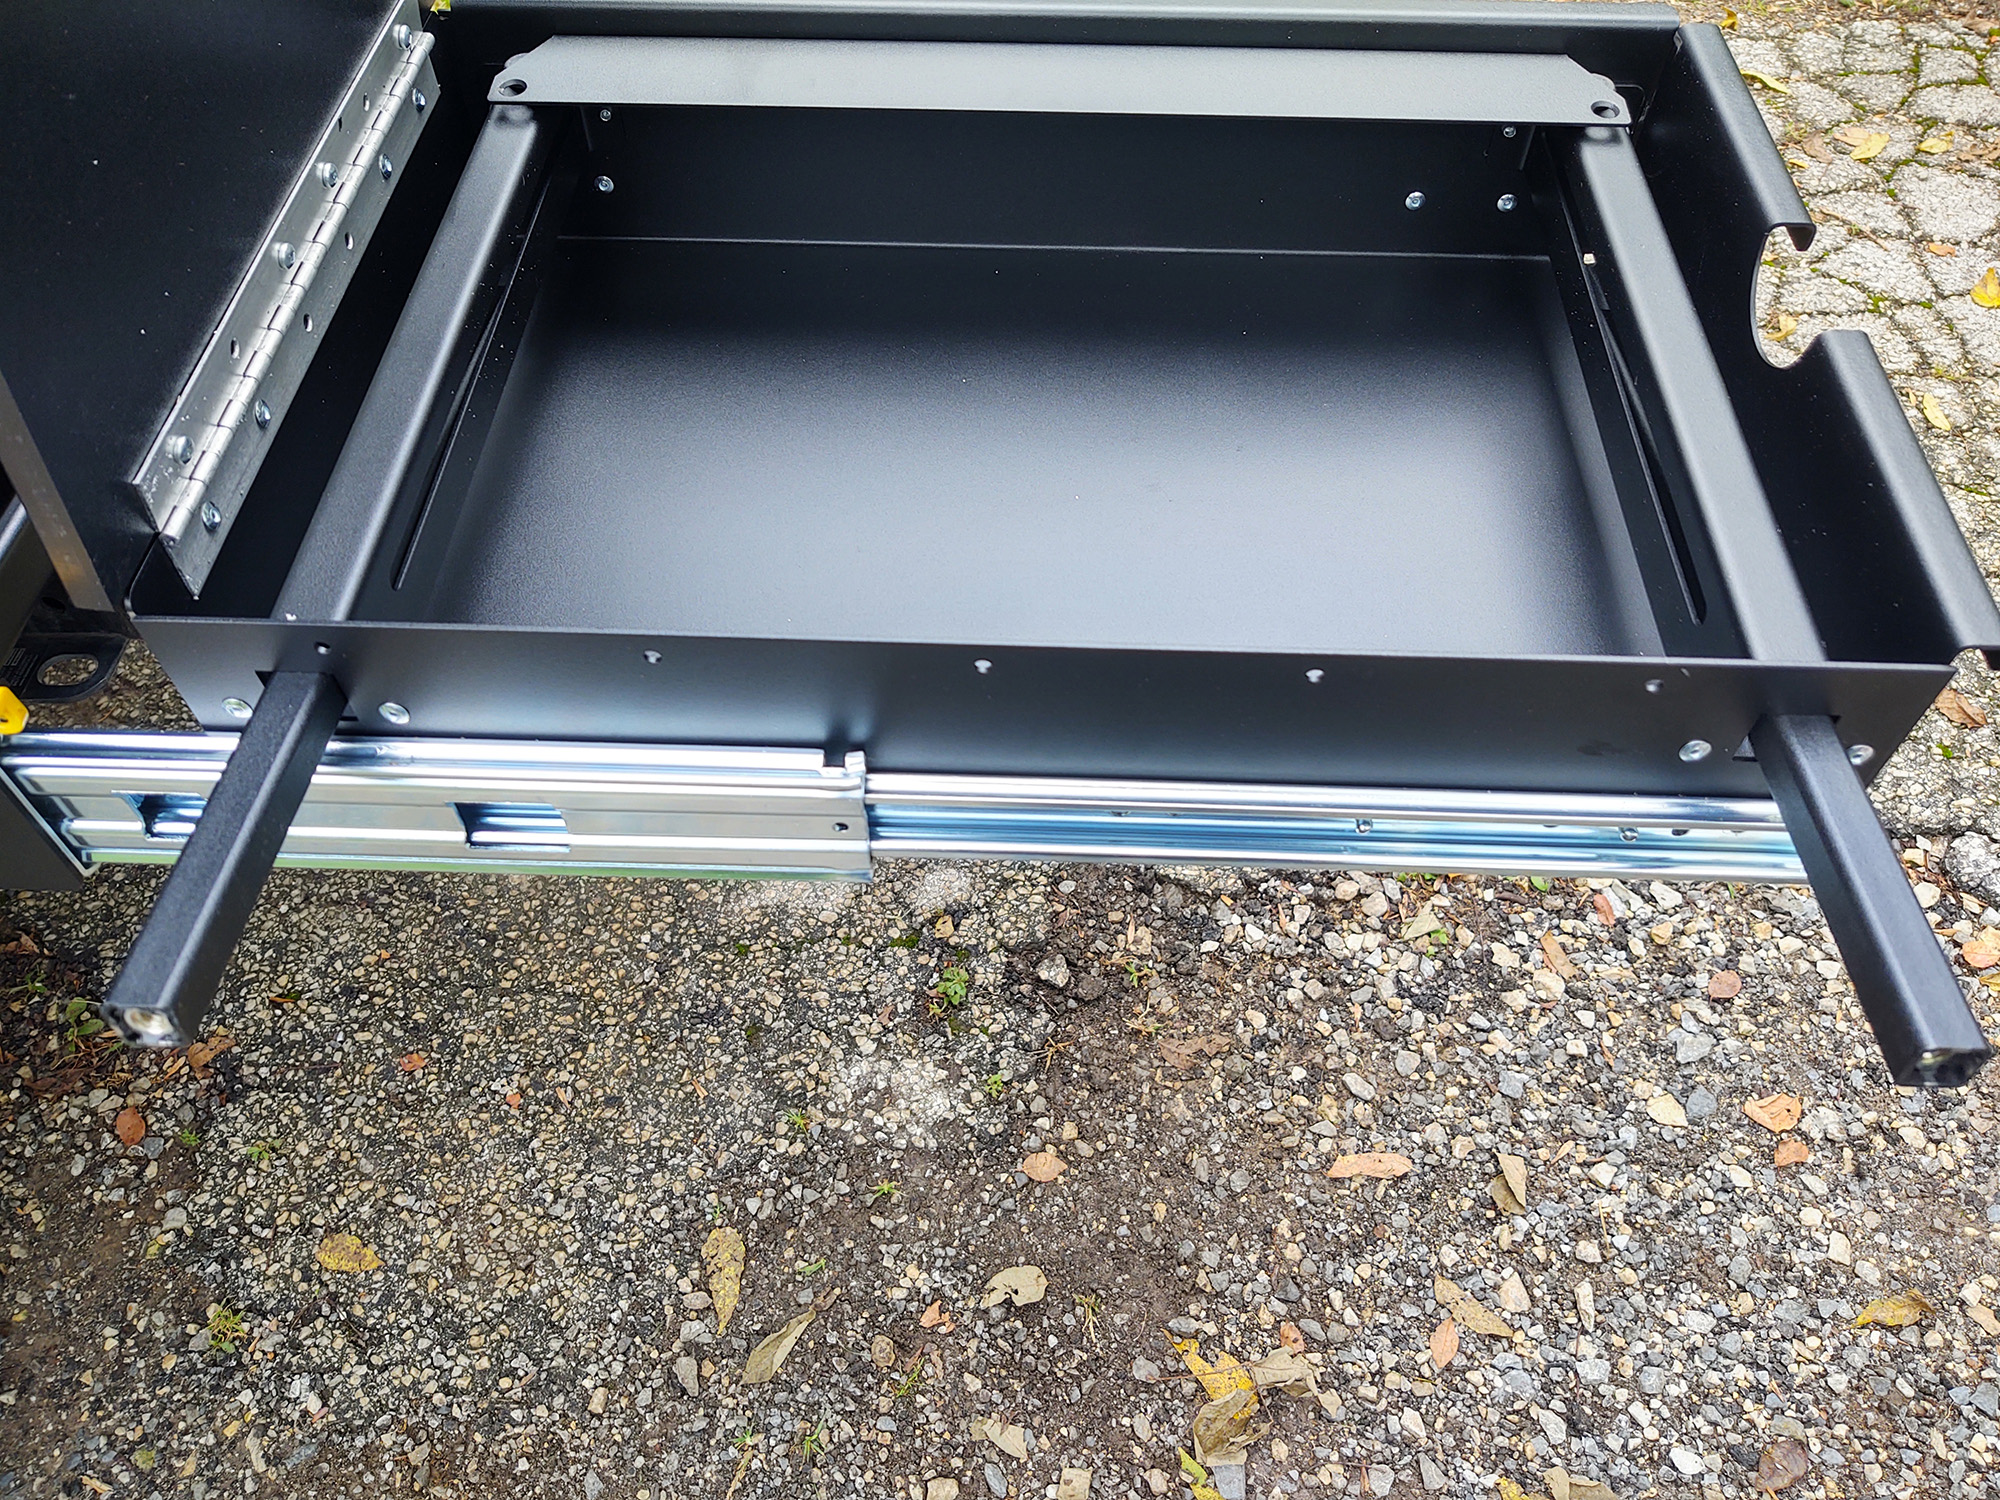
Unpack the trail kitchen and stand it on end, using some of the discarded cardboard as a cushion to keep it from being scratched. As I mentioned earlier, the Trail Kitchen base model itself is fully assembled — we just need to add a few parts for our application. Keep in mind, however, that this entire assembly is very dense because of the heavy duty materials used and the efficient use of space. As such, the trail kitchen weighs about 90 pounds, even though it doesn’t look like it is that heavy. Having another person help get it in the Jeep will ensure you aren’t injured in the process, as shuffling it to the rear of the trunk by yourself would end up using a lot of lower back muscles you really don’t want to strain.
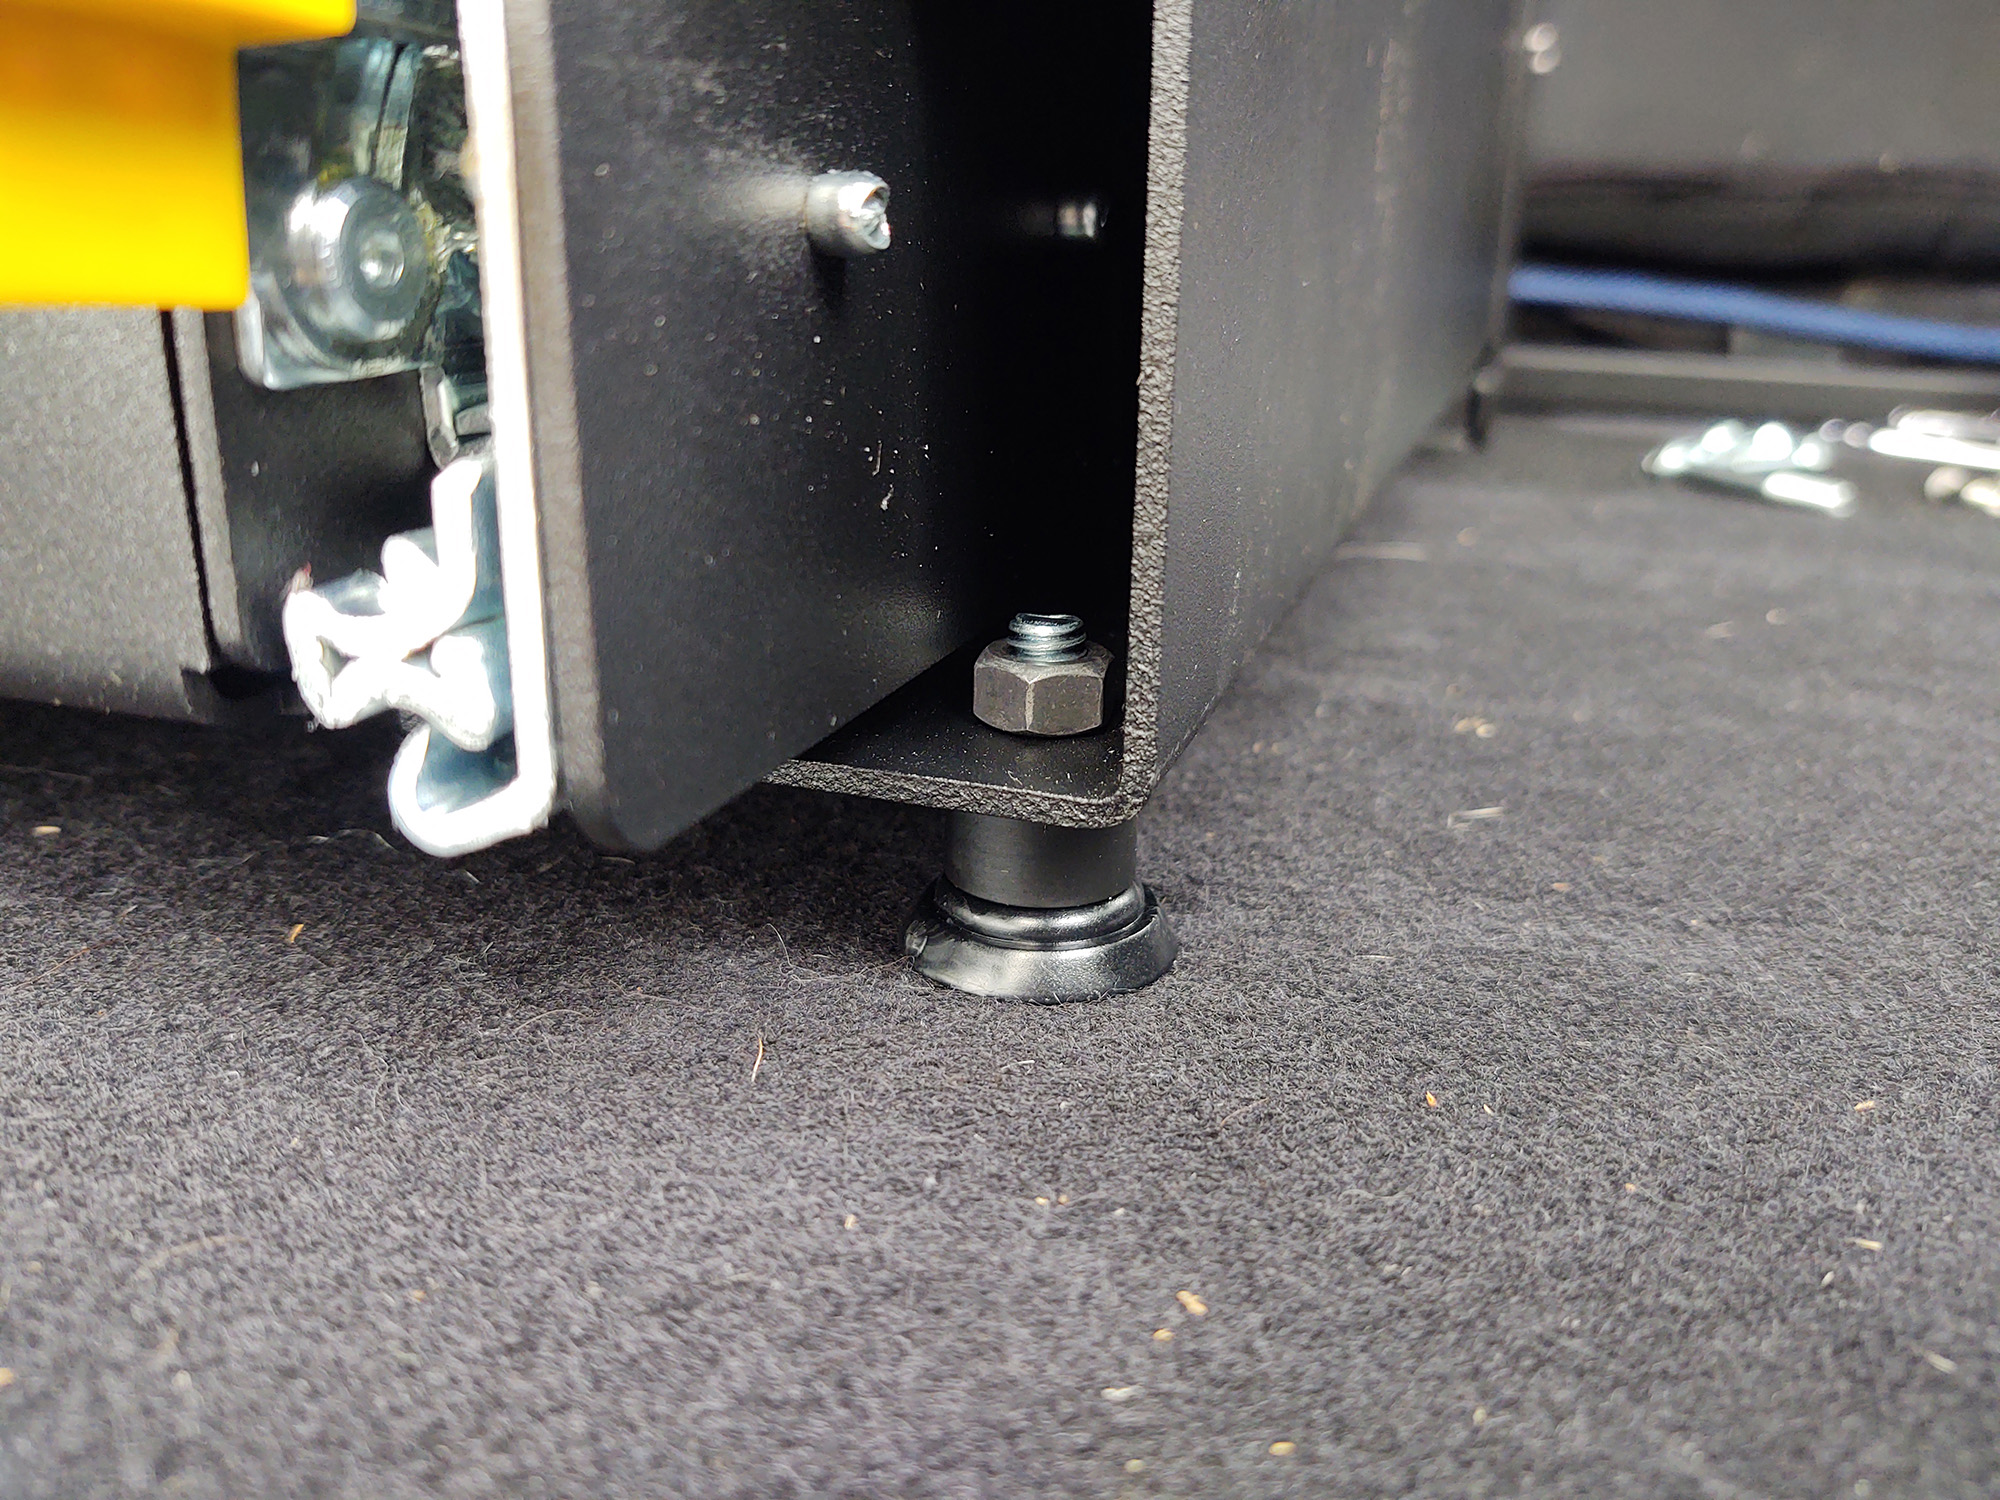
Also, the self-leveling foot (with the smallest of the two remaining spacers) needs to be installed on the trail kitchen assembly before being put in the Jeep, and where you install it depends on whether you have a floor-mounted factory subwoofer or not. Please check the instructions for your application. In Project Rattler, it was installed at the rearmost mounting hole. The tallest black spacer from the Bolt-In Kit Hardware package gets set on the driver side middle cargo tie-down mounting point.
Like we said before, enlisting the help of a friend to install the entire Trail kitchen unit is definitely helpful. And preferably a friend who isn’t likely to ask for help moving soon, so you don't blow your cover. See? I’m looking out for you.
We found the best way to do it was load the entire assembly in the trunk like a coffin, then open the driver's rear door and fold the seat down. From inside the Jeep on the front side, it becomes easy to set the trail kitchen down in position, keeping in mind which mounting position you would like to use (you can always switch it later).
The set of holes closest to the rear of the Jeep were the ones I eventually used with that 50 quart ARB Fridge Freezer, and it fits perfectly with almost no room to spare. The back seat touches the rear of the fridge, and there is very little gap in the front. Have the 5/16” bolts that came with the Trail Kitchen kit pre-loaded with washers and ready towards the rear of the trunk, and your ½" wrench (or socket) back there as well. There’s no turning back now.
Pull the release on the left side of the trail kitchen to slide the whole fridge tray and counter unit on the slide, having your friend counterbalance the rear portion to keep it from falling. Then put the last M6 bolt and lock washer from the Bolt-In Kit through that spacer you set in place, and hand tighten the middle driver’s side cargo tie down point in the trunk floor.
Note: I said I ‘eventually’ in the last paragraph because we used the middle position on the Trail Kitchen first as we didn’t know what we were eventually going to end up with. We photographed the first try, but didn’t do the last one. So, this picture would be how you would use the middle-mounting configuration.
Now, as you support the part of the trail kitchen protruding from the trunk, have your backseat friend start the remaining bolts — threading through the four holes in the back of the trail kitchen bracket and into the bolt-in kit nutserts. Leaving these a little loose while you get them all started is important.
Once you have all those bolts started, you can go back around to all of them and tighten them down.
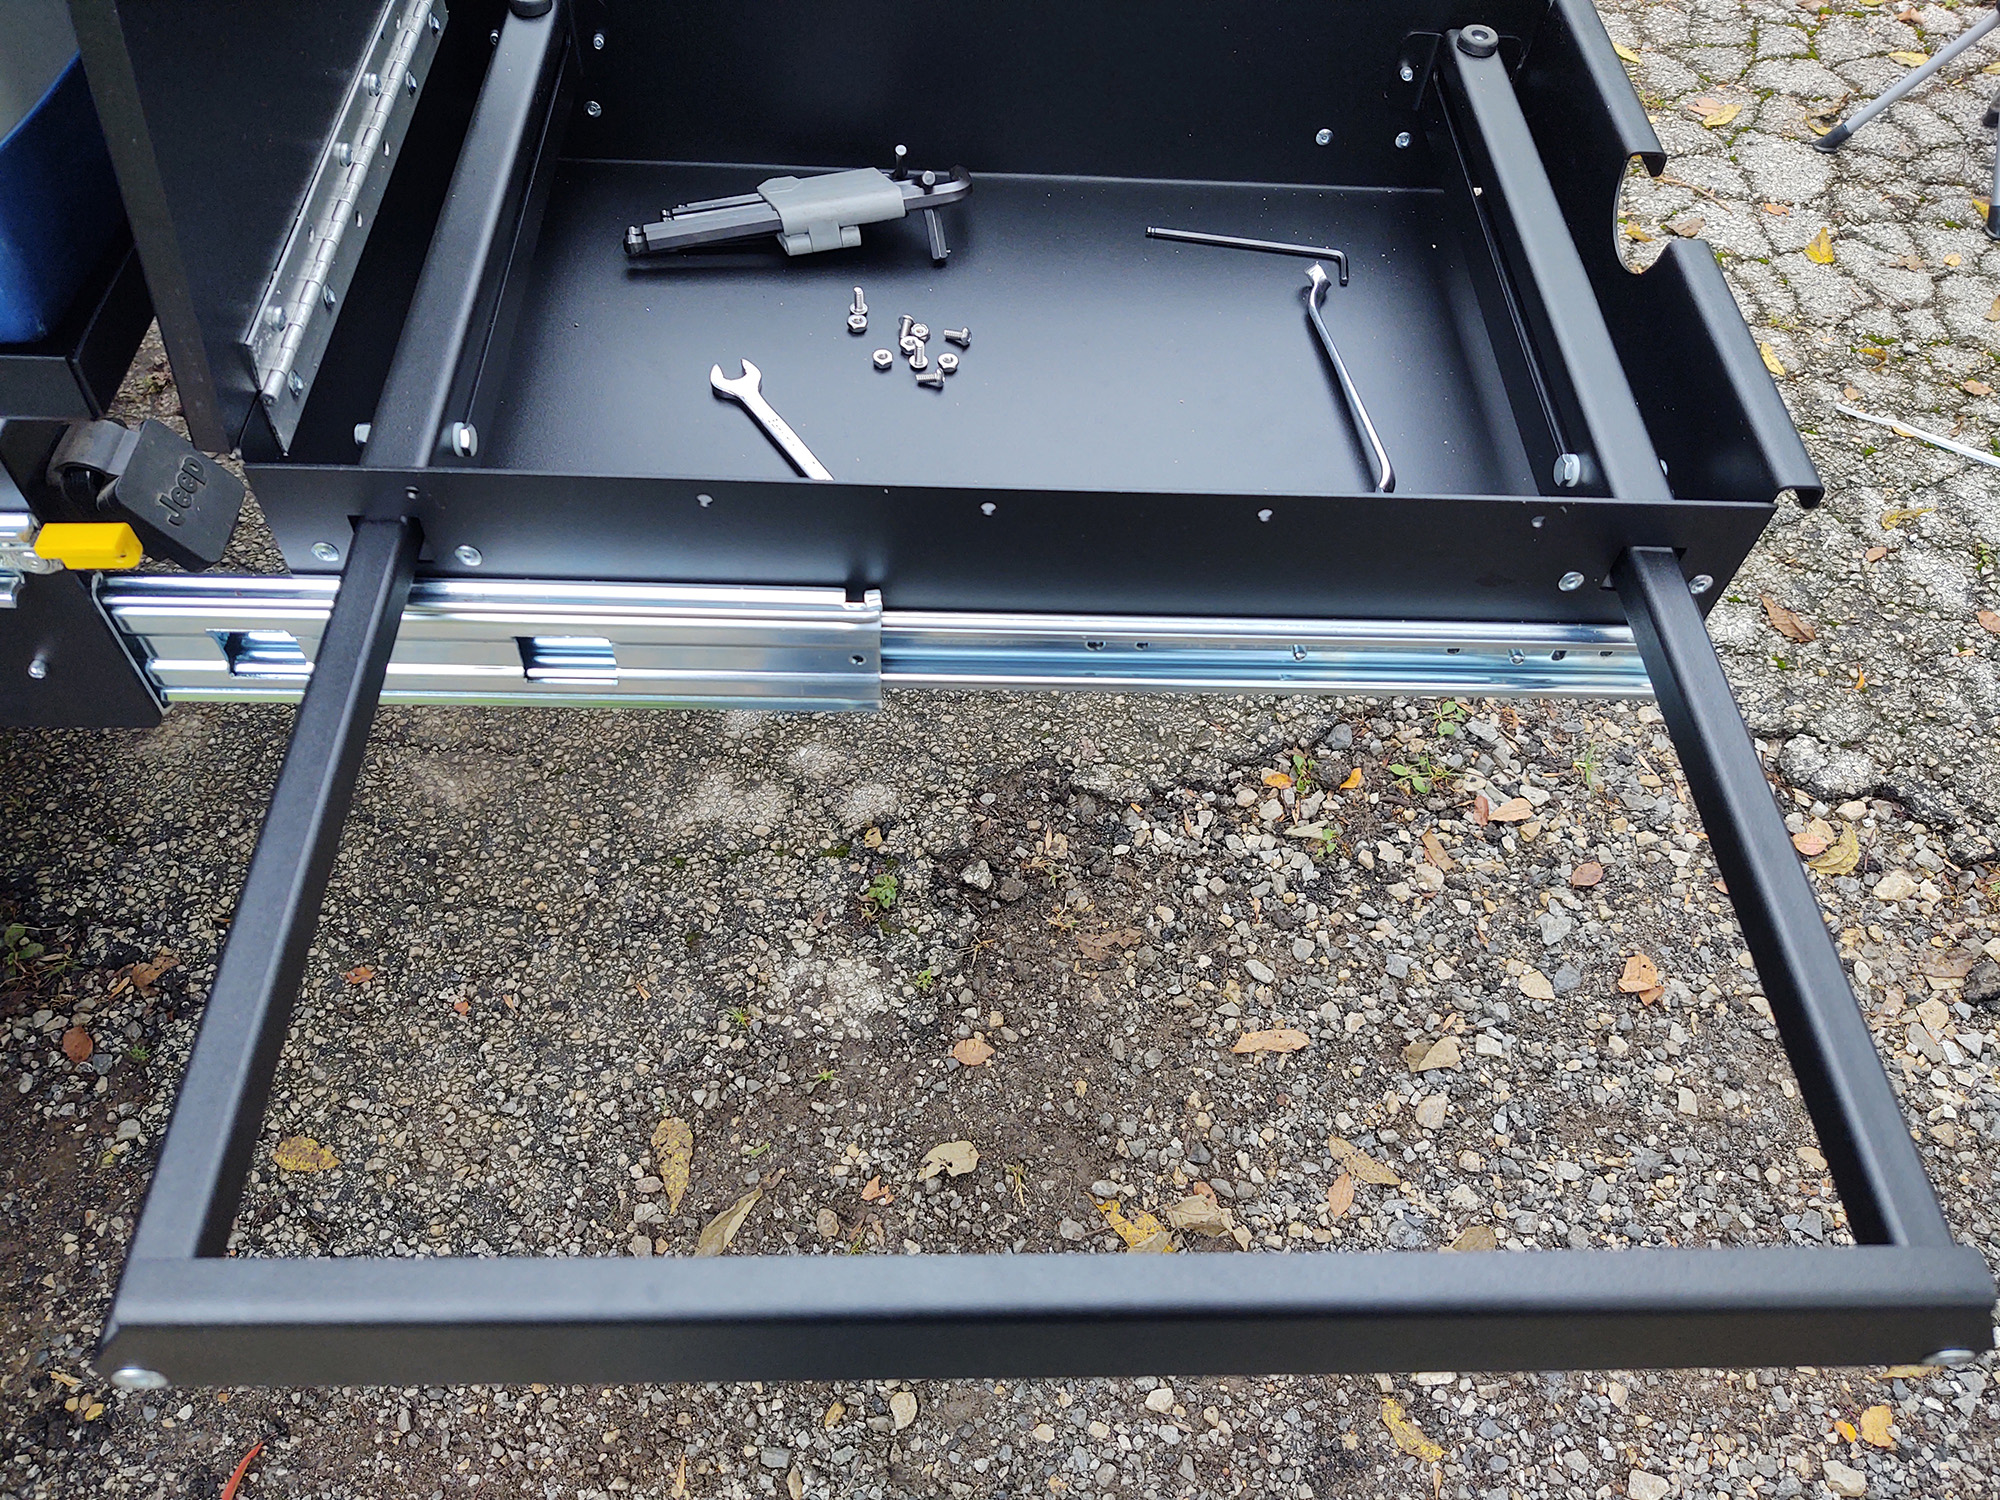
Now you can test fit your refrigerator, and the included tie-downs can be run through the handles with many units.
To give you an idea of how far the assembly actually rolls out, this is the counter and the fridge fully deployed. The latches lock both fully in and fully out, so even while parked on uneven terrain, the fridge or counter (or both) will stay locked out for use.
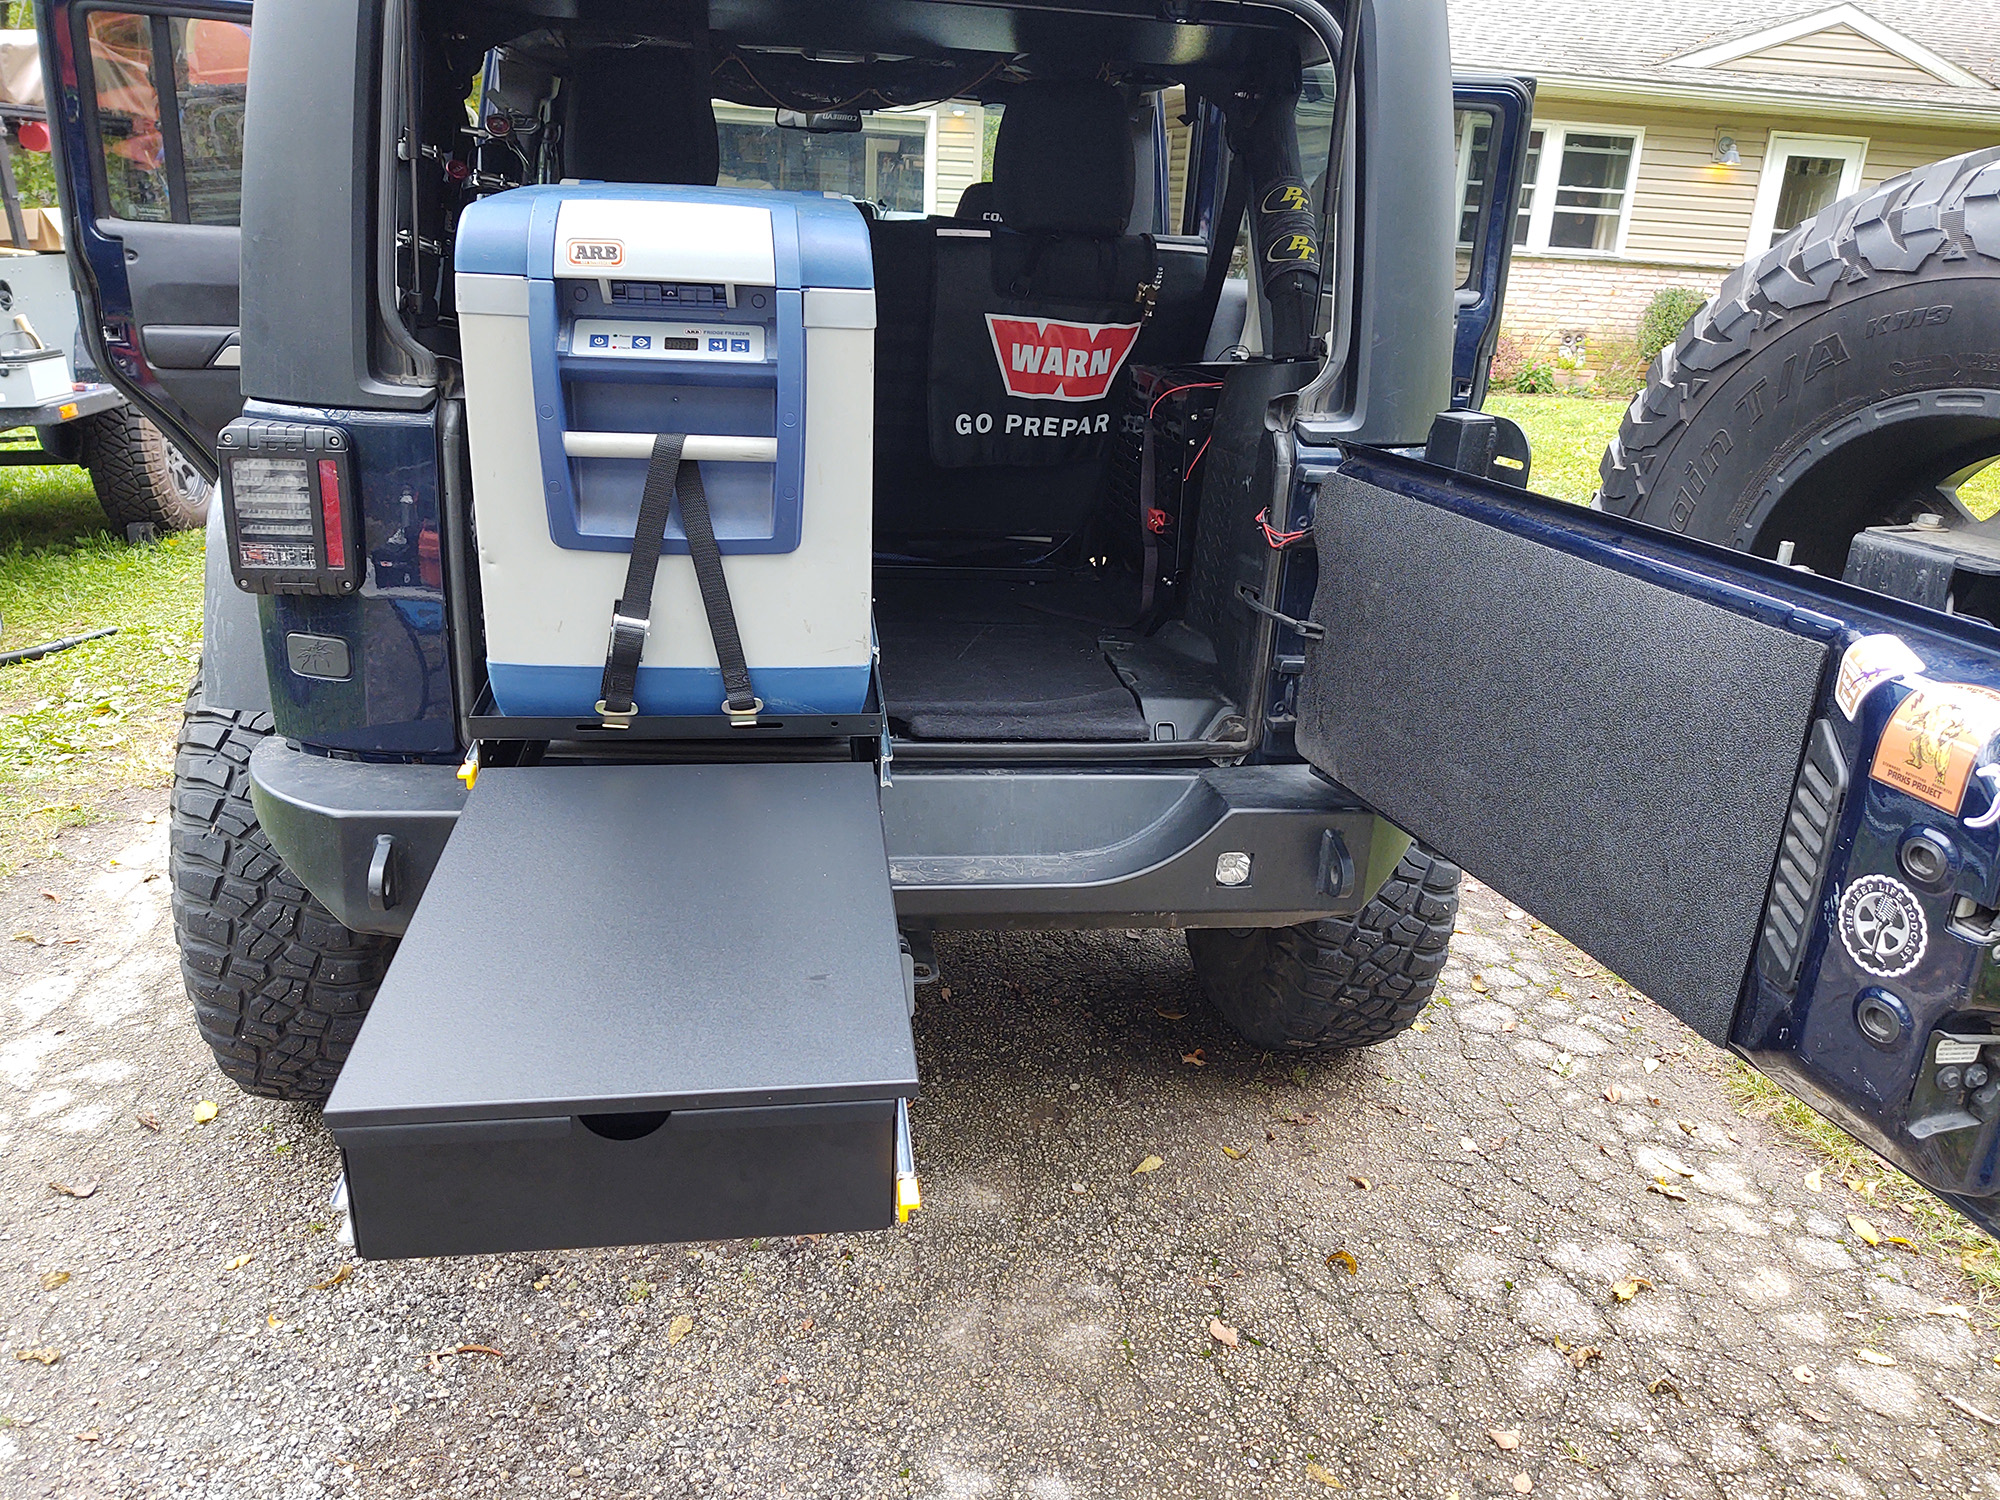
In addition to the added work space, the countertop lifts up to expose an ample amount of storage room for utensils, spices and the like.
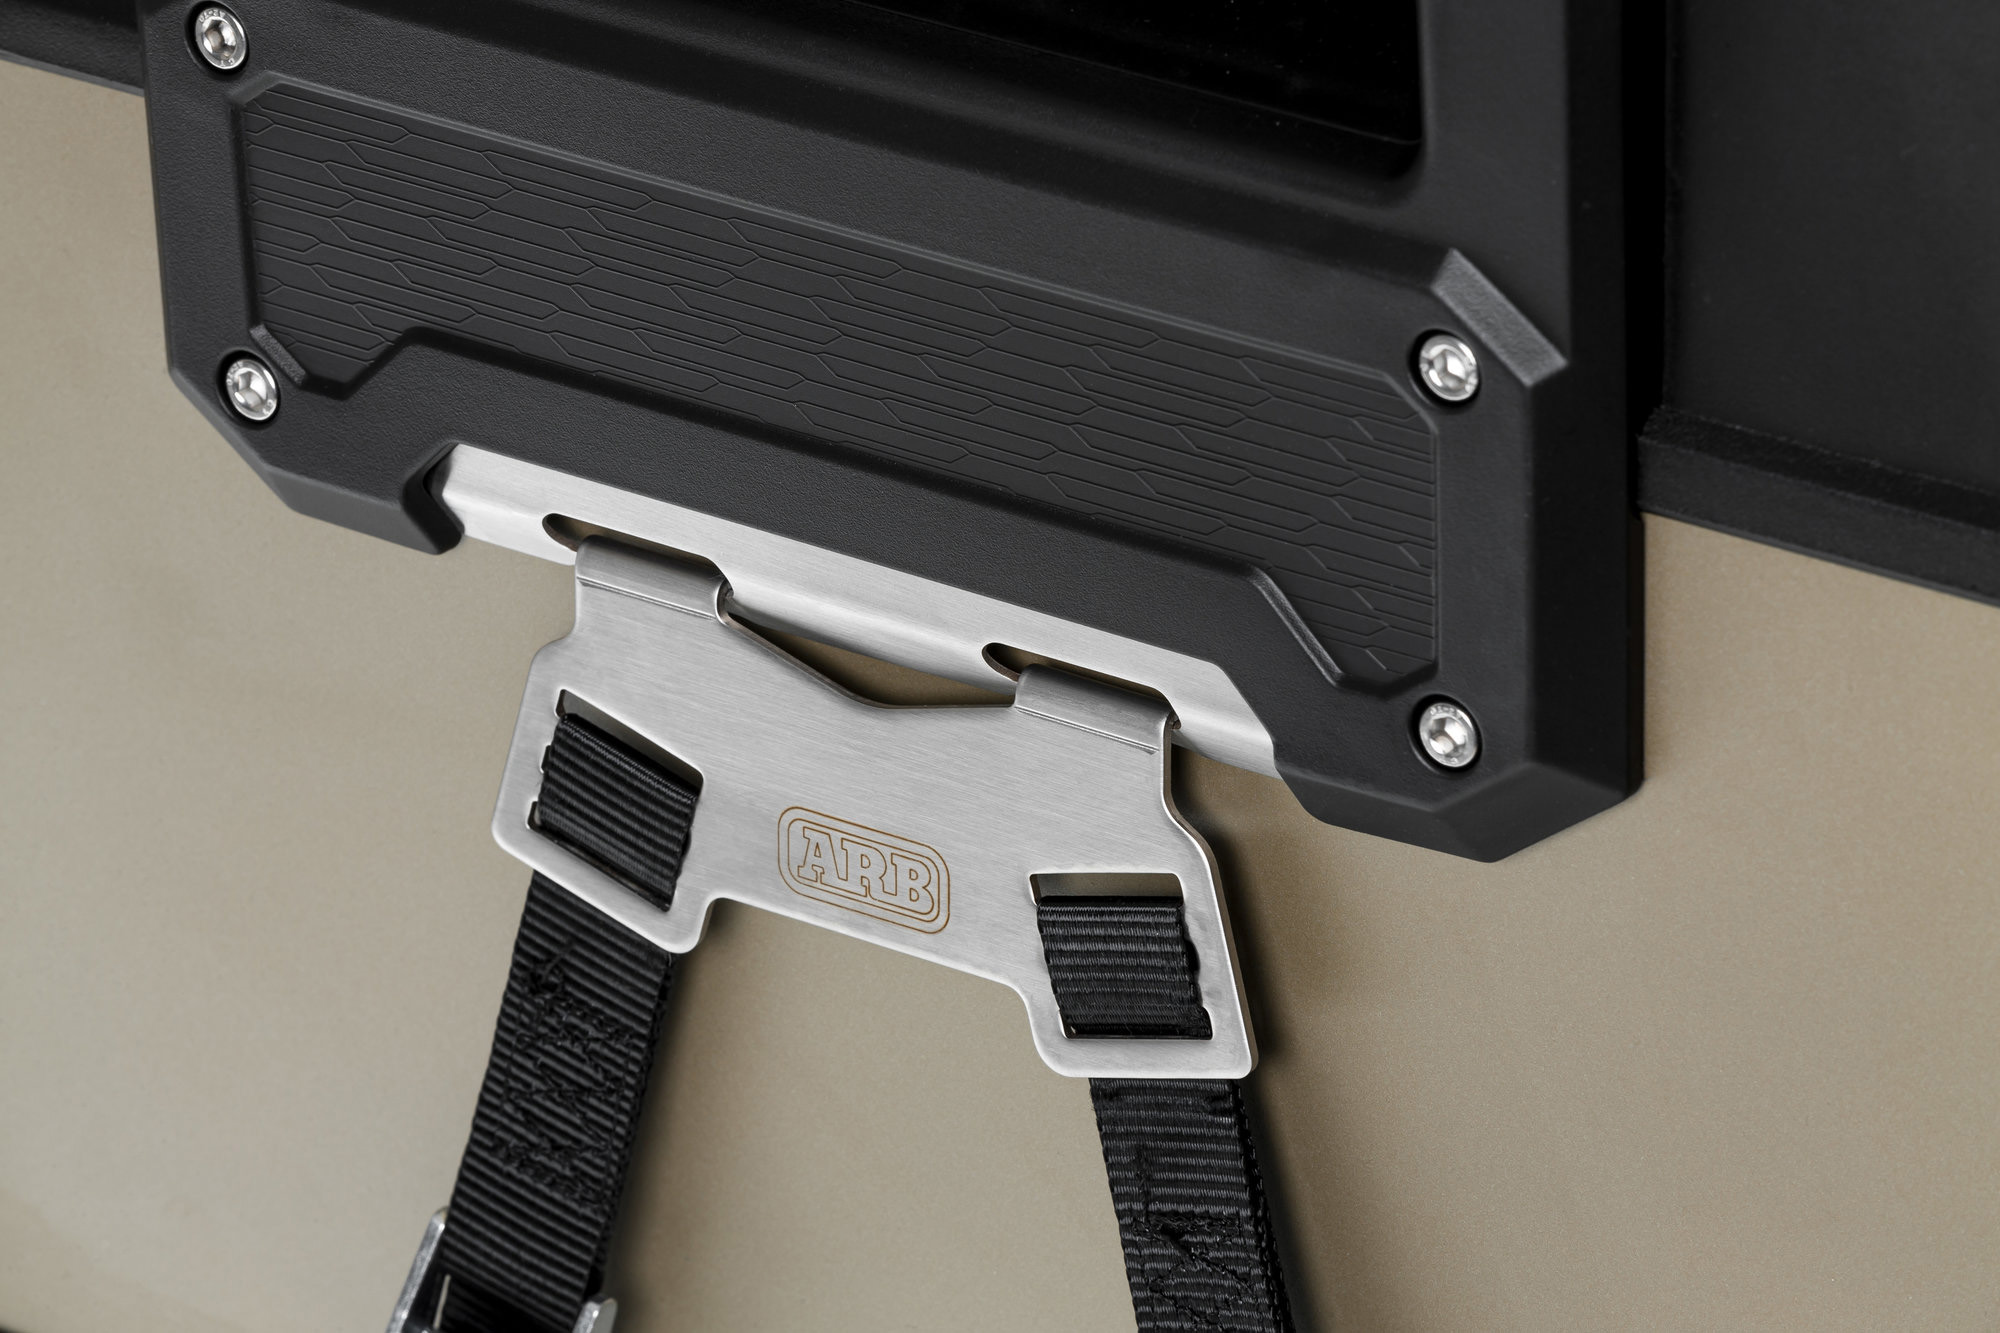
Also worth noting — the two tie down slots on the back and front of the fridge tray will work with the included tie down straps if you have available handles on the fridge unit. They are also compatible with ARB’s two strap tie down setups for the Classic range as well as the new Zero models.

MORryde Flip Out Counter Top
One of the reasons I really liked the MORryde Trail Kitchen system was its ability for the base system to be expanded to allow for more counter space. I cook many of the meals for our overland groups, as well as on trail days and normal camping trips.
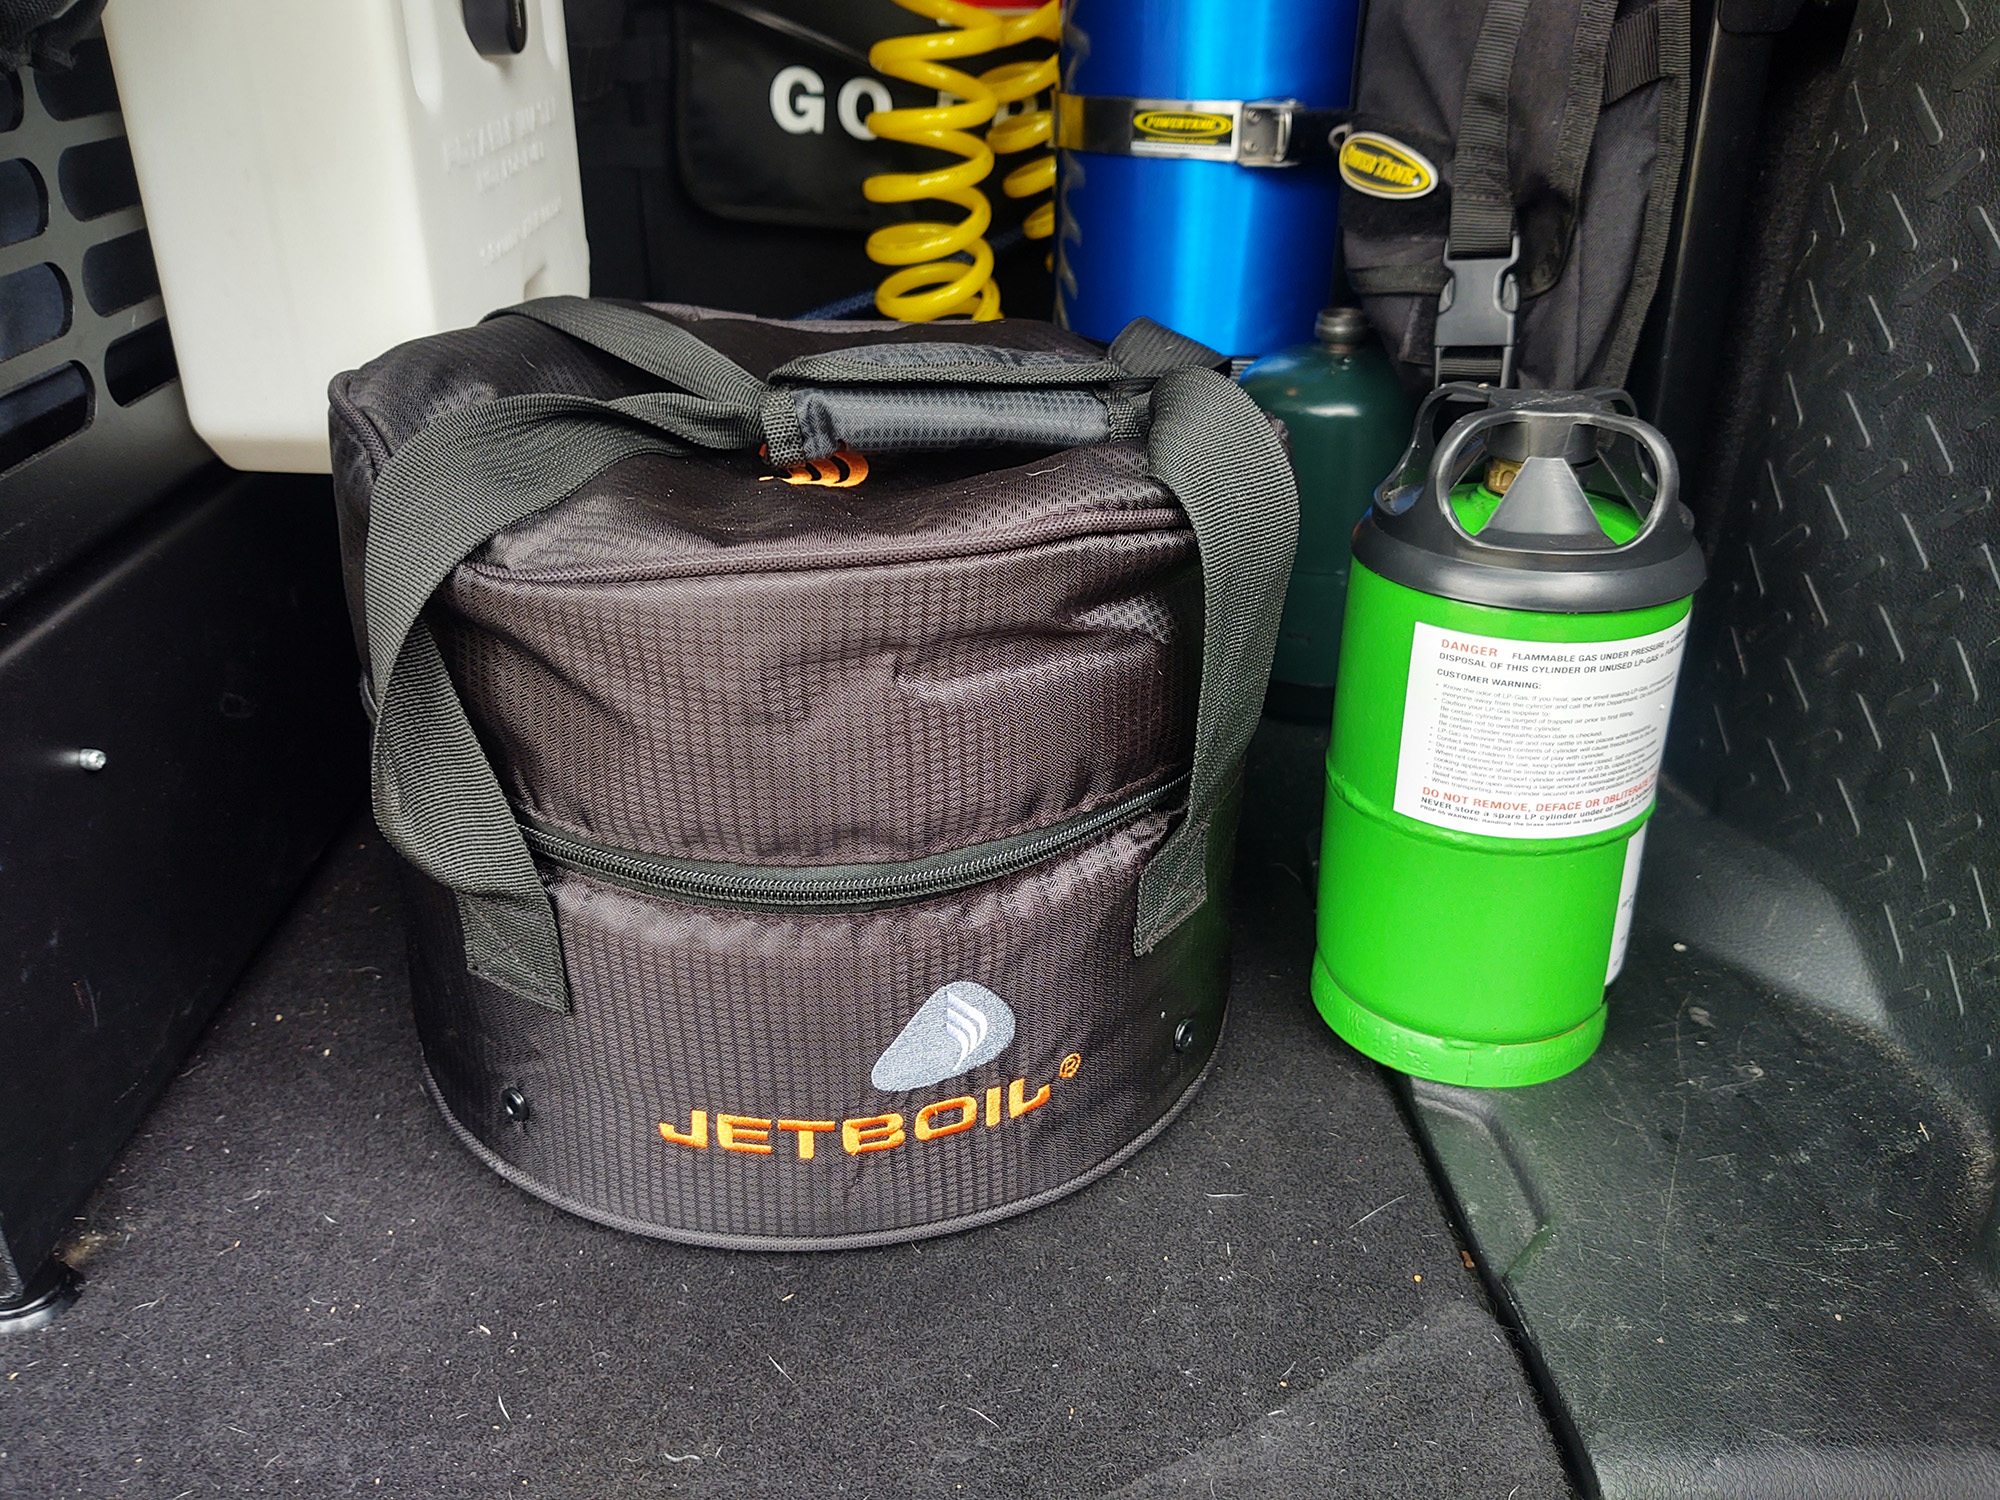
We use a Jetboil Genesis Base Camp stove system to save storage space while packed up, and I have been extraordinarily impressed with how well it works with these MORryde products. The Flip Out Counter folds up inside the main drawer when not in use, and it only very lightly impacts storage space. The trade off is almost double the counter space within a few seconds, which has been a real lifesaver when we need to keep ingredients AND our cooking out of the dirt.
Required tools:
- 7/16" wrench x2
- 3/8" wrench
- 5/32" Allen wrench
- 1/8" Allen wrench
This installation can also be performed in a matter of minutes, as long as you pay attention to the orientation of the hinge and hardware when you install it the first time. I did not. So don’t be like me.
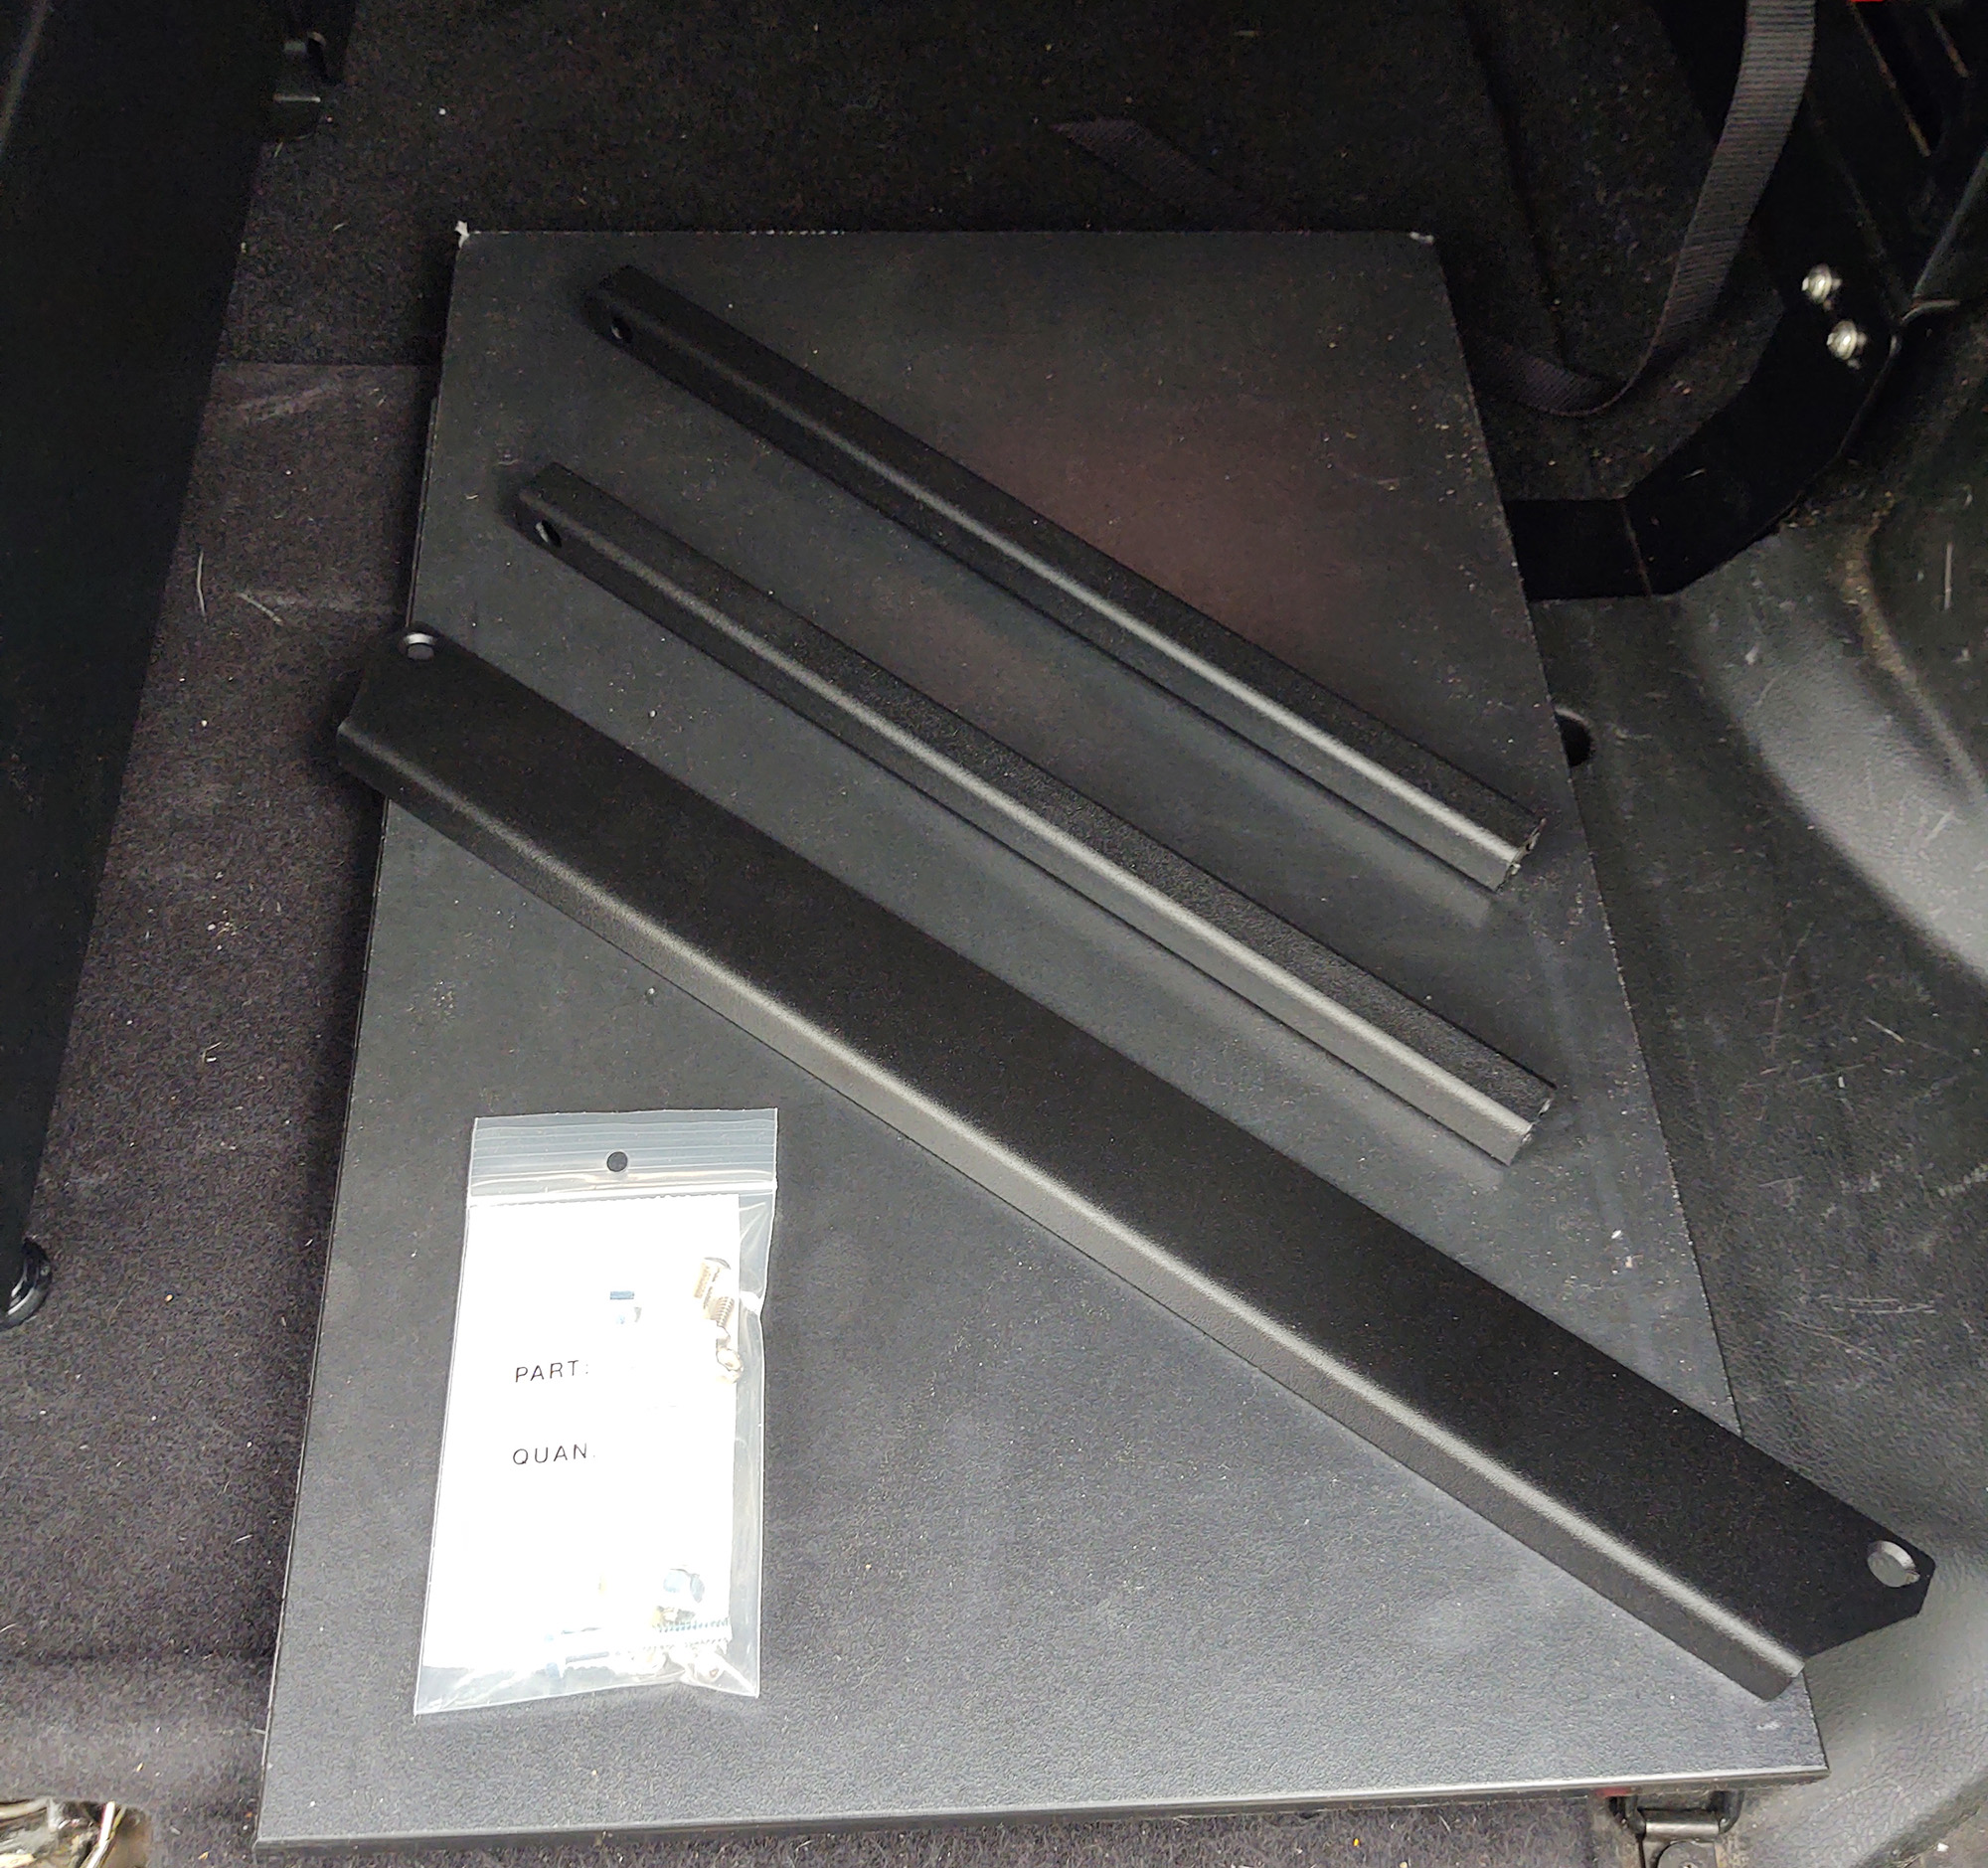
Included in this add on kit are the two extension tubes, the support bar, a hardware pack and the counter.
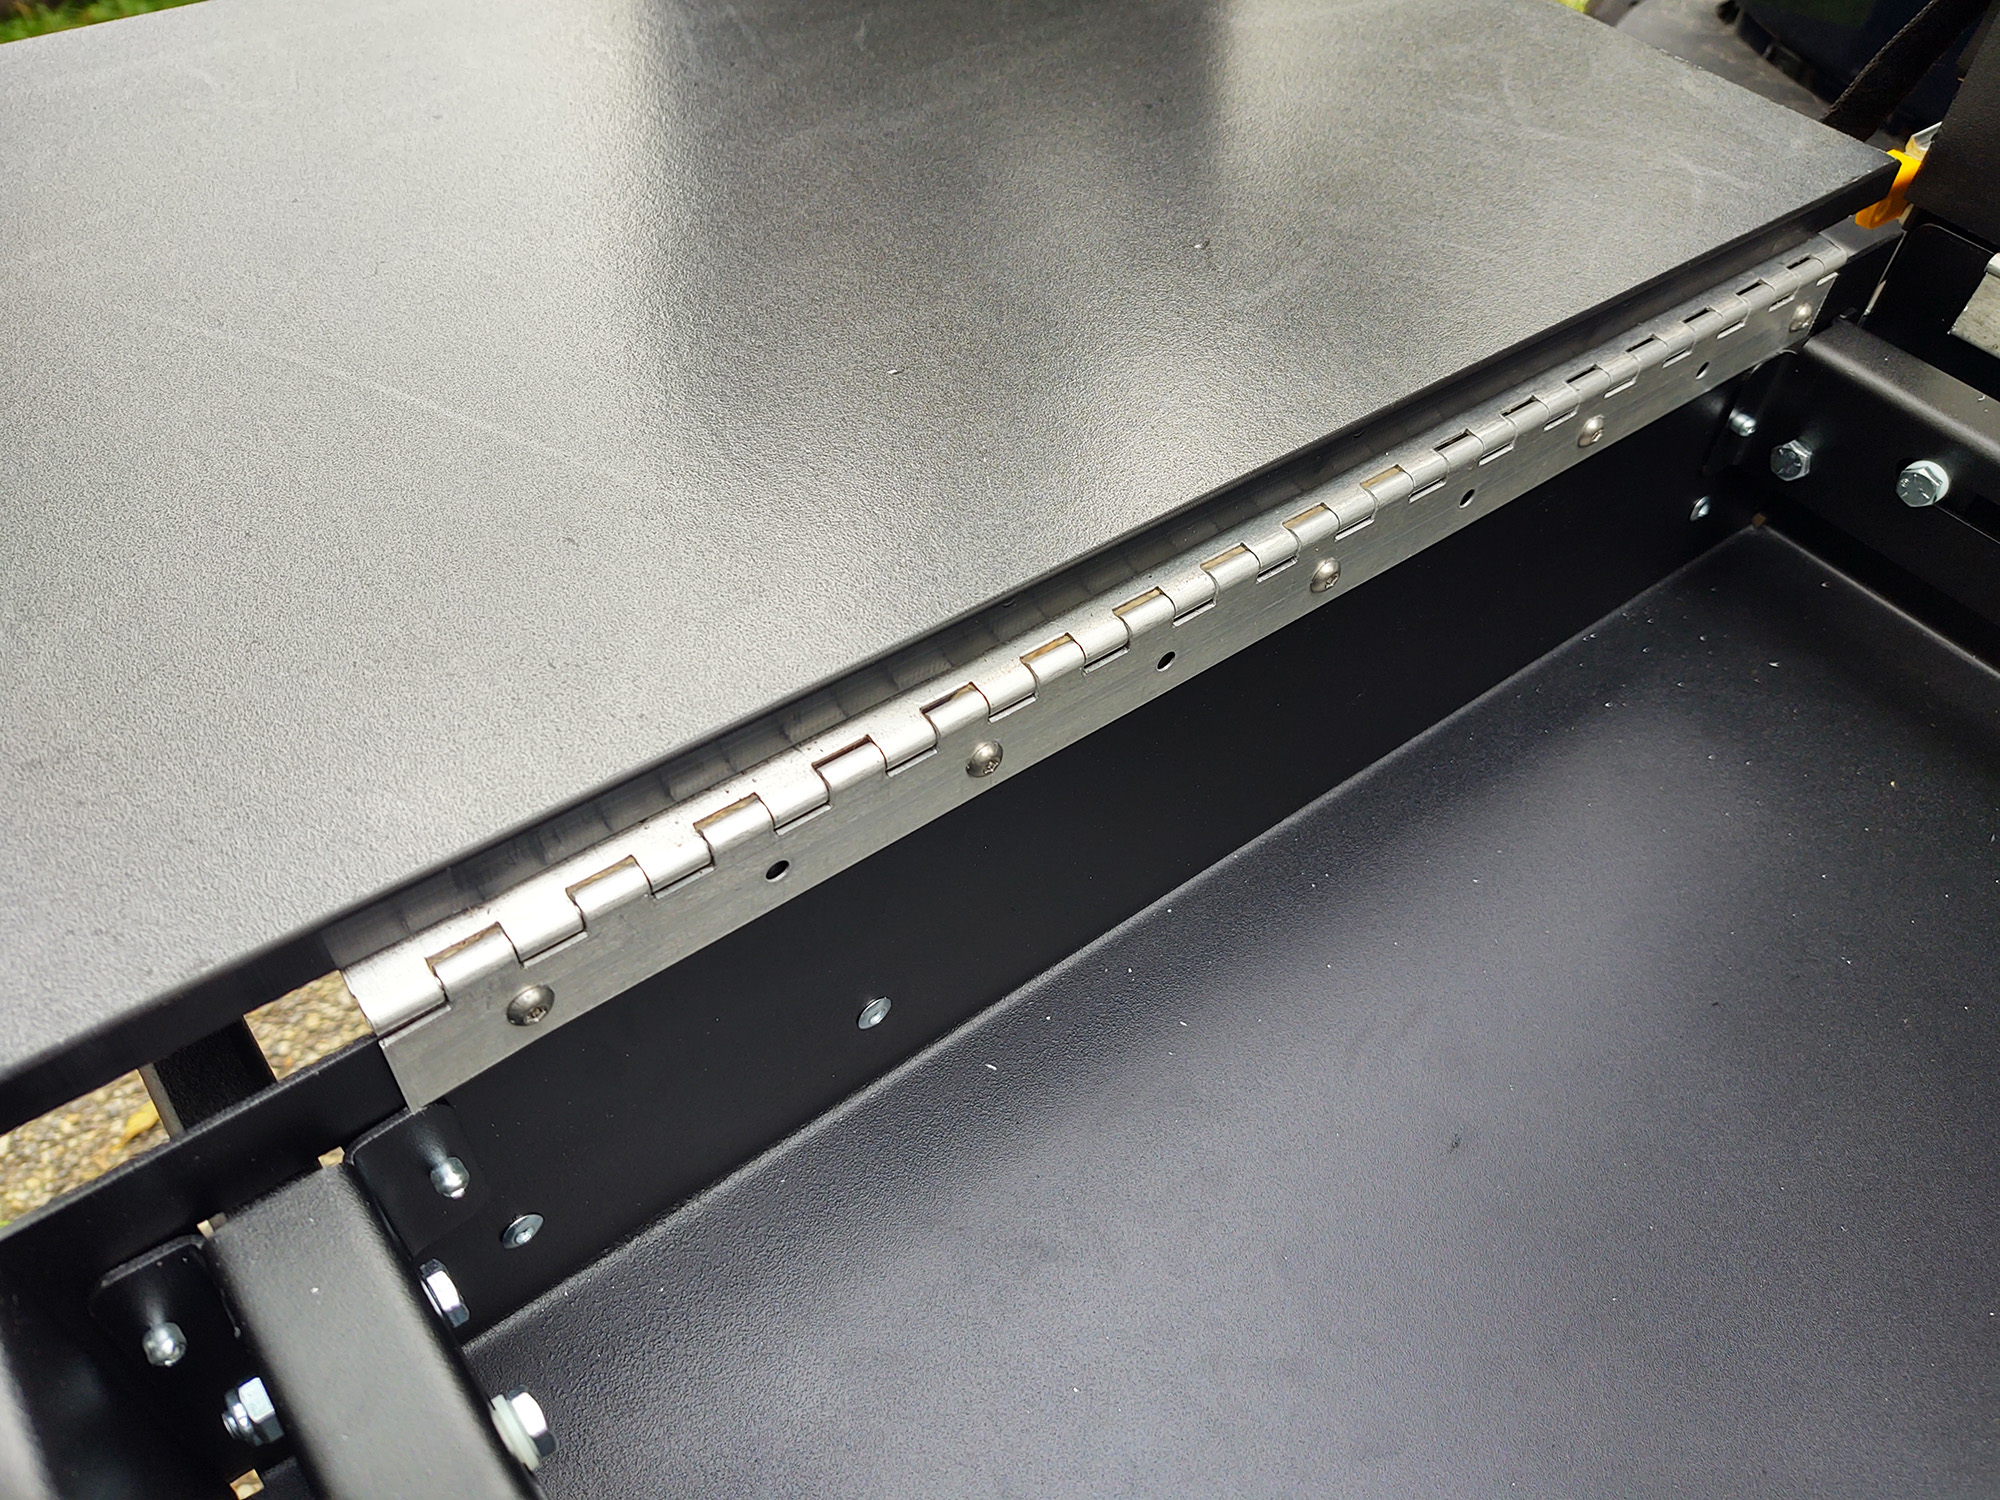
Start by aligning the tubes in the channels of the Trail Kitchen drawer. Make sure the threaded inserts are facing outward, and the two holes are facing parallel with the ground, not straight up and down.
Next, be sure to assemble the hardware for the rollers as pictured upon final installation. It is pictured like this so you can see the way it should work.
Insert this hardware through the slot in the channels of the drawer to act as a roller, with one bushing on each side — tighten with the two 7/16” wrenches, but not to the point that they can’t roll in the channels.
Attach the support crossbar to the end of the arms using the countersunk Allen head bolts and the 5/32” Allen tool. Verify that the entire support moves freely.
Next, using the remaining five small bolts and nylon lock washers, bolt the Flip Out Counter hinge to the Trail Kitchen storage tray. This is the part where you pay attention to the hardware and hinge orientation — it only works one way, despite my best efforts. Tighten these with the ⅛” Allen tool and ⅜” wrench.
This is what the Flip Out Counter looks like in the storage position (but without the support arm locked in):
This is what the entire assembly looks like once deployed at our campsite on the shore of Lake Champlain, in the pouring rain:
As I mentioned, this is a HUGE upgrade to the Trail Kitchen system. The main counter is 14.75” x 22”, and the Flip Out measures in at 13.75” x 21”.
MORryde Slide On Counter Top
Required tools:
- 3/16” Allen wrench
- #2 Phillips head screwdriver
This upgrade is great too, as it doesn’t really cost much storage space, but fills in the dead area between the trail kitchen slide and the Flip Out Counter, over the edge of your rear bumper. While smaller in size, we found this extra 13” x12.5” work surface to be crucial for larger meals.

Installation is actually quite simple, as it just locks into two slots on the edge of the Trail Kitchen. It also comes fully assembled, requiring only a slight adjustment to level it with the rest of your work area.
Simply fold down the support legs, slide them into the keyed slot and adjust the spacers to level. This should only need to be done once, and the Clip On Counter folds back up and can be stored in the Trail Kitchen drawer when not in use.
MORryde MOLLE Panel
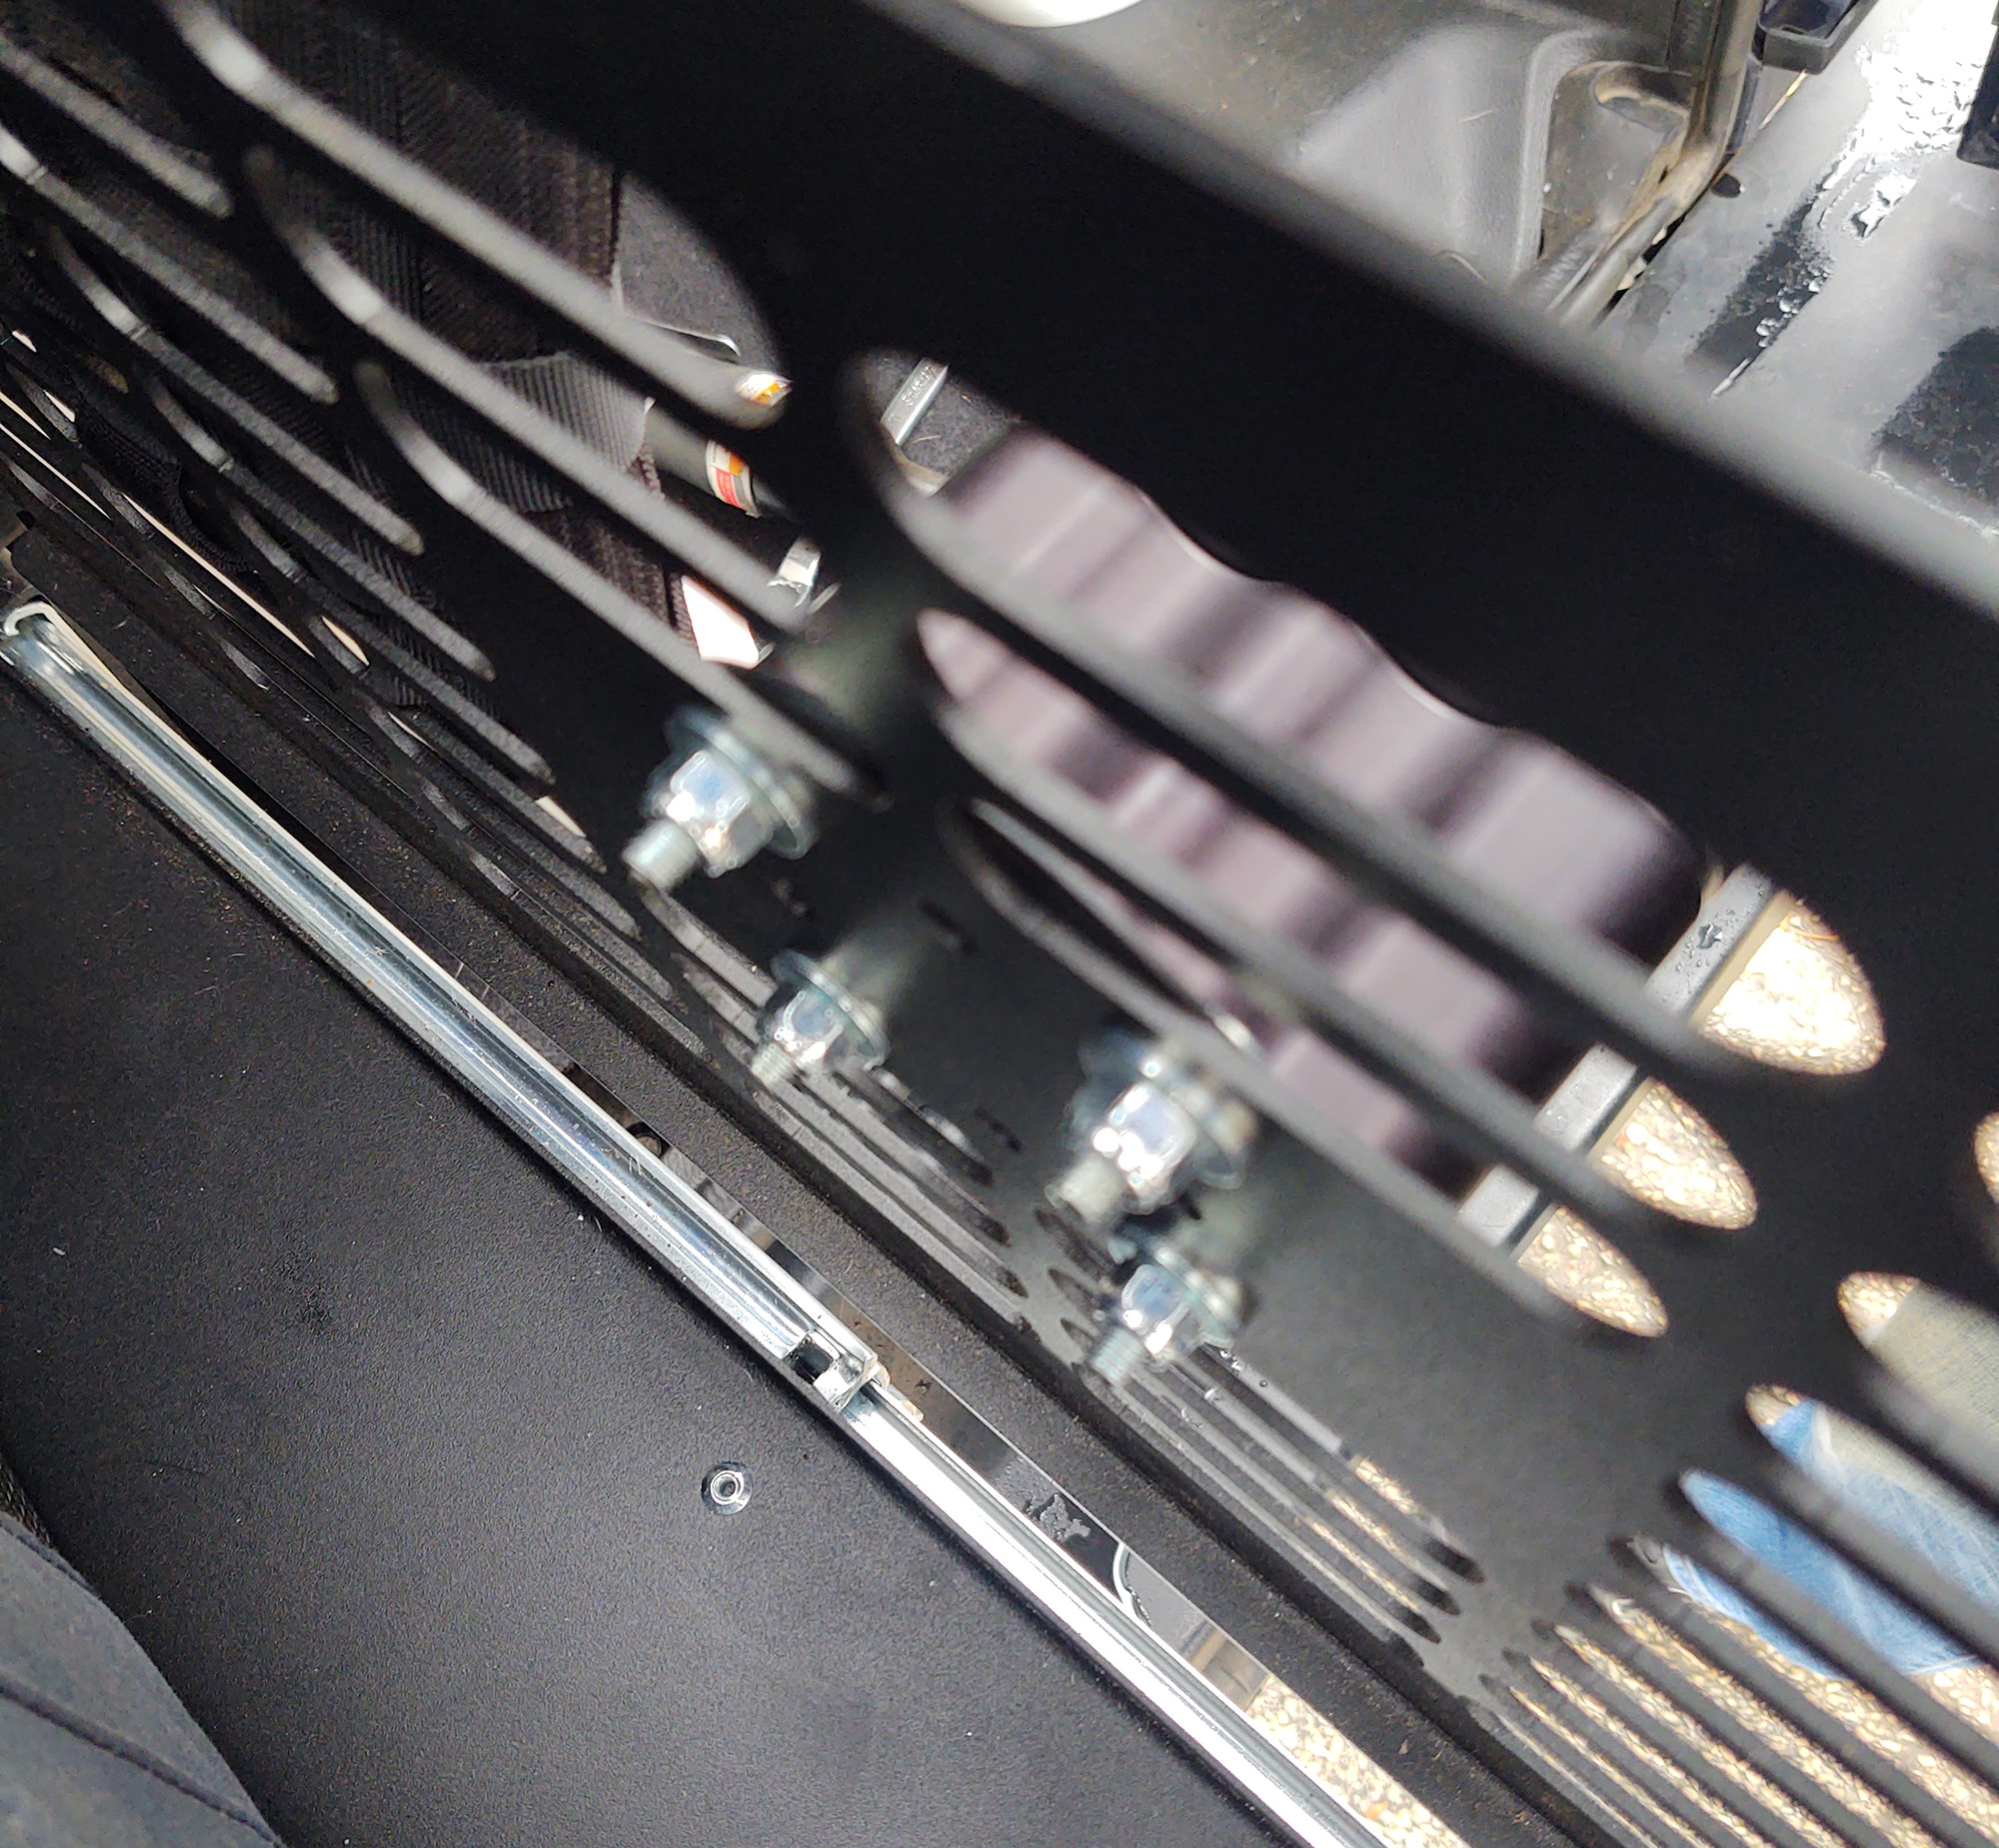
This is one of my favorite aspects of this system, and is only installed with four bolts, so it takes mere minutes. The adaptability of the installed product is incredible though, as it adds an additional panel of MOLLE-compatible slots, giving you the ability to customize your storage solutions with thousands of accessories or pouches.
Required tools:
- 7/16" wrench
- 5/32" Allen wrench
Line up the holes, and run those bolts home. Super easy. Threading in the MOLLE accessories will take you longer.
I have a flashlight holder, headlamp holder (actually a surplus grenade pouch) and a Leatherman MUT accessible from the rear of the trunk area, and a fold down tool pouch in the rear with small repair tools and Monster Valve field repair parts.
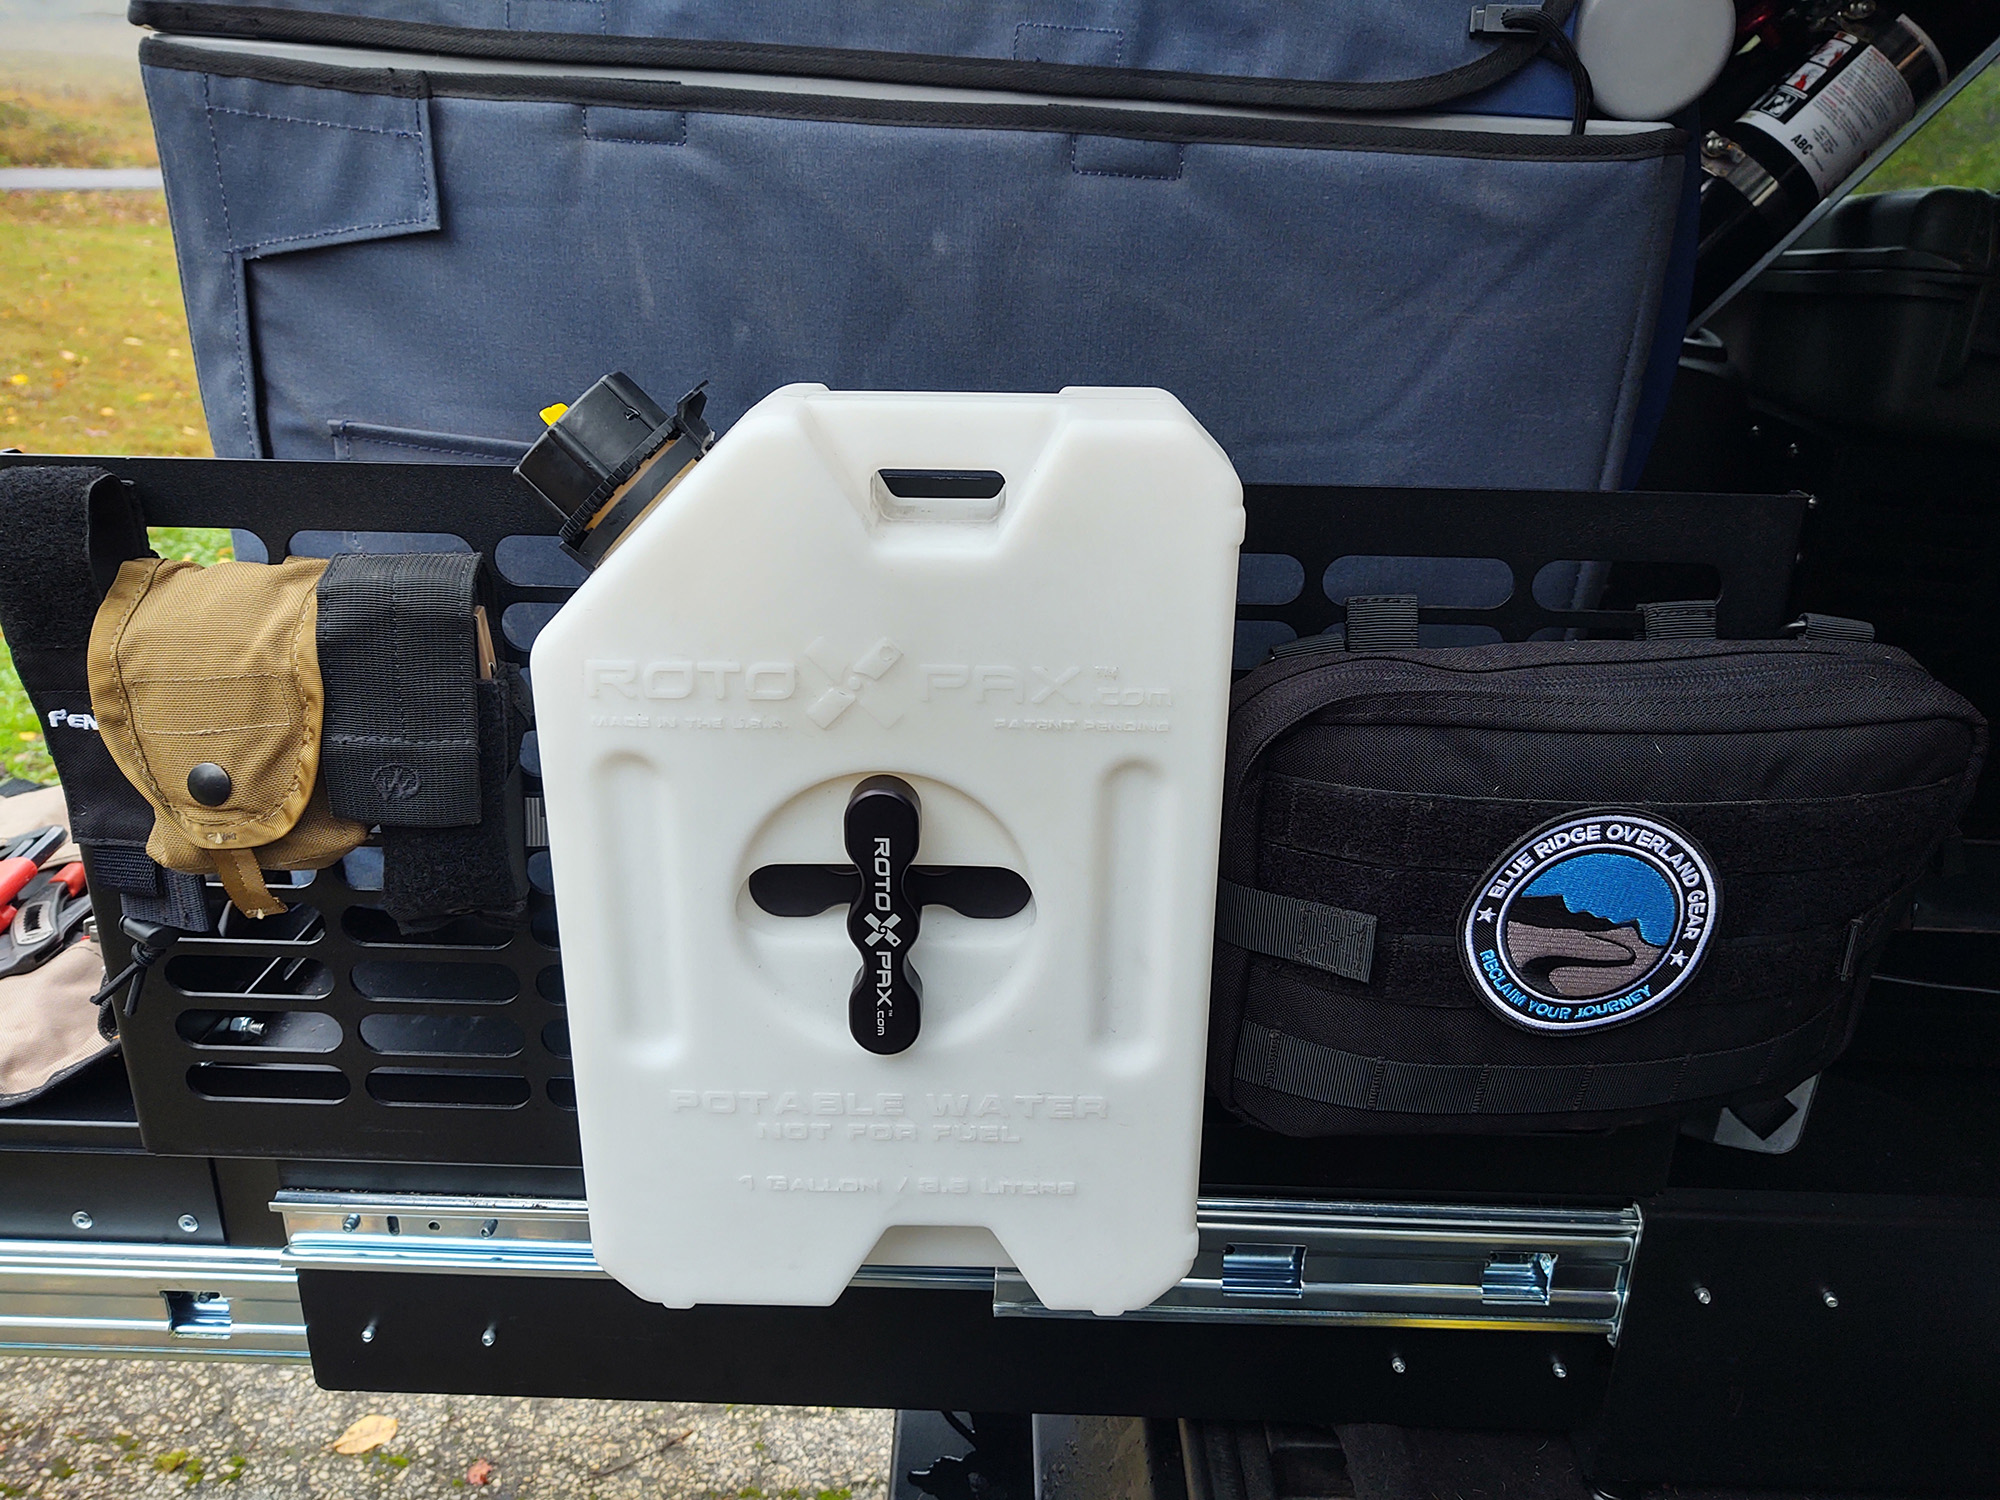
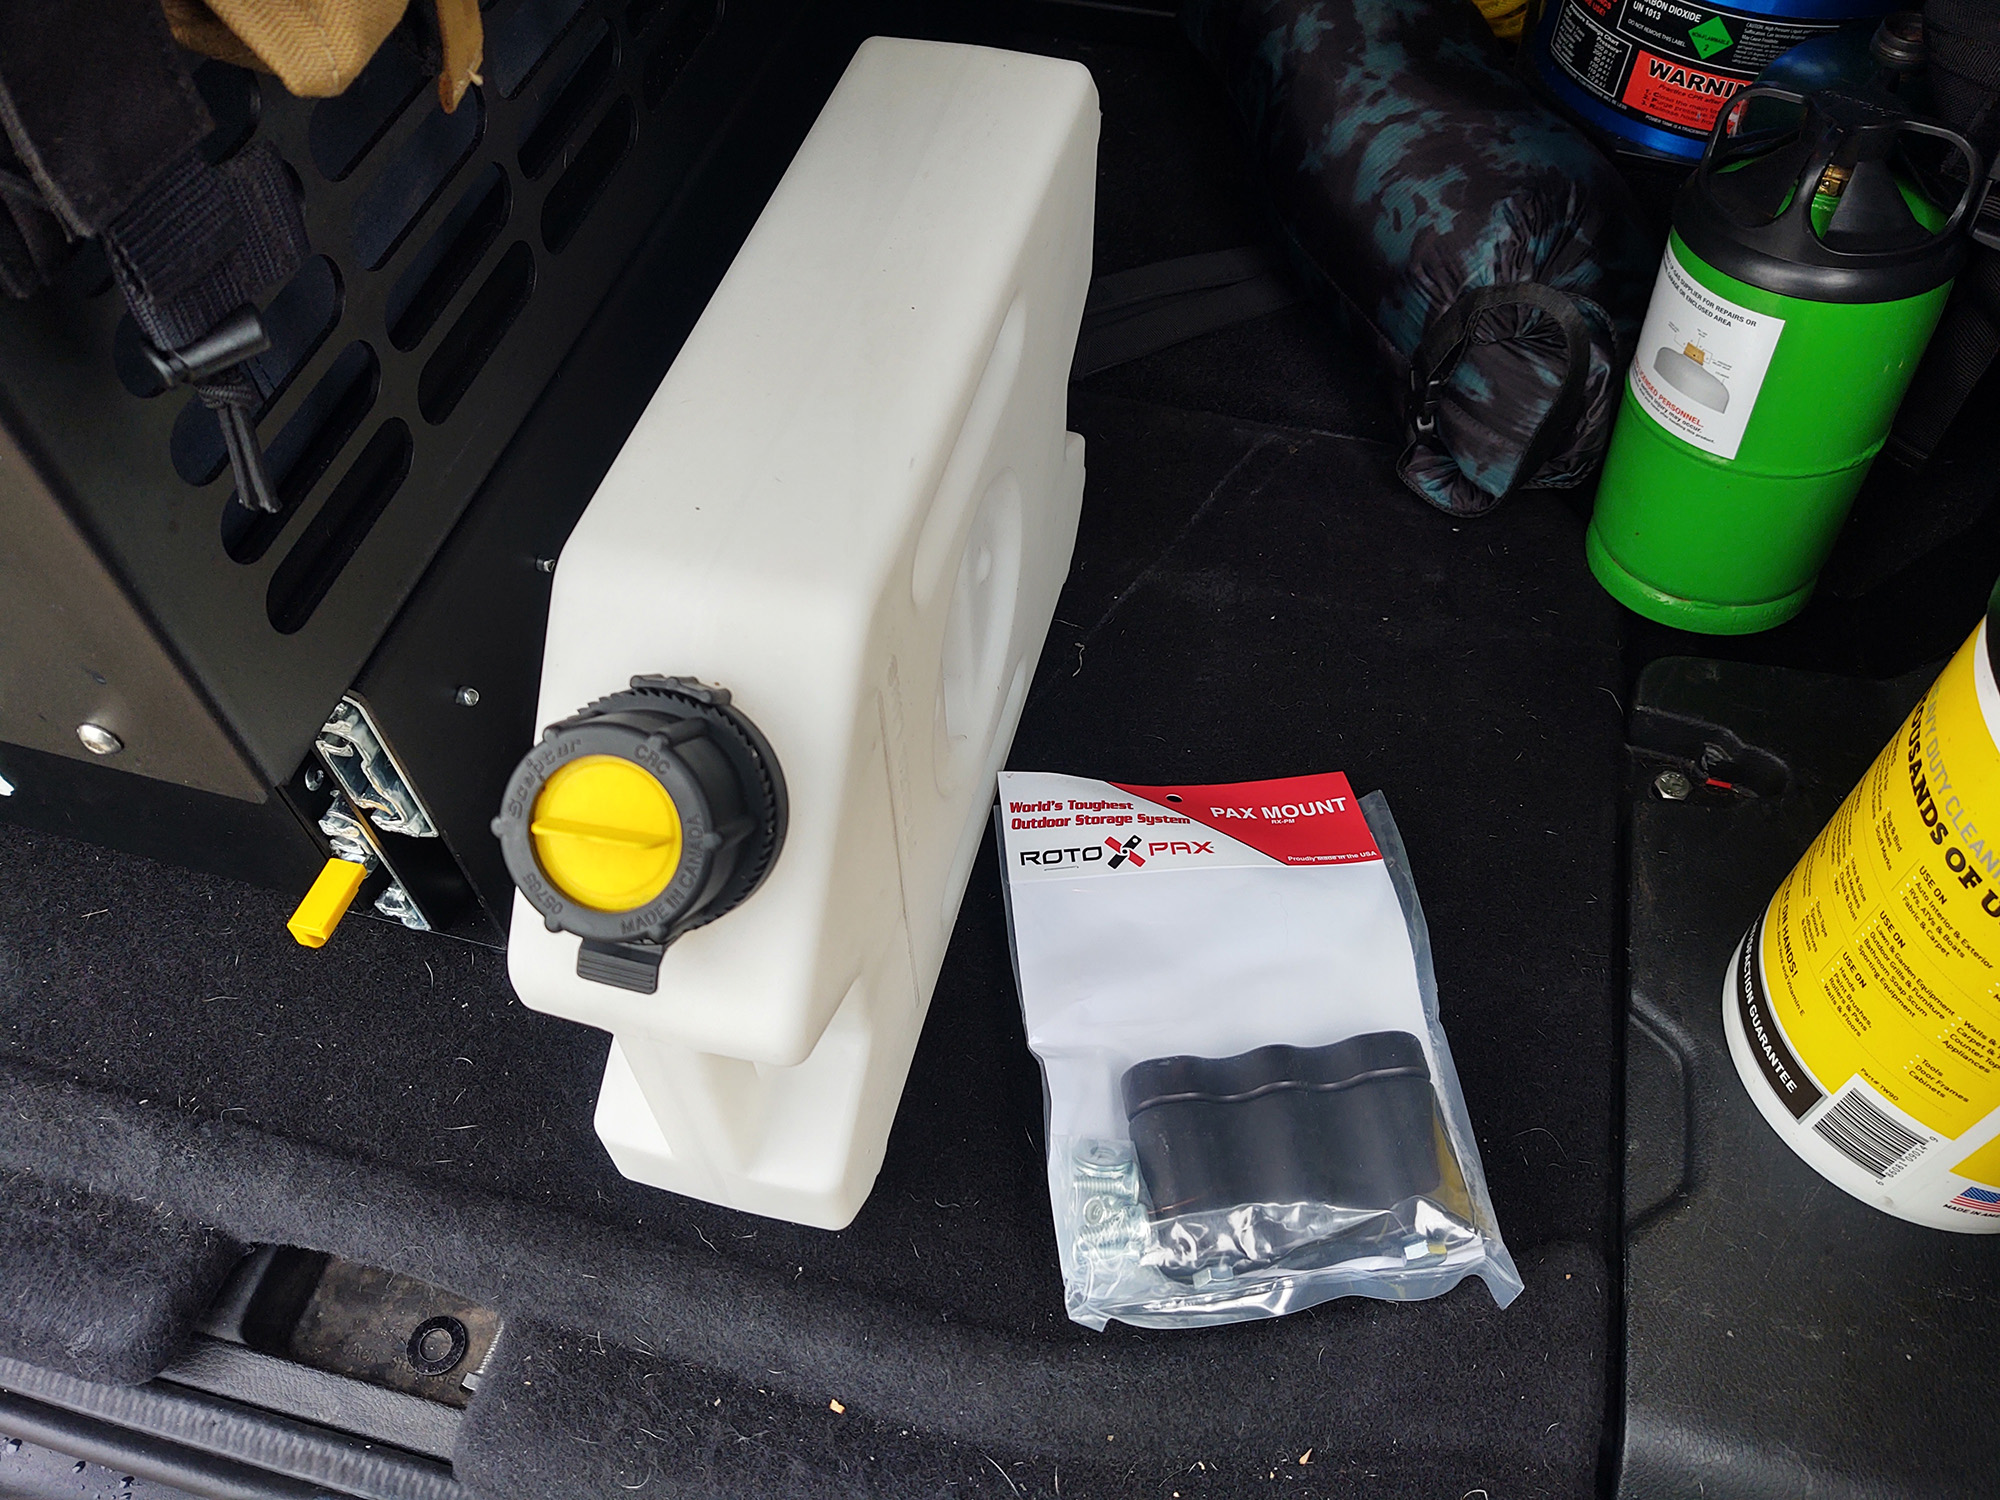
One of the added benefits that isn’t as obvious is the ability to add a RotopaX mount to the center of the MOLLE Panel, and that is exactly what I did. It can fit any of the RotopaX one or two gallon containers, allowing you to carry any fluid containers or storage bins that use a standard mount.
If you want to add to your setup, this is what I used:
Required tools and products:
- 13mm wrench or socket
- 11mm wrench or socket
- RotopaX One Gallon Water Can
- RotopaX RX-PM Pack Mount
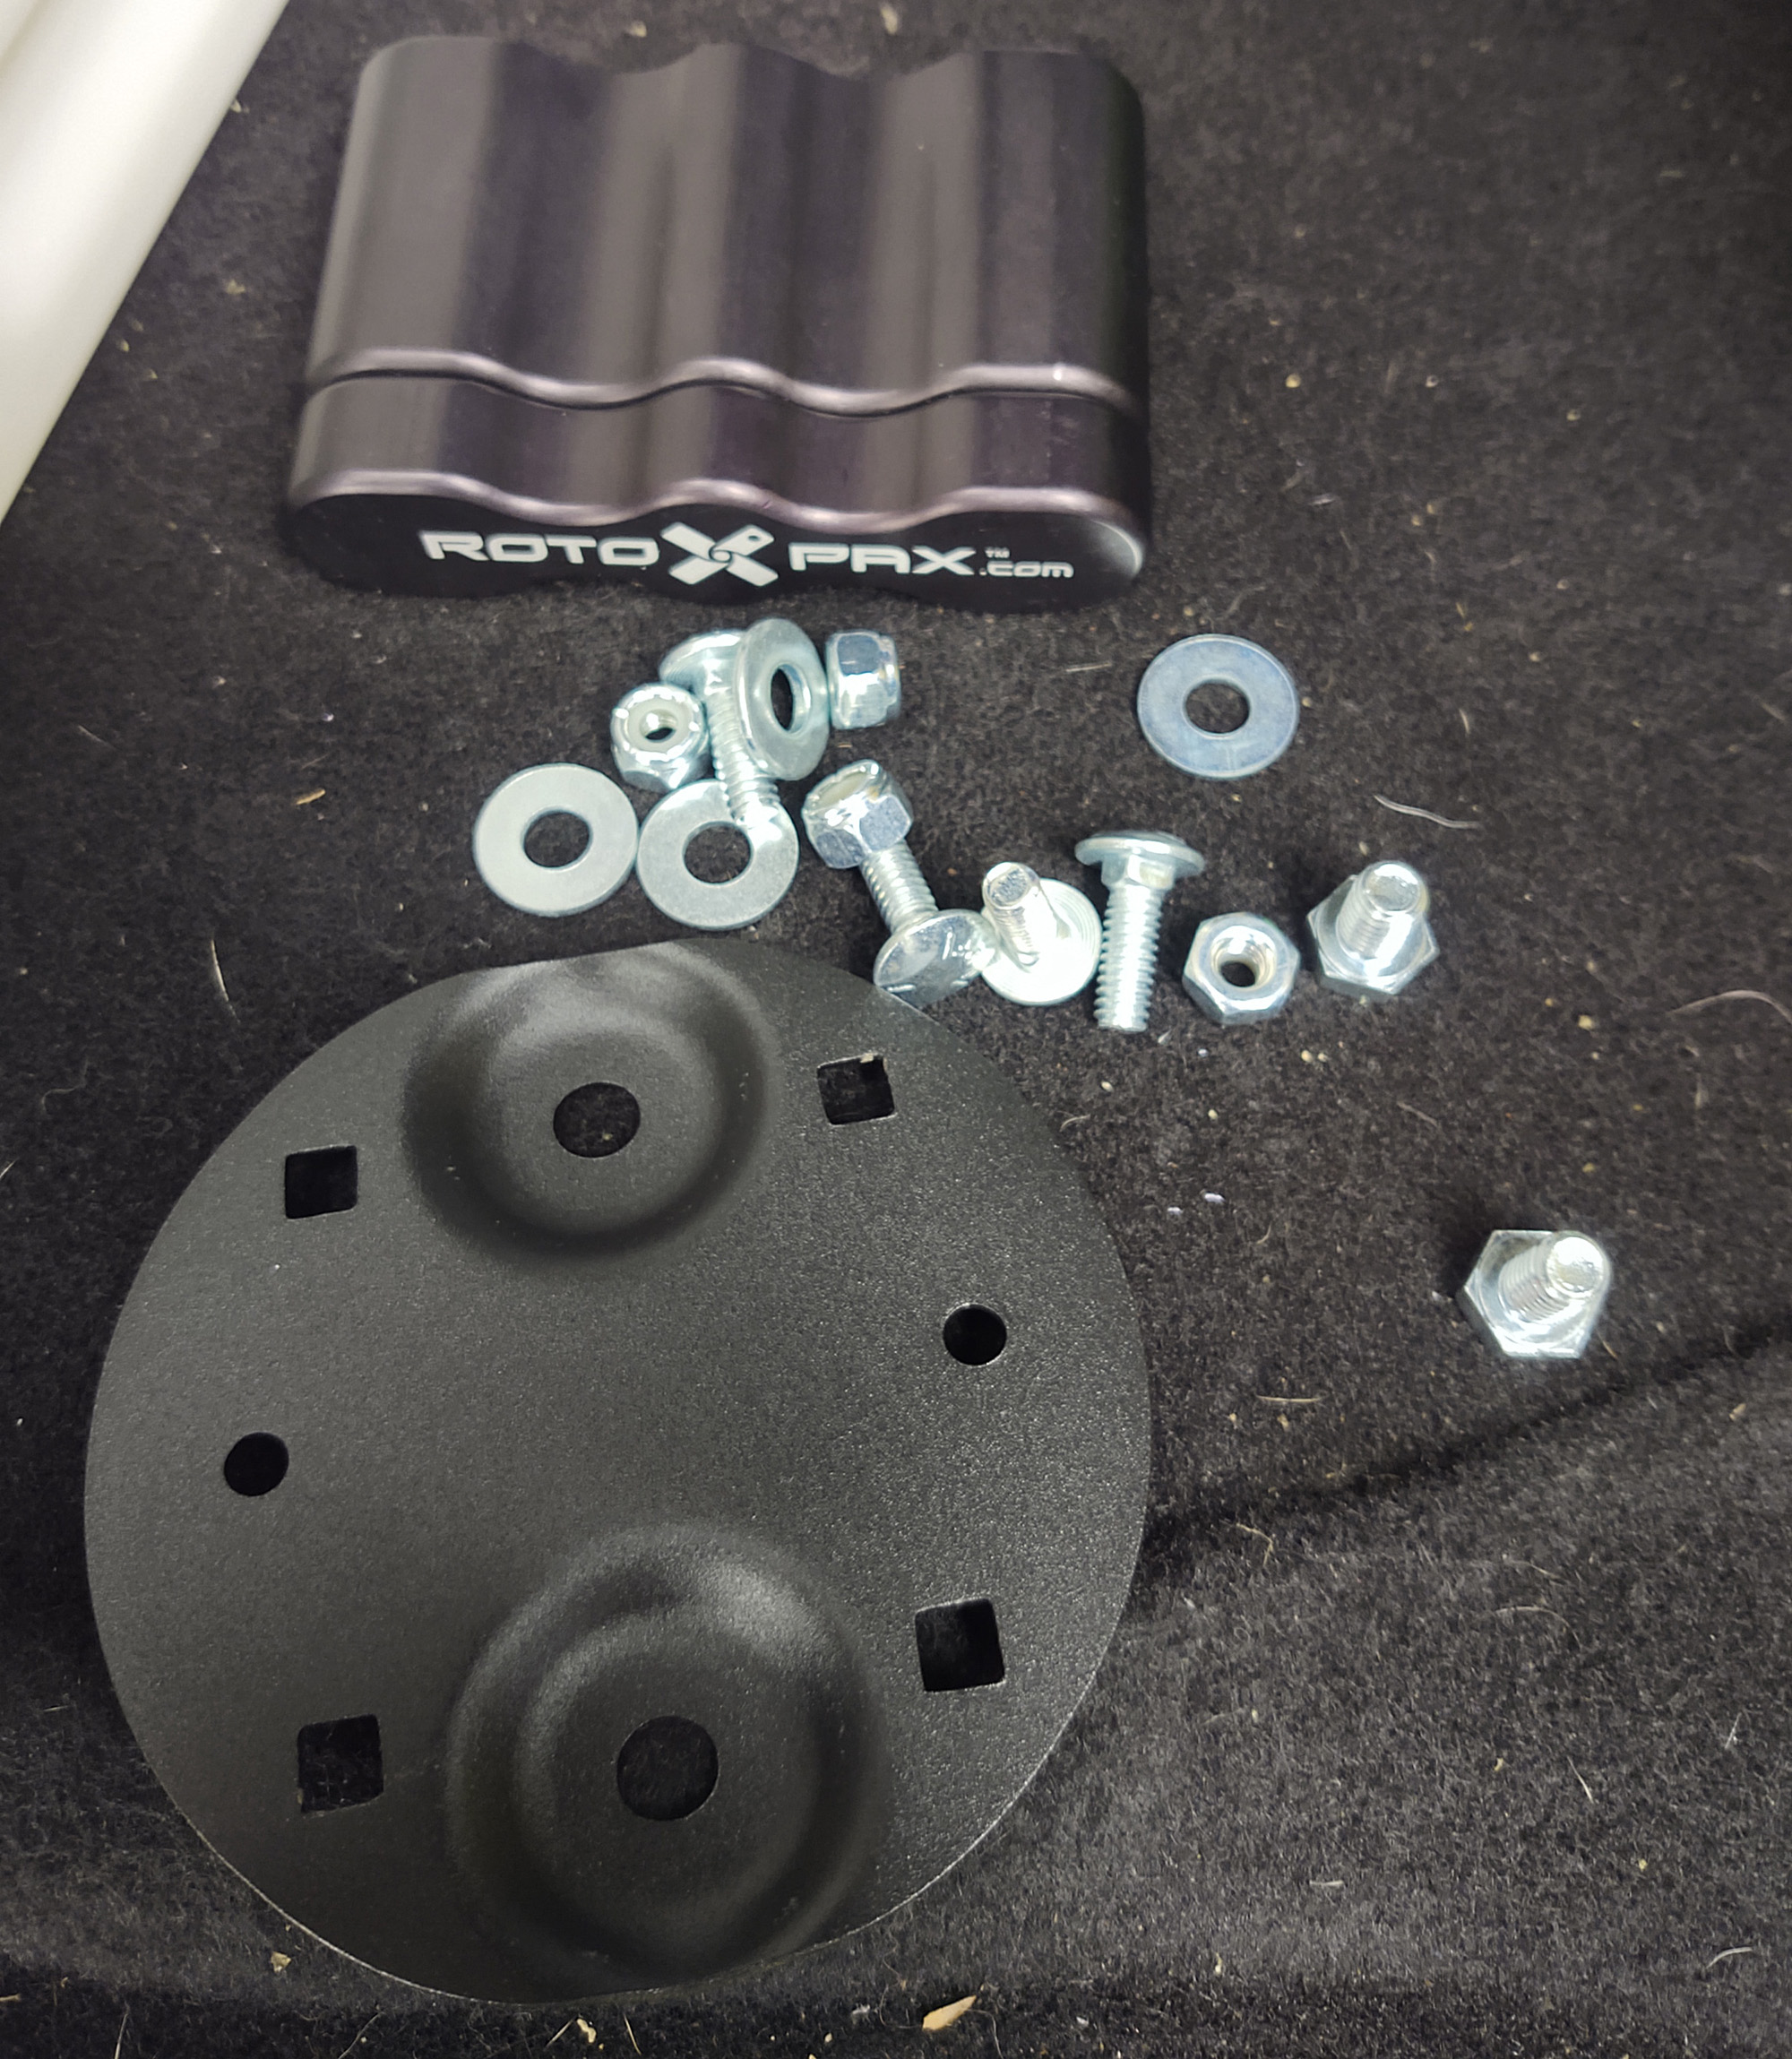
The RotopaX mount actually comes with all the hardware needed for this installation — the plate gets bolted to the mount itself, using a 13mm tool.
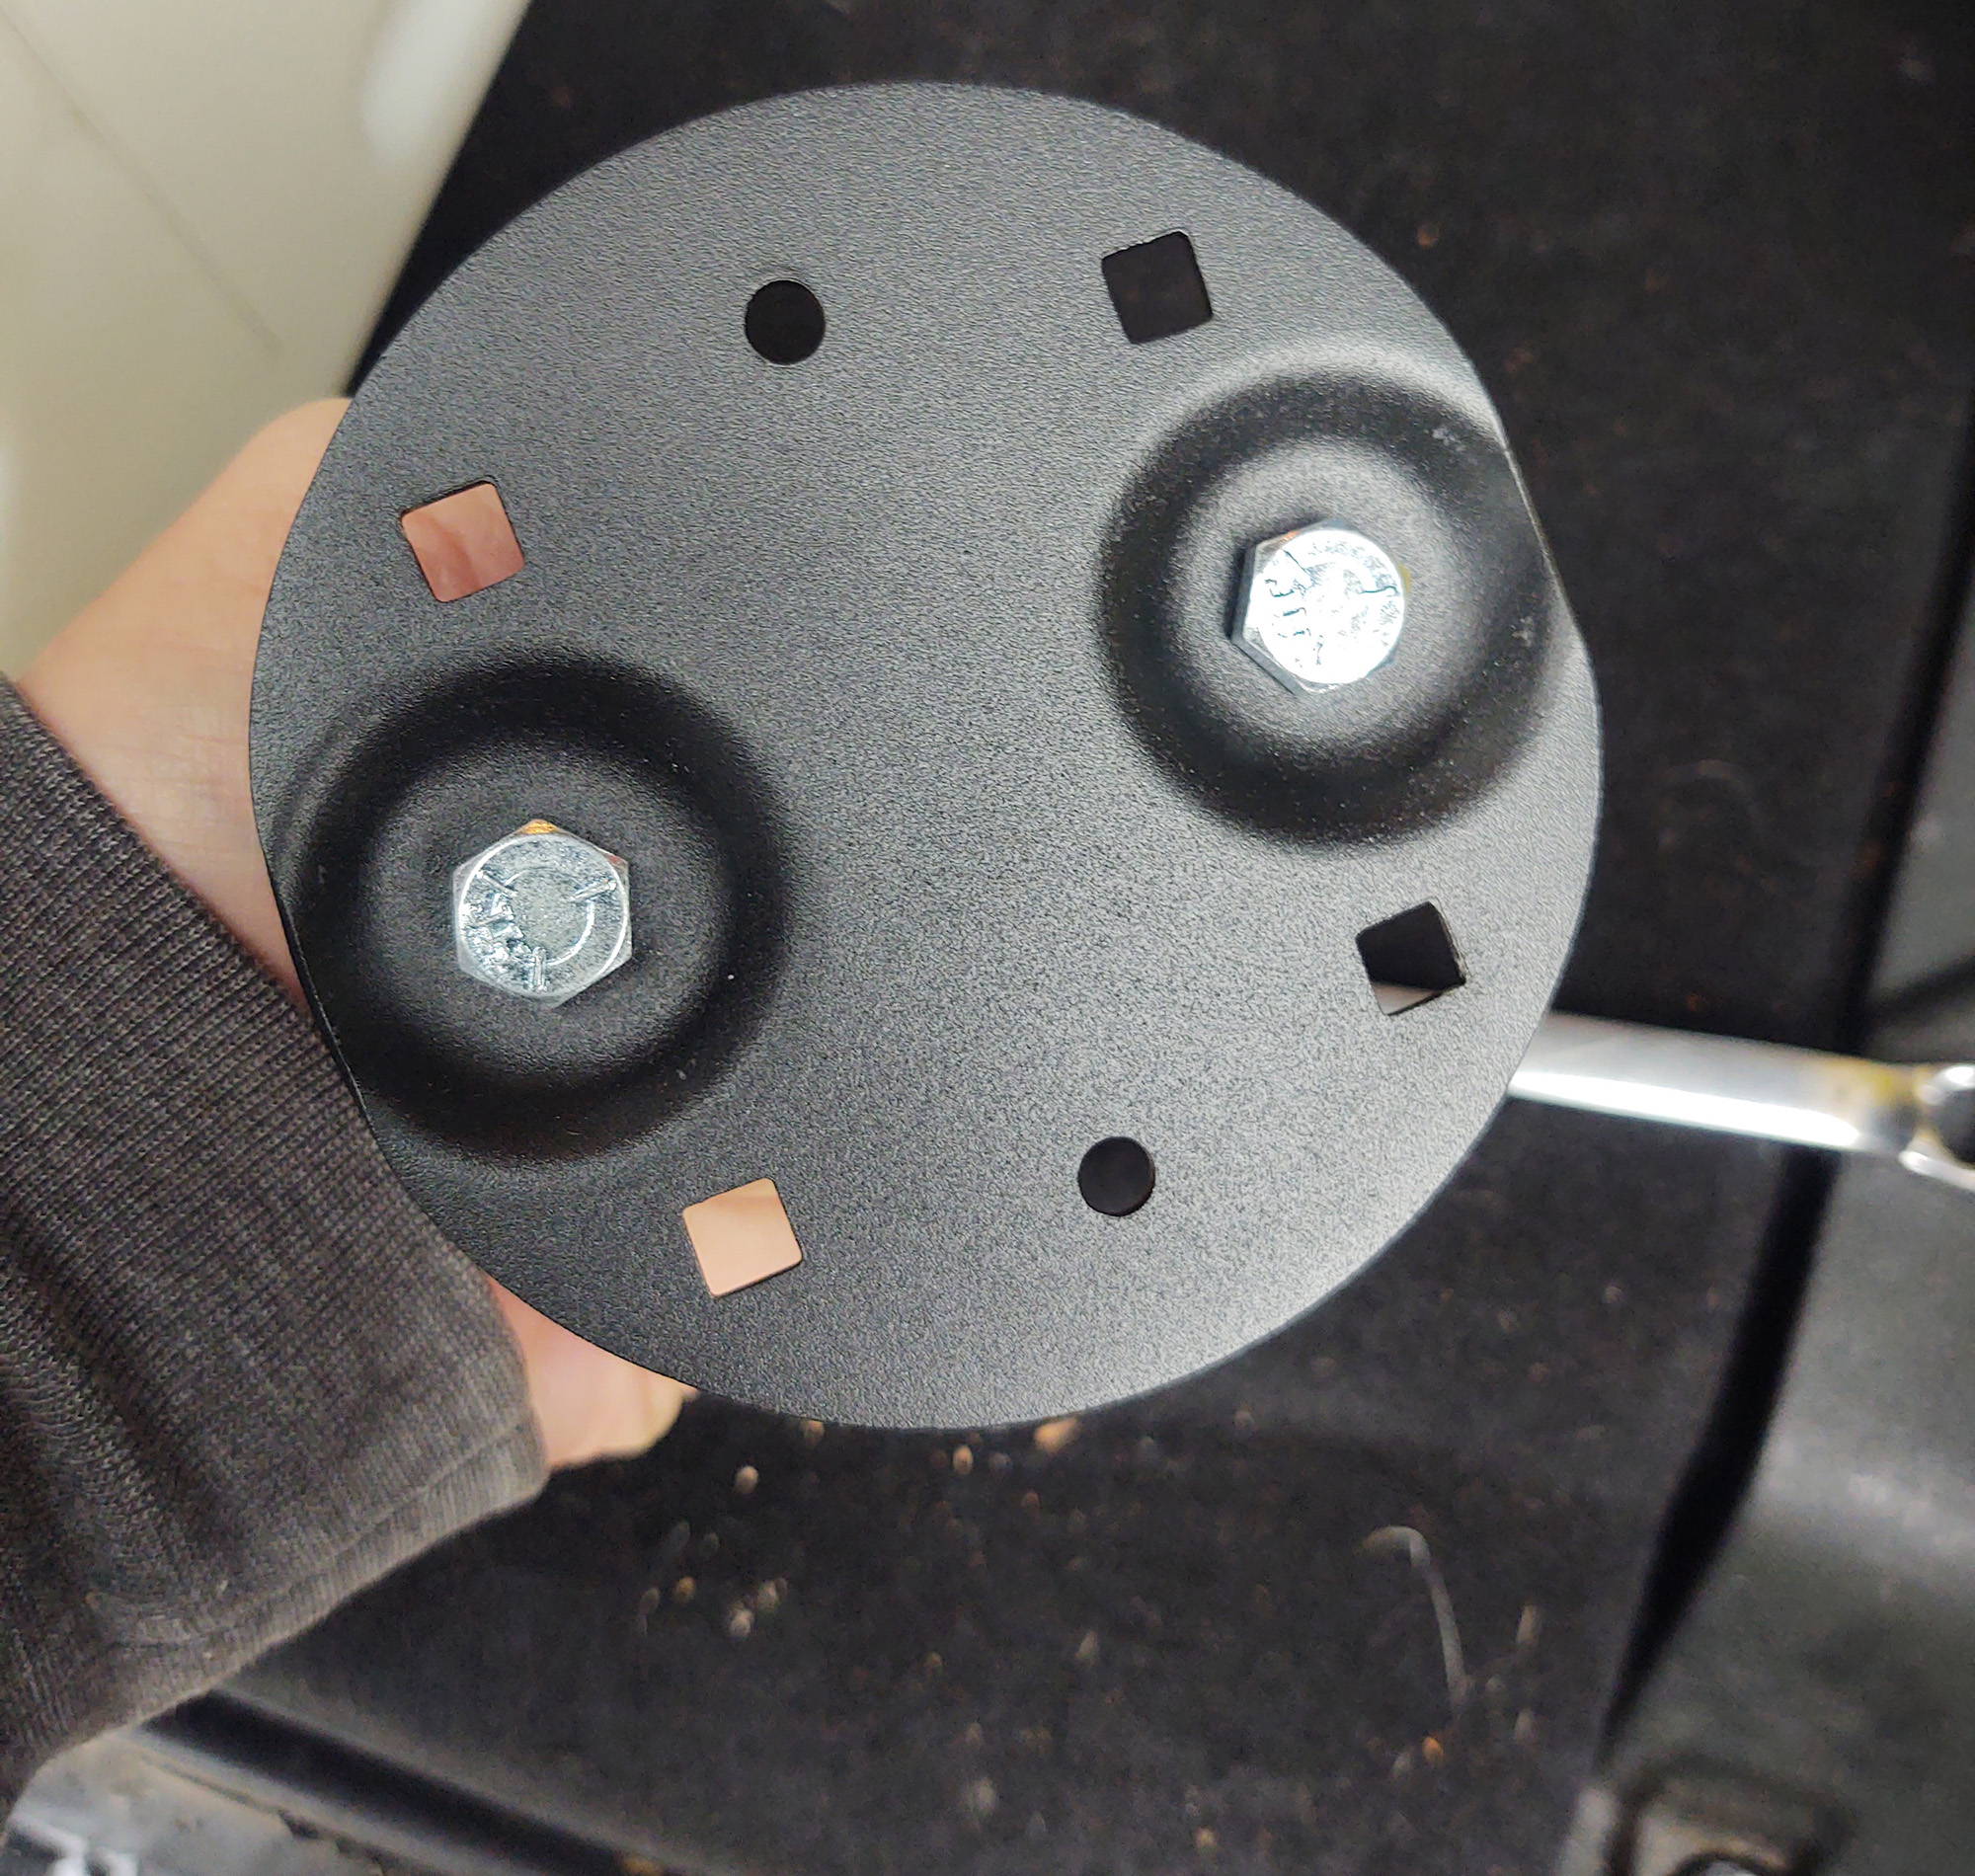
Then the plate itself gets bolted to the MOLLE Panel, through the square holes meant to accommodate the carriage bolts.
Here is a quick video of the whole MORryde Trail Kitchen system in action: