by Scott Ammerman
Torque Correspondent
“Take care of your equipment and it will take care of you.”
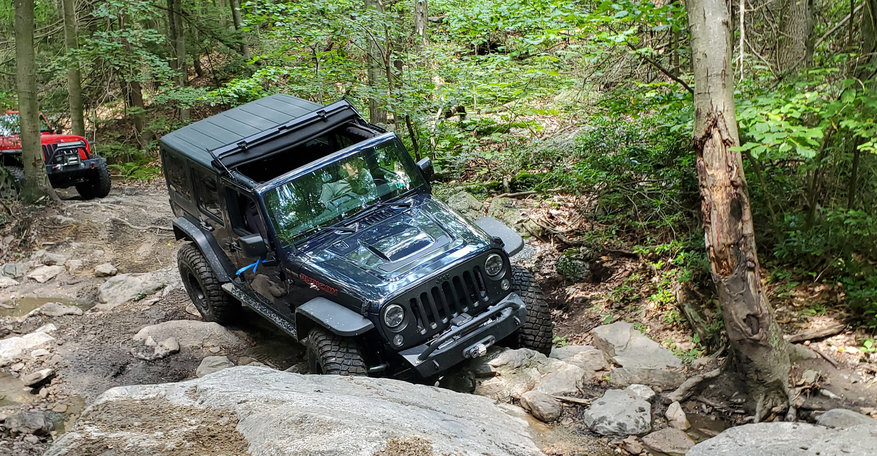
That’s an important quote to remember right there. In my life, this is usually applied to maintaining my whitewater rescue and recovery equipment. Having the right tubular rescue webbing, locking carabiners and personal flotation makes all the difference in the world. This same adage can apply to anything you rely on for safety and recovery, and your winch system is both of those things.
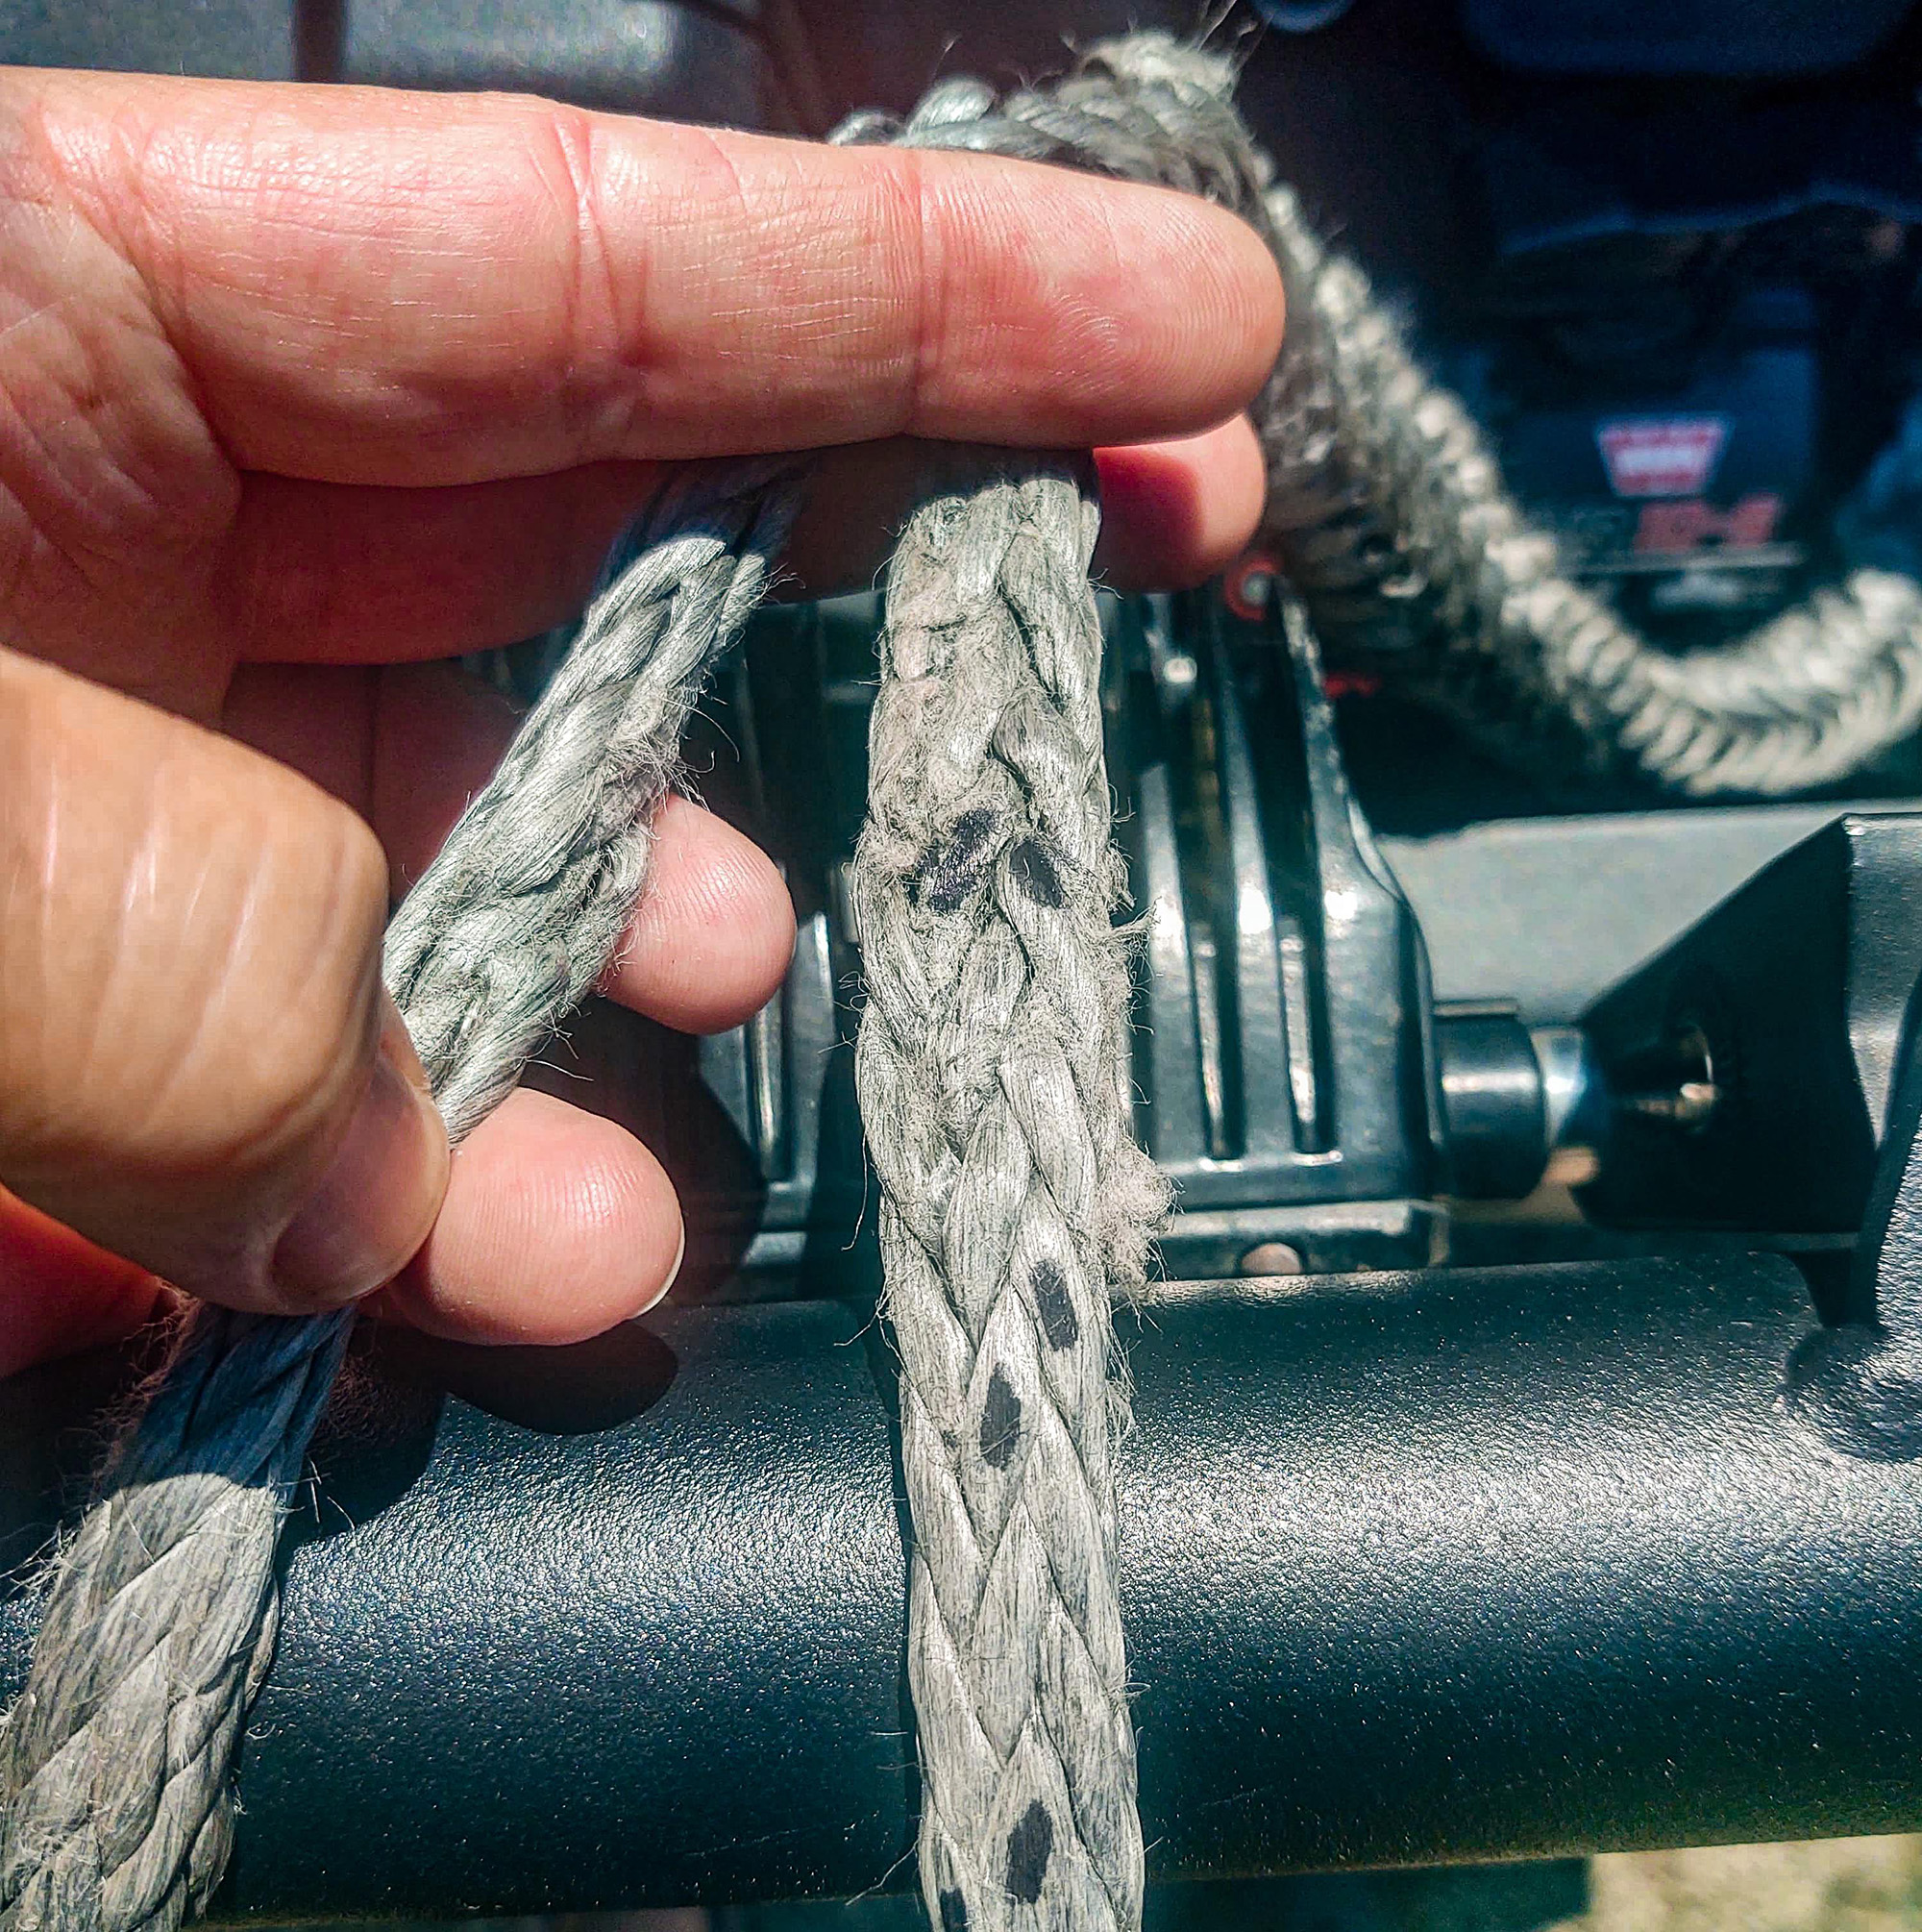
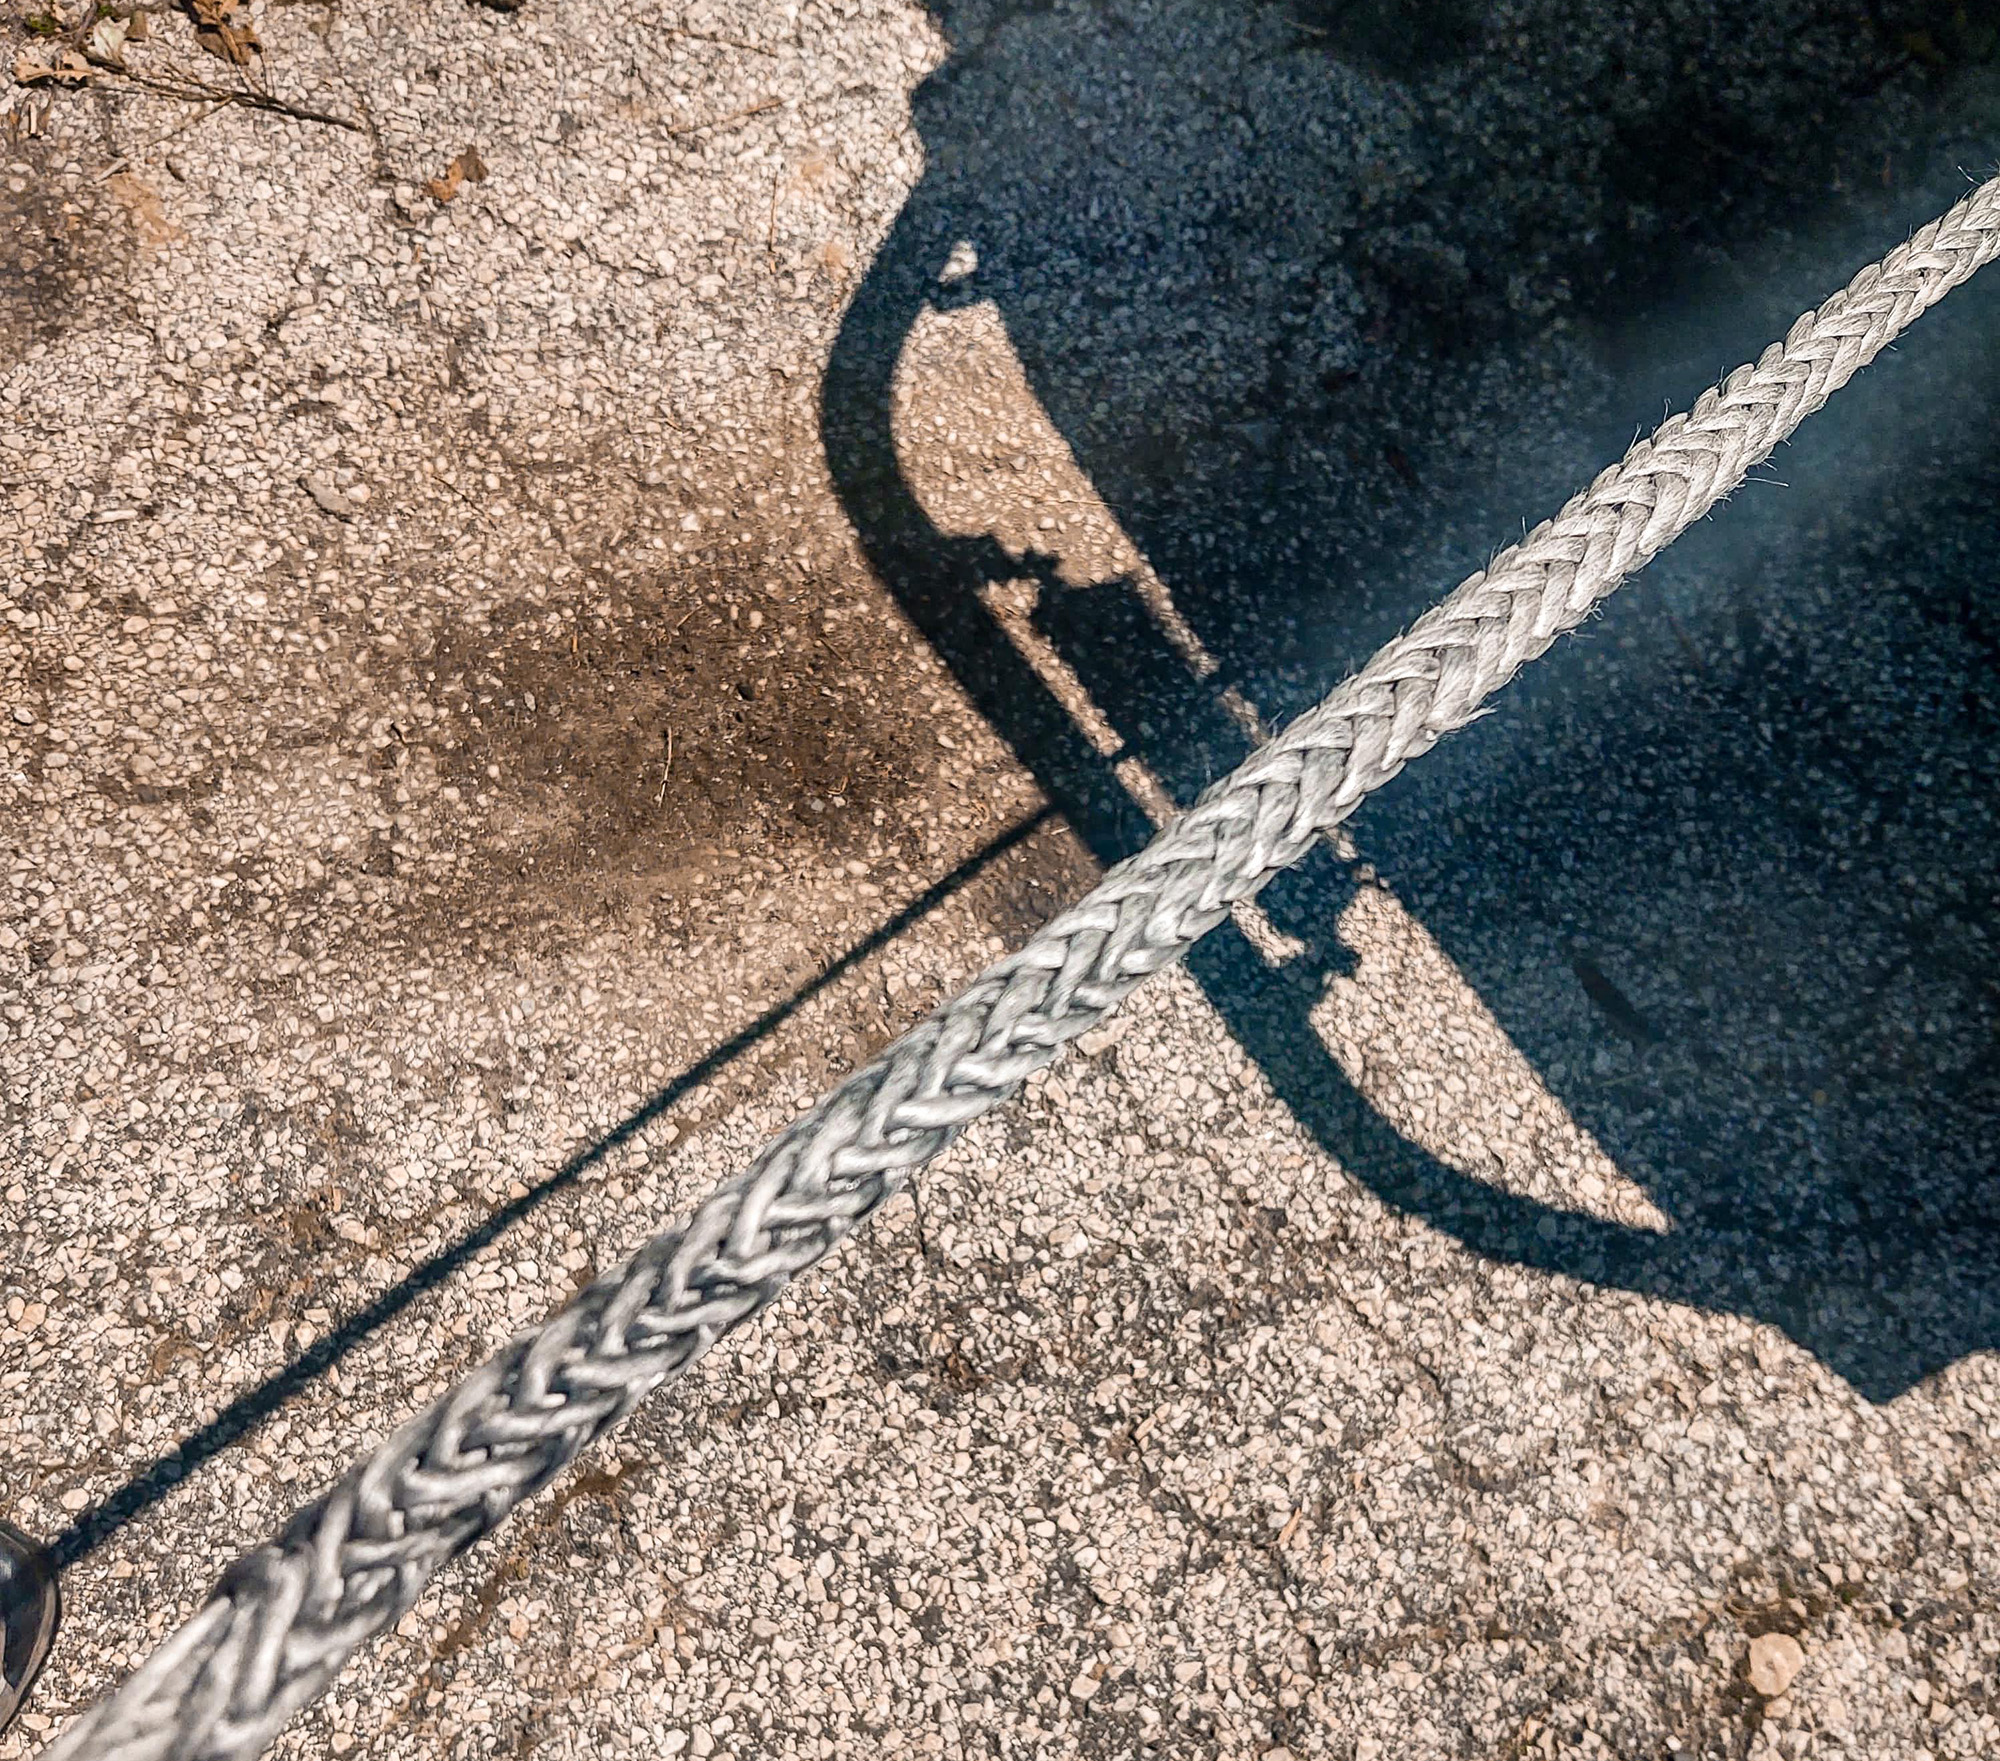
I recently found some damage to my synthetic winch rope during my 90 day inspection that needed to be resolved before the next time I had to rely on my winch to pull me out of a jam. A few strands of the Spydura braid were damaged by abrasion against rocks under load.
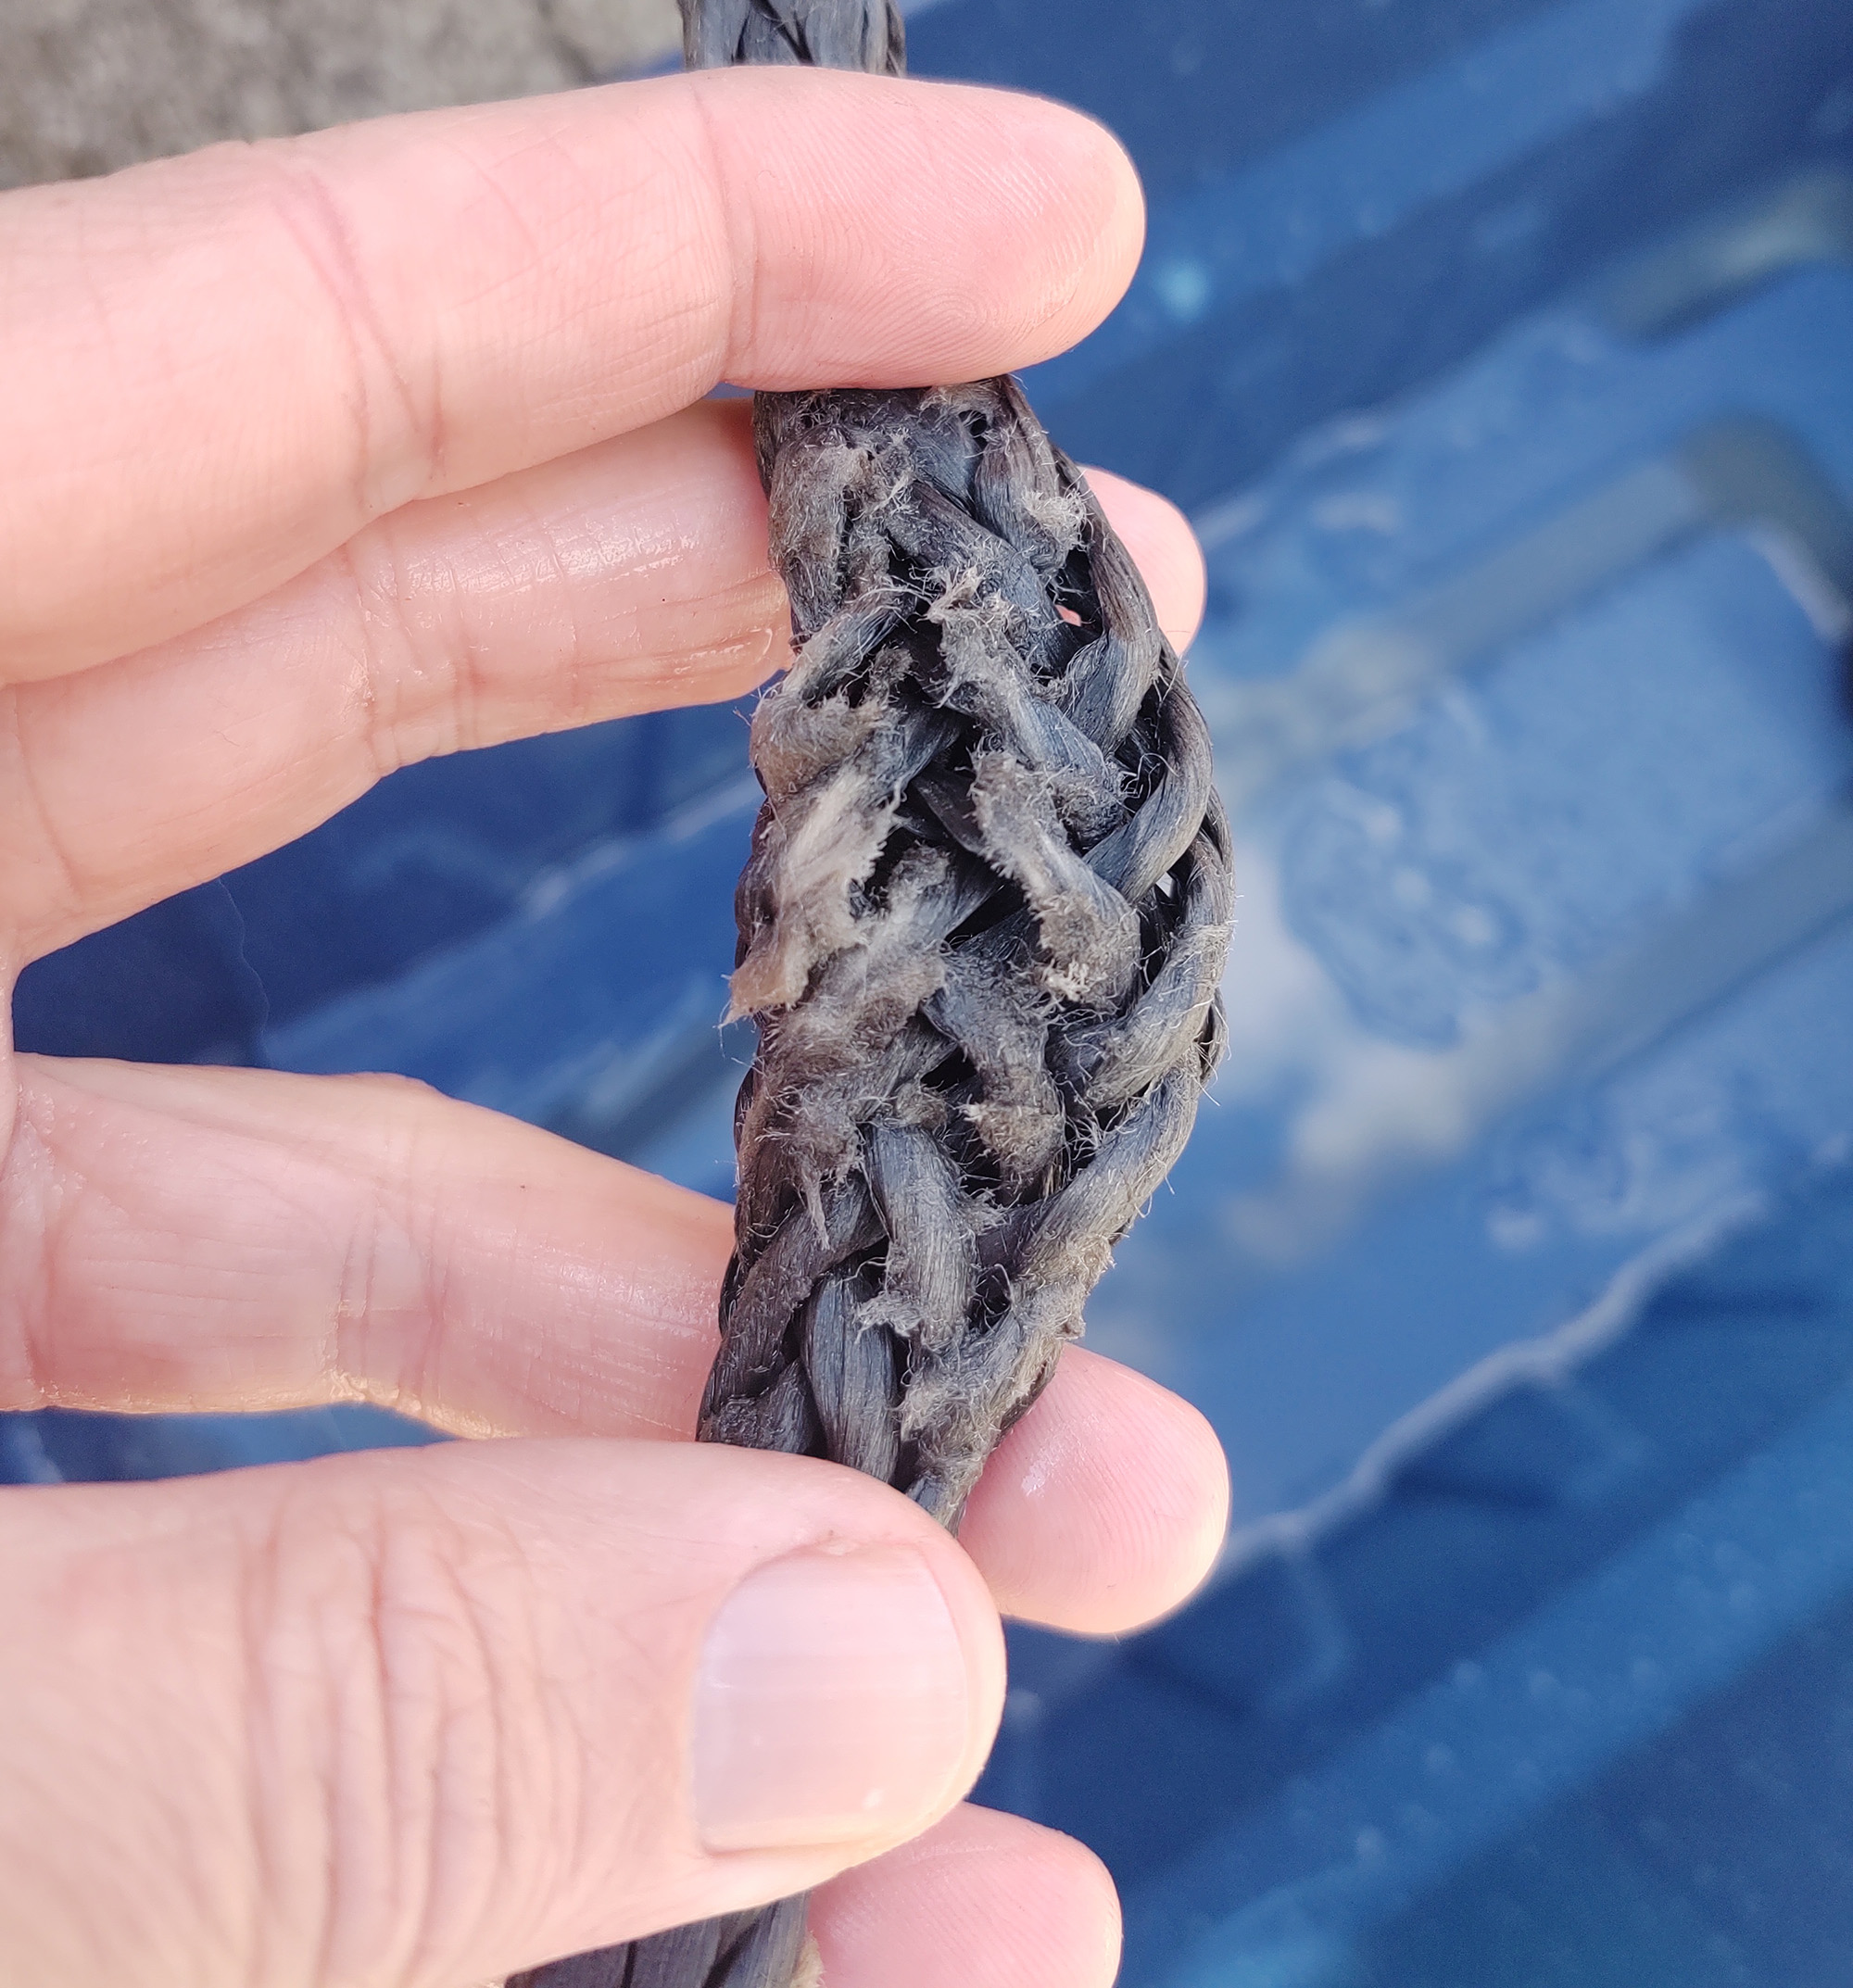
I go over the anatomy of a synthetic winch rope and how to check for damage in the previous article, but the short version is that I found damage to the rope in the 10 feet closest to my Factor 55 FlatLink. Because it was so close to the business end of the rope, I opted to repair the line with a fresh splice using the Factor 55 Fast Fid.
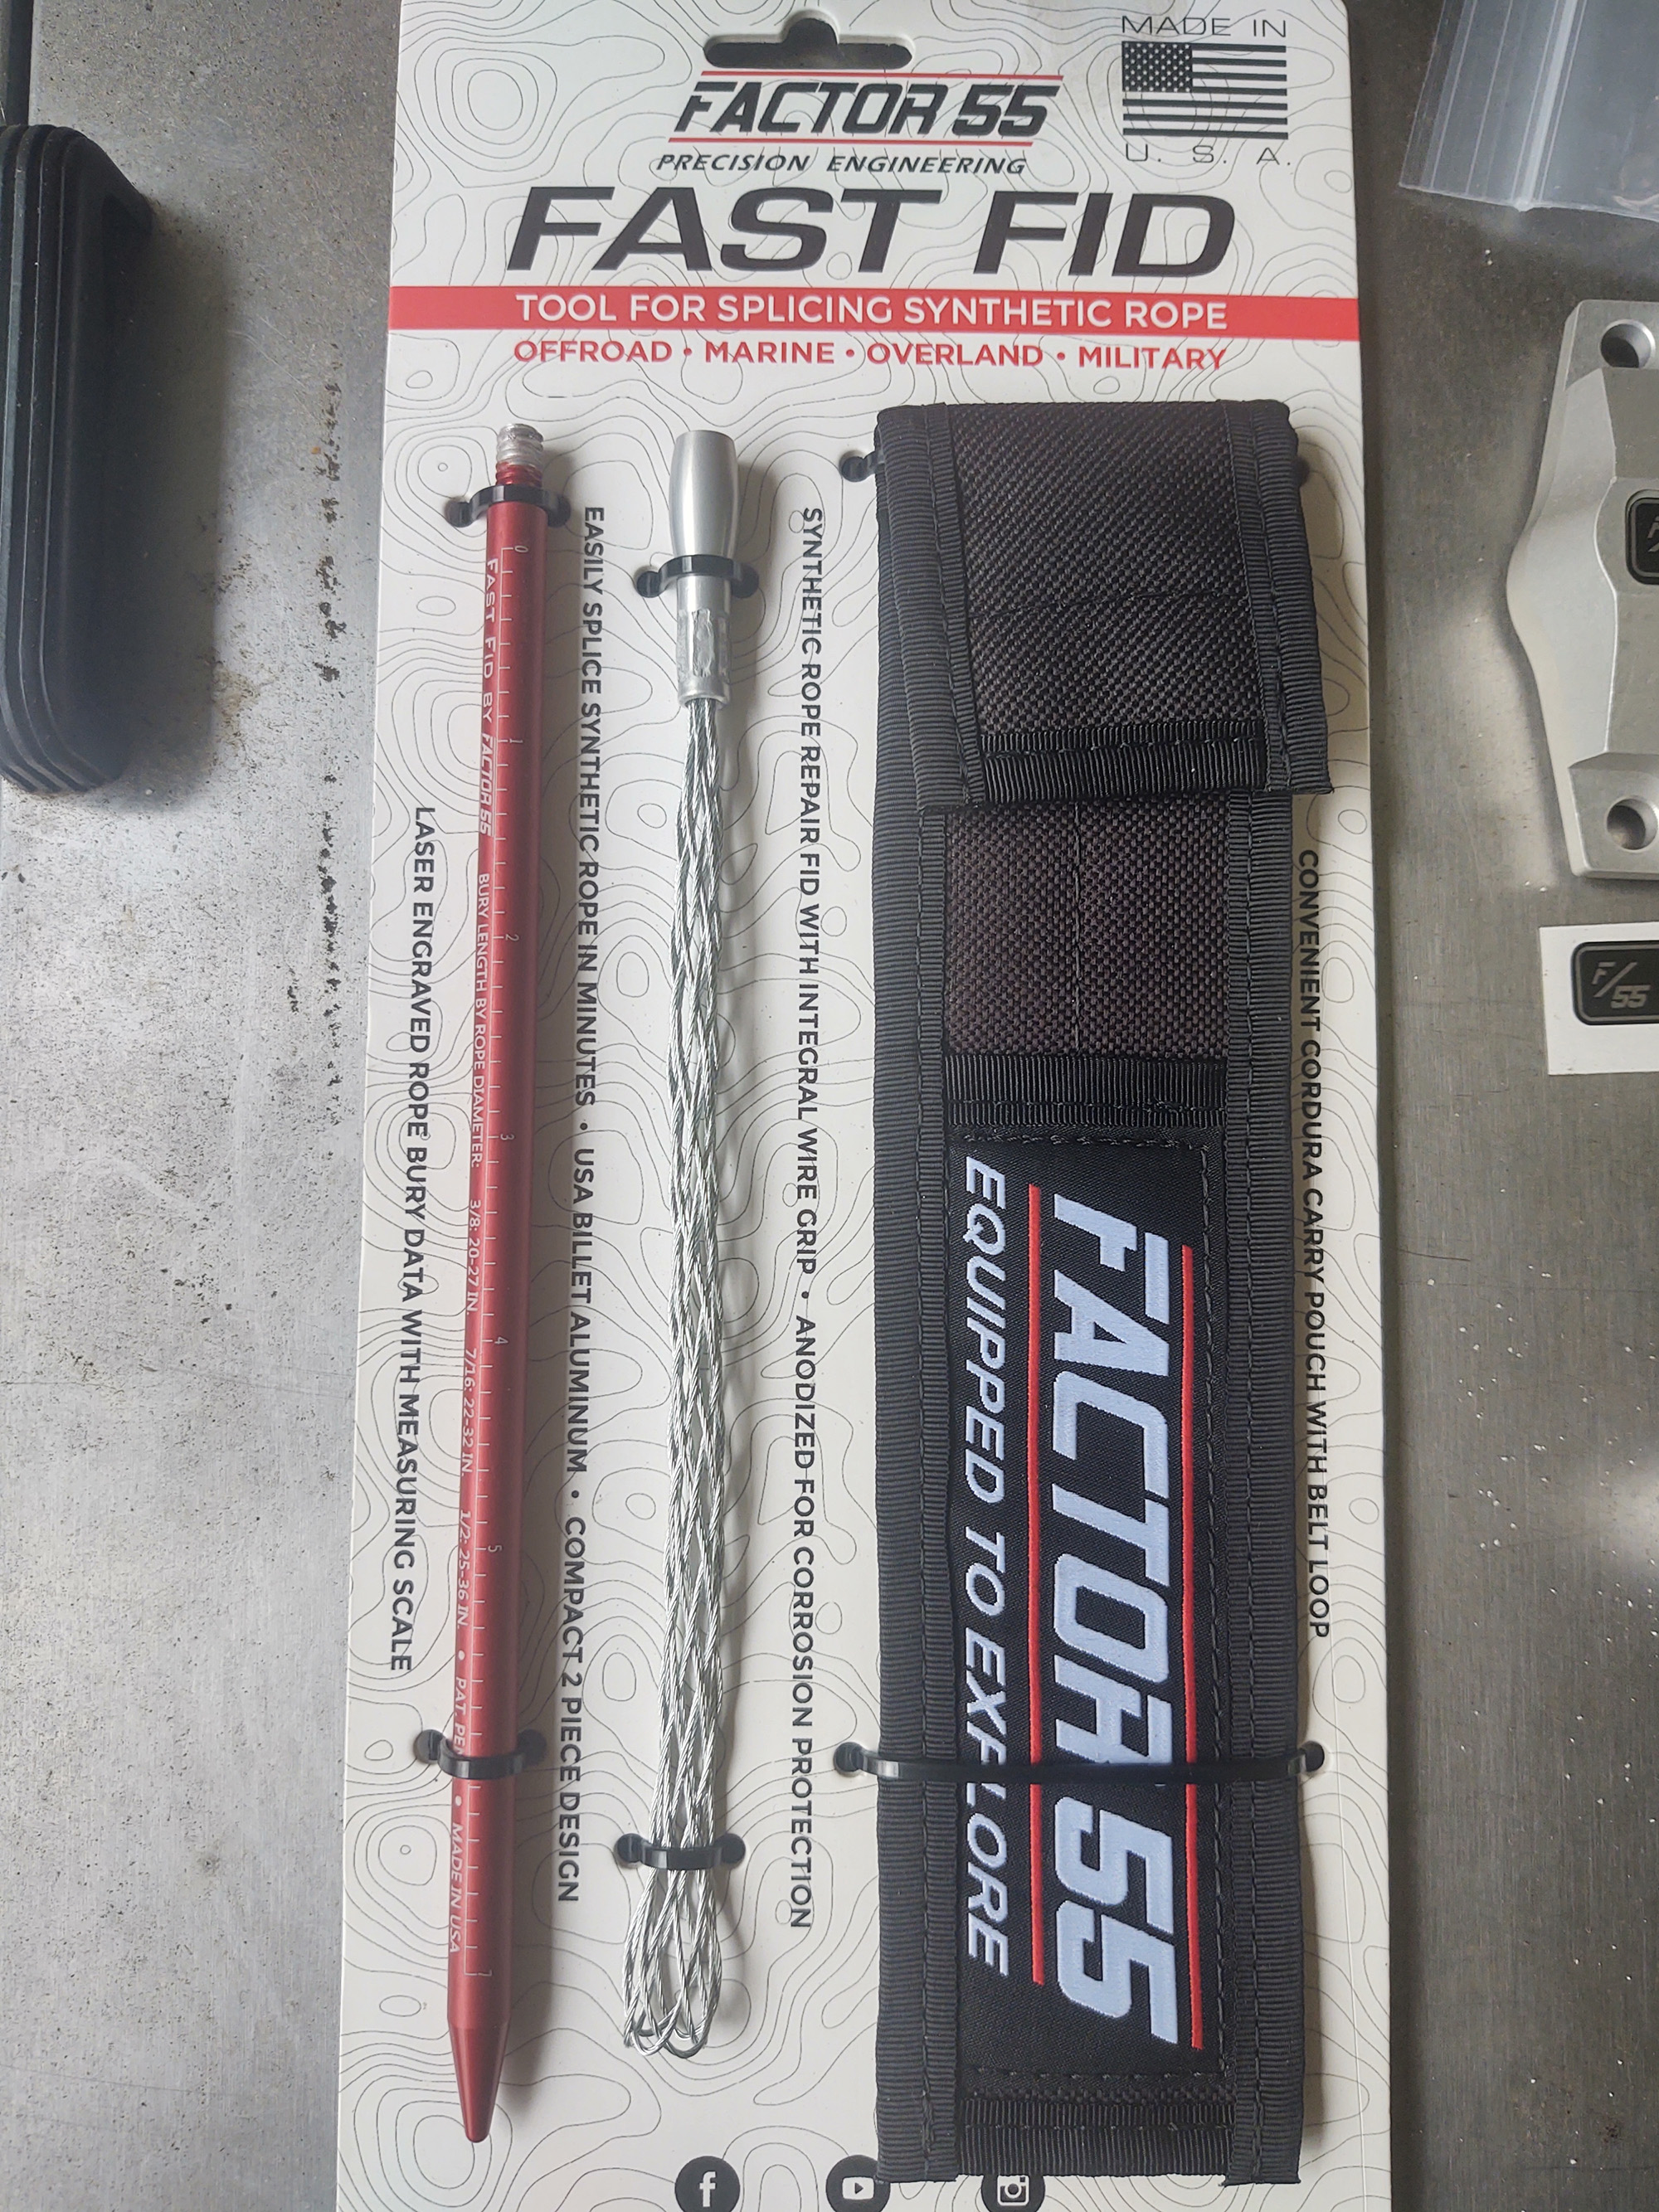
This tool is an absolute necessity if you’re running synthetic winch rope. It allows you to make safe and fast permanent field repairs of synthetic winch termination splices. How fast? Under five minutes once you understand the process. There is literally no reason to have a haggard rope end that might let you down under load—and in the event that you damage your cable on the trail, you can quickly get back up and running when your trail group stops for a conversation after the obstacles.
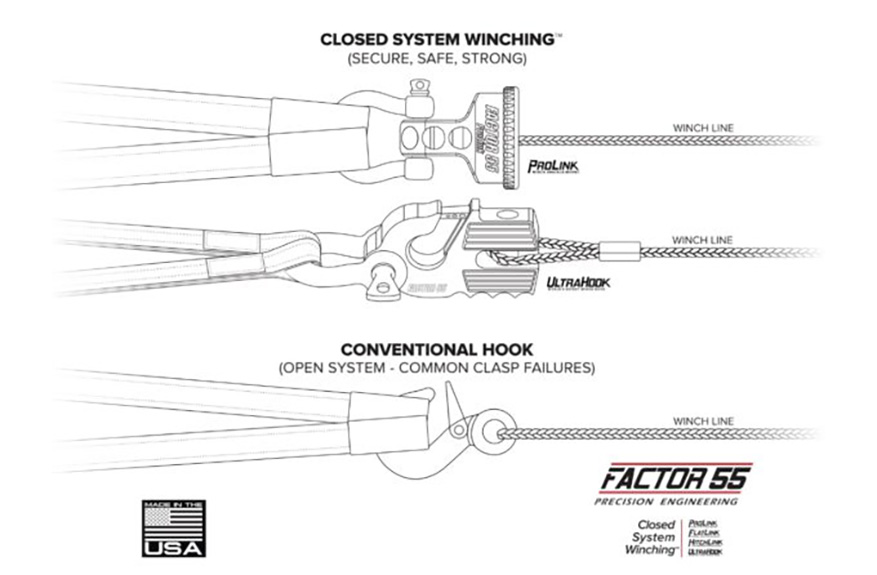
Since I’m shortening the Warn Spydura rope, I decided to add a few more Factor 55 parts into the mix to improve the way everything functions as a complete “Closed System Winching™” (this is trademarked by Factor 55, with good reason) solution. These parts are 100% designed, manufactured and assembled in the USA. You can’t buy more durable or well designed recovery equipment anywhere—that’s why Factor 55 gear is currently utilized in marine, industrial and military applications where superior engineering and durability are absolutely critical.
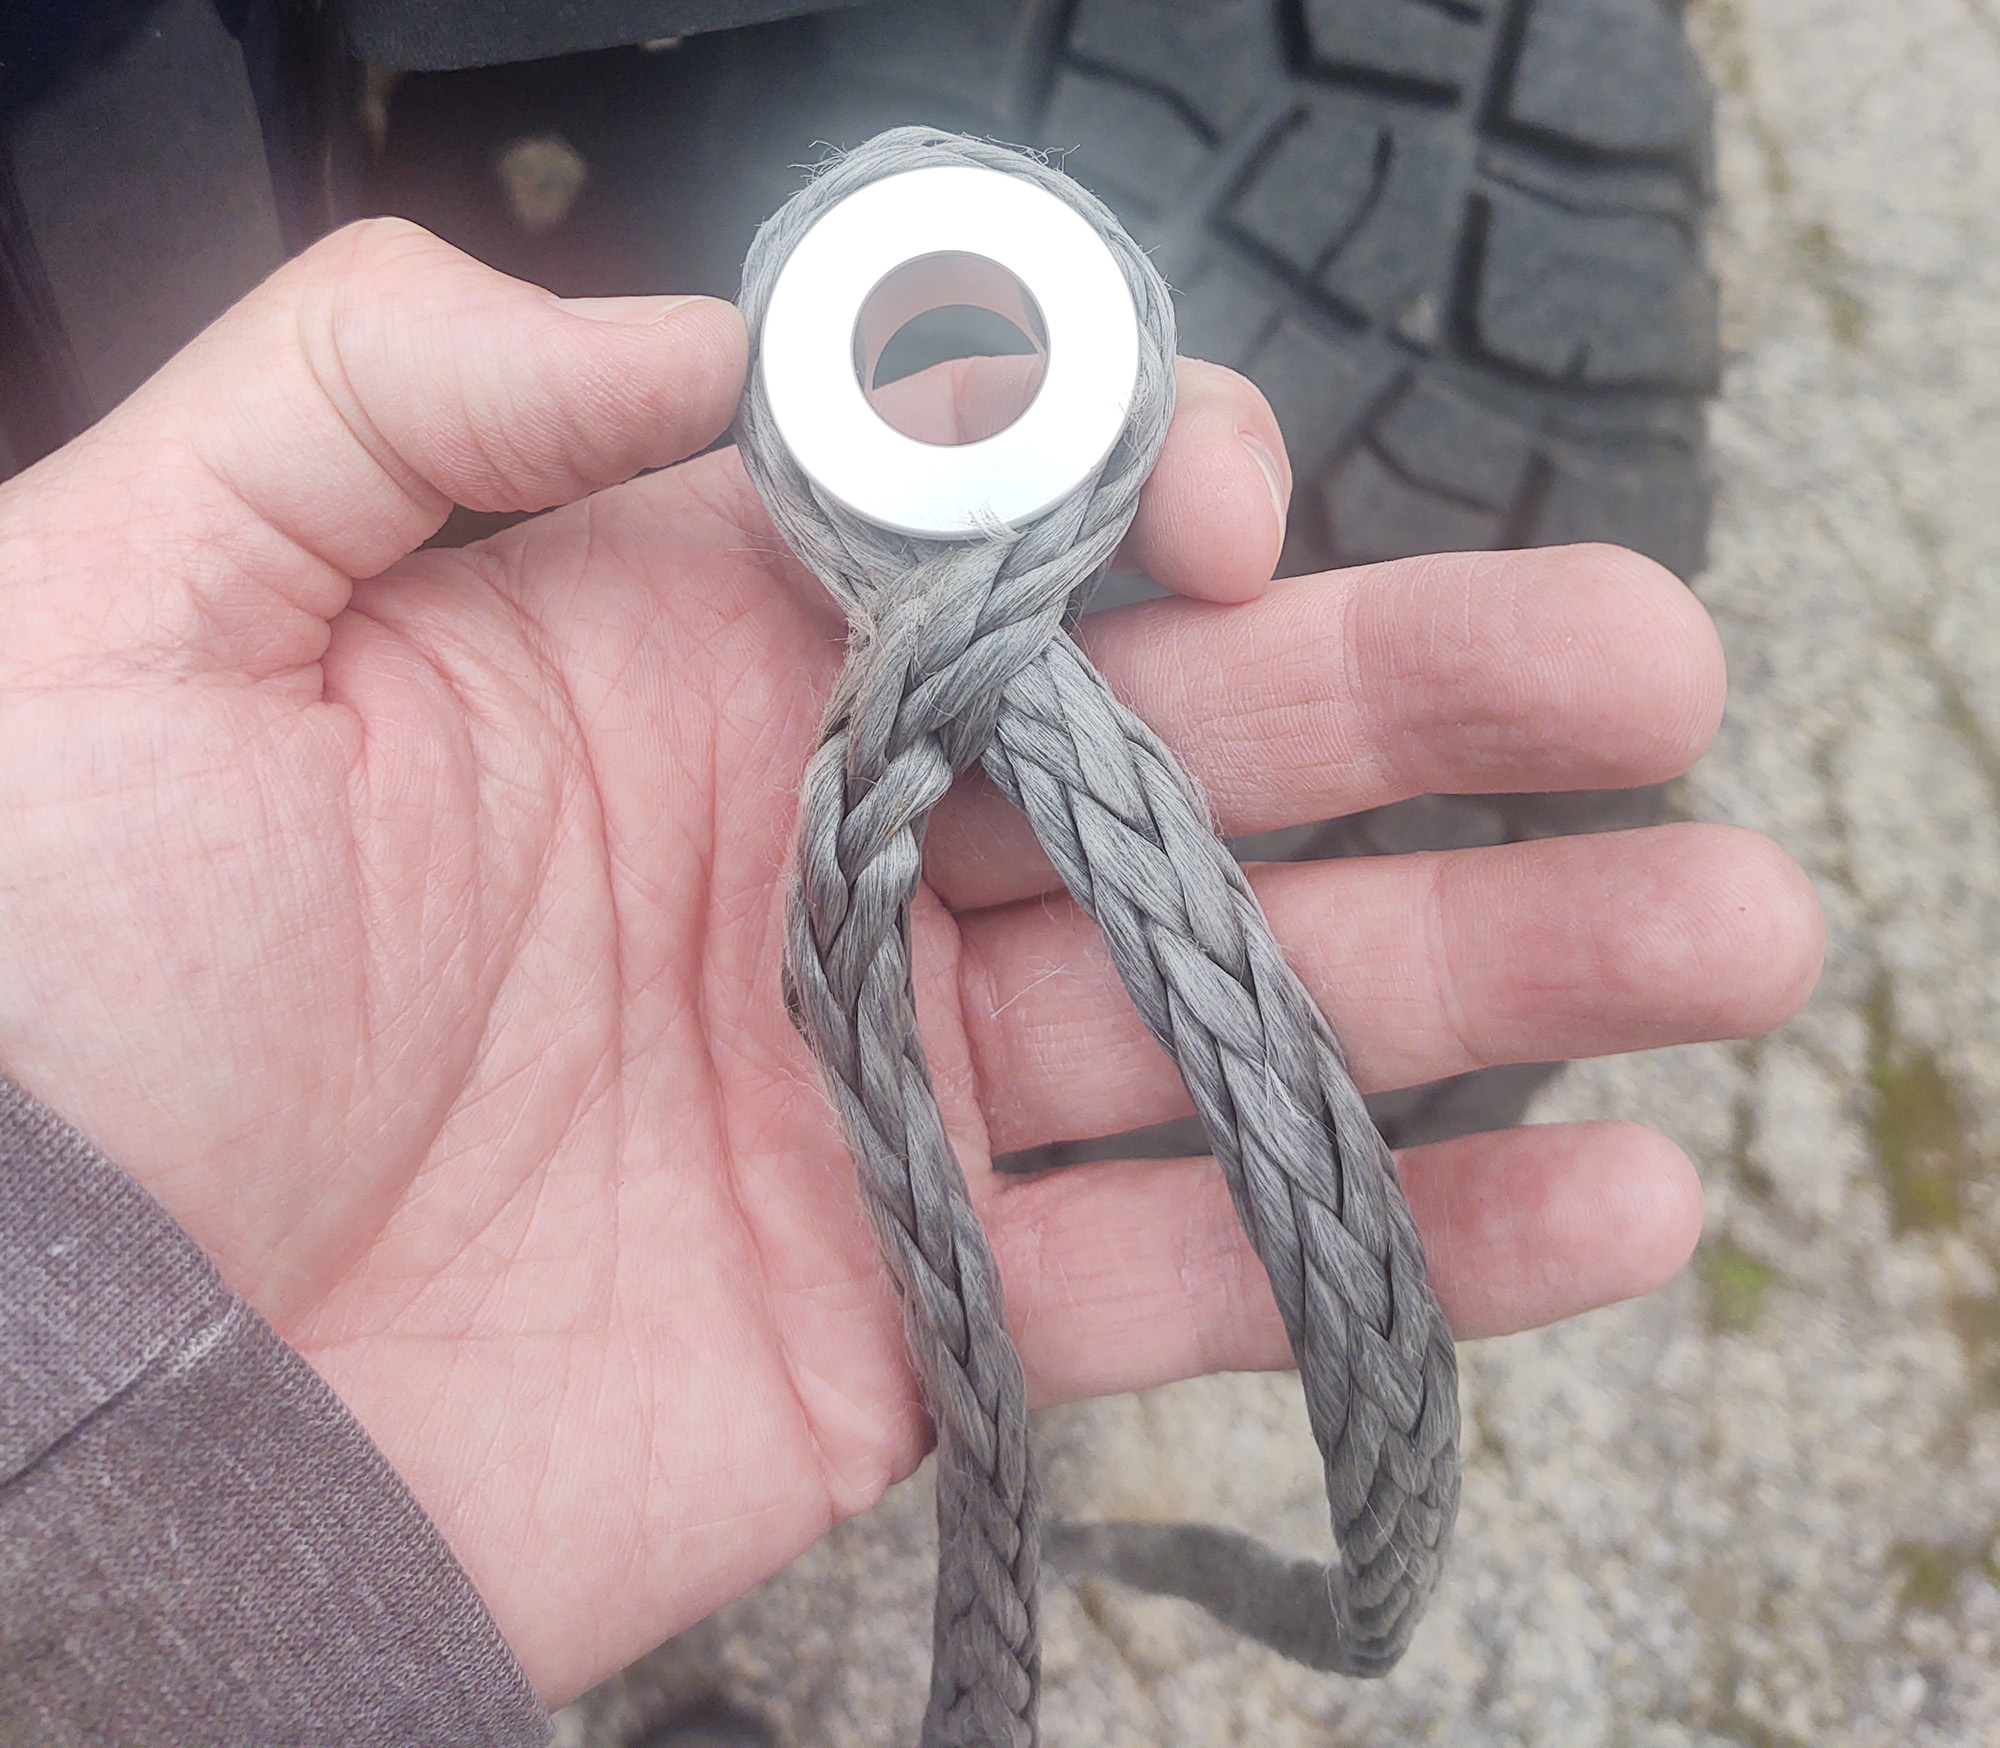
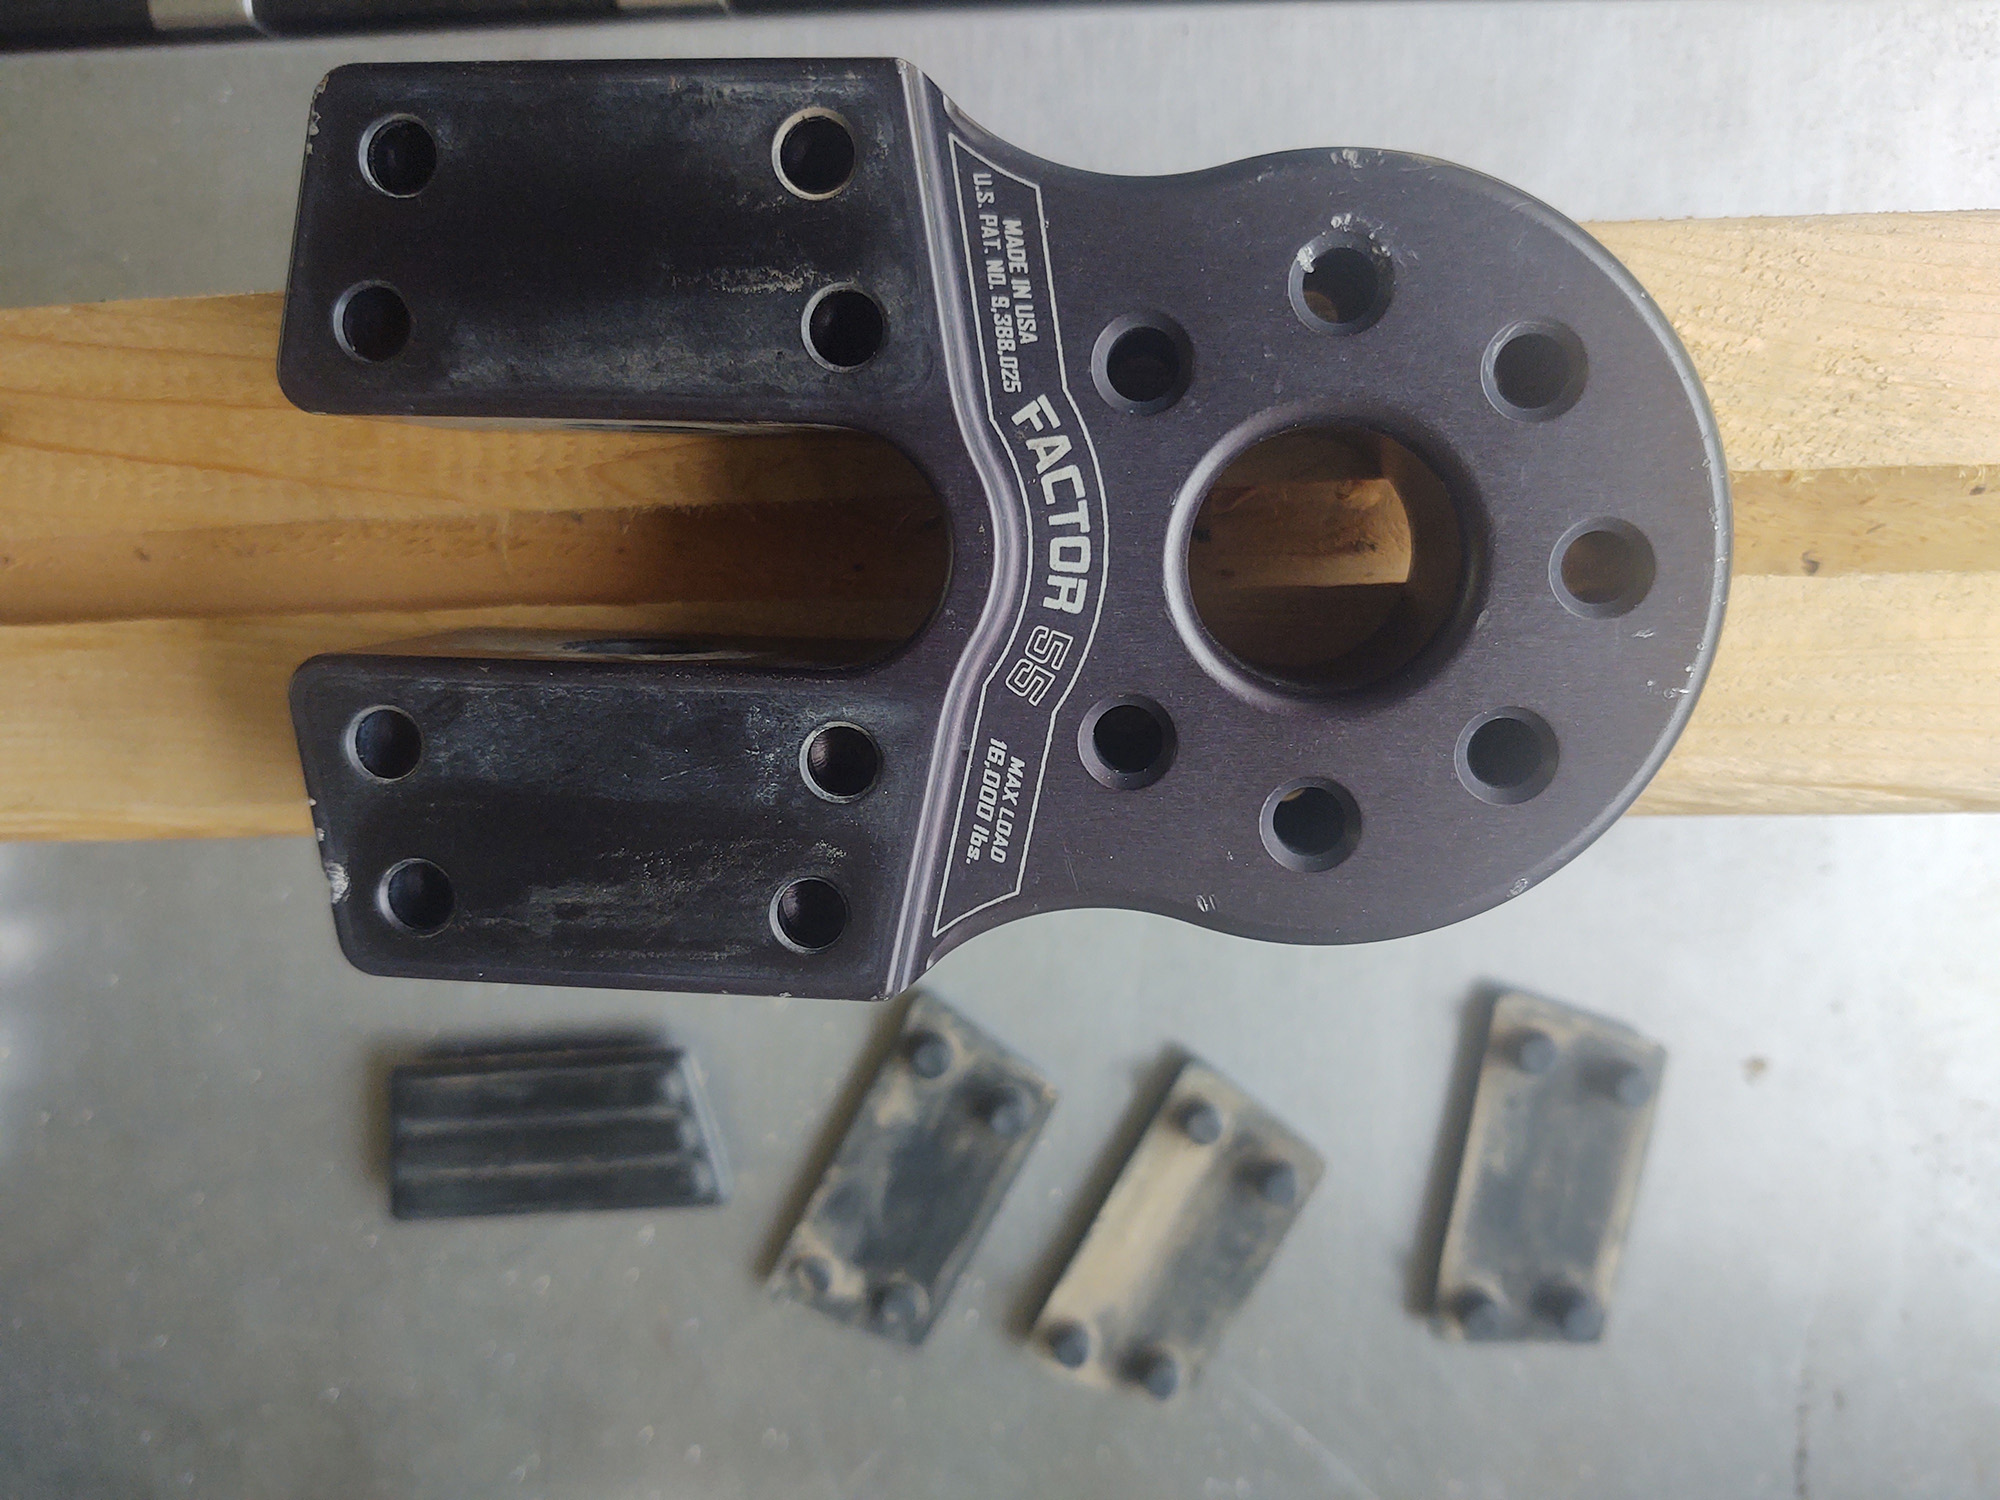
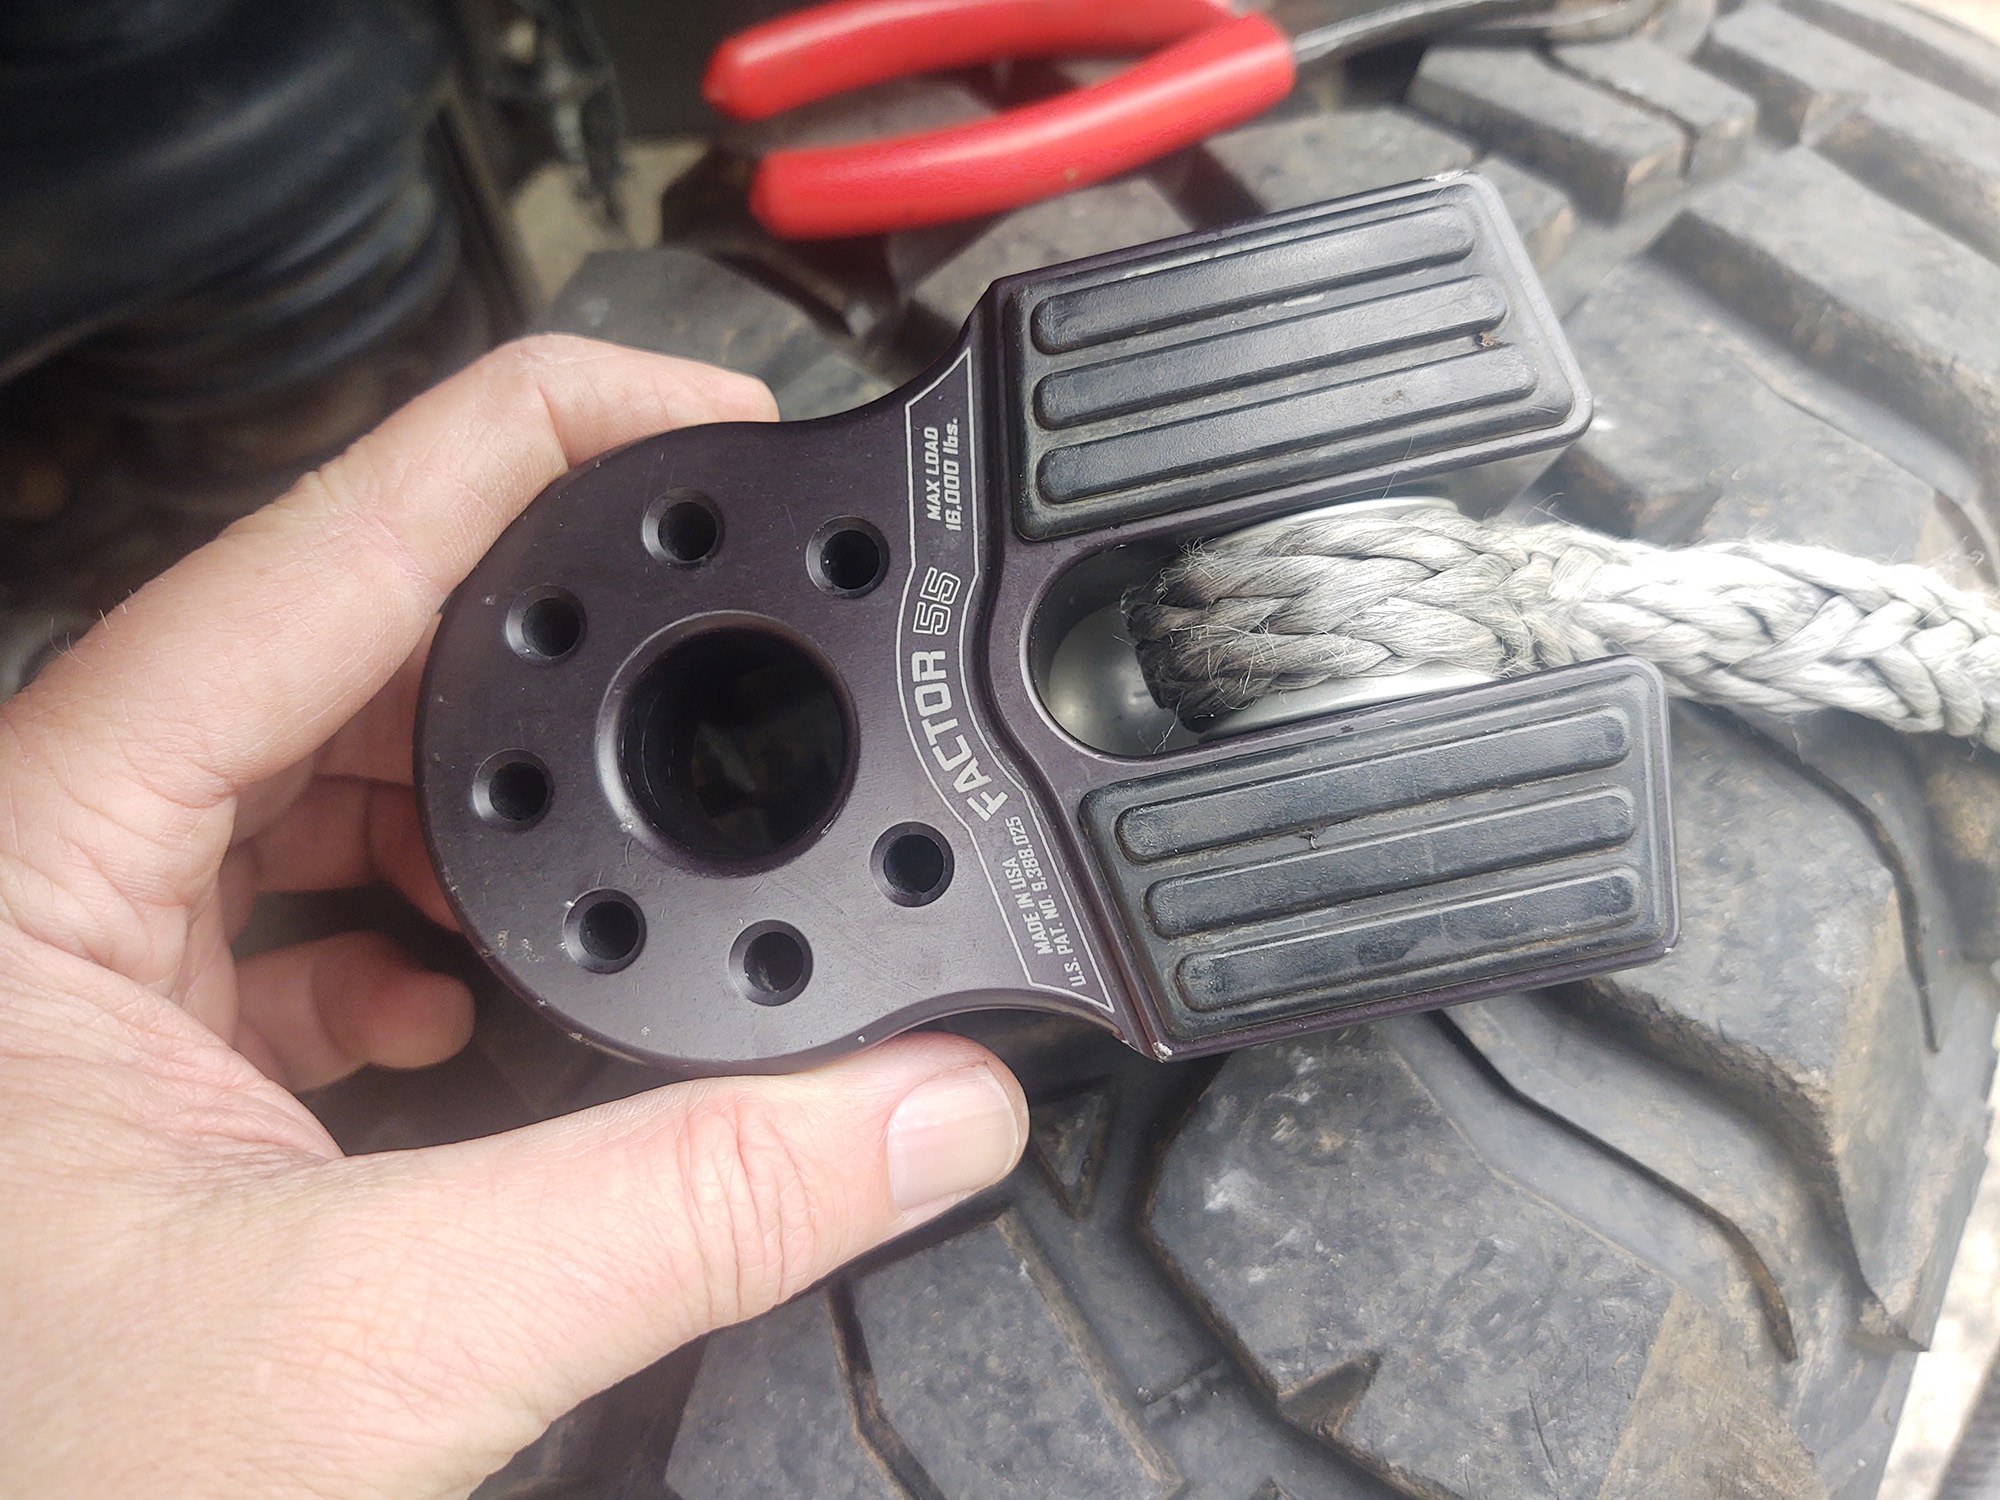
First, to improve the load centering characteristics of the FlatLink, I added a Factor 55 Standard Synthetic Rope Load Spool to upgrade the ⅜” tube thimble that came from the factory on my Warn winch rope. This little guy is precision CNC machined from 6000 series Military Grade Aluminum, and provides a smooth surface and minimum bend radius for the synthetic rope. It is also type II clear anodized to protect from corrosion.
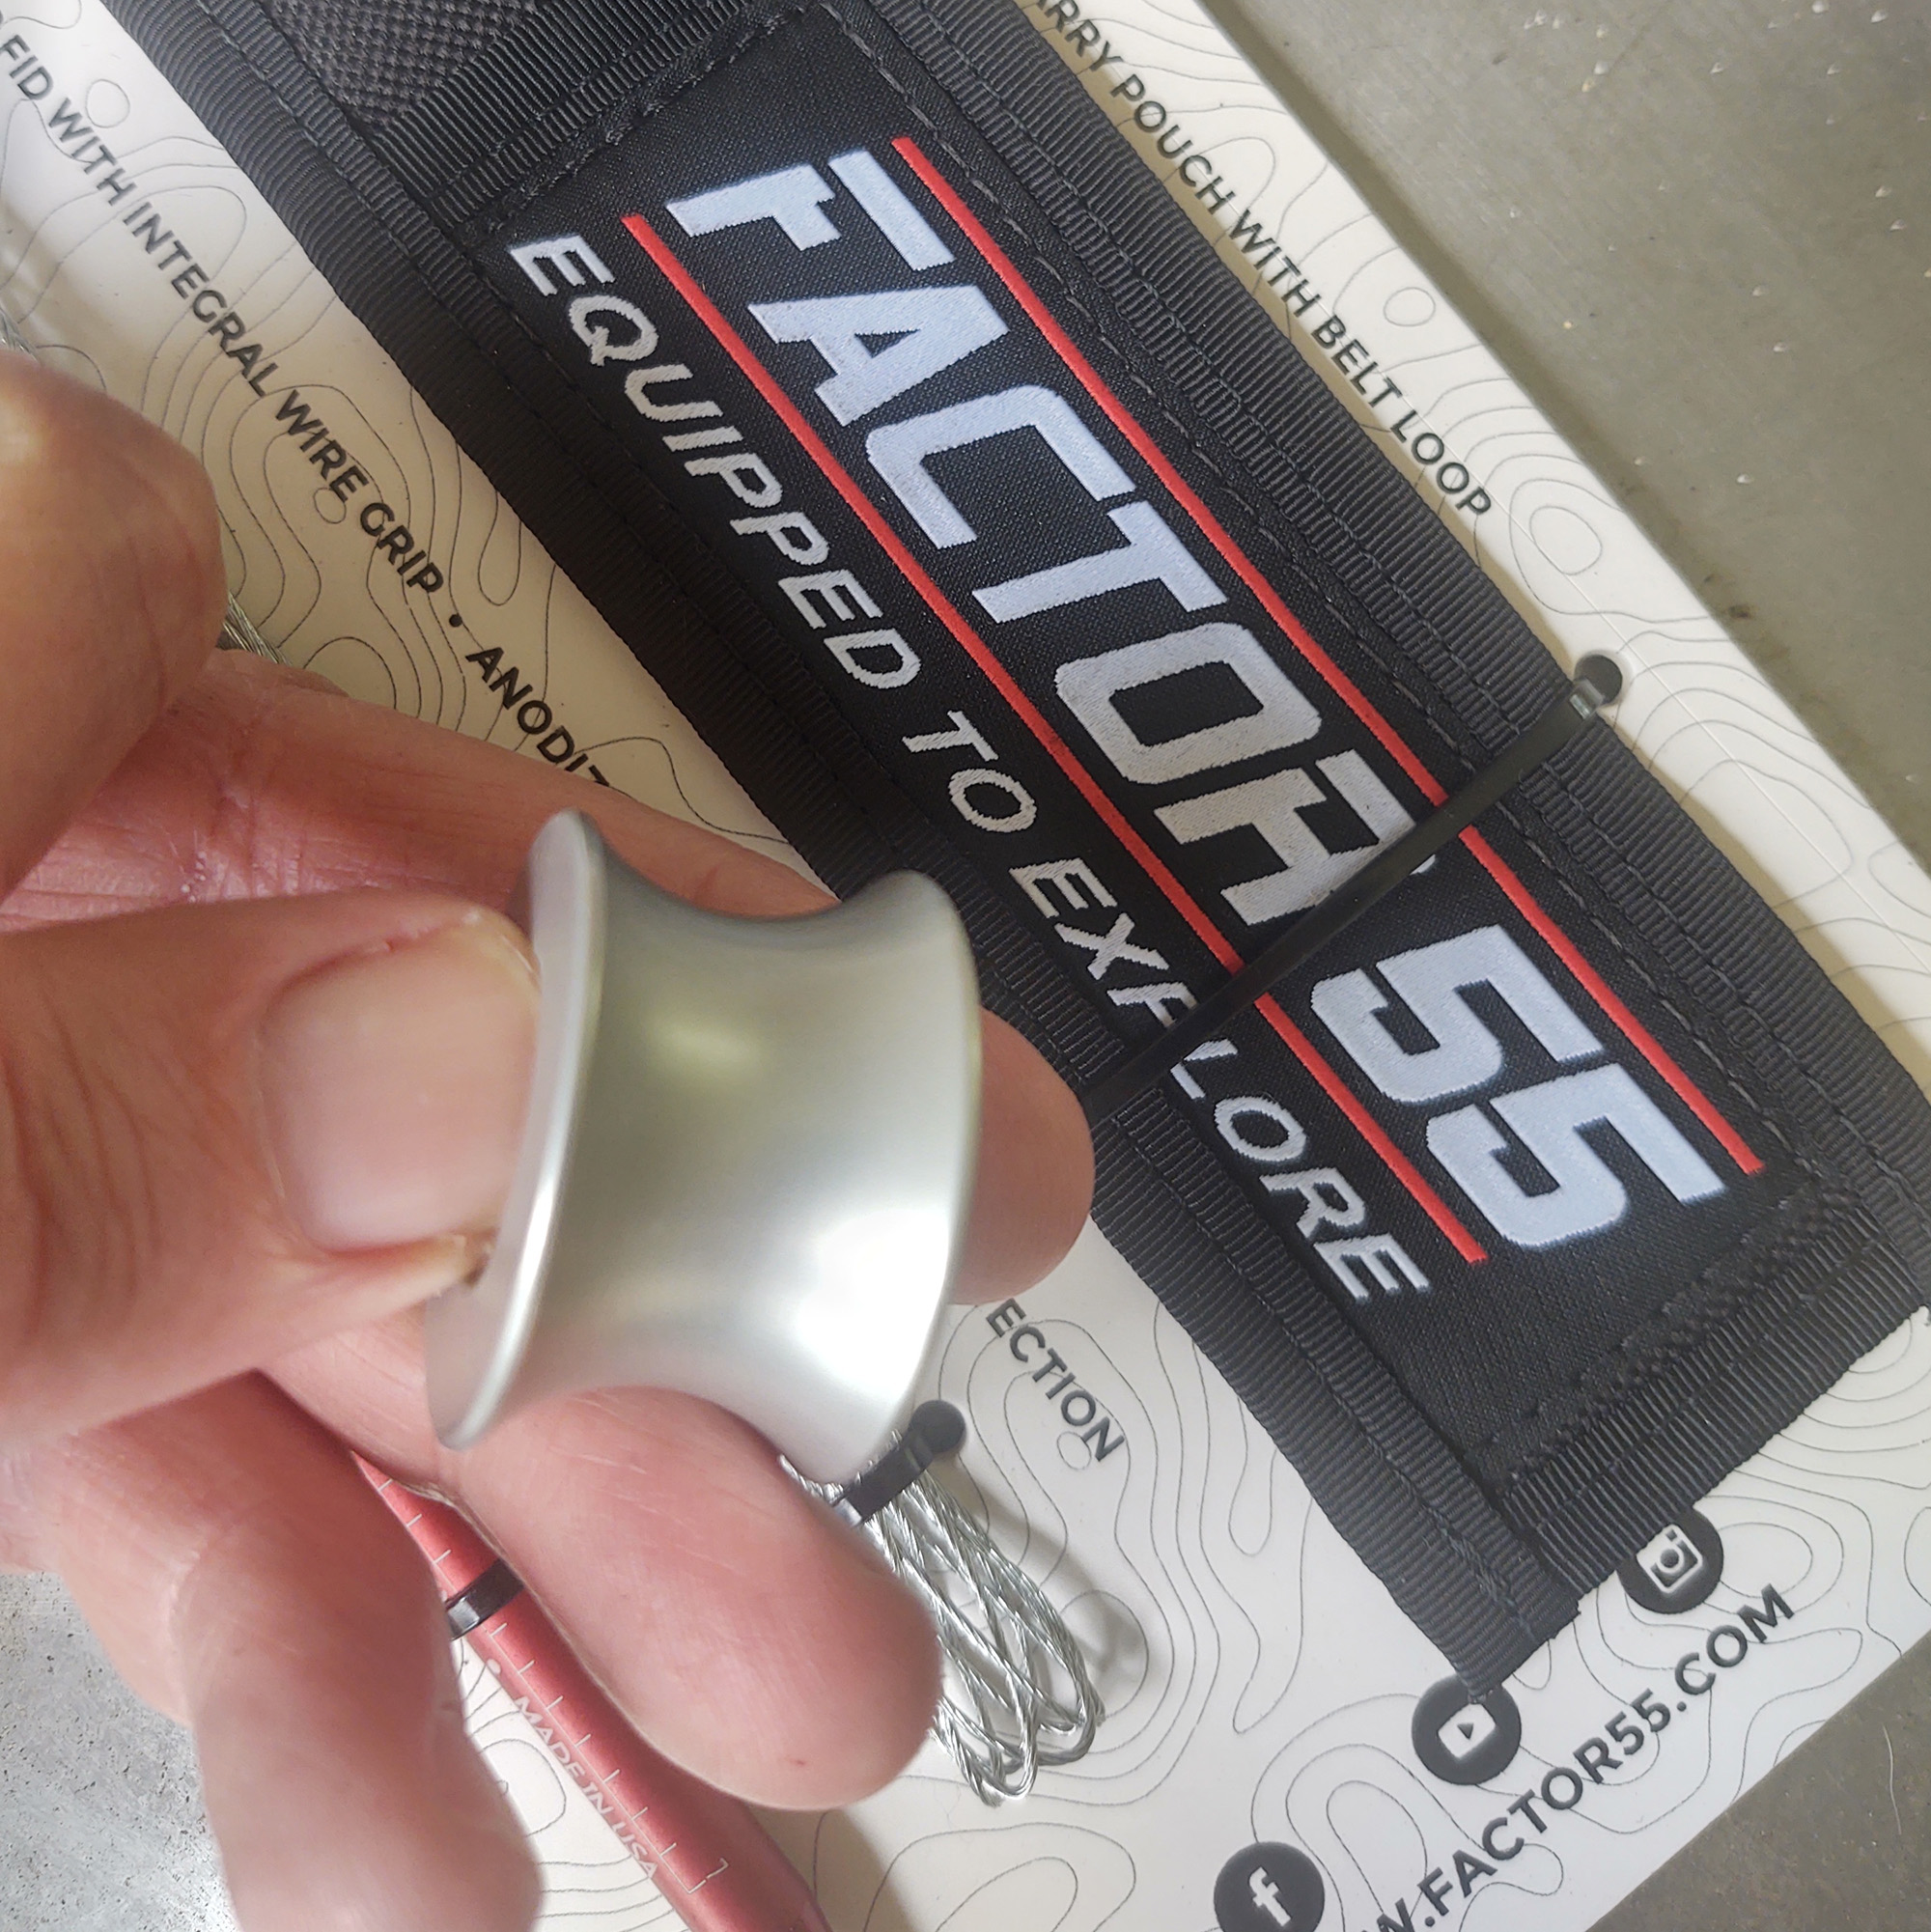
This improvement makes sure that during recovery, the original shear pin of my FlatLink has the load balanced over two shear points rather than a single one, and keeps everything in a straight line as the load is applied. As you can see on the telltale rust mark in this comparison picture, the original tube thimble was only contacting the FlatLink pin in the center, whereas the Factor 55 Load Spool is going to spread that load out over its full width for an increase in strength.

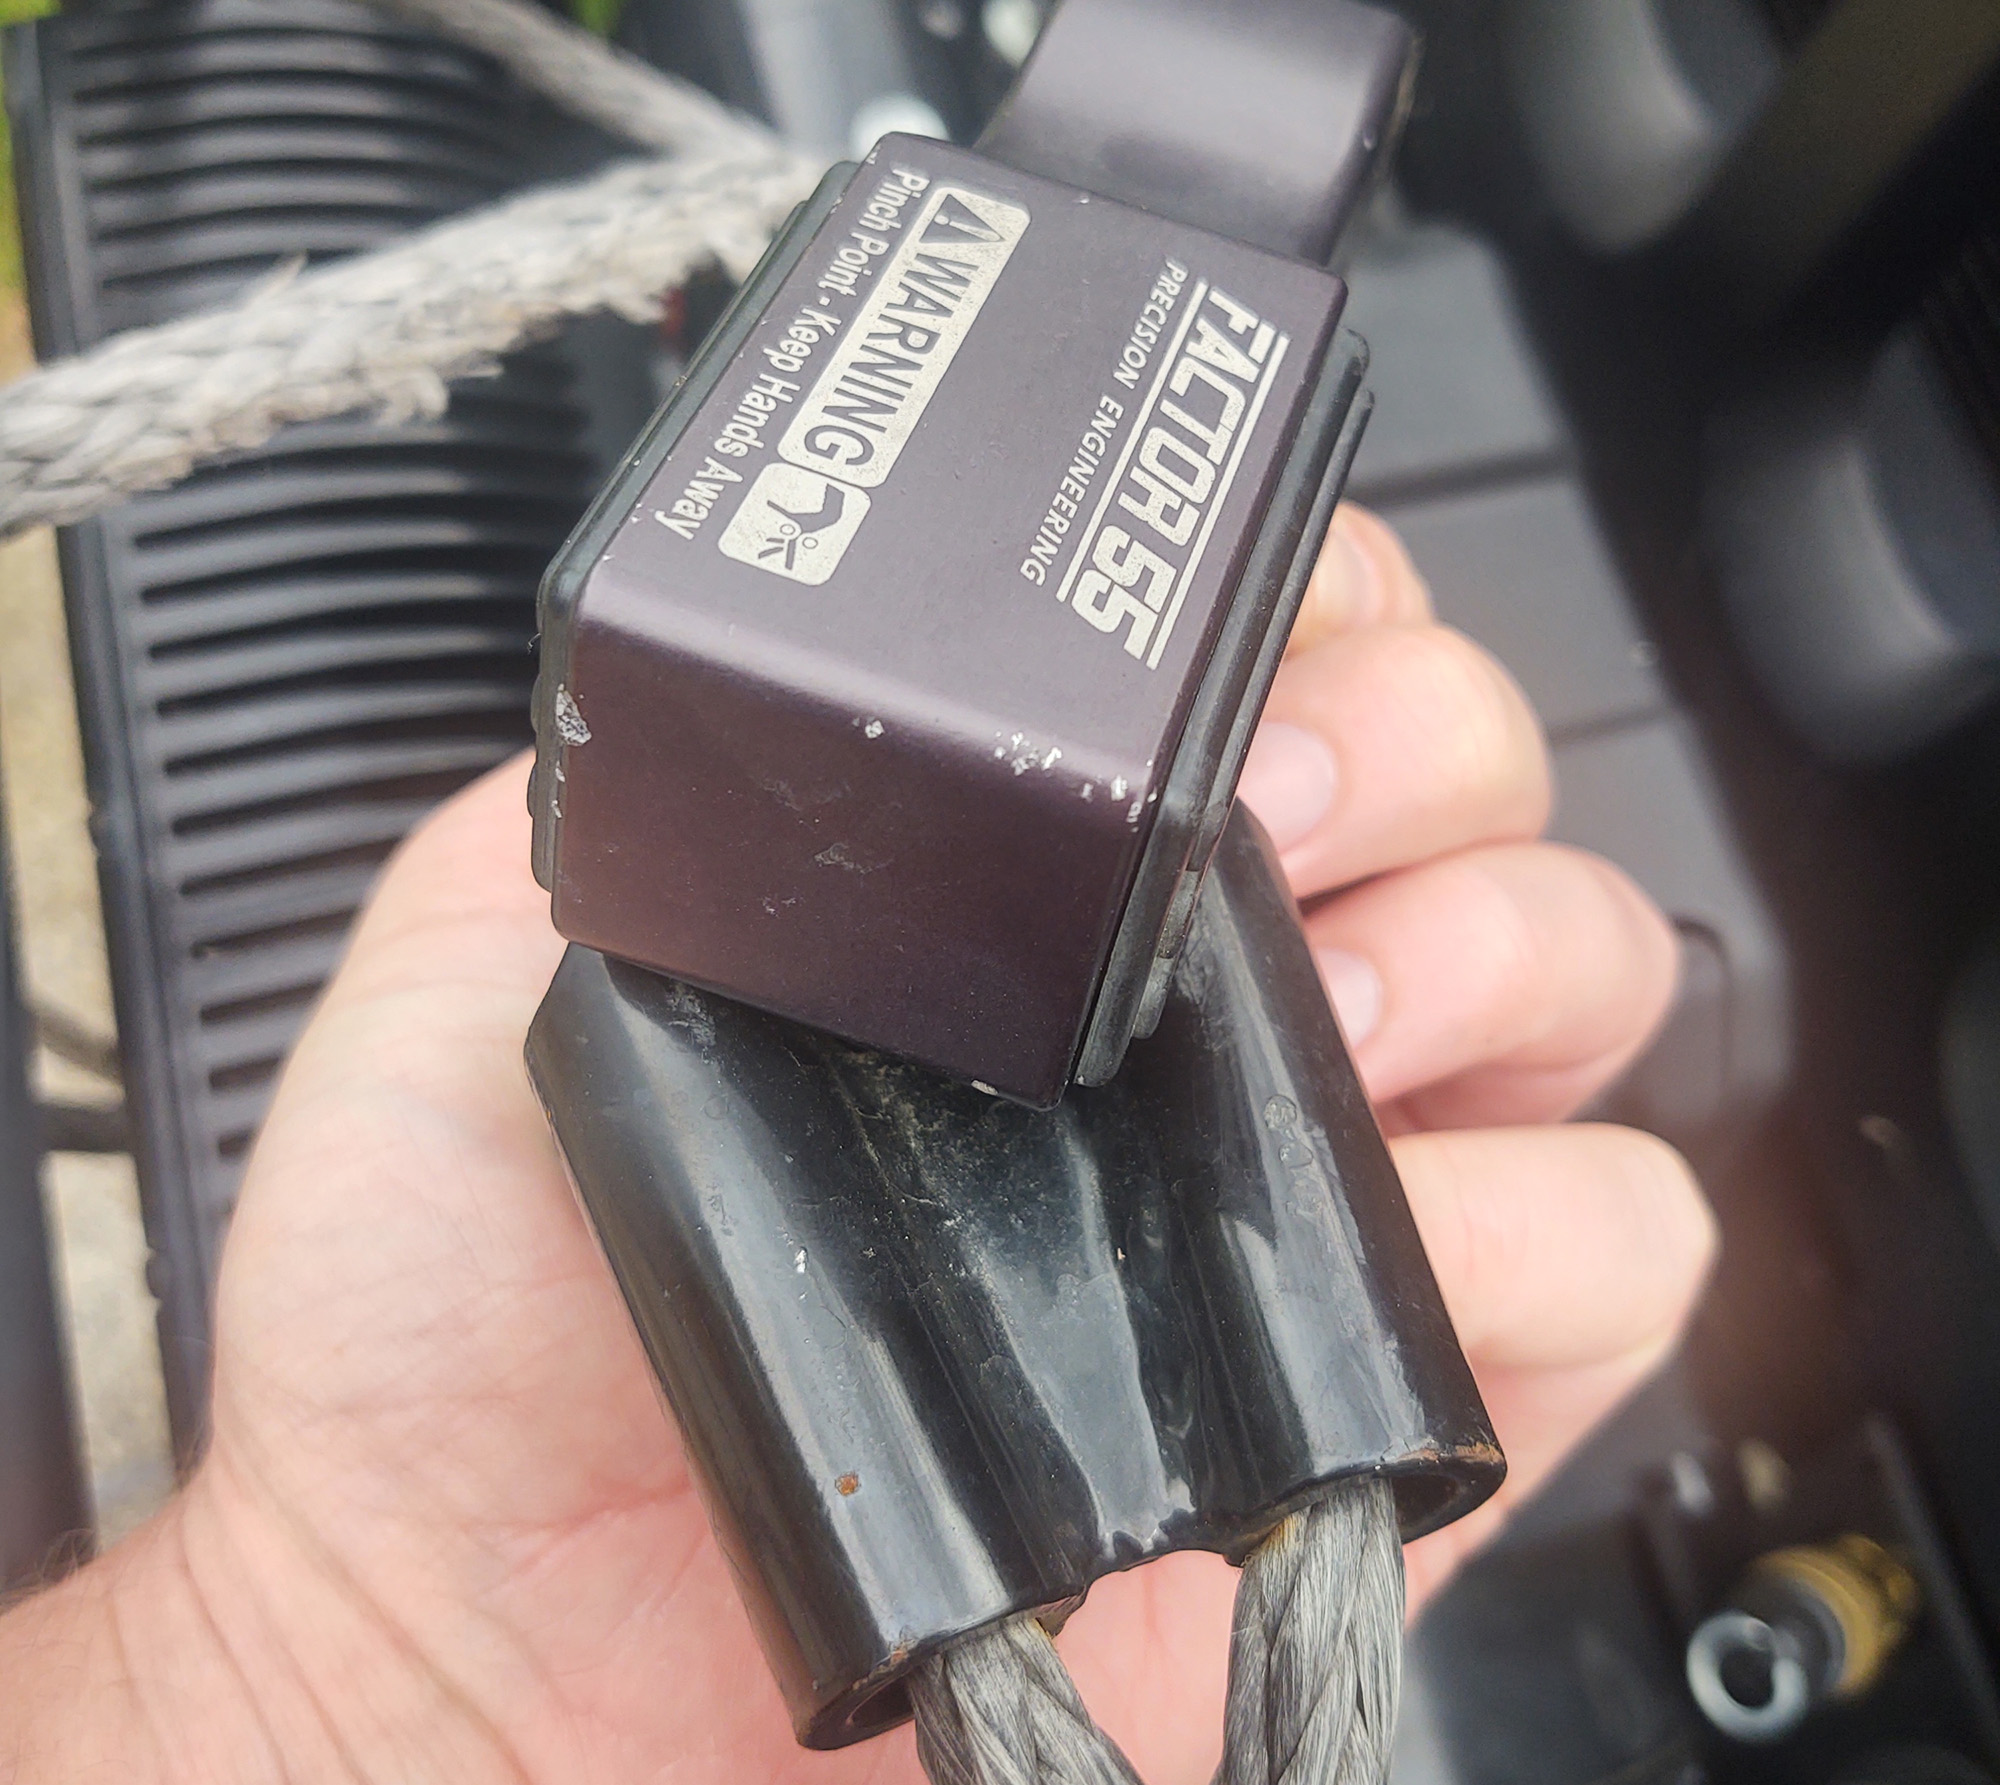
In addition, with my well loved FlatLink removed, now is a perfect time to add a Factor 55 FlatLink Rope Guard to protect the thimble end of the rope from abrasion, contamination, and UV damage. Of course, even the smallest Factor 55 products are made with pride in the USA.
Now, if you’re going to carry a toolkit in your Jeep that is capable of correcting an issue with your recovery system, there are a few tools you need that you might not currently carry.
To remove a Factor 55 FlatLink (or other sheer-pin equipped hook) you need a set of snap ring pliers.
Additionally, it is a good idea to have something able to quickly cut the winch rope if you need to make a repair to a damaged section.
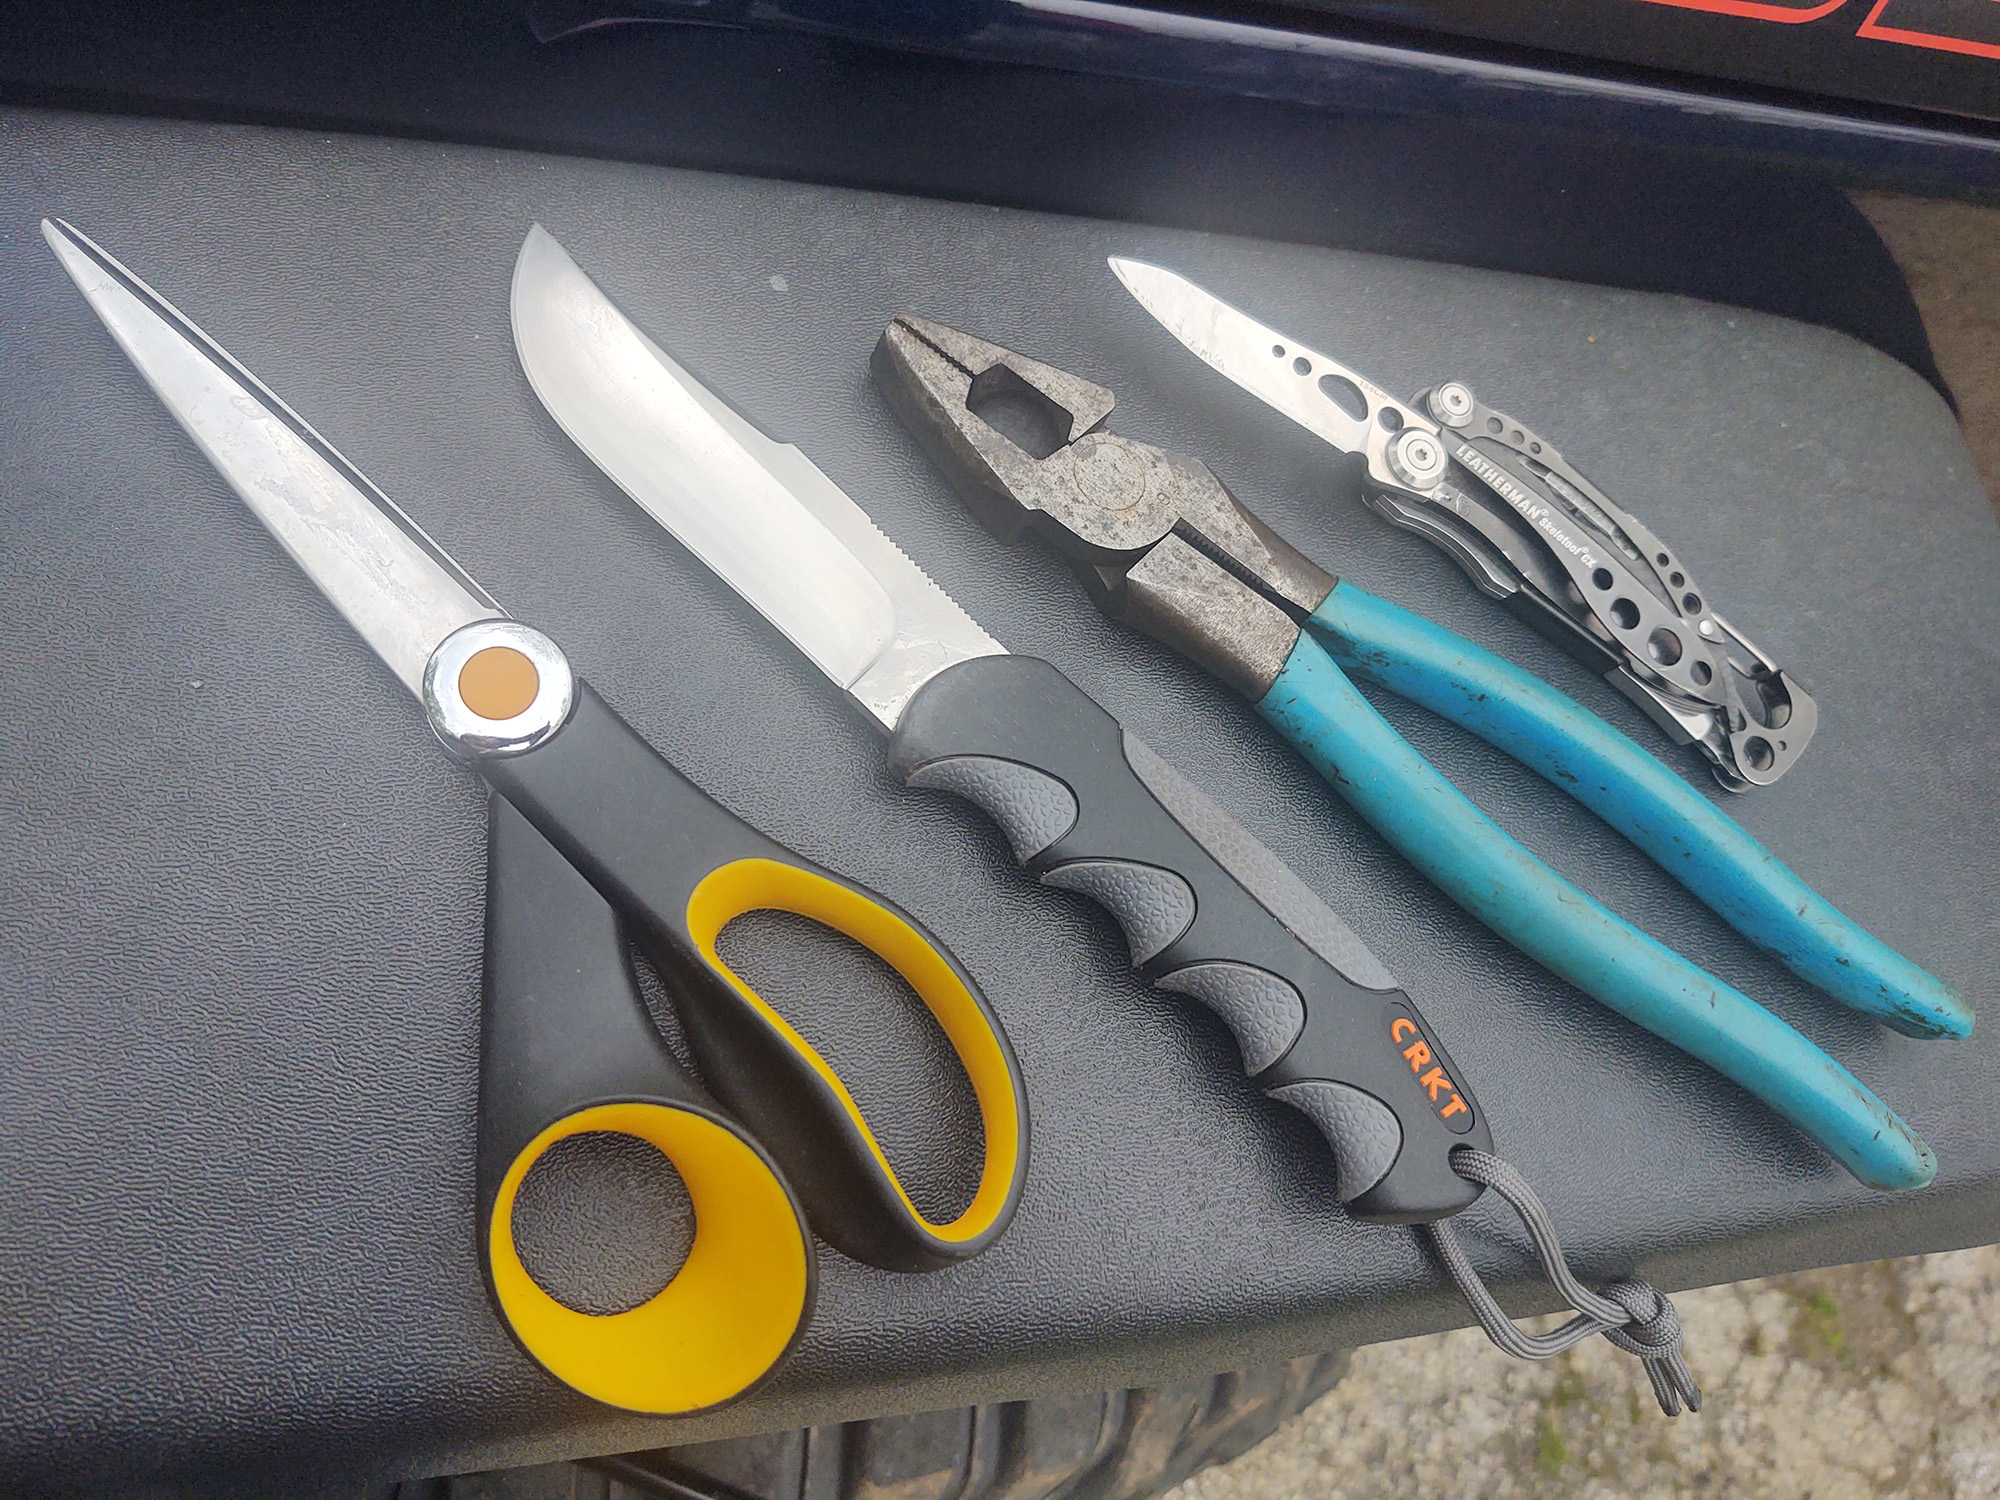
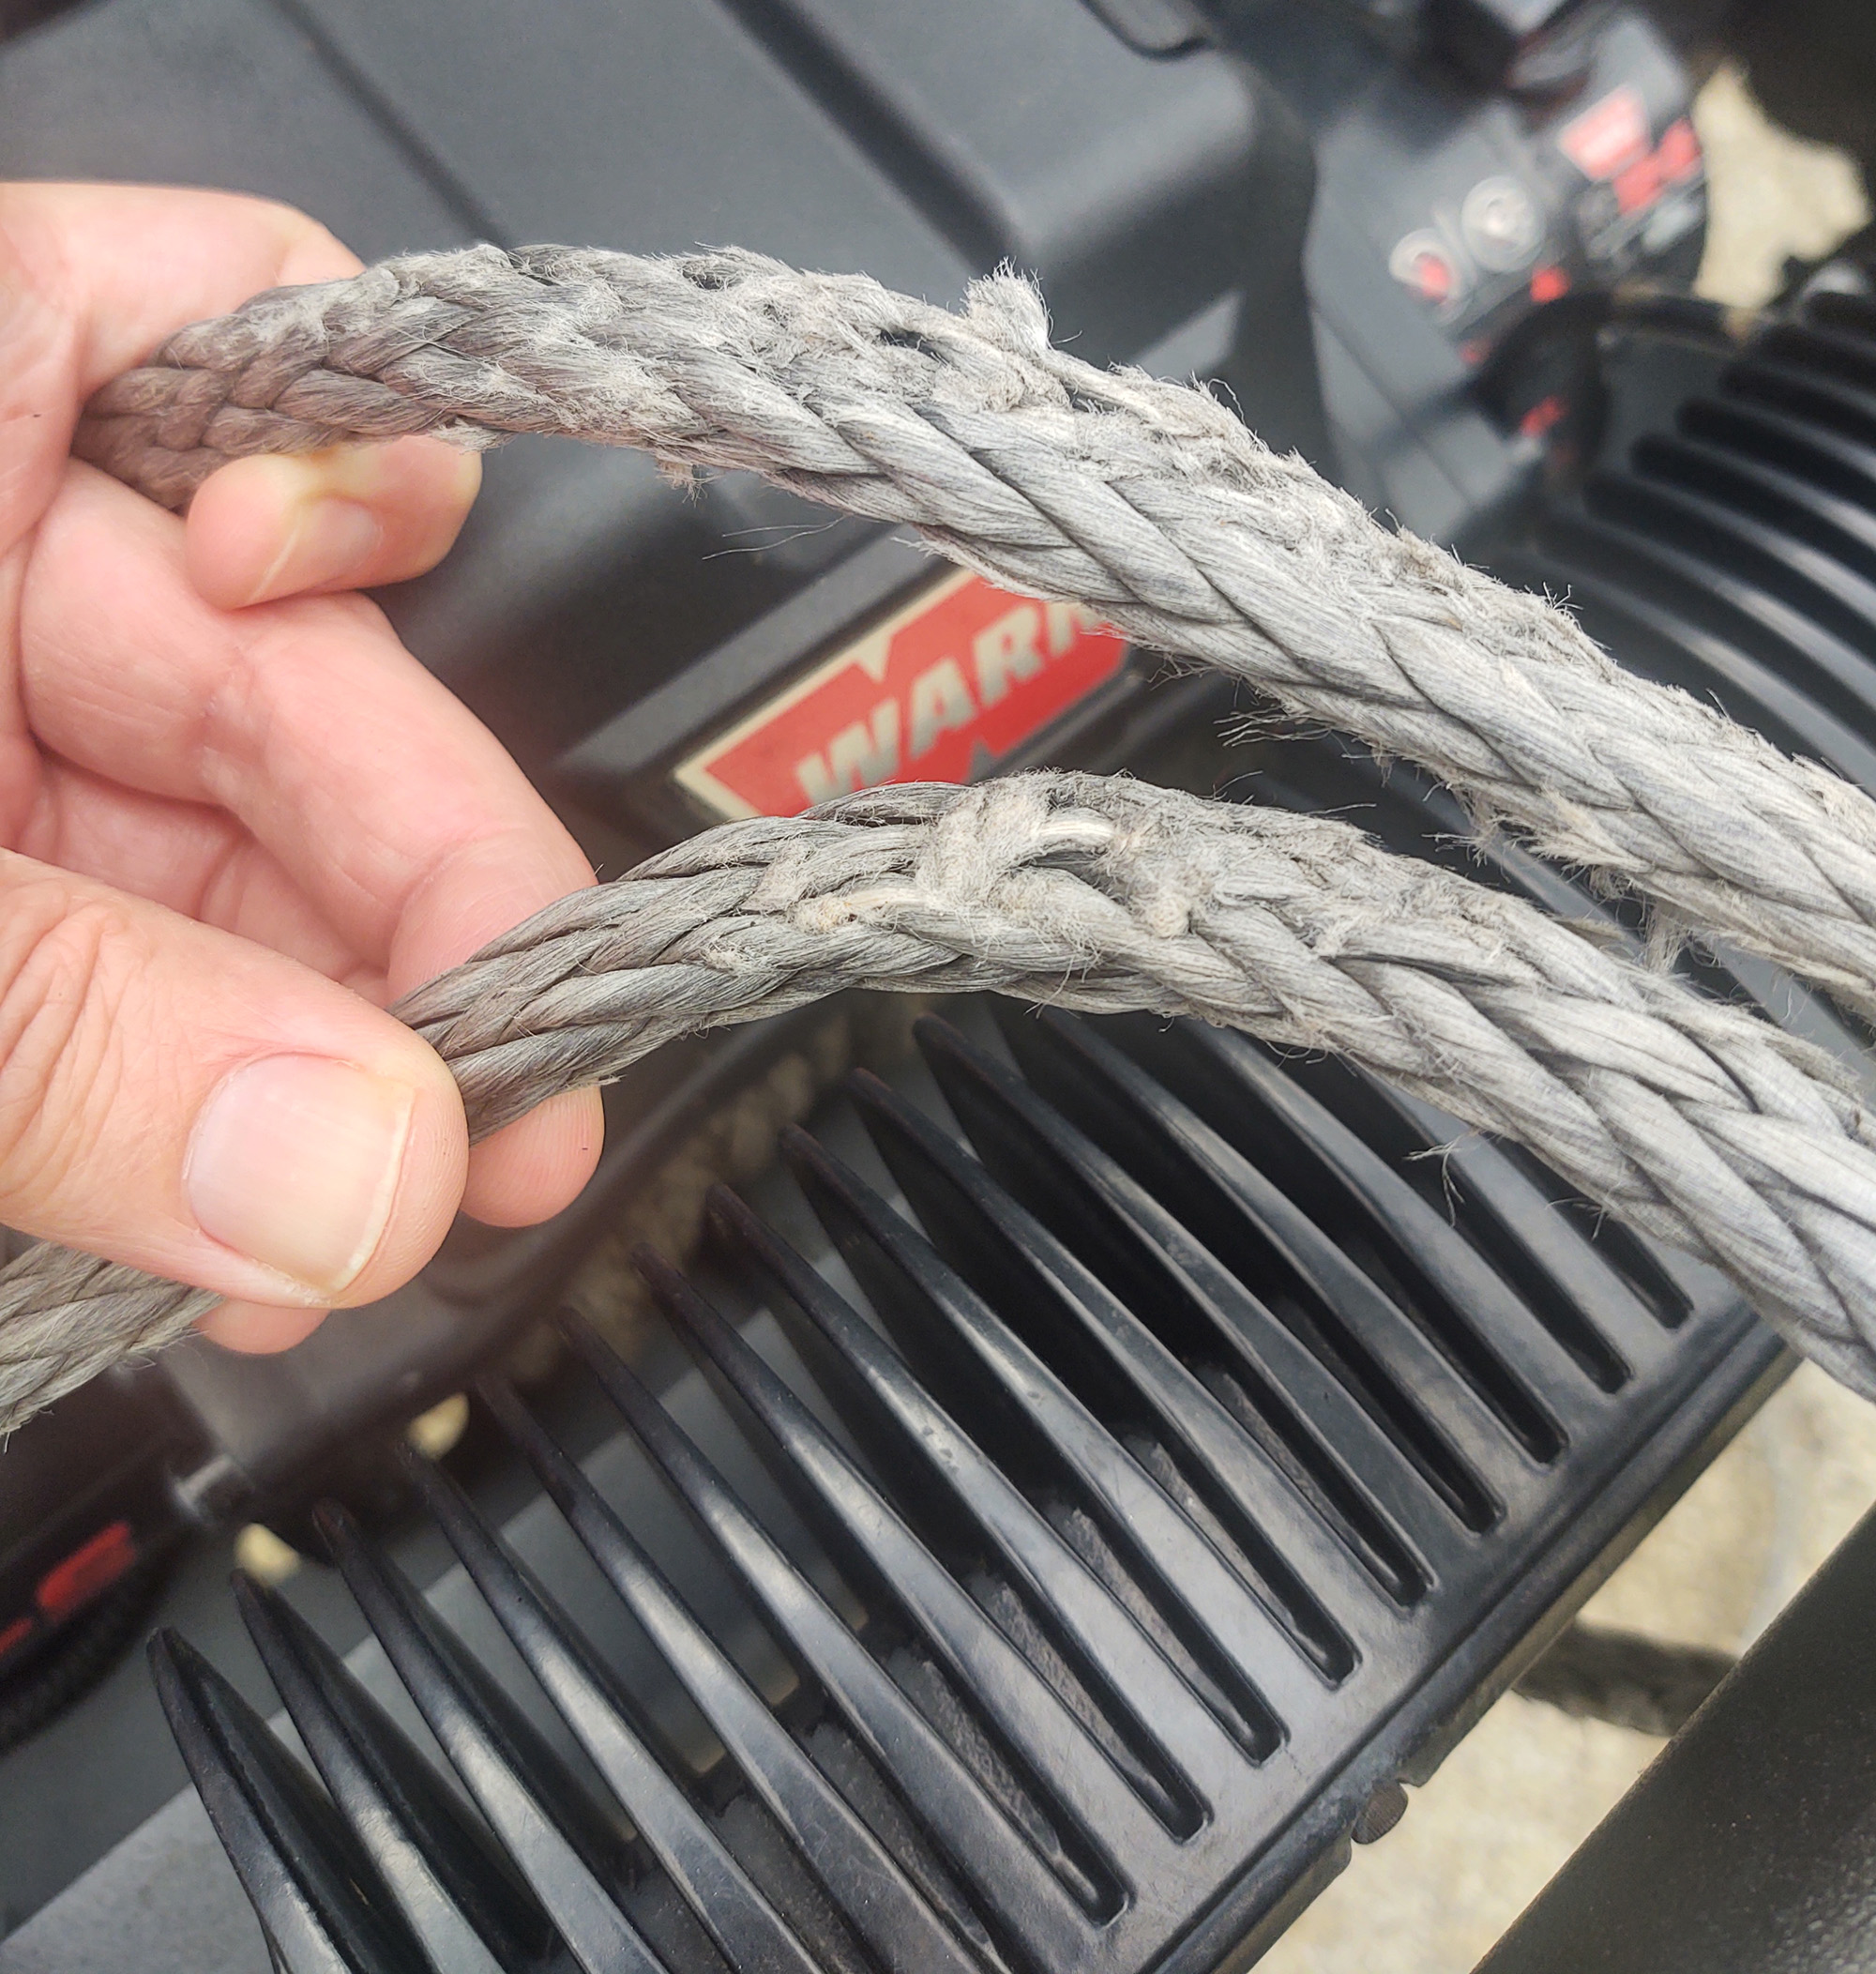
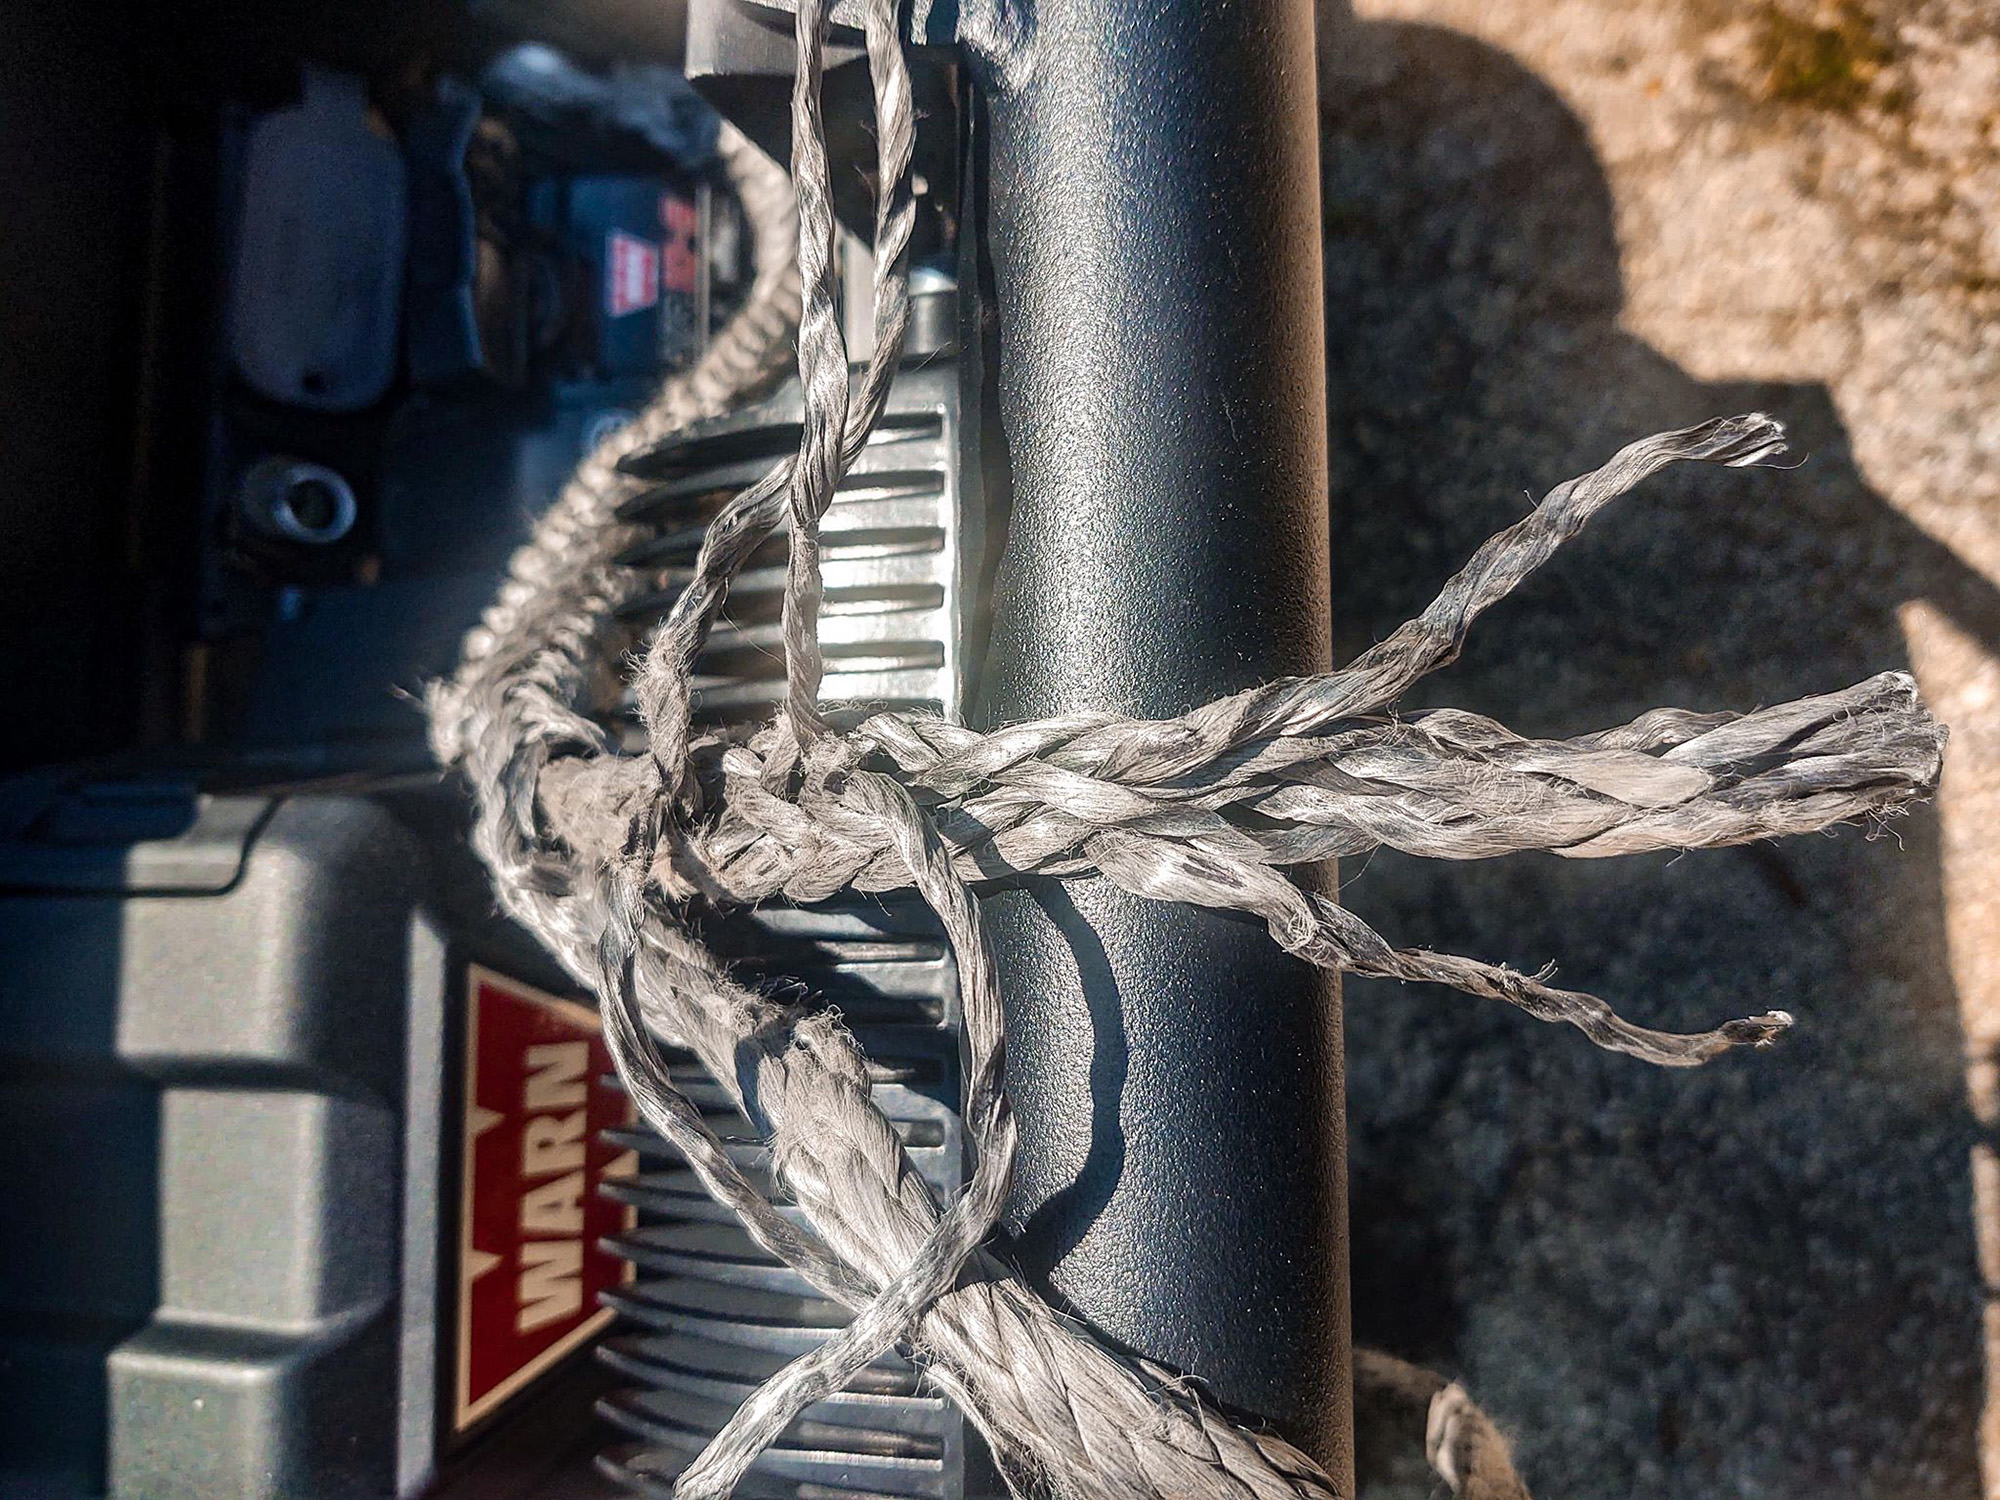
I figured I was already set in this department, as I keep two knives, diagonal cutters and a set of lineman’s pliers in the Jeep at all times. I was mostly correct in that department, but after spending five minutes sawing through the winch rope (and dulling the CRKT fixed blade knife in this picture) I tried the cutting pliers. Those just pulverized the strands, cutting through very little of the actual diameter with each high effort cut.
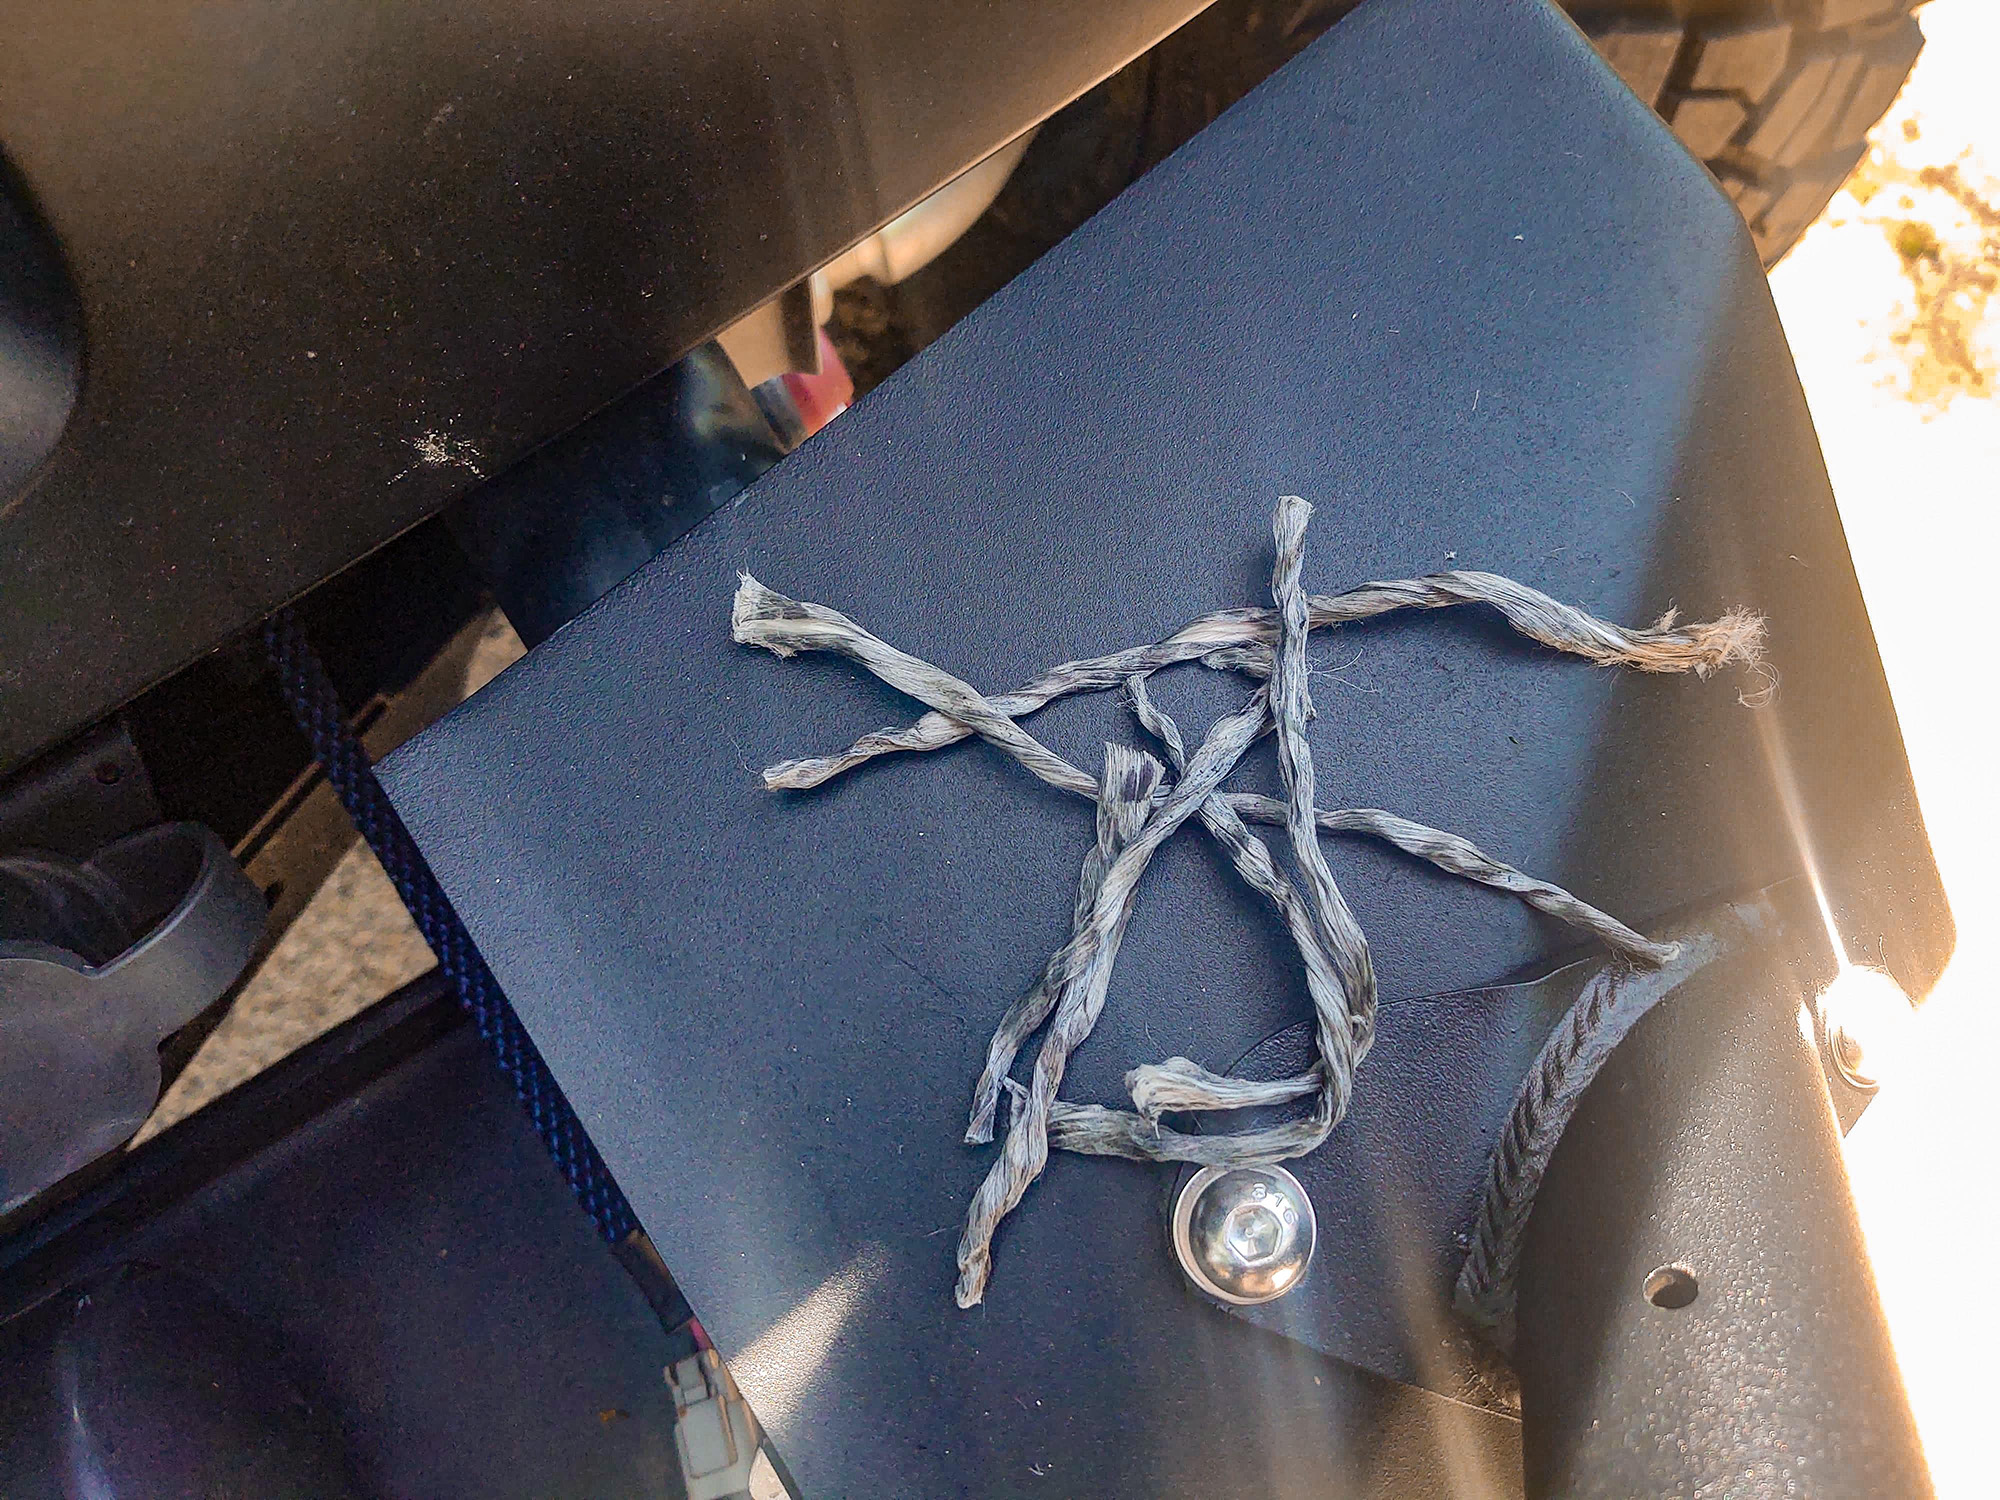
My significant other then asked “why don’t you just use the scissors in the kitchen?”, which I initially thought was a silly idea. The more I thought about it, the more I realized she was right—those things cut through ANYTHING. I wasn’t cutting a single strand, I was cutting tens of thousands of individual Dyneema and UHMC (ultra high molecular compound) strands. Having two sharp blades overlapping made quick work of slicing through the rope. The process went from several minutes down to a few seconds, and the cut was far cleaner.
I asked around to a few folks I know who cut large diameter Dyneema in industrial applications (sometimes under load because of the weight of the rope, and the diameter of a beer bottle), and they roundly recommended a sharp serrated knife. One of them even used a full sized ceramic bread knife for extra durability, as this is a regular workplace task.
I gave the fully serrated blade on my Leatherman Wave a try, and it produced the cleanest cut yet, and very quickly. Now, it should be noted that you don’t always need to cut the end, if the fraying is minimal it could be folded over before inserting it into the Fast Fid so as not to impede the splicing operation.

With the compromised rope sections removed (which only amounted to the final 11 feet of my 90-foot winch rope) I was ready to start the repair. As I said, the tubular thimble was being retired, and was being replaced with a much smoother aluminum load centering Factor 55 load spool to create a soft eye termination.
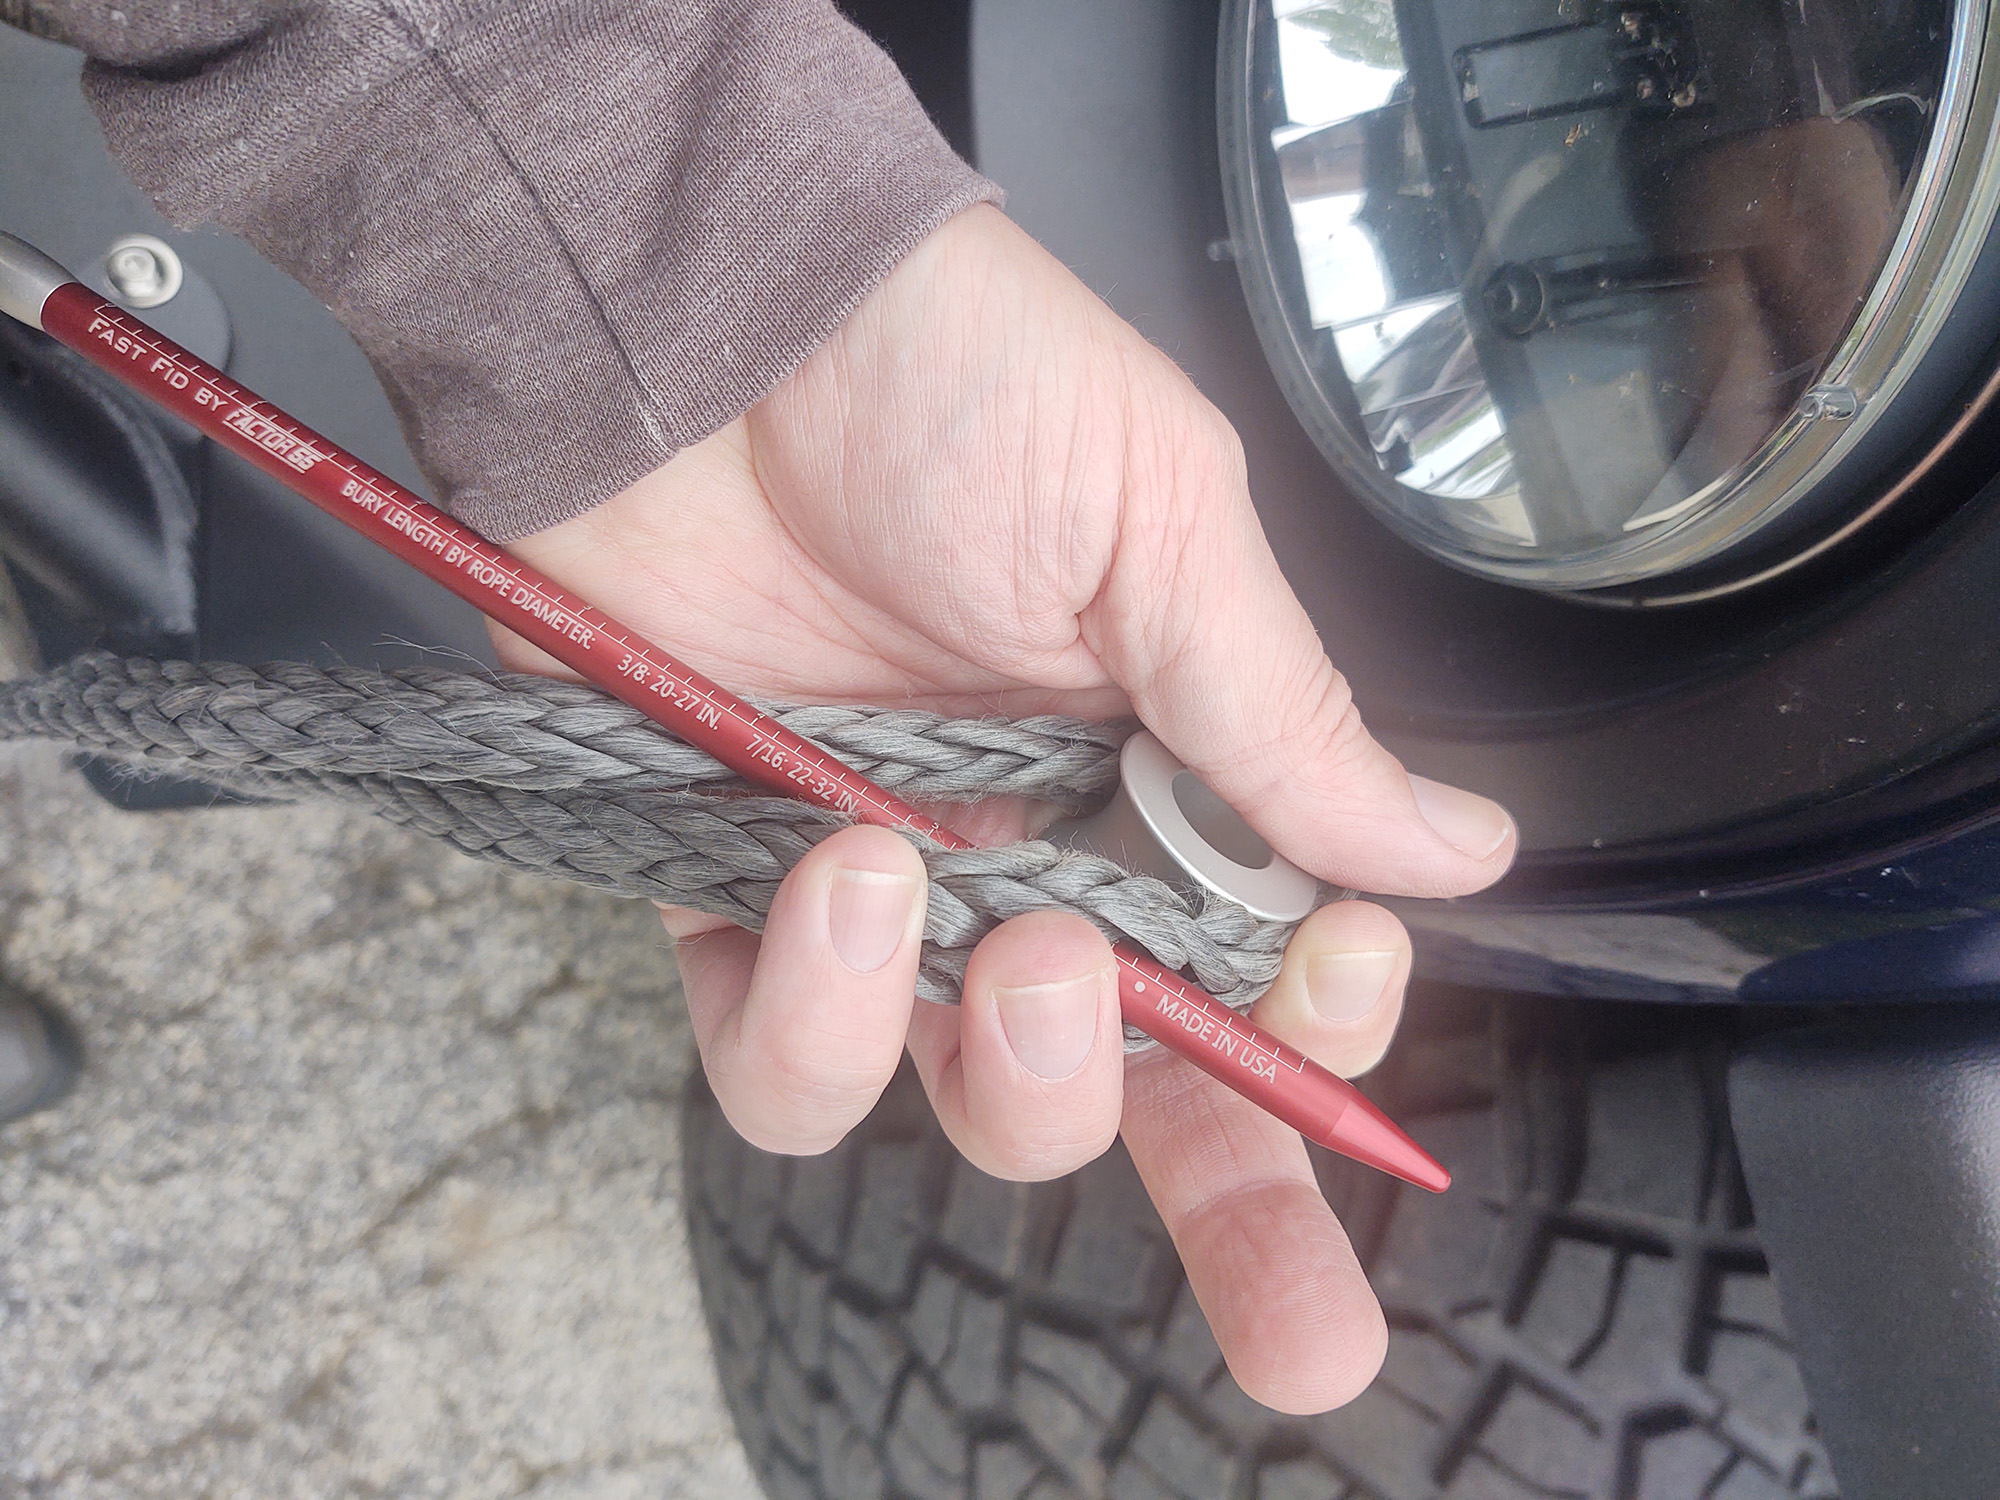
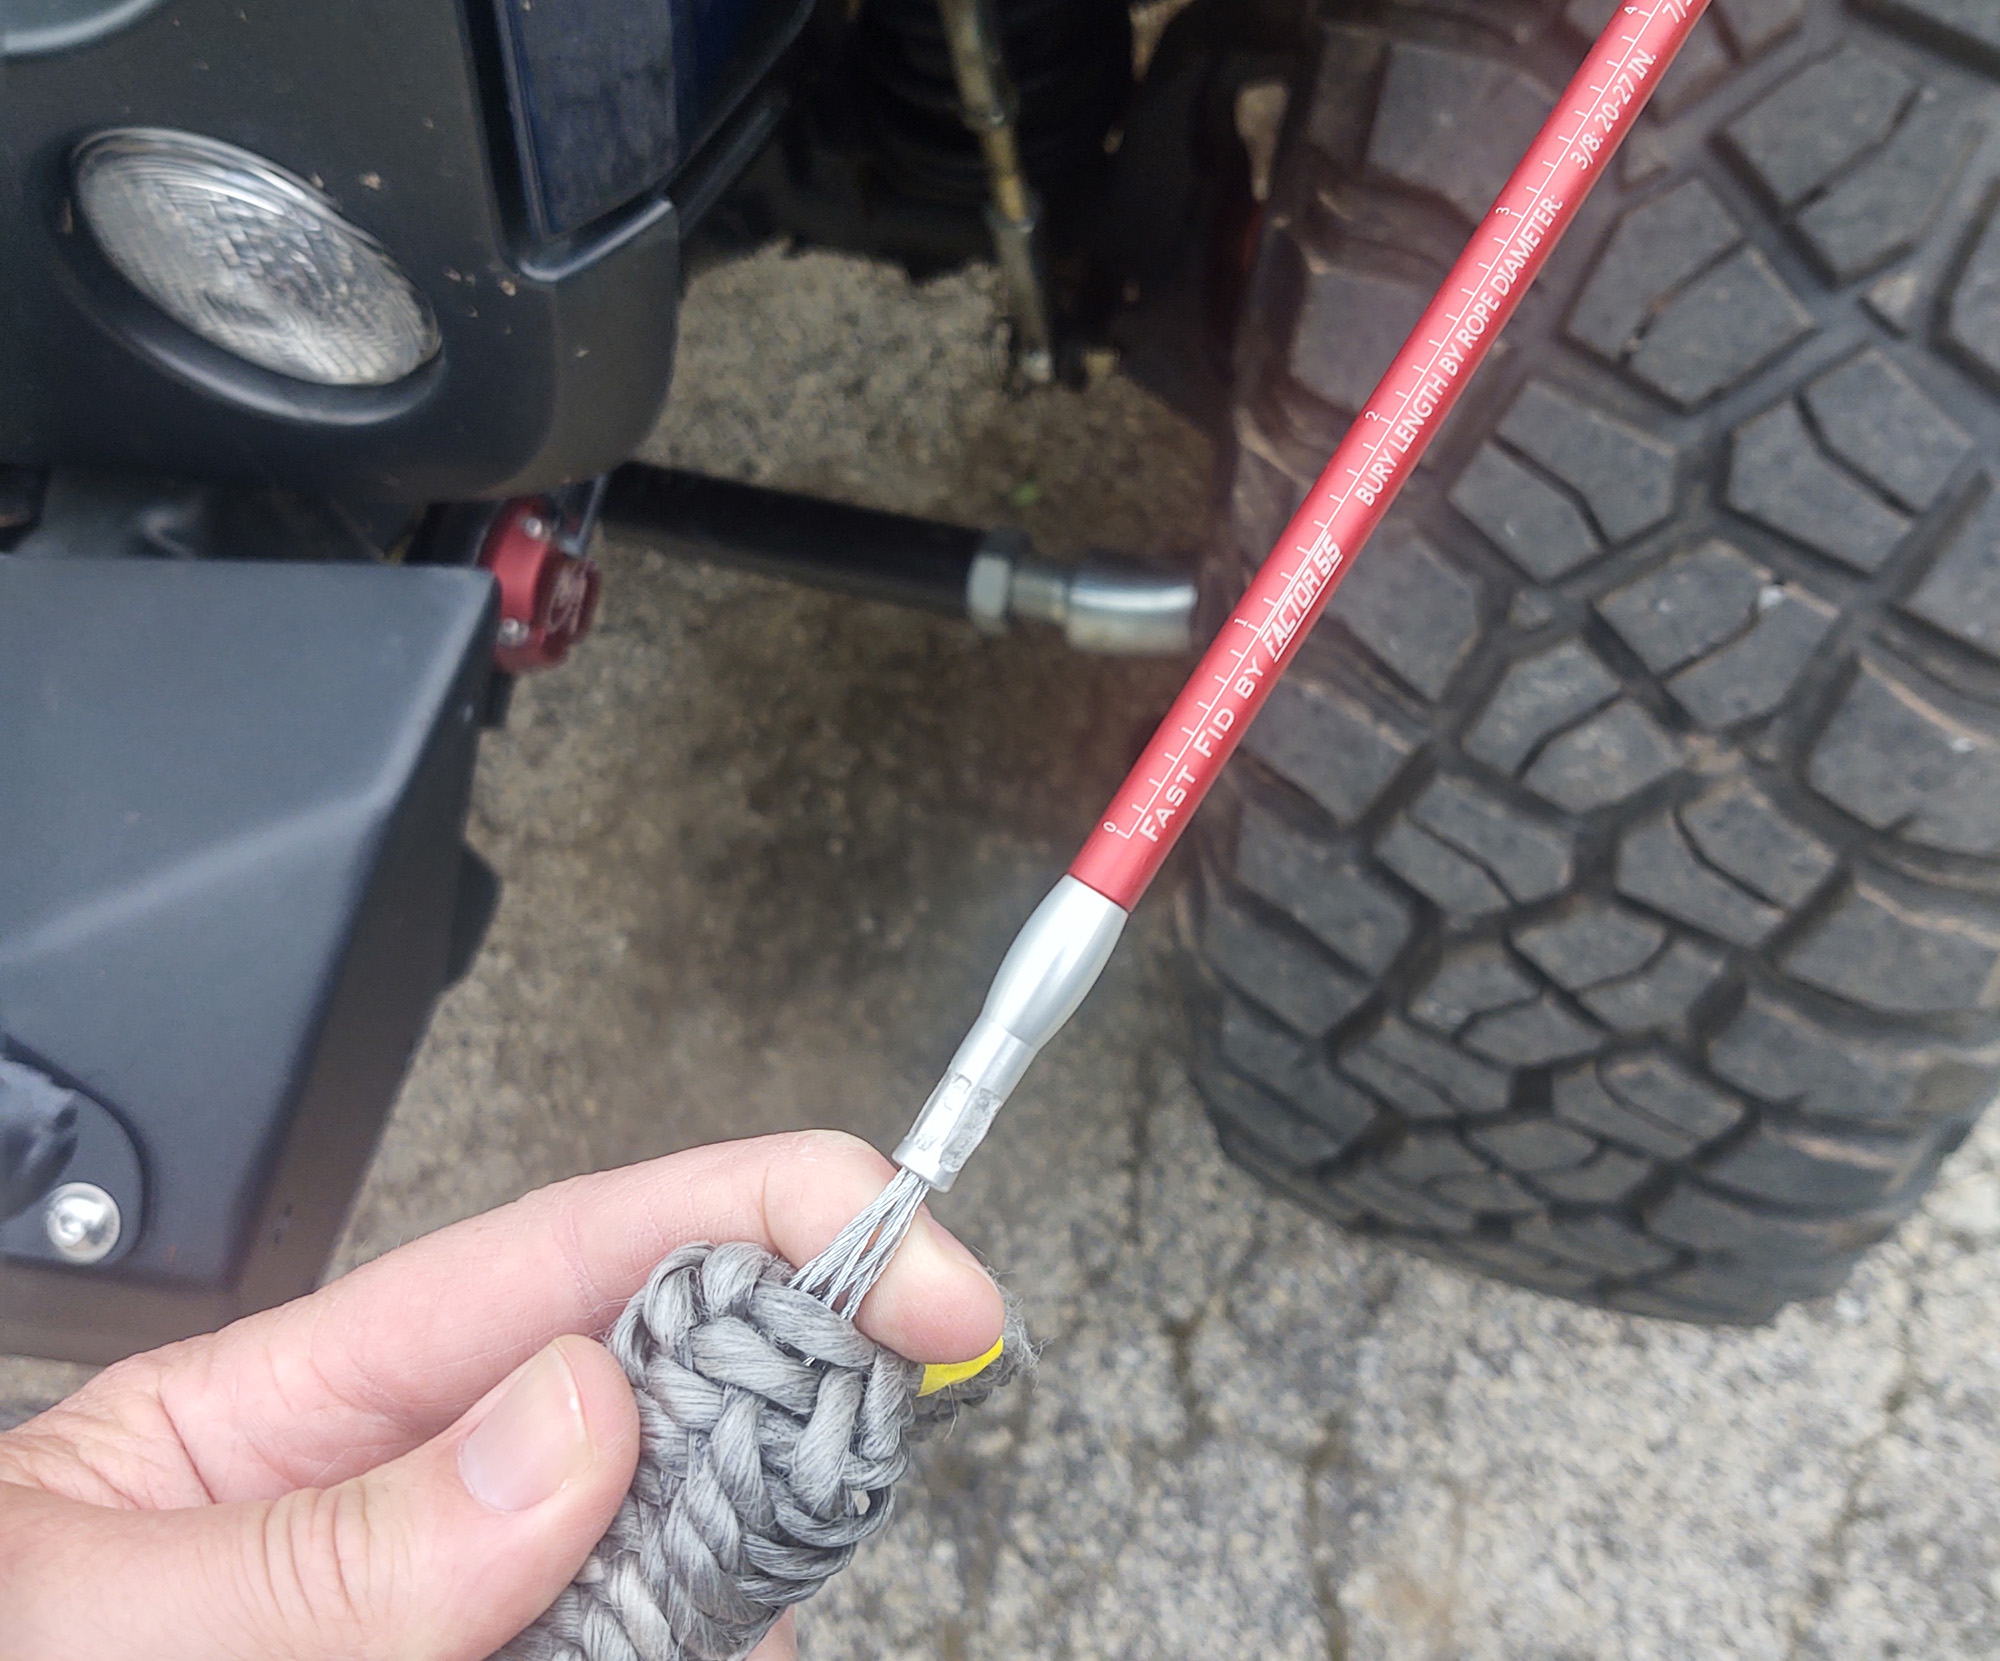
The Fast Fid comes in a ballistic nylon case, and is separated in two pieces that screw together in the center—the rear section is a stainless steel woven wire grip basket that uses friction to hold the end of the synthetic rope in place during the splice.
This same type of wire grip is used in construction applications to pull wire through conduit, and is very reliable. When pulling rope, it clamps down like a finger trap puzzle.
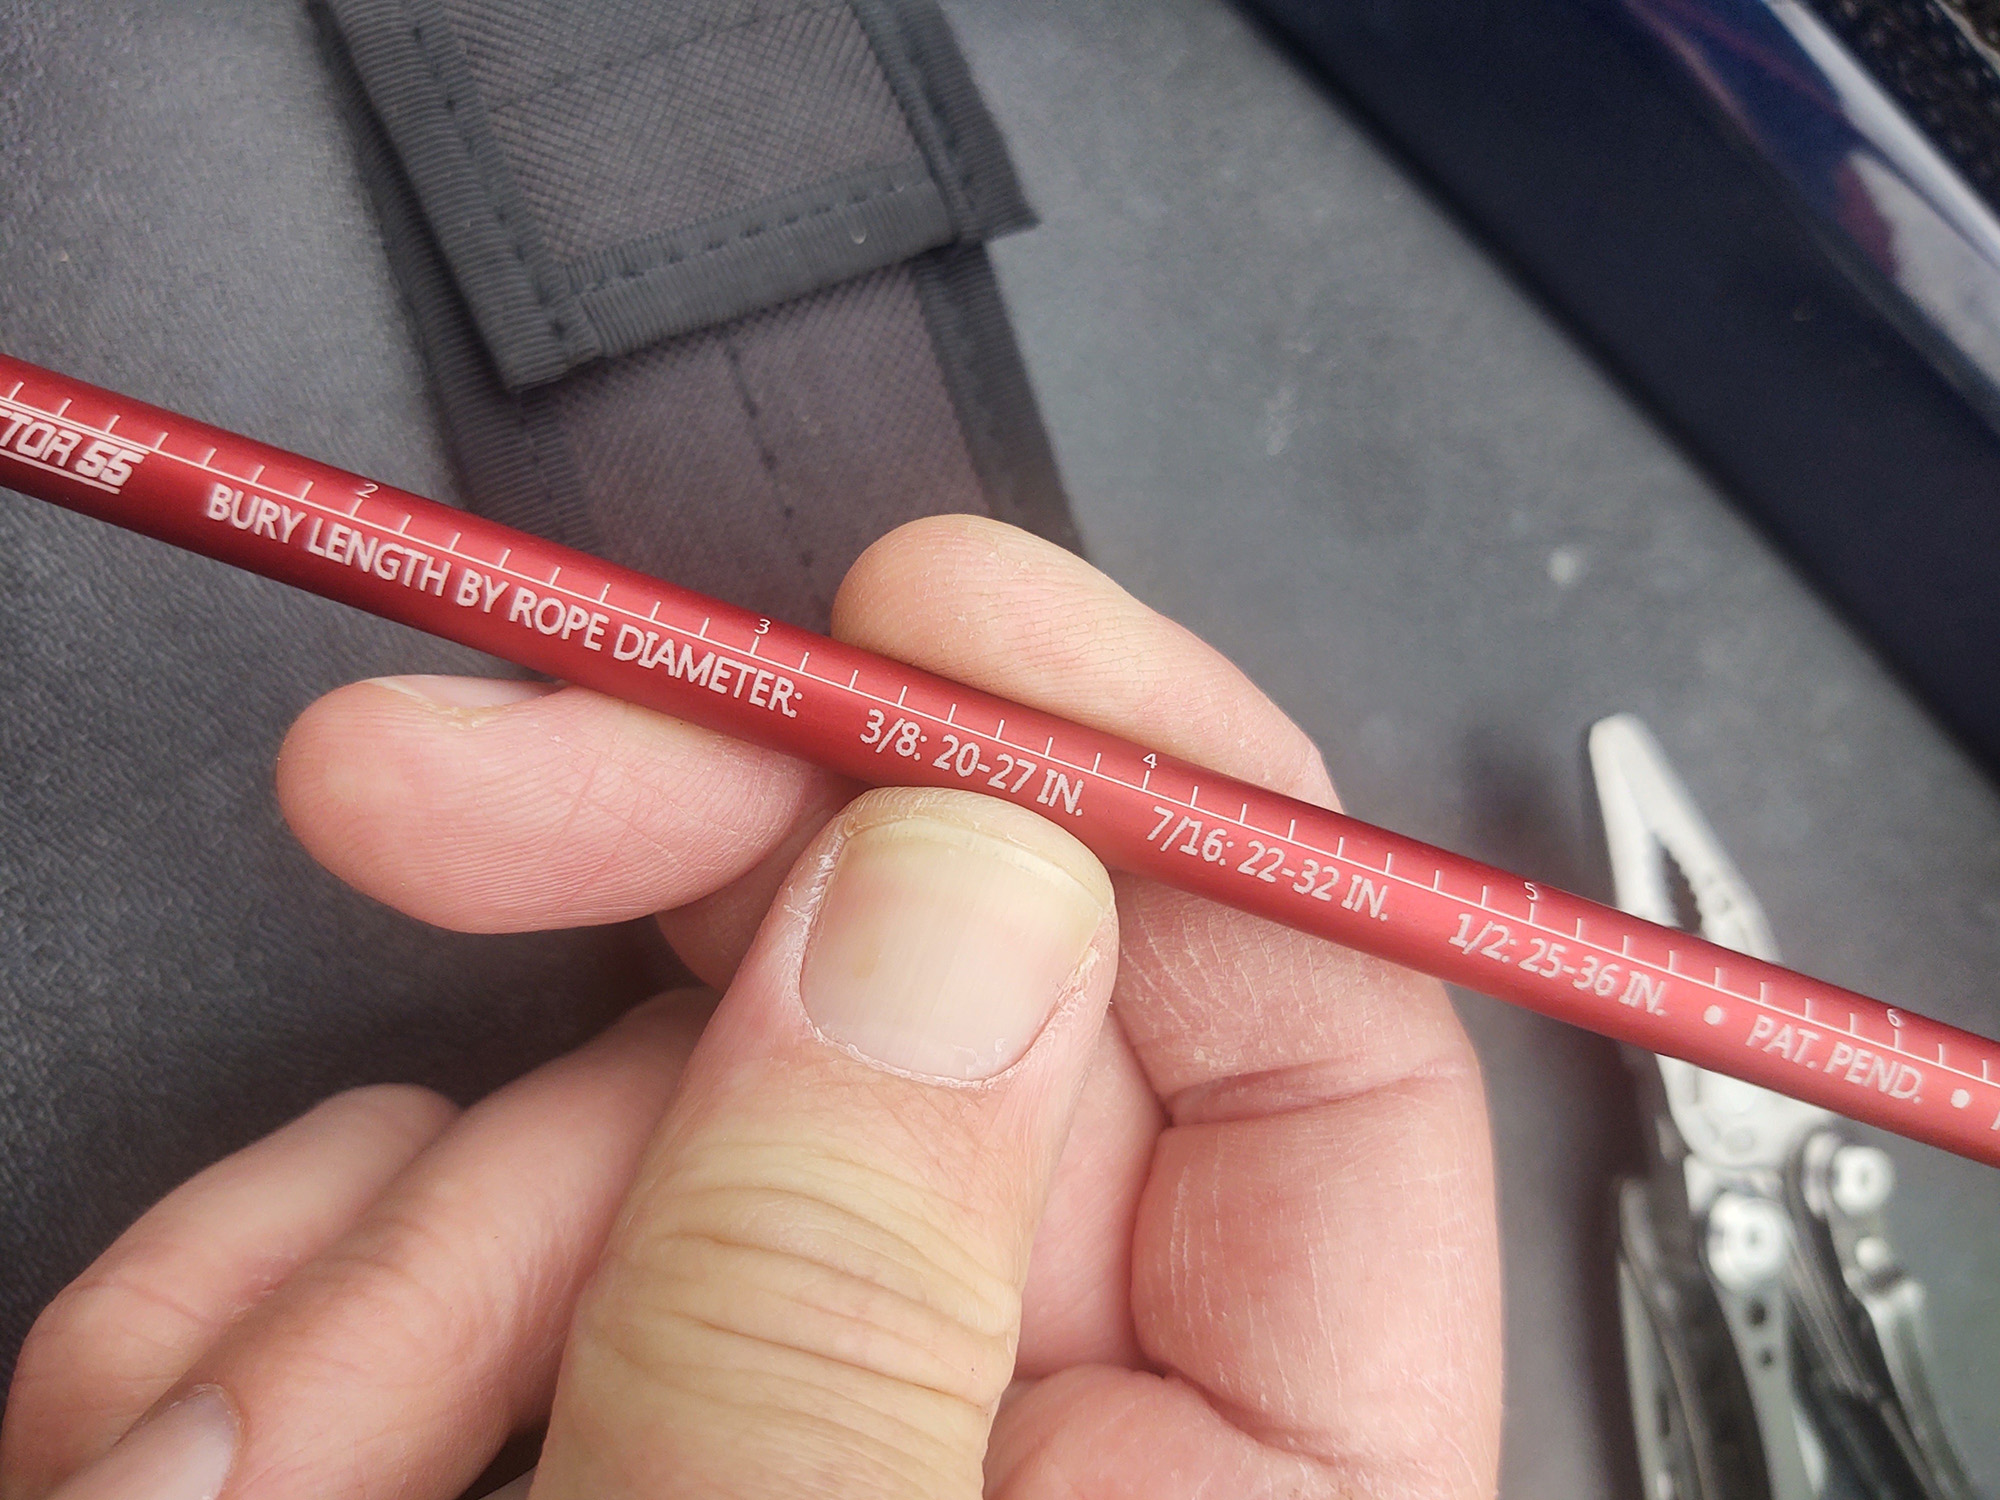
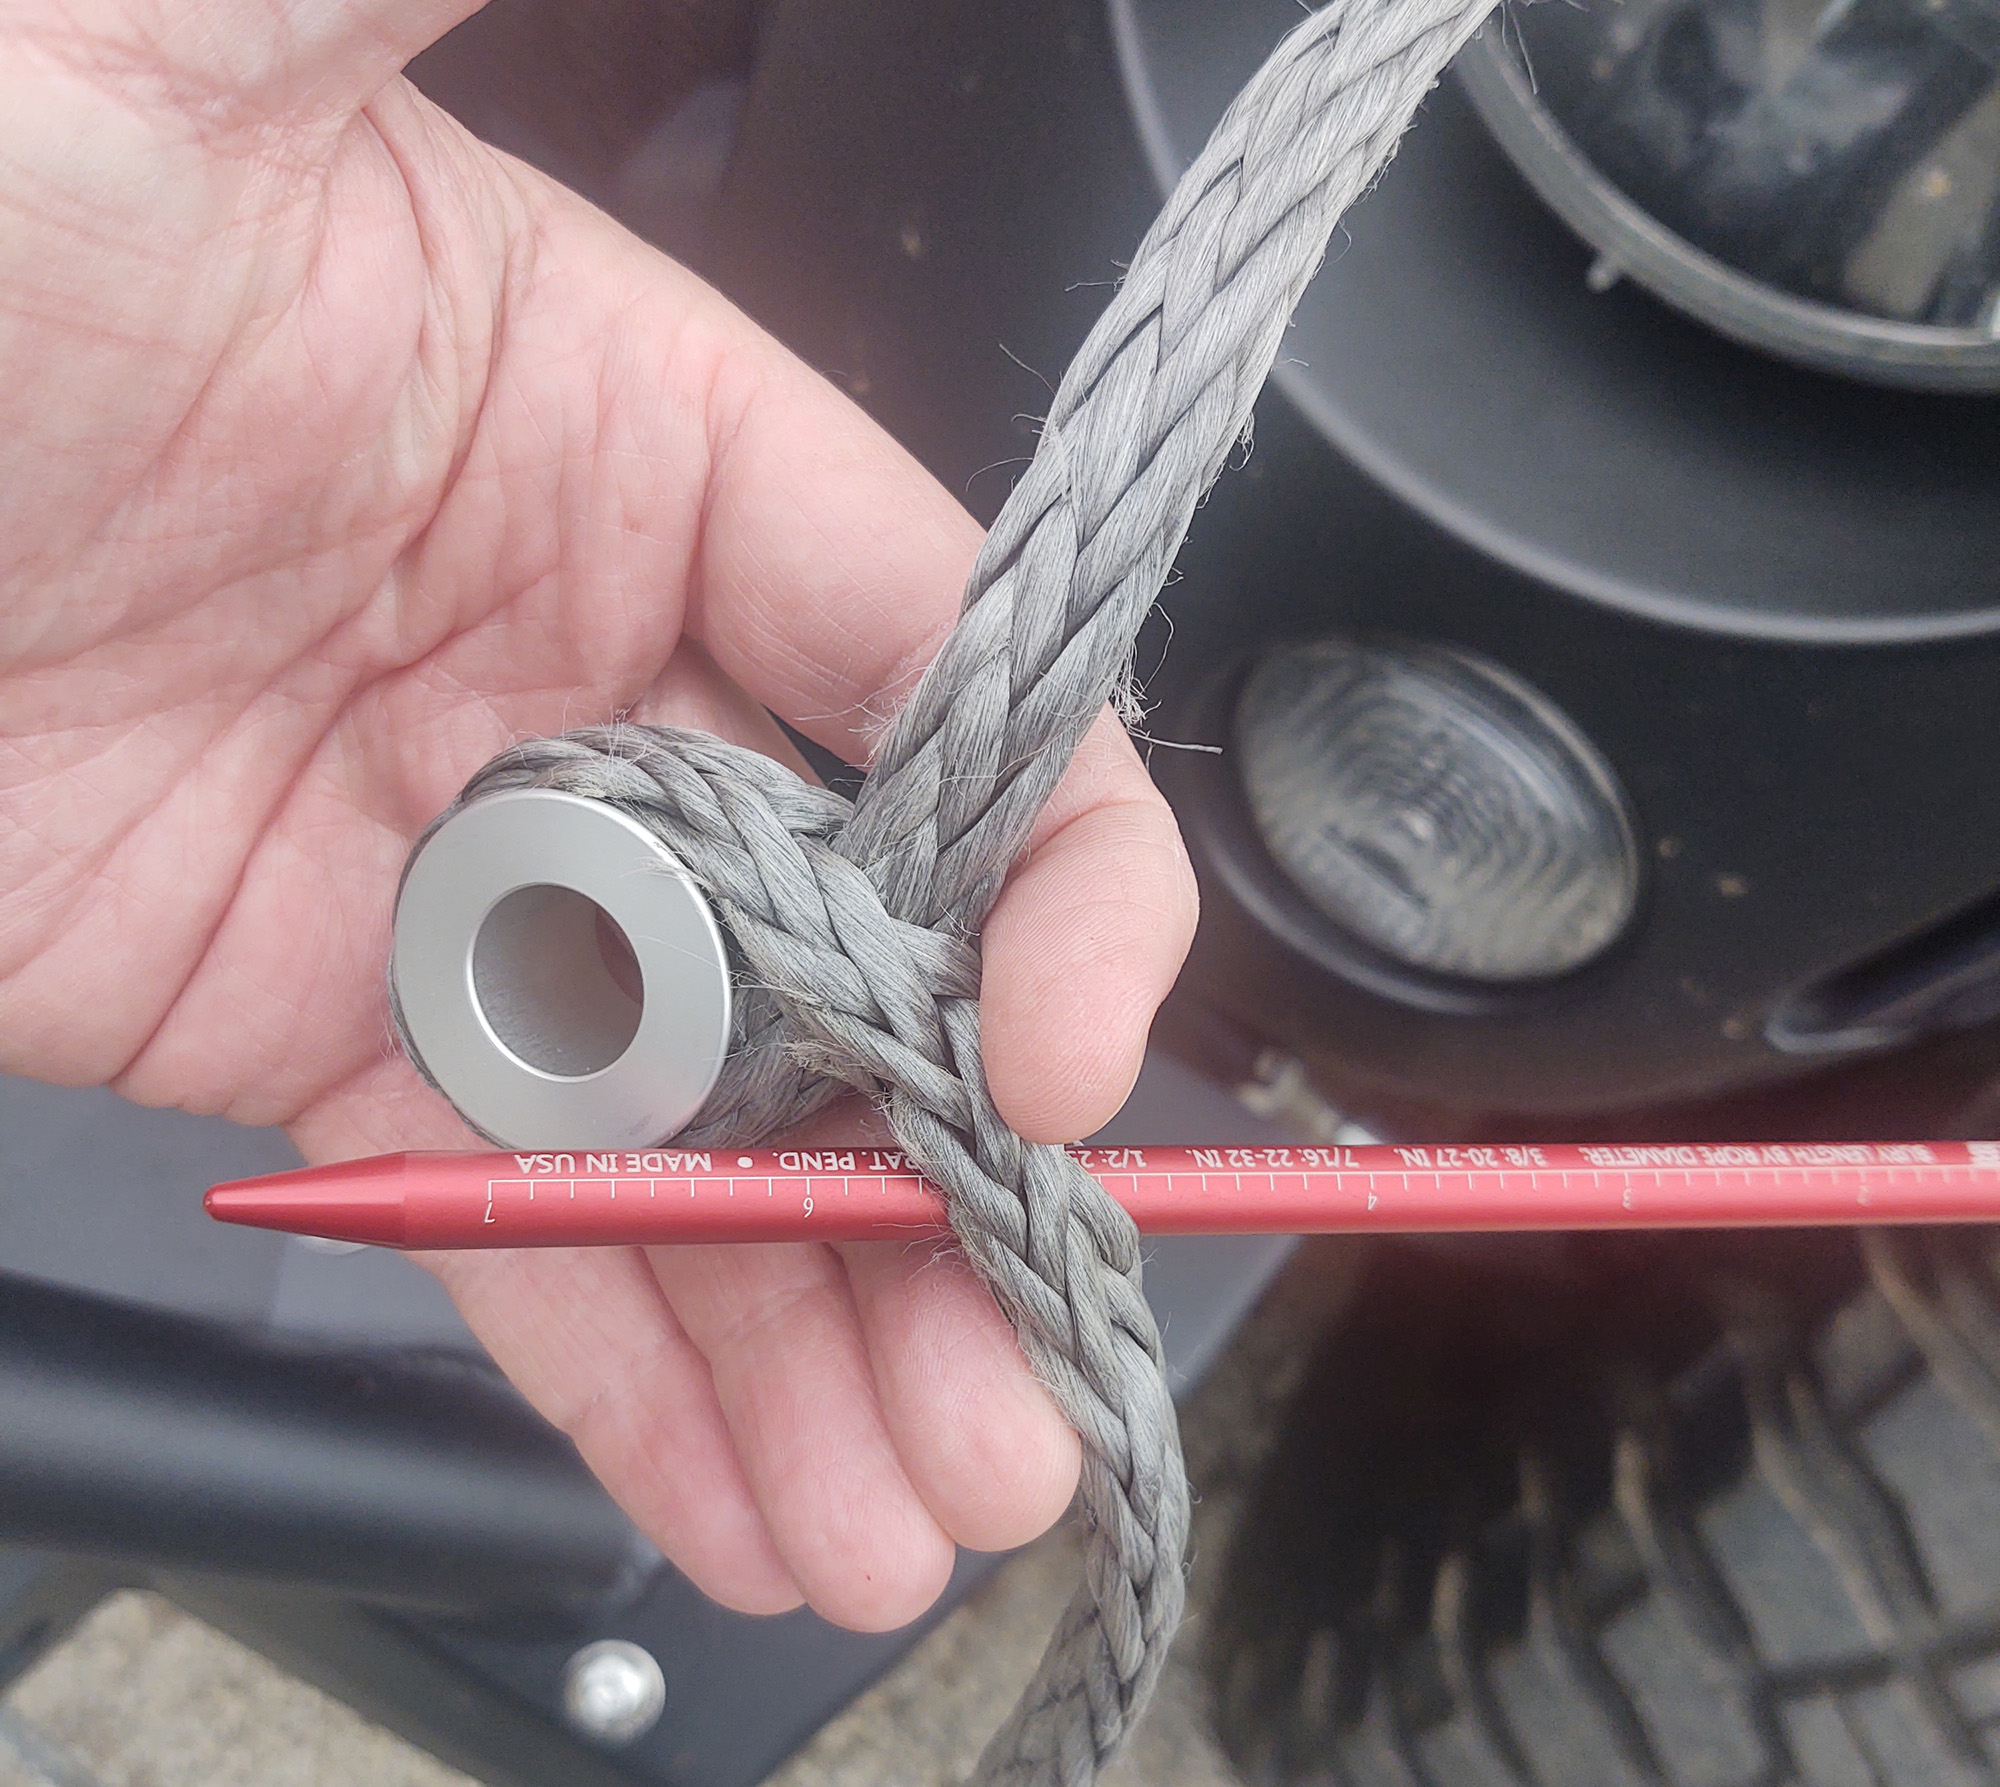
The front part is machined aluminum, and has measurements as well as recommended rope bury lengths based on diameter. I will be splicing my ⅜” diameter rope, so the recommended depth is 20-27”.
For the purposes of this explanation, I’m going to use the following terms, commonly used when describing fishing (and many other) knots:
The working end is the section of rope between the winch and the loop.
The tag end is the section beyond the loop, being deep buried to create the splice.
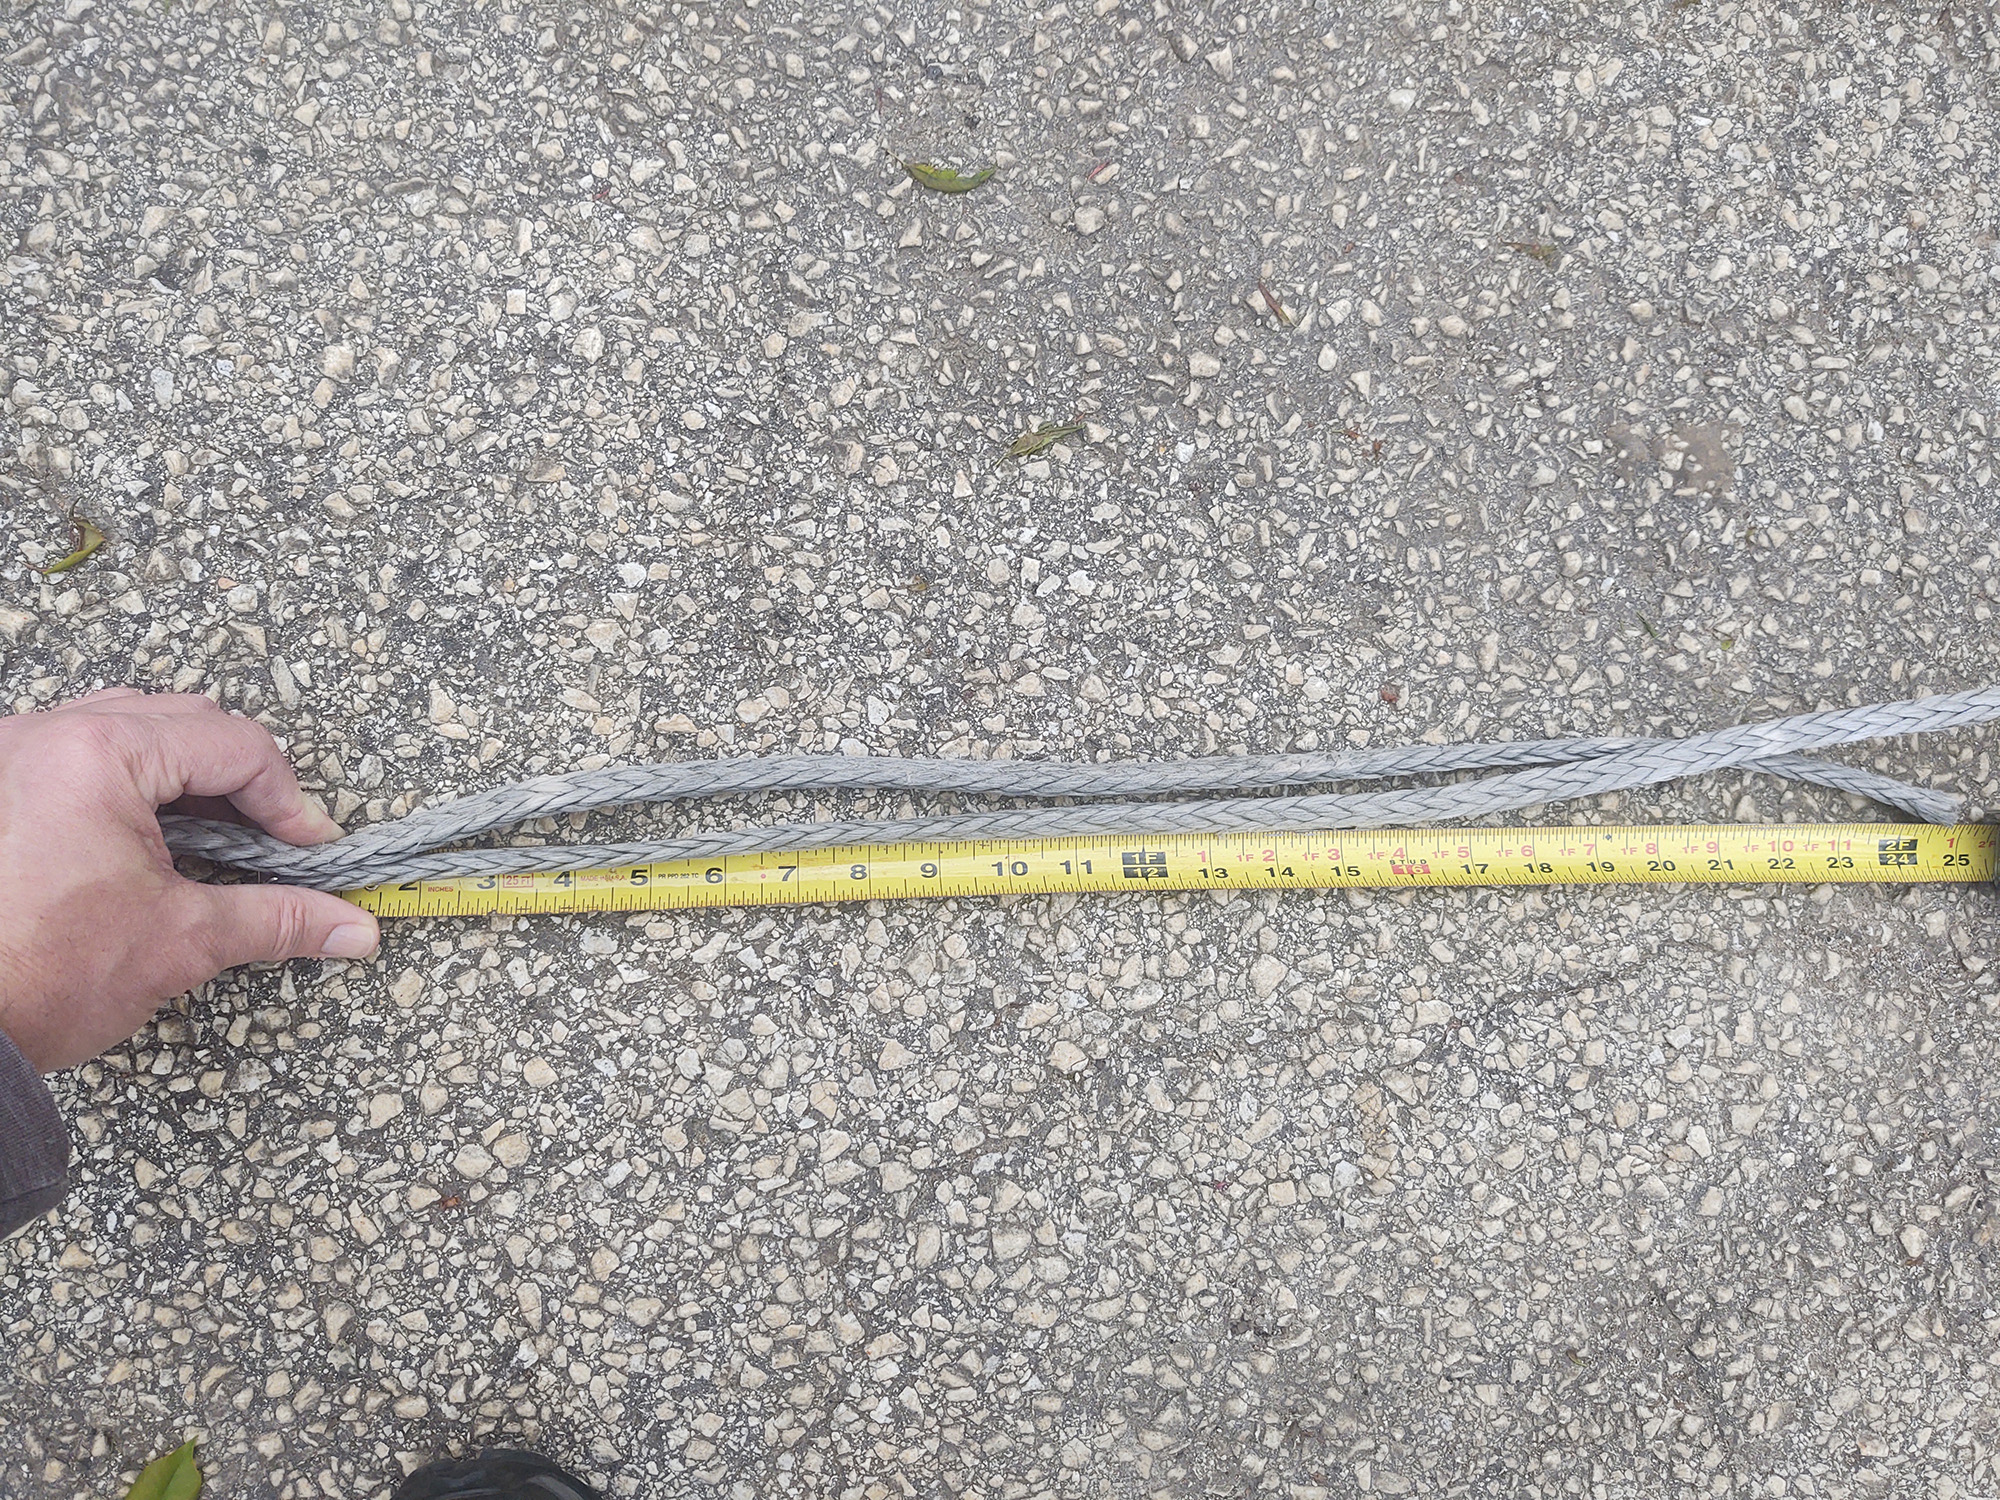
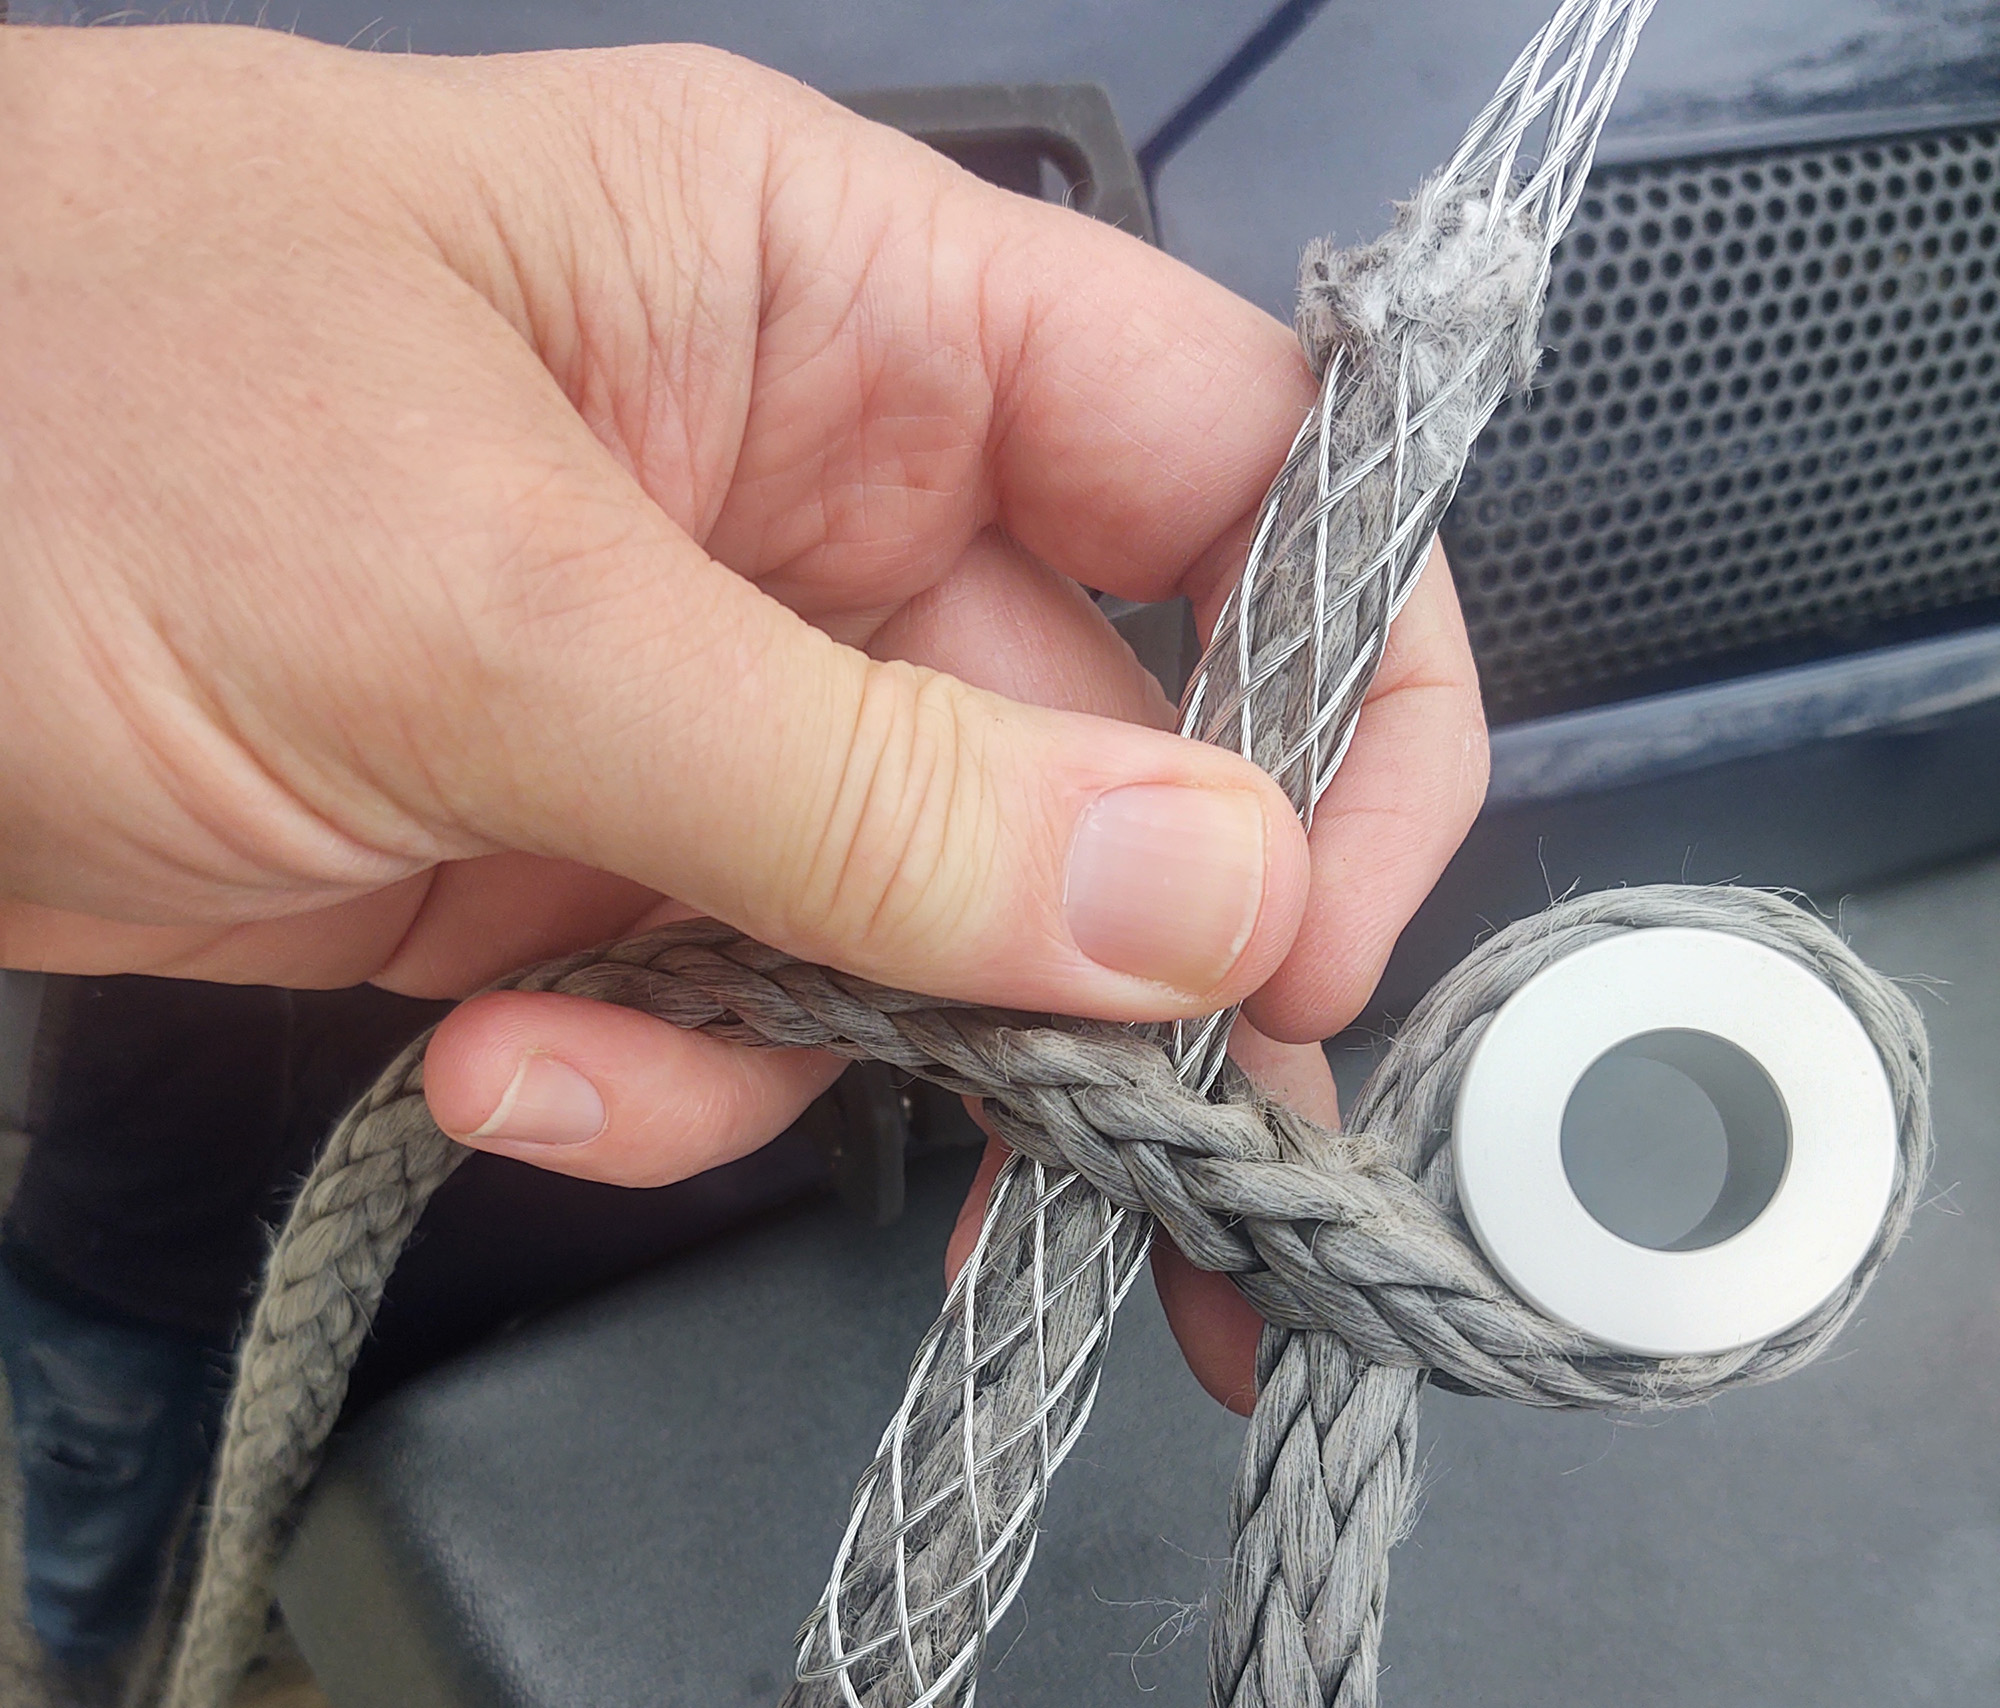
I measured 25” out from the end of the line, and looped it back towards the winch. I erred on the side of the longer measurement, as I knew I would lose a little of the length due to the working end being expanded to accommodate the buried section. I put a piece of painter’s tape around the length where my Fast Fid would exit.
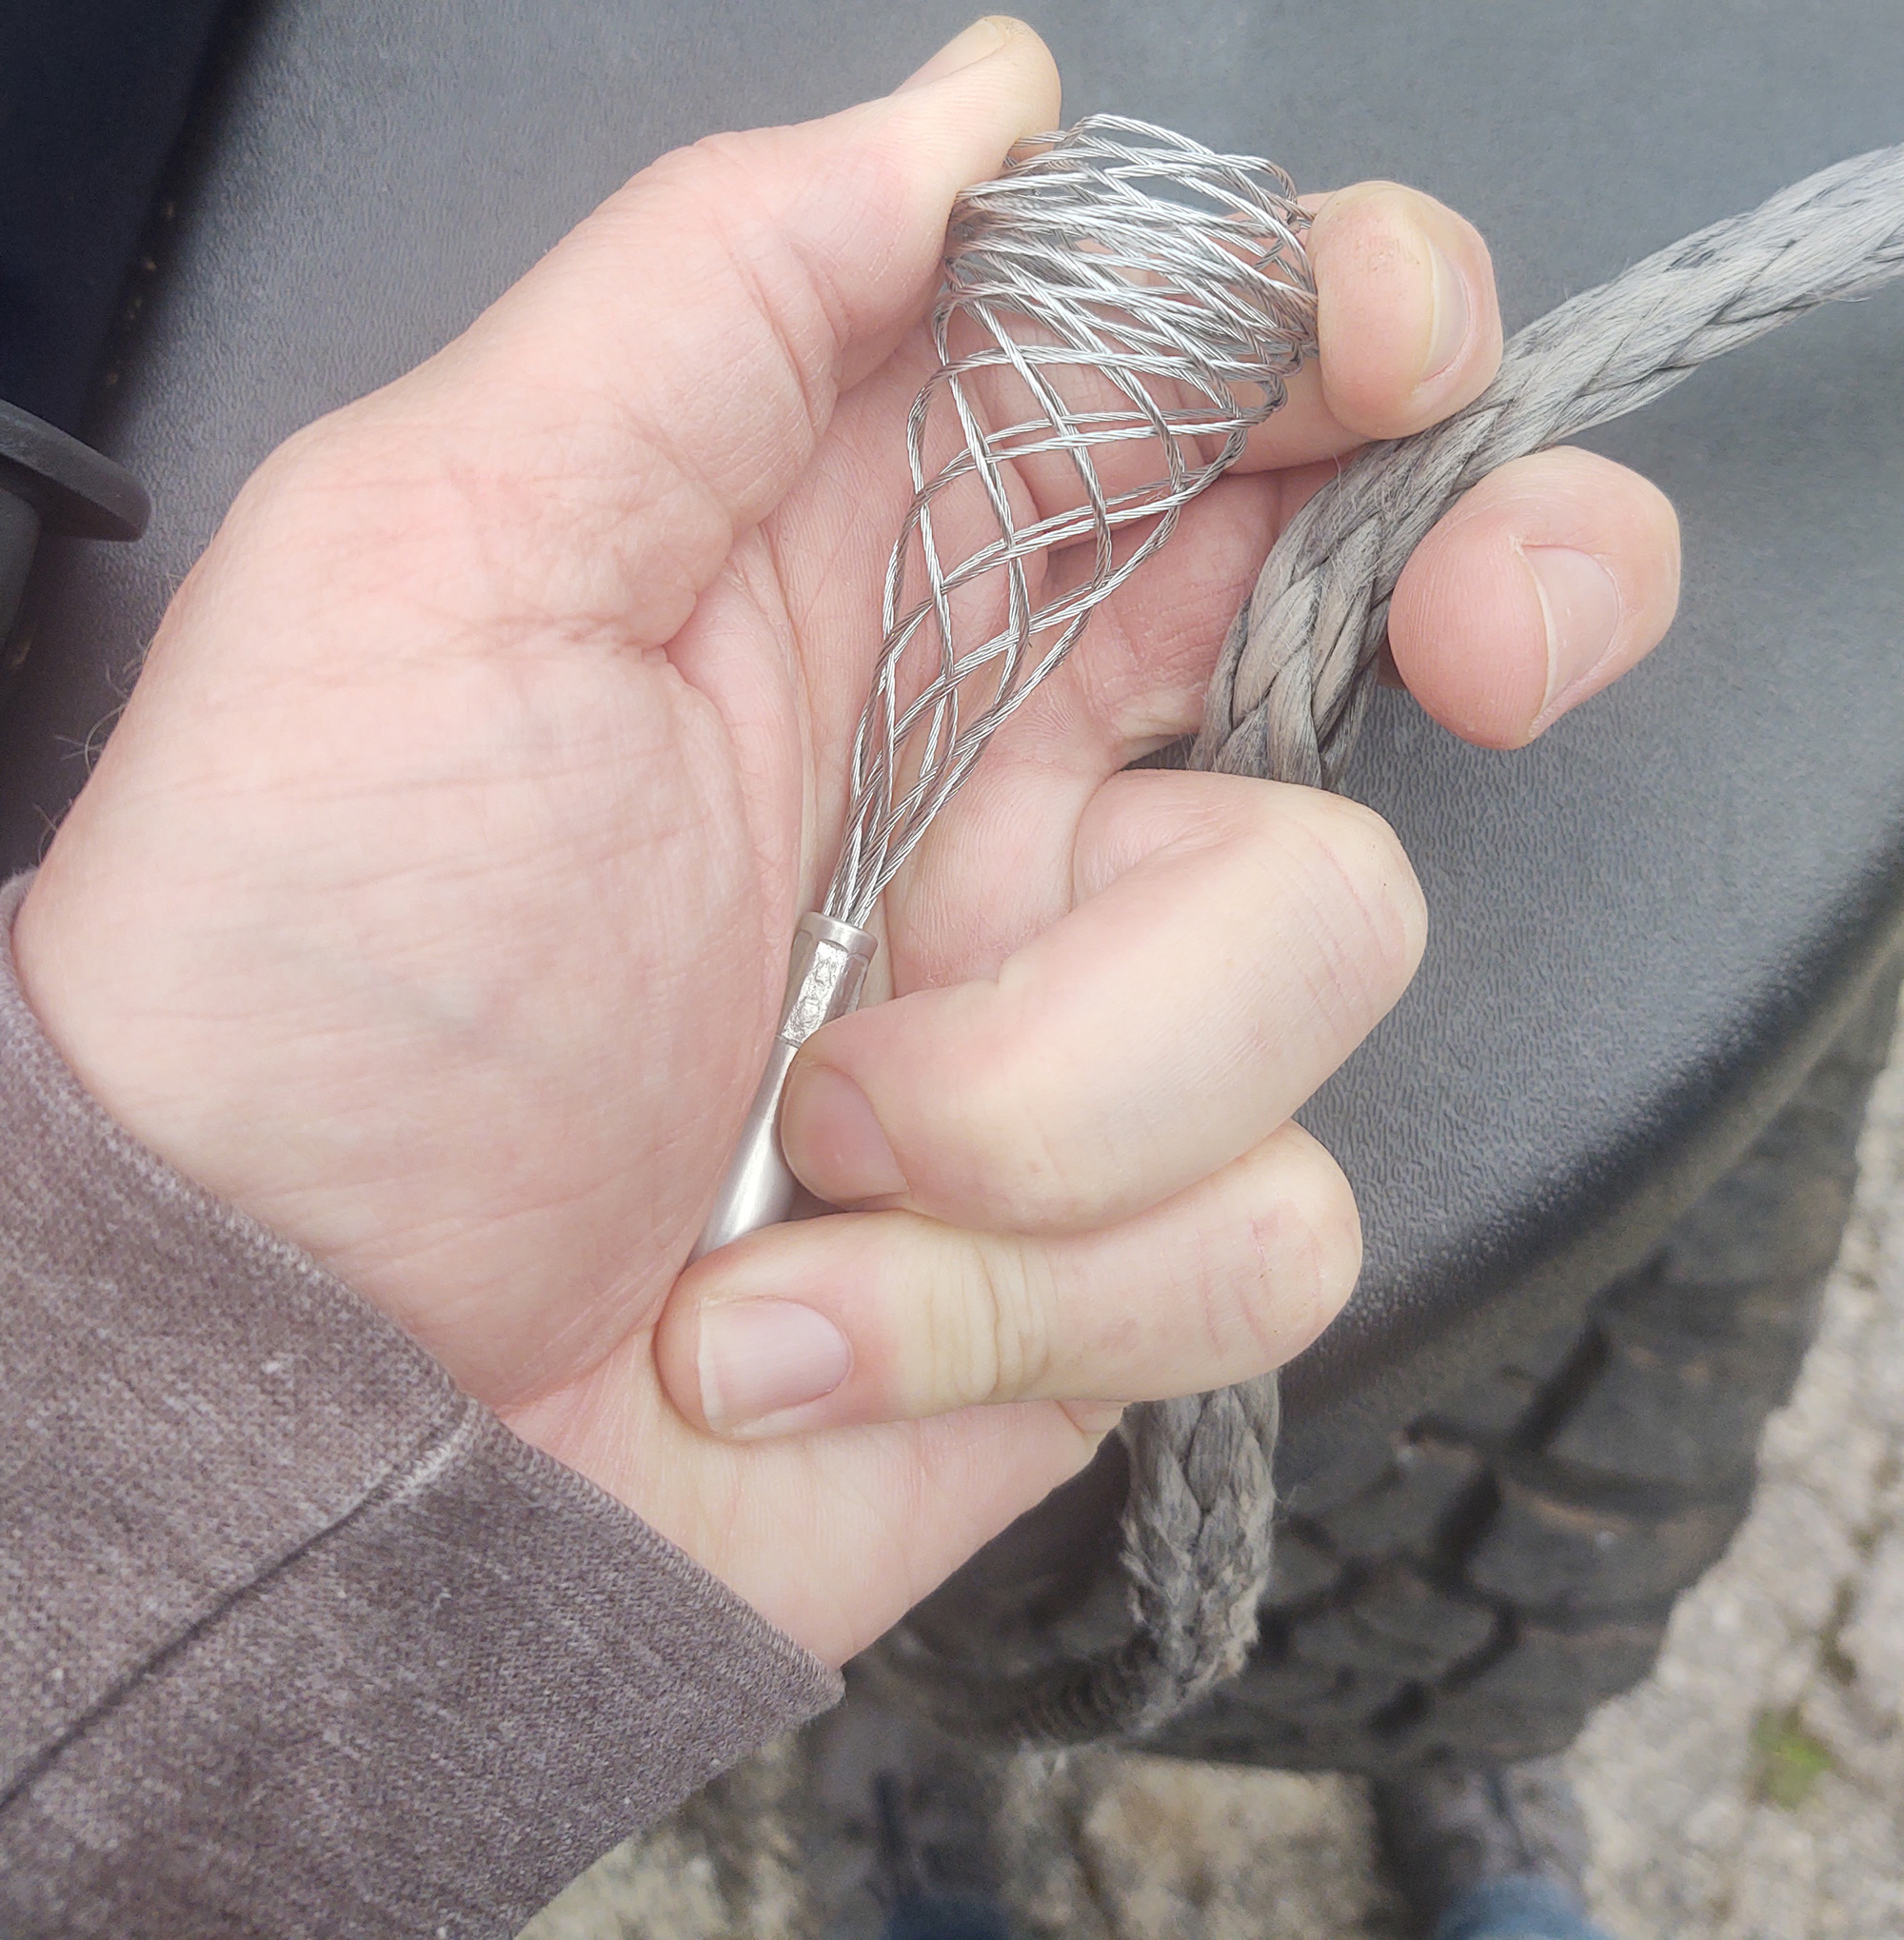
Holding the wire grip open, insert the tag end of the synthetic rope. When released, it will grab on to all sides of the rope and can be threaded on to the fid section of the tool. It actually could have been threaded on earlier, but I’m trying to juggle a tool, a rope and a camera here, so cut me some slack. It actually might be easier, depending on the size of your hands, to open the wire grip with the fid end attached, but you can clearly thread it on and off at any time.
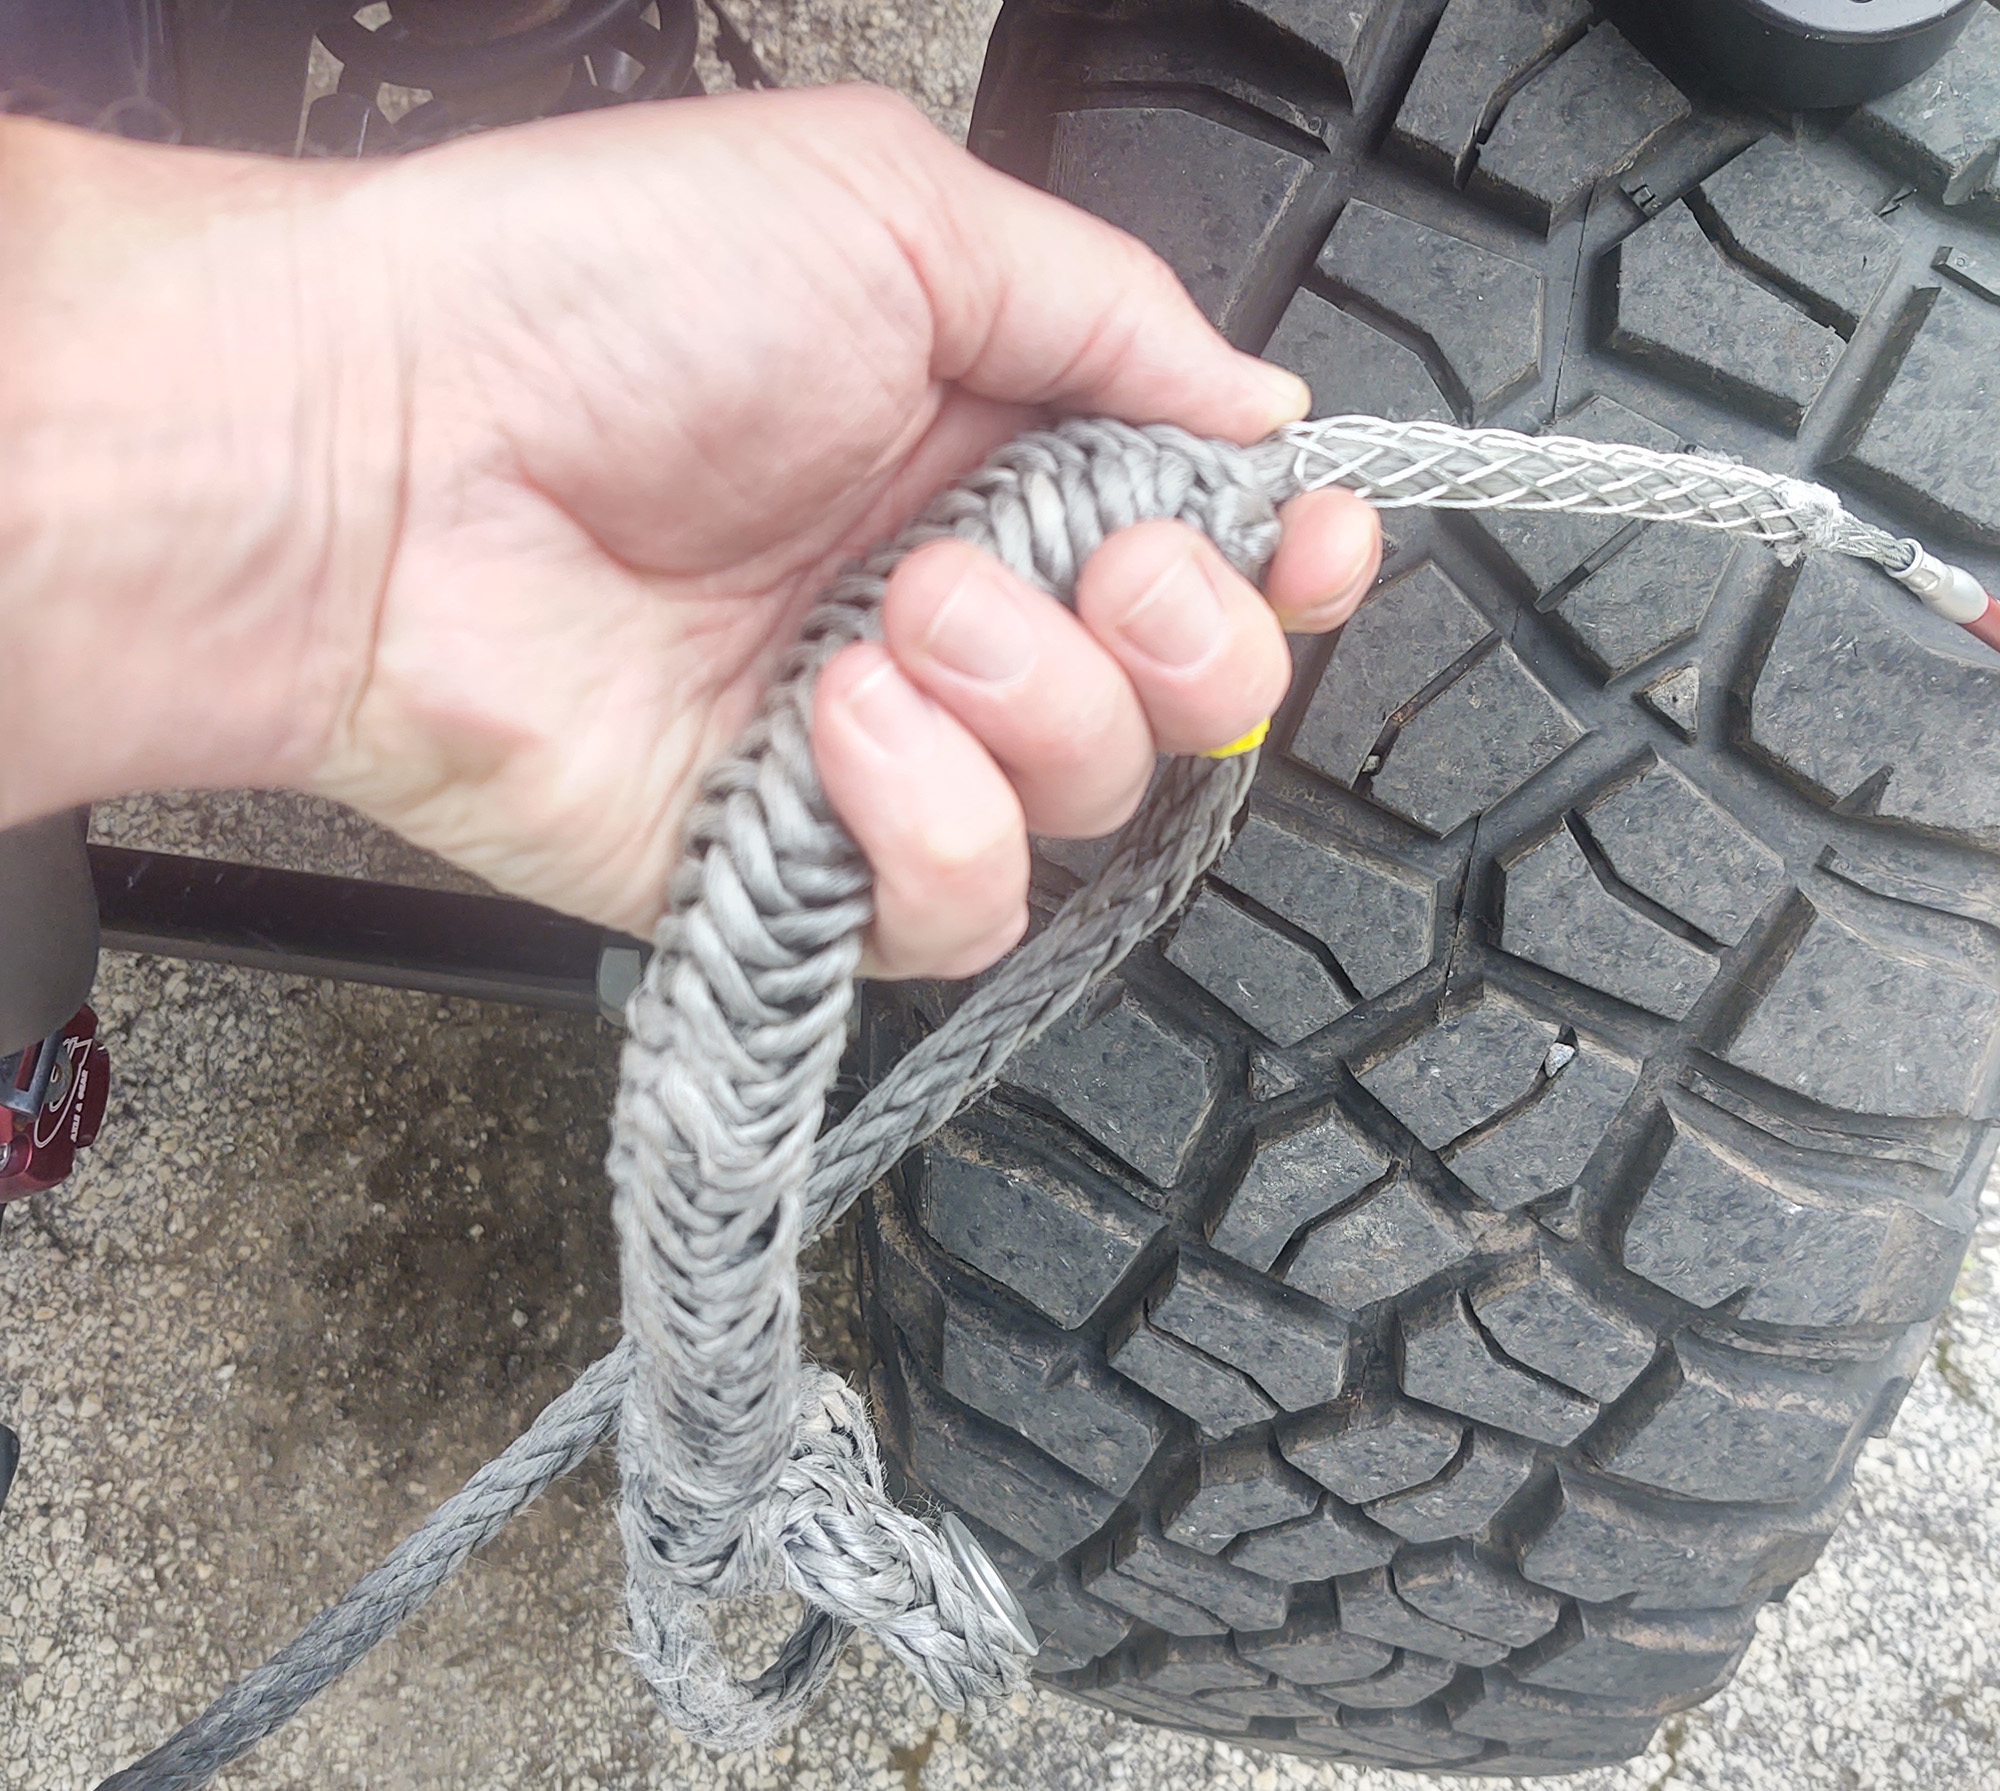
With the tool assembled, wrap it around the load spool and compress the winch rope enough to allow you to thread the Fast Fid through the center of the working end of the line.
It will look like this once you do the first loop. You don’t have to have the end completely tight against the load spool as I did, however. It is fully acceptable to have a larger loop, more like this:
Just make sure the rope isn’t twisted through the end loop as you pull it through.
Go down the working end several braids and thread the fid back through the center of the working end again, but this time in the opposite direction from the first pass.
The smooth profile of the wire grip has no problems going cleanly through the synthetic rope without any threat of a snag.
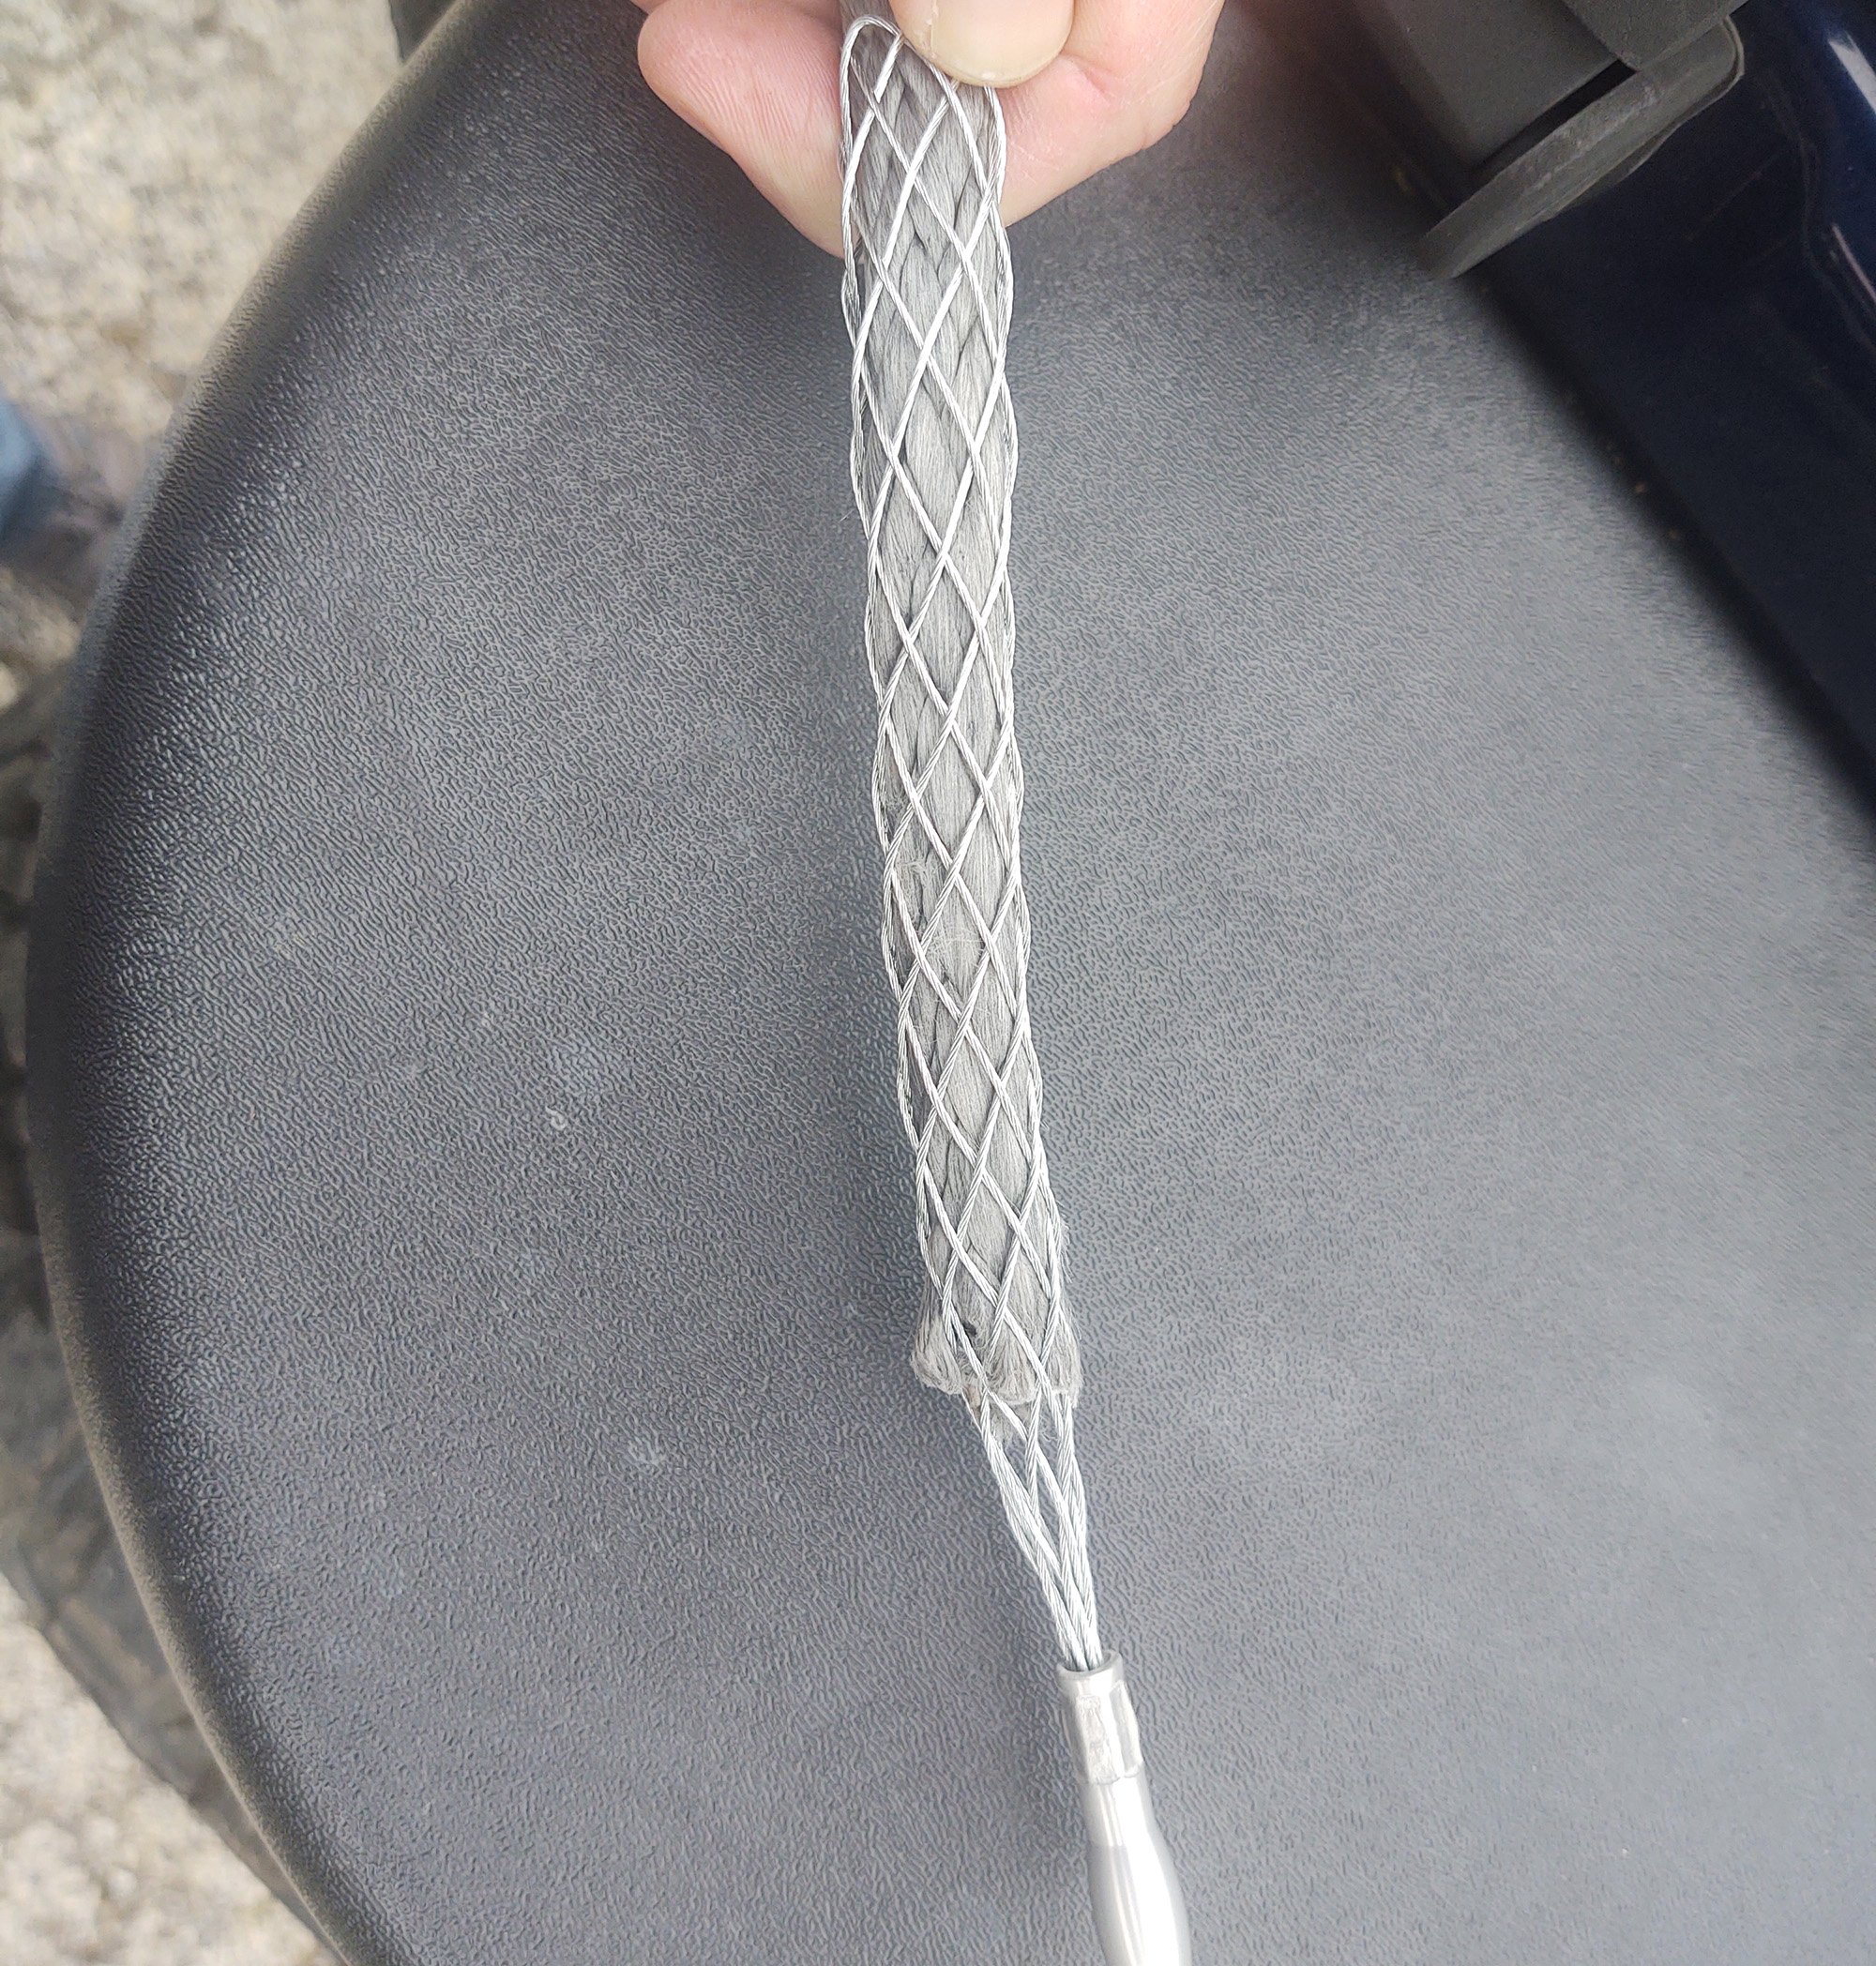
With the tag end pulled completely through, your splice will look like this:
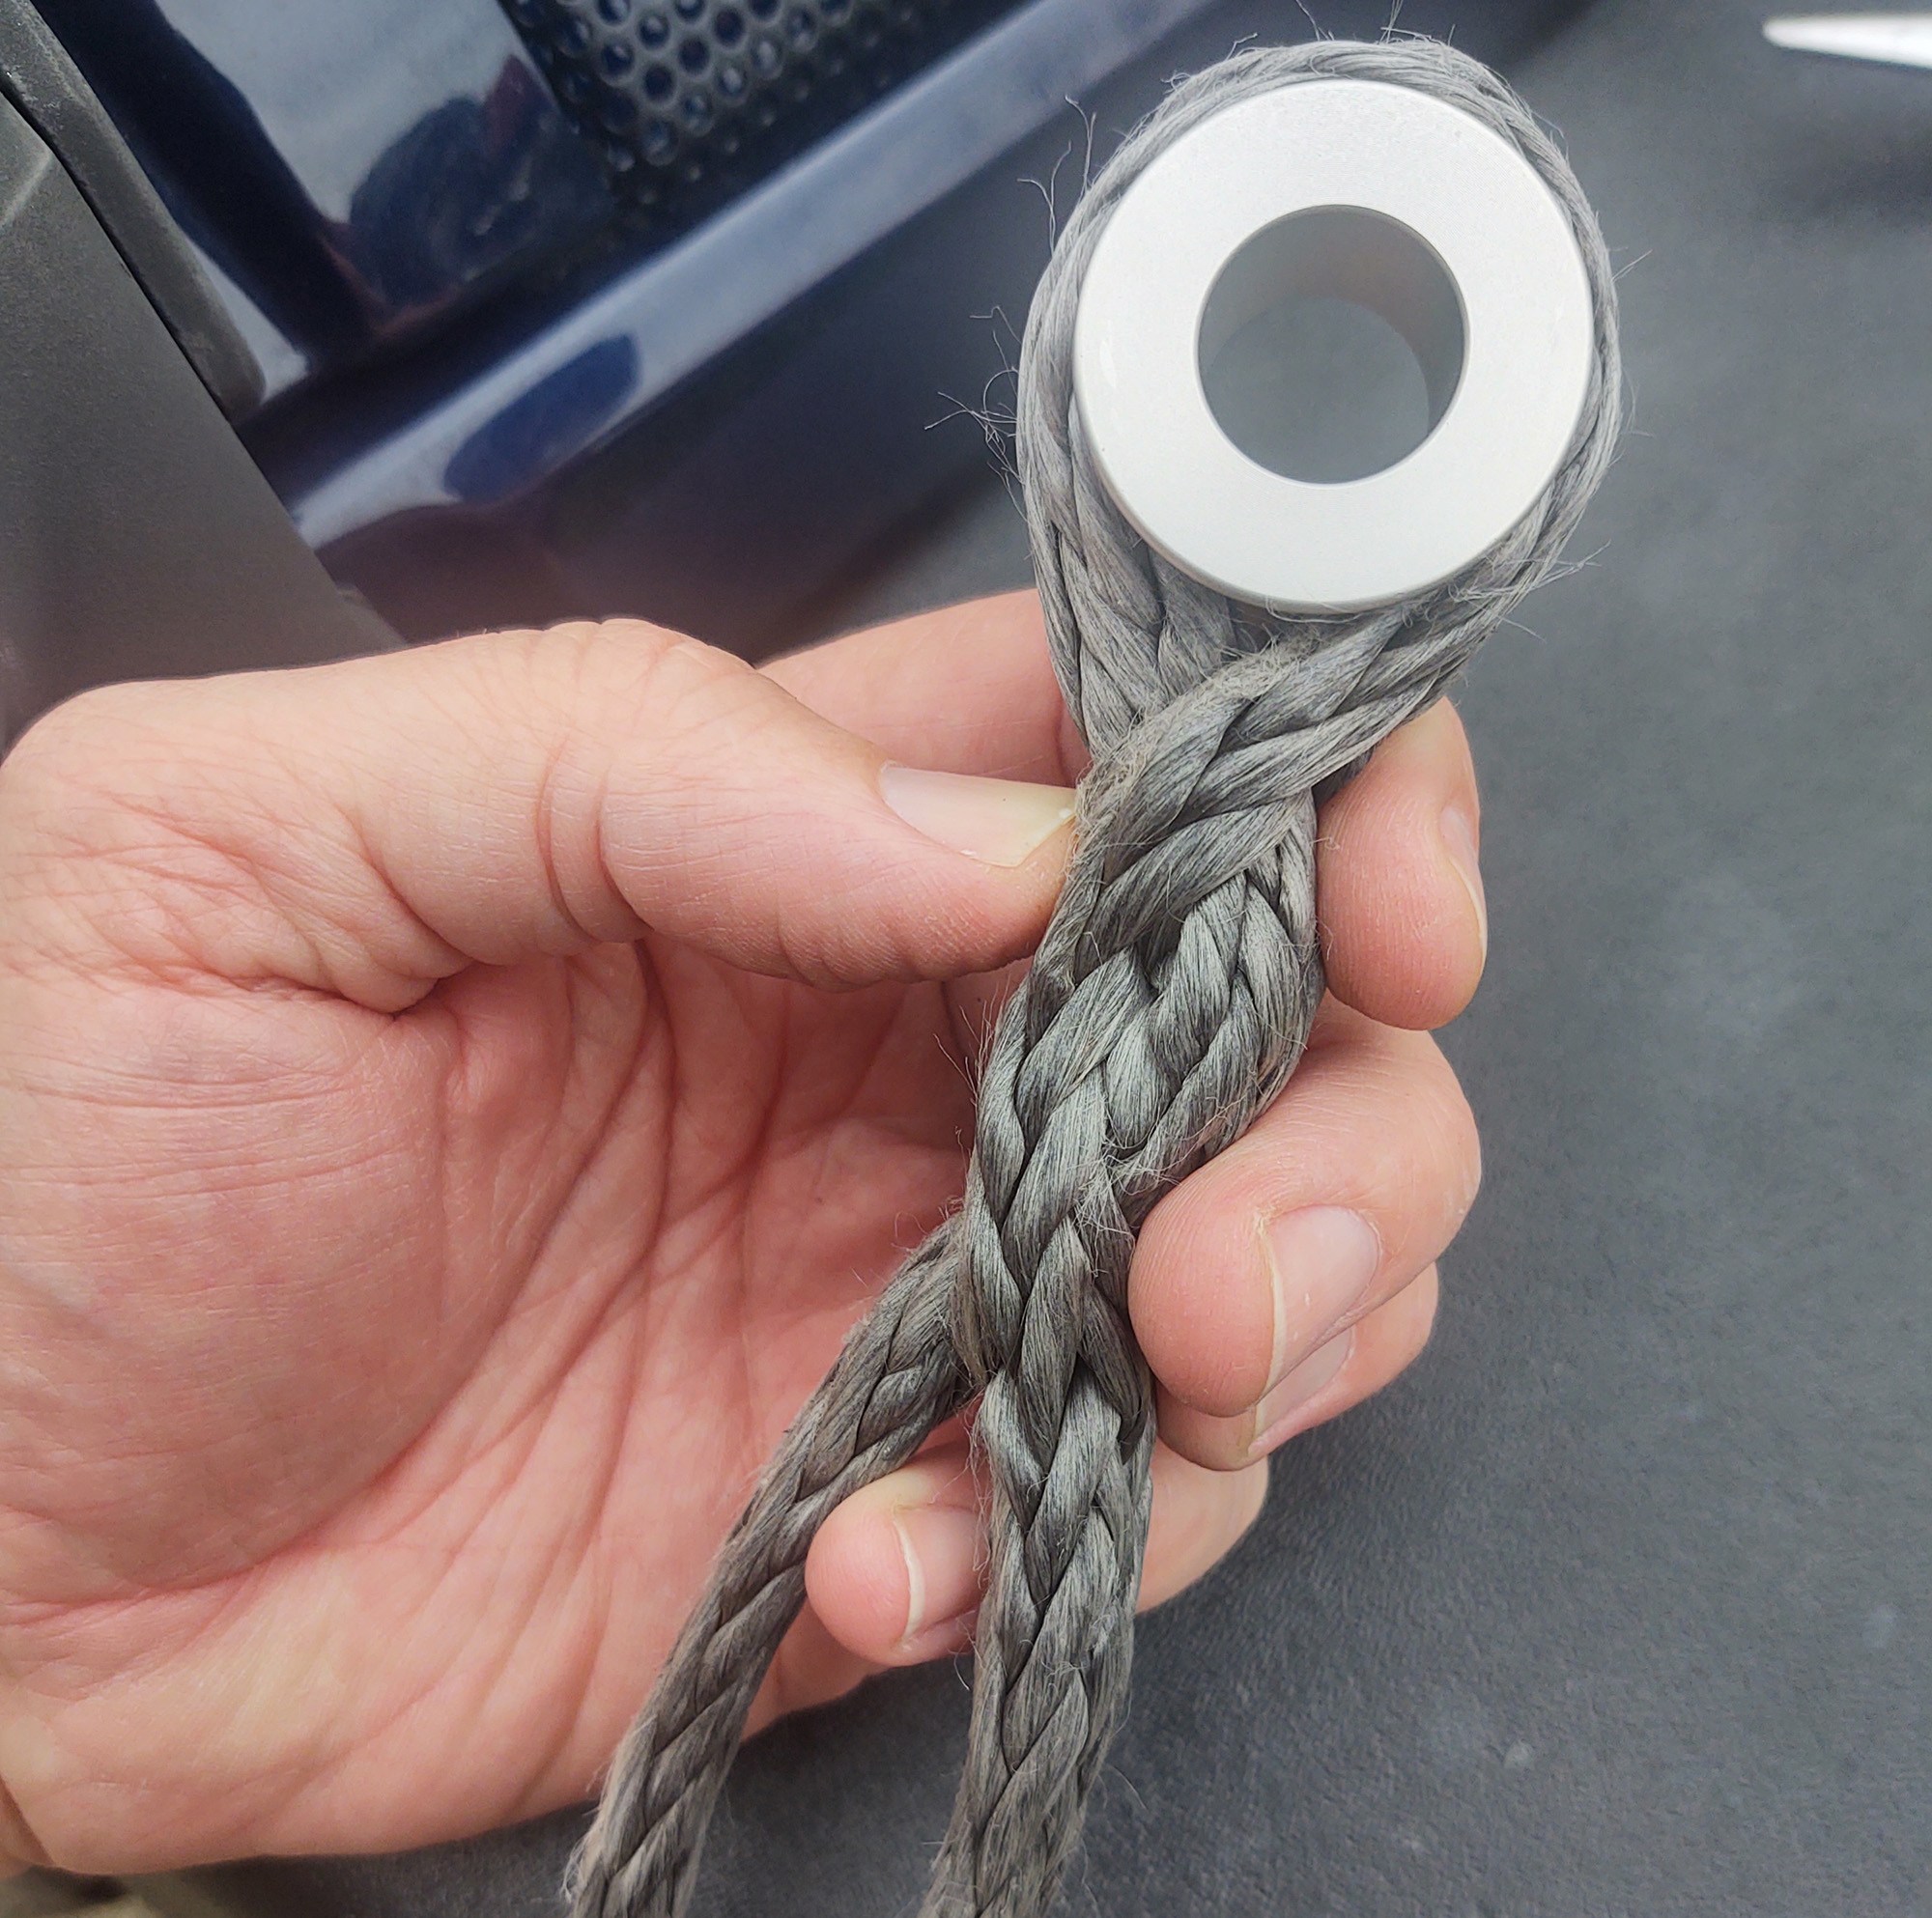
Now to start the tunneling operation through the core of the rope. Shortening the braid opens up the hollow core, so you can skip down a few braids as before and push the Fast Fid into the empty cavern.
Ever lose a drawstring in a hooded sweatshirt? Working the fid through the rope core is going to seem a little bit like that.
Actually, it might remind you of watching a snake eat.

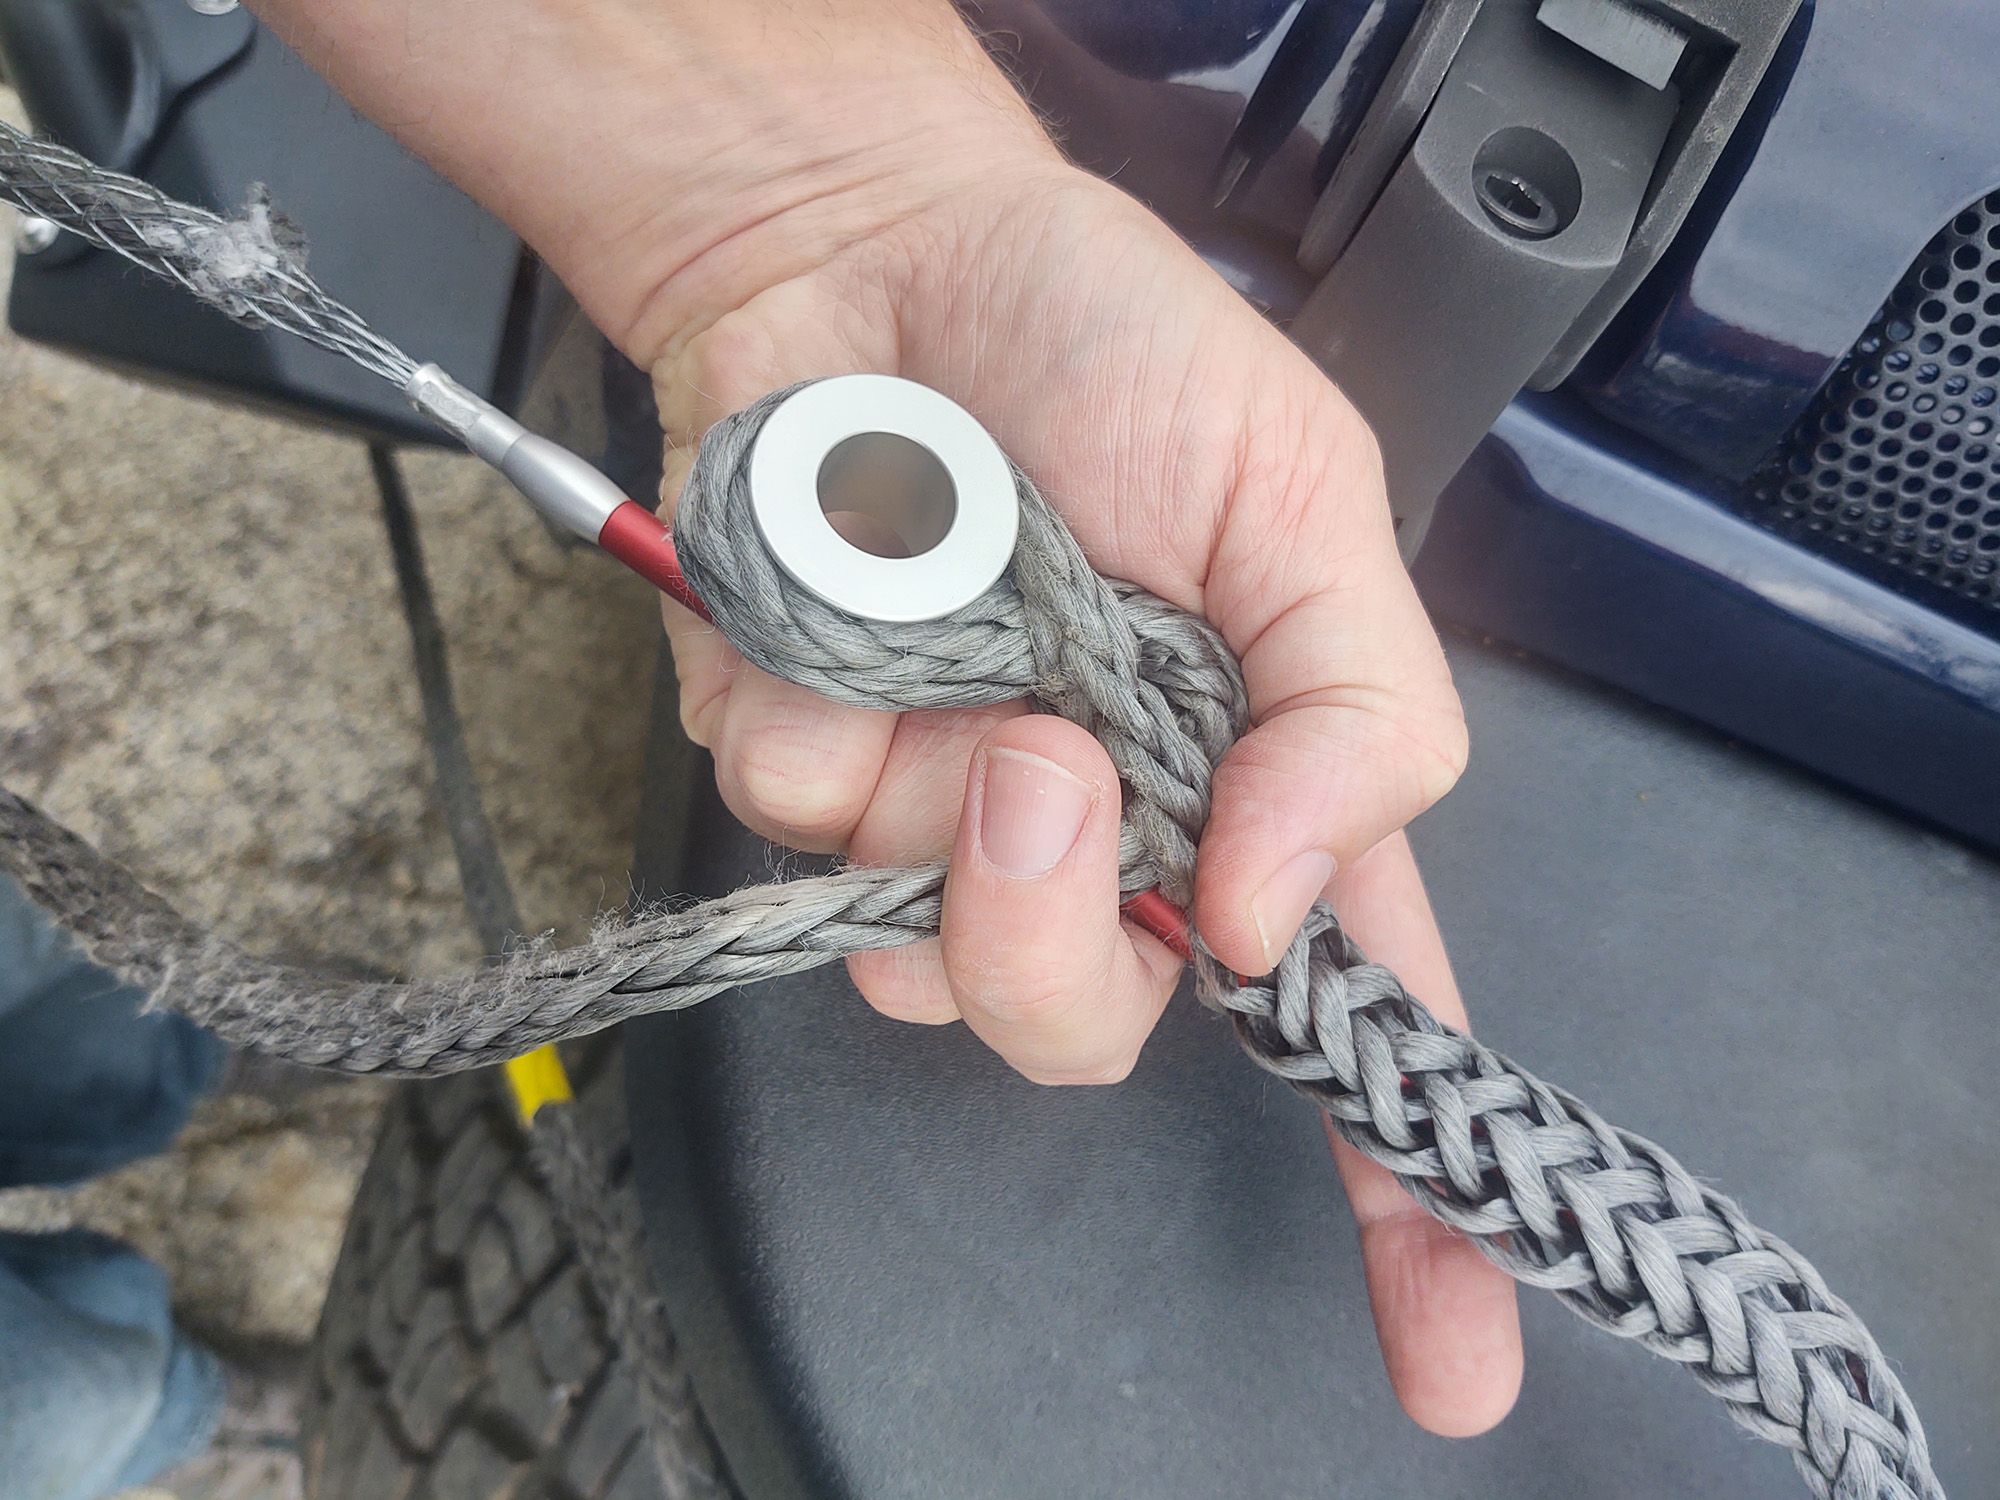
Either way, compressing the rope all the way to your exit mark will let you get the tag end completely buried.
When you reach your exit mark, push the point of the Fast Fid through the side of the rope.
Continue to pull the tag end through the exit spot until the end of the wire grip is outside.
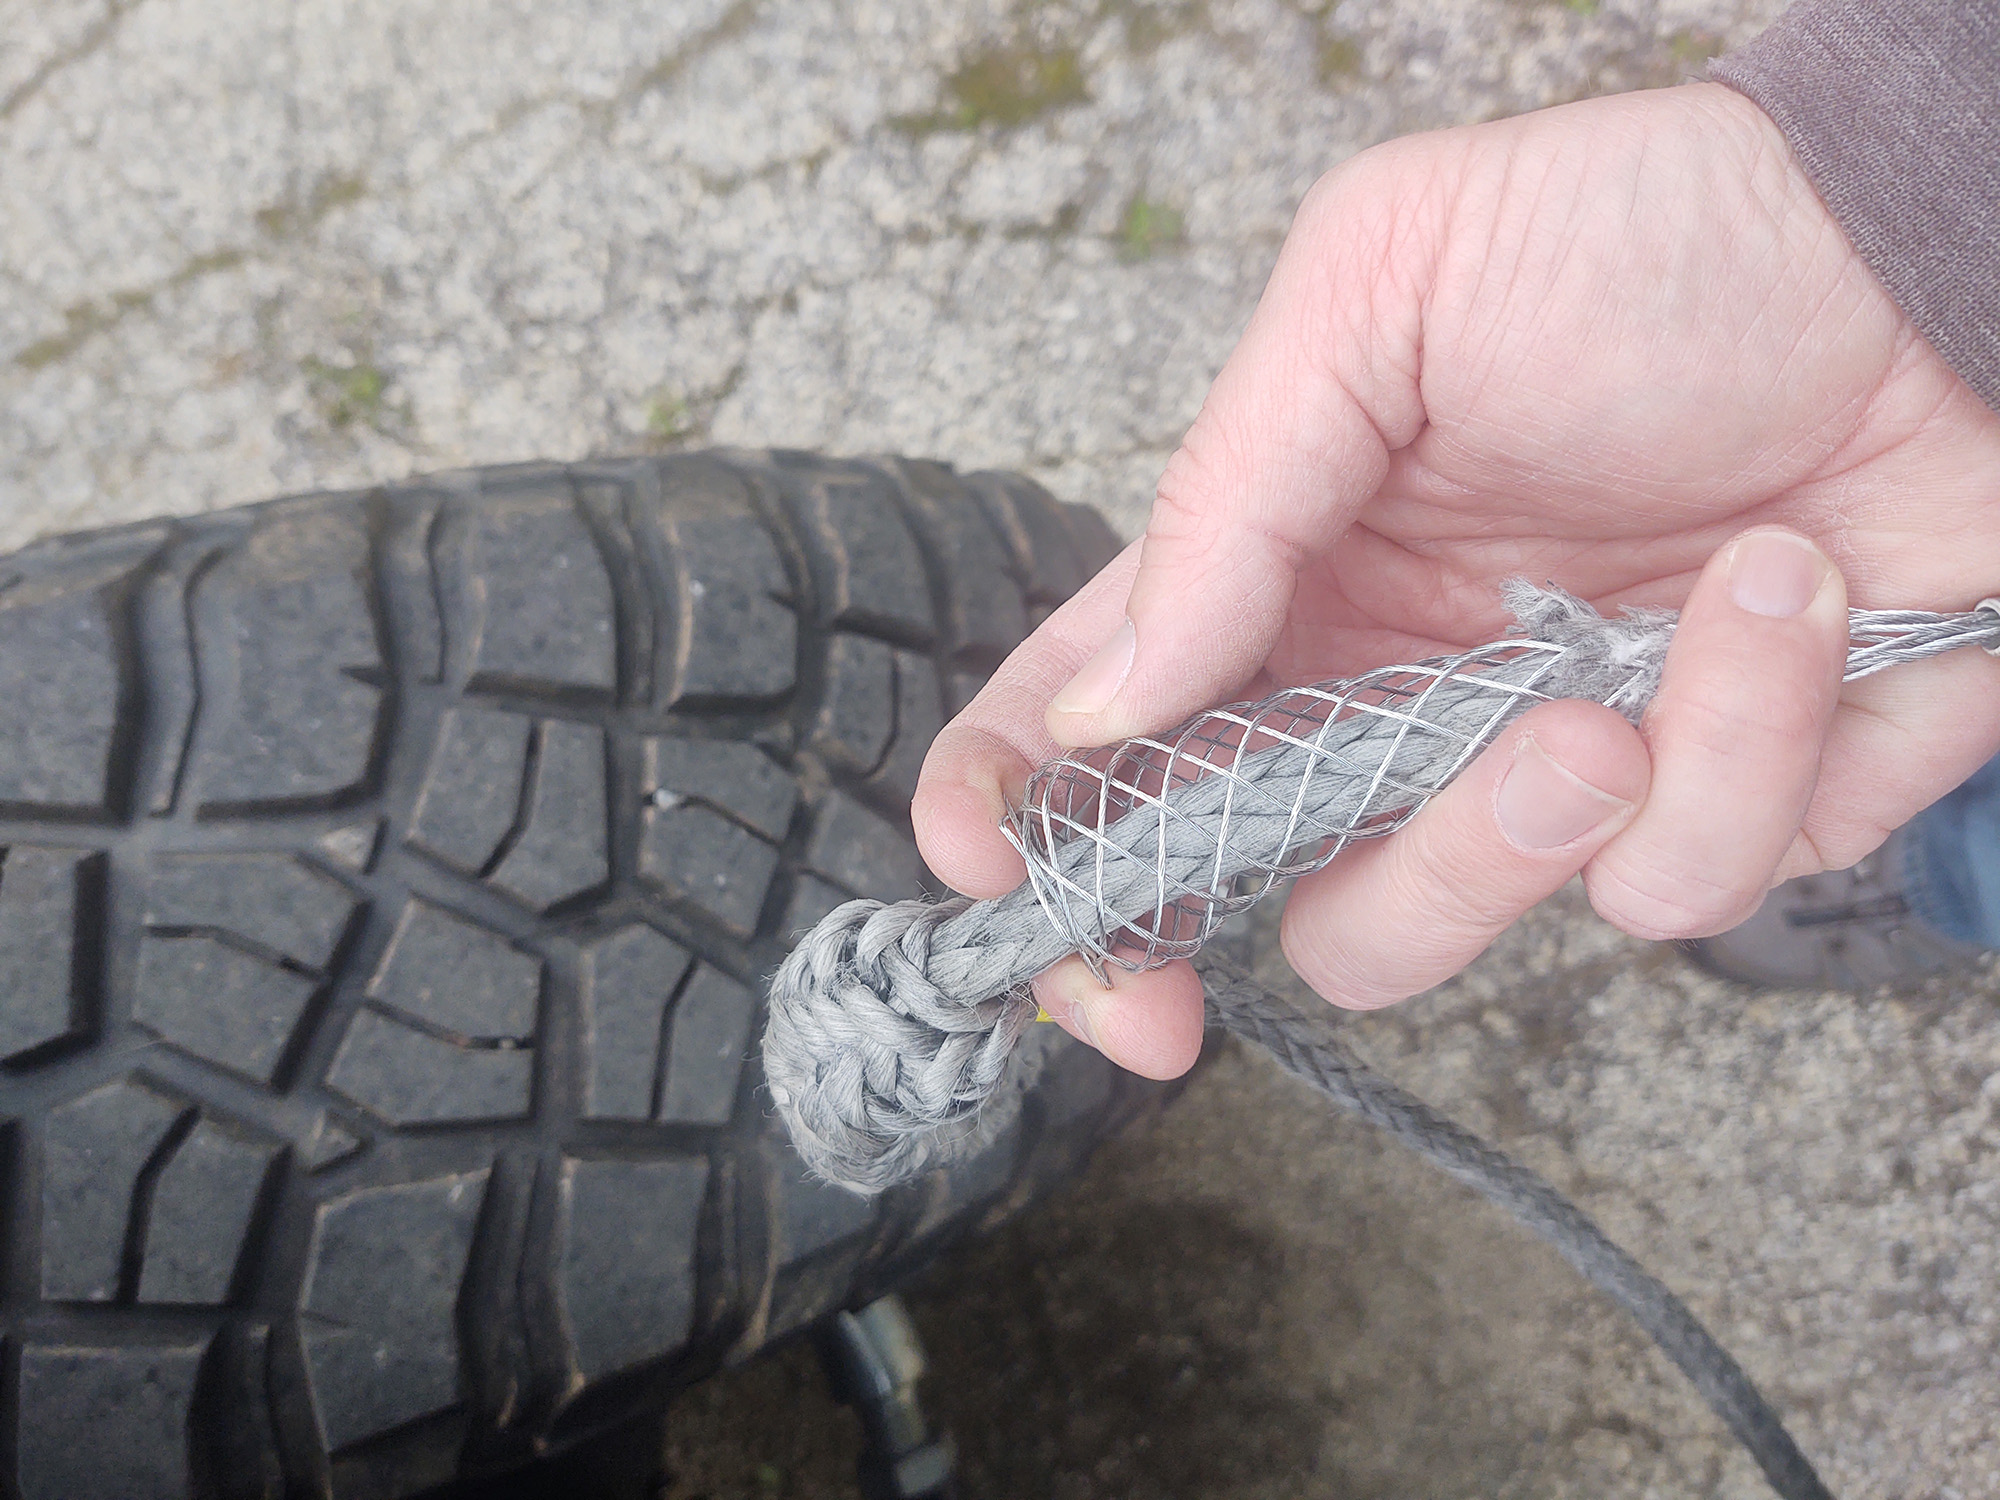
Compress the wire grip to release the tag end of the rope—don’t worry about how much you pulled through, it will disappear as you stretch the rope back in.
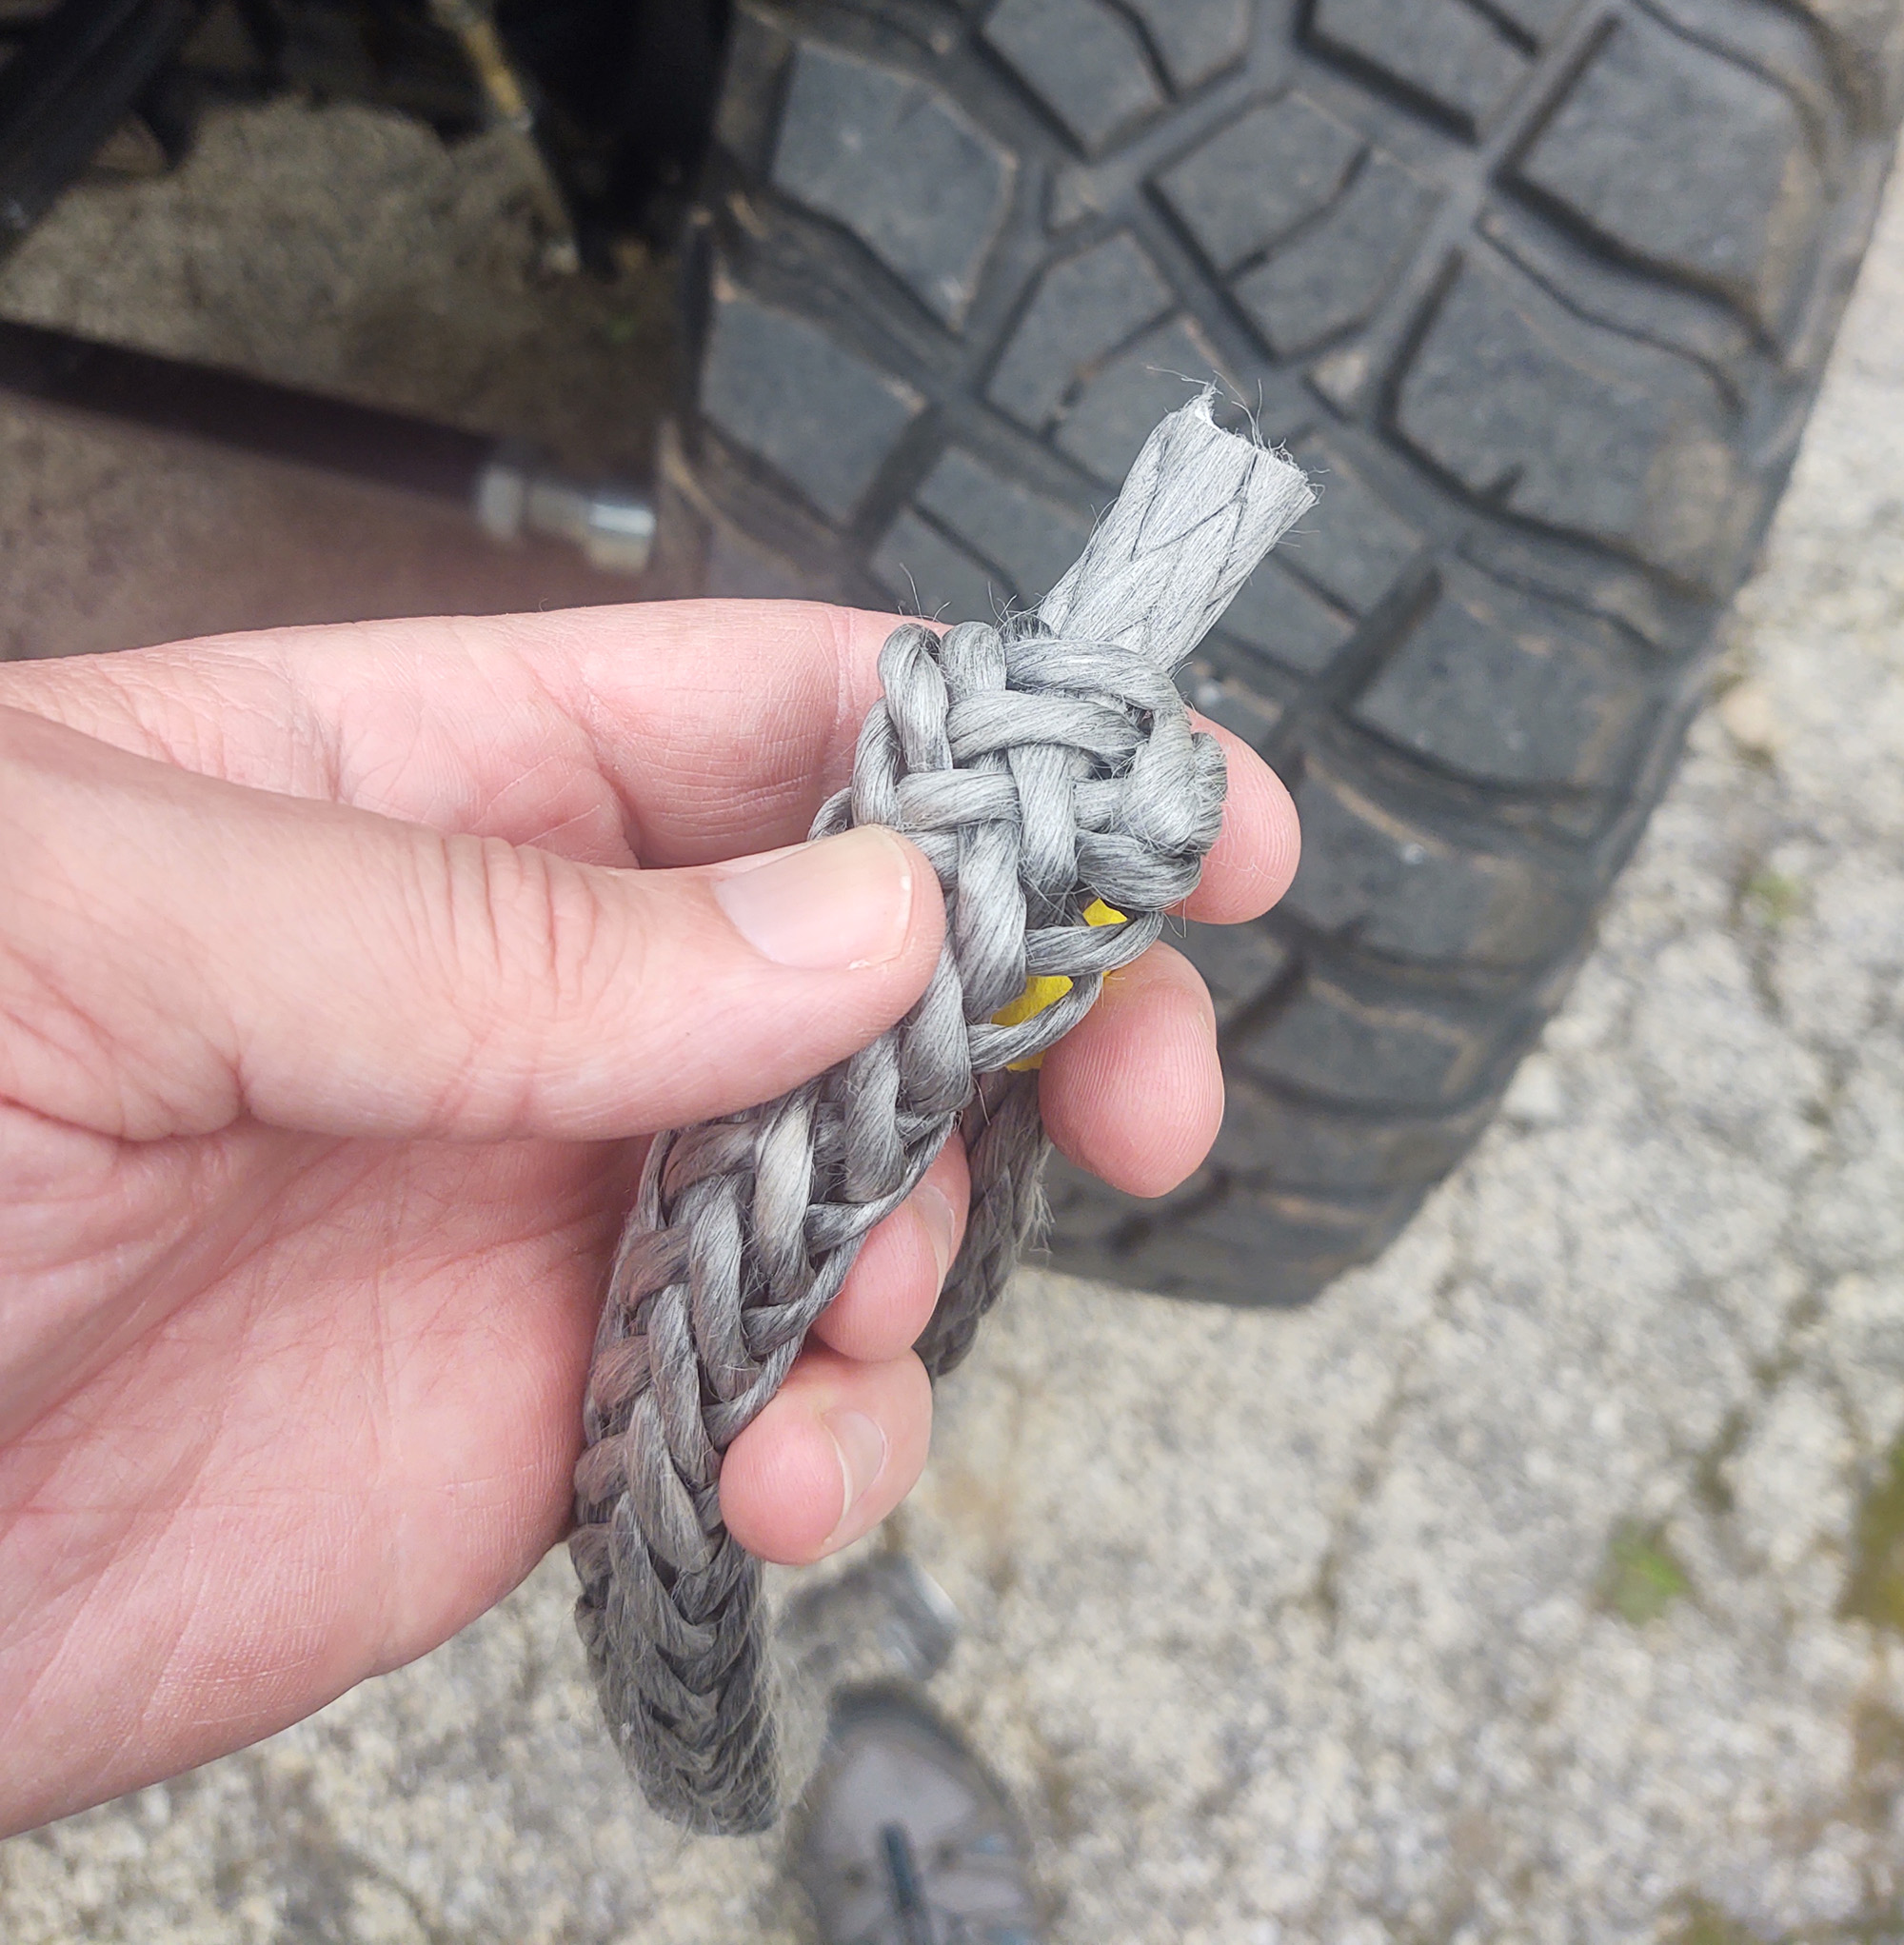
The tag end was a little shy of the original exit mark once I was done with the stretch, but was still 23” of buried length, or just about the center of the recommended specification range.
Now, this repair would be fine to get you out of the woods, but for the strongest repair possible, the tag end of the rope should be tapered before you pull it back in. With a non-tapered end, your rope splice strength could be reduced by up to 10%. Considering tapering the end only takes a few more minutes and a little extra work, I would recommend it if you have the time, but you could always do it later if needed.
Start by taking the last 8-10” of the tag end and marking opposing strands of the rope. Then move down a few inches and mark another pair. Then do a third a few more inches past that last mark.
These strands will be removed from the braid and cut off at the marks.
Removing this volume of the rope allows the end to have a far more gradient profile, rather than a blunt end.
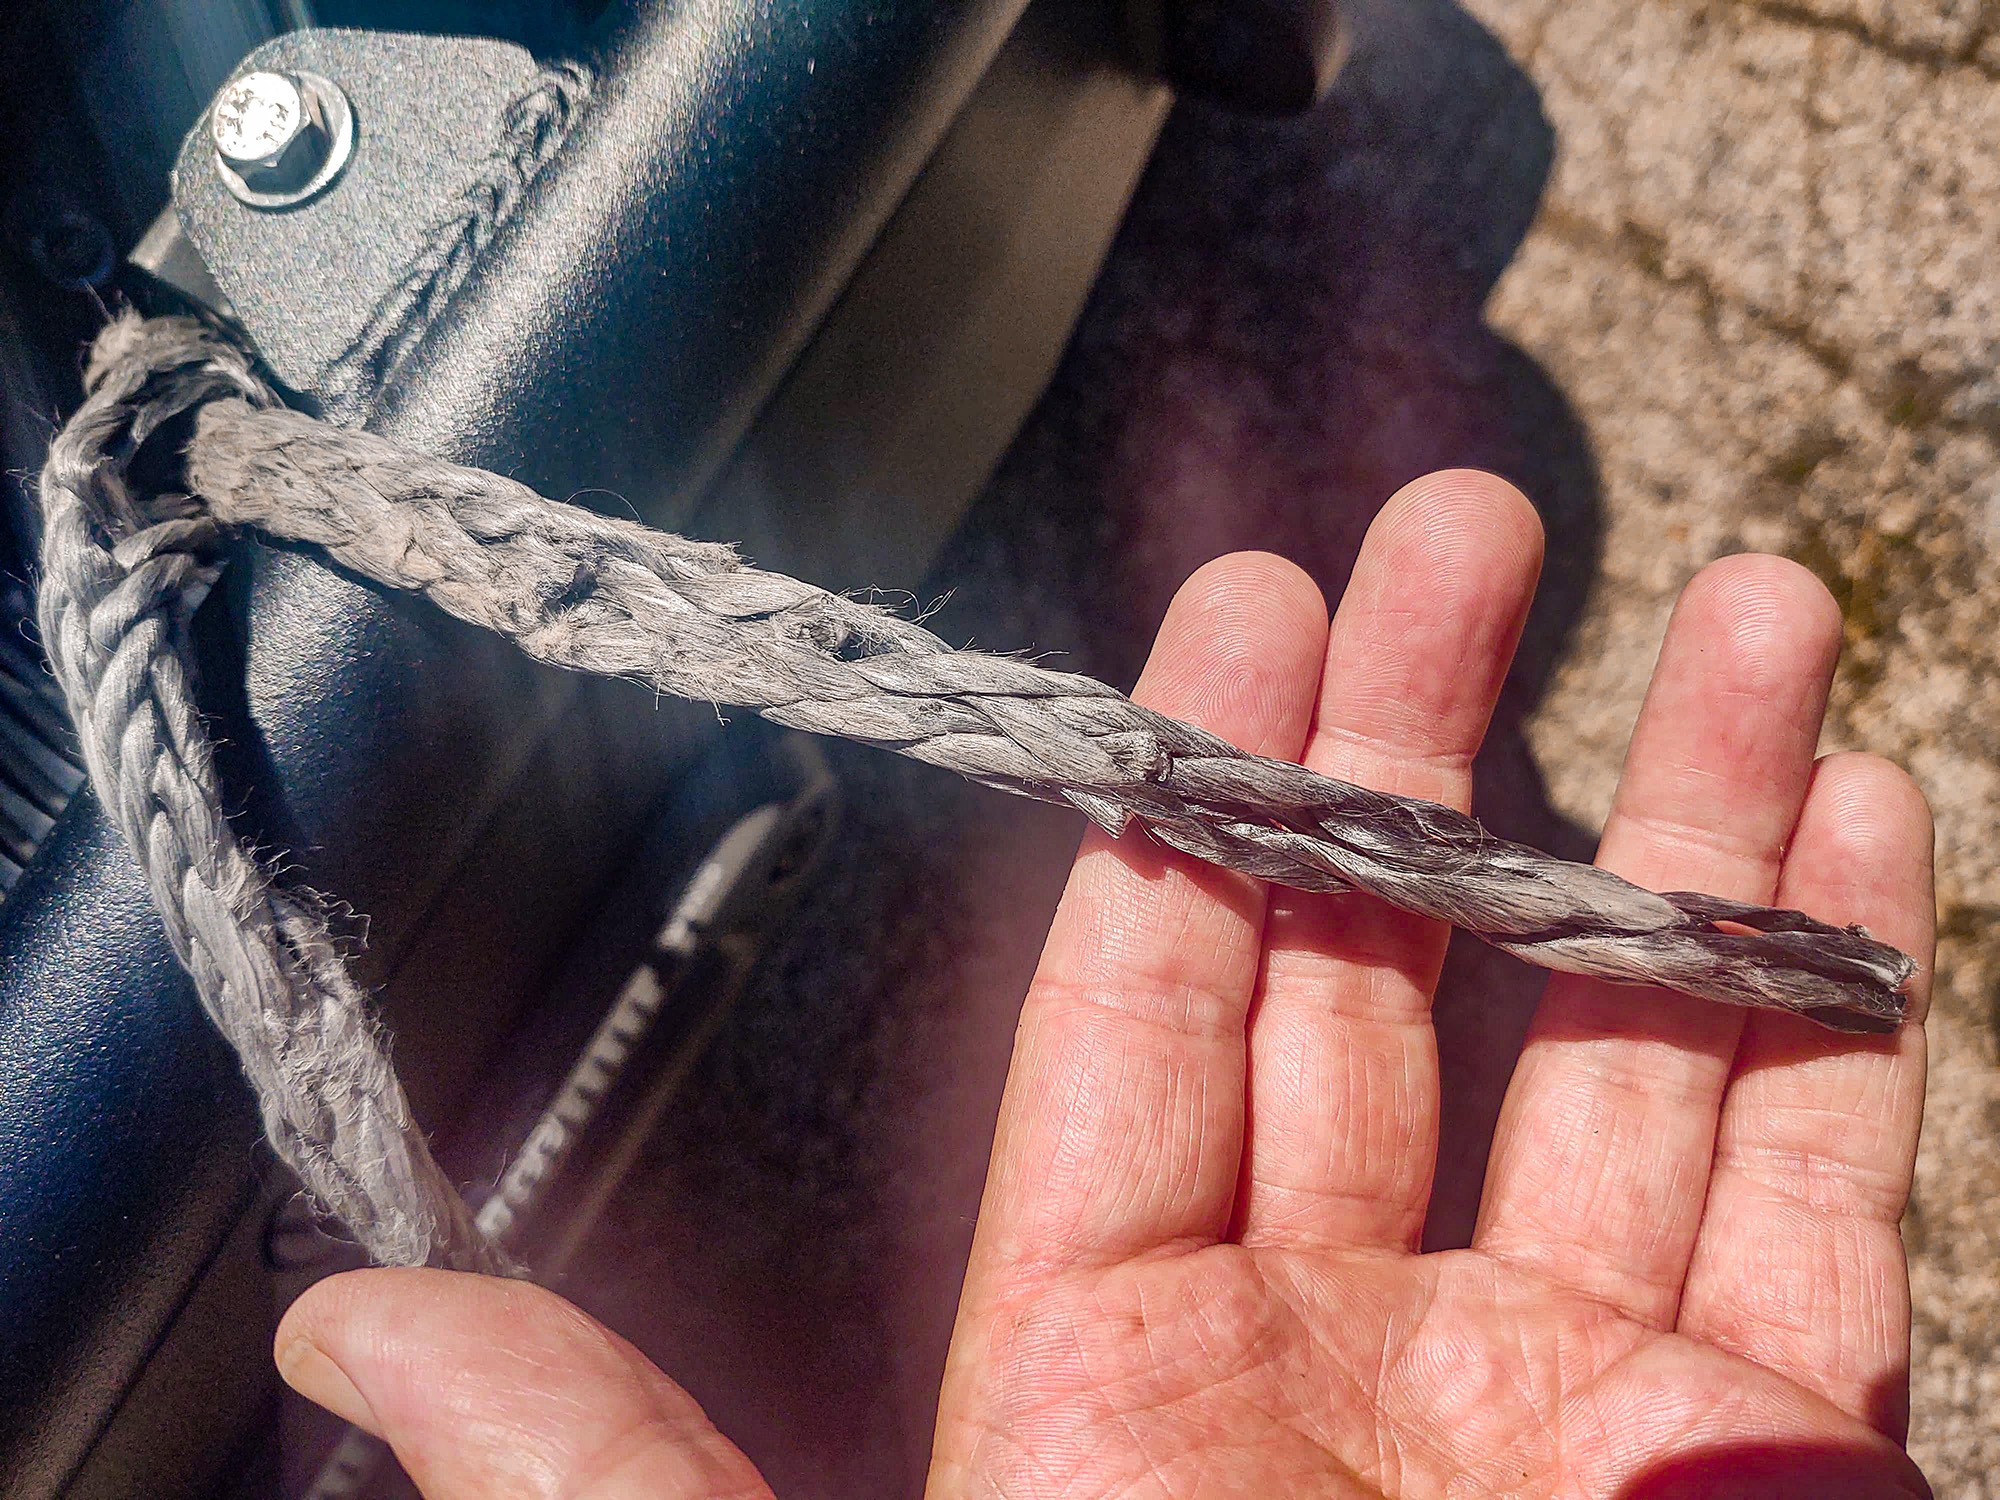
When completed, the rope looks like this.
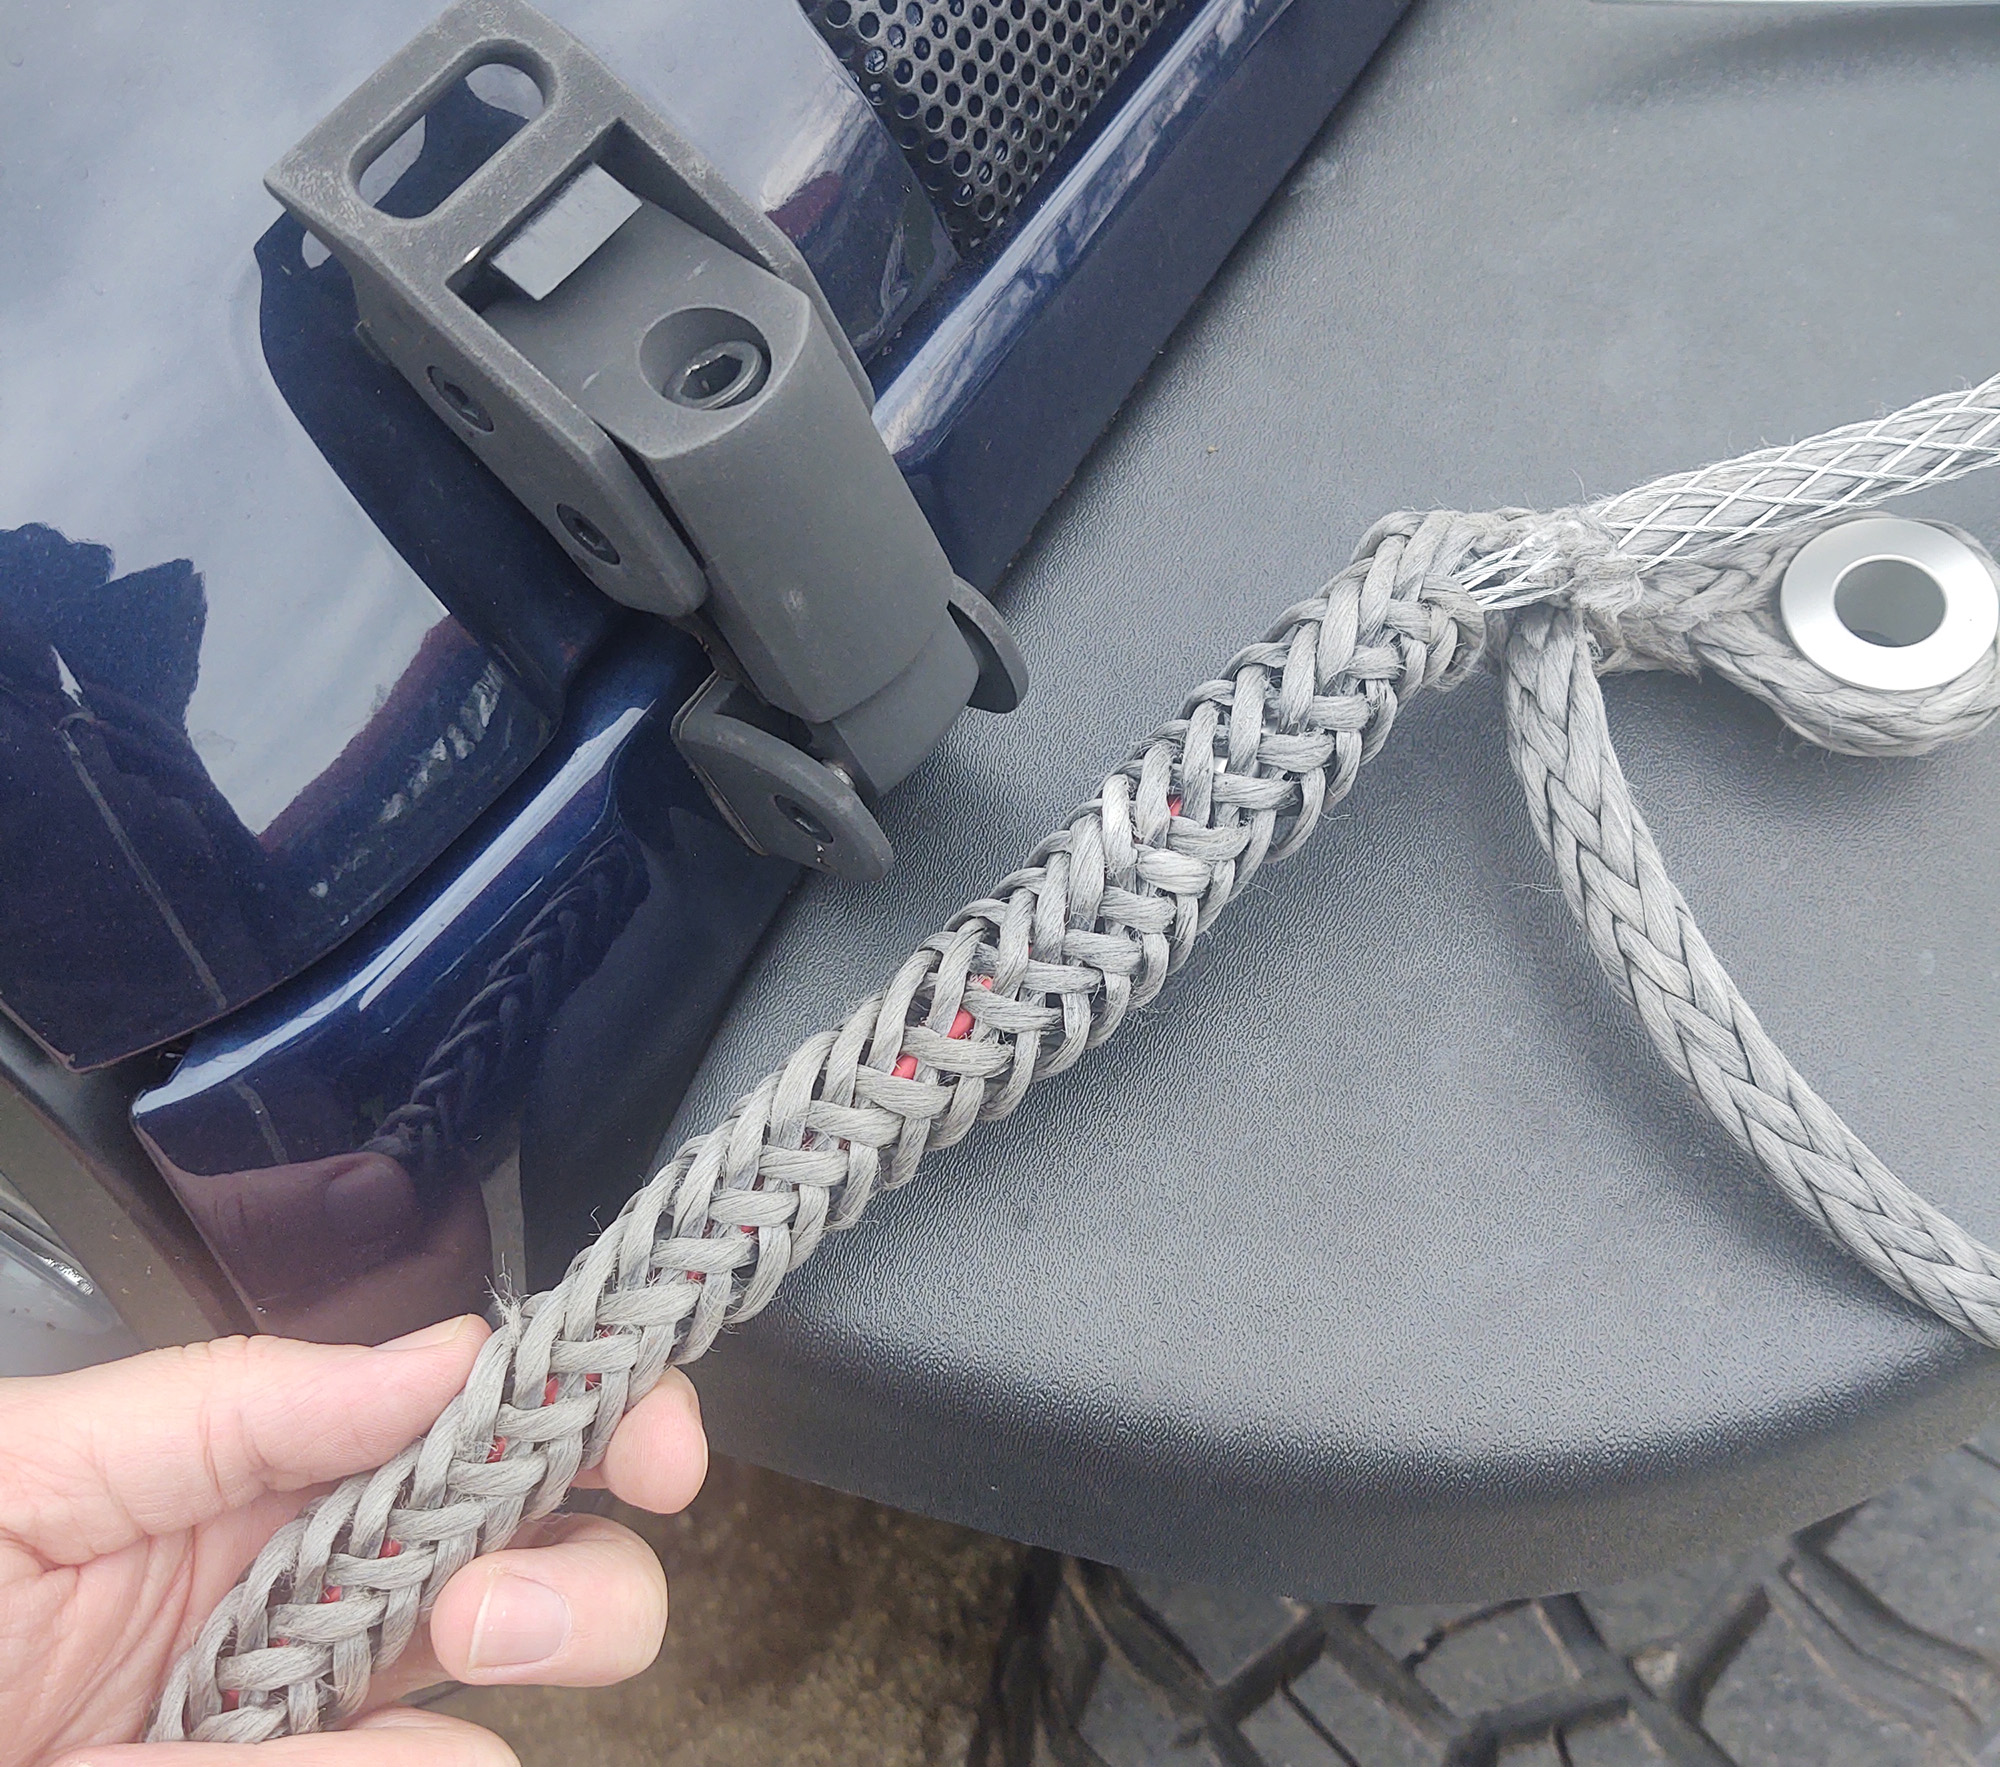
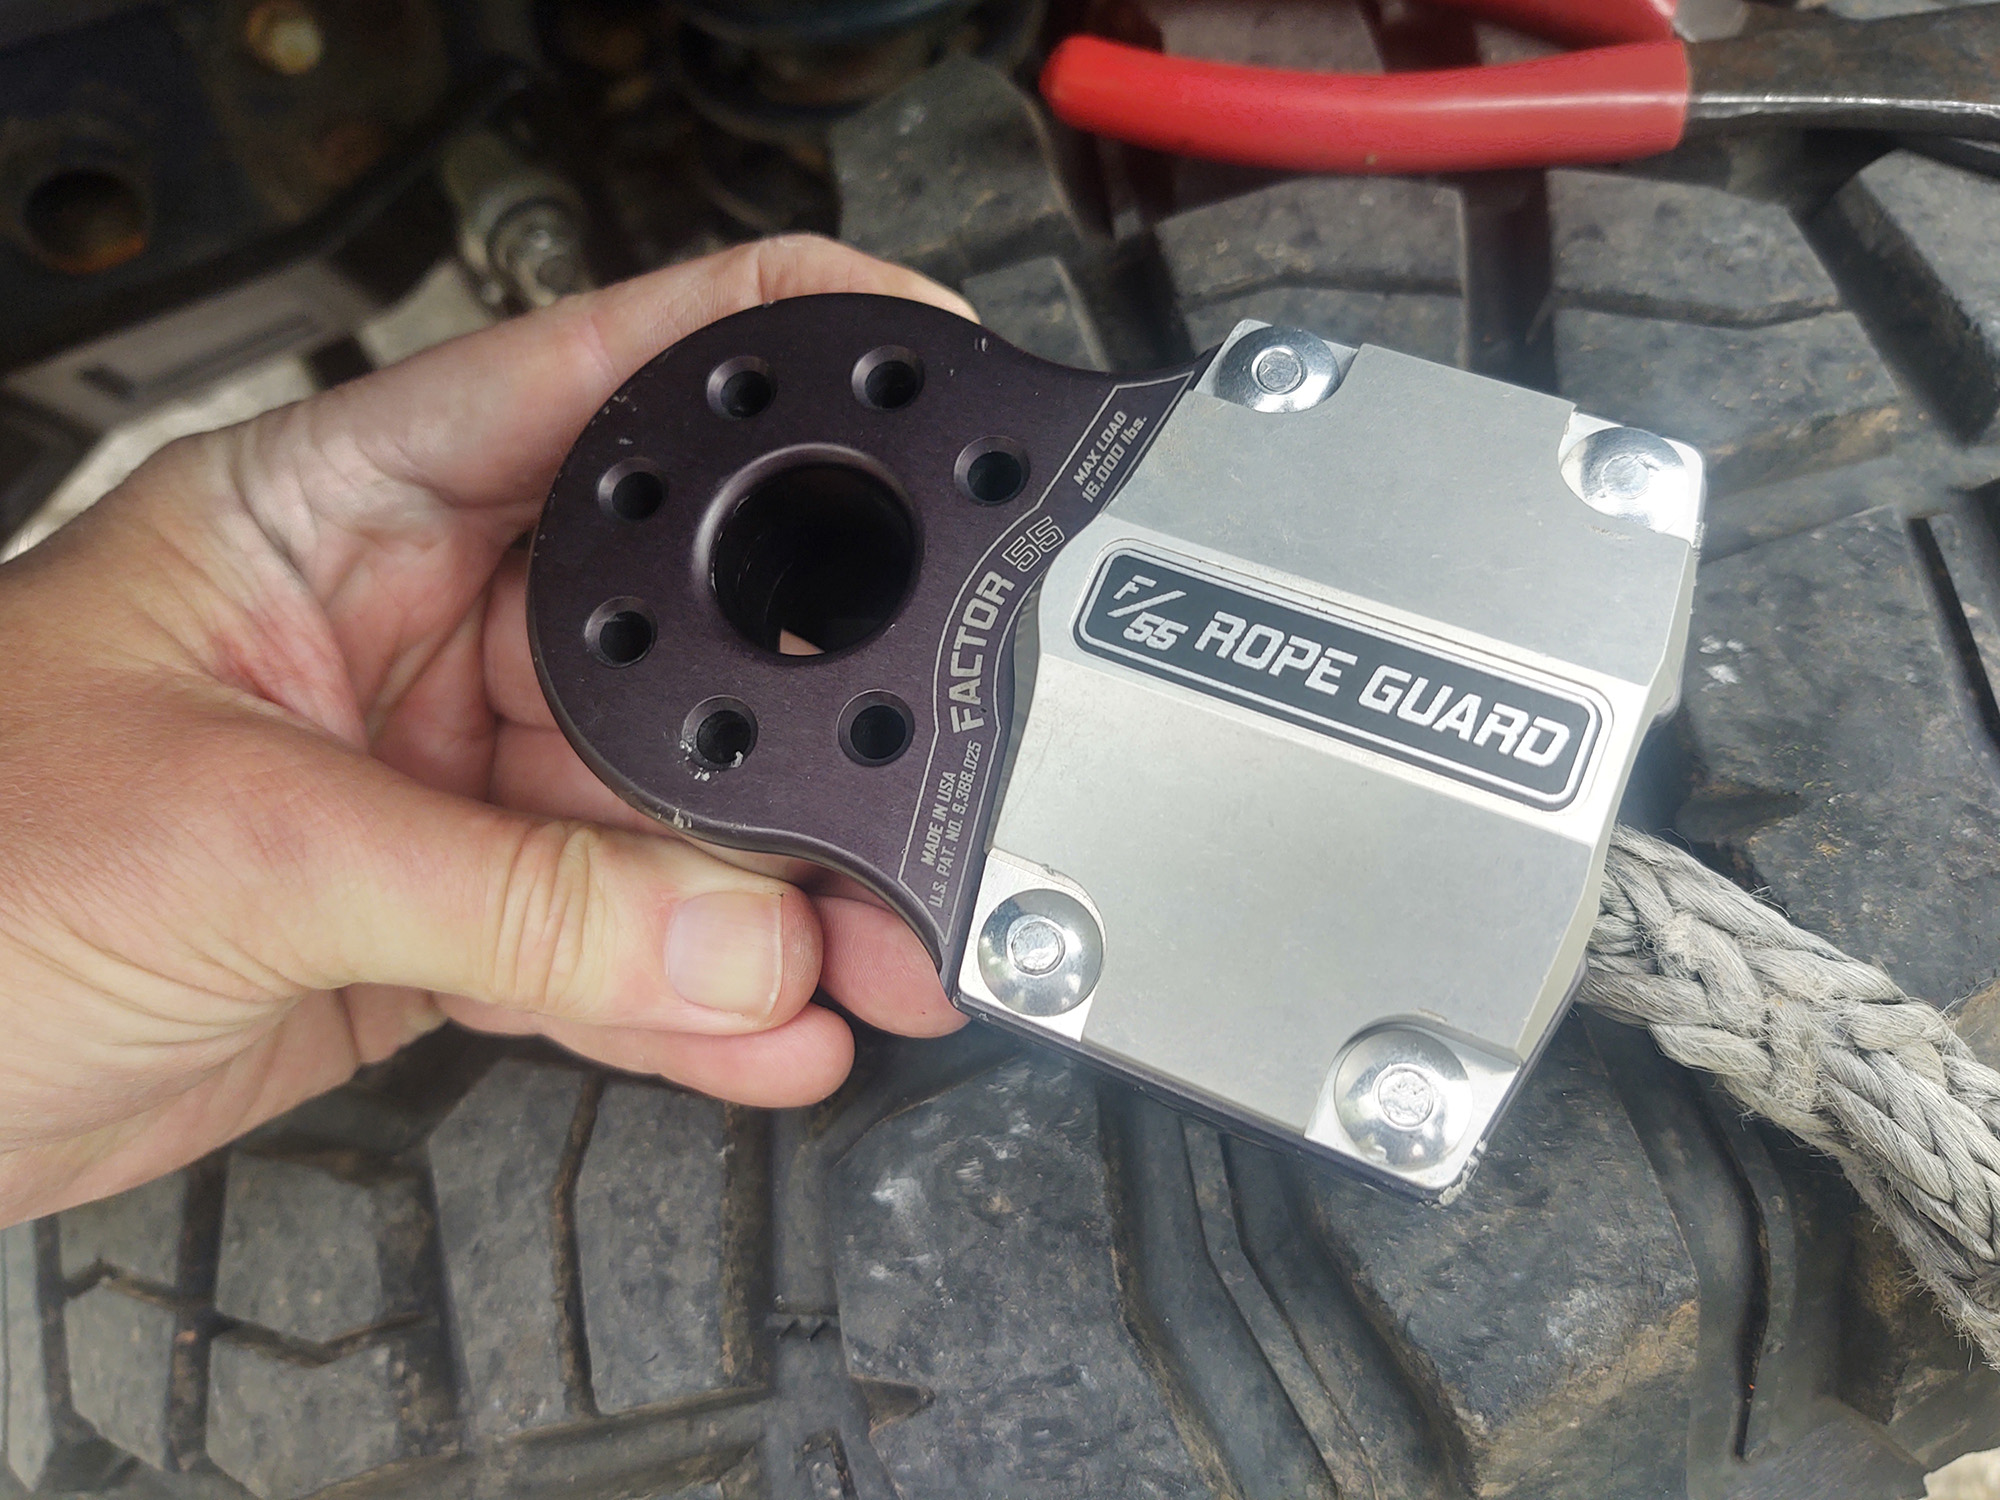
Now, let's move on to the RopeGuard installation. The FlatLink itself keeps your winch rope and hook from flapping around in the breeze, allowing it to stay tight against your fairlead. In my case, I already had both this and the Factor 55 Hawse Fairlead 1.0 in use, so my rope was already almost completely inside my Hyline Offroad bumper.
The more you protect your synthetic rope from damage, both physical and in the form of UV sunlight, the longer it will last. That’s not just a marketing message, it's a well proven fact.
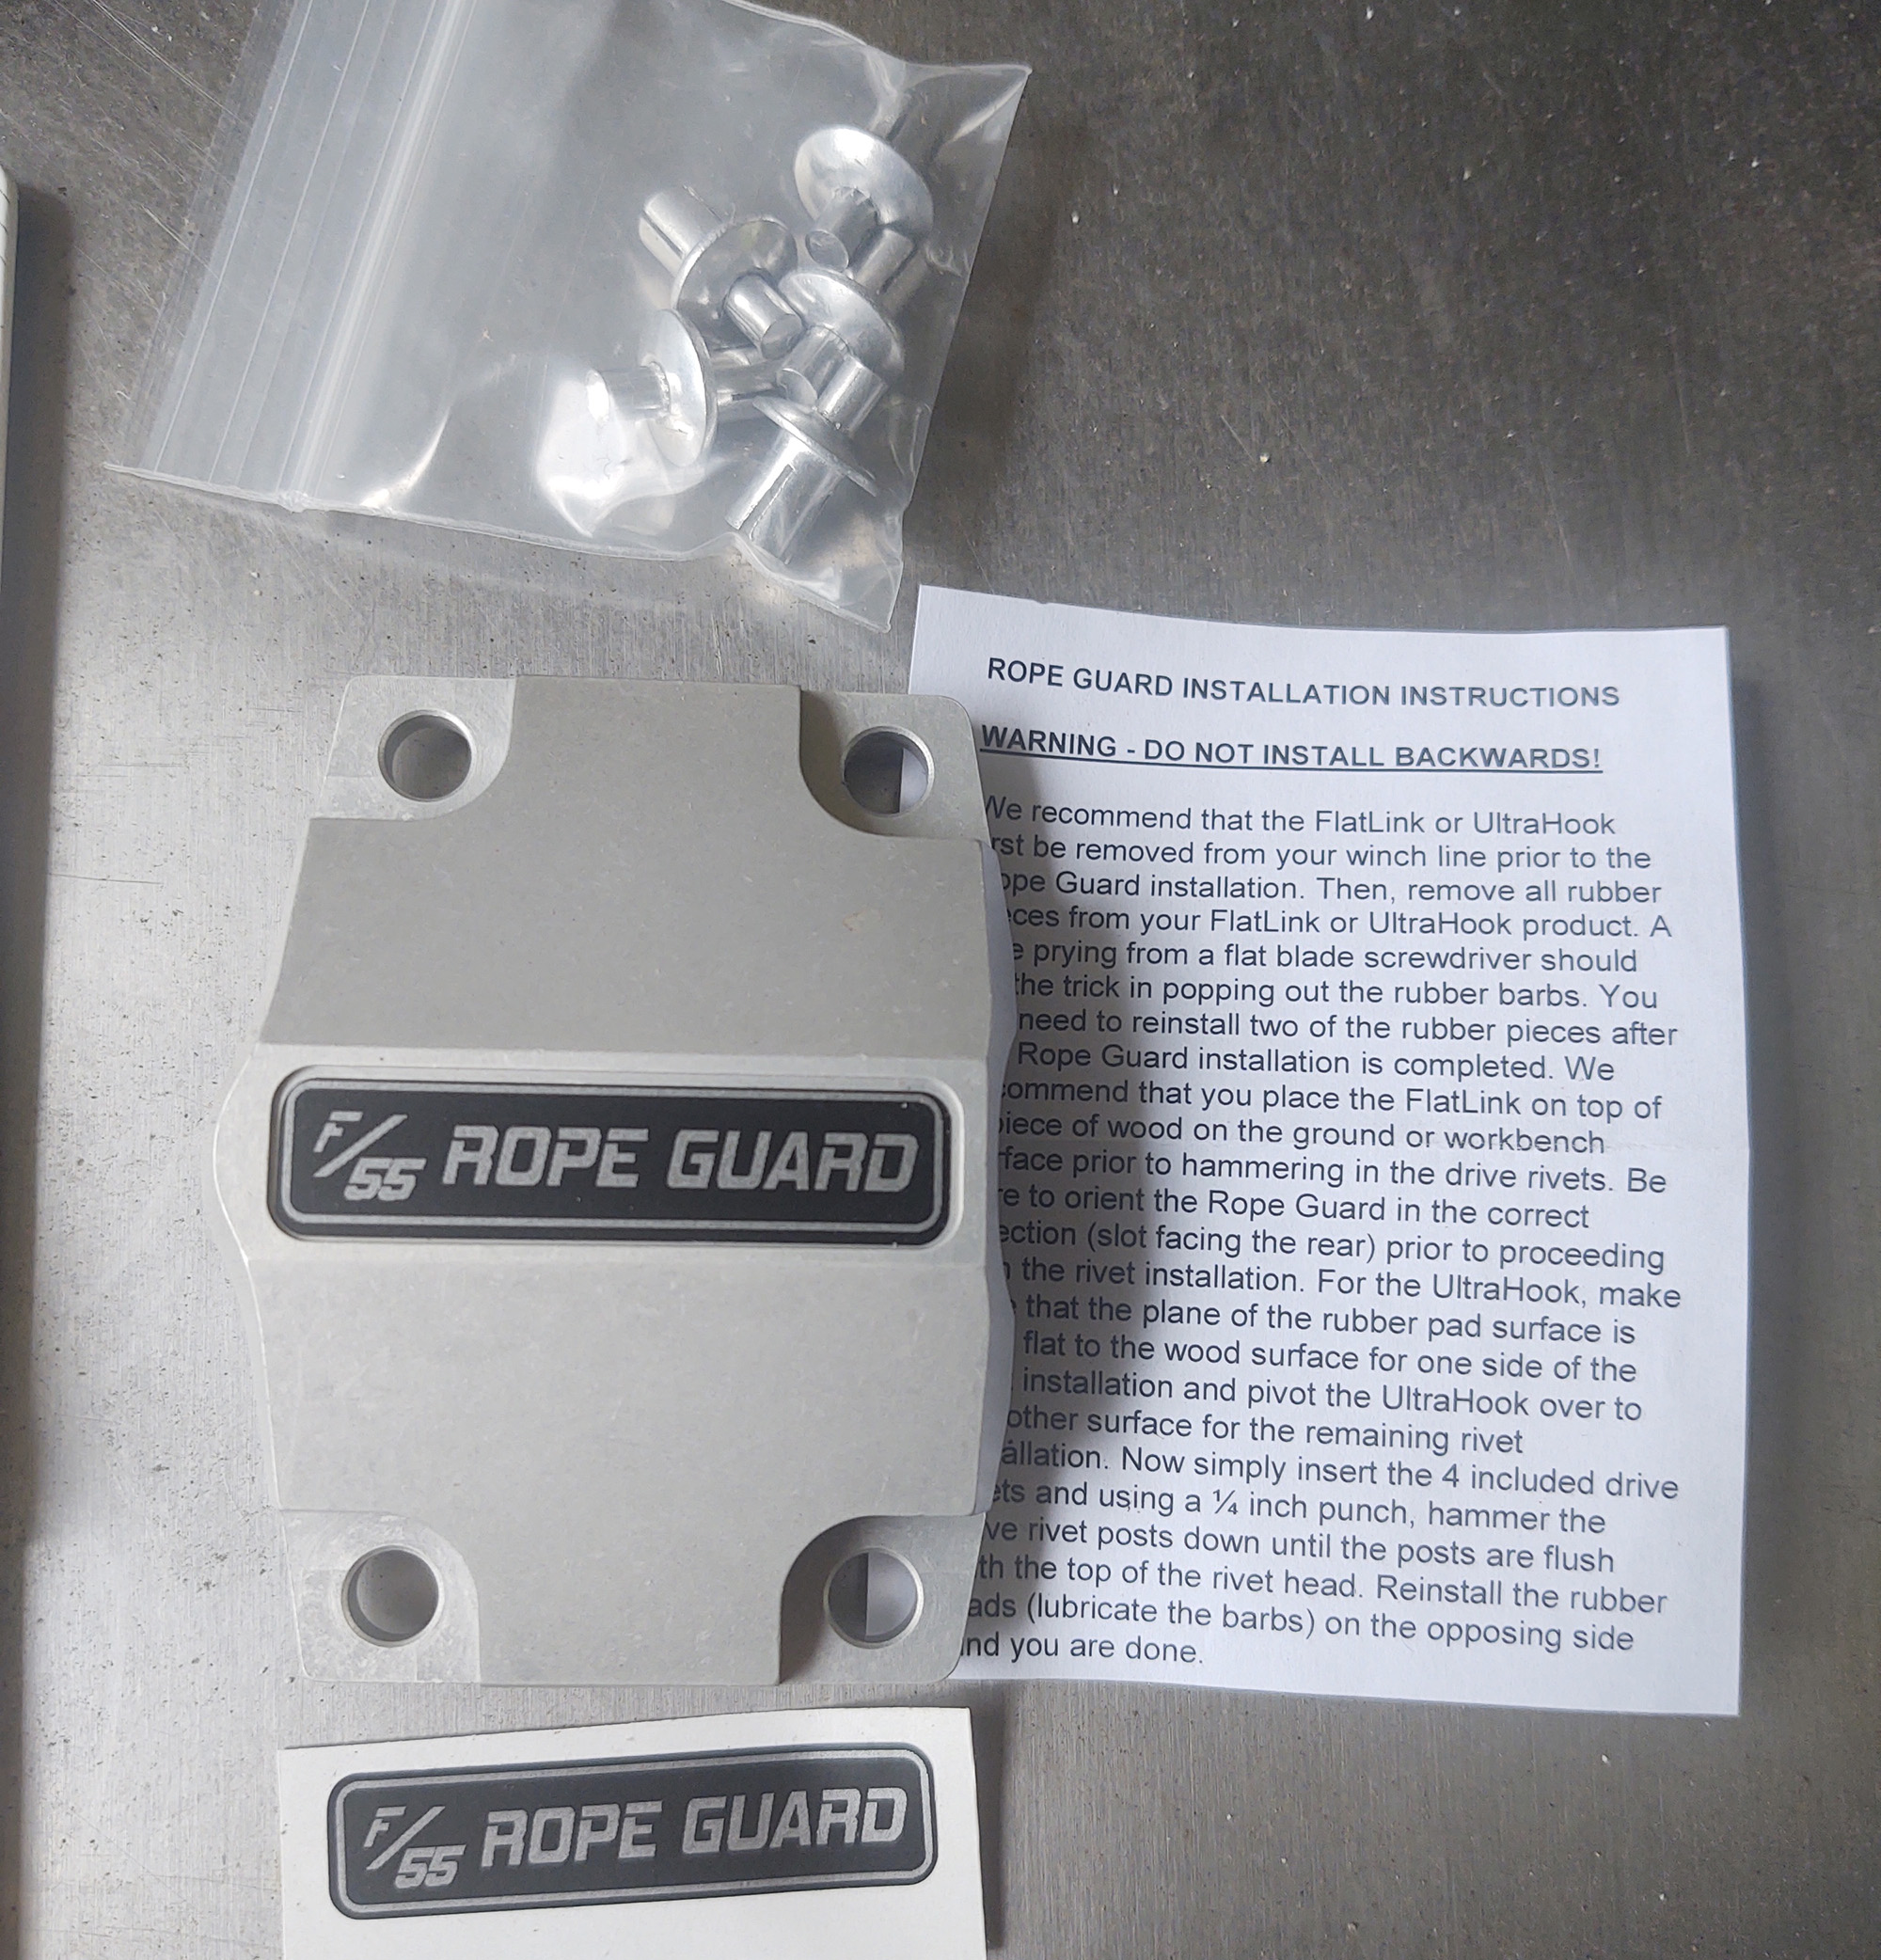
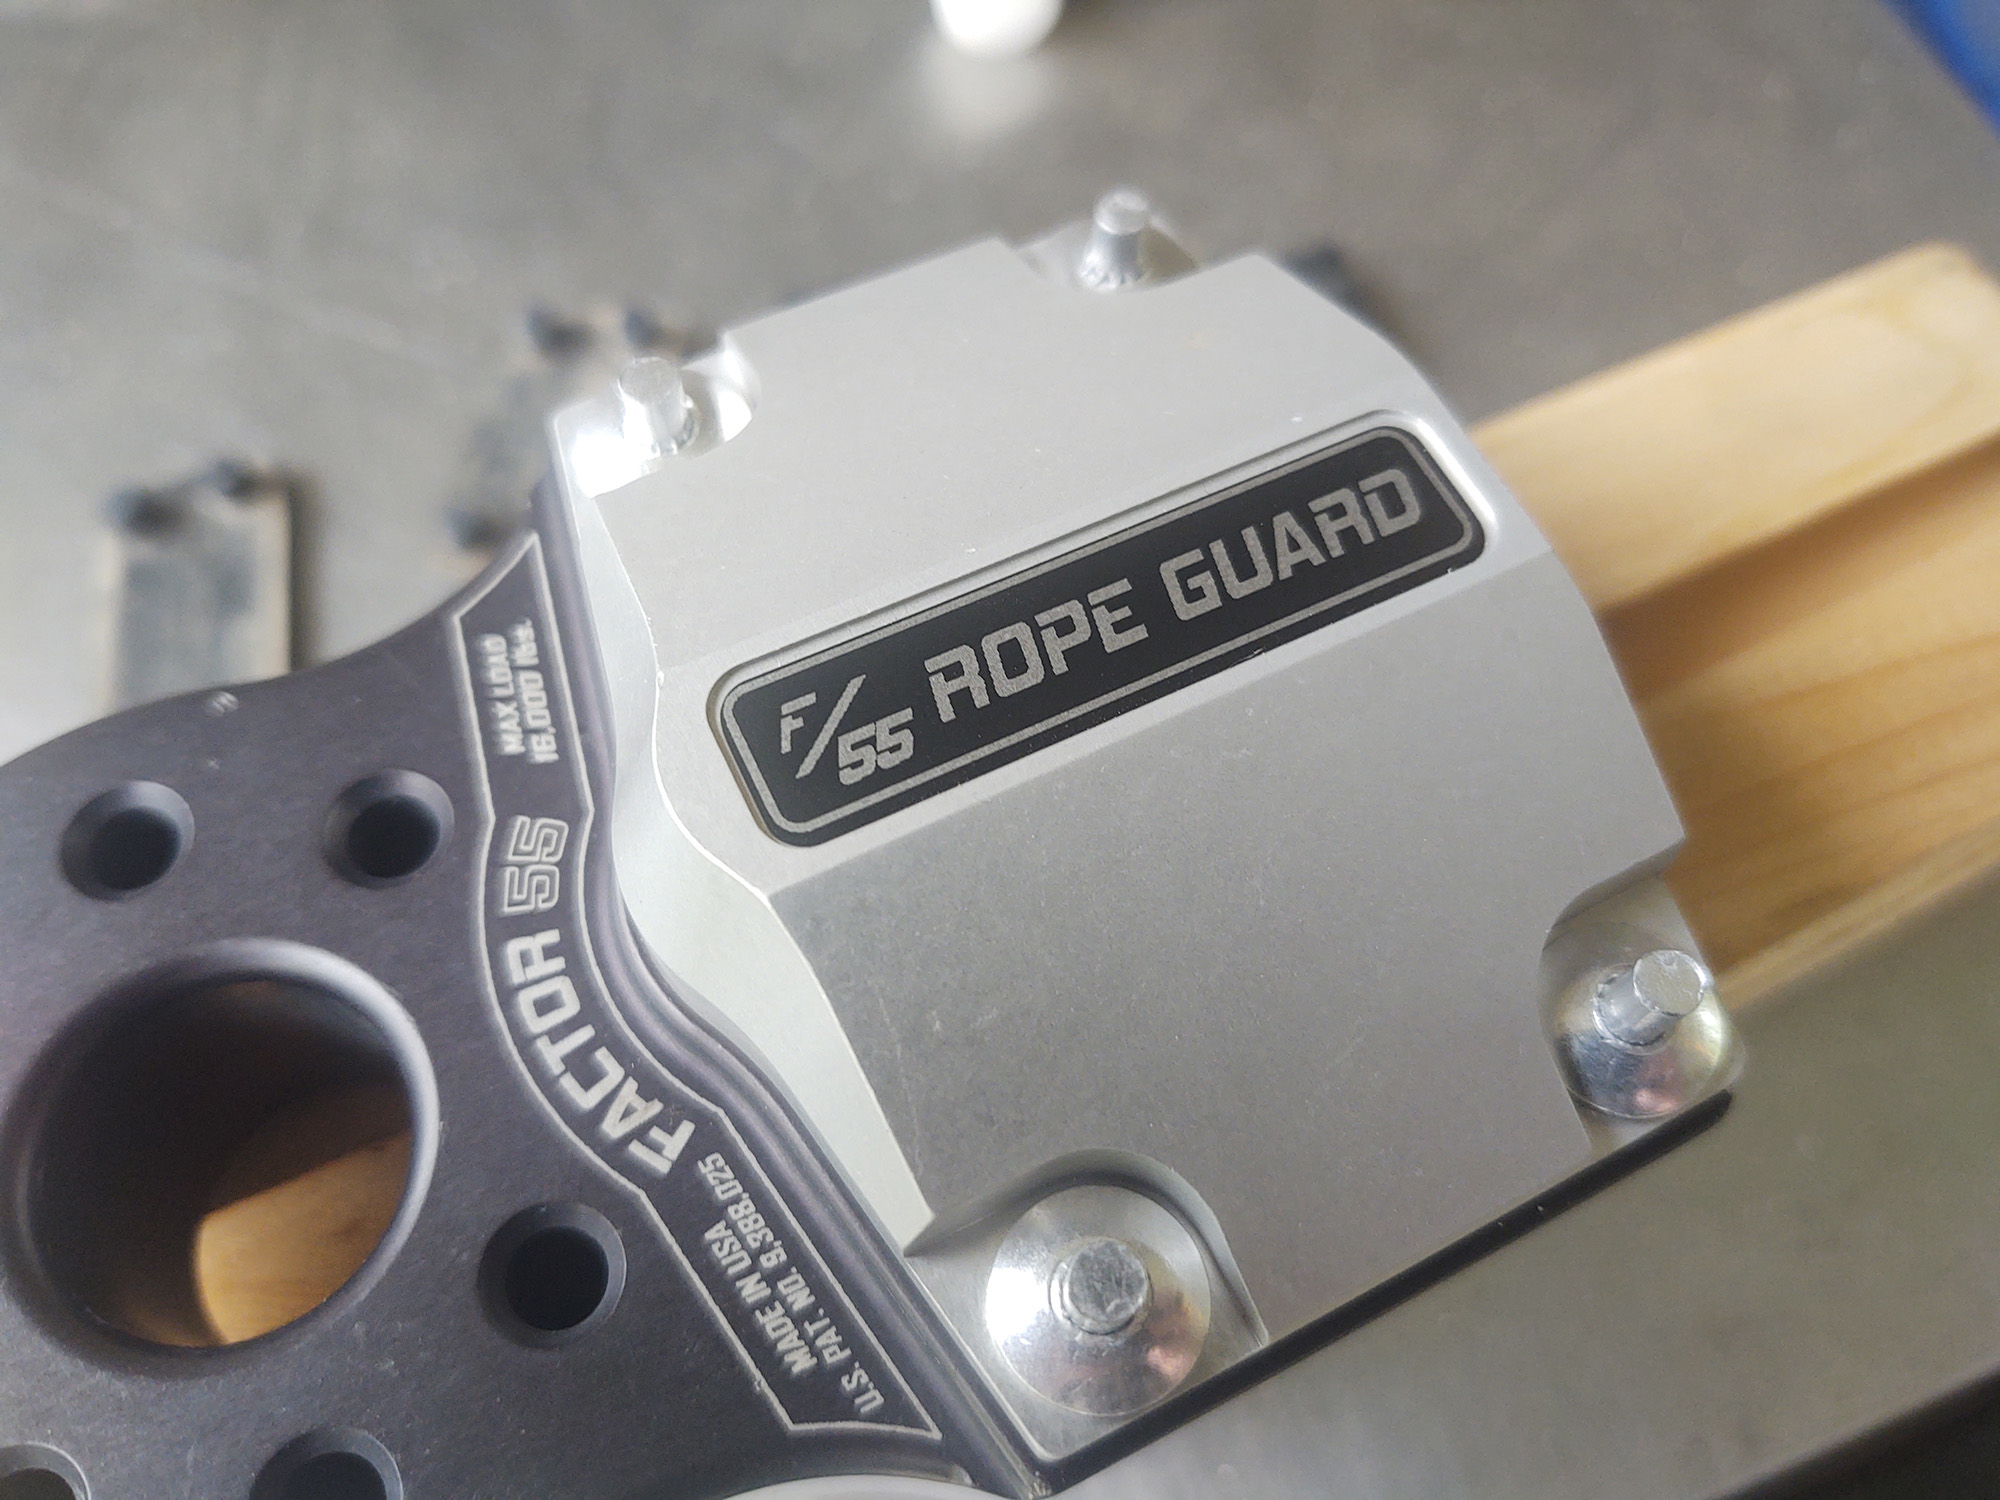
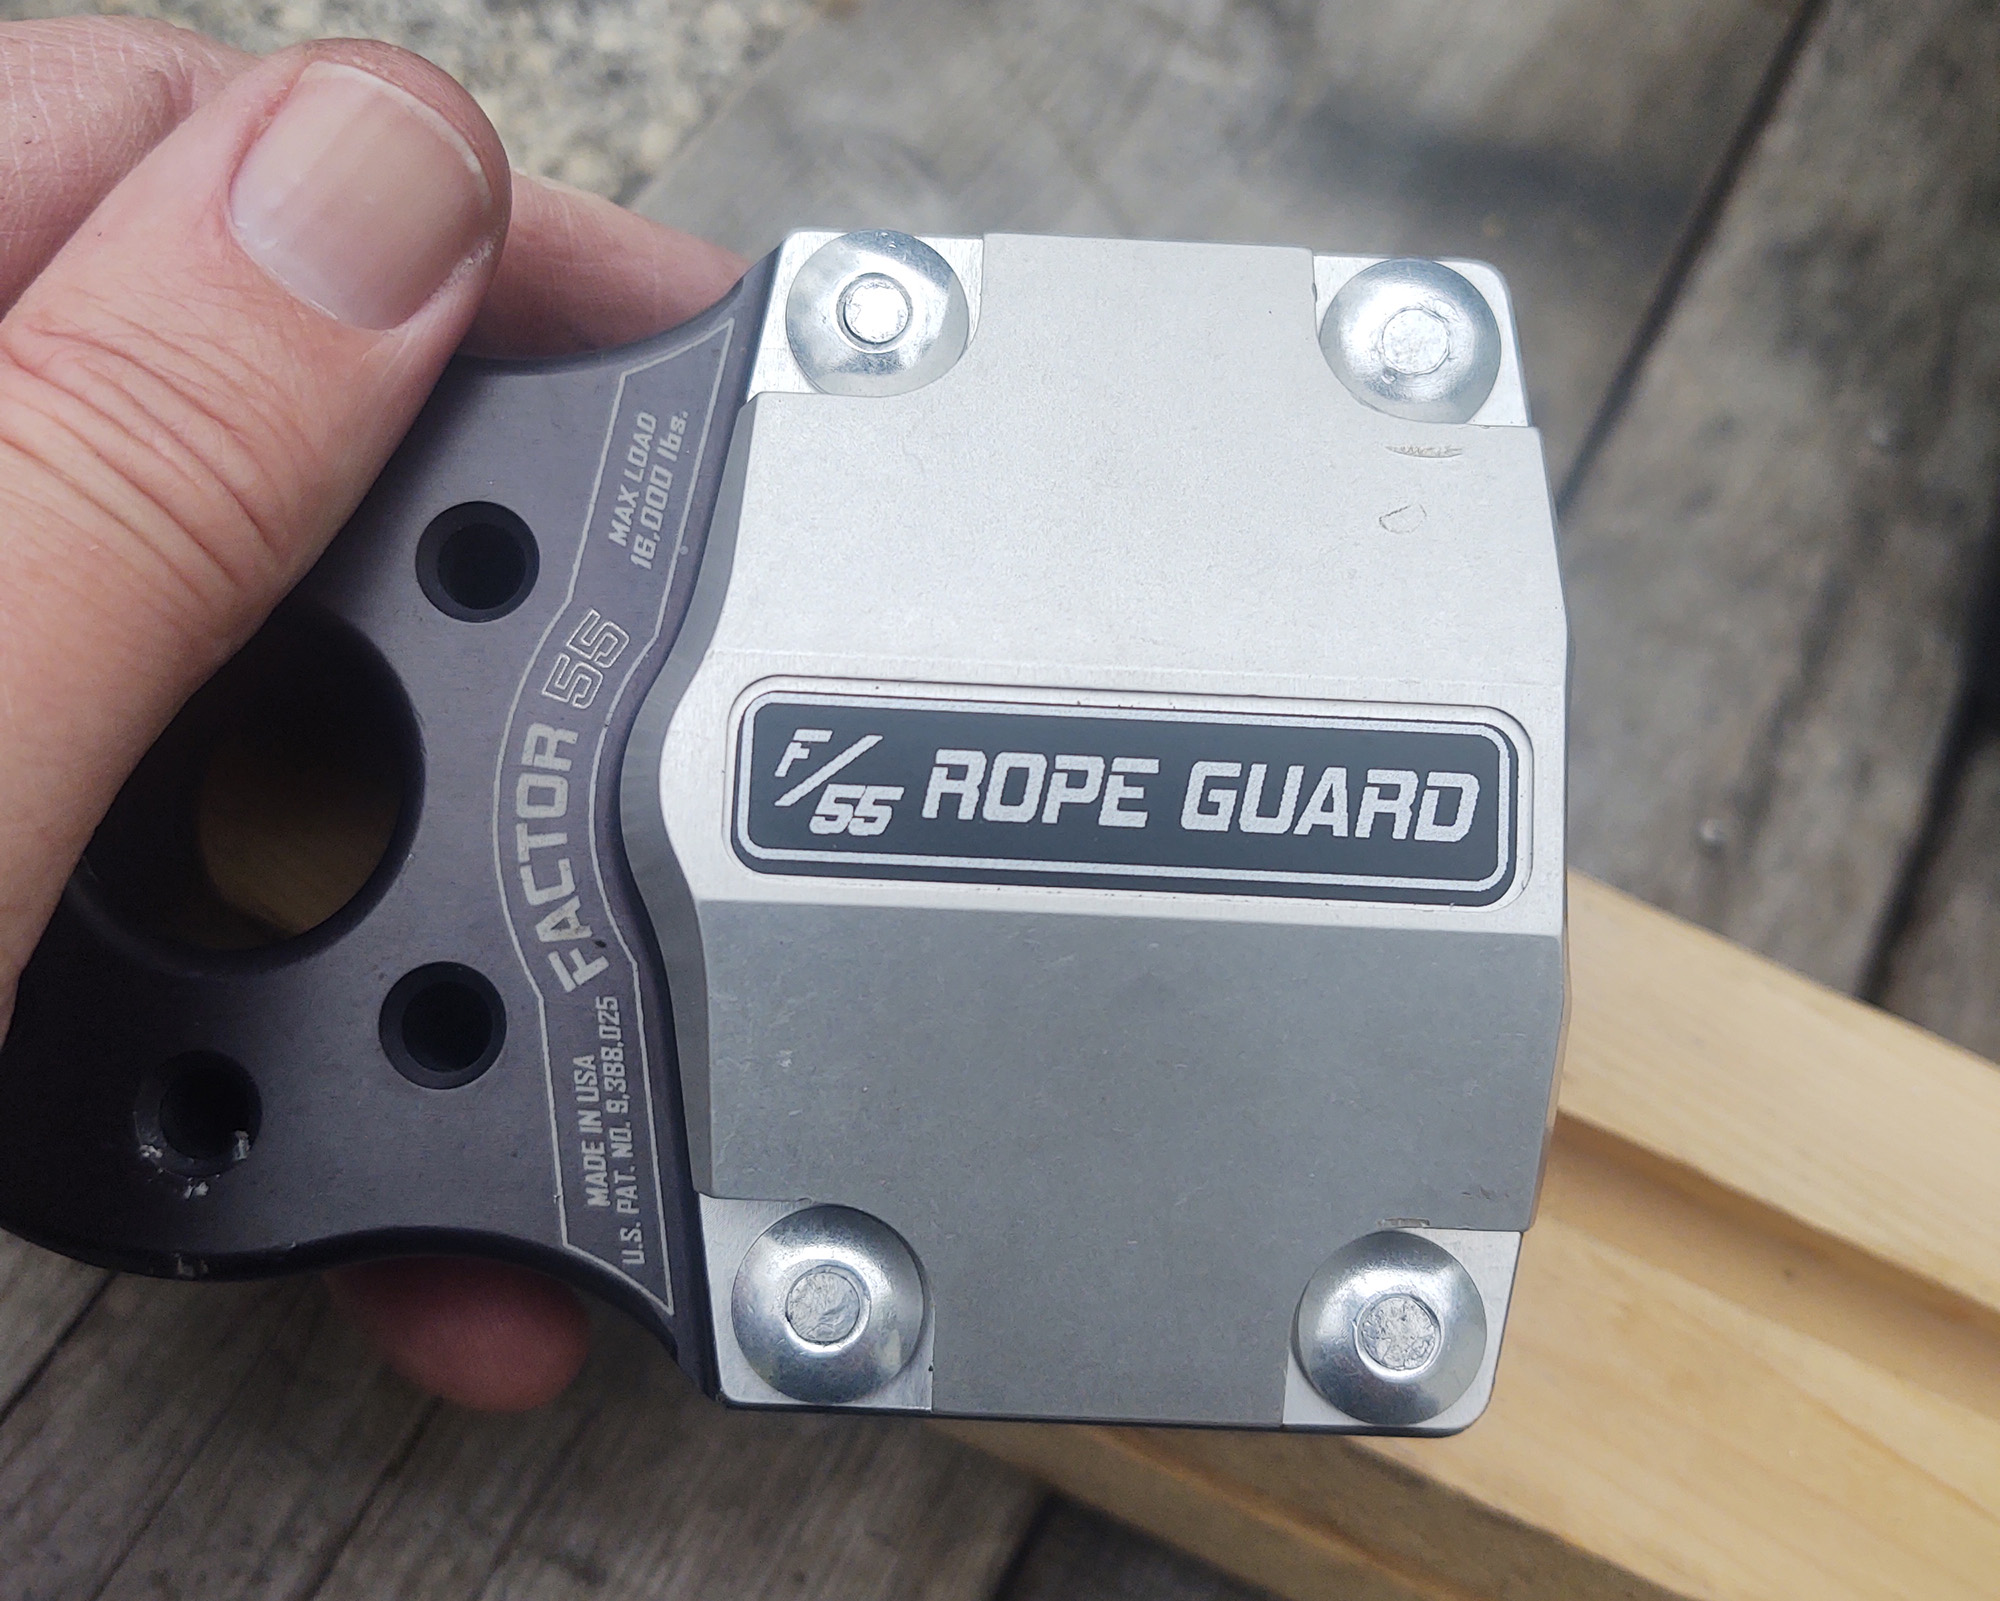
The RopeGuard can be easily installed on any of the FlatLink family of products, and a version is offered for the UltraHook as well. It takes a final step in protecting the very end of your winch rope from its mortal enemies, and is made from Kaiser billet 6000 series aluminum. They even include a second decal in case you want to refinish it, or orient your FlatLink in the other direction, which would mean the original sticker was upside-down. If you squint you can read most of the provided instruction sheet in the picture above, or you can continue reading this for a more in depth version (with pictures).
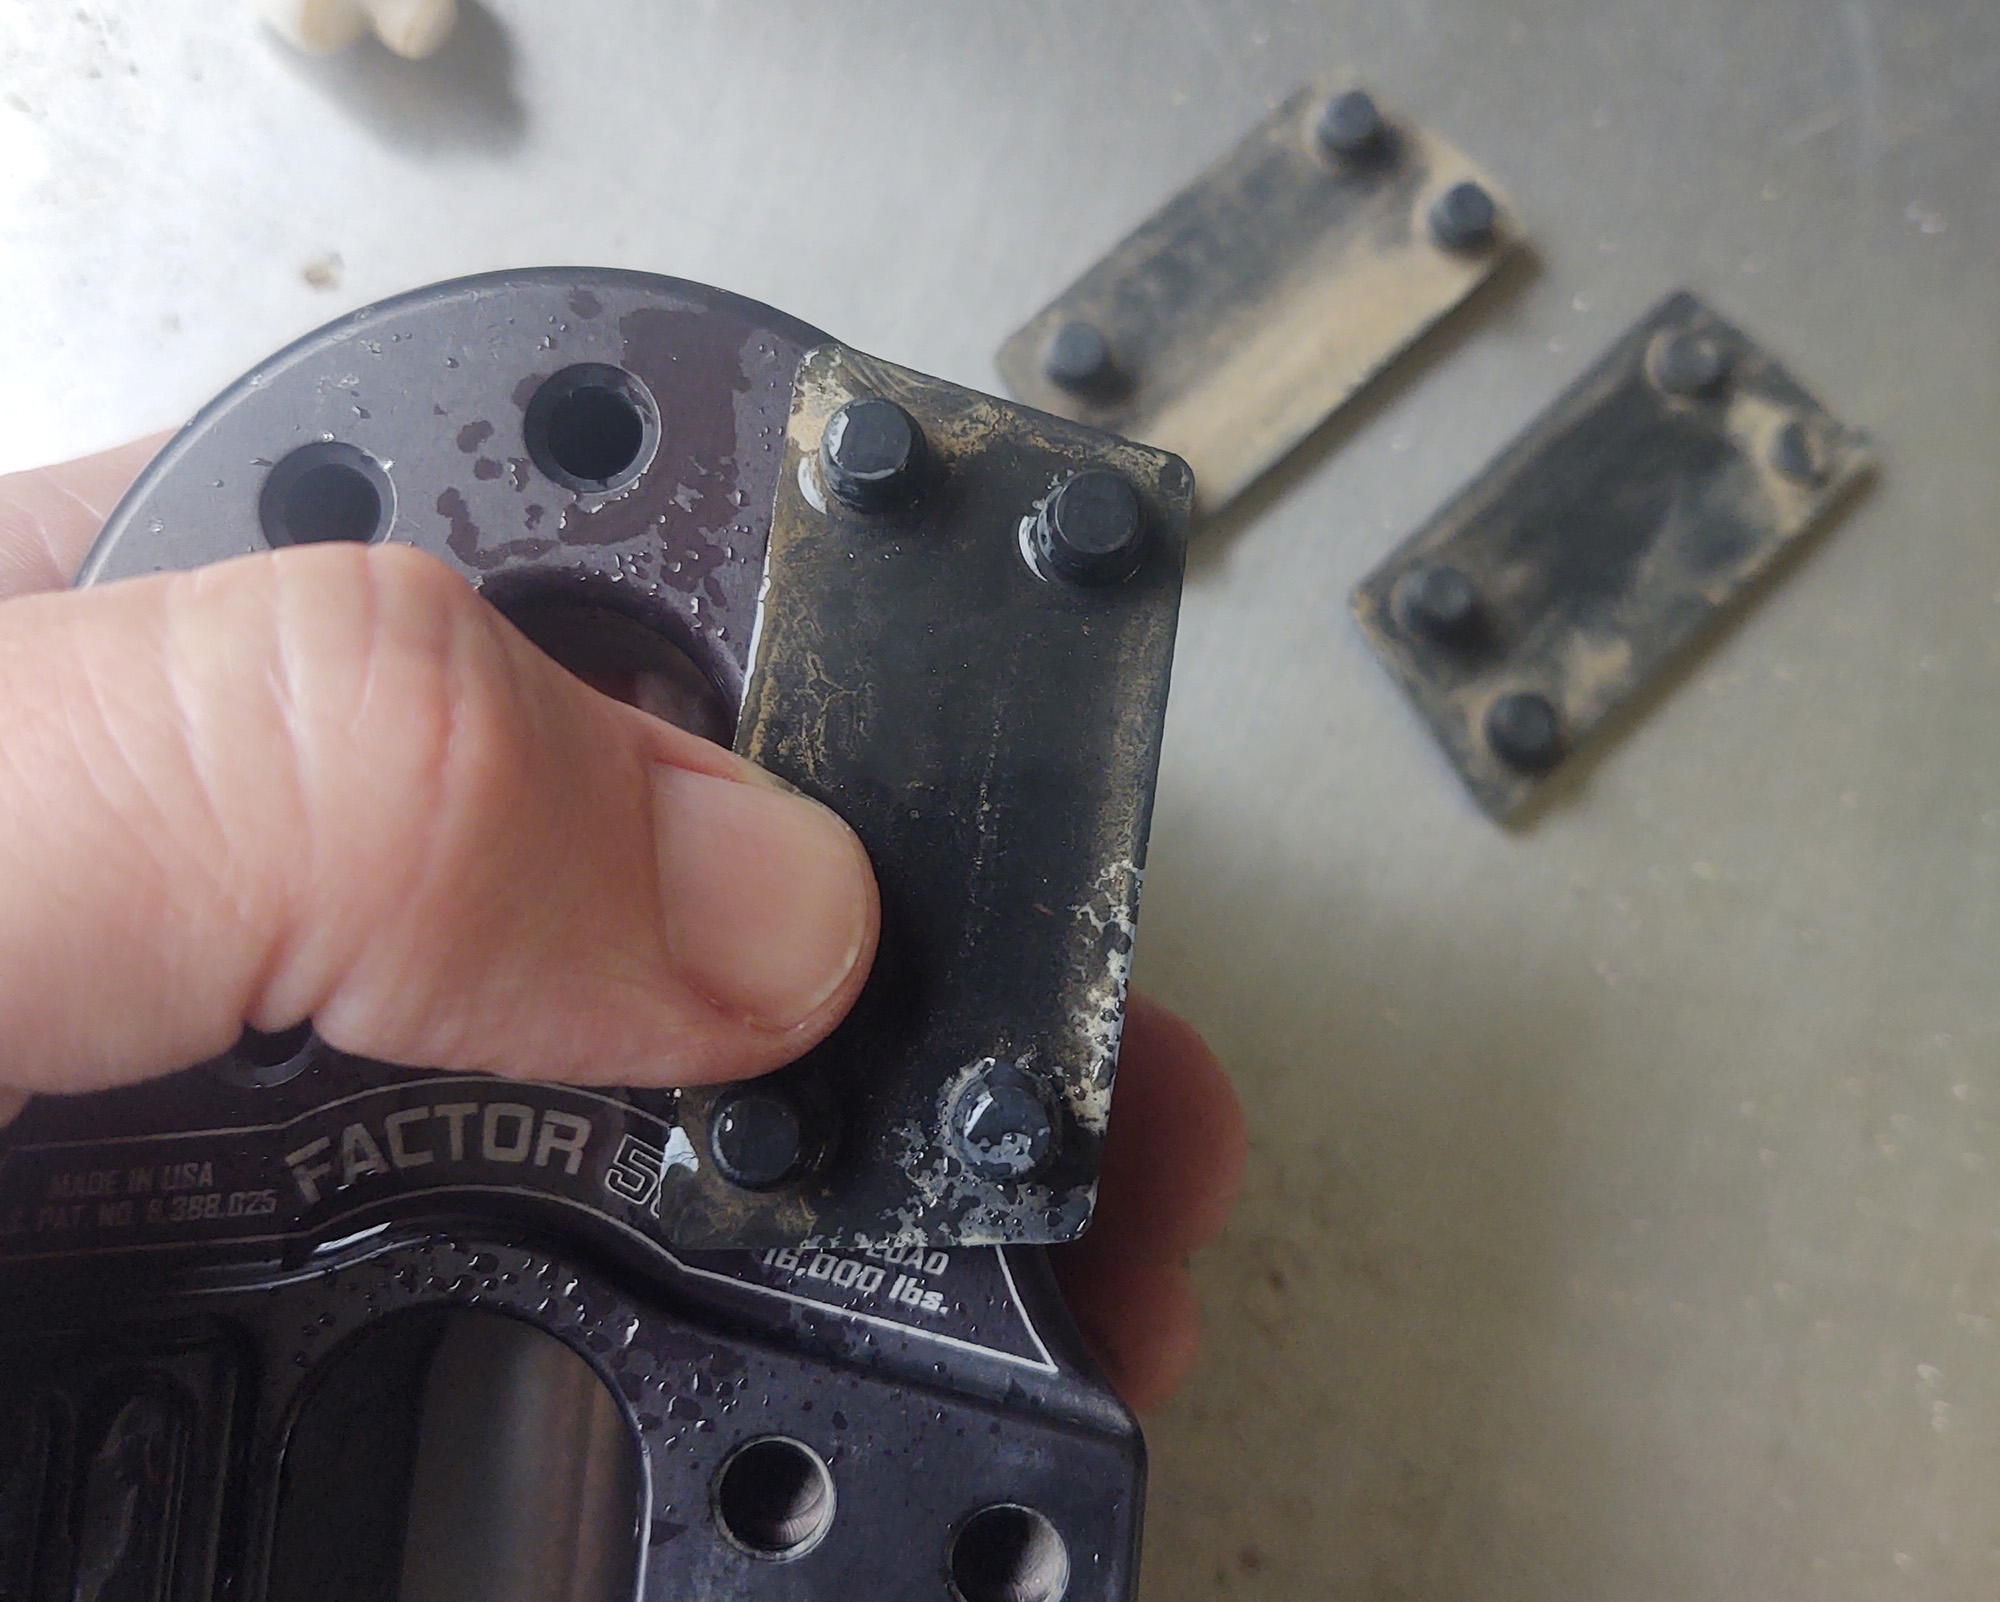
Factor 55 recommends removing the FlatLink from your winch line. Luckily for me, I had already done this earlier in the day. Using a wood block as a work surface, remove all four rubber pads using your fingers or another flat tool. Plastic would work best to not harm the finish. You want the ones out of the rear of the FlatLink as well, so they don’t absorb the impact of the hammering you’re about to do—making the rivet installation a bigger pain than needed.
Make sure you have the Rope Guard aligned correctly, and test fit all rivets in the holes before starting.
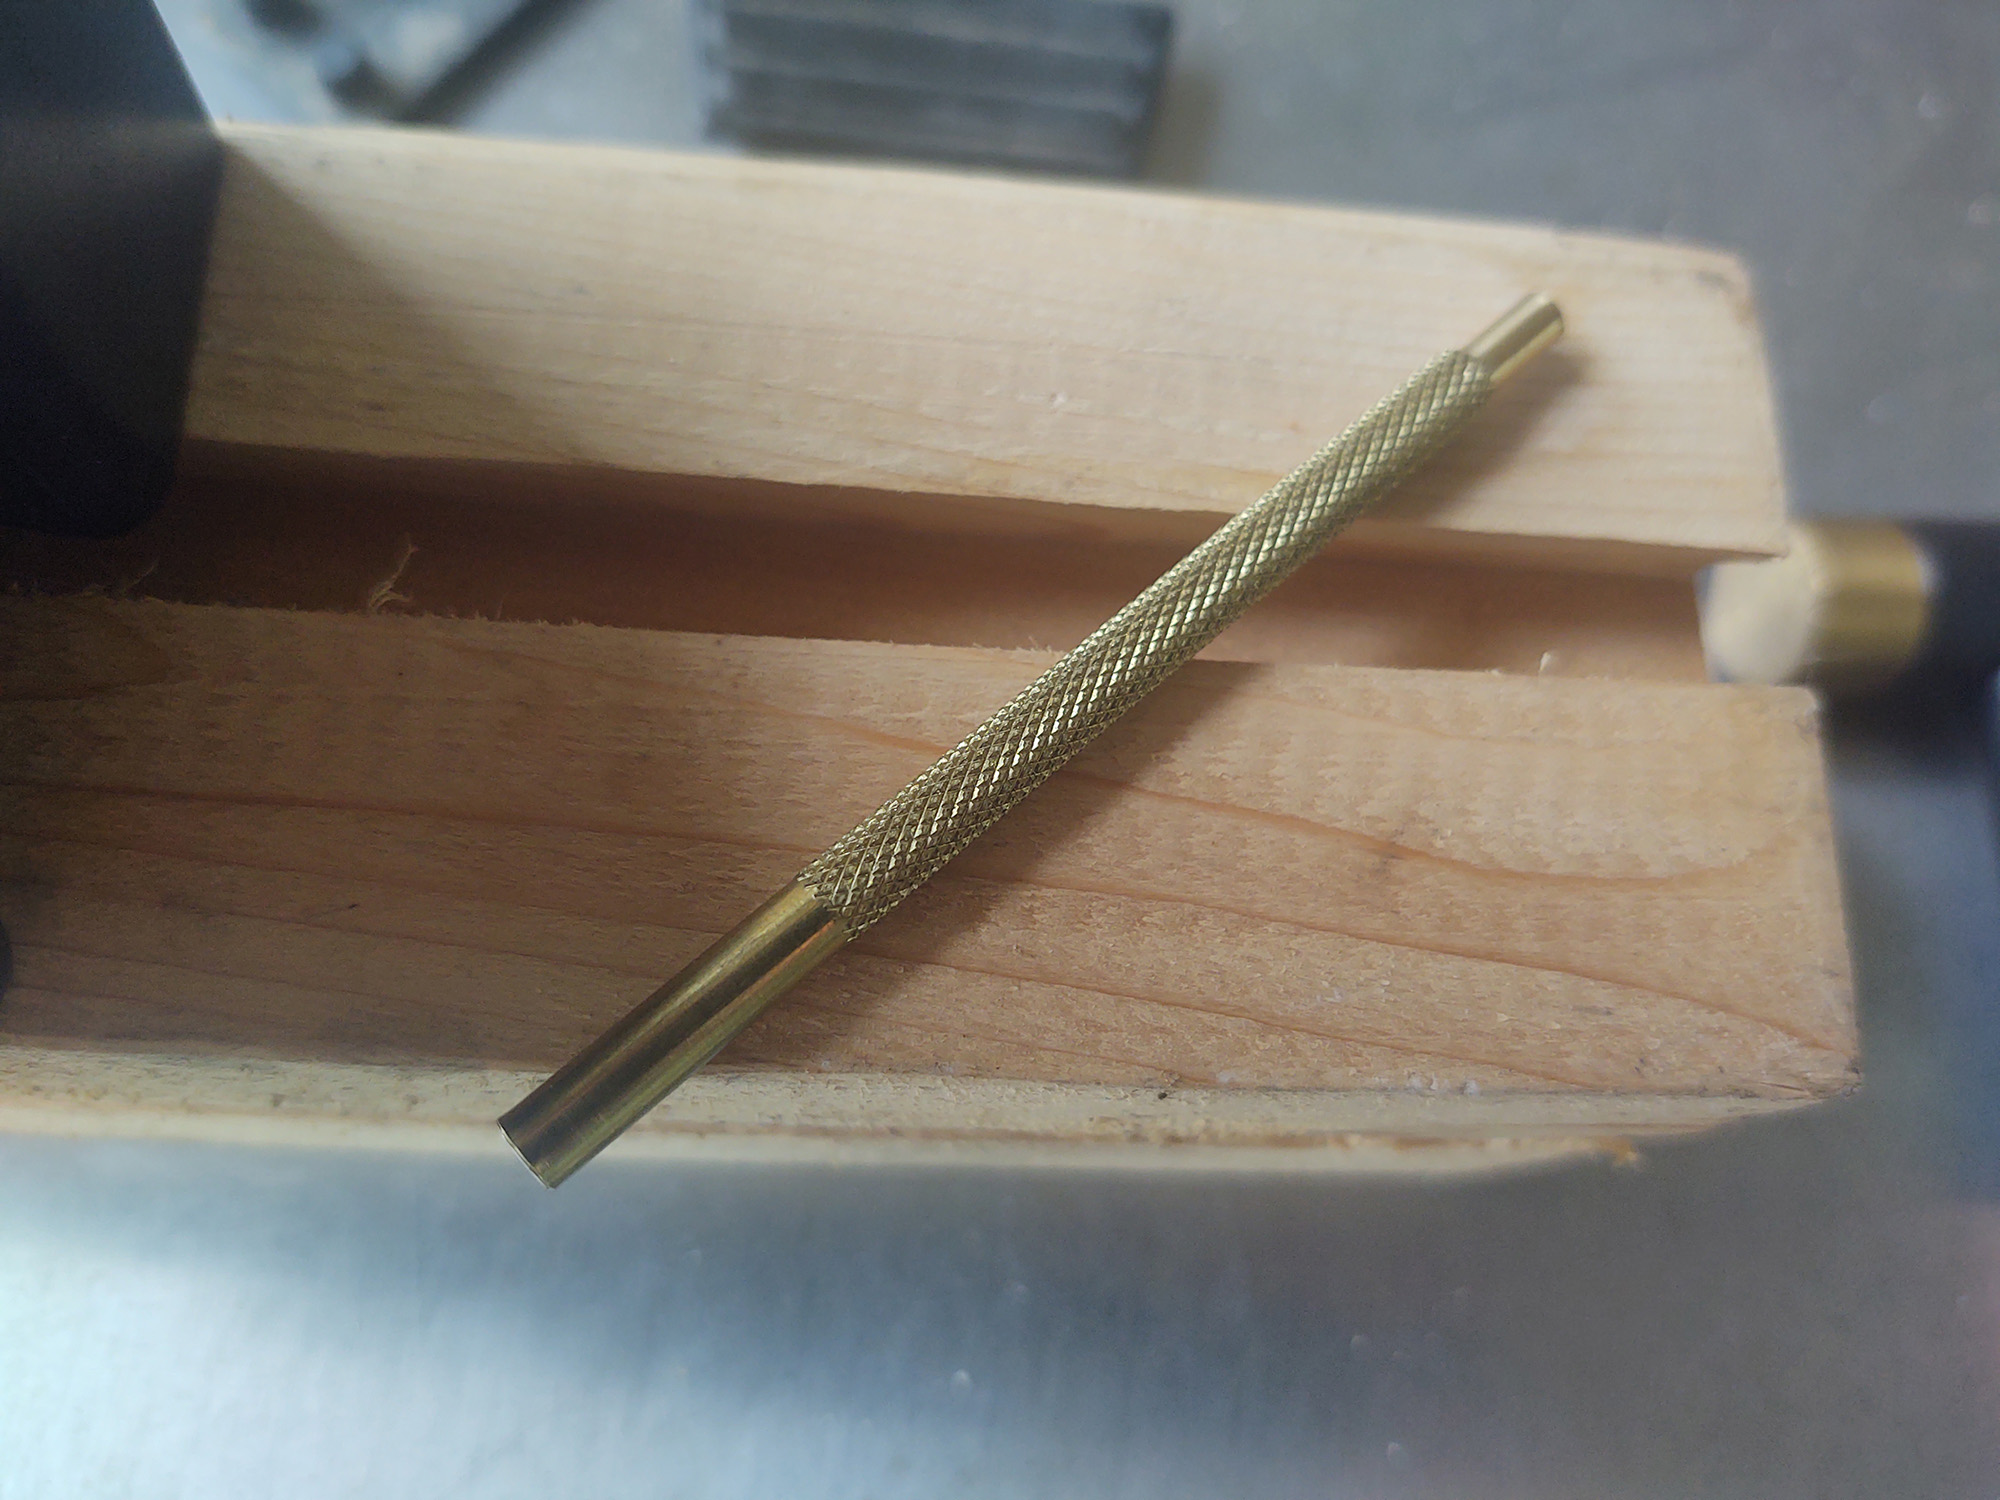
Using a ¼” punch and a hammer (I used a brass drift because I had one), smash the aluminum rivets home.
After that, take the best looking of the two rubber pads, and reinstall them using a little glass cleaner to lubricate the barbs.
Reinstall your titanium sheer pin and clip through your Factor 55 Load Spool (or tubular thimble if you’re as old school as I was a half hour ago), and then you’re done.
Articles You May Be Interested In:
Best Tools For Your Off-Road Recovery Kit