Featuring Premium Parts from
by Eric Ammerman
Torque Staff Writer
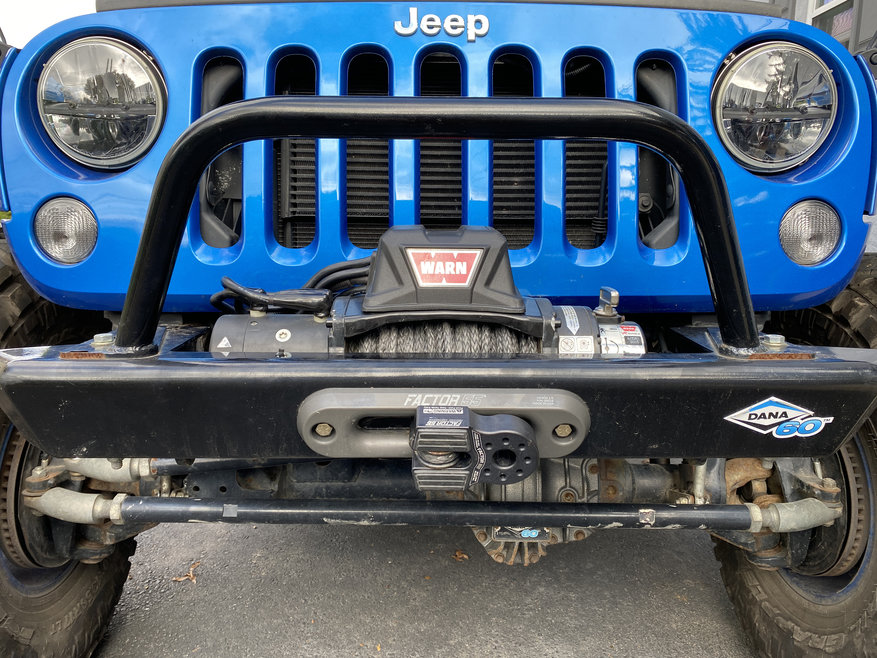
Front and center on my 2016 Wrangler JKU sits a proud first generation Warn VR 10,000S winch. It’s been there for many years, recovered many friends while out wheeling and even helped me up a few muddy granite ledges during an event in Bethel, Maine.
It is a powerful workhorse that has never let me down. But it is also something that is starting to look its age.
The solenoid cover plastic has started to go gray, and even the bold Warn logo is fading. Many people would just replace the whole winch at this point, which is fine, but the folks at Warn know there are plenty of us who would rather upgrade and fix (if needed) the parts we have, especially on something that has been reliable since day one.
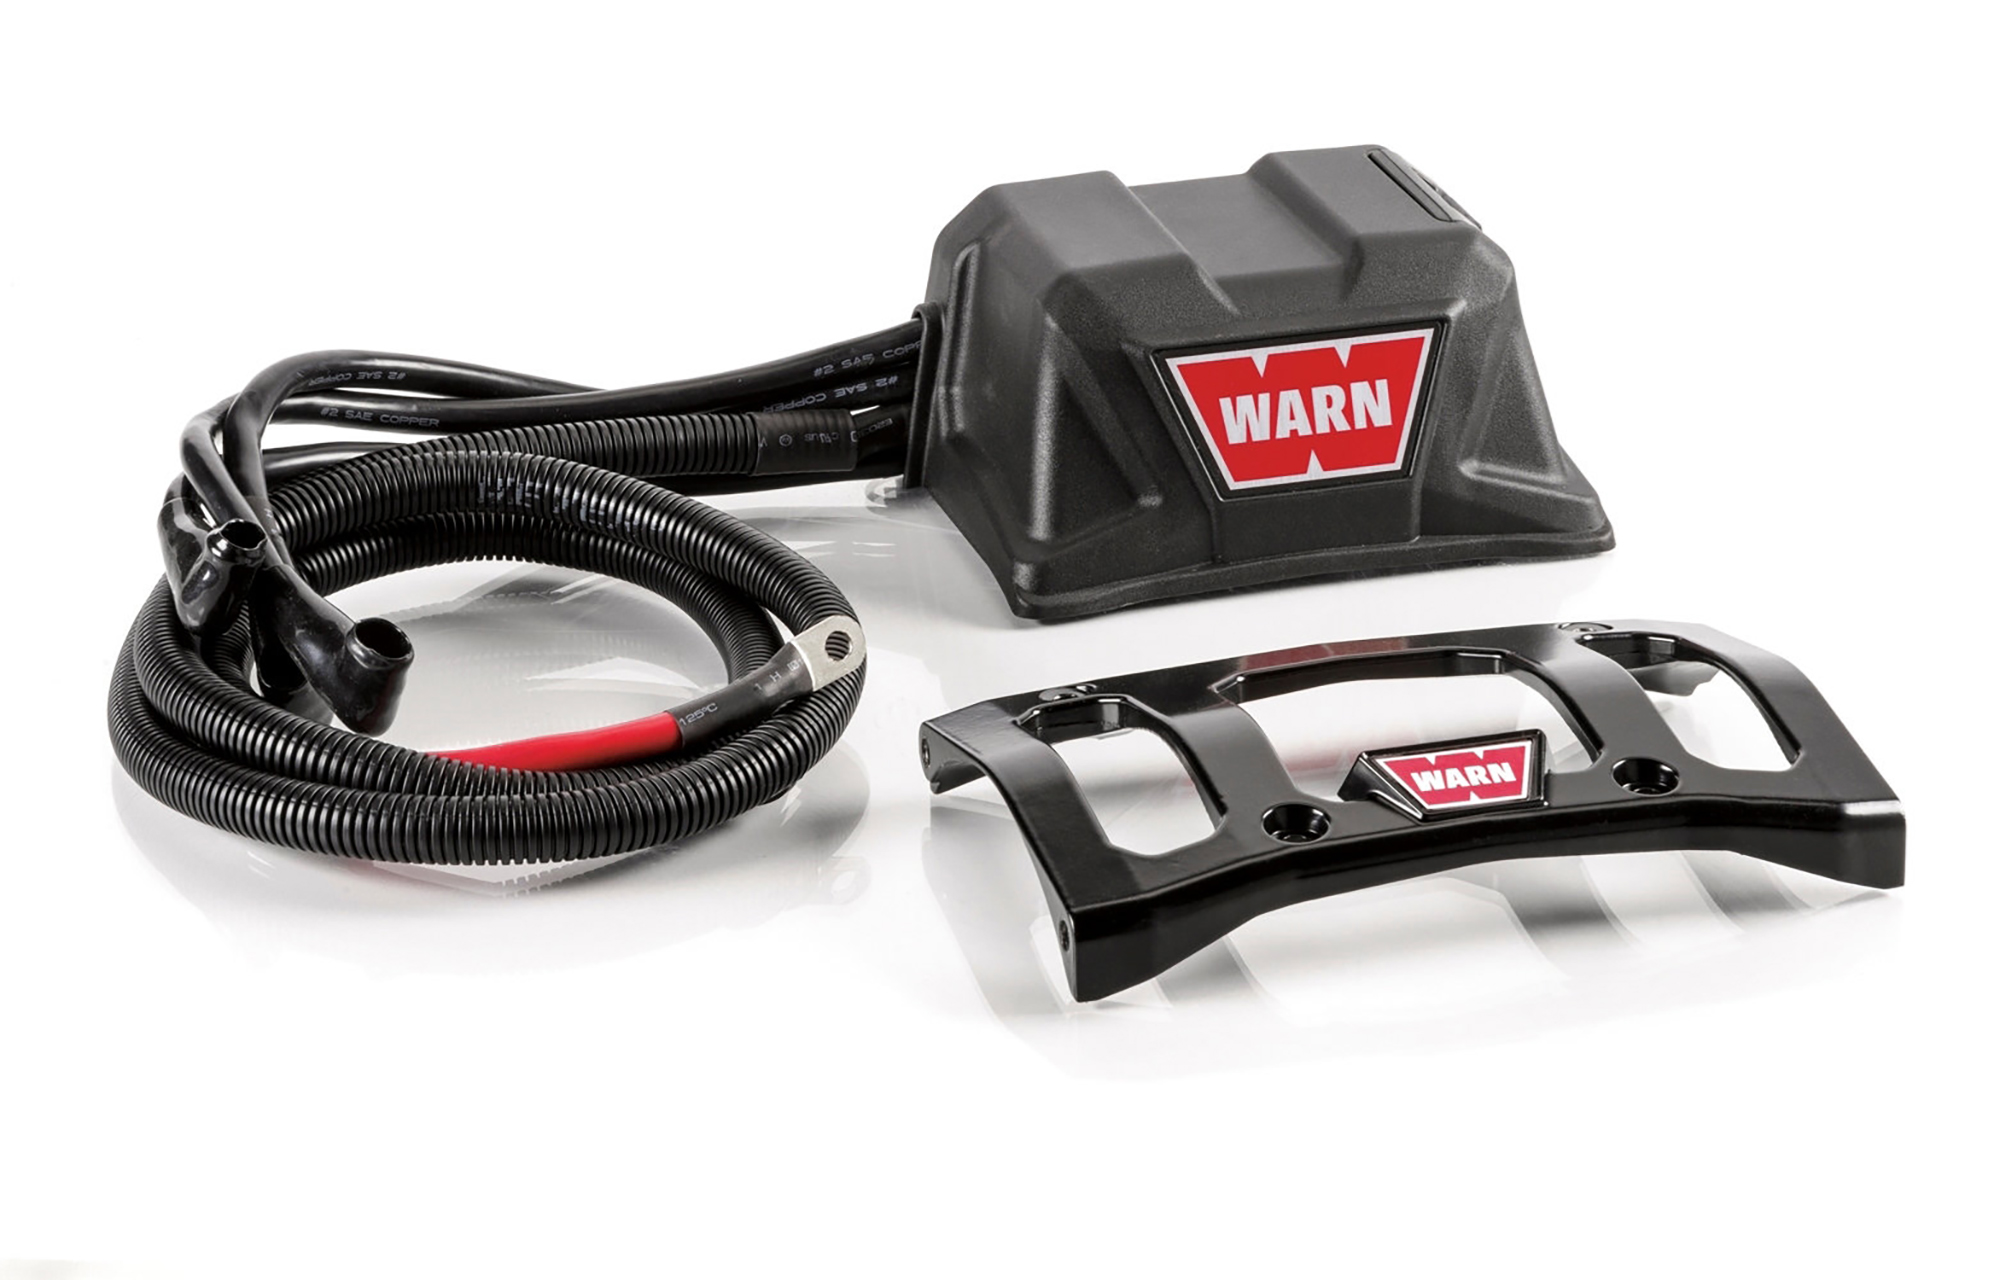
The Warn 99760 Control Pack Upgrade Kit does more than just update the looks of your Warn mid frame winch. It also adds some performance upgrades that will keep your winch saving your friends (and perhaps yourself) for many years. The solenoid is replaced with an Albright contactor control, as contactors are more reliable than a solenoid, and they are better weatherproofed as well. In fact, Warn uses this on most of their higher end winches.
This kit also replaces the winch tie bars found on older Warn winches with a tie plate, which adds rigidity and durability to the frame of the winch. The more obvious thing, though, is the kit updates the look and styling of your Warn winch to be more in line with the appearance of current Warn winches.
Warn’s Control pack upgrade kit fits the Gen 1 VR, Tabor, Magnum, M8, XD9, 9.5xp, and M6000 winches.
Please note that we are installing this on my First Gen Warn VR, but these install instructions are similar no matter which Warn winch you own.
Here are the tools you'll need:
- 3/8ths socket wrench
- 13mm socket
- 10mm socket
- 13mm ratchet wrench (or open ended wrench)
- 9/16ths socket
- Pliers or vicegrips
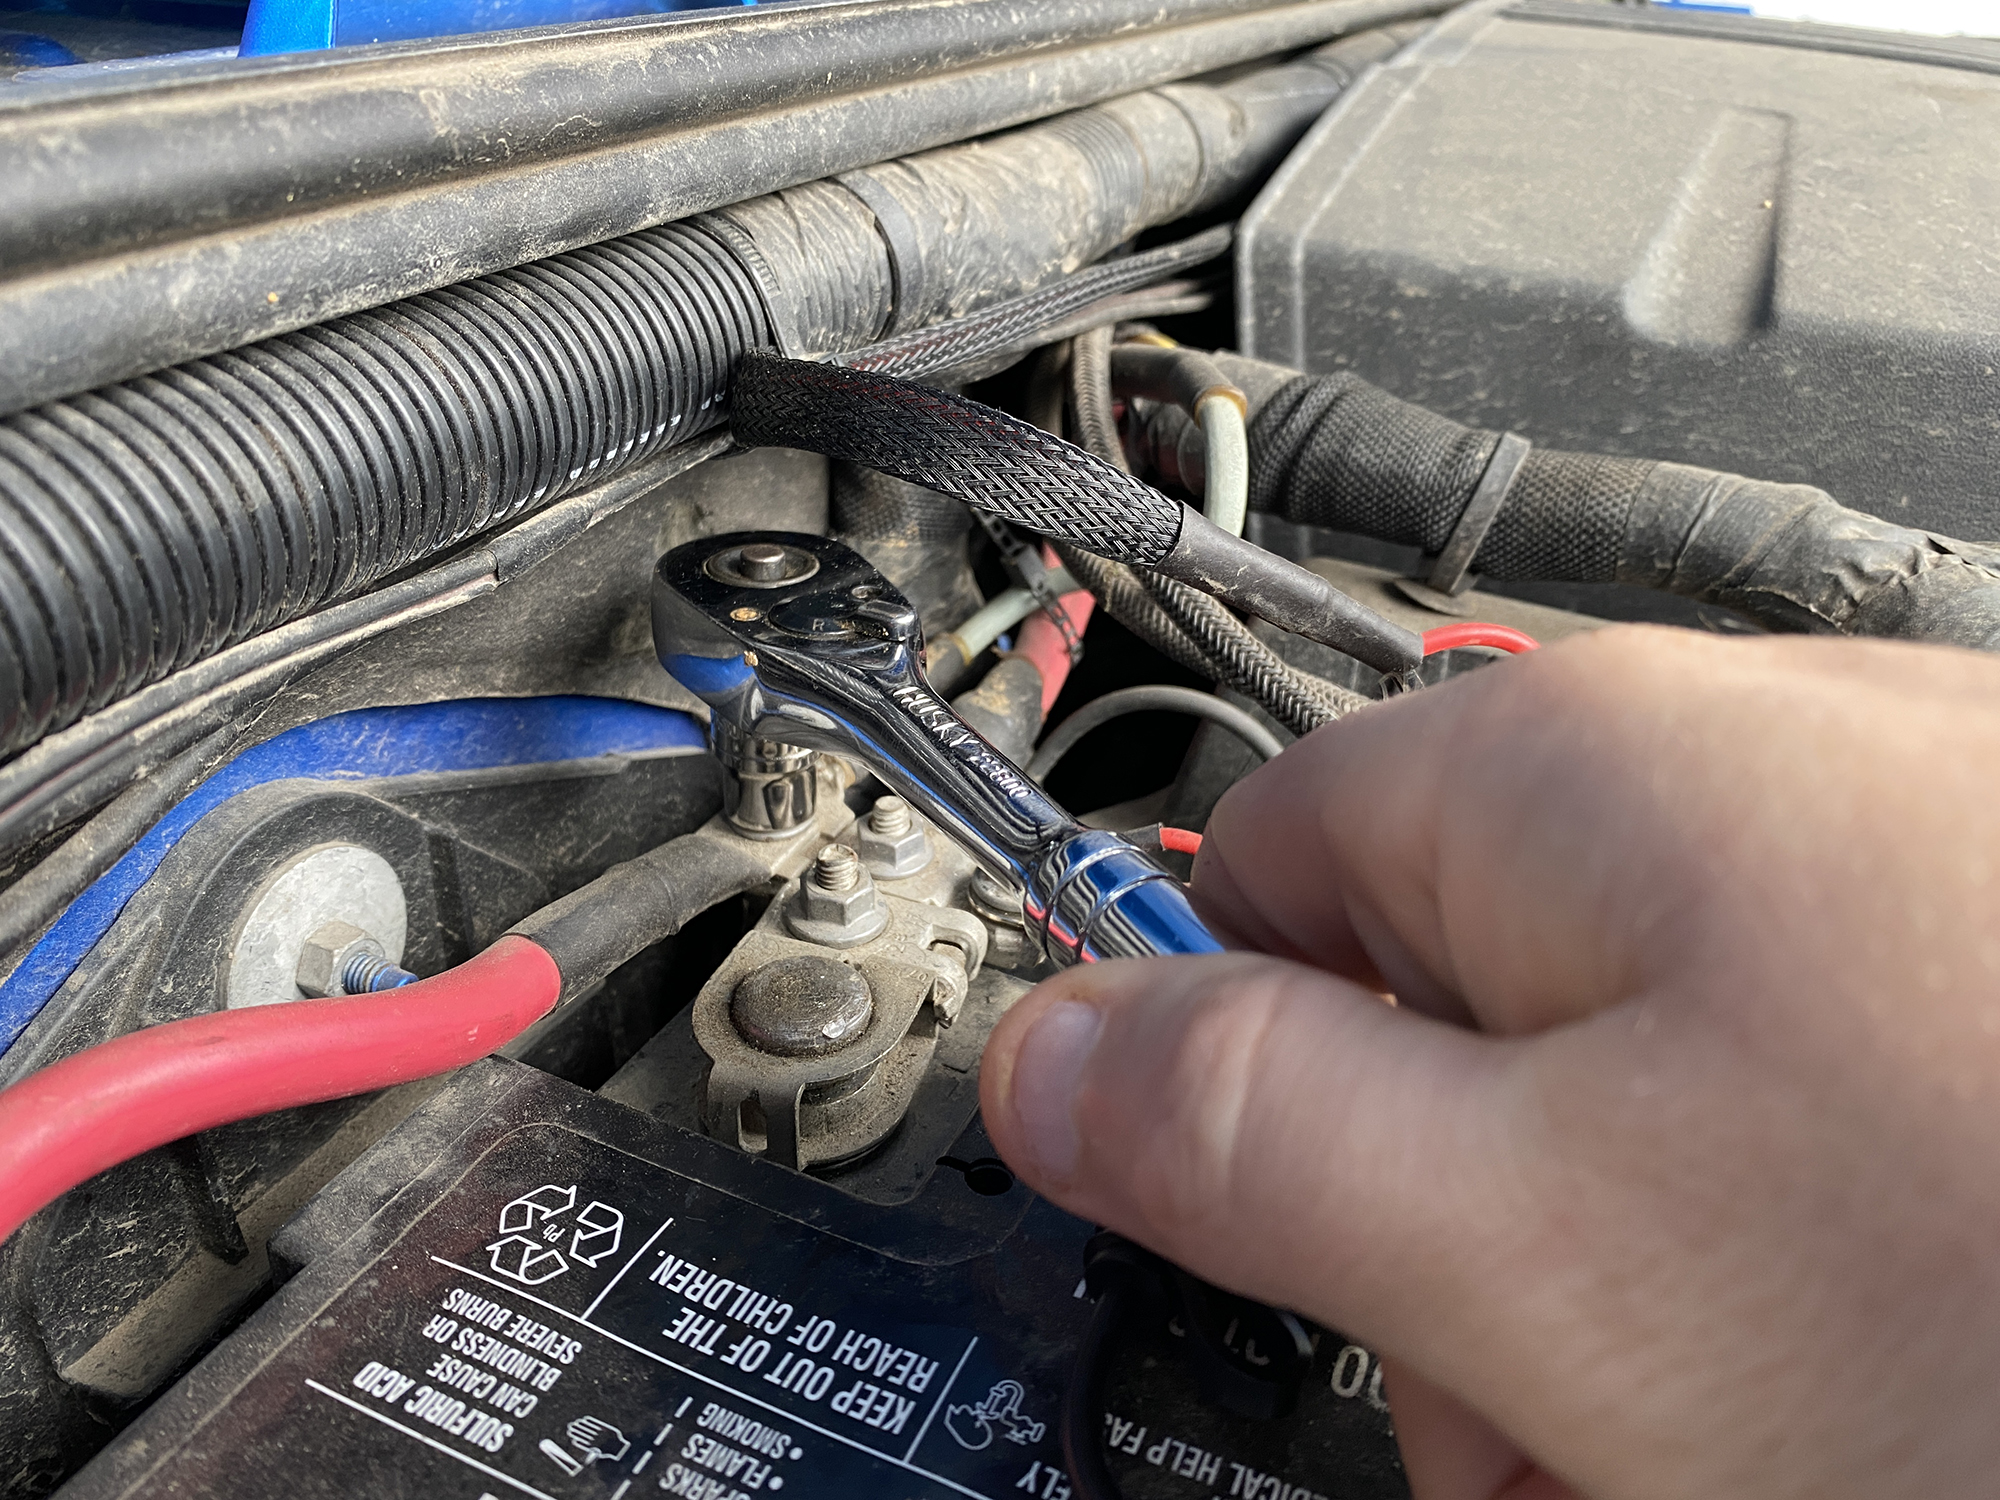
Remove the red winch cable from the battery side.
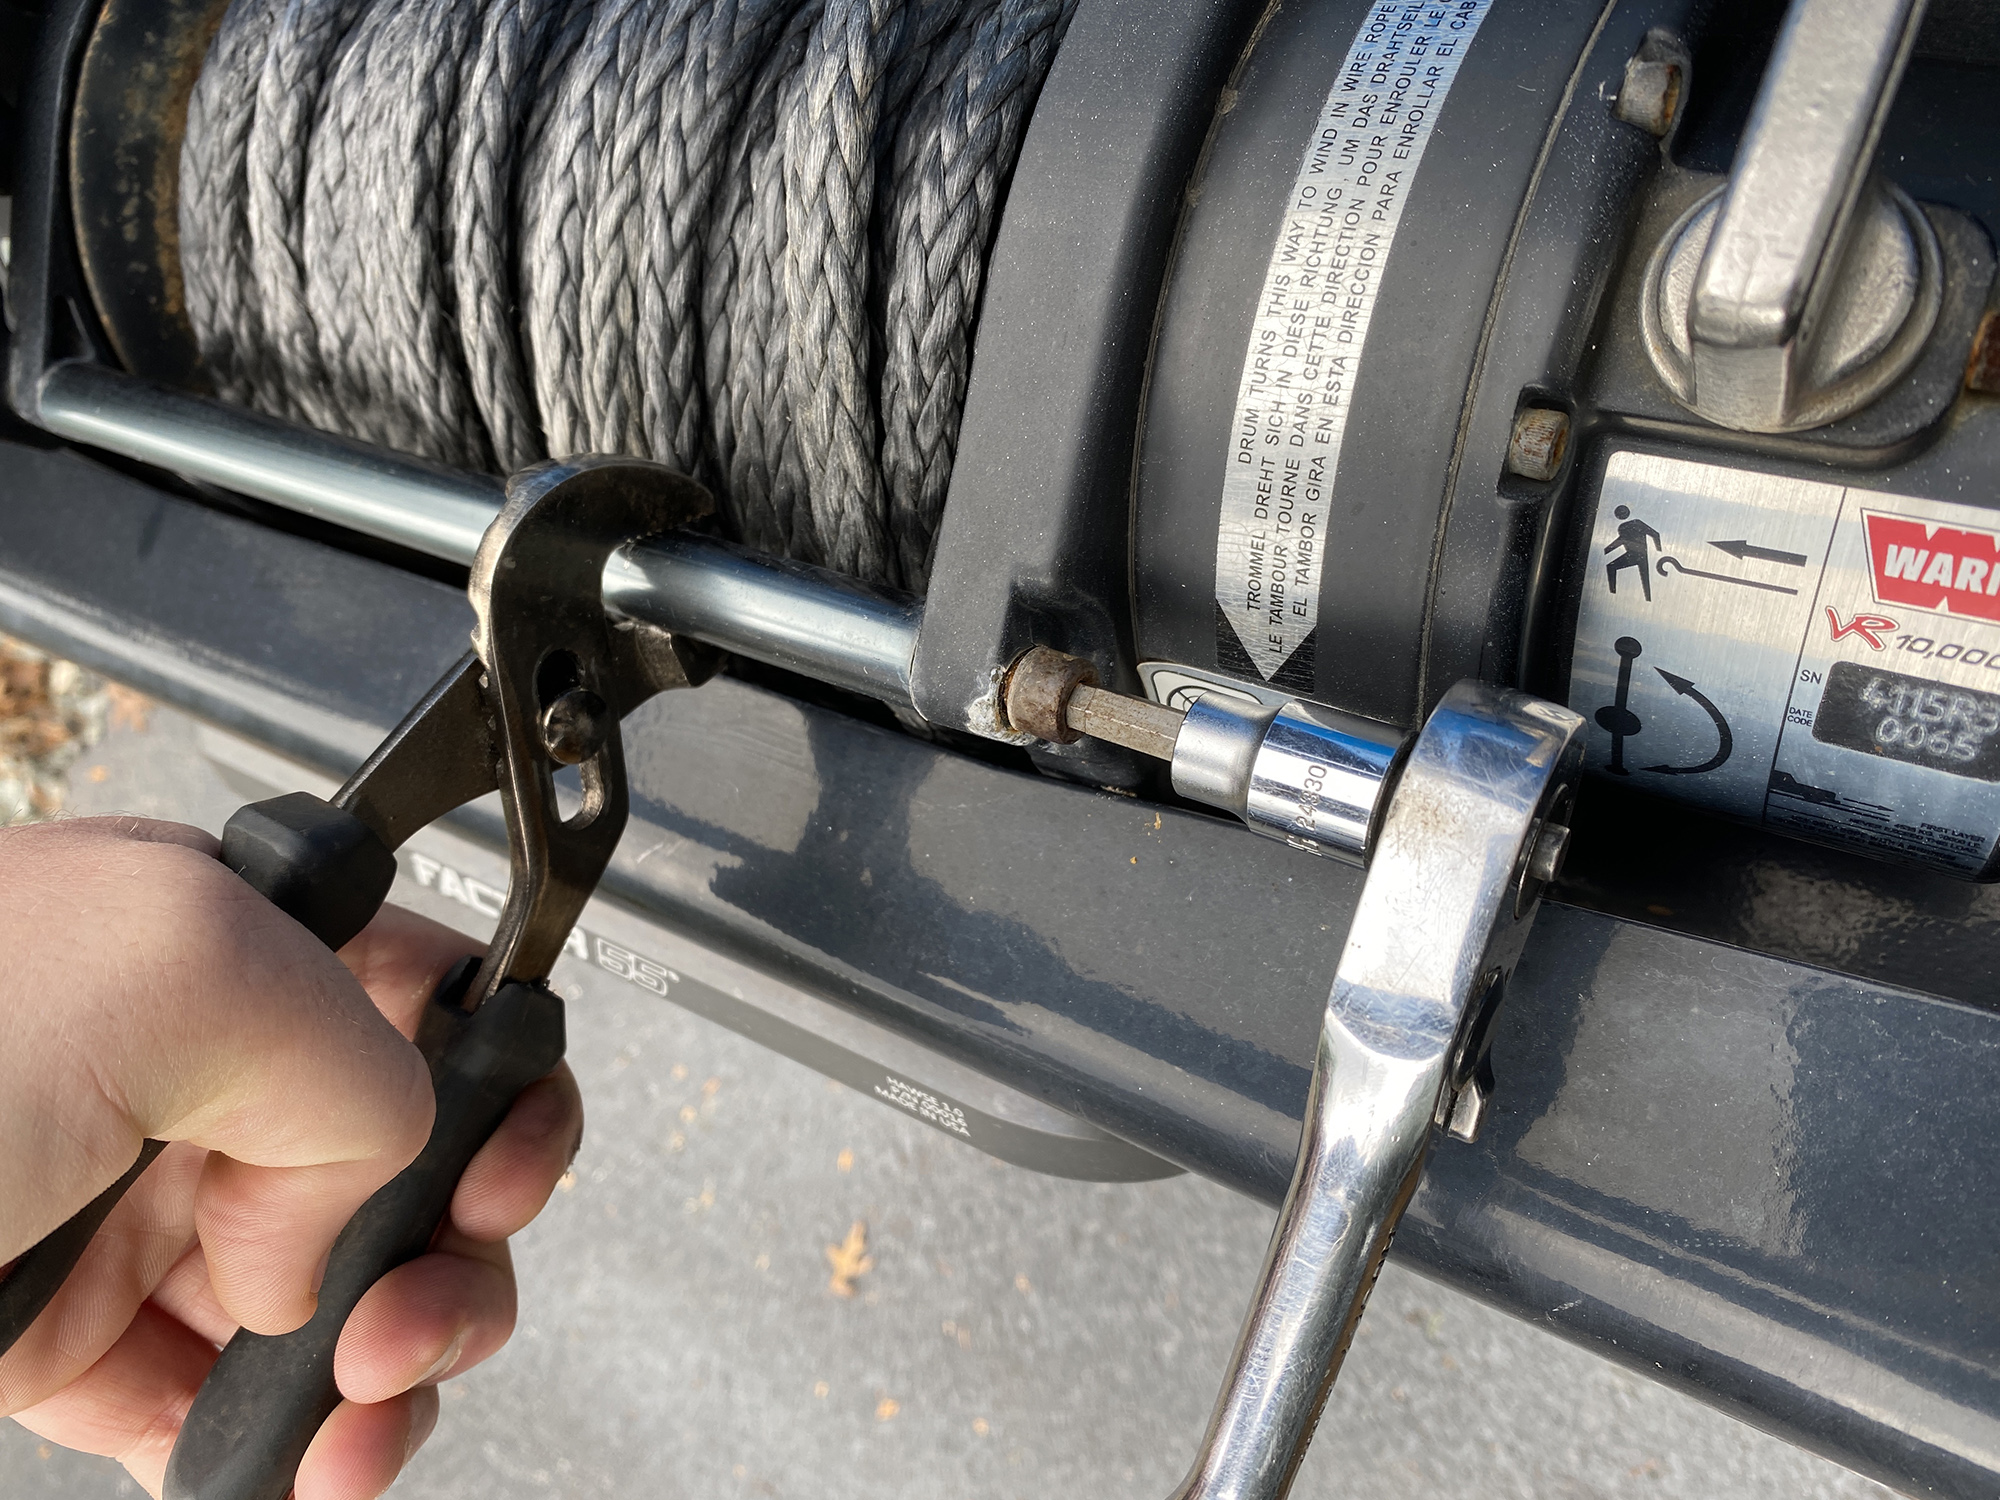
Next, remove the front tie bar from the top of the winch using a 6mm allen socket, and either some pliers or vice grips to hold the tie bar.
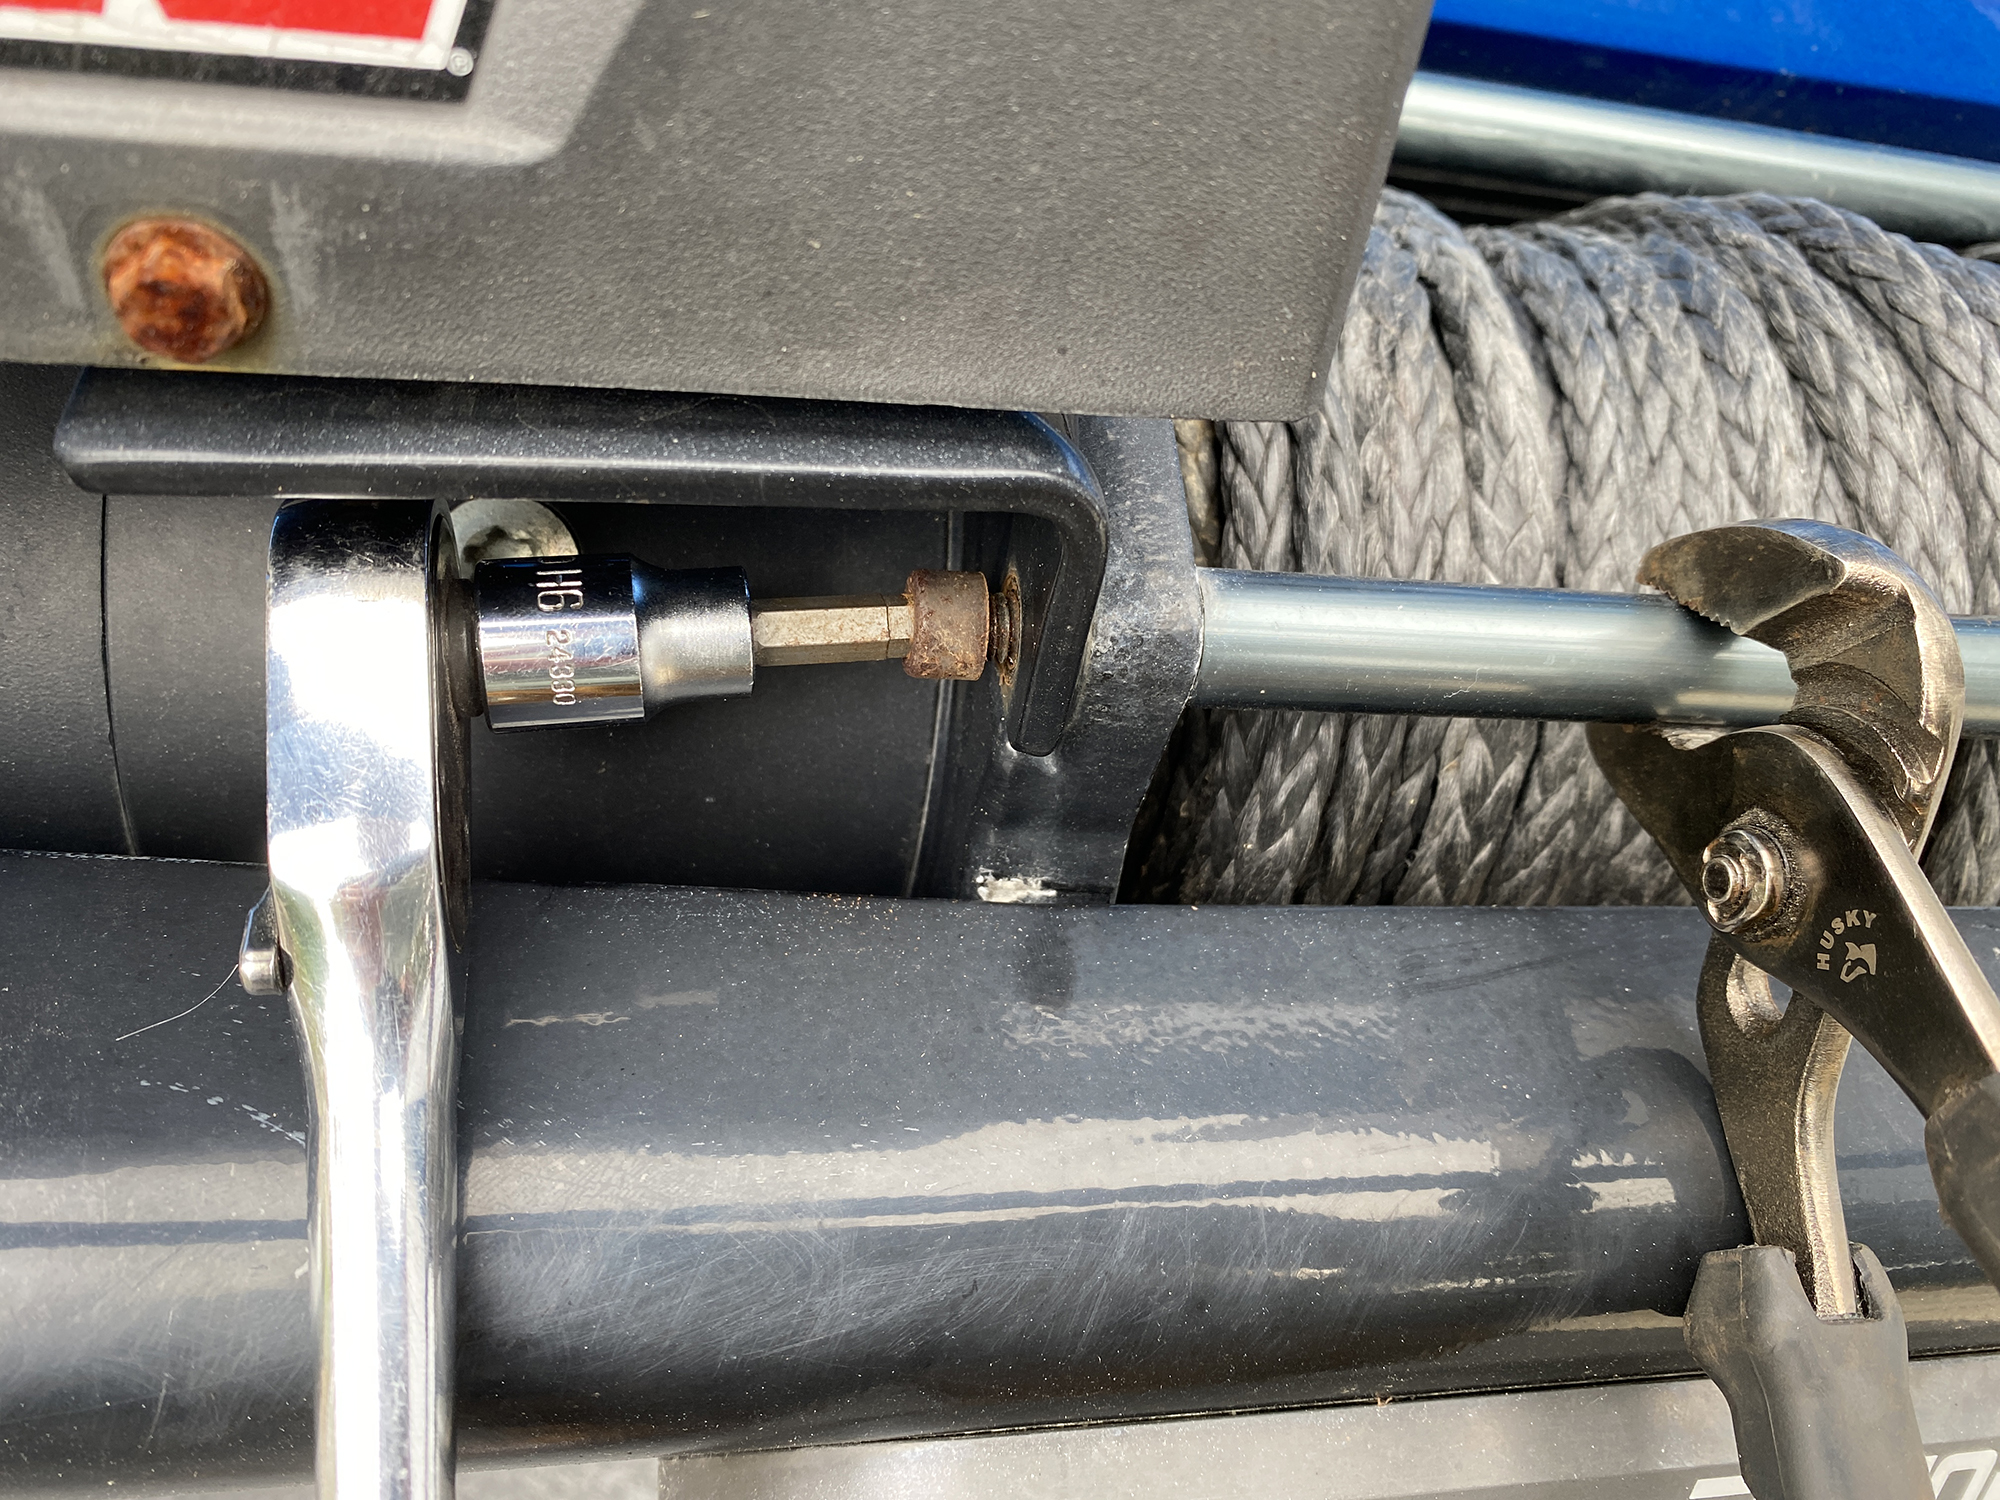
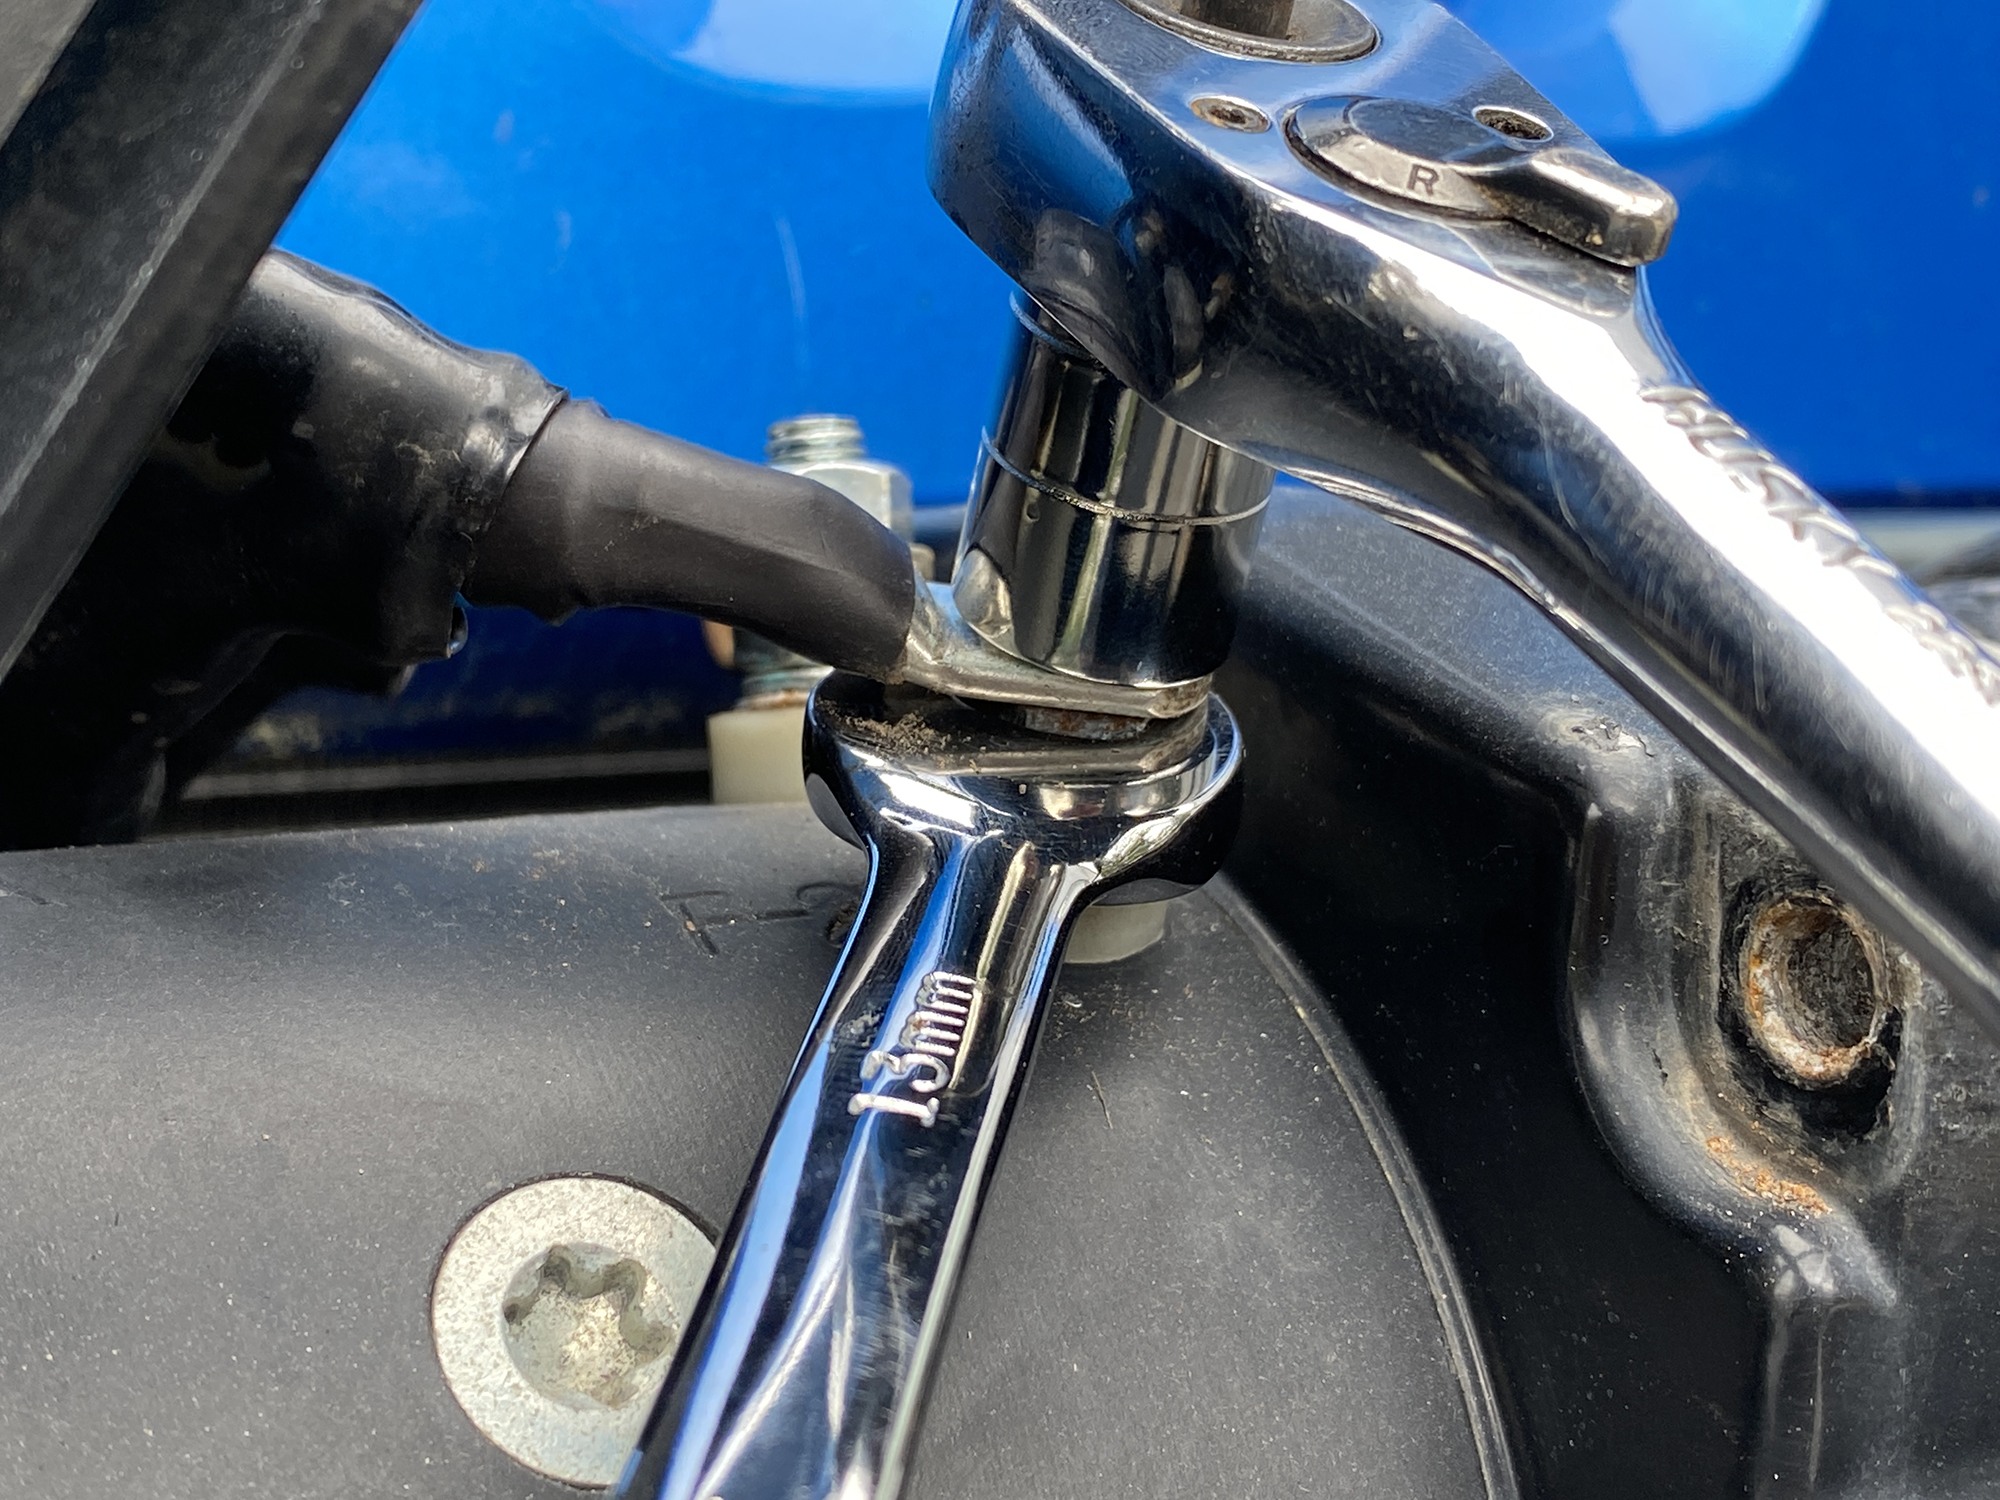
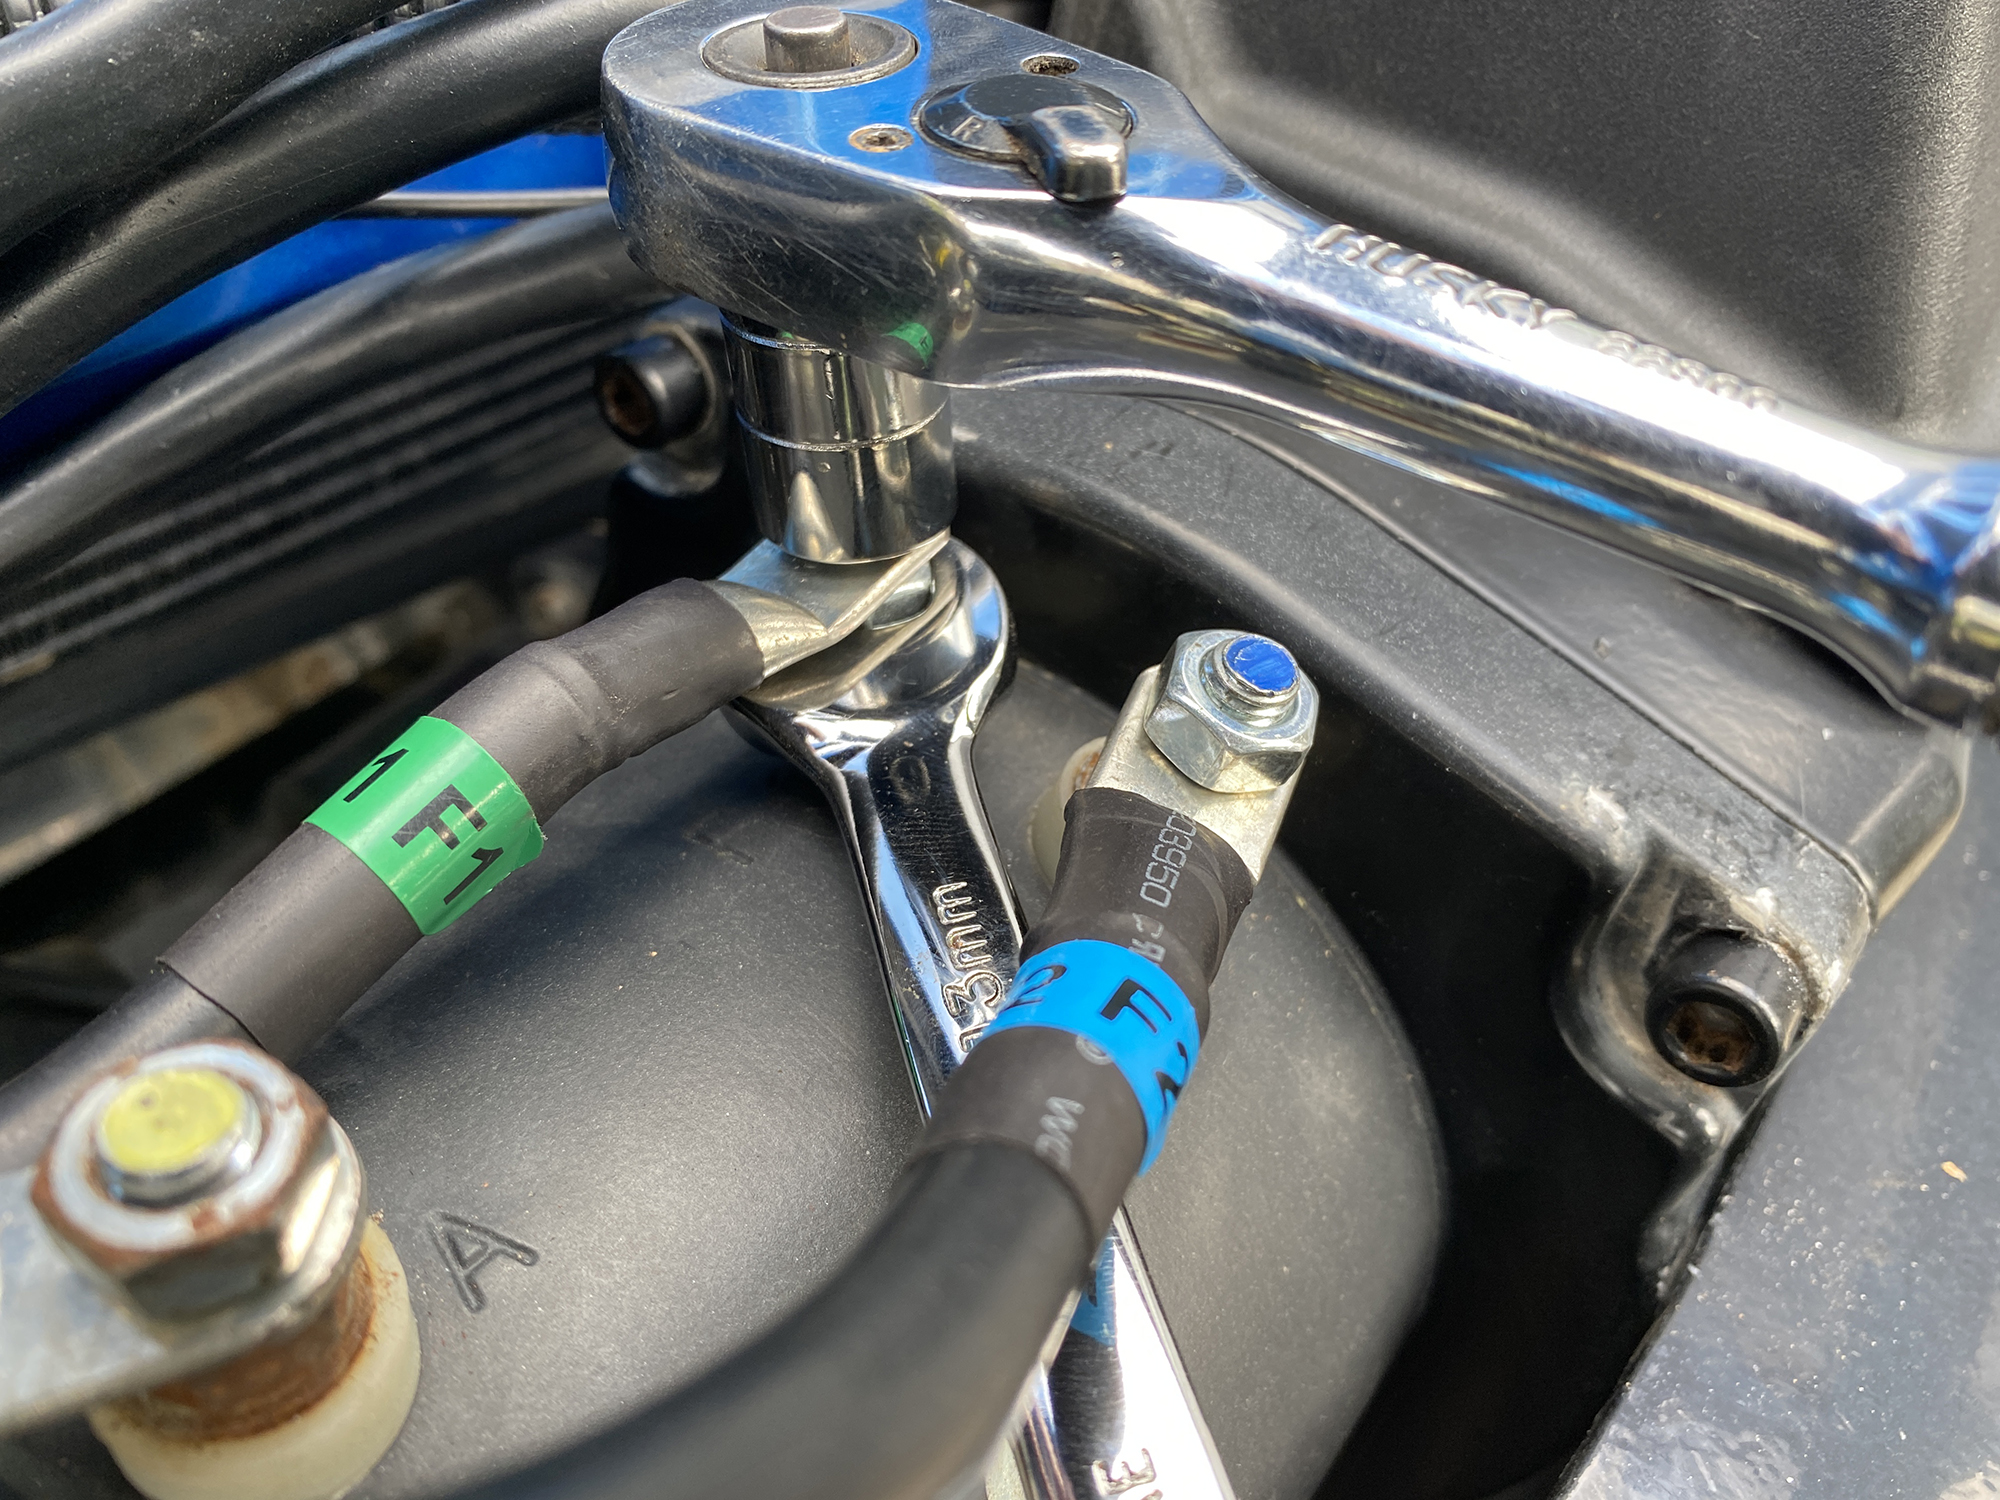
Once you have the front tie bar removed, you should be able to move the solenoid box out of the way to access the cables on the top of the winch body. Using a 13mm wrench and 13mm socket, remove each top nut from the cable terminals.
Now you should have no problem removing the rear tie bar.
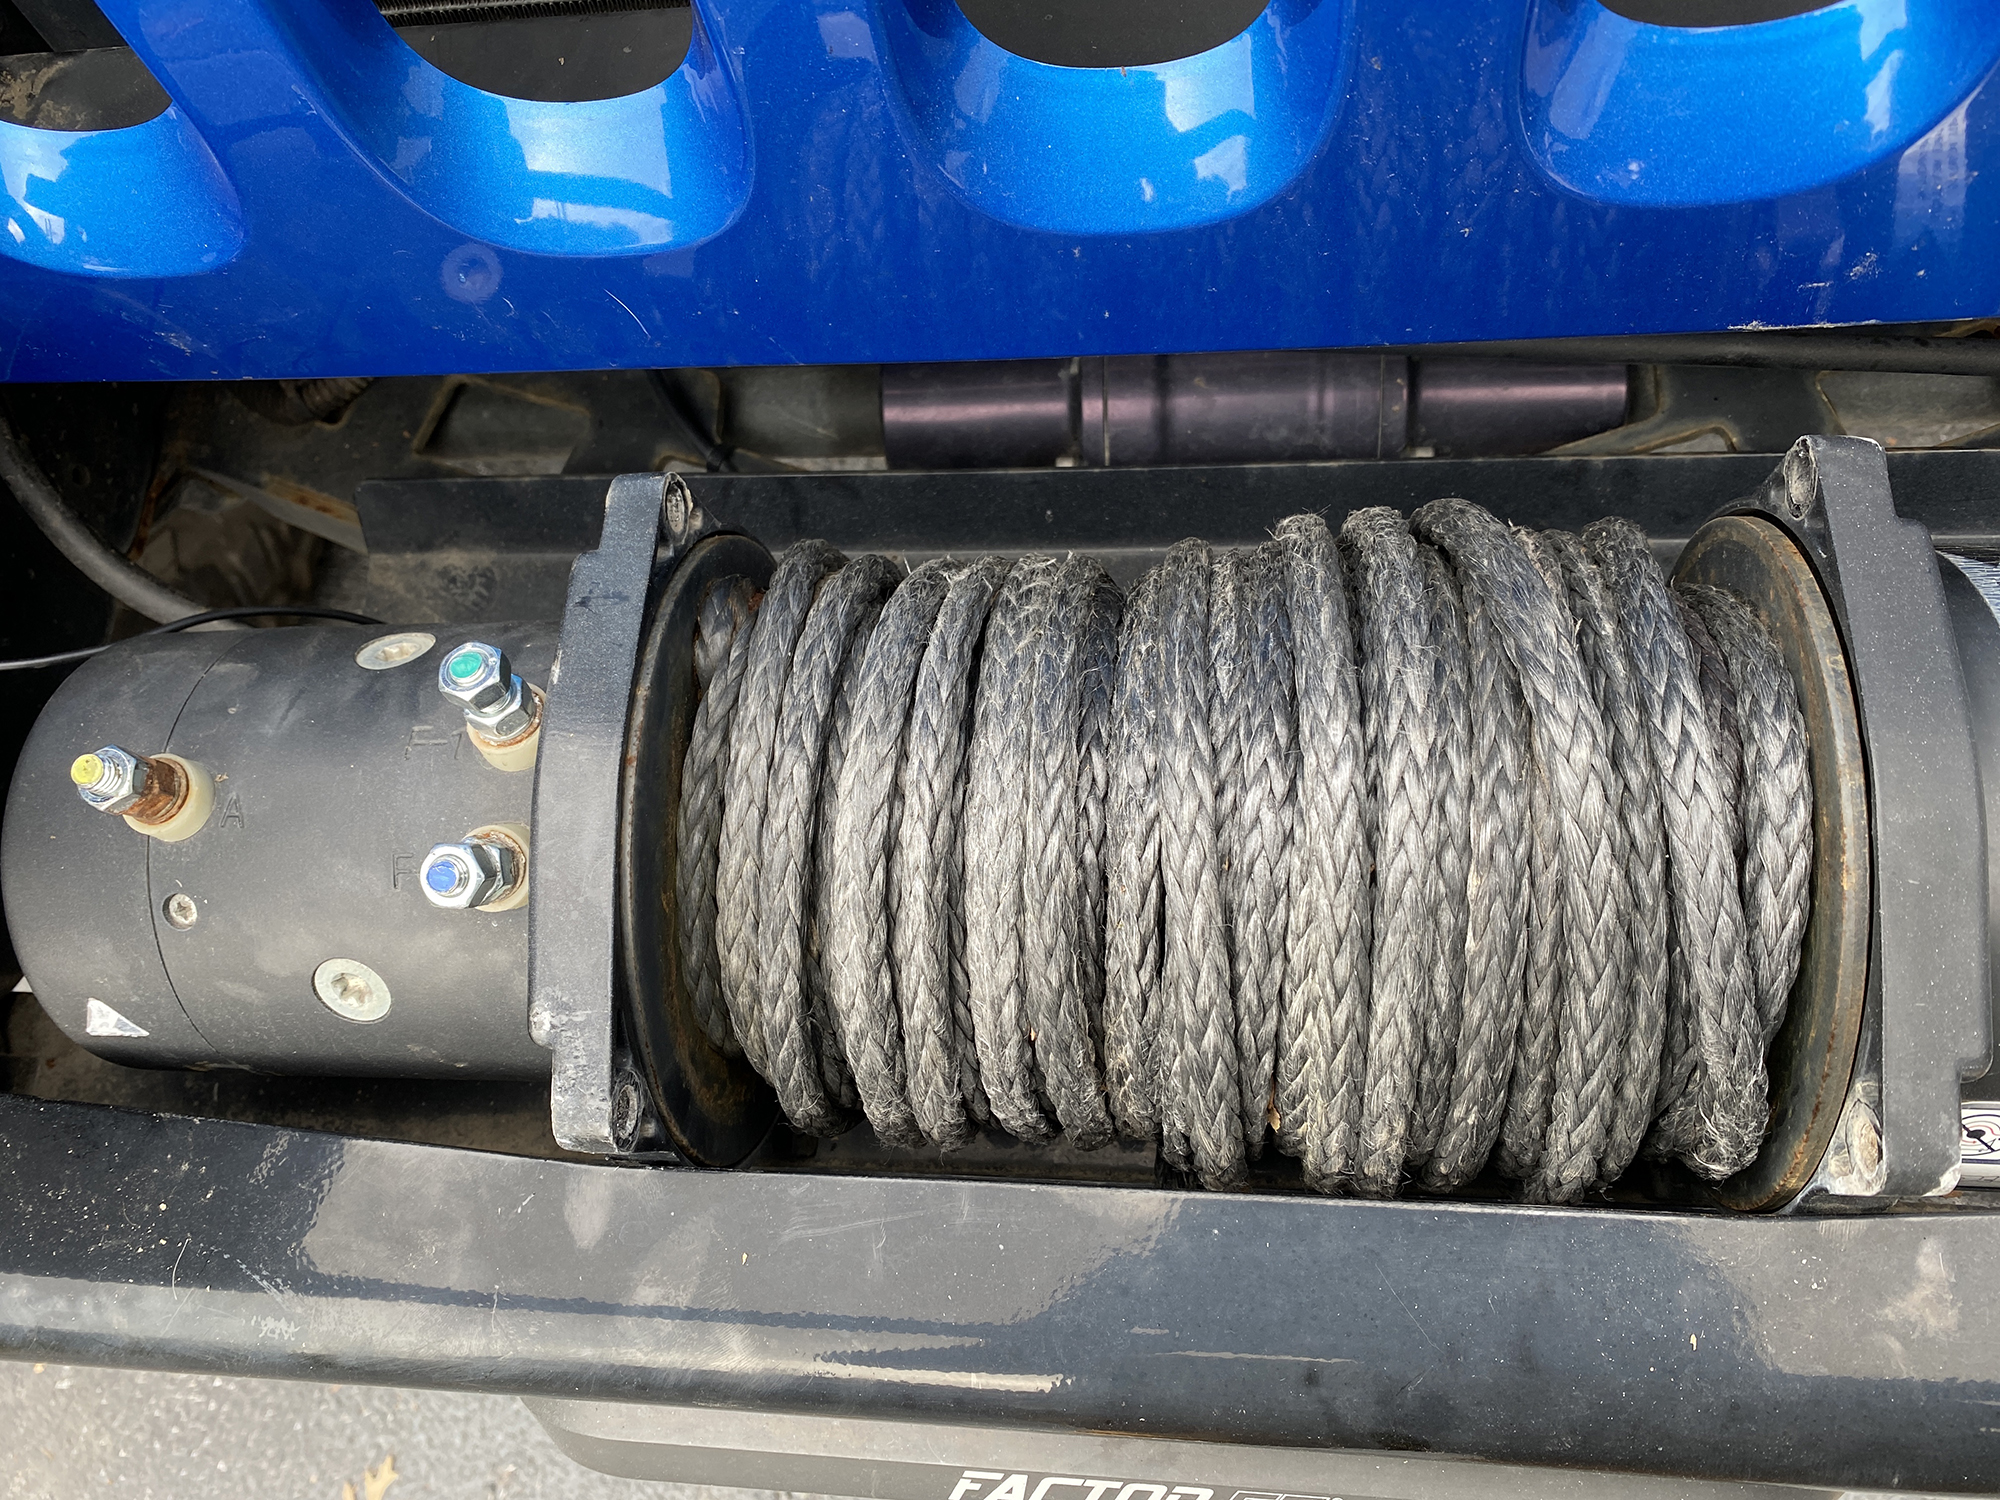
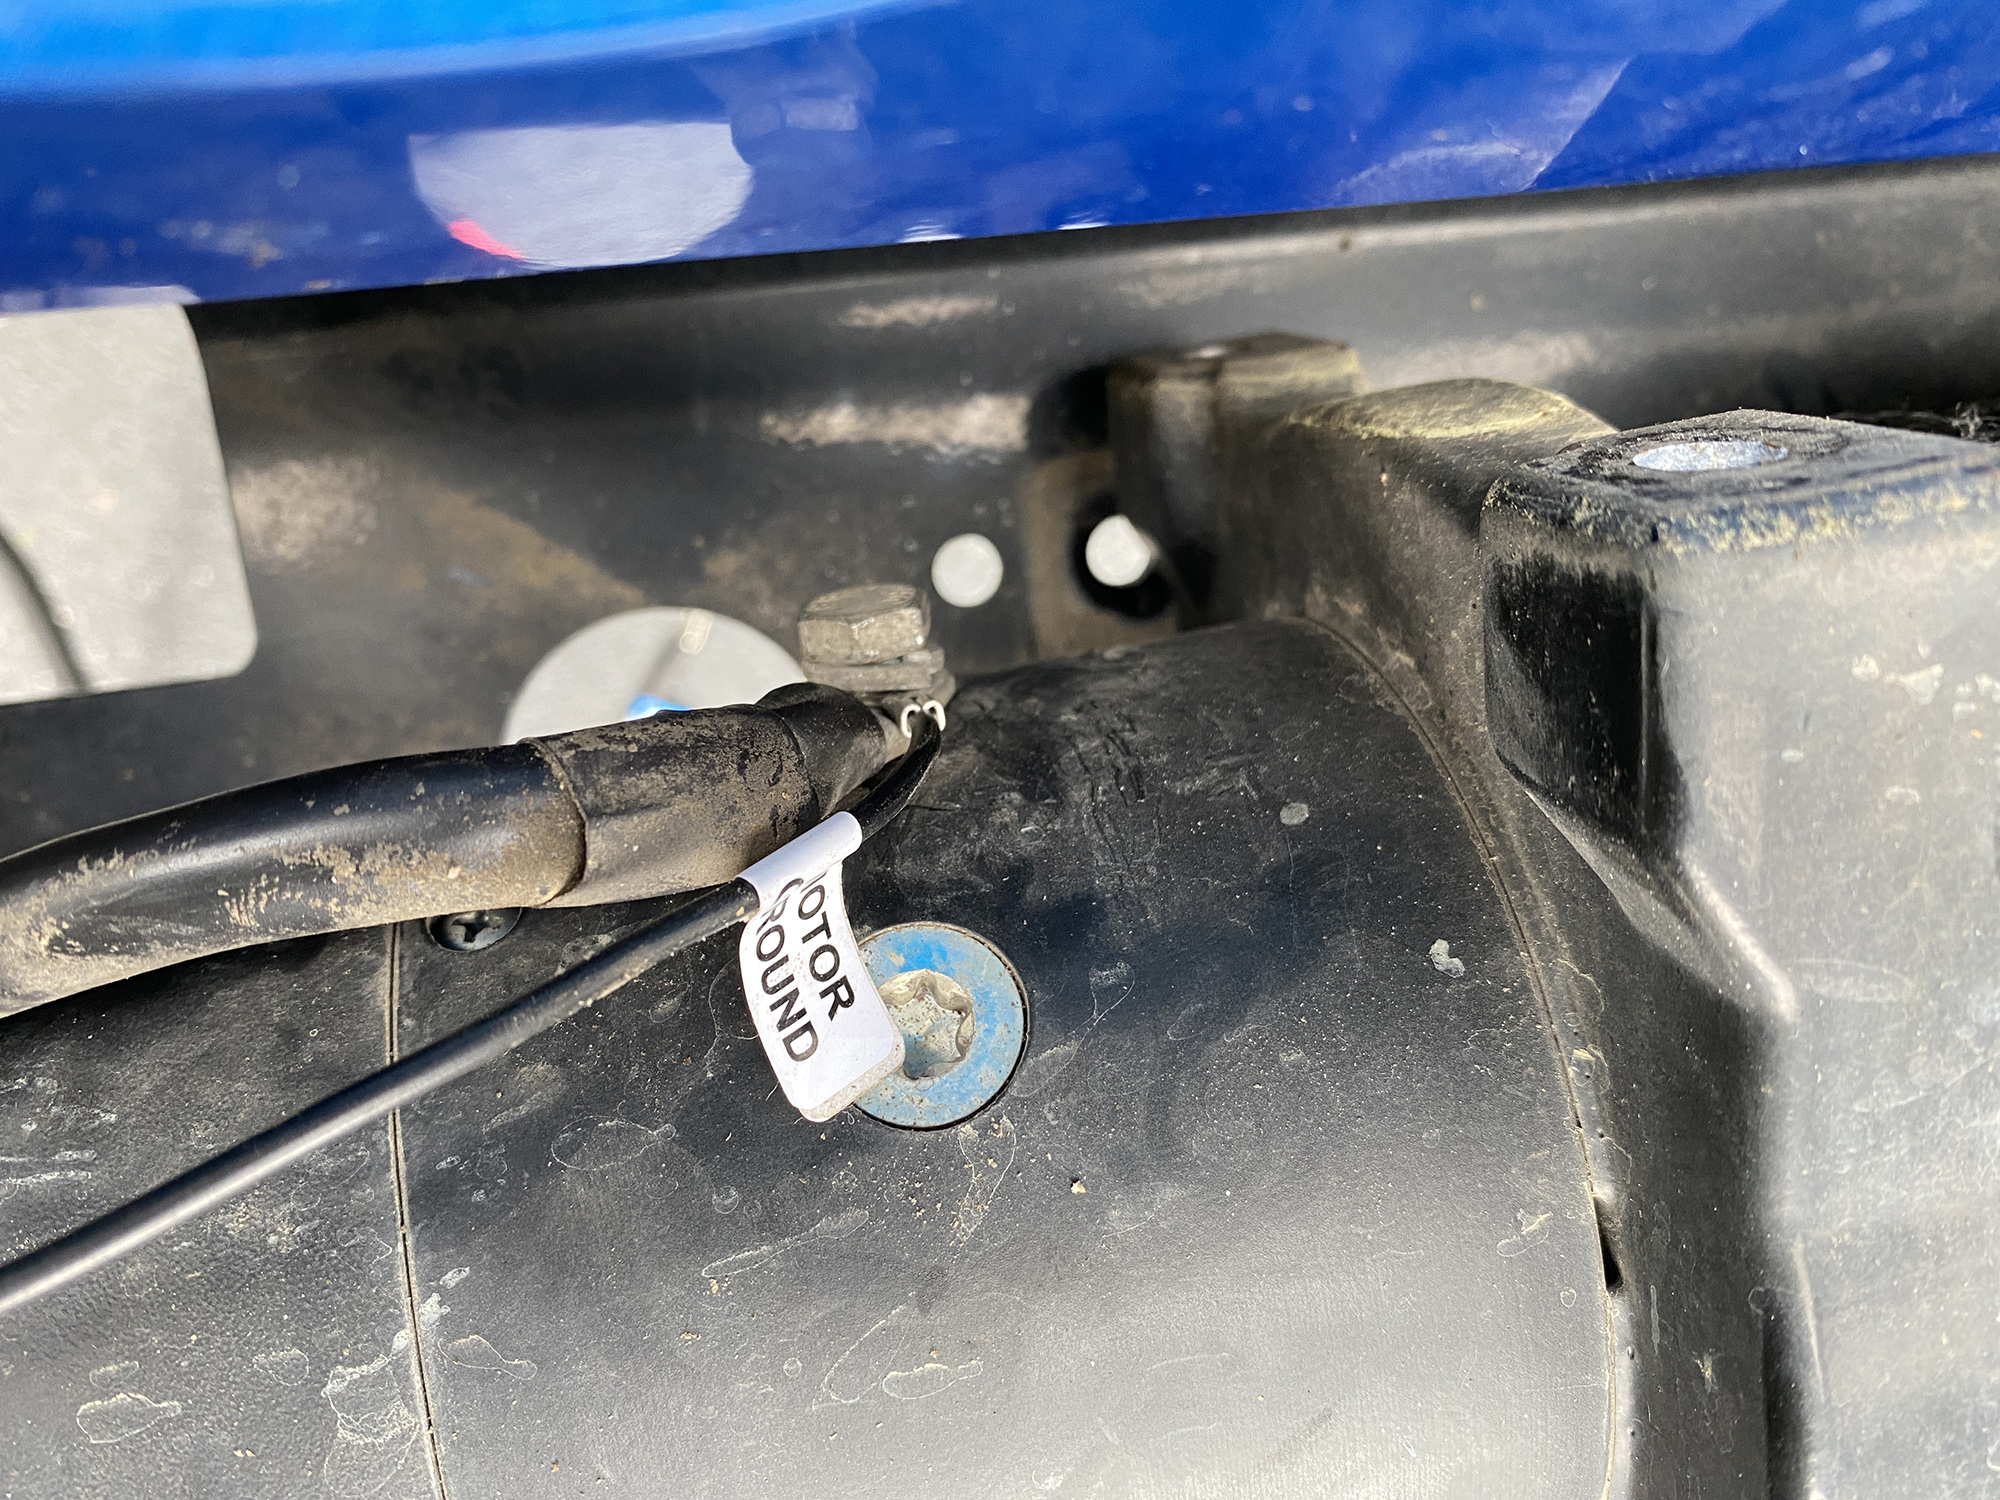
The black cable to the battery will stay in place, But, the small ground wire that goes from the solenoid to the winch body will need to be removed from the winch body side. You don't need to remove the winch from the Jeep to make this swap if you can access the ground terminal on the bottom of the winch body. With mine, it was a little tight, so I removed the four 9/16ths bolts that hold my winch to the winch plate, freespooled my winch and rotated until I could get a 13mm wrench on the terminal.
Once the thin ground wire is disconnected, you can remove the solenoid box completely from the Jeep and set it aside.
Now we can install the new control pack on the top of the winch.
Start by connecting the thin black ground wire coming out of the control pack labeled ‘motor ground’ to the ground terminal on the underside of the winch body along with the black battery cable.
Now you can rotate the winch back onto its mounting feet, and put the control pack in place to bolt it back together.

The tie plate that ships with the new control pack is not threaded from the factory. But the bolts included will self tap into the tie plate. If you want to go that route I would suggest using a small impact gun to run the 6mm bolts into the tie plate.
The other way to go (which is what I did) is to tap the holes if you have a tap set.
Replace all four tie plate bolts (included with the kit) with your 6mm allen socket and torque to between 18 and 22 lb-ft.
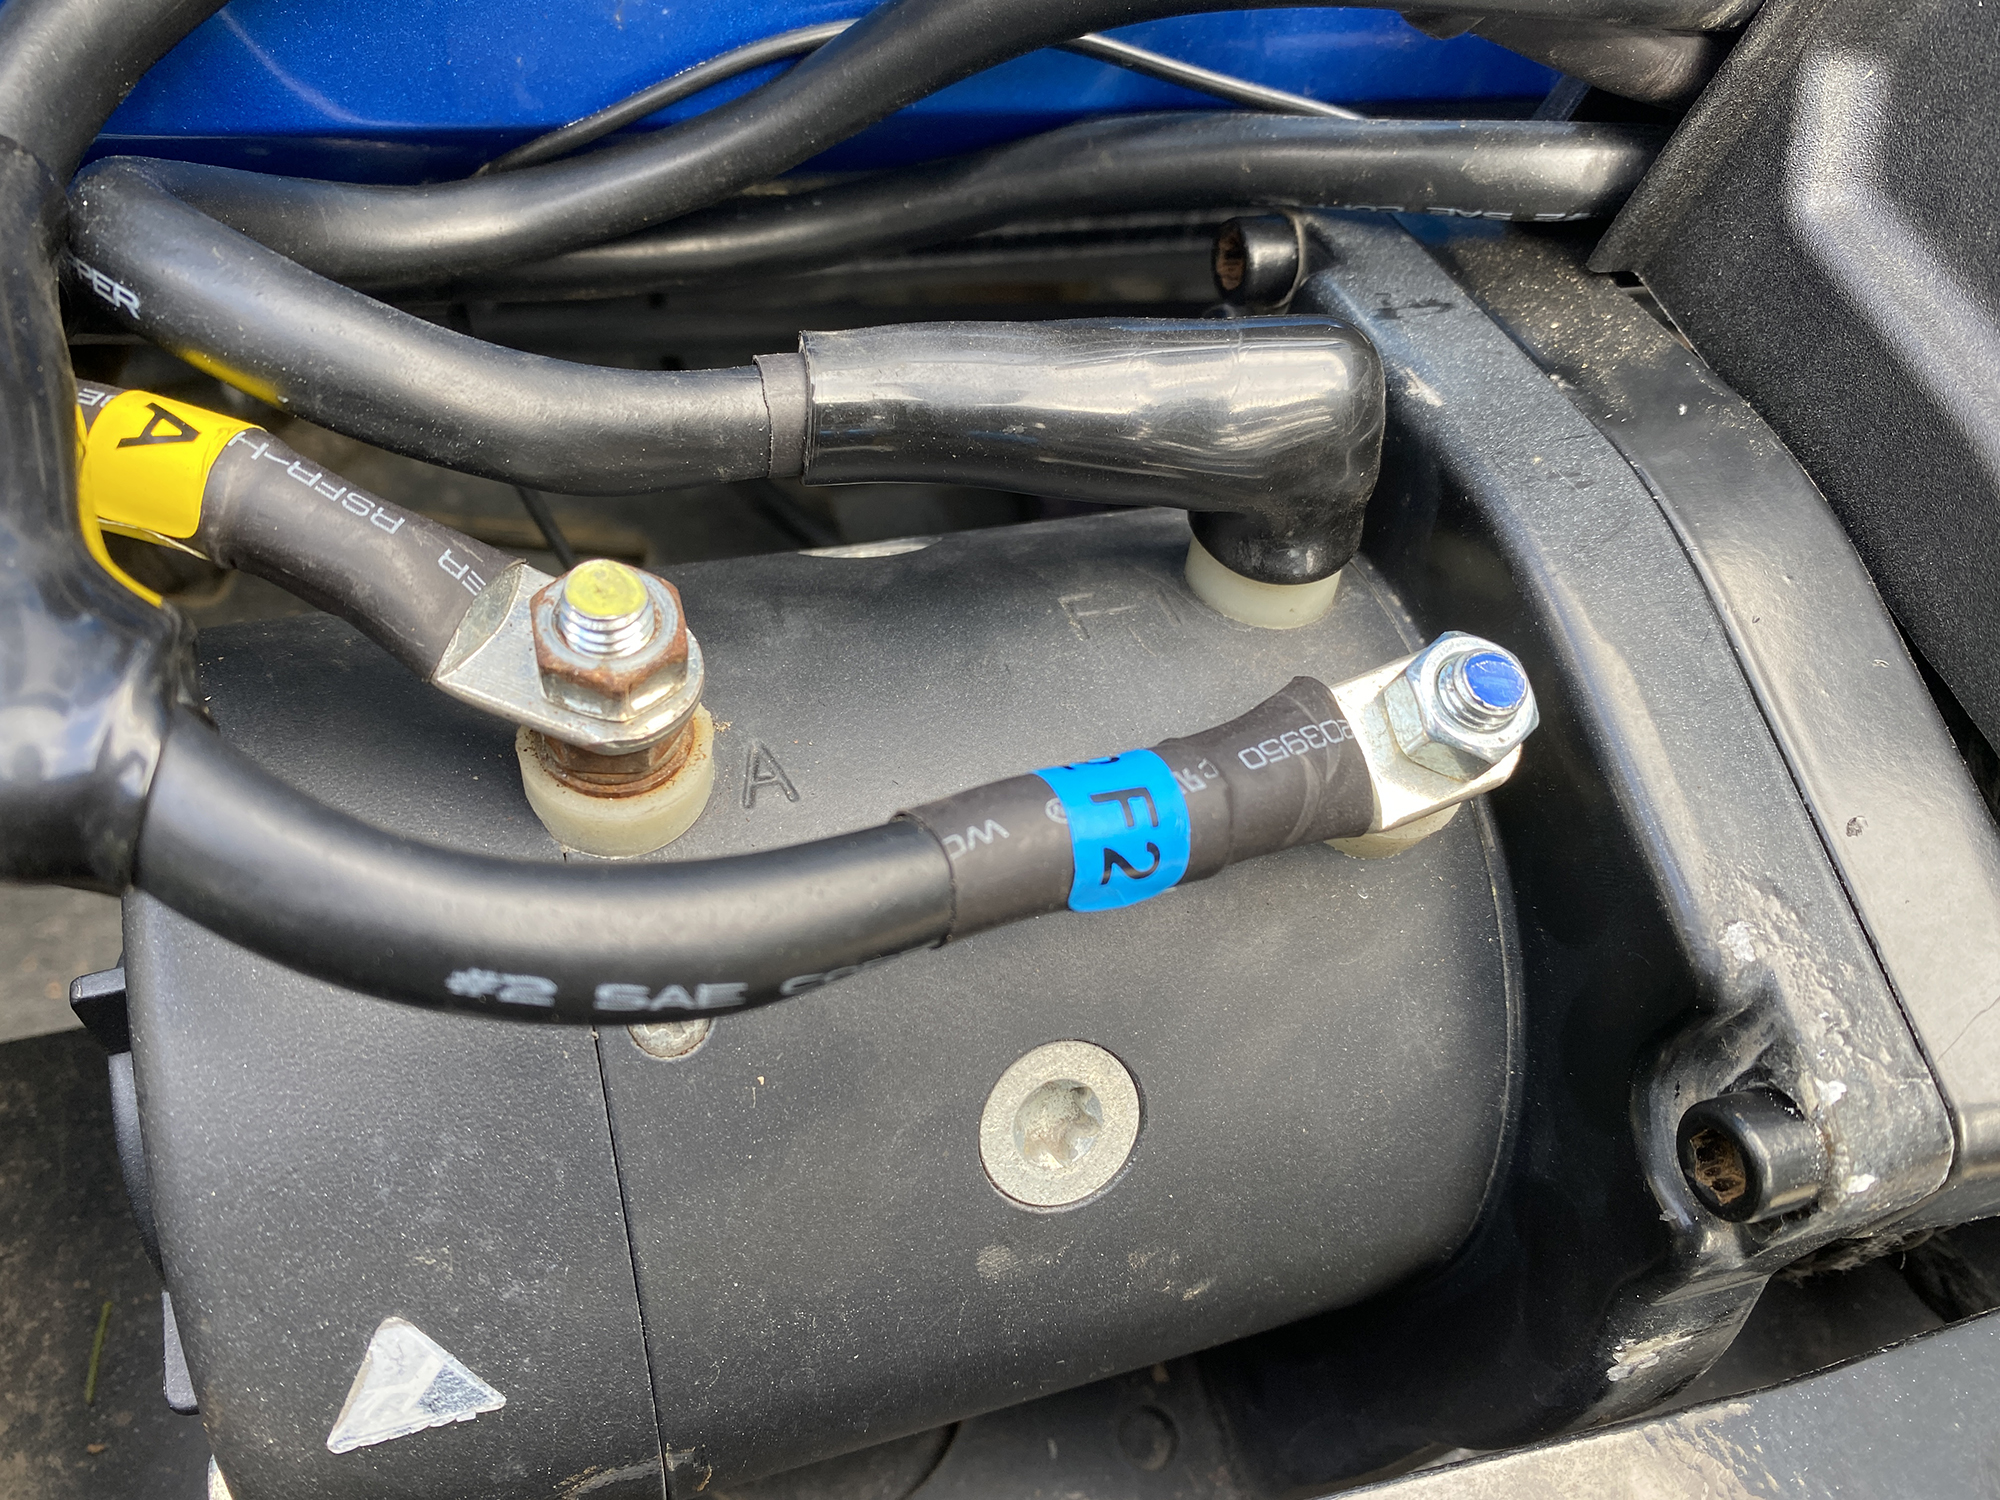
Now connect all the color coded cables from the control pack to the matching terminals on the winch body, and tighten with the 13mm wrench and 13mm socket.
Make sure you cover all the terminals with the weatherproof boots.
Now route the red cable to the battery and attach to the positive terminal of your Jeep battery. Plug in your winch remote and test it out to make sure everything works correctly.
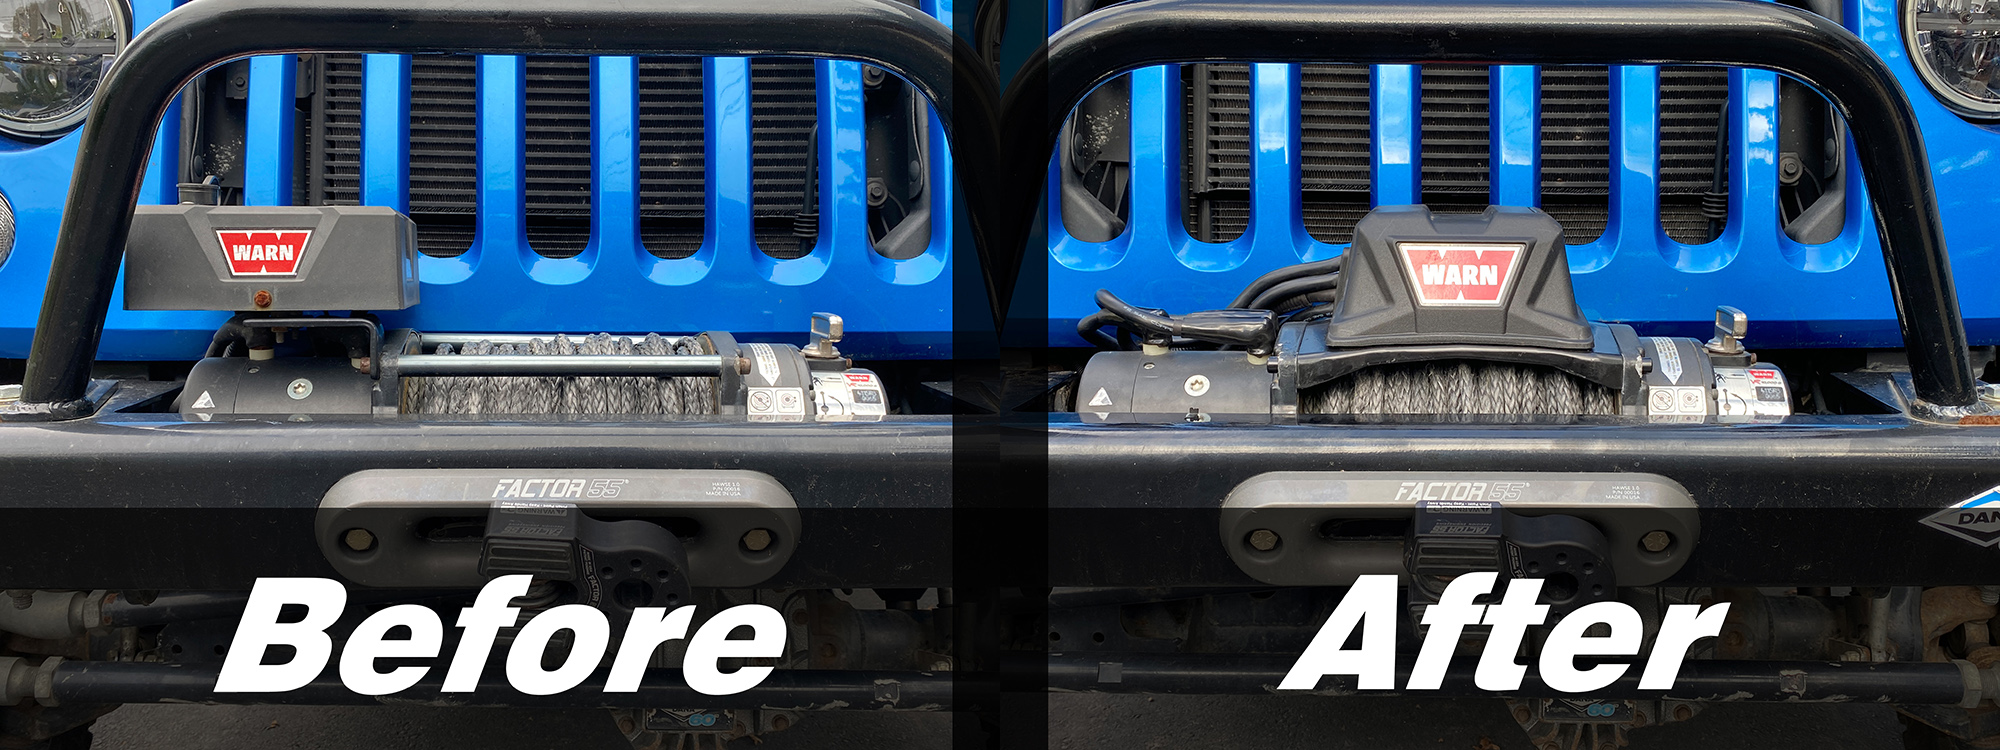
That is all it takes to change the look and upgrade the control pack on your older Warn winch.