Today's Mod Monday focuses on adding Kentrol Tailgate Hinges, as well as a Rear Wiper Arm Cover and Stainless Steel Hardtop Hinge Kit when replacing factory versions.
Quite frequently, the direction of your project can change when purchasing upgrades. This can lead to issues with fitment, as not all aftermarket parts are designed to play well with each other.
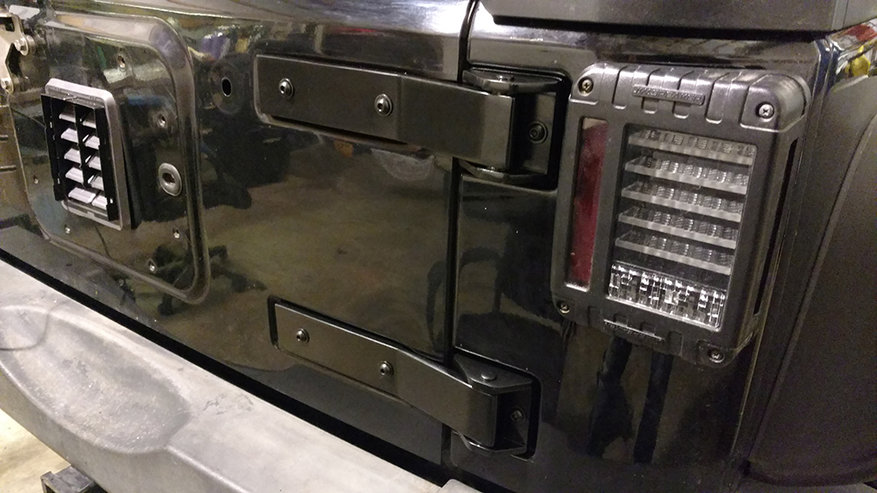
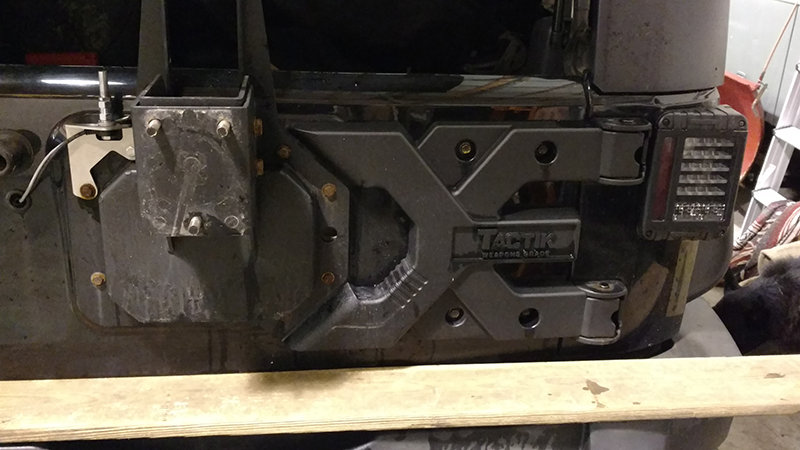
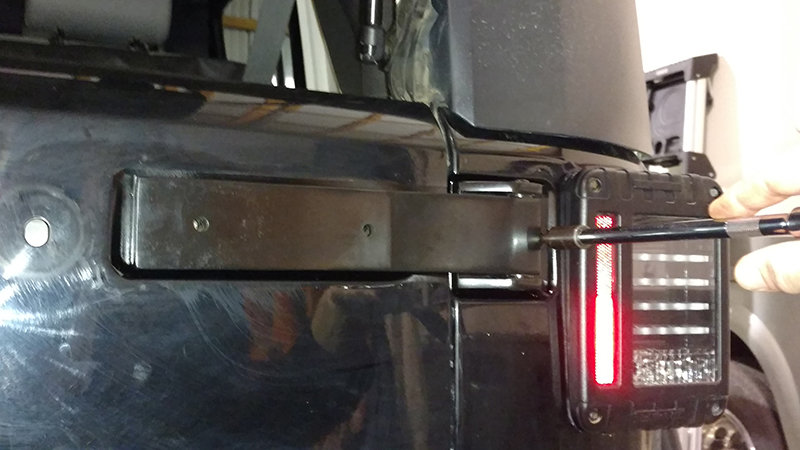
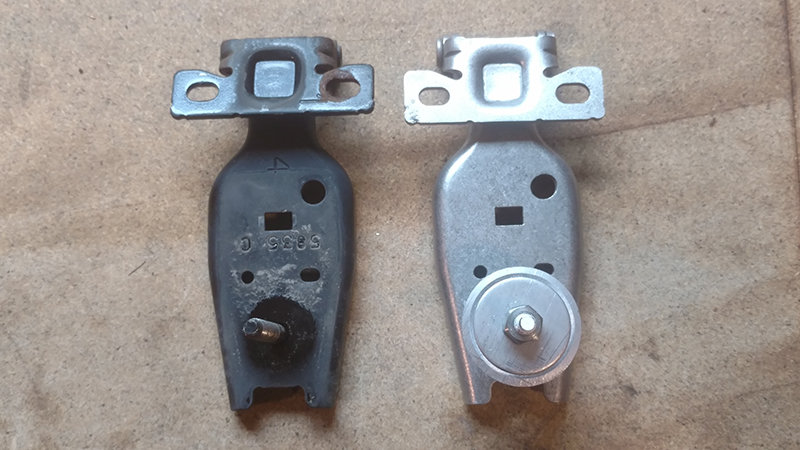
Such was the case recently with Project Snake Eyes, my 2008 Jeep Wrangler Unlimited. The Tactik Hinge Reinforcement and Adjustable Spare Carrier we installed last year is now being replaced with a bumper mounted tire carrier. Its bulk was necessary to prevent the tailgate from damage thanks to the mass of a larger spare tire, but it sticks out just far enough to contact the pivot pin of the new carrier.
There wasn’t anything wrong with its operation, and the carrier could have stayed on the Jeep if it didn’t create this clearance issue. Since the factory steel hinges and covers were removed and discarded when it was originally installed, something needed to go in its place. And with the heavy load of the 35” tire being removed from the tailgate, a reinforced model was no longer needed.
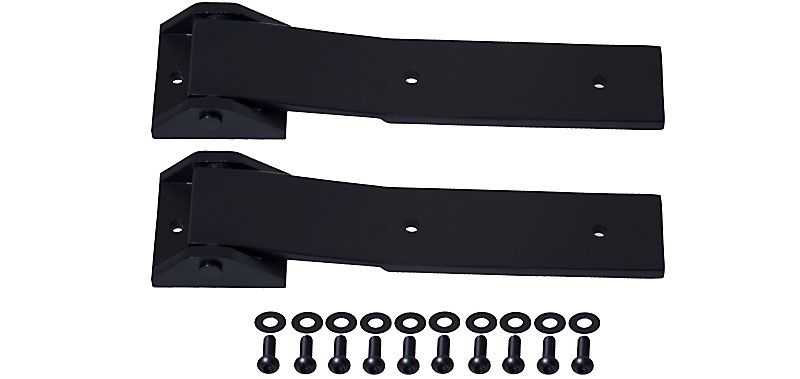
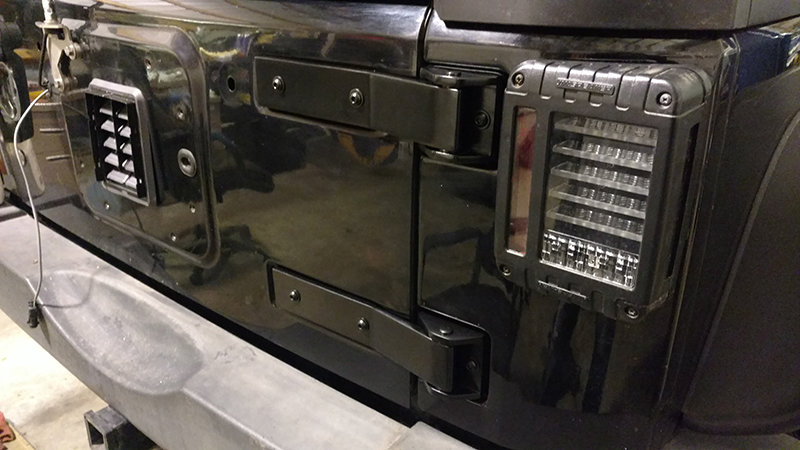
Luckily, Kentrol makes very sharp sets of low profile stainless steel tailgate hinges for Wrangler JK models. These hinges come with all new, stainless steel hardware and are available in polished stainless steel or matte black, as well as black textured powder coated finishes.
These hinges are perfect if you’re having the same type of issue as me, or if you just want a smoother looking hinge without the need for clunky-looking ABS plastic covers.
As with the other hinges on your Wrangler, the body panels were painted at the factory with the hinges installed. In my other article about installing Kentrol replacement hood and door hinges, I left these mostly unprotected surfaces alone. For this installation, I am going to treat and paint the metal before installing the new hinges.
My hard top hinges have been creaking and groaning when opening and closing, no matter how much I lubricate them. When inspected, the pivots were rusty and worn which definitely is causing this condition.
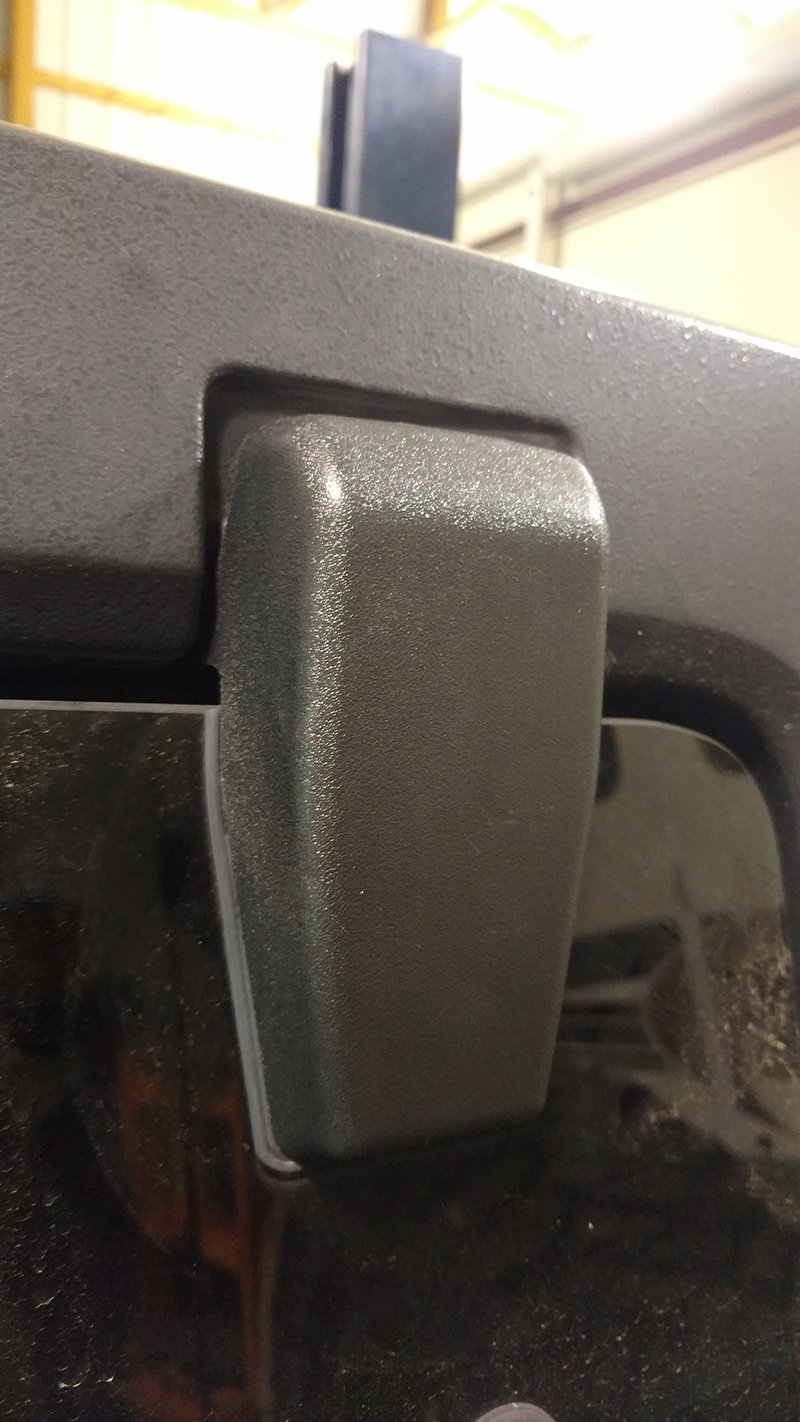
I will also be installing Kentrol Hardtop Stainless Steel Hinges. Since the ABS covers are UV damaged, gray and scratched, I ordered a set of Kentrol Hardtop Hinge Replacement Covers as well.
As a simple “dress up” add-on, I am painting and installing a Kentrol Rear Wiper Arm Cover. This will also give the wiper arm a little more protection, as my CB antenna smacks against it constantly as it snaps back following impact with overhead objects while on the trail. I haven’t broken one yet, but maybe this tiny little armor piece will help. Or maybe it's just aesthetic. Don’t tell anyone!
Tools and supplies required for tailgate hinge installation:
- 13mm socket for removal of factory hinges (or Tactik hinge reinforcement, in my case)
- 5mm Allen socket or key
- T-47 or T-50 Torx socket (both fit, but the T-50 may need to be tapped into place because of paint)
- Wood blocks to brace underside of tailgate against bumper
- 6” extension for sockets
- Rust Reformer or any rust-inhibiting primer
- Touch up paint in your Jeep’s body color
- Wide blue masking tape
Tools and supplies for hard top hinge replacement:
- 10mm deep socket
- T-25 Torx bit
Material and paint for coating the polished wiper arm cover:
- Self etching primer
- Automotive enamel or spray touch up paint in your Jeep’s body color
- Medium grit emery cloth or sandpaper to scuff surface before painting
Tailgate hinge replacement:
This is actually fairly quick if you have a good solid support underneath the tailgate to keep it from sagging in the middle of replacement.
For this, I used a big plank of wood that just happened to be the right size to hold it against the factory bumper. When I installed the Tactik hinge reinforcement, I used several small wooden shims. It doesn’t take much, but keeping it from moving in the middle of replacing the hinges will make your installation very easy.
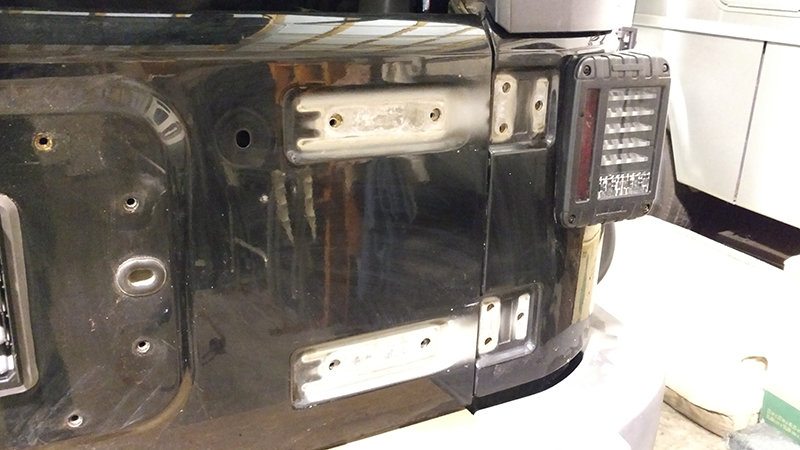
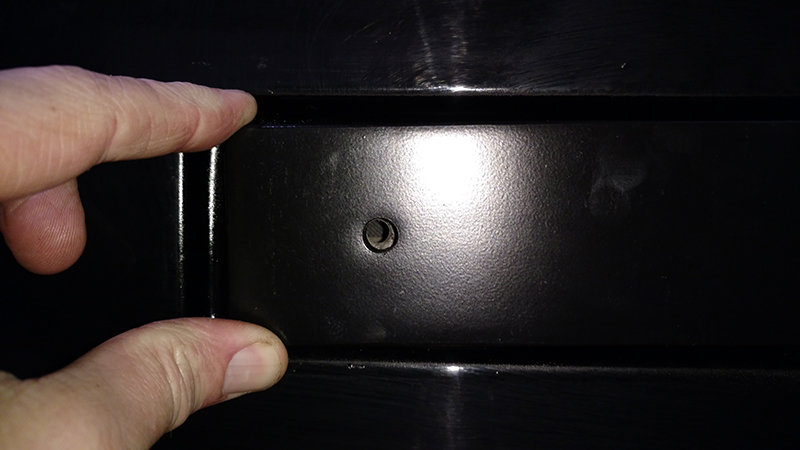
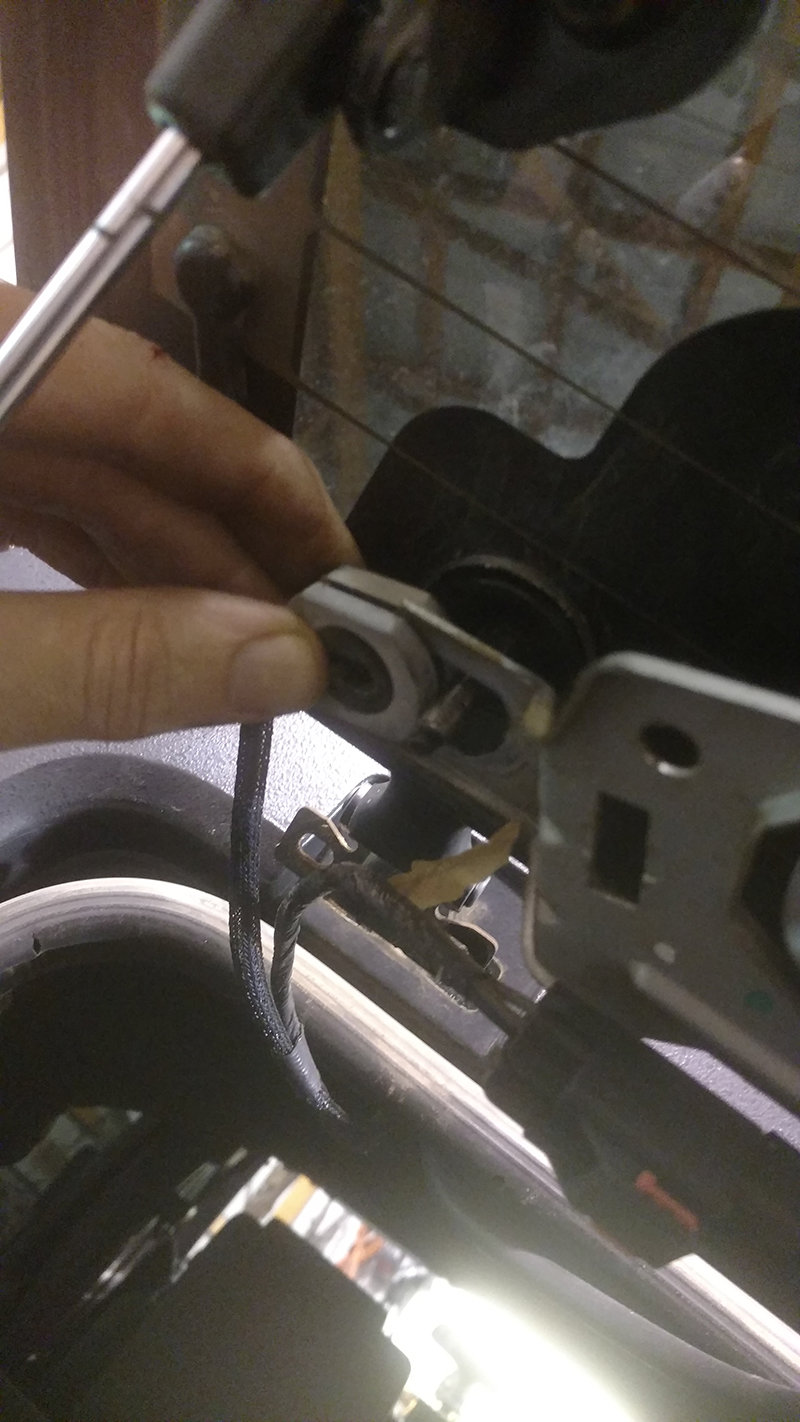
With everything supported, keep the tailgate closed and latched. For factory hinge setups, pull upwards on the four plastic hinge covers to remove them. If you have a reinforcement style hinge, everything is out in the open.
Remove the four 13mm bolts (two per hinge) holding the hinge arms to the tailgate, and swing the hinge open. Remove the six Torx bolts holding the hinge to the body of the Jeep, and the whole thing pulls off.
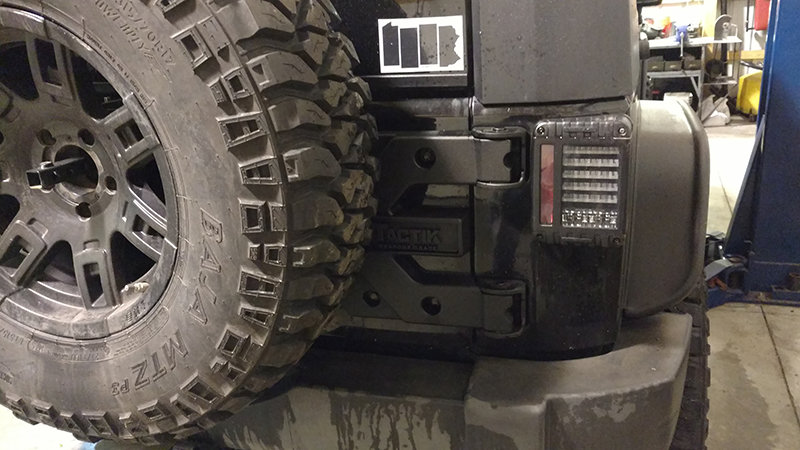
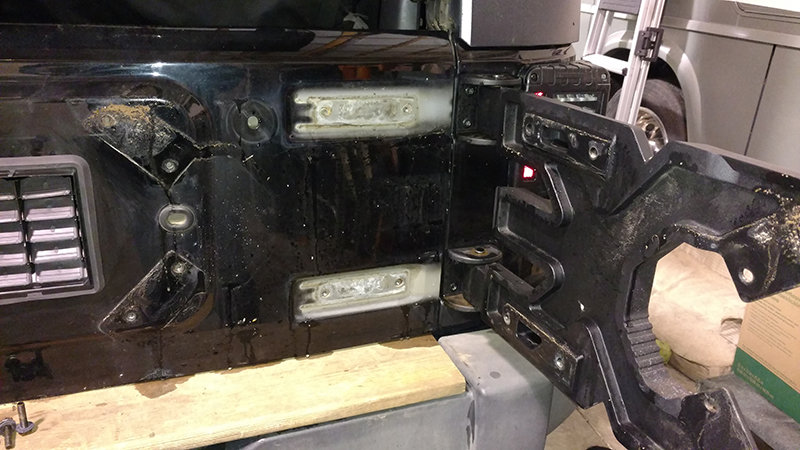
No matter what you removed, your tailgate probably looks a lot like this. The surface rust under the hinges was minimal, but worth taking care of before putting on the new parts.
I masked off the area I didn’t want to paint using blue painter’s masking tape. I didn’t mask the bumper, as it is being removed soon, but plenty of overspray ended up on it. If you’re not replacing your bumper, mask this area off as well.
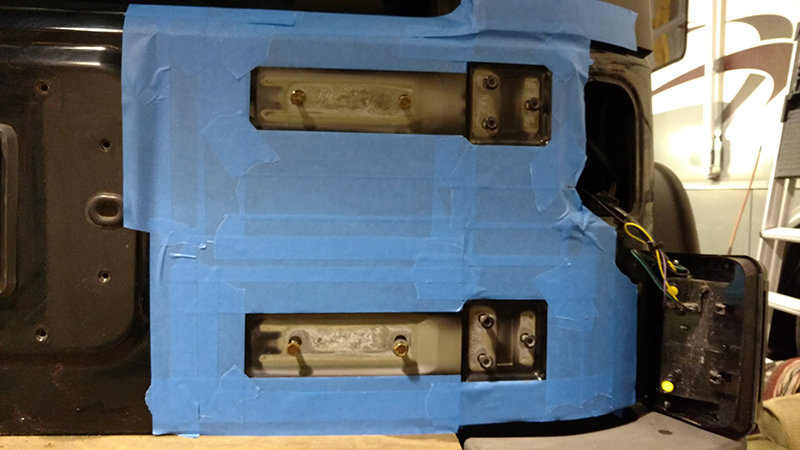
I used Rust Reformer paint as a primer. This paint is available at most hardware stores, and converts surface rust to a paintable surface. If your rust behind the hinges is worse than mine, you may want to use coarse grit emery cloth to remove the worst of it before painting.
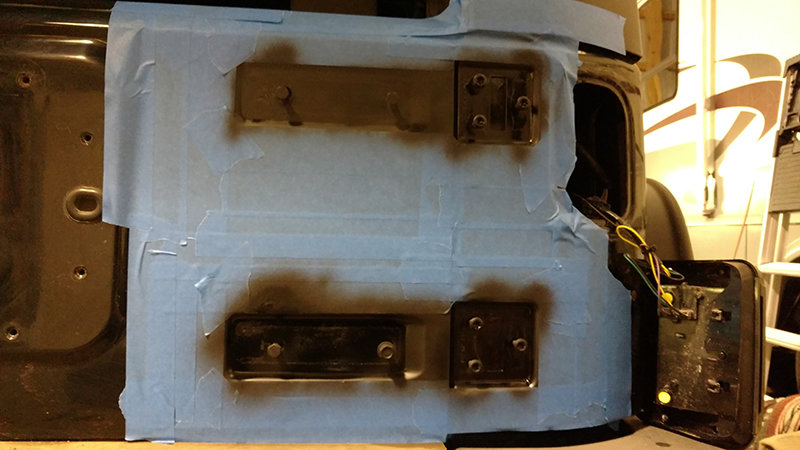
With the masking tape peeled away, everything is the same color. Since my Jeep is black, I can get away with a lot more as far as paint selection goes. If you had a brighter colored Wrangler, I would highly recommend using the Mopar paint in your paint code for best results.
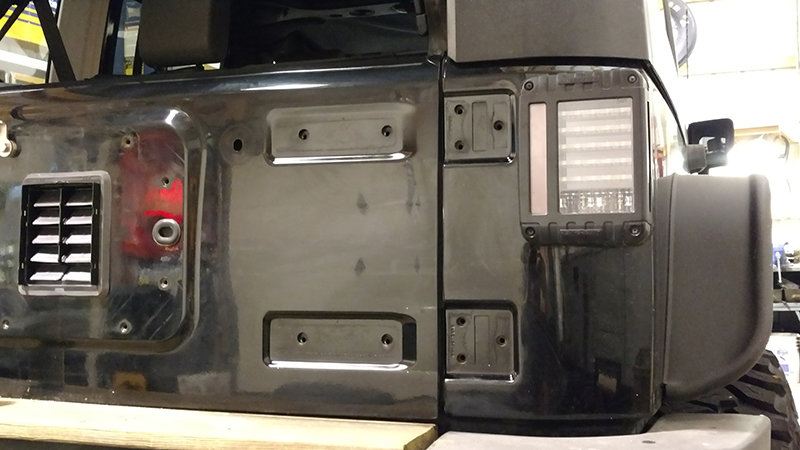
With this step completed we move on to hinge installation which, with a little caution, is a very simple step.
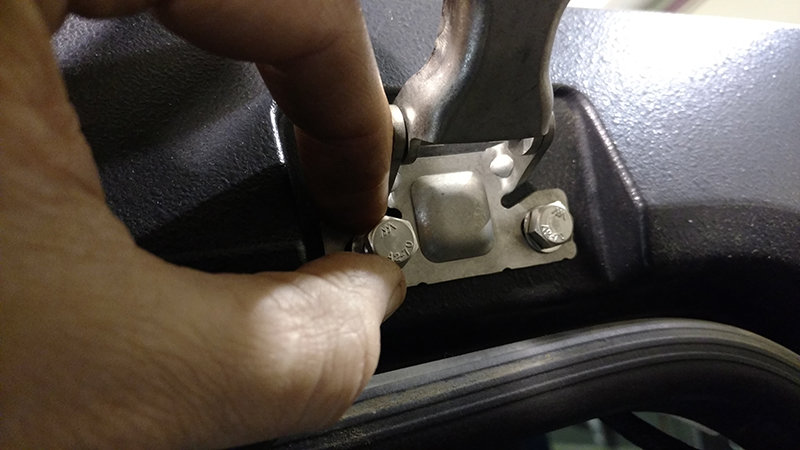
Using the included stainless steel Allen bolts and washers, partially install each set of 3 mounting bolts on the body side of the hinges snugly (so you can still adjust the hinge), but do not fully tighten at this point.
Rotate the hinge against the tailgate, and look through the mounting hole to see the threaded centering plate behind the hinge. Get it as close to center as you can on both tailgate side holes, and tighten the outer 5mm Allen bolts to hold this angle.
Open the hinges back up, and tighten the inner two mounting bolts. Close the hinges again and install the tailgate side bolts and washers.
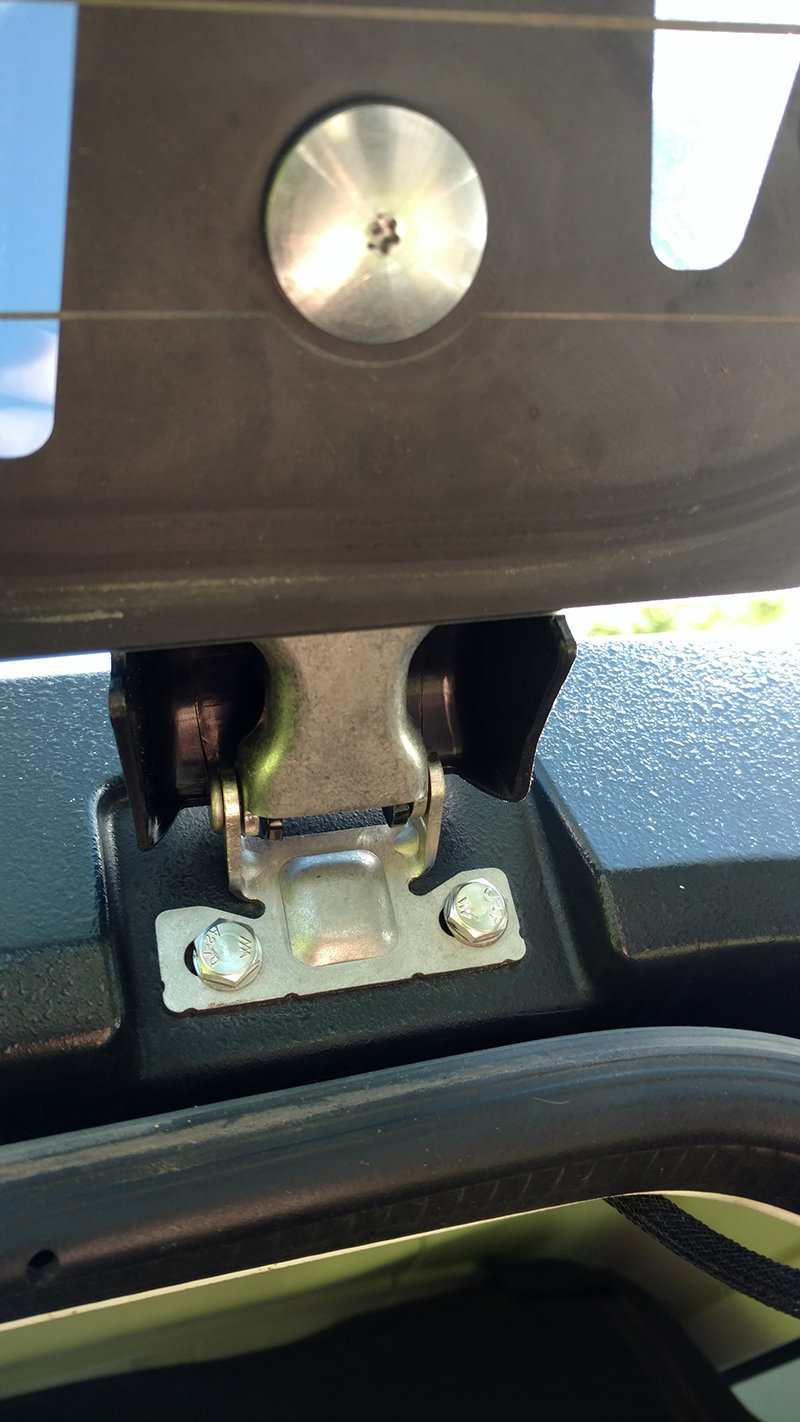
Verify that the tailgate opens and closes as it should, no adjustment should be necessary. If the tailgate doesn’t operate smoothly, close it and loosen the tailgate side bolts one hinge at a time and re-tighten. This should center the tailgate in the hinges.
Hard top hinges:
The key to these is doing one hinge at a time. The gas filled struts will give you enough support that removing a single hinge won't throw anything too far off or send your rear window falling towards the earth.
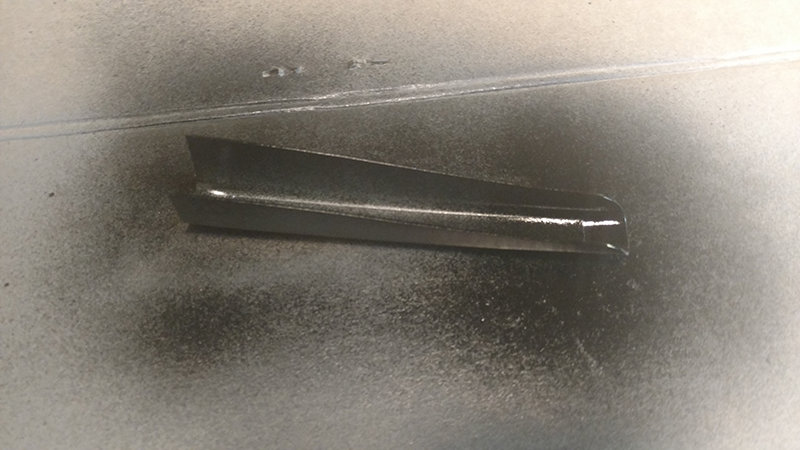
With the glass closed, the ABS plastic hinge covers can be removed by carefully prying upwards with a small screwdriver or trim tool in the small slot below it. If you ordered new ones with your kit, you can pull down on them with your hands, but the upper tabs may break. If you have a new set, this doesn’t matter.
Starting with the passenger side, loosen (but don’t fully remove) the two 10mm bolts holding the hinge to the hard top.

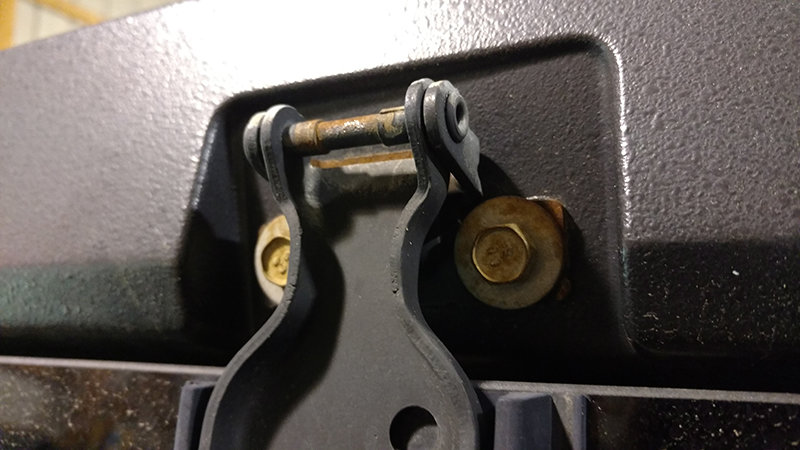
Move on to the T-25 Torx plate holding the hinge into the glass. Remove this fully, but save the plastic grommet the bolt goes through. This will be reinstalled.
When that is removed, the hinge may still be stuck to the glass, so grab it on the top side and pop it free. The two 10mm bolts should keep it from going flying. Remove those bolts after the glass side of the hinge is free, and take the whole hinge over to your workbench.
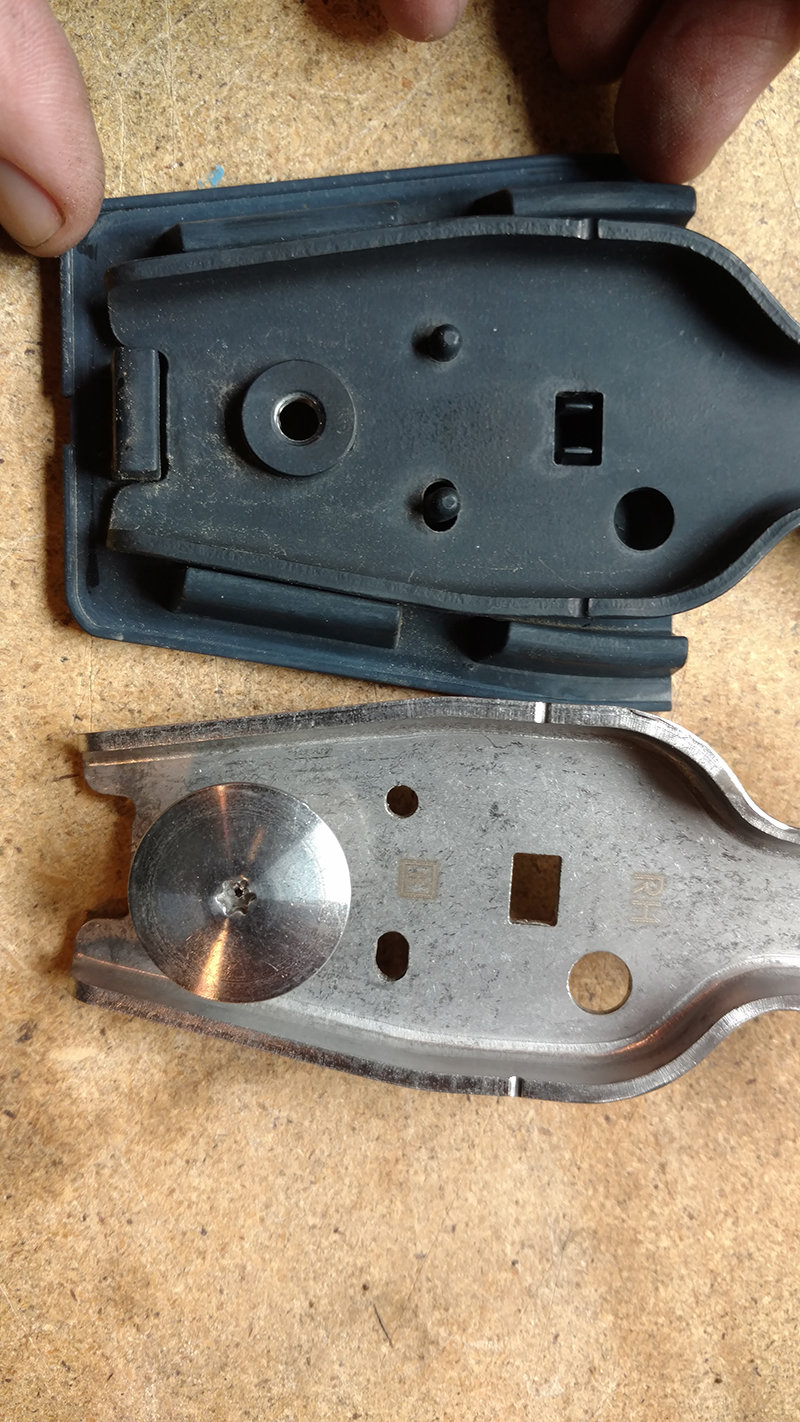
The plastic part behind the hinge must be swapped over to the new stainless steel version. It pops free easily enough, but installing it can be a little harder. Lay it flat on the edge of your work surface; align the new hinge in the tab on the lower side and over the two guide pins. Pressing down on the hinge will let it snap into place easily.
Install the new 10mm bolts and washers on the hard top side of the hinge first, then move on to the glass side Torx bolt. Make sure you reuse the plastic grommet that goes in there, as it keeps metal from contacting the glass.
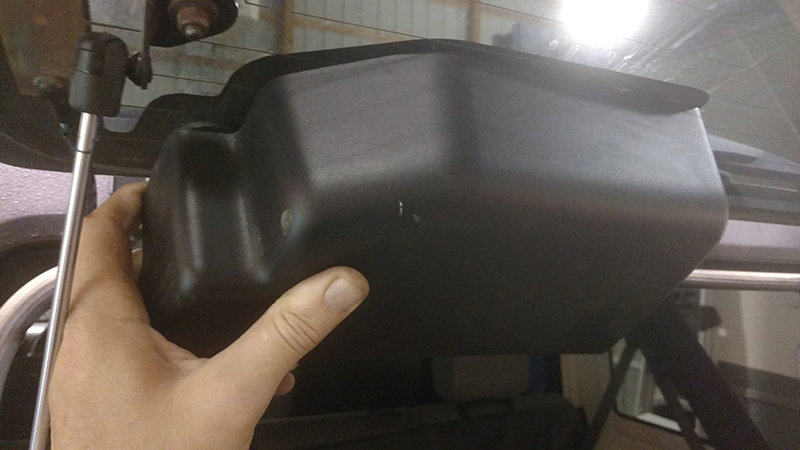
Moving over to the driver’s side, you can see there are a few more obstacles in the way. Start by removing the wiper motor cover by pulling downwards with the glass open. It is held on with 3 spring clips, but it should come off easily. You can remove the two 10mm bolts on the hard top side of the hinge completely, as this one won’t go flying.
With your 10mm deep socket, remove the shoulder nut holding the mount bushing onto the stud.
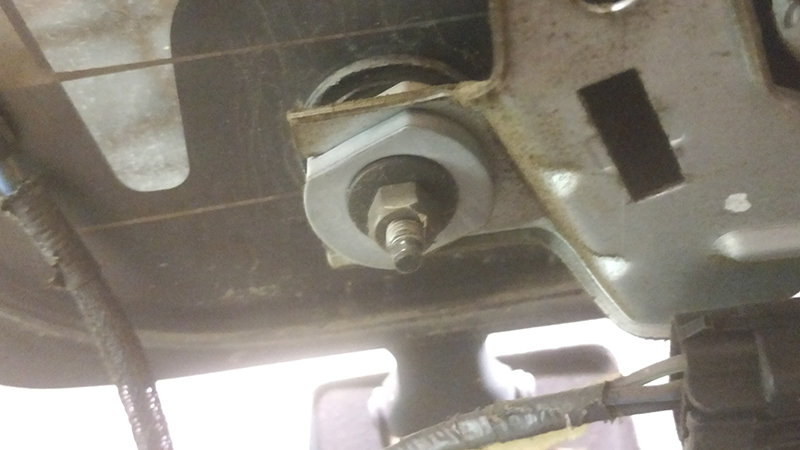
You should have enough flex to slide the rubber mount to the side over the head of the stud, but if it seems close you can loosen the other side of the wiper motor mount.
Now, use the deep 10mm socket to remove the second nut holding the hinge to the glass. As with the passenger side, pay attention to how the inner grommet is installed because you will be reusing this part. Pop it free from the glass like the other side, and swap the plastic surround over to the new hinge.
Reinstall the driver’s side hinge the same way the original came off, using the new stainless shoulder nut in place of the original. Attach to the hard top side with the new stainless steel bolts and washers, and remount the wiper motor.
Snap the wiper motor cover back in place, and close the glass. Install your original (or Kentrol high quality replacement) plastic hinge covers.
Wiper arm cover:
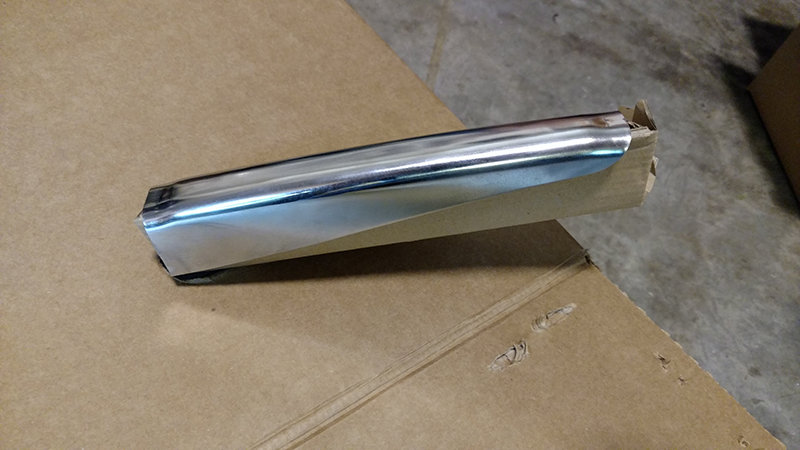
This isn’t really an installation guide, as the Kentrol Rear Wiper Arm Cover simply attaches to the wiper with double sided tape. However, we get a lot of inquires asking if this item can be painted.
It can, with some preparation.
The trouble is, a highly polished stainless steel is not really the best surface for paint adhesion.
After scuffing it up with some emery cloth, clean the surface completely with alcohol to remove all abrasive media and metal dust.
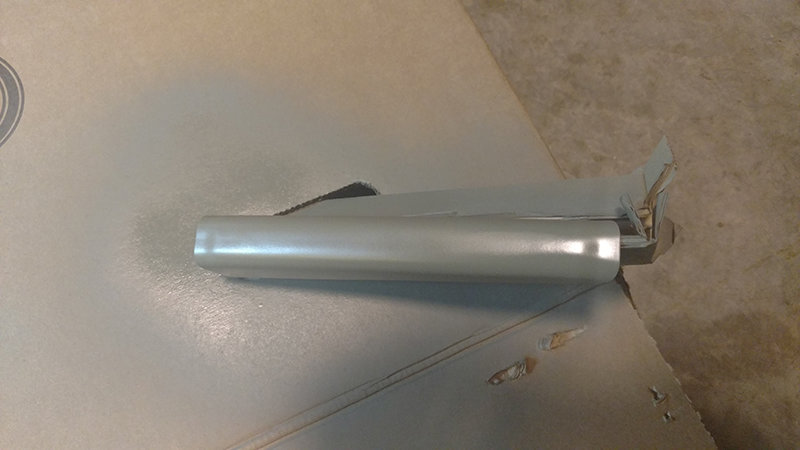
Set it up so the edges aren’t touching anything, and spray it with two coats of self-etching primer to give your top coats something to stick to. This paint takes a while to dry, so allow some time for it to do its job.
Once the primer is dry, move on to the top coat. You can paint this with any automotive enamel spray, or the exact paint code of your Jeep using Mopar Touch Up Spray.
It isn’t very noticeable on my black Jeep, but this would be a good addition on a brightly colored Wrangler with lots of color matched parts. Clean the surface of the wiper arm with alcohol, and then peel the backing off the double-sided tape on the rear of the wiper arm cover. Install it centered between the hinged parts, so it won’t interfere with wiper arm travel.