Featuring Premium Parts from
As you probably already know, hood flutter is a common problem with JK Wranglers. As the rubber hood retention straps start aging, they can get softer and stretch which allows the hood to move around pretty substantially at highway speeds. There are many products produced to combat this, and my first attempt to correct the nearly one inch of lift with a headwind (which actually was enough to slow the Jeep down!) left me with two-tone latches that looked fairly out of place. The polyurethane upgrade to the worn rubber parts was very hard to close and open, requiring the use of both hands and a solid amount of effort. They were good at precisely one thing: keeping the hood firmly closed.
Now, as far as upgrades go, they were fairly inexpensive. Metal hood latches cost several times as much as this type of product, but what I replaced these with was well worth the added cost.
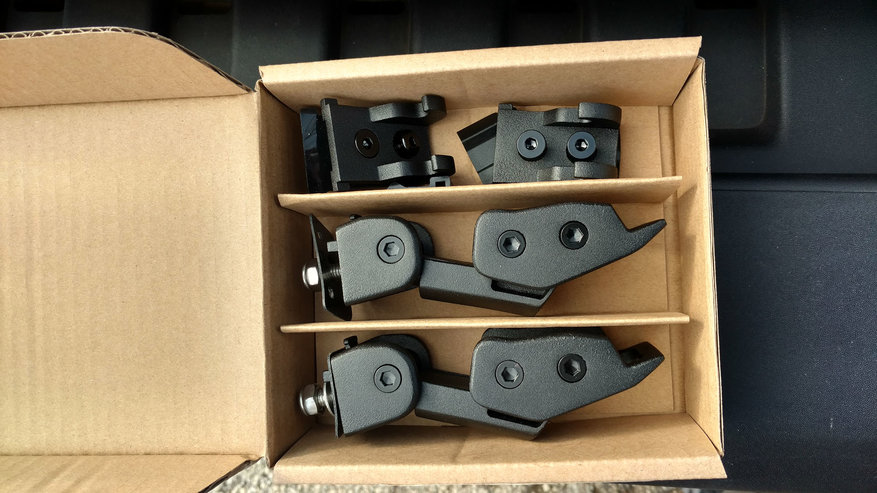
Kentrol makes three different kinds of hood latch upgrades for the JK, and the Mechanical Hood Catch Kit is the newest. The all stainless steel design uses leverage rather than stretching a rubber strap to keep the hood down, and they are finished with a textured powder coating. They also use rubber gaskets behind the upper and lower catch, thus protecting the paint from abrasion. When you invest in a Kentrol product, you know you are getting a second-to-none manufactured part, as every detail is quality checked by a human before it leaves their factory.
Also, I was so impressed with the quality of their replacement hinges I replaced last year, I ordered a set of their Stainless Steel Windshield Supports to install at the same time as these hood catches.

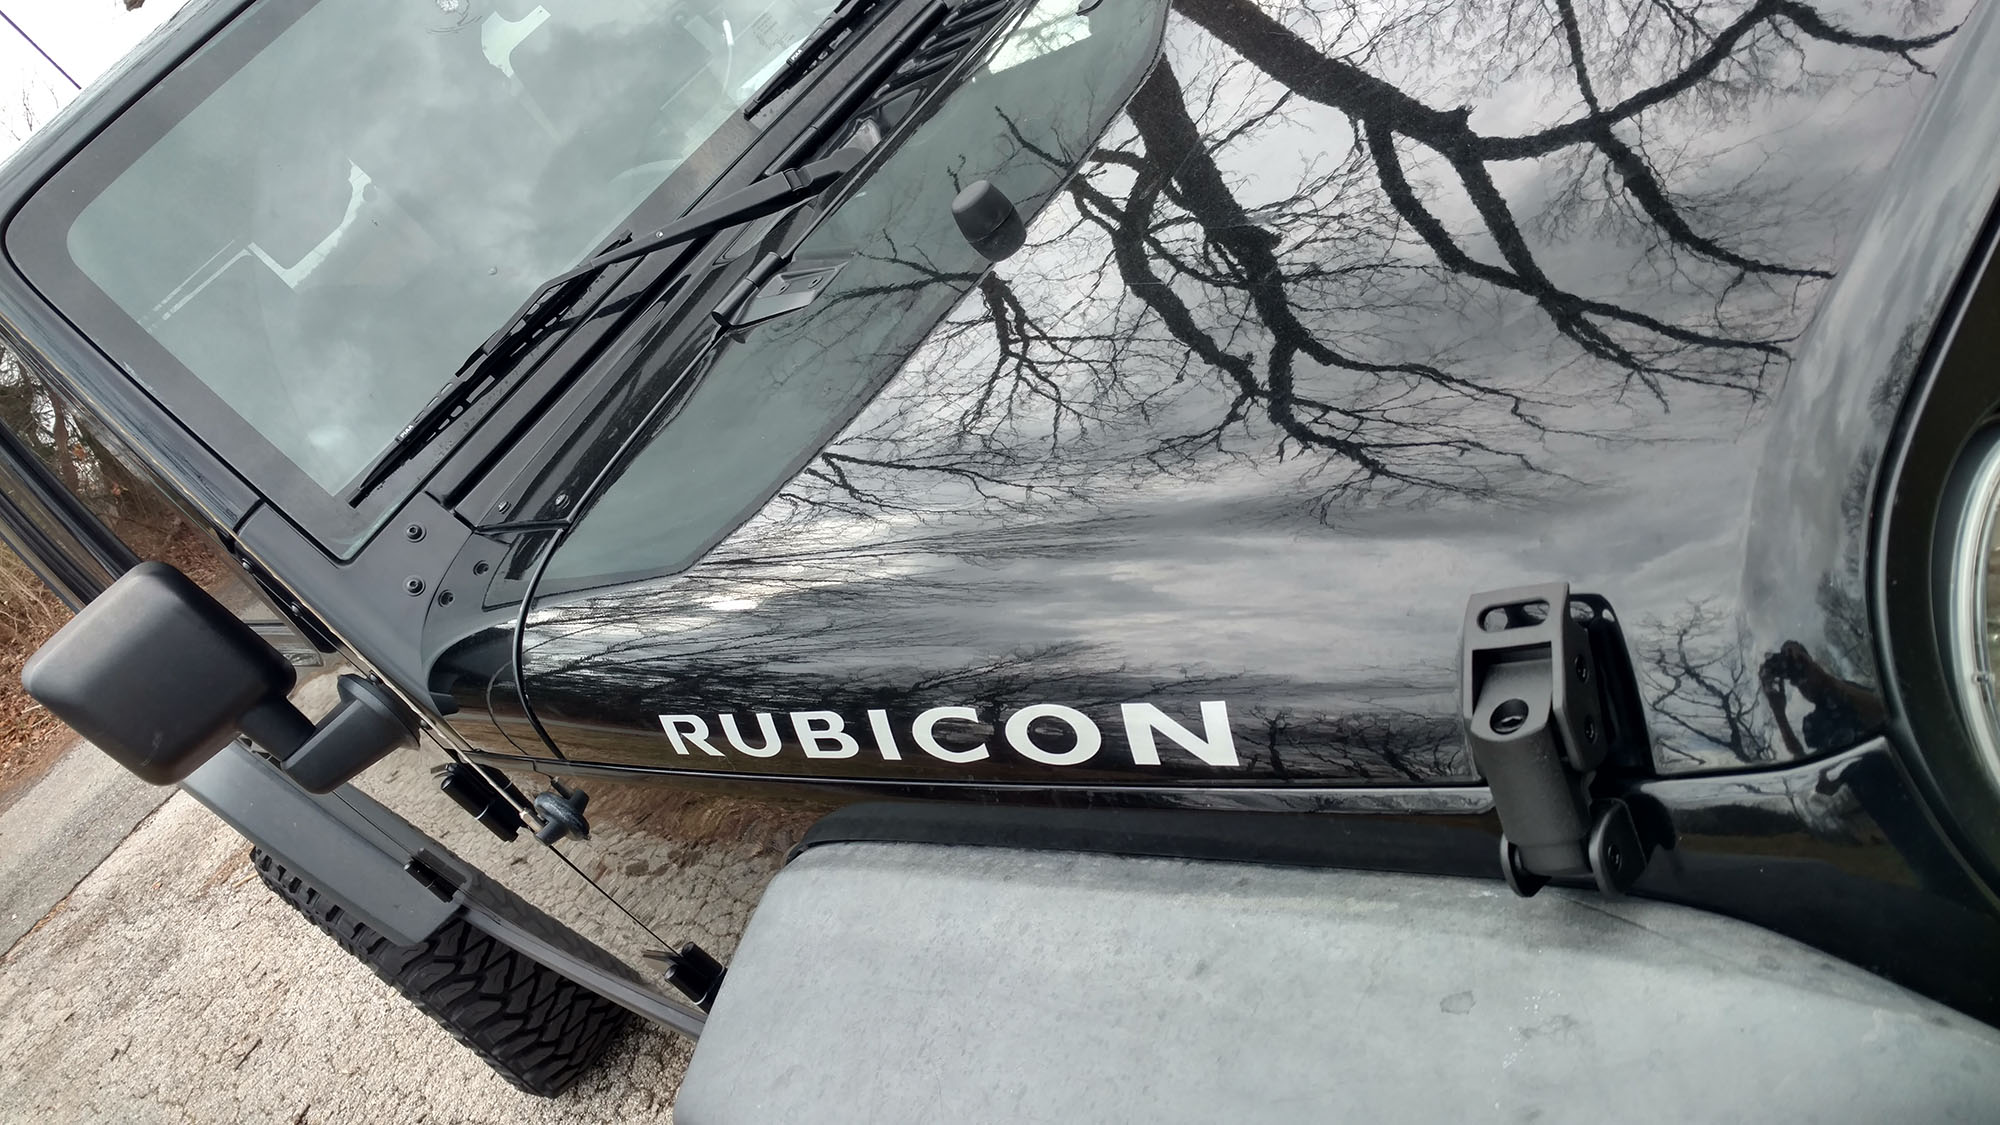
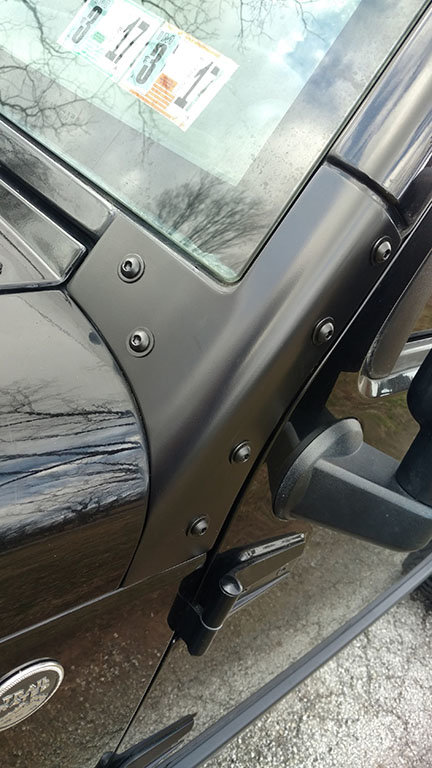
My factory original hinges had some pretty obvious stone chips and brush scratches, with a small amount of rust causing the paint to bubble. I’ve seen worse, but these Kentrol upgrades look really sharp. This version is stainless steel finished with a matte black powdercoat. They are also available in stainless and textured black powder. Quick upgrades are best in two (or more), right? Make efficient use of your weekend!
Tools and materials needed for windshield supports:
- T-40 Torx
- 5mm Allen
- Clear RTV
- Anti-seize compound
- Degreaser and a clean rag to remove debris
Tools and materials needed for hood catch upgrade:
- 10mm socket
- 13mm socket
- 4mm allen
- 8mm allen
- Blue threadlocker compound
- Flex-head long handled socket wrench (not required, but will make this easier)
- Touch up paint (optional, may not be required- see note)
- A Phillips-head screwdriver or trim tool, depending on how your grille is mounted
- Degreaser and a clean rag to remove debris
Kentrol Stainless Windshield Support upgrade:
This is not complicated, but there are a few things to be mindful:
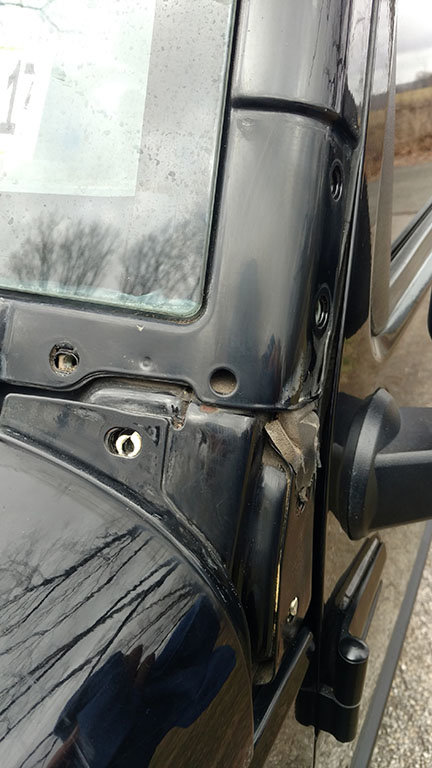
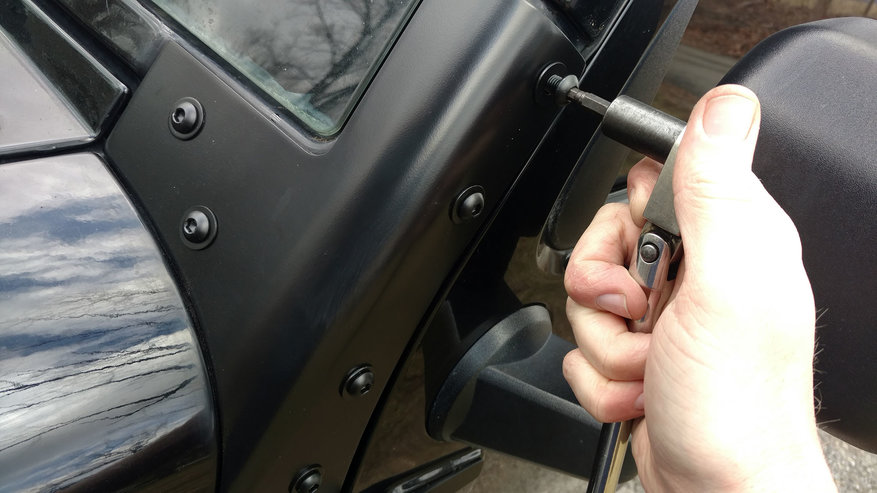
First, remove the six T-40 Torx bolts from the original windshield supports. I left the uppermost one on the side finger-tight to keep the entire bracket from being kidnapped by gravity before I was ready.
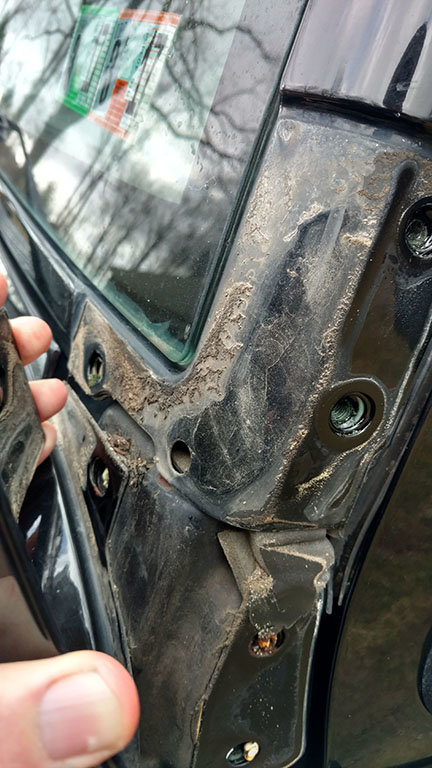
When you pull off the old supports, don’t be surprised by the silt and dirt trapped behind them. Luckily, there wasn’t any rust to contend with when I took off the supports.
Clean all that built up funk off the paint with your degreaser and a rag. A clean surface will allow the new precision made supports to sit perfectly.
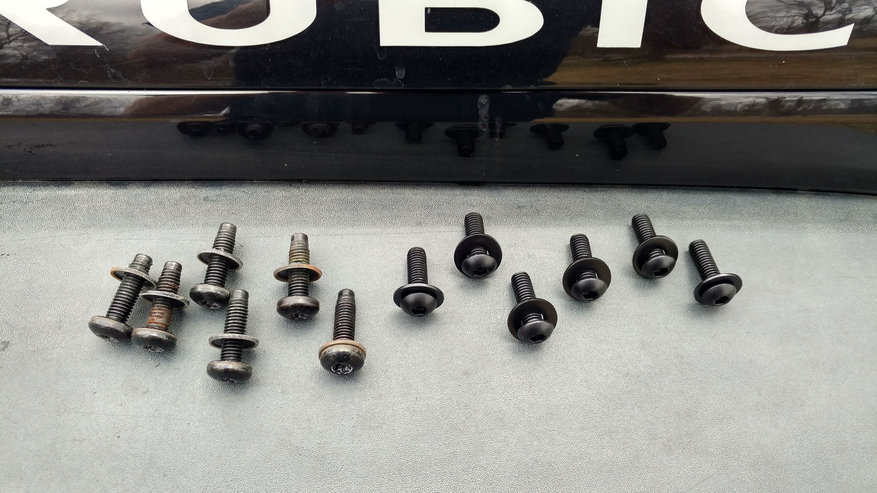
The Kentrol kit comes with all new, stainless steel and coated fasteners and washers. Say goodbye to those rusty Torx bolts if you want, but you'll never miss them.
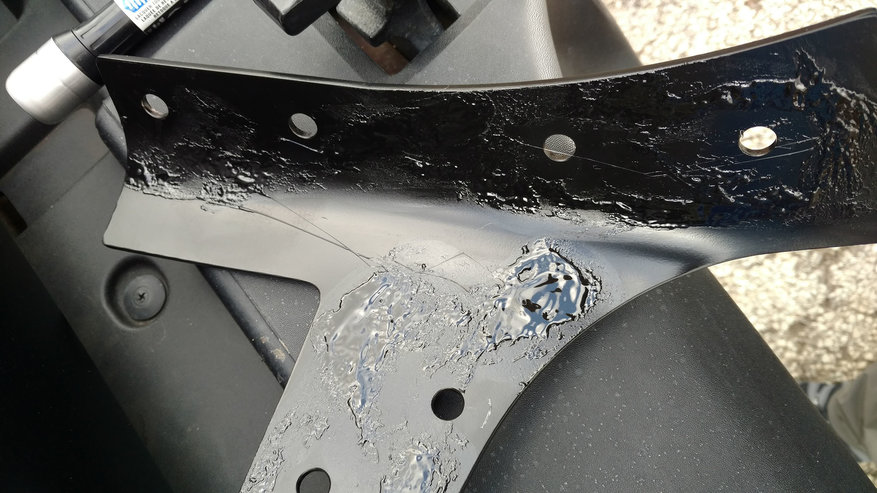
Kentrol recommends applying a thin coat of clear RTV to the back of the new supports to keep vibration abrasion to a minimum. If you regularly fold your windshield down (I have no plans to do this) you may want to skip this step.
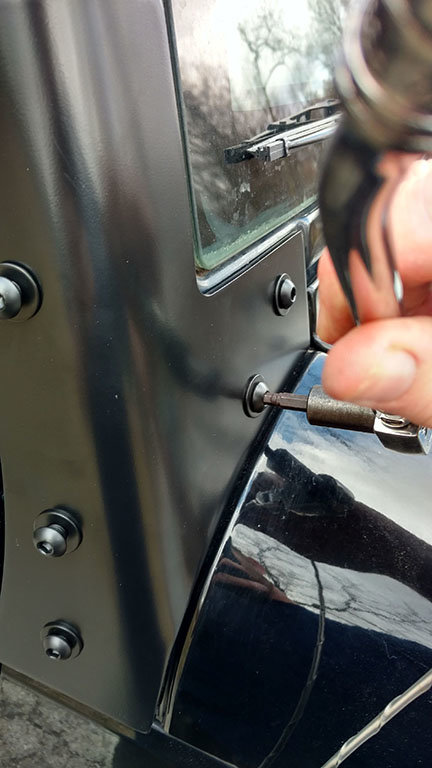
Tighten the front side 10mm Allen bolts (with washers) first, as this will ensure the support is fully seated. A small amount of anti-seize compound is recommended on the new bolts to keep corrosion at bay.
Then, move on to the rest of the bolts.
Kentrol Mechanical Hood Catch upgrade:
Upgrading these isn’t difficult at all, but I did find it necessary to remove my grille to get at the body side 13mm nuts. This only takes a few minutes, and is very easy to do. I suppose if you have really tiny hands, or a trained helper monkey you could get at the nuts on the lower catches with the grille installed.
Just pop the fasteners out along the top edge of the grille, using a Phillips-head screwdriver and your fingers (with an early JK) or a trim clip tool (for later model JKs). Twist your bulb holders out of the turn signals and pull the grille forward to remove. I've found that pulling the upper clips out near the headlights first before separating the lower ones works the best. Put the grille gently out of harm's way, where your mail carrier can't run it over.
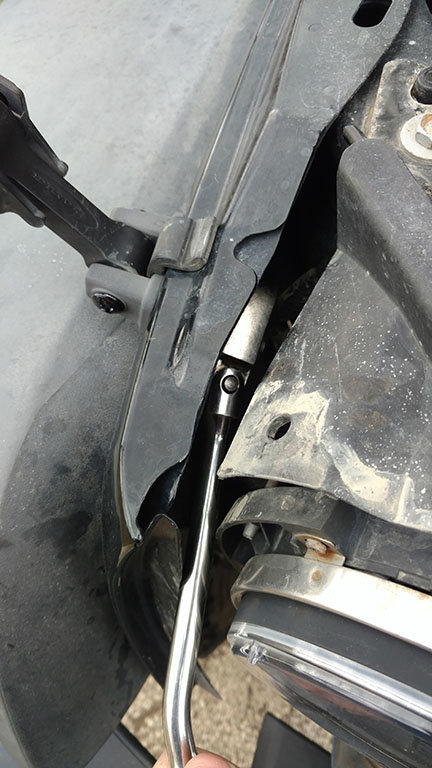
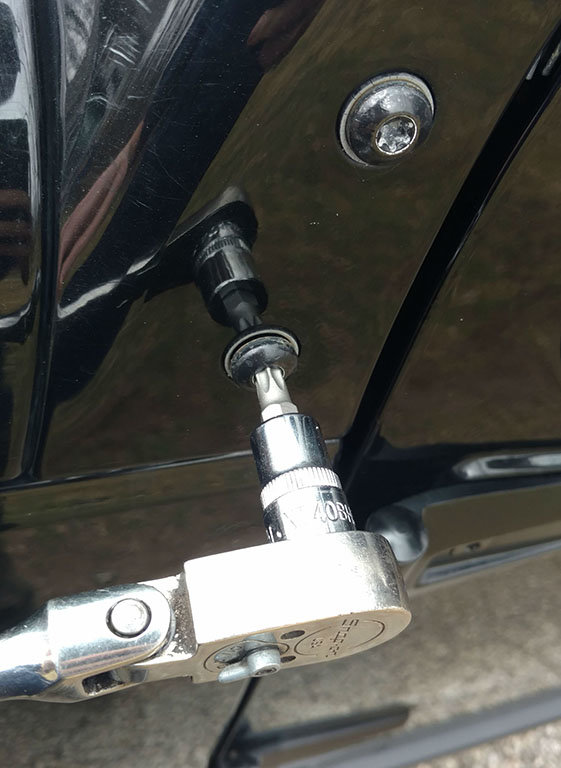
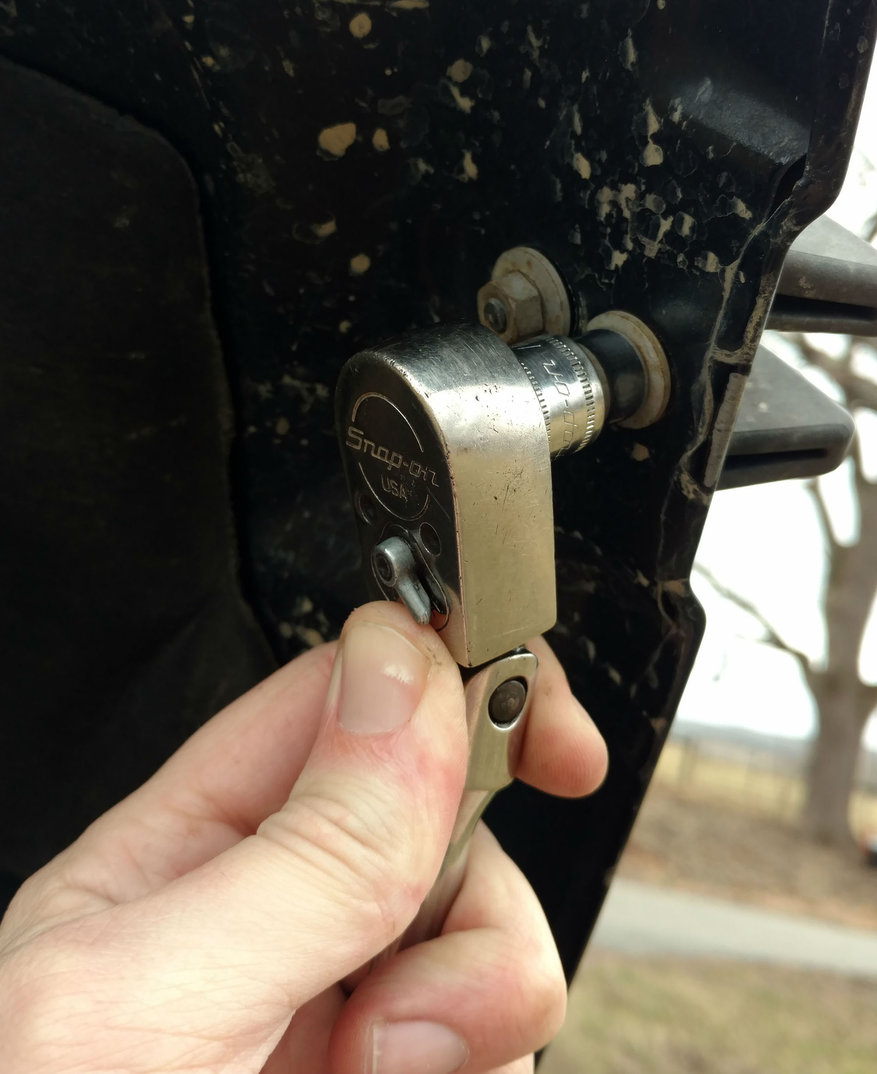
This is where I found having a flexible socket wrench to be a great advantage. These 13mm nuts are in a tight spot, but being able to swivel around the headlight bucket gives you a decent swing.
Once you have them removed, clean all the built up junk off the paint.
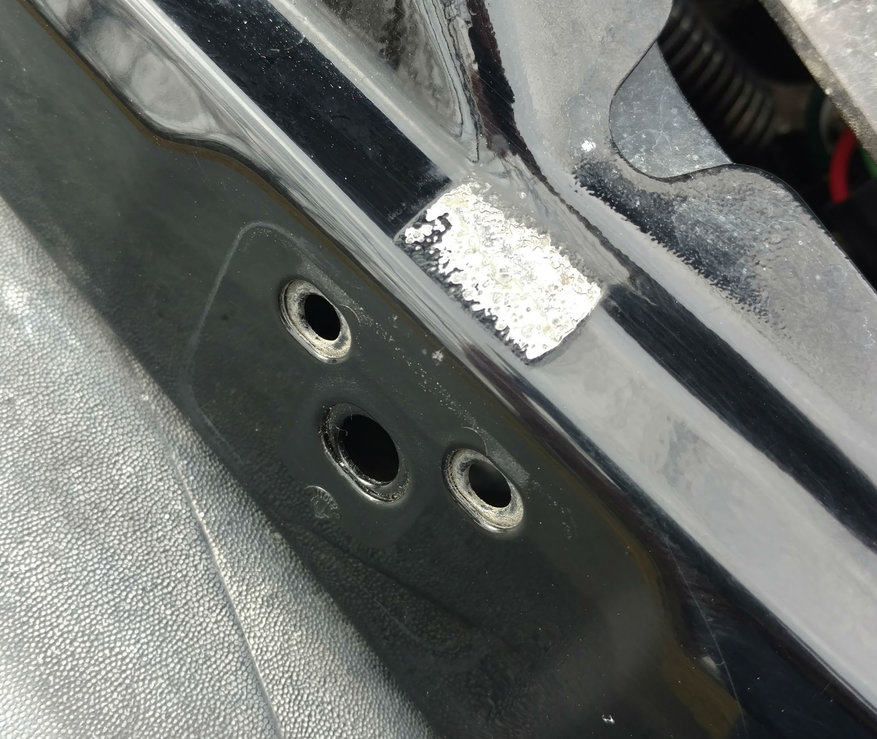
Note: I didn’t know, before taking everything apart, that my hood flutter had actually managed to wear the paint off below the rubber hood stops and on the bottom edge of the hood. I would recommend checking under these rubber guys for missing or damaged paint before ordering your new Kentrol Hood Catches - you can pull them off with the latches installed. Quadratec sells Mopar touch up paint pens in all factory paint codes, and a quick coat will help protect the bare metal where the hood and body touch.

At this point, I moved on to the uppers while the touch up paint dried. A 10mm socket on the two nuts makes short work of removal, and a quick cleaning of the trapped debris gets you ready for the new parts.
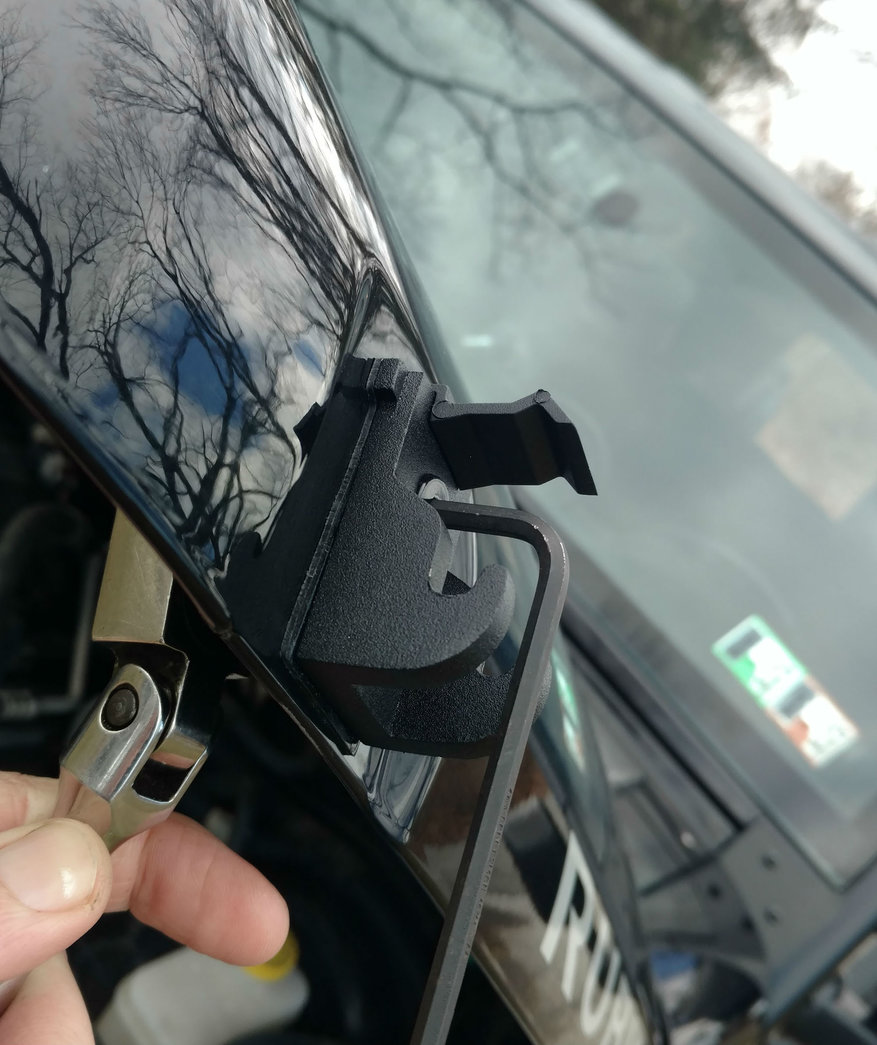
If you haven't noticed the trend, all of Kentrol’s stainless hardware is first-rate quality, and the new nylock nuts and countersunk Allen bolts used here are no exception. You'll need the 4mm Allen key from the last time you assembled an Ikea bookshelf, and the same 10mm socket you just used. Install the plastic catch retainers on the top side as shown. Make sure you center the gasket under the upper catch as you tighten it down so it looks like it was installed by someone who cares.
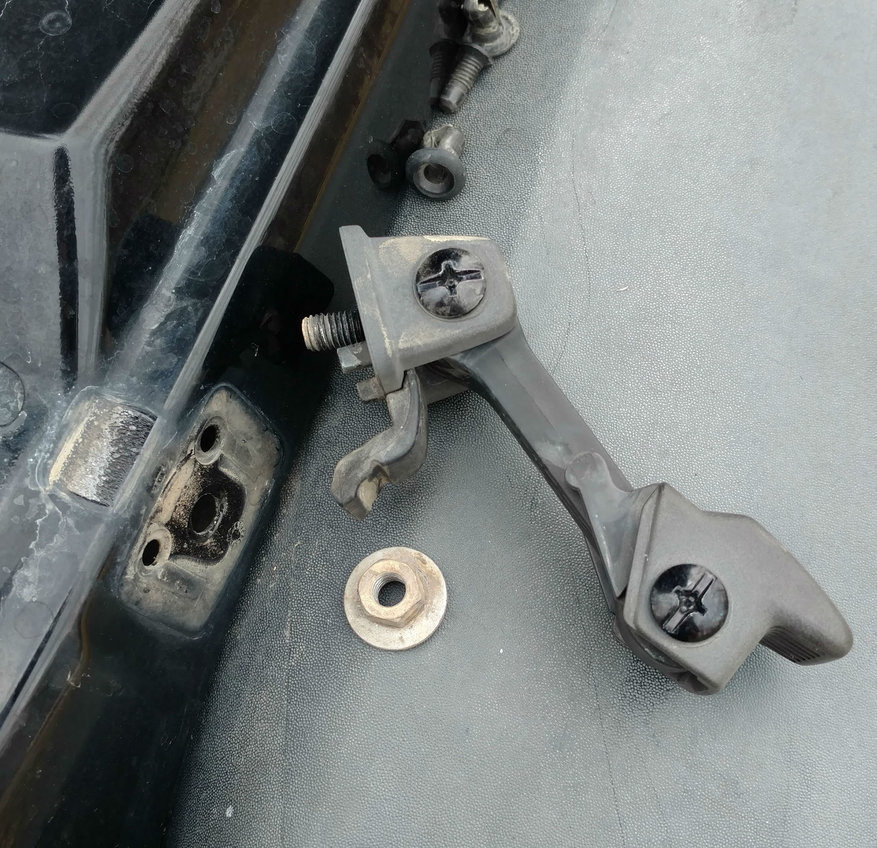
Now, to finish off those lower catches. Have your helper monkey balance the flat washer on the stud and start the nylock nut. If working alone, drop the hardware a few times and curse your lack of fine motor skills in confined spaces. Align the gasket underneath as you tighten it down.
Swap the rubber hood stops from your factory hood catches to the new ones, giving them a quick cleaning in the process.
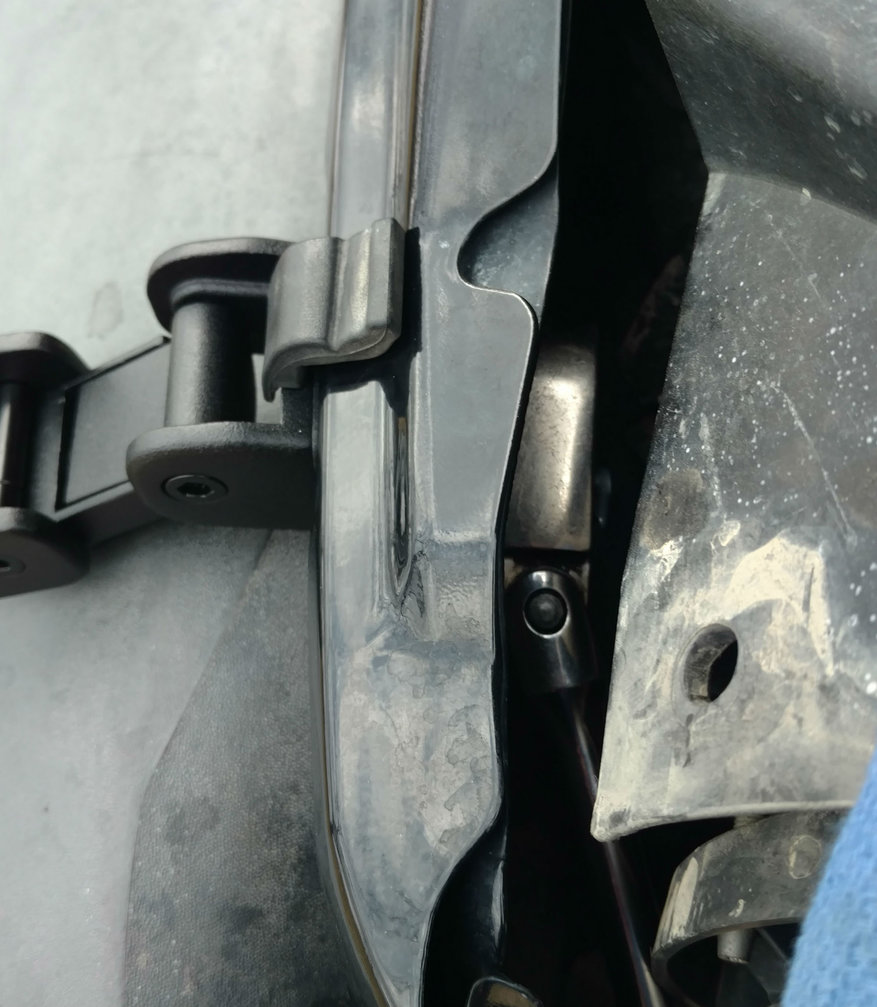
Remove the 8mm Allen bolts completely, so we can set the adjustment of the entire assembly. As you can see in the picture, there are threads in both the upper and lower sections, and the bolt has an unthreaded shoulder.
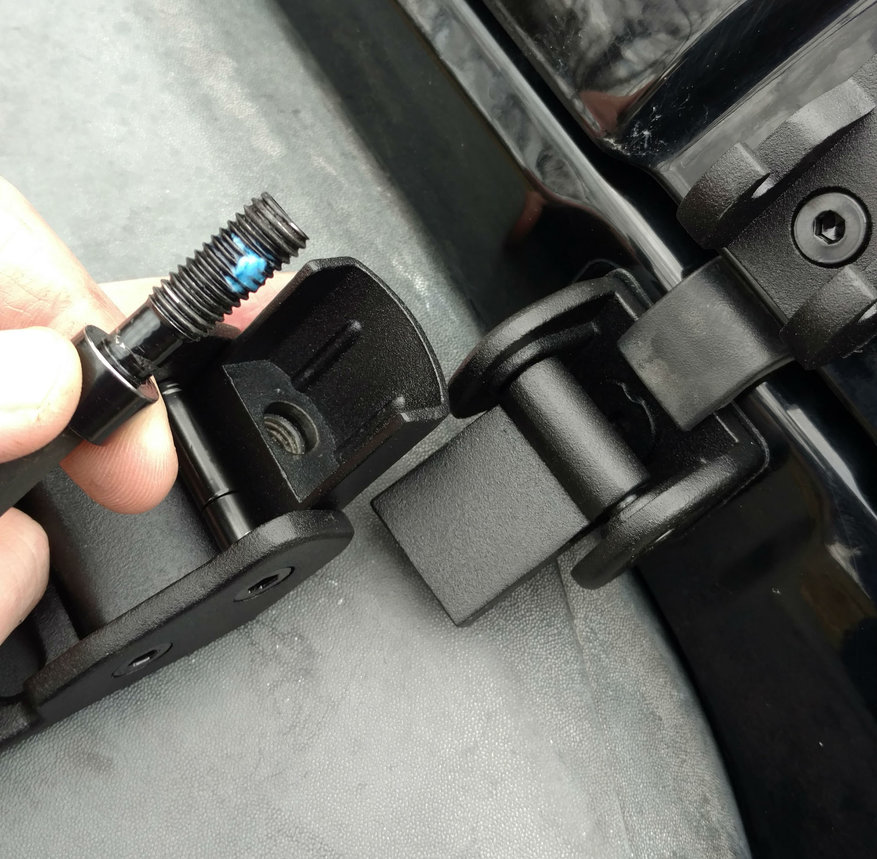
Pull up on the upper section as you remove it so the threads don't bind. Put a small amount of blue threadlocker compound on the threads of the bolt, and reinstall through the upper and into the lower a few turns. Latch the hood closed and run the first 8mm bolt in until the hood is tight enough against the body that it doesn't rattle. Repeat for the other side.
If everything seems okay, reinstall the grille. Don't forget to reinstall the turn signal bulb holders, or other motorists may have to remind you later- not that it ever happened to me.
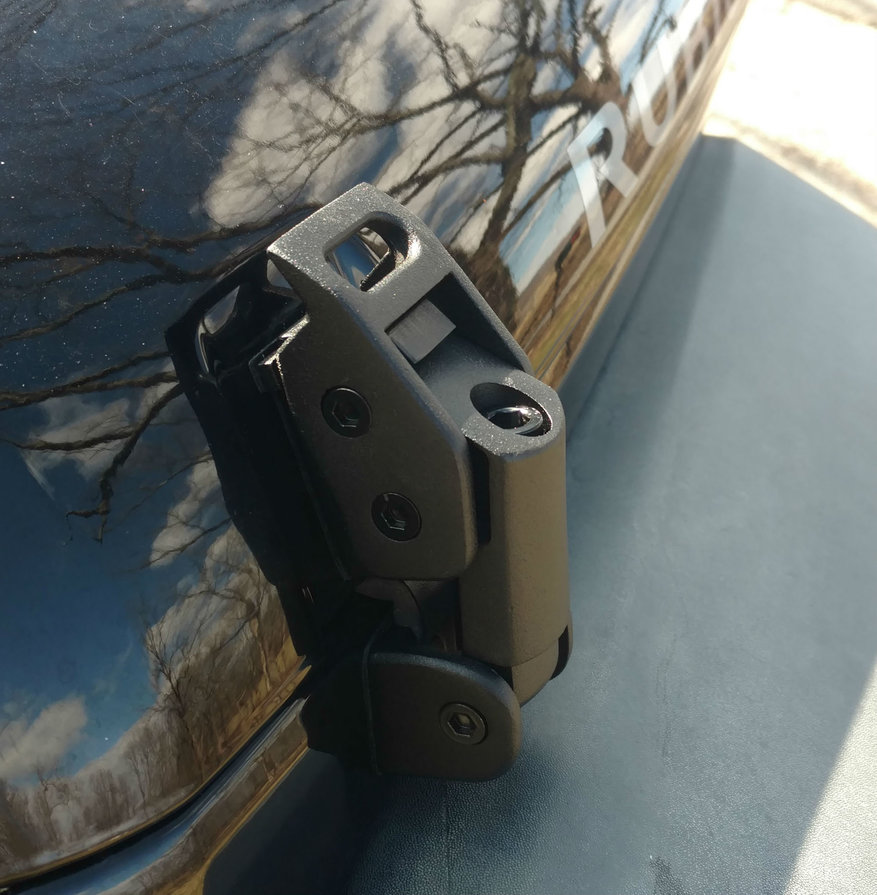
Recheck operation of both latches, they should be smooth to use with no excessive force required. As I said before, the added leverage does the work here.
As you can see, all the Kentrol parts look great. They’re a subtle, high quality upgrade without looking out of place at all. I’m very impressed with the fit and finish of everything they make, and I spend a lot of time staring at Jeep parts.