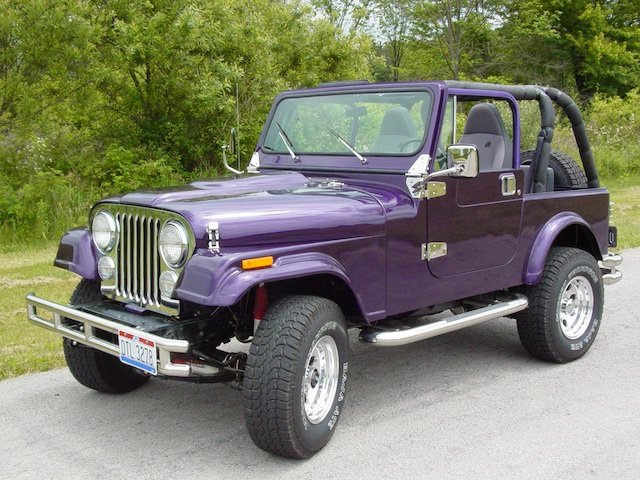
WHEN IT COMES TO MODIFICATIONS FOR YOUR JEEP, many people always look toward more 'eye catching' things like bumpers, tops, or wheels. Yet often it is the smaller parts that could use our attention first.
Things like your Jeep's hinges.
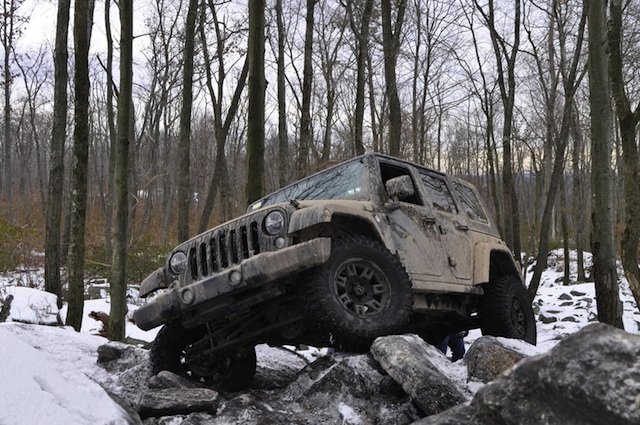
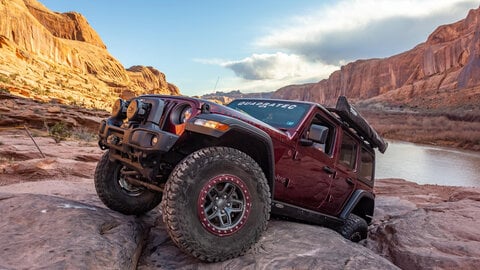
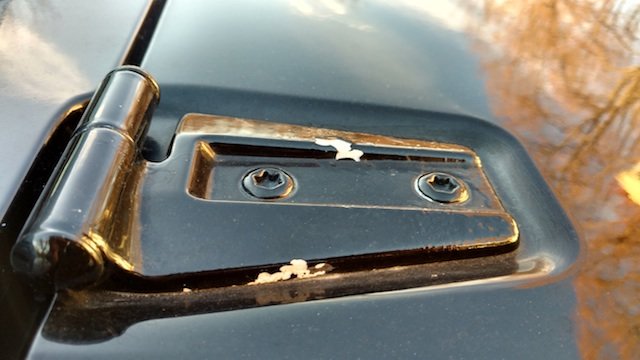
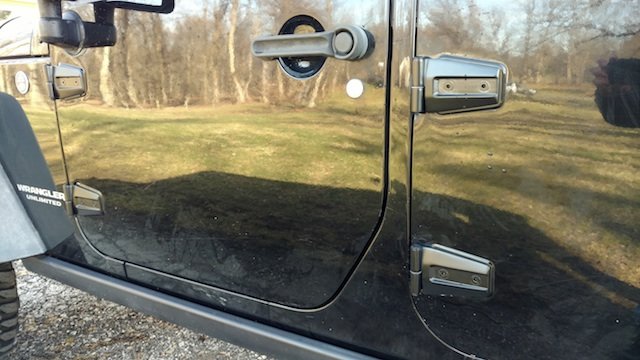
The factory hinges on my 2008 Jeep Rubicon Unlimited were well beyond 'looking a bit rough'. They tend to take a lot of damage on their leading edge from rocks kicked up by the tires, with the ones on the rear doors soaking up the worst of it. With the recent installation of larger tires, the amount of road debris flung upwards at the protruding portions of the hinges was increased as well.
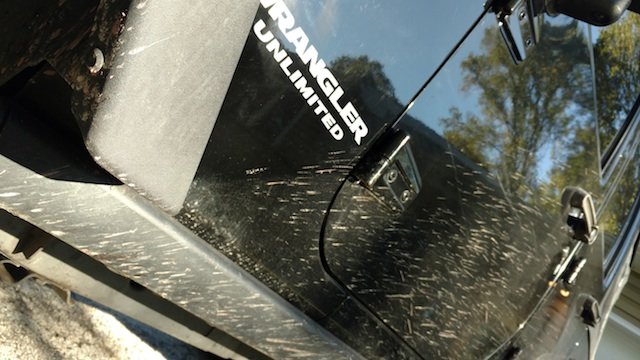
Aside from that, they’re made of aluminum and many JK hinges weren’t properly treated at the factory to resist corrosion before they were painted. I’ve seen a handful of much newer Wranglers than mine, that have cratered paint on the body side of the hinges- an early indicator this type of thing will happen to them in the near future.
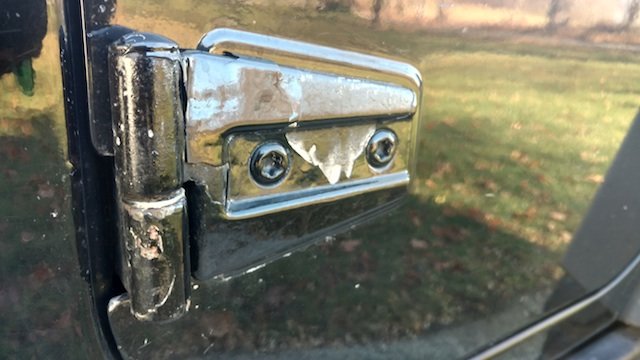
After 120k miles, mine have 'uglied' up quite nicely. At some point, they were also touched up by the previous owner. While this probably made them look slightly better in the short term, they were easily the ugliest parts of the body.
The combination of corrosion below the paint, and stone chips taking chunks away from the top coat, have made me crave a solution since the first day my Jeep came home with me. Even if I removed all the hinges and sent them out to be sandblasted and painted, the substandard anodization on the aluminum would cause problems over and over again.
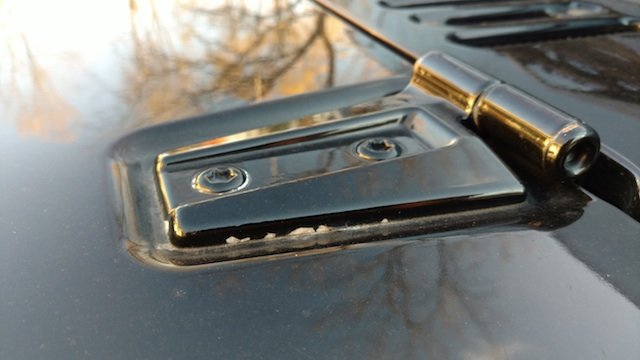
The hood hinges also suffer from these same issues. Paint is peeling off them as well, and a few chunks have flaked off in the last several months.
Luckily, our friends at Kentrol have a perfect solution for this problem. These guys manufacture replacement hinges with several distinct advantages over the factory originals.
First of all, Kentrol hinge replacements are made from T-304 stainless steel, and are offered in three finishes: polished stainless, black powder coat and textured black powder coat. Additionally, you can get them in a paint-ready stainless version if you prefer the color matched look.
If you’ve read any of my previous articles, you’ll know I’m a big fan of powder coating. The protection advantage it offers over paint is remarkable.
Kentrol hinge kits also come with every bit of hardware you’ll need for installation. They use marine grade stainless steel fasteners, so you know they’ll hold up better than the original hardware, especially when subjected to off-road abuse.
These hinges are also slightly oversized. While not really noticeable when held up side by side, this extra size allows the new hinge to cover over the paint seam left behind when Jeep painted your doors with the original hinges installed. So even with a brand new pair of OEM hinges that you sent out for paint, you would end up with a little nastiness around the edges. This isn’t the case at all with Kentrol's higher quality replacements.
Kentrol has been in the Jeep market since 1980, manufacturing high quality stainless steel gear for CJ-5 models all the way up to the current JK. You don’t get as good as they are overnight, but with more than 36 years of making high-quality products for the Jeep vehicles they love, it's safe to say they have it down to a science. Their product line doesn’t stop at hinges, either.
Every single part is inspected before it leaves their facility to make sure you’re getting the quality you deserve for the money you’re investing.
Installation of these parts is straightforward (and somewhat repetitive), but some care must be taken during the process to retain your door hinge adjustment as much as possible. Adjusting doors can be a frustrating endeavor, but if you replace one hinge at a time and follow this method, you will have a much easier time getting them dialed in correctly.
This is an ideal time to protect the metal under the hinge if you choose to do so, and I only put minimal effort into this. However, I’ll outline the steps you should take if you want to do a more meticulous job while you have everything apart.
What you will need for the door hinges:
- 10mm socket to assemble the new hinges
- T-47 Torx bit for the OEM door side hinge bolts (T-50 will work with extra effort)
- 13mm socket for the body side hinge bolts
- 10” ⅜” extension to clear the dash on the upper front door hinges
- 5mm Allen socket or key for the door hinges
- A few ⅜” ratchets- you’re going to be switching sockets a lot, this can save you a bunch of time
- Anti-seize lubricant
- A sharp knife
- A hammer (to tap your Torx bit into the painted door Torx bolts if using a T-50)
- A floor or bottle jack
- A length of 2x4 or 4x4 18-24” long (depending on how tall your Jeep is, or how high your jack goes)
What you will need for the hood hinges:
- T-47 Torx bit for the OEM door side hinge bolts (again, a T-50 will work)
- T-30 Torx bit for the cowl panel bolts
- 13mm socket for the body side of the hinges and wiper arm removal
- A wiper arm removal tool, or other small puller (may be required)
- A trim clip/door panel removal tool
- 5mm Allen socket or key for the hood side of the hinges
- Anti-seize lubricant
- A sharp knife
- A hammer (to tap your Torx bit into the painted hood Torx bolts if using a T-50)
If you want to paint under the hinges:
- Fine grit emery cloth or sanding block
- Rust inhibiting primer
- Body color touch up paint (or black automotive enamel) in a spray can
- Clear RTV silicone
- Blue masking tape, newspaper
Door hinges:
Since I’m working on an Unlimited, I've gotten a lot of practice while replacing the full set of eight door hinges. Having someone to help balance the door and help feed the hinges through the door gap is definitely a plus if you can find a partner. I did the first door by myself, and quickly learned how important it was to have all my tools within easy reach. Once you have a hinge removed, balancing the door on the jack can be tricky.
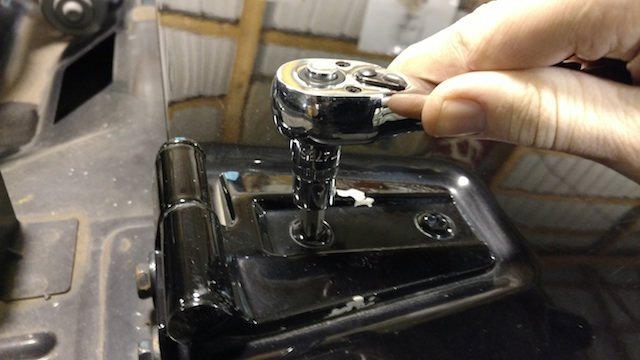
First, start by putting all the hinges together with the hardware provided. The nylon washer goes between the two hinges, with a flat washer, lock washer and 10mm nut on the bottom completing the assembly.
Upper body side hinges have three bolt holes, while the lower ones have two. The door side hinges are either left or right side, so assembling them all ahead of time will save you a headache later. All the factory body side 13mm bolts will be replaced as well, with provided stainless washers.
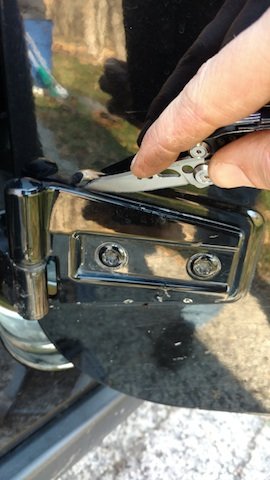
For the next step, go around to each hinge and split the paint seam with a knife between the hinge and door. It may also be helpful to do the same around each Torx bolt, as this will make removal easier. The hinges come with new countersunk stainless steel Allen bolts, so you don’t need to worry about being gentle with the painted Torx bolts. What we’re trying to avoid is flaking paint off the door when the hinge is removed.
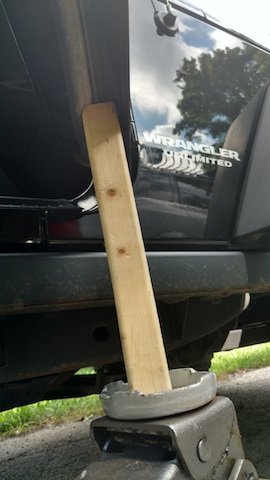
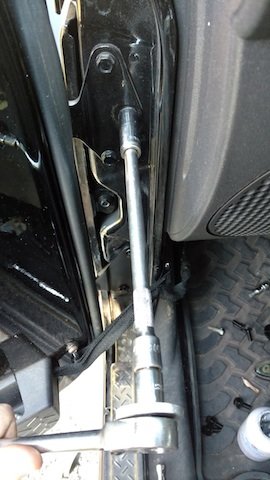
Lift up gently on the door with a beam of wood between your floor jack and the underside of the door. I used a 2x4, but a 4x4 piece may be a more secure platform. Don’t create too much upward pressure - we just want to support it when the hinges are replaced. If you’re planning on painting the doors behind the hinges, a stable platform is more essential unless you really like the idea of holding on to the door and watching paint dry.
Trace around each body side hinge with a permanent marker so you have a rough idea of where it goes.
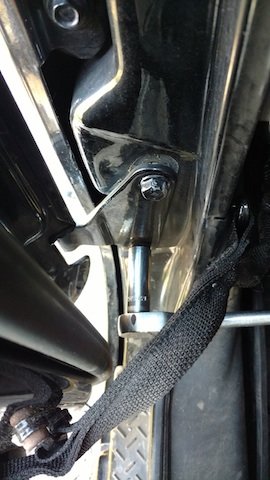
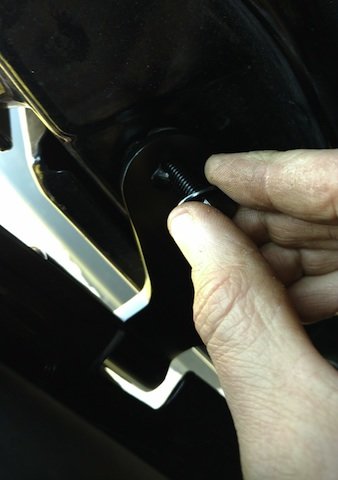
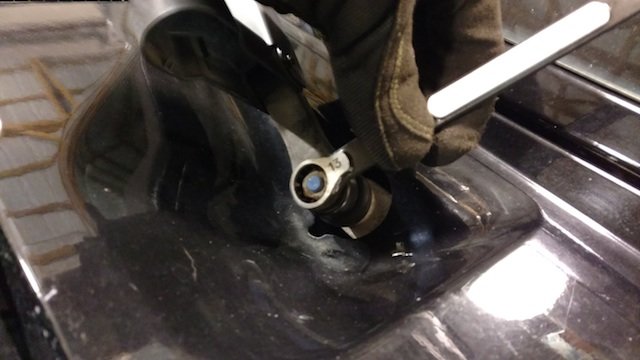
Once that is done, I would recommend starting with the body side 13mm lower hinge on your first door, but leave the upper bolt in for now. Loosen it to the point that you can get it out by hand once the door side bolts are removed. Next, move around to the outside and remove the Torx bolts holding the hinge to the door.
This is where I found it useful to have multiple ratchets handy. I was rapidly switching back and forth between T-47 Torx, 5mm allen and 13mm sockets. That gets old after a few minutes.
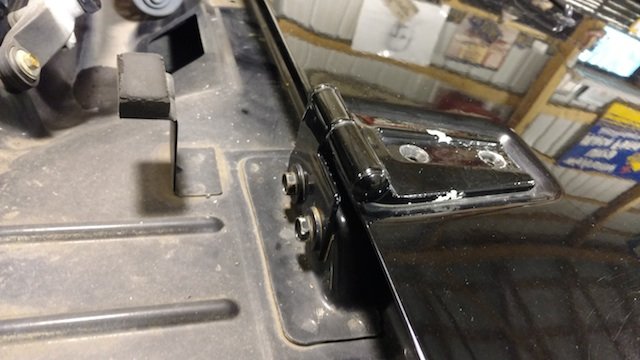
The hinge may still have a slight bond to the door, or it may come loose now. Give it a slight tug if it isn’t separated; the one 13mm body side bolt will keep gravity from sending it skittering across your paint on the way to the floor. Once it breaks free, remove that last bolt and feed it through the door gap.
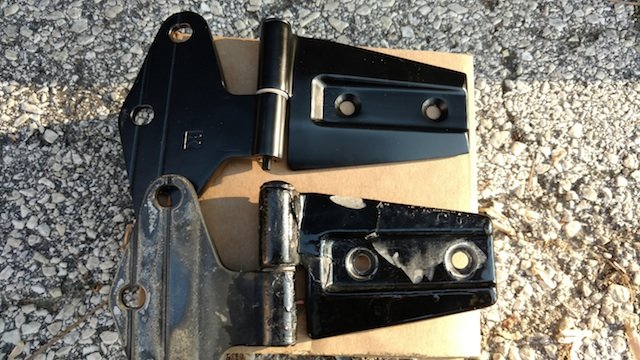
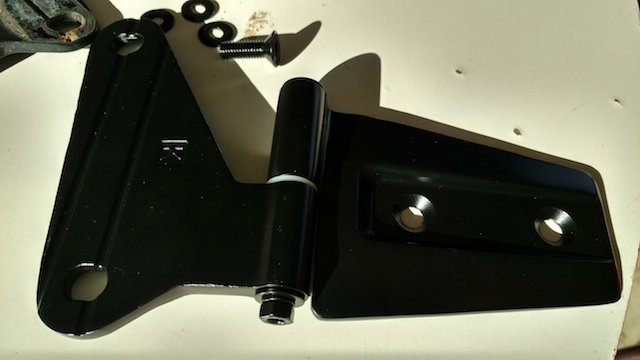
Match each nasty hinge as you remove it, with its beautiful new counterpart. You can see how well manufactured and coated the Kentrol hinges are in this picture - they take quality control very seriously, and it shows.

I did not paint my doors with the hinges removed, but I may in the spring. For now, I knocked the surface rust off and coated it with some WD-40.
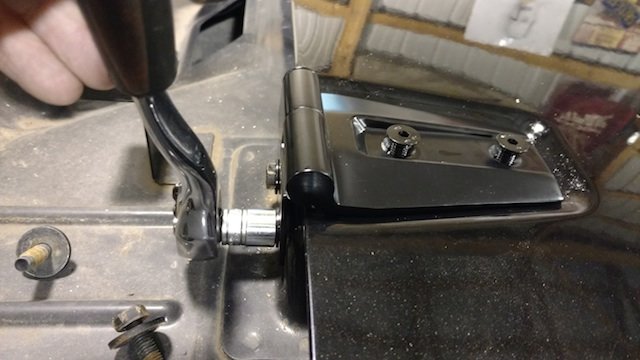
Next, feed the door hinge through the gap, and install the new 13mm bolts and flat washers by hand. I coated mine with a little anti-seize compound in case they need to be removed later. Line them up with your marker lines, but keep in mind that they are slightly oversized, and may cover over the markings a bit. Most of the in-out-up-down movement is on this side, so having it lined up properly will make proper adjustment easier. Tighten with the 13mm socket.
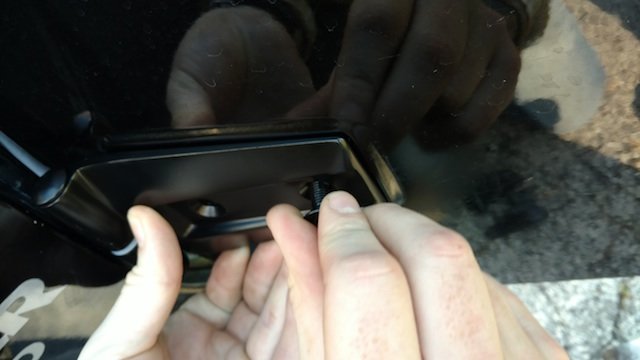
There is a centering plate behind the door sheet metal that the new Allen hinge bolts thread into, and the best way I found to do this was to snug these bolts in, but not fully tighten them until the body side was adjusted properly. Use a little anti-seize on these, too.
Door adjustment is the very definition of “trial and error”. Replacing the hinges one at a time minimizes the amount the entire door can end up out of adjustment, but slowly adjusting it back into spec after each hinge will get you where you need to be faster. If your door closed normally prior to hinge replacement, I would NOT recommend adjusting the striker on the rear of the door frame. At the very least, this can be used as a fixed point of reference. Changing its adjustment in the middle of this process will only lead to frustration.
Open and close the door, and see how close it is. Adjust the hinge as necessary, and try to get the door snug against the body without having to slam it. Excessive force required while closing usually means the body side hinge is adjusted in too far. Watch the gaps all around the door though, as having even one hinge out of whack can have a remarkable difference in these tolerances.
Once you get it right, then fully tighten the Allen bolts on the door side of the hinge with the door closed.
Next, move on to the upper hinge for that door. On the front doors, an extension will make is easier to get to the upper bolts.
Repeat the entire process as you did for the lower, then move on to the other hinges. Working methodically and not rushing through the steps will make adjustment a snap. If you’re anything like me, you’ll get really good at it just before you’re completely done. Then, expect your other Jeep friends to want these Kentrol hinges once they see yours - so you might be able to trade a bunch of free beer and pizza for your newly acquired “expert-level” skills.
Hood Hinges:
Kentrol's hood hinges were a breeze to install. There were a few minor catches to overcome, but the process was simpler than the doors. A second person is recommended for this procedure as well, since you’re going to have to remove the cowl panel between the hood and the windshield. The two hinges are identical and come pre-assembled, and all new stainless steel mounting hardware is supplied.
First, make sure your wiper arms come off easily.
Since removing the arms should only take a few minutes, it makes sense to try getting them off (even before you order any replacement stuff) before you jump into this project.
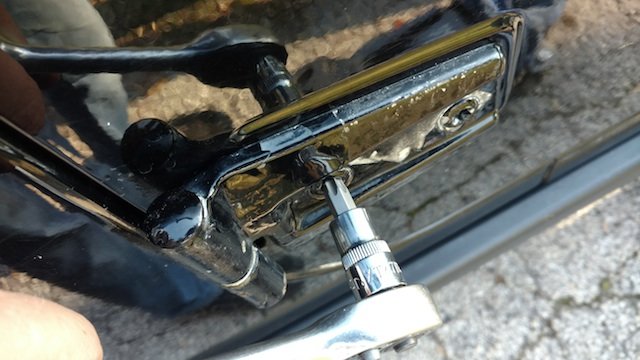
Pull off the plastic cover over the base of the arm, and remove the 13mm nut. Since mine have seen a fair amount of road salt, they wouldn’t pull straight off. This is a good thing to check before you plan to start replacing the hinges, as you may need an additional tool to remove them. We used a battery terminal puller, which has two jaws and a center threaded pin, but you may be able to substitute another small two-arm puller if you have one available.
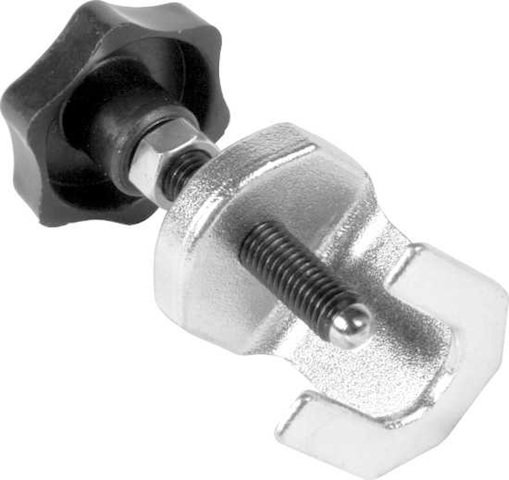
Quadratec also sells a Performance Tool Wiper Arm Removal Tool for ones that are really stuck. The goal here is to pull them straight up without bending the linkage shaft, so prying isn’t a good idea.
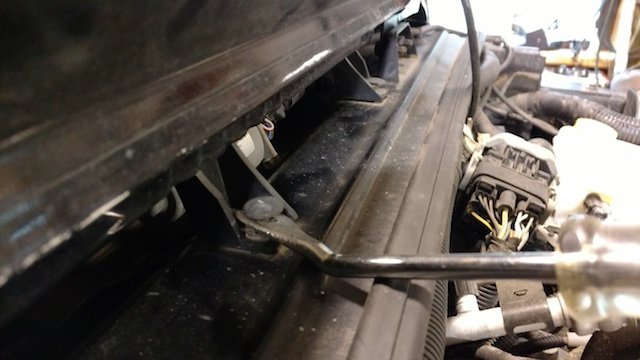
Four T-30 Torx bolts hold the cowl panel down, two on either side. Remove these first, then open the hood to gain access to the two trim clips holding it down on the front edge. If you don’t have a Performance Tool Door Panel Removal Tool already, you might want to pick one up with your next order. They are useful for removing all sorts of clips on your Jeep.
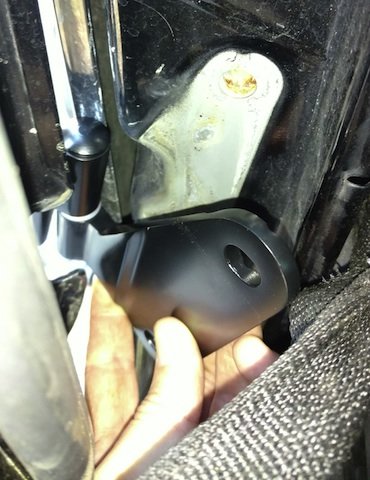
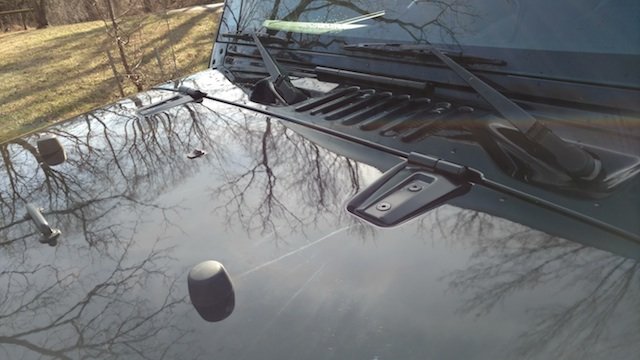
After removing those two clips, there are two additional tabs holding the panel in place. They’re not easy to see with it installed, so here’s a picture with the panel removed for reference:
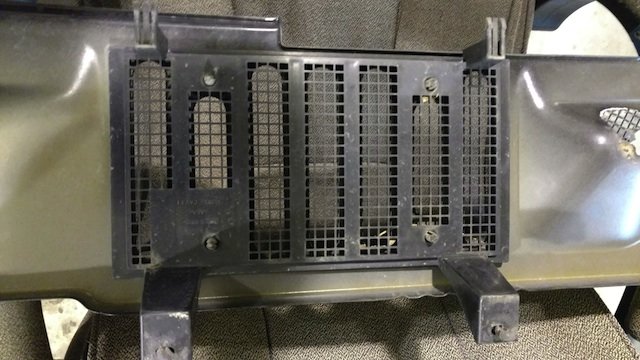
The cowl must first slide forward, then out one of the sides. The panel is thinner gauge steel than you would expect, and care must be taken to avoid creasing it. We found that with the hood completely vertical, the panel could be pulled towards the front of the Jeep to free it from the last two clips, then pulled out the side after getting it past the windshield hinge. I wouldn’t want to try this with one pair of hands, so this is the step you’ll want to have help with.

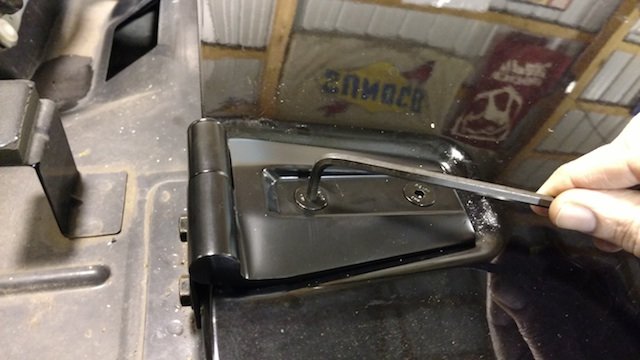
As before, cut around the paint seam with a sharp knife, you don’t want flakes of hood paint flying when you pop those hinges off.
Close and latch your hood. Using a T-47 (or T-50 tapped into place), remove the two bolts holding one hinge to the hood. These required a little more effort than the door hinges, so make sure your Torx bit is all the way in there before going crazy with the leverage. Again, we want to do one hinge at a time so physics aren’t fighting us.
With those removed, go after the two 13mm bolts holding the hinge to the body. The hinge will come right off in your hand after that.
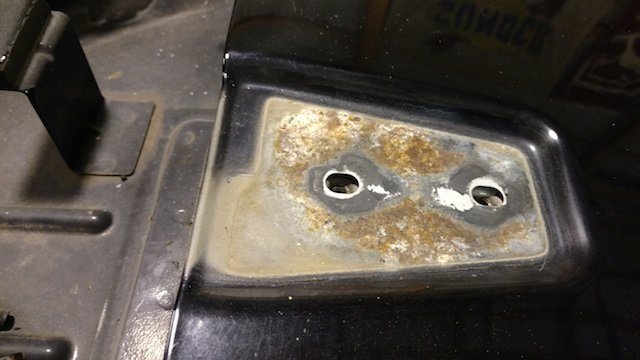
You will likely find more of the same surface rust under these, since they were also painted while installed on a primer coated hood. I’ll be replacing my hood before the minor discoloration ever becomes an issue, so I left this alone.
After applying a small amount of anti-seize to the tips of all the bolts, thread them in by hand. Use the new flat washers with the 13mm stainless bolts. Tighten these first, then move on to the 5mm Allen bolts on the hood side.
Move on to the other side of the hood and replace that hinge using the same procedure.
Once they are both in place, verify proper operation of the hood before reinstalling the cowl. No adjustment should be necessary, but this is the best time to double check.
When reinstalling the cowl, make sure you only snug the T-30 bolts down - as I said before, this panel is thin, and it would be very easy to dimple the area around the bolt holes by over tightening them.
Everything turned out great, and I’m very impressed by the precision engineering that went into these hinges. If yours are looking even close to as bad as mine were, you might want to consider these as an upgrade.
Now, a note on painting:
If you want to add a little rust protection behind the hinges while you work, plan on spending a good deal more time on this installation.
If you’re working on a two door Jeep, it wouldn’t be too bad - but adding drying time for a couple of coats of paint, a the task of masking everything will add a lot of steps to the project.
After removing the hinge completely, mask off the area with painters tape and paper. Since you’ll be doing this one hinge at a time, plan on having a completely free day with plenty of extra activities (or beer) to distract you while each coat dries. Sand off the surface rust and wipe clean, then spray the rust inhibiting primer on the bare metal.
Wait for it to dry, usually about 10-15 minutes if the humidity isn’t too high. Spray the top coat enamel on over the primer, and wait at least 20 minutes.
Once that’s done, add a thin bead of clear silicone around the outside perimeter of the mounting surface of each hinge, then install. This will keep moisture from getting between the body and hinges. Adjust as you normally would, then move on to the next hinge. Wait until the silicone dries and peel the excess away.
As I said, I may do this in the spring. With the doors off (and not needed every single day) I should be able to find time to clean up the paint. By then I may have bigger fish to fry, however.