Featuring Premium Parts from
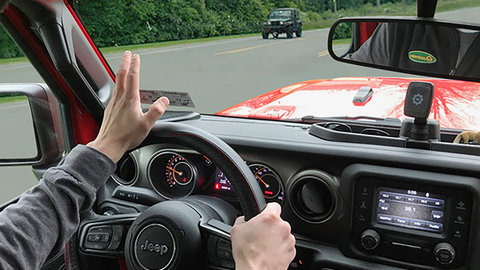
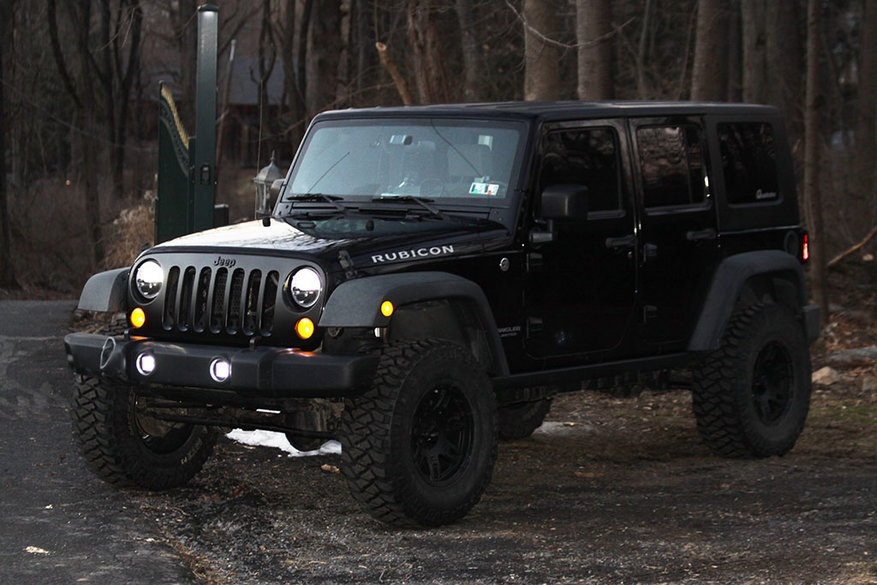
The first nighttime driving I did with my JK Rubicon, I immediately realized why lighting upgrades are so popular with owners of these vehicles.
Full disclosure: my night vision is terrible, so I've upgraded the headlights in nearly every vehicle I've owned. I would change the halogen bulbs to “higher than legal” wattages, and add relays and heavy gauge wiring to compensate for the added draw on the electrical system. In some cases, I even imported European H4 headlights to replace sealed beam original equipment.
Oncoming drivers hated me. Due to the limitations of halogen reflectors, the only way to create more usable light was to push the wattage past the limitations of legality.
My last several vehicles have had HID Xenon headlights, and the output was adequate enough that I left them alone. In addition to much longer bulb life, the color temperature was more like natural sunlight - not yellow tinted like halogen lamps. The drawback of HID lighting is bulb cost when they do need replacement (typically well over $100), and an additional ballast that increases voltage and can eventually fail. Buying HID “retrofit kits” for halogen reflectors is a bad move, as the light scatter is terrible. You’ve probably passed some of these on the road at night and noticed that the bulbs are bright, but not much of the light ends up where it needs to be.
Why LED?My first hand experience with aftermarket LED lighting began when driving a few miles in Quadratec’s Project XJ, after its headlights had been upgraded with Truck-Lite replacements. LED technology isn’t new, but recent advances have made the output substantially brighter, while having an extremely long life compared to replaceable bulbs. That being said, not all LED lights are created equally.
Truck-Lite 55001 7" Round LED Headlight Kit
When Truck-Lite uses the phrase ‘military grade’, they know a thing or two about what that means. Although many products from computer motherboards, to backpacks, to cell phone cases claim to be built to “mil-spec” standards, this isn’t always the case. Truck-Lite’s 7-inch Round LED Headlights
When a civilian vehicle has a headlight bulb burn out, it is considered unsafe enough to warrant a replacement stop at the local auto parts store. On a military vehicle, the danger created by missing forward facing light is drastically increased, and pulling over in the middle of a mission to replace could have deadly consequences. If the military trusts them to avoid roadside bombs, I think they’ll get you around that next pothole.
These lights are built to last, with full epoxy sealed internal electronics, die-cast aluminum housing and impact shedding polycarbonate lens. They are almost shock and vibration proof, and electrically protected from surges up to 600 volts.
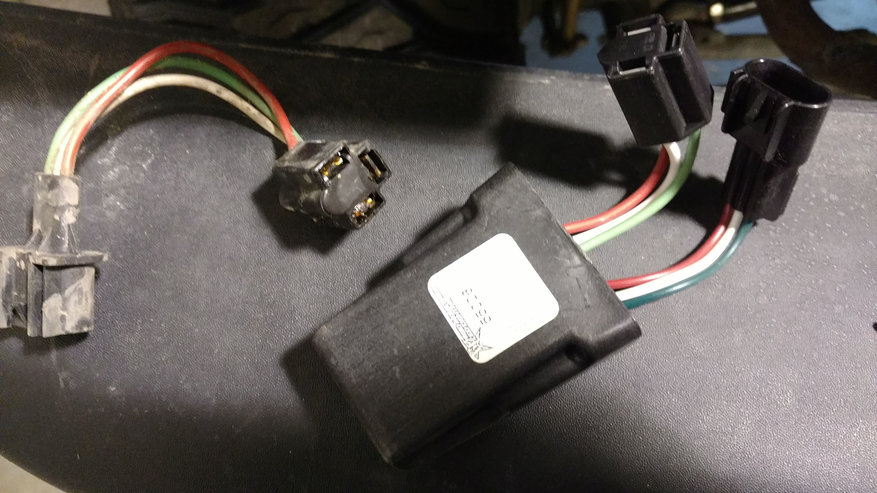
When I first installed them, I ordered the kit with adapters that convert the H13 plug in the Jeep to the H4 connector on the headlights. These are made as H4s to maximize compatibility - most vehicles (including many older Jeep models) that use 7-inch round lights have this connector, going back to the 1930s. I did have a minor flicker from the lights with these connectors, due to a variable voltage being sent to the lights. This is a common problem only experienced with some Wrangler JK models and LED lighting, as the Jeep’s electrical system was really designed simply to work with factory halogen lights.
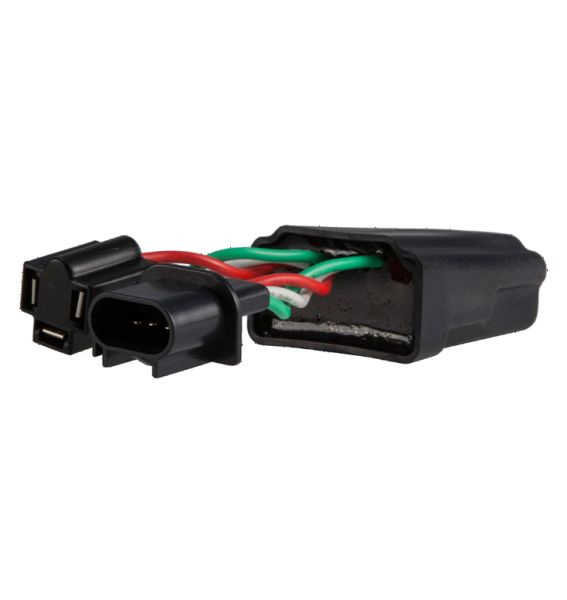
Luckily, this minor quirk can be eliminated by installing the Rigid Industries PWM (pulse width modulation) adaptor. This smooths out the voltage irregularities and actually made the headlights appear a little brighter once the dimming was stopped. The Truck-Lite headlights are available through Quadratec in a kit with adaptors included. Due to my experience with these lights in my individual model (2008 JKU Rubicon), I would recommend the added cost for the assurance they will work perfectly right out of the box.
If you live in an area with severe winters, there is also an upgraded heated version with heating elements built into the polycarbonate lens that automatically turn on at temperatures below 50 degrees Fahrenheit.
Upgrading your headlights to any of the Truck-Lite 7” round LED headlights is simple:Remove the front grille upper clips, using a trim tool or Phillips head screwdriver (depending on fastener style), and pop it free from the lower spring clips, starting near the headlights.
Remove the four T-15 Torx bolts attaching the trim ring to the headlight bucket. With these lights, everything is plug and play. A tube of dielectric grease is included to keep the connections solid and weatherproof.

With the Truck-Lite LED headlights installed, the factory fog lights were very dim and yellow in comparison, so a second lighting upgrade was needed.
Since I haven’t yet chosen a new aftermarket front bumper, I wanted to make sure my fog light replacements were going to be usable. Many aftermarket bumpers accept factory style fogs, but some do not.
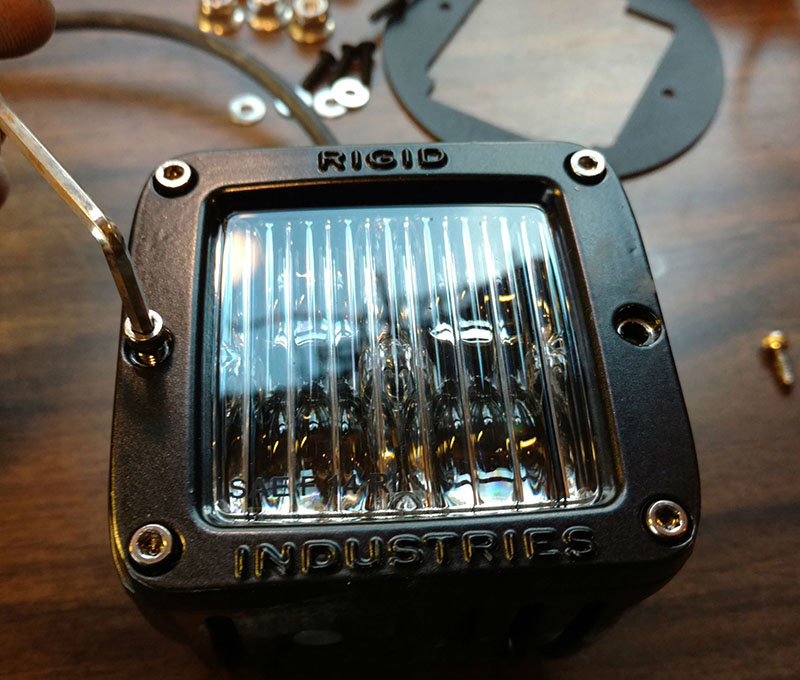
Rigid Industries 50481 D-Series SAE Fog Lights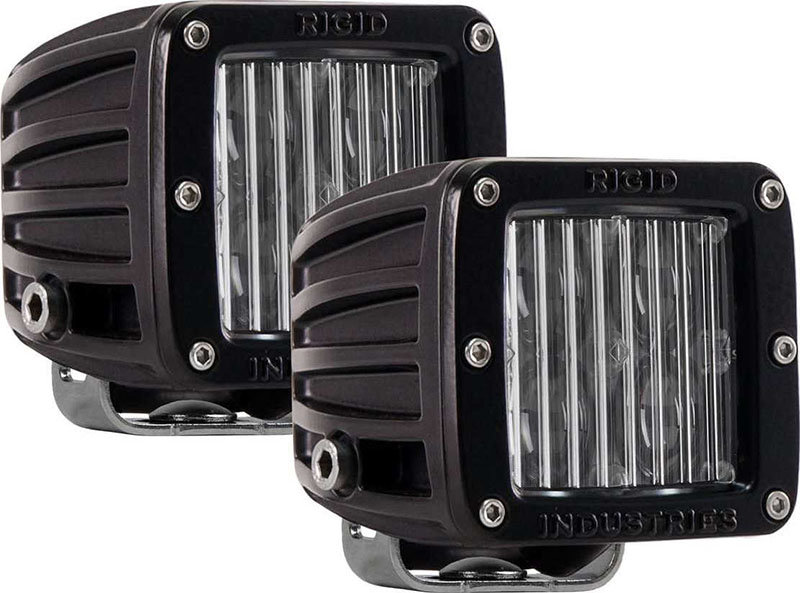
Since I want something legal for on-road use, the Rigid Industries SAE approved fog lights were my best option for both light output and flexibility in the future. These lights are SAE J583 class compliant, which means they are street legal in my area.
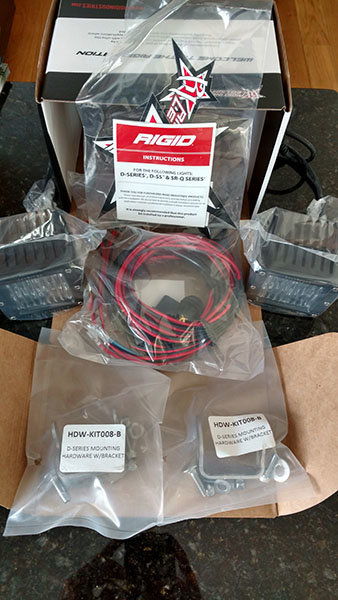
As with the Truck-Lite headlights, everything needed for installation is included. I won’t be using the U-brackets right now, but I’ll save them for later in case my mounting requirements change. The included wiring harness is incredibly well made, and has both a lighted switch and a relay - connecting them to the battery and mounting the switch would be a plug-and-play way to get these running. The powder-coated housing is flawless, and the entire back is finned to help dissipate heat. When the mounting brackets are installed, they are mostly hidden inside the fins so they don’t look clunky and out of place. A sturdy polycarbonate lens protects the lights from rock hits and trail damage. A Gore pressure-equalizing vent is used to prevent moisture buildup inside the light that could cause hazing or fogging.
Just like its parent company Truck-Lite (who acquired Rigid Industries in 2015), Rigid has always taken engineering and manufacturing standards, as well as abuse testing, very seriously.
To ensure precise output tolerances, Rigid has invested more than a million dollars on in-house testing equipment. All Rigid products go through tests (such as submersion, vibration and temperature/humidity) to guarantee the item you receive is ready to go to work. If you haven’t seen the “Tortured” video on Rigid's website, check it out. Rest assured these lights can take any kind of abuse you can dish out, and keep on operating.
Because of the vast amounts of LED components Rigid buys, it is able to specify the exact output and color needed from its vendors. Ever see a 50-inch light bar that has a few wonky LEDs? Well, that one will not have a Rigid name on it because they only buy high-end LED components. Yes, you’ll pay a little more, but the quality you receive for your investment is completely worth the expense.
Because I want to fit a “square peg in a round hole” by mounting them in the bumper, one more item is needed to replace the factory fog lights.
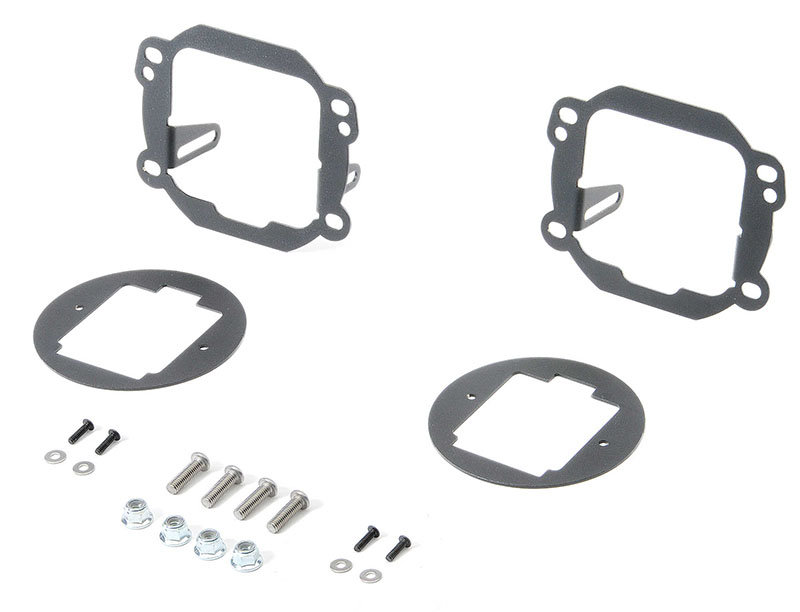
The Rigid Industries 40138 Fog Light Mount Kit allows any D-Series (Dually or D2) Rigid light to be mounted in place of a factory style fog light, so you have plenty of options.
For this installation I’m going to splice them into the fused factory circuit for the OEM fog lights so they turn on with the stalk switch. If you’re not keen on splicing wires, you could use the Rigid Industries wiring harness that comes in the box and add another switch inside your Jeep. Either way works.
Tools required:
- SAE Allen set
- Wire stripper
- Crimping tool
- Phillips head screwdriver
- Performance Tool Door Panel/Upholstery Removal Tool (if you want do this from the top)
I started by removing the frame cover, since I already had the grille removed to install the PWM adaptors.
I’ve seen several how-to articles and videos on removing this cover, most of them ended up with the trim clips being drilled out and replaced in frustration.
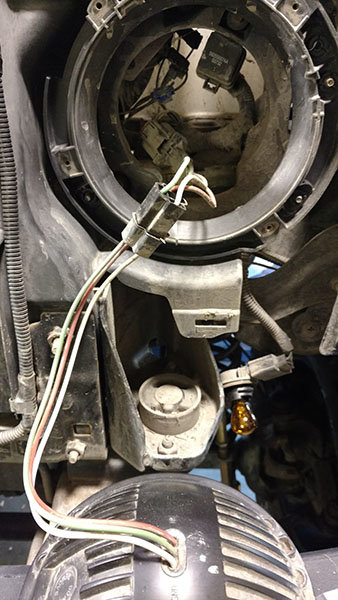
In theory, you are supposed to be able to unscrew the center section with a Phillips head screwdriver, but that seldom works on a Jeep with some miles on it. I haven’t had to replace the fasteners yet, and have always used a trim tool to pry between the frame and cover so the fasteners pop right out. I suppose a small pry bar would work too, but being able to center the V of the tool around the fastener makes quick work. With the clips removed, the 4 screws around the perimeter of each light can be removed, and the whole thing comes right out.

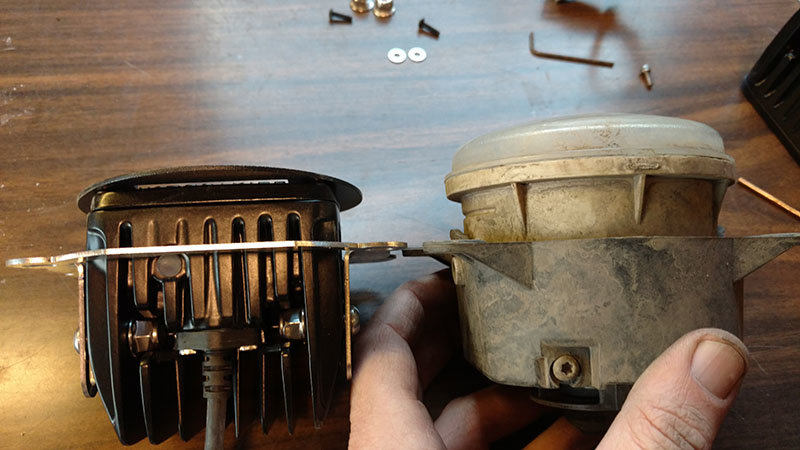
These lights have seen better days, and the lenses were always hazy. While that certainly hampered my light output, the halogen bulbs were never going to be capable of what I wanted anyway. The weatherpack style connector pulls right out of the back of my 2008-style light, while 2011+ models have a slightly different plug.
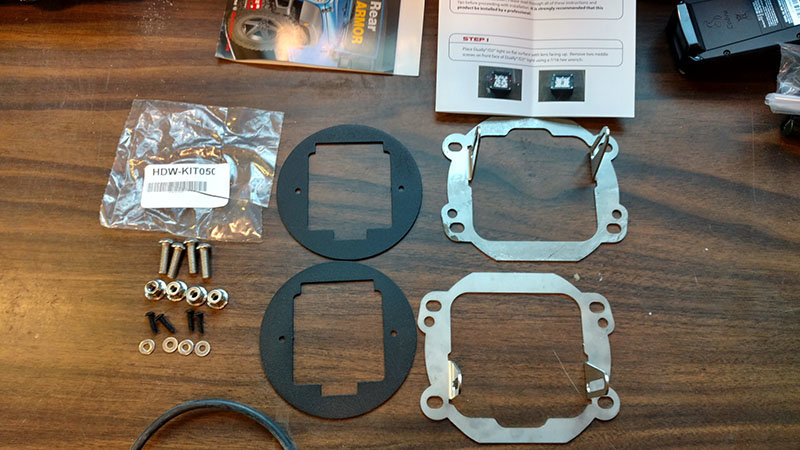
After a few minutes, I had the D-Series fogs mounted to the black textured front plates using a small SAE Allen wrench (not sure of the size, as the set wasn’t marked). Small washers are included to keep the plate from rubbing against the light’s front bezel, as well as black Allen hardware to replace the two stainless steel bolts from the center of the light.

Next, the mounting brackets are added to the entire assembly with another Allen bolt and Nylock nut. One of the advantages to this setup is the ability to set the depth of light once installed, as well as allowing you a few degrees of up-and-down movement to aim the lights.
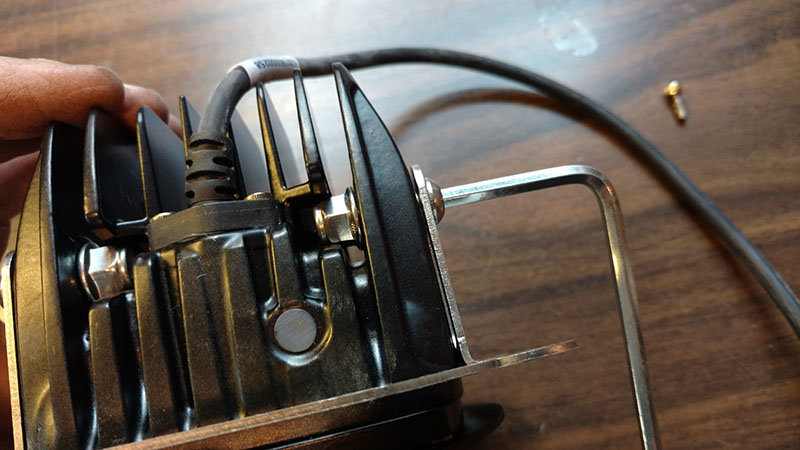
This extra adjustment will not only allow them to sit flush in the enclosures of whichever aftermarket bumper I install, but also afford me the ability to make sure they’re pointed exactly where I need.
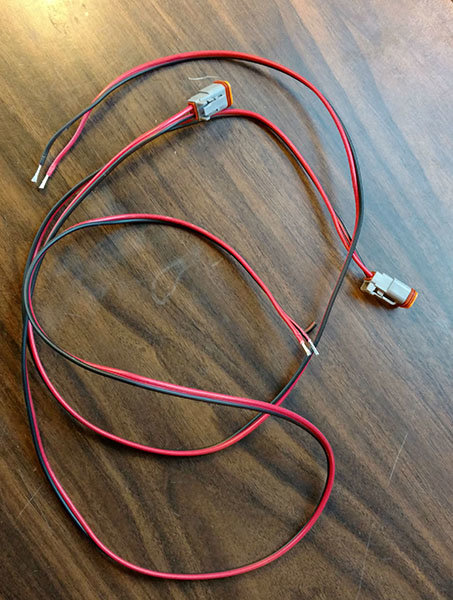
After mounting to the adapters, I robbed the weatherproof wiring plugs from the Rigid Industries harness by cutting them right at the connector, just in case I ever wanted to reconnect them and use with the relay.
Next, I stripped the ends of both sections of wire. While I’ll have a lot of excess wiring to hide in the short term, I know I’ll have the length I need if my mounting location changes.
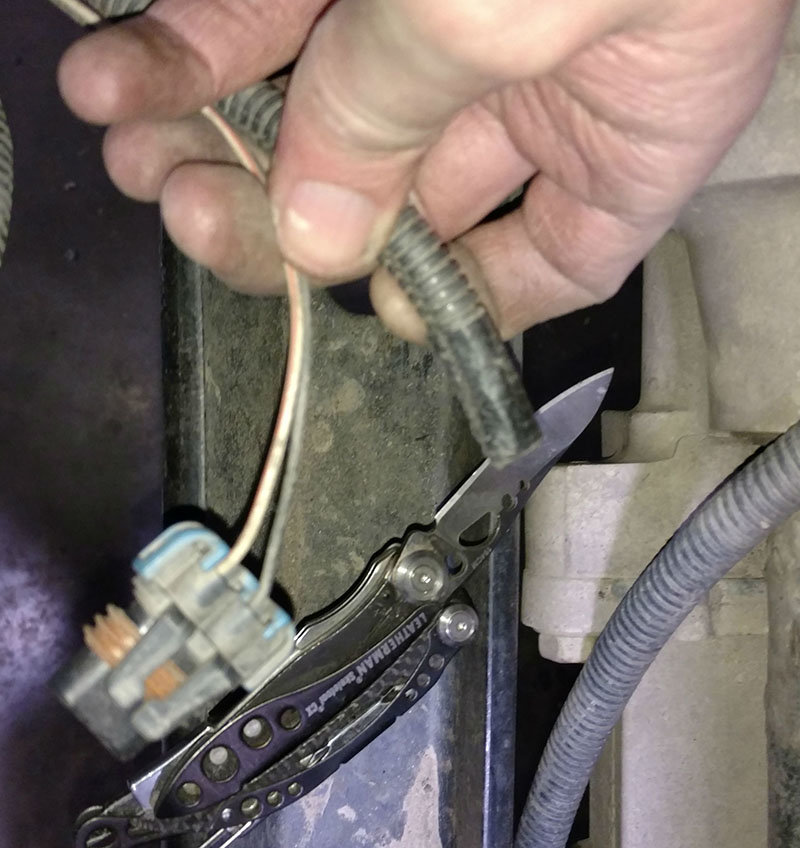
Then, I cut the factory fog light connector off with enough wiring behind it so I can use again if ever needed.
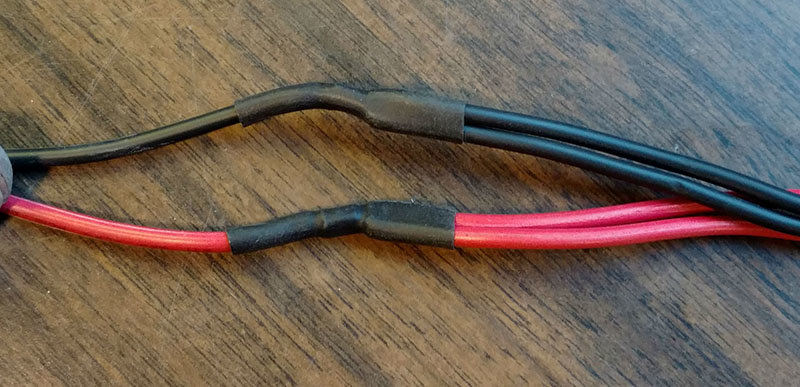
You could use butt-connectors to connect the wires, but heat shrink ones are best out in the elements. I opted to solder and heat shrink the connections to make sure they wouldn’t be a problem in case I drown them during a water crossing.
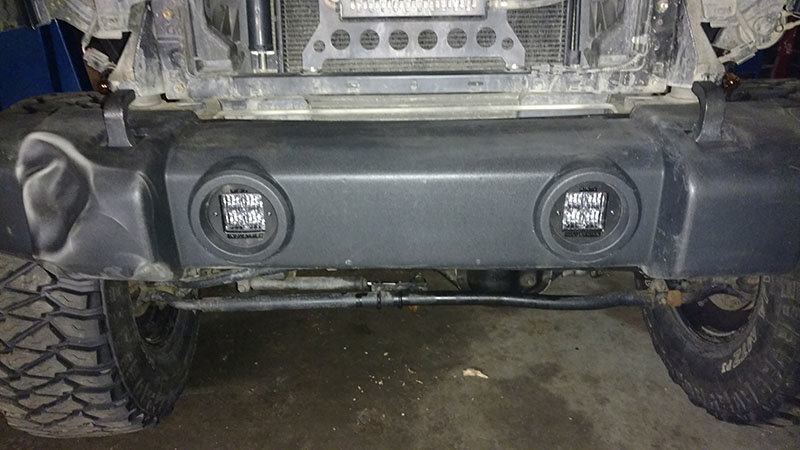
Following that, the mounting is simple. The four Phillips head screws per side that mounted the factory fog lights are used to install these into your bumper.
After driving around with these installed for the past few weeks, I would unreservedly recommend them to anyone looking to maximize their light output without limiting themselves to off-road use. Are these bright enough to light up the trail at night? Absolutely.
The color temperature is identical to the Truck-Lite headlights as well, so (thankfully) no more yellow tinted sadness.