by Matt Konkle
Managing Editor
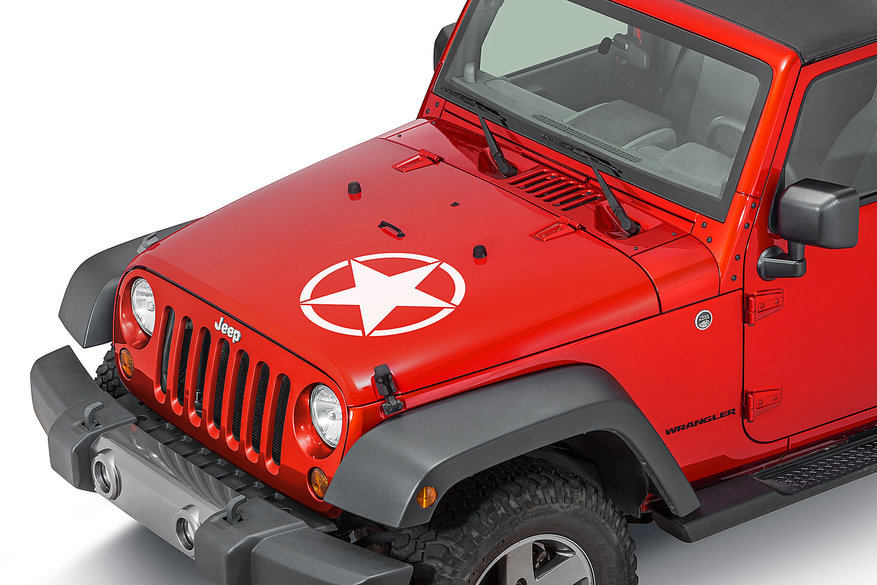
When it comes to installing your new Jeep decal or sticker, you may want to unbox the thing and immediately attach it to your vehicle. And while that probably seems like the best (and most fun) thing to do because you really want to see it on your ride, you really need to hit pause for a few beats before proceeding.
That's because no matter how clean the area looks where you want to install the decal or sticker, it still most likely has dirt or other small particles which can interfere with your installation.
After choosing which type of decal works best for you, most will arrive with three layers — a top one that is the transfer taper and is used to correctly position and apply the decal, a middle layer that is the decal itself and the bottom layer which is the paper backing sheet. Visually inspect these before detaching anything to make sure there are no defects to tears, and then you can start getting your Jeep ready.
Preparing the surface: Before applying your decal, thoroughly clean the vehicle's surface, removing all dirt, wax and oils. The life of your decal depends on a properly cleaned surface, and a decal affixed without this focus may not sit correctly, bubble, or quickly degrade. Denatured alcohol or rubbing alcohol both work very well to clean most surfaces, while standard glass cleaners can also be used for glass surfaces. If the temperature is below 50 degrees outside, then make sure to warm the surface before applying your decal as well.
Applying the decal: With the transfer tape facing up, slowly peel it up from the backing sheet. The vinyl should be attached to the transfer tape as you lift it up. Make sure to do this slowly as there may be very small vinyl pieces that need to come up with the transfer tape. (NOTE: If any piece sticks to the backing sheet, use a firm object such as a fingernail to rub the transfer tape where the vinyl is stuck.)
Carefully position where you want the decal to attach to your vehicle and make sure you do not come in contact with the sticker surface. When you have the decal where you want it, tack one edge in position and fold the decal onto the surface in a rolling motion. On larger surfaces like a windshield, you may need someone on the other side. Remember there are no second chances when installing a decal. The transfer tape will keep the decal together, and align itself.
Once the entire decal has contacted the surface, with the transfer tape still attached, rub the decal onto the surface with a plastic applicator, your fingers, or a credit card. This will remove any bubbles trapped under the decal, and should ensure good adhesion over the entire decal. Don't worry about the decal itself as that transfer tape allows you to firmly rub the decal without damage. Take as much time as you need to get those bubbles removed as the more time you take, the less chance of bubbles.
When the decal has been completely applied to the surface, gently peel away the transfer tape. The decal will adhere to the surface much more aggressively than the transfer tape. If there are still bubbles present under the decal even after a thorough bout with the plastic applicator, then try to remove using a small pin or needle to puncture the bubble and remove the air. A small pinhole will not be seen after the air has been removed.
The application of decals is not terribly difficult, but always remember it is best to work carefully and slowly. Don't try to rush the process or you could ruin your decal. Once applied, decals cannot be repositioned so take your time.
Additionally, once installed, make sure you do not hit the decal directly with a pressure washer when washing your vehicle, or an ice scraper to assure a long life of your decal.