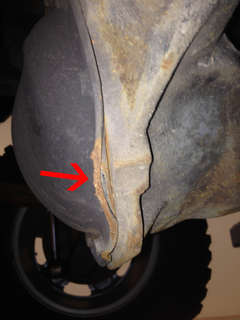
On one of my recent wheeling trips in my 2001 Jeep cherokee XJ, I heard the all to familiar thud of something near the rear axle impacting a rock as I came through a mud pit on the trail. If you have done any amount of off roading you are probably familiar with this feeling. Once I was back in dry harbor, I hopped out of the XJ to make sure everything was still intact. The good news was I hadn't done any serious damage, but the factory rear differential cover had hung up on a rock, and bent one side of it back.
No gear oil was leaking, so I finished my day of trail riding, and added the diff cover to my list of projects (a list that seems to grow every time I go off road). I was taught from a young age "If something breaks, don't just replace it, upgrade it." So when I got back to the office, I picked out the diff covers for the Jeep, I decided to go with the aluminum covers from G2 Axle and Gear.
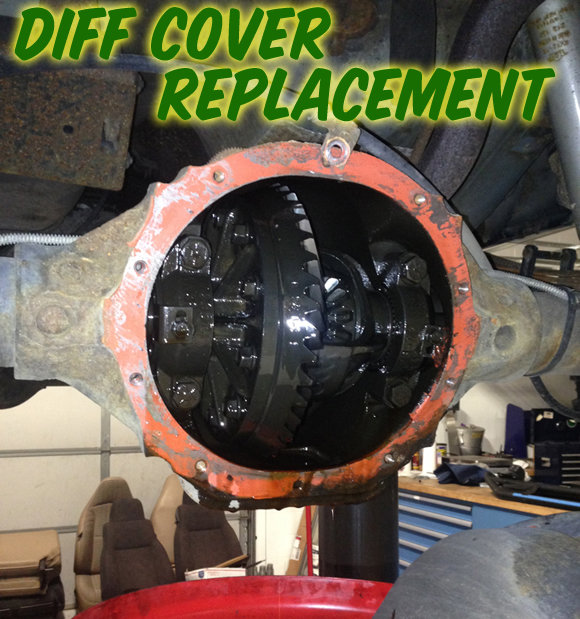
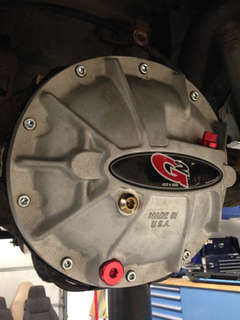
G2 Axle & Gear Aluminum Differential Cover
Besides the obvious reason of upgraded protection, these diff covers had a few features that I really liked. In addition to the seperate drain and fill plugs, G2 also added a port in the cover to run air lines, or wires through for a locker. I do plan on running lockers on the XJ so saving myself from having to drill for those controls was a big benefit for me. Another nice bonus, G2 also includes a tube of RTV in the box so you don't have to borrow the wife's car to run out to the auto parts store to buy some after you forget to pick it up.
Once the covers came in, and I purchased the 4 quarts of gear oil (for front and rear) I put the XJ up on the lift and got to work. This is a project that can be easily done in the driveway with no lift, and you really don't even need to use a jack, a nice level driveway will work just fine.
The factory differential cover is a study in simplicity, it's stamped steel, 10 holes for the bolts, and a fill plug. End of list. Once you get a drain pan under the center of the differential, start removing the bolts starting at the bottom. Leave one or 2 bolts near the top part way in so the cover doesn't go splashing into your pan. At this point the factory diff cover should still be held on with RTV sealant, so you'll need to use a flathead screwdriver, or a pry bar to pry the cover off starting near the bottom. Now the terrible smelling gear oil will start to drain out.

Once most of that gear oil is drained, you need to remove all that old sealant. I used a combination of tools; a razor knife, and a nylon abrasive wheel.
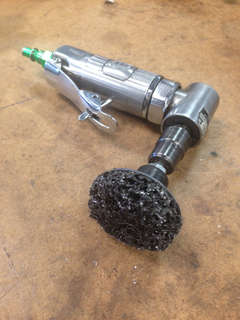
This is a very important step, you need a good clean surface for the new RTV to bond to so you don't have a leaky mess.

After getting the surface cleaned up, use some brake cleaner to get rid of all the dirt.
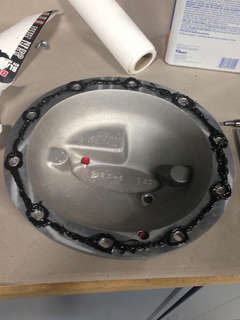
While the brake cleaner is drying grab your RTV sealant and apply a bead on the mating surface of the new diff cover, make sure you circle all the bolts as you go.
Now with a couple of the supplied bolts in your hand push the dif cover into place and hold it still while you start the threads of those 2 bolts. I start with one at the top and one at the bottom, so it will hold straight. After you get those 2 just hand tight, start the other 8 bolts hand tight as well.
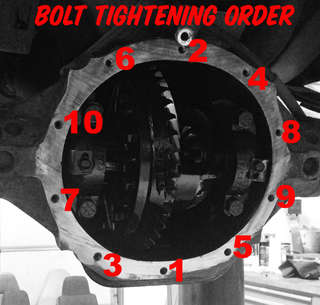
Now tighten all the bolt is a cross pattern (see image below for pattern) to the factory torque specs (the factory service manual calls for 35ft lbs) I prefer to do this in 2 stages, starting with 20ft. lbs in my cross pattern, then adjust the torque wrench to 35ft. lbs. and follow the same pattern until all the bolts are tightened correctly.
Make sure you read the drying time on the RTV package so you know how long to wait before adding your gear oil.
Once the RTV has set up, remove the fill plug from the differential cover, and begin adding your gear oil slowly into the fill plug. The diff is full when some gear oil begins to drip out of the fill plug.
Replace the fill plug and you are all done.
This is a super easy install that should only take a few minutes of your time (you'll spend more time waiting for the RTV to set than the rest of the install)
Now that I don't have to worry about my differential getting destroyed, I can take a look at that list and find something else to upgrade.