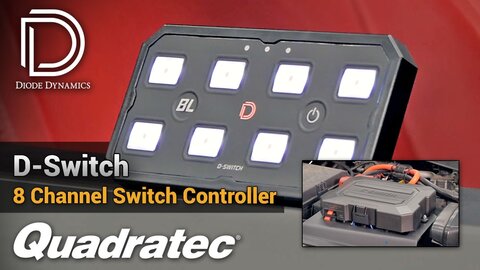
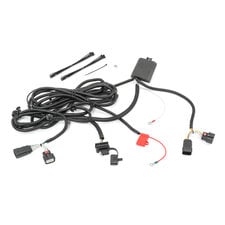
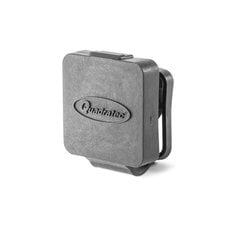
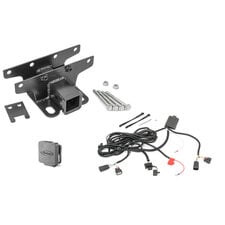
Hey Rob here for Quadratec.com. Today we're going to be taking a look at and installing a Quadratec Premium two inch rear receiver hitch for the 2018 and newer Jeep Wrangler JL. It is compatible with both two-door and four-door Wranglers of all trim levels. Now getting your new hitch installed is a very easy task that you should be able to tackle right at home in your garage or driveway in just a few short minutes. In fact it doesn't even require you to remove that factory rear bumper and as you'll see today, odds are you probably won't have to remove an aftermarket rear bumper either. Now getting a hitch installed on the back of your Wrangler of course will increase its capabilities giving you the ability to bring along a maybe a small utility trailer, a boat or a pair of jet skis, or maybe add a hitch mounted bike rack to the back of your Wrangler to bring along some bikes on your next outdoor adventure or maybe even the ability to add a cargo basket to your hitch to increase the cargo carrying capacity of your Wrangler. That's well definitely a plus if you've got a smaller two-door Wrangler. I've got three components on the table today, of course the two-inch receiver hitch itself, also our Quadratec plug-and-play four pin trailer wiring harness, and well the hitch plug to finish off the look once you have your hitch installed. All three of these components are available conveniently in one complete kit that's easy to buy and will give you everything you need to legally tow a lighted trailer on the road or each of these components are available separately. So well say maybe you already have a hitch on your Jeep but you don't have the wiring needed to legally tow a lighted trailer well you can buy just the trailer wiring harness or maybe you know that you'll never be towing a trailer you'll only be using your hitch for bike racks cargo racks and accessories, well you can simply purchase just the hitch by itself. The Quadratec Premium receiver hitch is constructed from high strength carbon steel, it's finished off in a black powder coat finish and when you install the hitch on your four-door Wrangler Unlimited you will be giving your Jeep the capability of towing up to a 3,500 pound trailer with 350 pounds of tongue weight. If you're installing this on a two-door Wrangler you'll be giving your Jeep the ability to tow a 2,000 pound trailer with up to 200 pounds of tongue weight. Now of course those numbers are mandated by the vehicle itself not by the hitch and it's always important to make sure you're following your vehicle manufacturer's suggested trailer tow capacities of course not only to protect your vehicle but also for not only you but everyone else on the road around you safety. The receiver hitch will include all the hardware you need for a very easy installation it even goes as far as including this great little bracket to hold your four pin trailer wiring harness. Now speaking of that trailer wiring harness our Quadratec plug and play four pin trailer wiring is an easy straightforward install. Of course the wiring on the newer Jeep Wrangler JL’s is pretty complex so gone are the days of simply tapping into the brake lights and turn signals here at the tail lights but our harness does make it extremely easy to get everything installed. It features a t-style harness connector that will plug in between your taillight wiring and the body side wiring on both the driver and passenger tail lights, a control module and a positive wire that you need to run up the frame rail and connect at your battery to provide power to that control module and finally of course you'll get your four pin flat trailer wiring receptacle here along with all the appropriate christmas tree fasteners that are going to help to secure all of that wiring at the appropriate locations around the frame of your Jeep to make for a very easy install and of course that plug will snap right into that tab right here on the receiver hitch and then of course finally well that receiver hitch plug will just finish off the look closing off that receiver when it's not in use. Now as I mentioned our Quadratec Premium receiver hitch is compatible with all trim level Wranglers. Your installation will vary depending on which model you have slightly. Now if you have a Sport model Wrangler or a Rubicon with the factory steel rear bumper well your installation is going to be pretty straightforward you'll simply slip that receiver hitch over the rear crossmember and secure it in place with the four bolts. The two center bolts will thread into the welded nuts right here on the receiver the two outer bolts, well you'll secure those in place with the two provided flange nuts. Now if you have a Sahara model like we have here today in the shop or maybe a Rubicon with the plastic rear bumper, well we just have one other bracket that we need to be aware of. There is this separate fascia bracket here that is mounted to the rear cross member that provides two mounting points for that factory rear plastic bumper on the Sahara and Rubicon models. So before we begin your installation you will need to first remove the two 10-millimeter bolts right here that go through the bottom of the bumper into this bracket at which point we can go ahead and remove the two larger 18-millimeter factory bolts, at which point we'll go ahead and simply slide that fascia bracket slightly forward still resting inside of that factory rear bumper while we complete our install only this time those two center bolts again will thread into the welded nutserts, the exterior bolts however instead of using those flange nuts when we thread those in they're simply going to thread right into the welded nuts on that fascia bracket. In my opinion making your install even just a little bit easier. Now we're only going to be using some basic hand tools to complete this install. You can use an 18-millimeter socket wrench or if you have an 18-millimeter ratcheting wrench that'll work pretty well and then you'll also need a torque wrench so that we can make sure we torque all these bolts to spec when we're finished the install, especially important if you're going to be towing with your new receiver hitch. So why don't we go ahead and get started by getting these two factory 18-millimeter bolts out of the way. As I mentioned if you're installing this with your factory bumper installed at this point well you'll simply slide this bracket forward and just let it rest inside your bumper I'm just going to go ahead and set it out of the way for just a moment so that we can get our hitch prepped for the install.
We can set our wiring adapter aside for the moment, go ahead and take the hitch simply slide it right up over that rear cross member on the frame
and then from the back side we'll start with these two center bolts. Just get it started to hold the hitch for you
and now at this point again if that factory bumper were installed
you can see we'll simply just slide this fascia bracket back into place. There are two large cutouts on the bracket that will accommodate those welded nuts on the hitch so we don't need to do any modification to this bracket to make it compatible with the receiver hitch and as I mentioned it's just going to make the installation go a little bit easier because we don't even need to worry about these flange nuts and using two wrenches. We can go ahead and thread one of these bolts in from the back side here on the passenger side and we'll just get that bolt started.
And now at this point you want to make sure you don't forget the tab to hold your trailer wiring here on the driver's side or actually in fact you can install this bracket on either side whichever you prefer. Now if you're know that you're not going to be installing the wiring you can leave this bracket aside you don't need to install it but since we are going to be installing the wiring I'm going to go ahead and slip this in between the fascia bracket and the hitch and then thread this last remaining bolt from the back side.
Go ahead and grab that 18-millimeter wrench again now I'm just going to go ahead and tighten all those bolts down.
All right with all four of those hitch bolts snugged down at this point you can go ahead and reinstall those two 10 millimeter bolts through the bottom of your factory bumper. At this time we also need to go ahead and make sure that we're torquing all of those hitch bolts to specification. They need to be tightened to 67 foot pounds. Now that's especially important if you're going to be towing a trailer with your hitch. If you don't happen to already have a torque wrench well you can click the info button to head over to Quadratec.com to check out our selection of torque wrenches from Performance Tool. I’ve already gone ahead and set my torque wrench to 67 foot-pounds and there's just enough room here to fit the socket on the back of that bolt and clear that factory muffler.
Right now that we've got those bolts all torqued down we can go ahead and start installing our trailer wiring harness. Now go ahead and unravel the harness and lay it out and then we'll start by removing the driver side tail light. Go ahead and disconnect the factory connector and plug the t harness with the yellow and brown wire between the tail light connector and the body side wiring harness. We're also going to be installing the control module in this location and installing our white ground wire on the post here as well. Next we can move over to the passenger side where we're going to be installing the remaining t-harness with the green wire again between the factory connector here on the taillight and the body side wiring harness. Now at this point you can go ahead and follow the included instructions to show you all of the wire routing securing it in place with all of the included zip ties and christmas tree fasteners running up the frame rail to make your positive connection at the battery and of course the last step to go ahead and finish installing our trailer wiring is to go ahead and secure that four-way connector right here in the provided tab that we installed earlier on the side of the hitch. We can go ahead and put the receptacle cover in place there snapping it on and finally the last thing to do is to go ahead and finish off our install by installing the receiver hitch plug. Simply stretch the retainer around the receiver and fold it up into place to give your hitch a nice finished off look when you're not using it. Now if you guys want to get more information or to purchase a Quadratec Premium Two Inch Receiver Hitch for your Jeep Wrangler JL along with the four-way plug-and-play trailer wiring harness and the hitch plug you can click that info button to head over to Quadratec.com. Of course you have any comments or questions about any of the components or how to get them installed you can always leave those for me down in the comments section below or contact us directly at any of the options on the screen and as always if you haven't already and you like these videos do me a huge favor make sure you hit that thumbs up button don't forget to hit that subscribe button as well as the notification icon so be sure to catch all of our latest videos. Until next time, I'm Rob, I'll see you guys out on the trail!
If you are planning a vacation and need a hitch to tow behind your Wrangler JL look no further then our Premium 2" Receiver Hitch. We dare you to compare our Exclusive hitch to others with its premium design and construction without a premium price. Features the maximum allowed 3,500-lb tow rating with 350-lb tongue weight rating on Wrangler Unlimited JL and 2,000-lb tow rating with a 200-lb tonque weight rating for Wrangler 2 Door JL. Consult your owners manual for maximum vehicle towing capacity and recommended towing procedures.

Shop Brands in this video

Tags:
Comments