by Scott Ammerman
Torque Correspondent
Jeep Wrangler Rubicon models, starting in 2007, were factory equipped with a push button disconnect sway bar. This part, called a “SmartBar” was produced for Jeep by a company called American Axle & Manufacturing, and was a welcome addition to the most off-road Jeep models rolling off the assembly line at the time. From the original press release in 2005:
“AAM's SmartBar is a microprocessor controlled disconnecting stabilizer system that provides maximum suspension articulation during off-road and rock climbing situations. When in the connected mode, the SmartBar functions as a traditional stabilizer bar system to assist in controlling vehicle roll stability. It utilizes electronics and firmware control with connect and disconnect modes of the two stabilizer halves thereby making them truly independent of each other.”
AAM actually first produced the SmartBar for the 2005 Dodge Ram Power Wagon, before getting it installed into new Jeep Wrangler Rubicon editions.
"We are extremely pleased that AAM's SmartBar was chosen for the new Jeep(R) Wrangler Rubicon," AAM Vice President, Engineering and Chief Technology Officer John J. Bellanti said at the time. "The design of the SmartBar is ideally suited to meet the off-road and rock-climbing requirements of Jeep enthusiasts.”

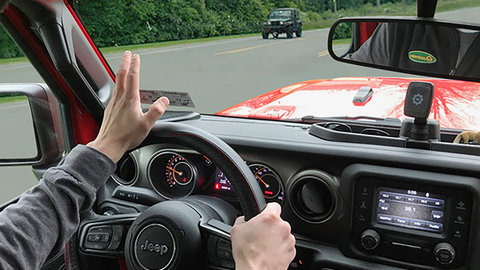
So with all that, why is mine removed from the Jeep and on the ground?
Well, that’s a good story. I’m glad you asked.
This is the tale of why I removed an automatic disconnect sway bar and installed a much more reliable complete setup. Oh, and it is something you can do as well.
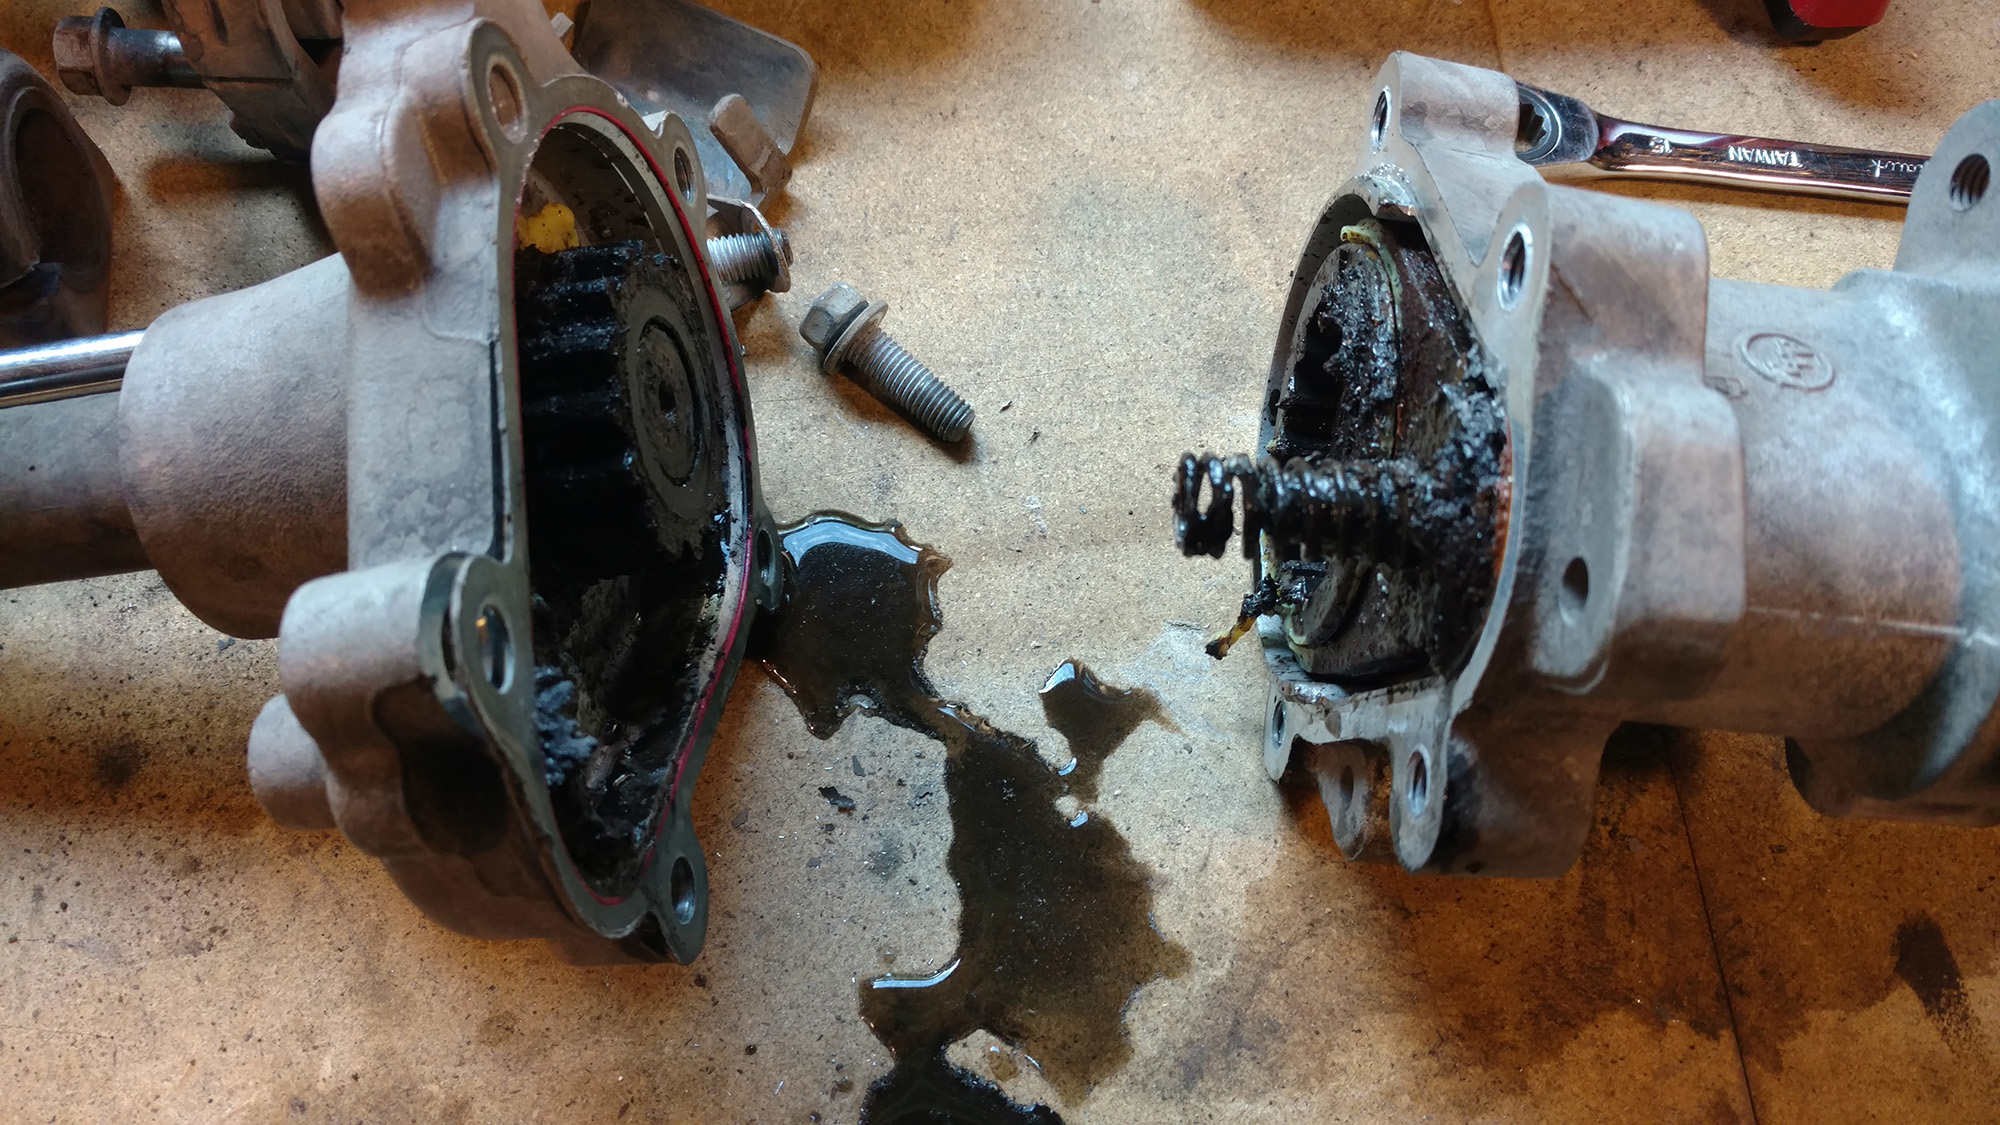
I had an experience with this same part a few years prior, but that time was with my 2008 Rubicon 'Snake Eyes' build, where the unit simply entirely stopped functioning. This caused a yellow light to flash incessantly in the instrument cluster, letting me know there was an electrical malfunction. Because the bulk of the electronics lie below the maximum fording depth and are not fully sealed, over time even rainwater can seep its way in, causing havoc with the circuits.
Since it was rendered totally inoperative, I installed an EVO NoLimits Manual Sway Bar Disconnect System in this article, converting the SmartBar’s operation to a fully manual knob. This was far cheaper than replacing the entire Mopar Disconnect Front Stabilizer Bar and it worked fine with the 2.5” lift and 35-inch tires on Snake Eyes. I never experienced another issue once it had been lobotomized by removing the electronic parts of the system.
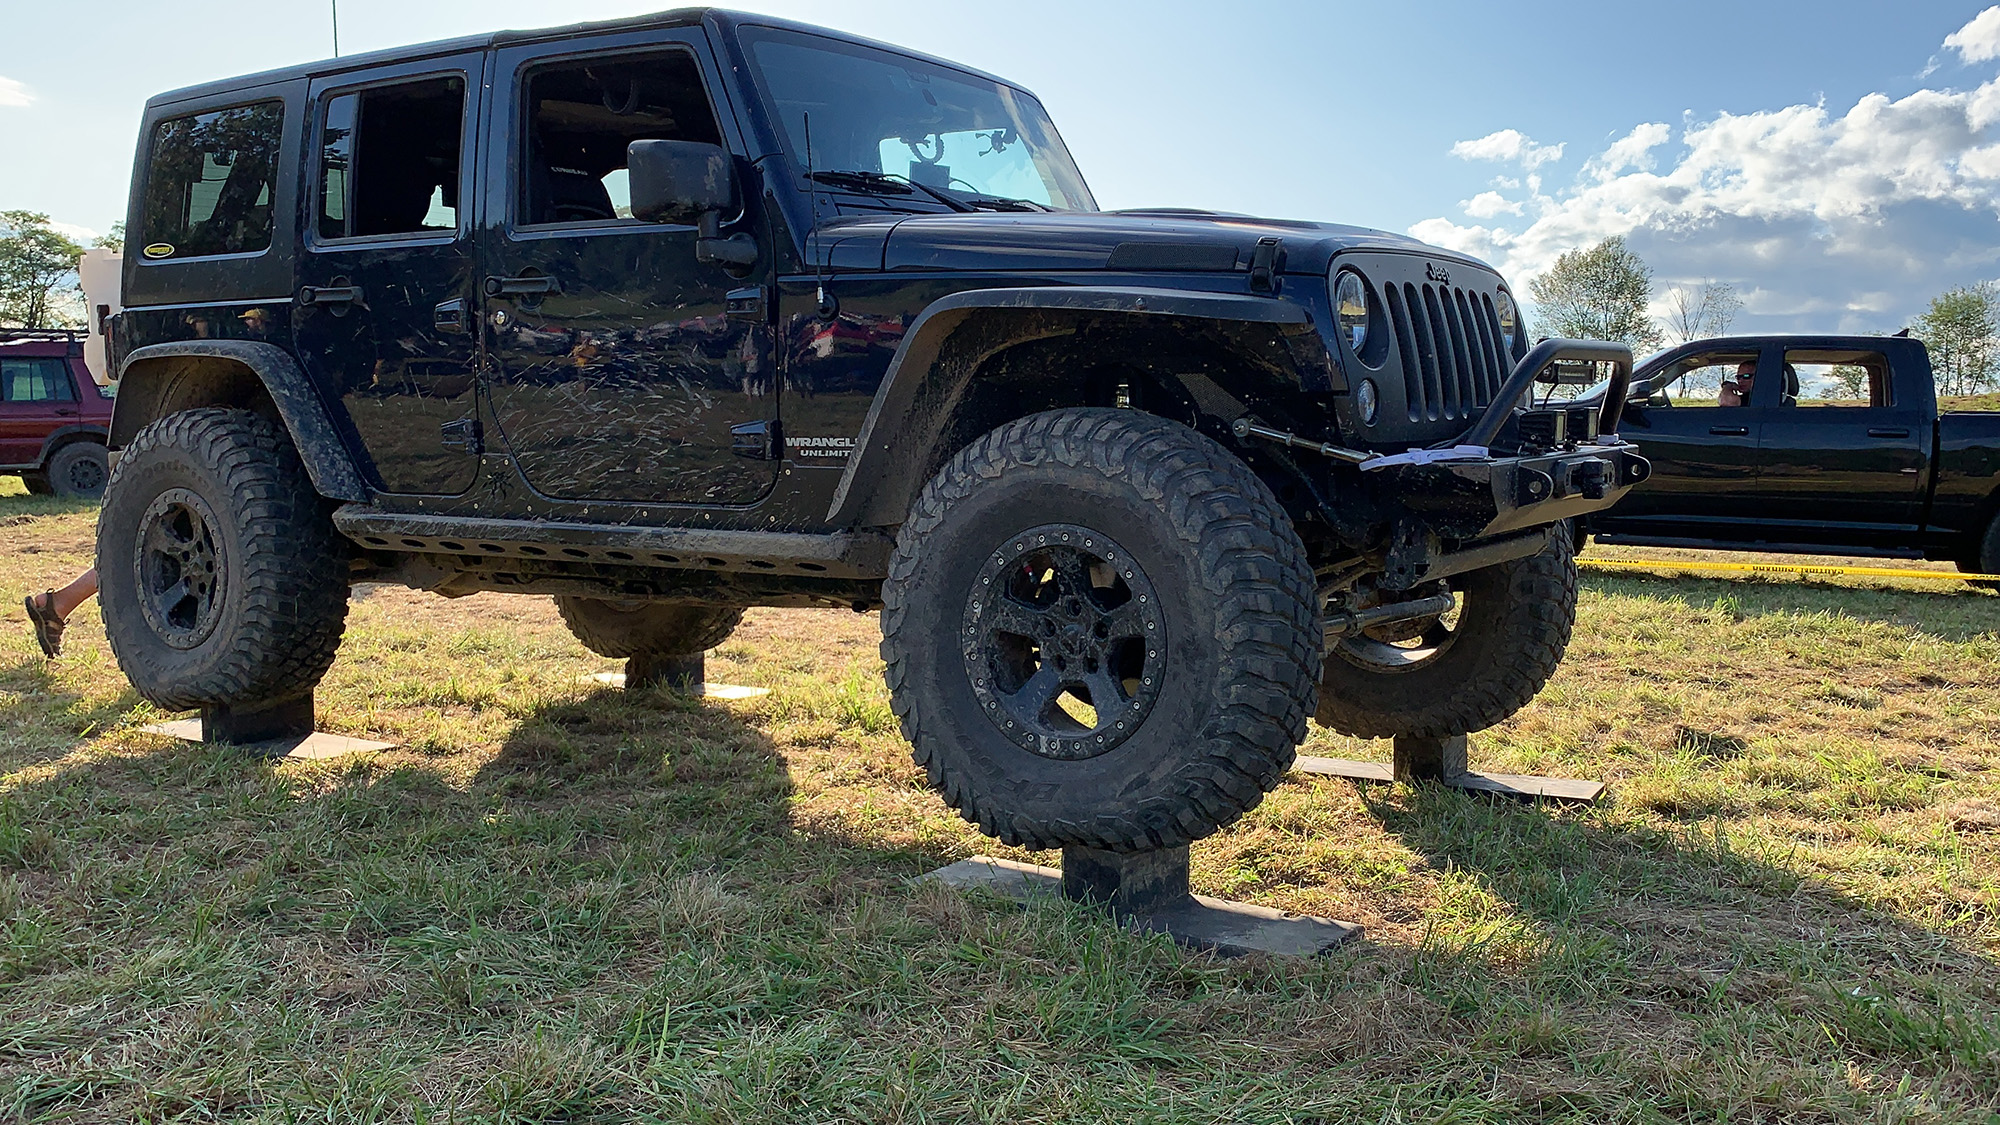
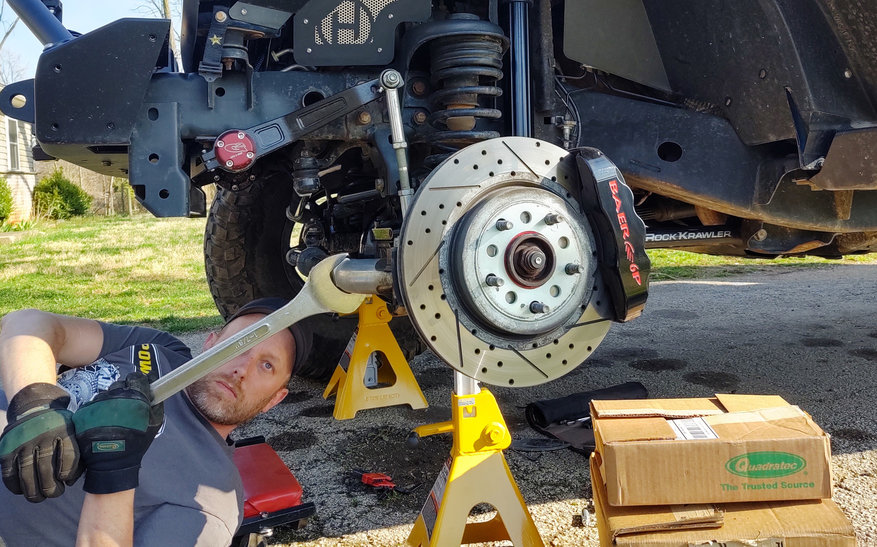
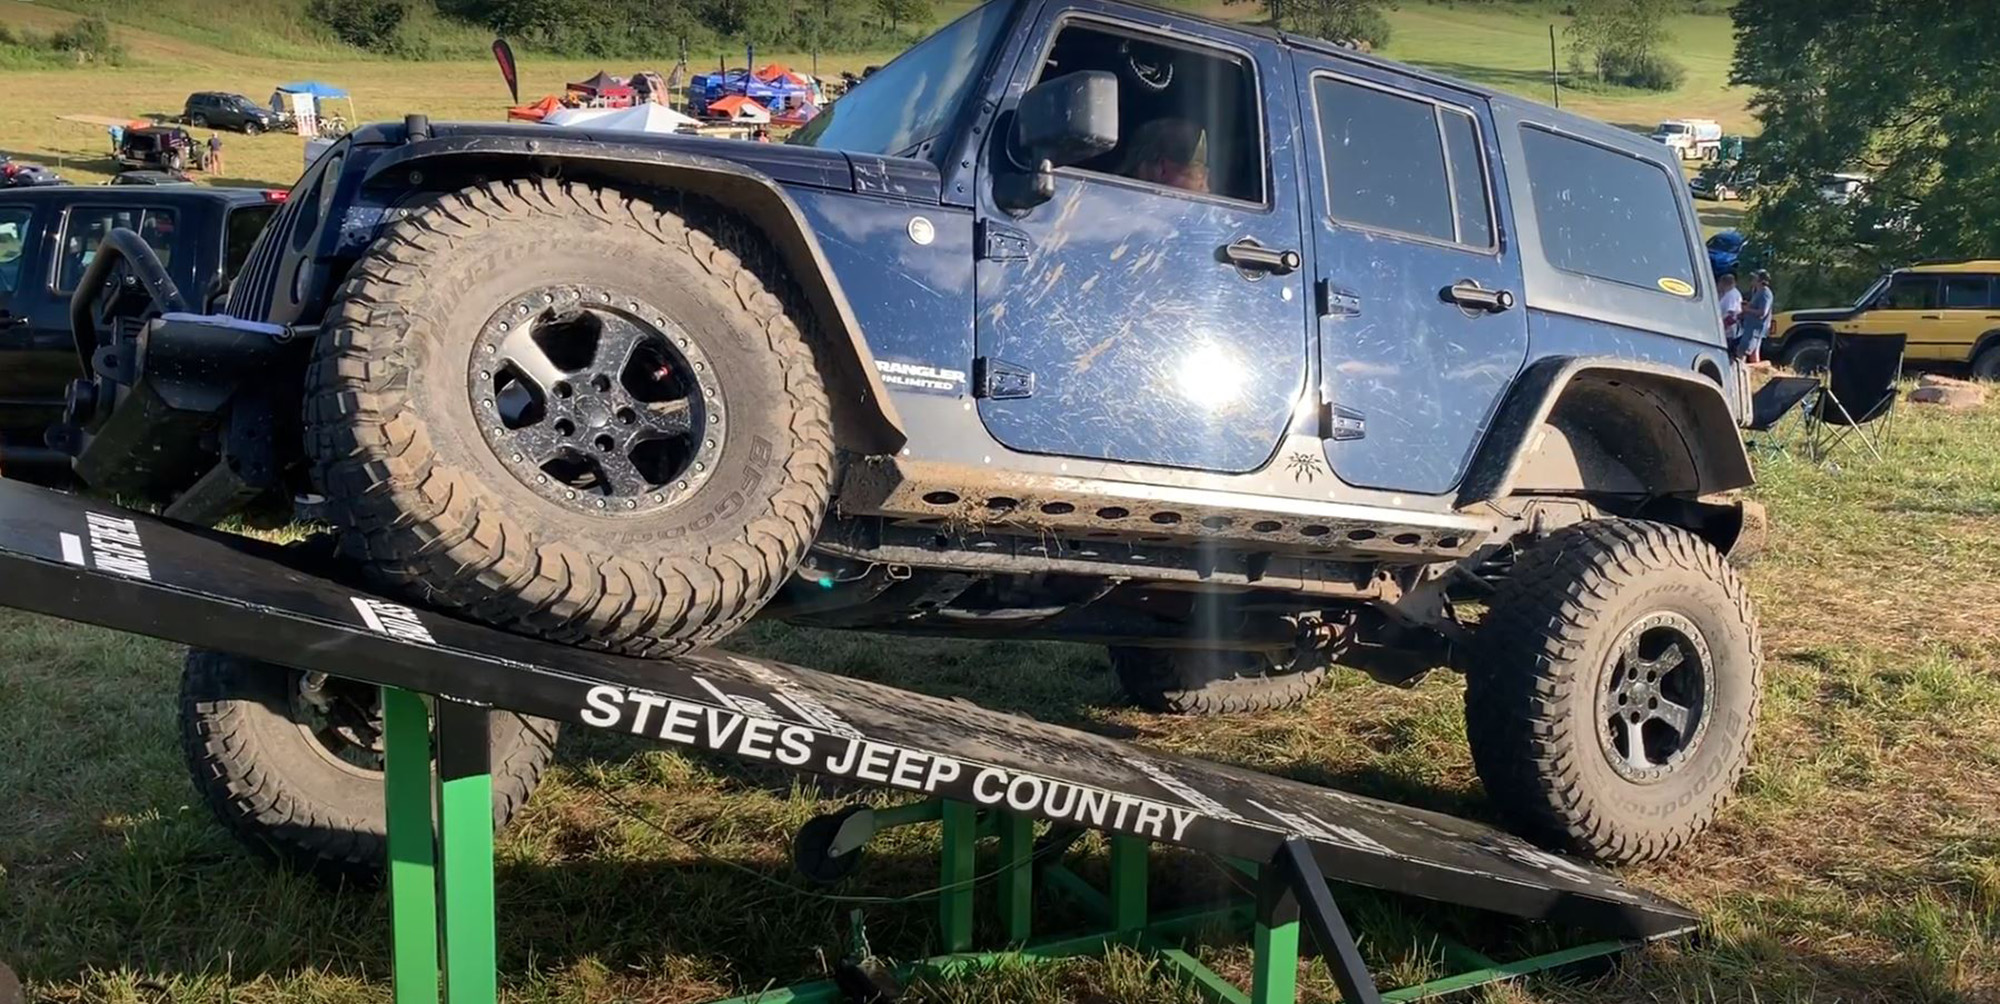
As most Jeep owners will tell you, their build project is never completely done. Way back in the summer of 2019 (which seems like ages ago), project Rattler had its upgraded suspension freshly installed — a Rock Krawler 3.5-inch Mid Arm X-Factor, along with a set of 37” BFGoodrich KM3 mud terrain tires. With only one or two shakedown trail days in the books after install, a few friends and I headed to the Mid Atlantic Overland Festival in central Pennsylvania later that summer.
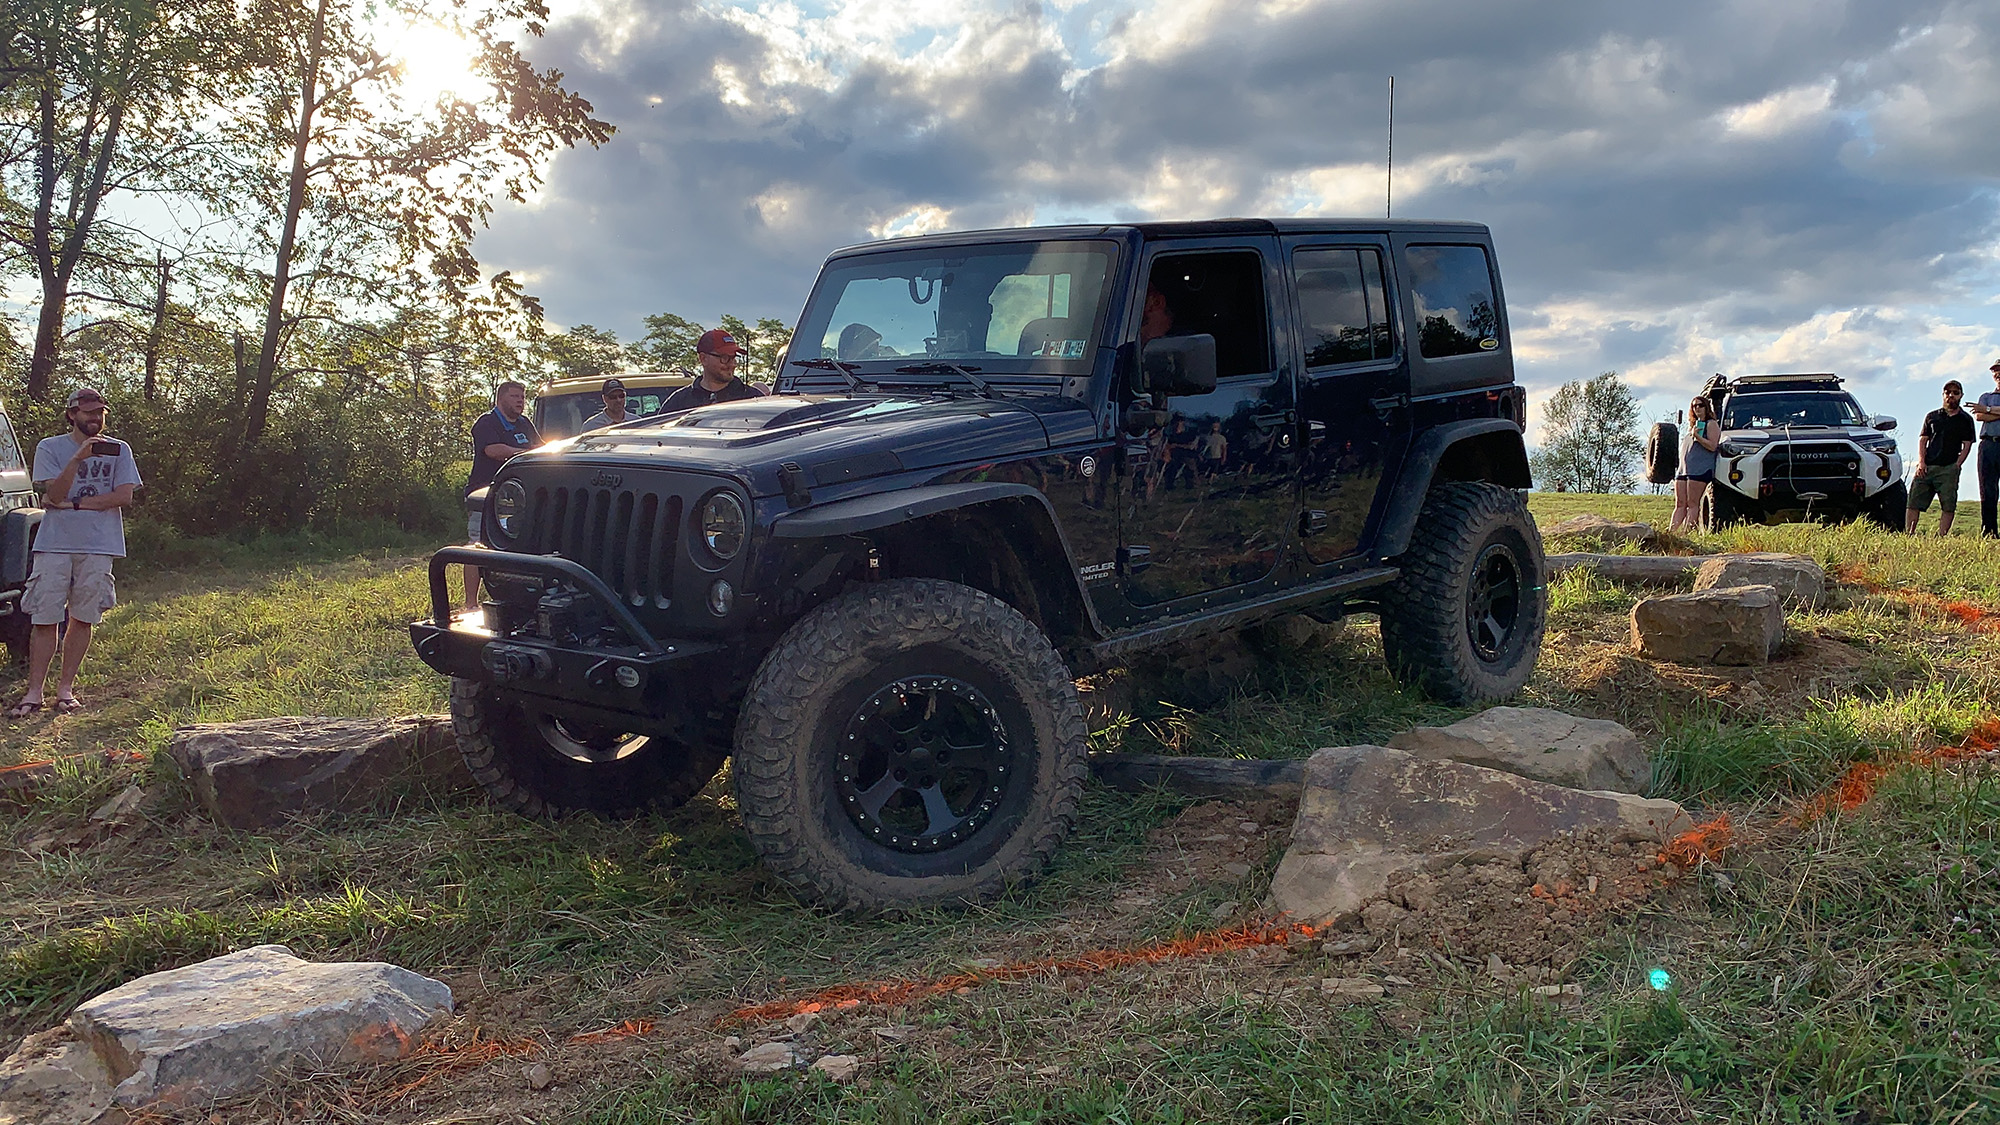
Photo credit: Branden “Magellan” Buxman
This event included training classes, trail rides and a “skills course” designed by Ron Harrington of Ridgeback Guide Service. You could sign up to perform feats of 4 wheel drive prowess, and I certainly did, as I was eager to test out the most recent modifications.
On the first day, the RTI ramp was open to flex out your suspension and get an official score sheet before running the downhill skills course. For this RTI score, you position your driver’s side front tire in line with the ramp, and drive forward until another tire leaves the ground.
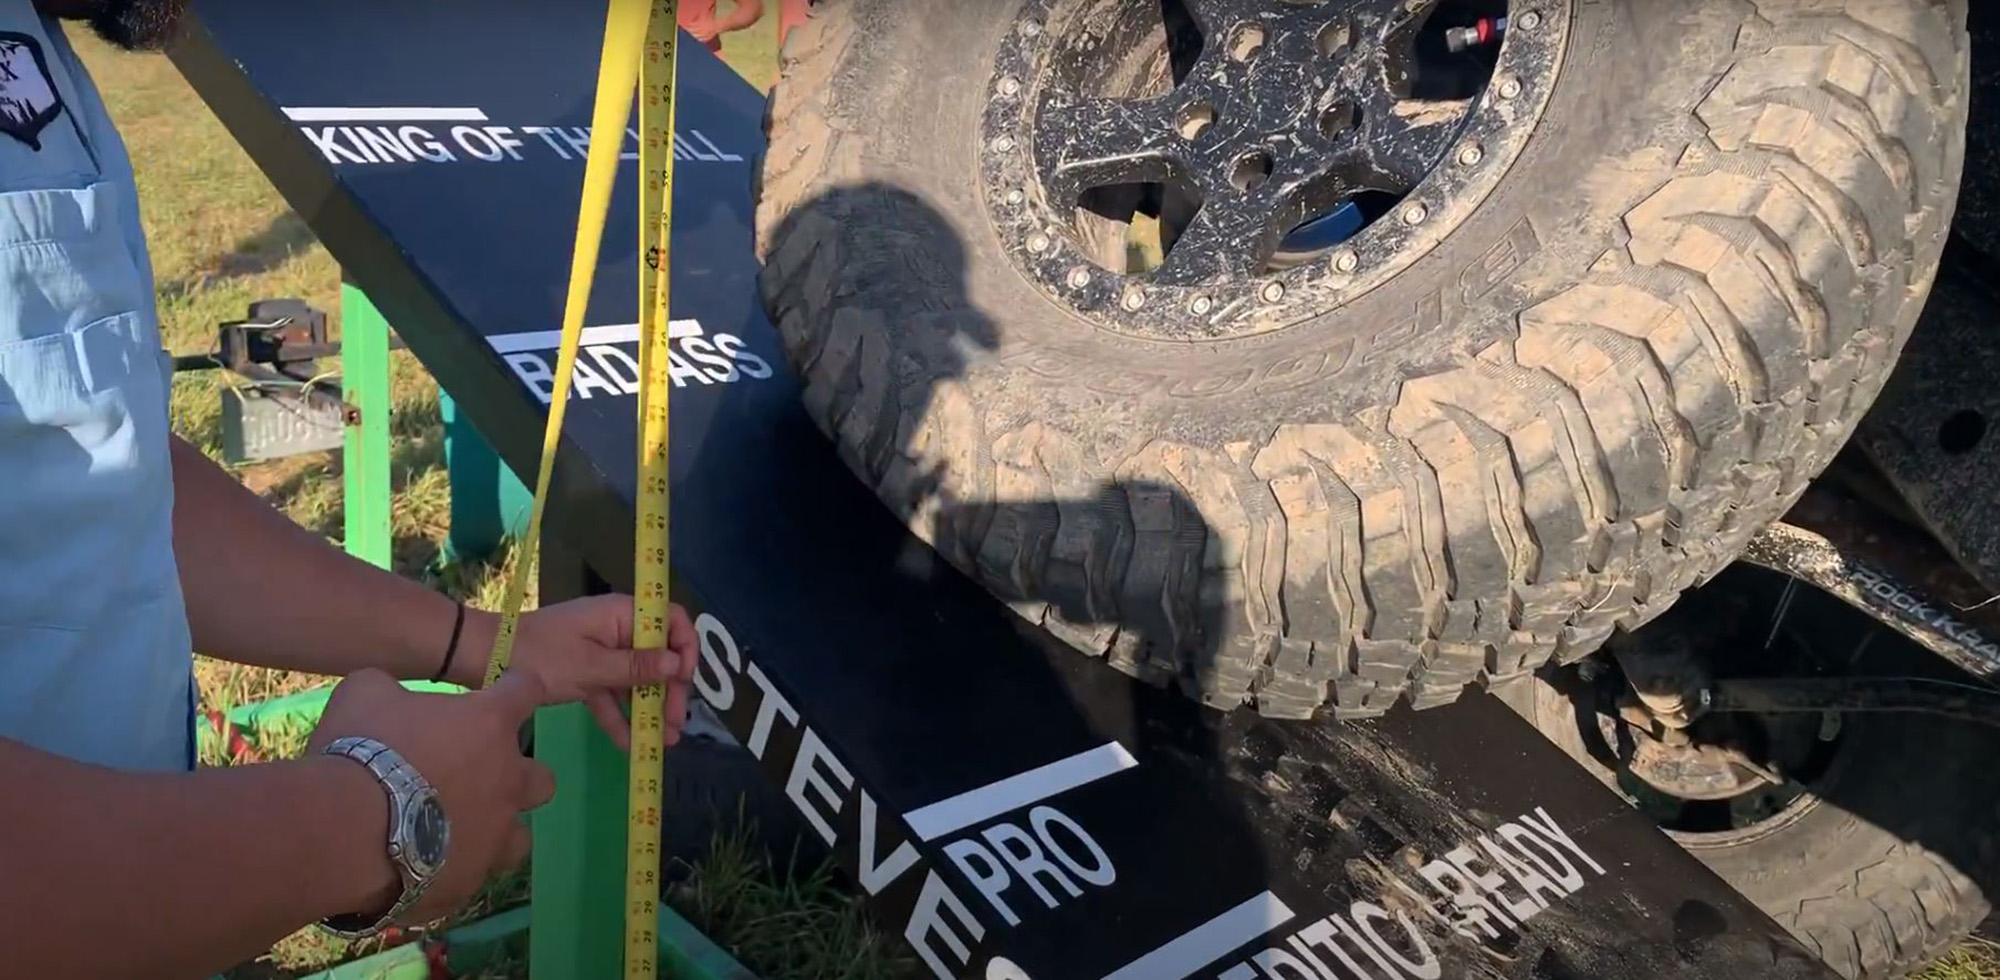
Here was the problem — I knew my Jeep didn’t score as well as it should have, even with the tires aired down and the sway bar electronically disconnected. After some consultation with friends in the Jeep aftermarket, I gave my brother, who recently installed a G2 Core DRS Sway Bar (my brother) a call. This was the installation on his Jeep:
He recommended, in no uncertain terms, that the sway bar end links be removed from the equation. We determined that the limiting factor with a 3.5-inch lift must be the factory SmartBar system.
So, on day two and with a second opportunity available, I fully disconnected my sway bar end links by removing the bolts and tying them out of the way. While my Rock Krawler suspension came with a set of quick disconnects, I used bolts instead with the SmartBar, never thinking I would need them. I got much higher on the ramp, until the rear tire was nearly touching it. For reference, the day one score was below the “pro” mark on the ramp.
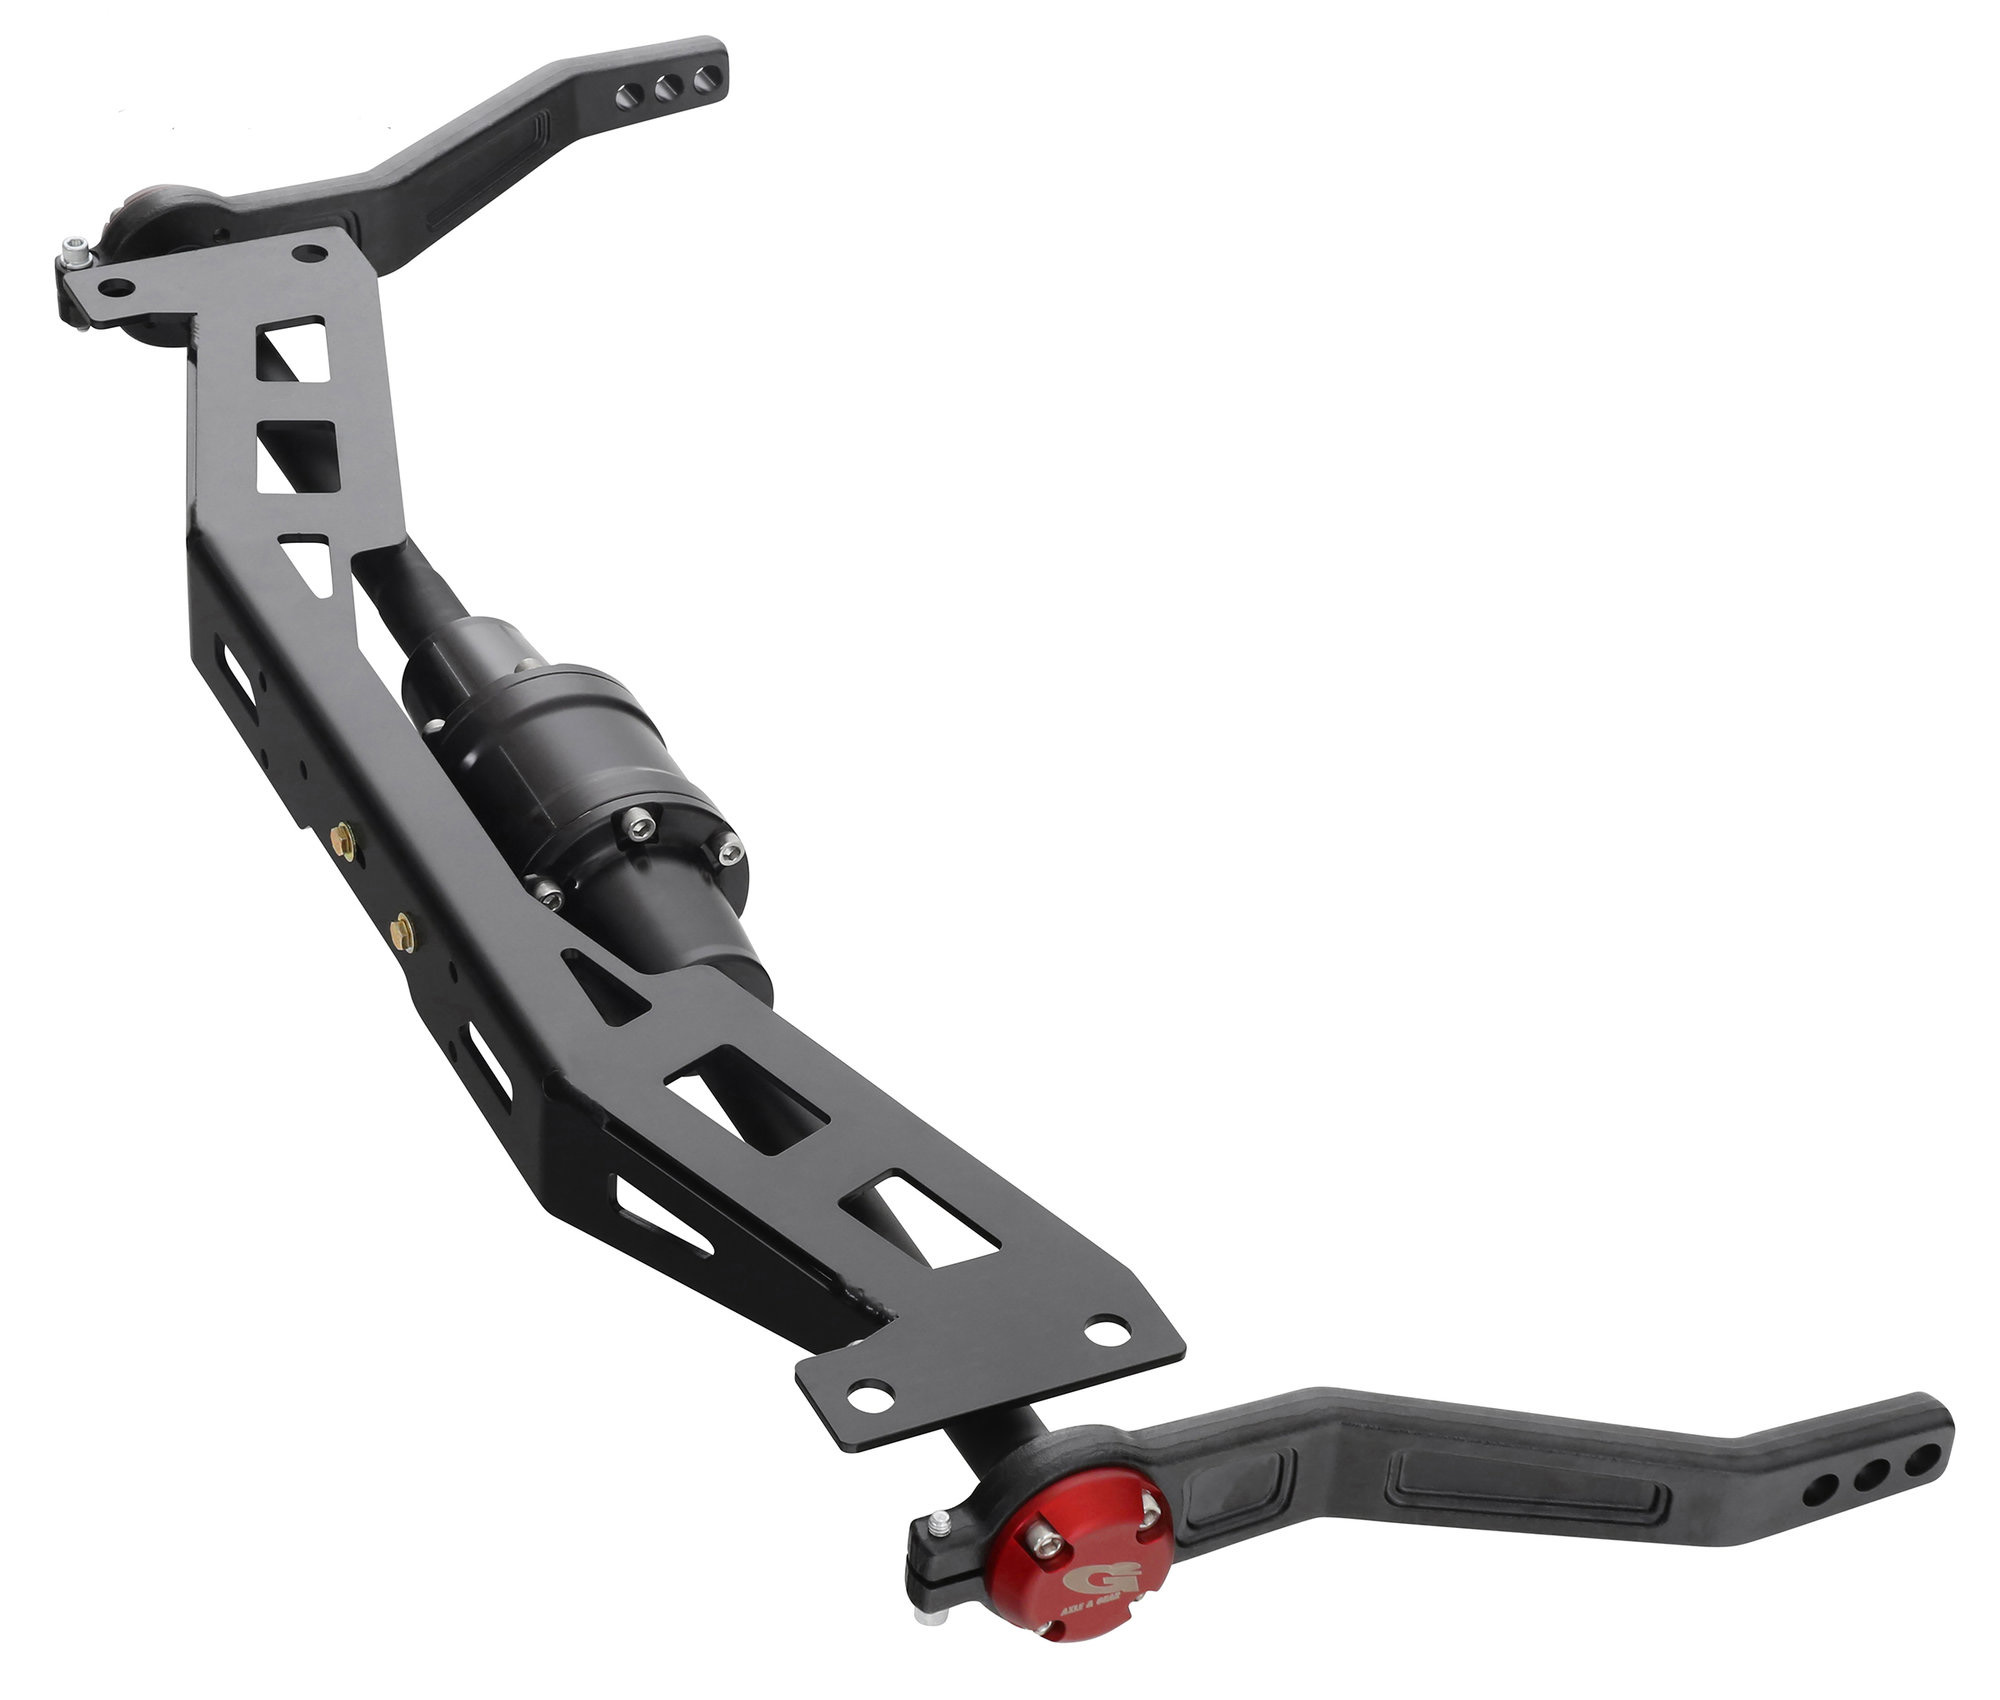
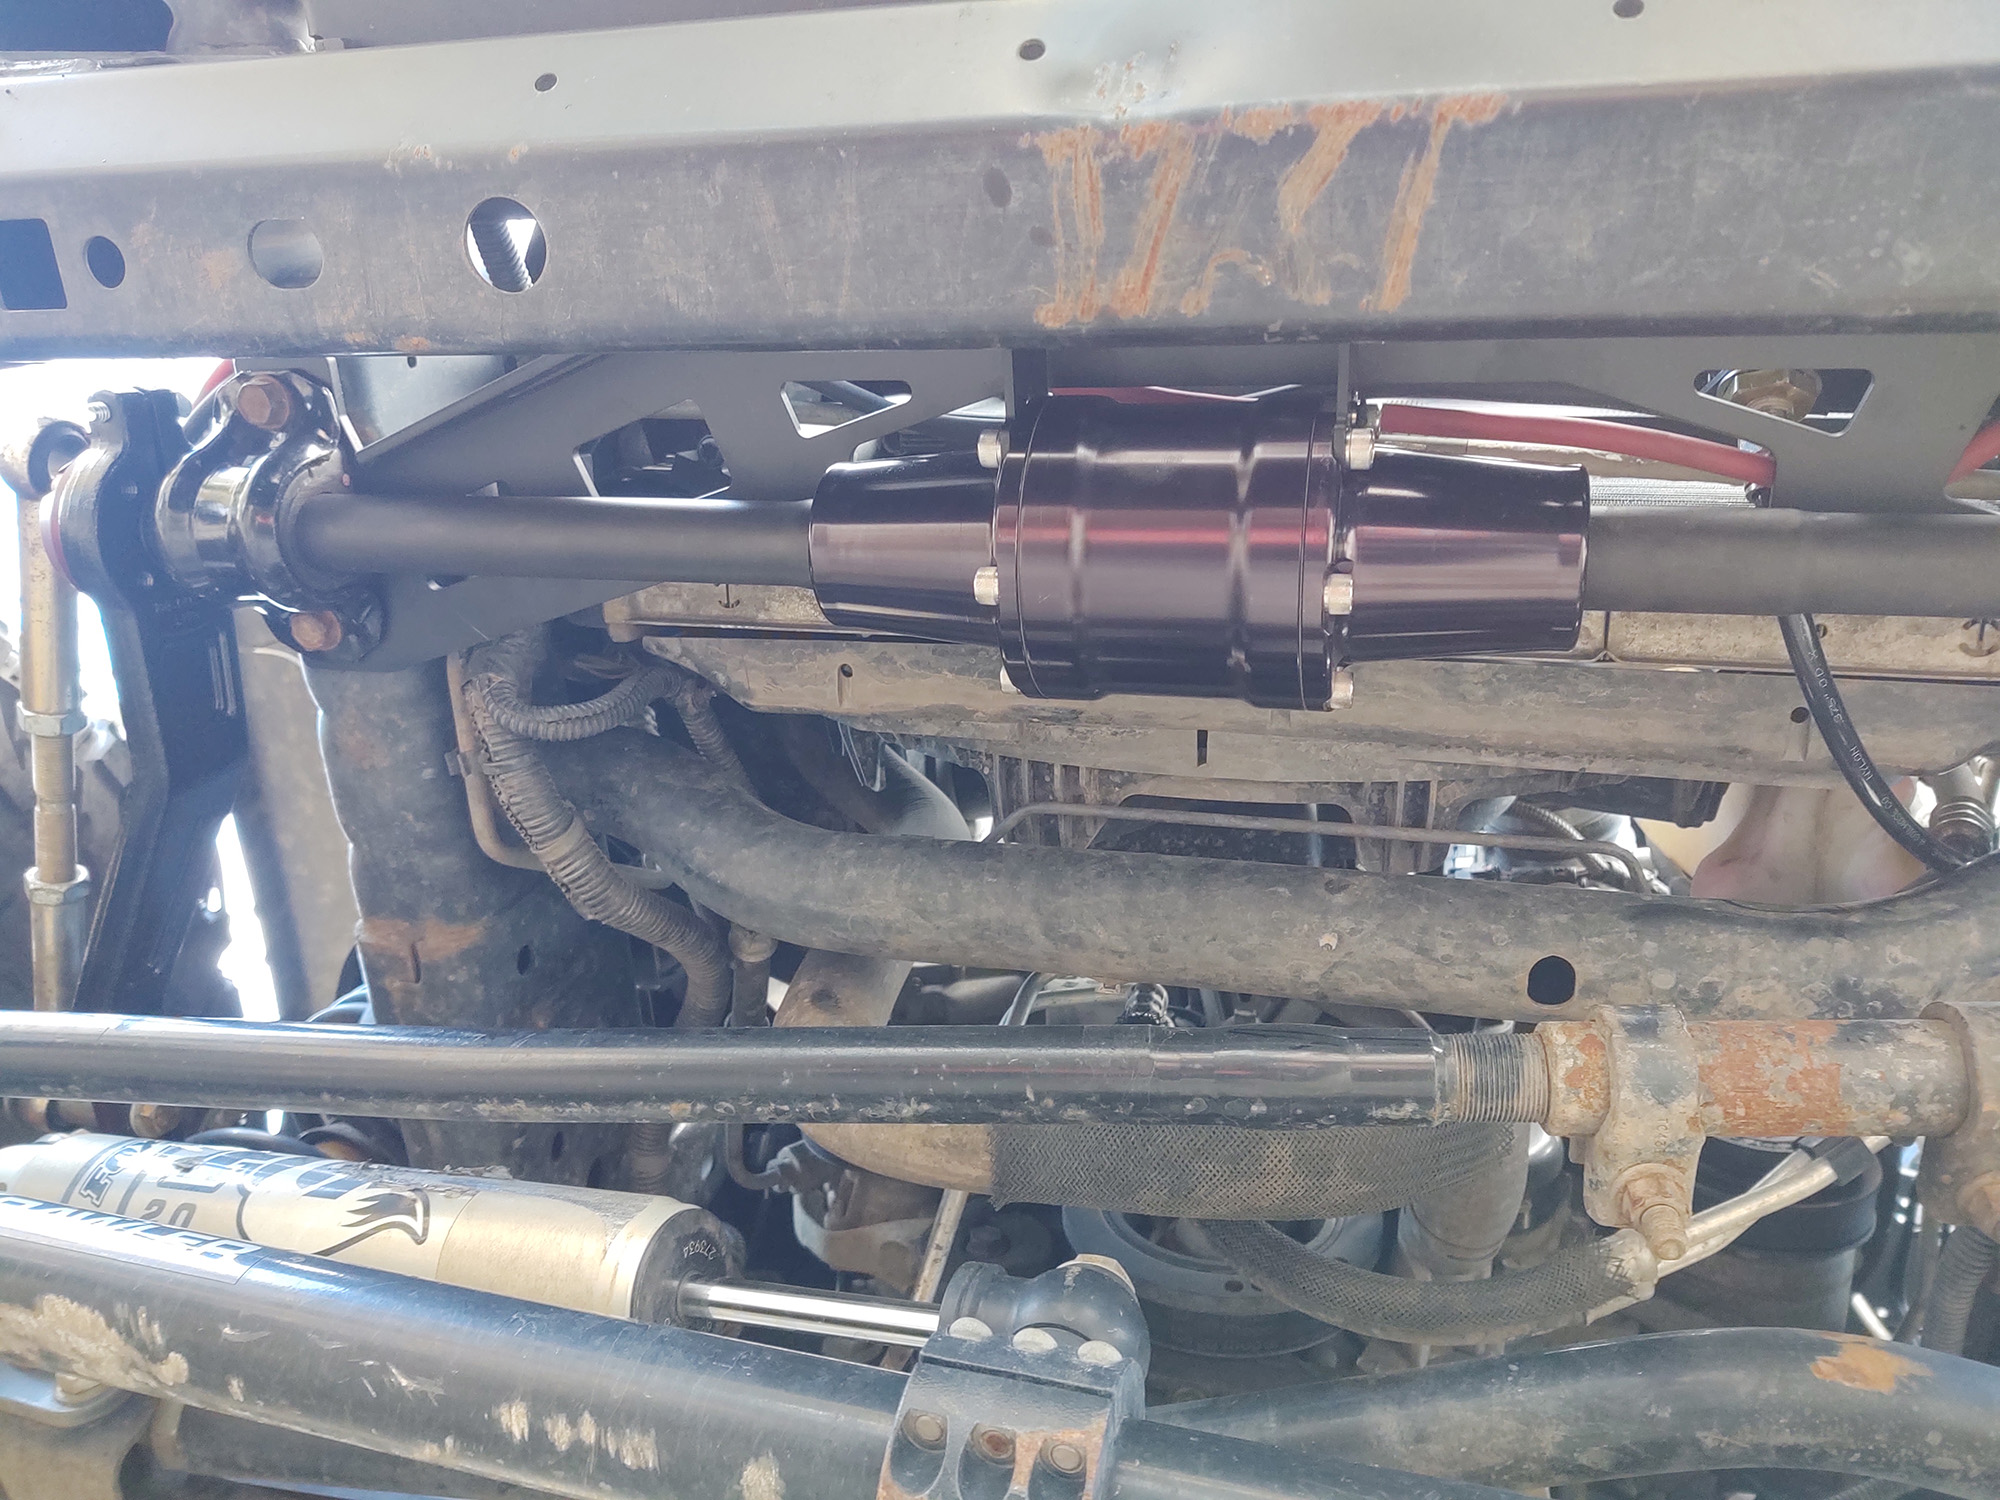
So from that day forward, the plan was to upgrade to the air-actuated G2 Core DRS system. In our “independent totally scientific tests in real world conditions” (commonly known as a forklift), this system has proven itself to allow the maximum articulation your suspension can support, without being a limiting factor.
The center actuator uses air pressure to separate the two halves of the sway bar and inside the core of the hollow bars there is a smaller diameter bar — perfect for controlling sway at low speeds, but with not enough resistance to limit flex.
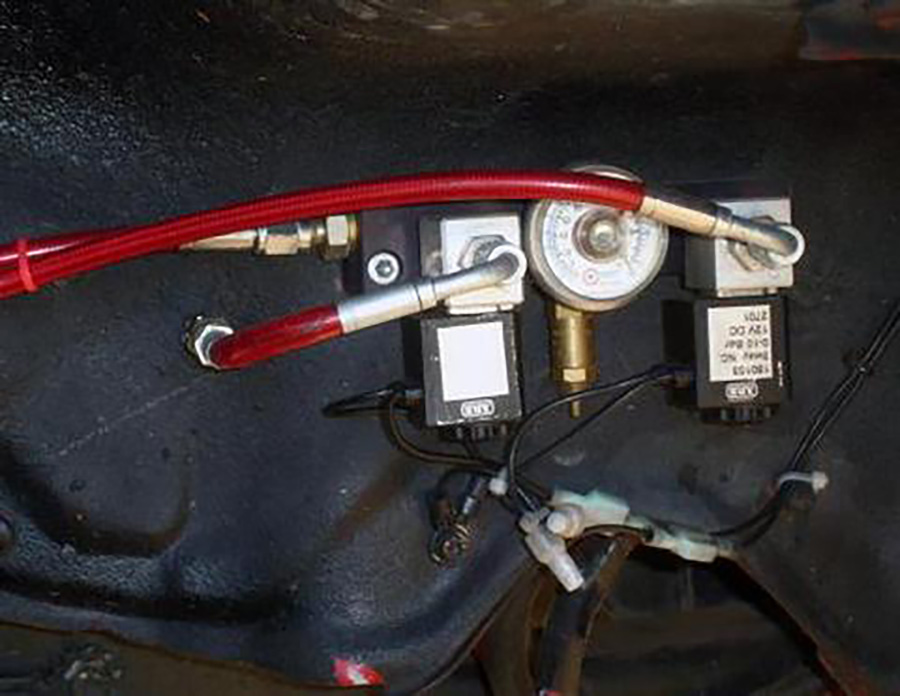
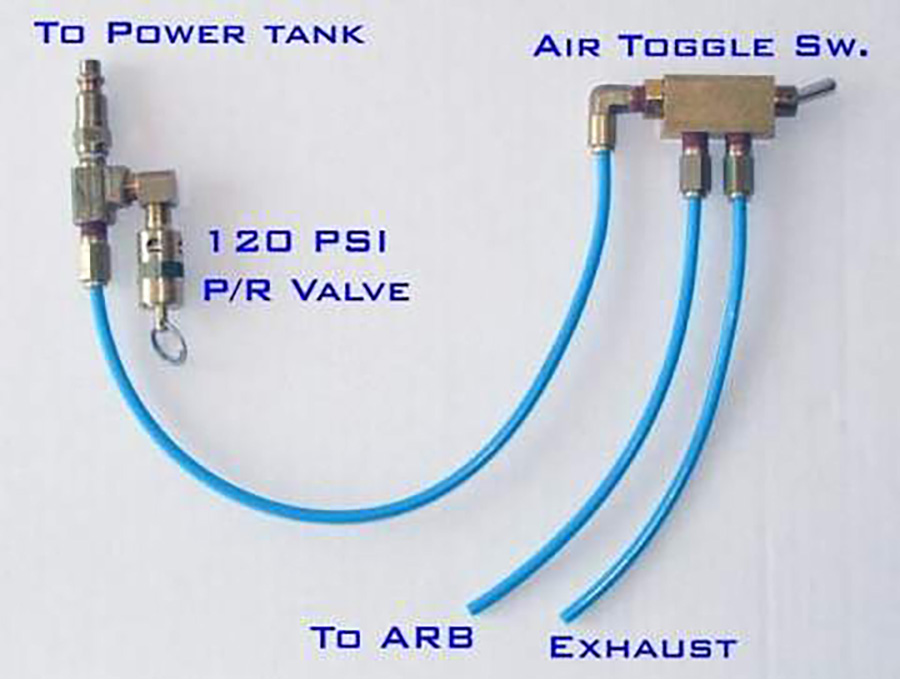
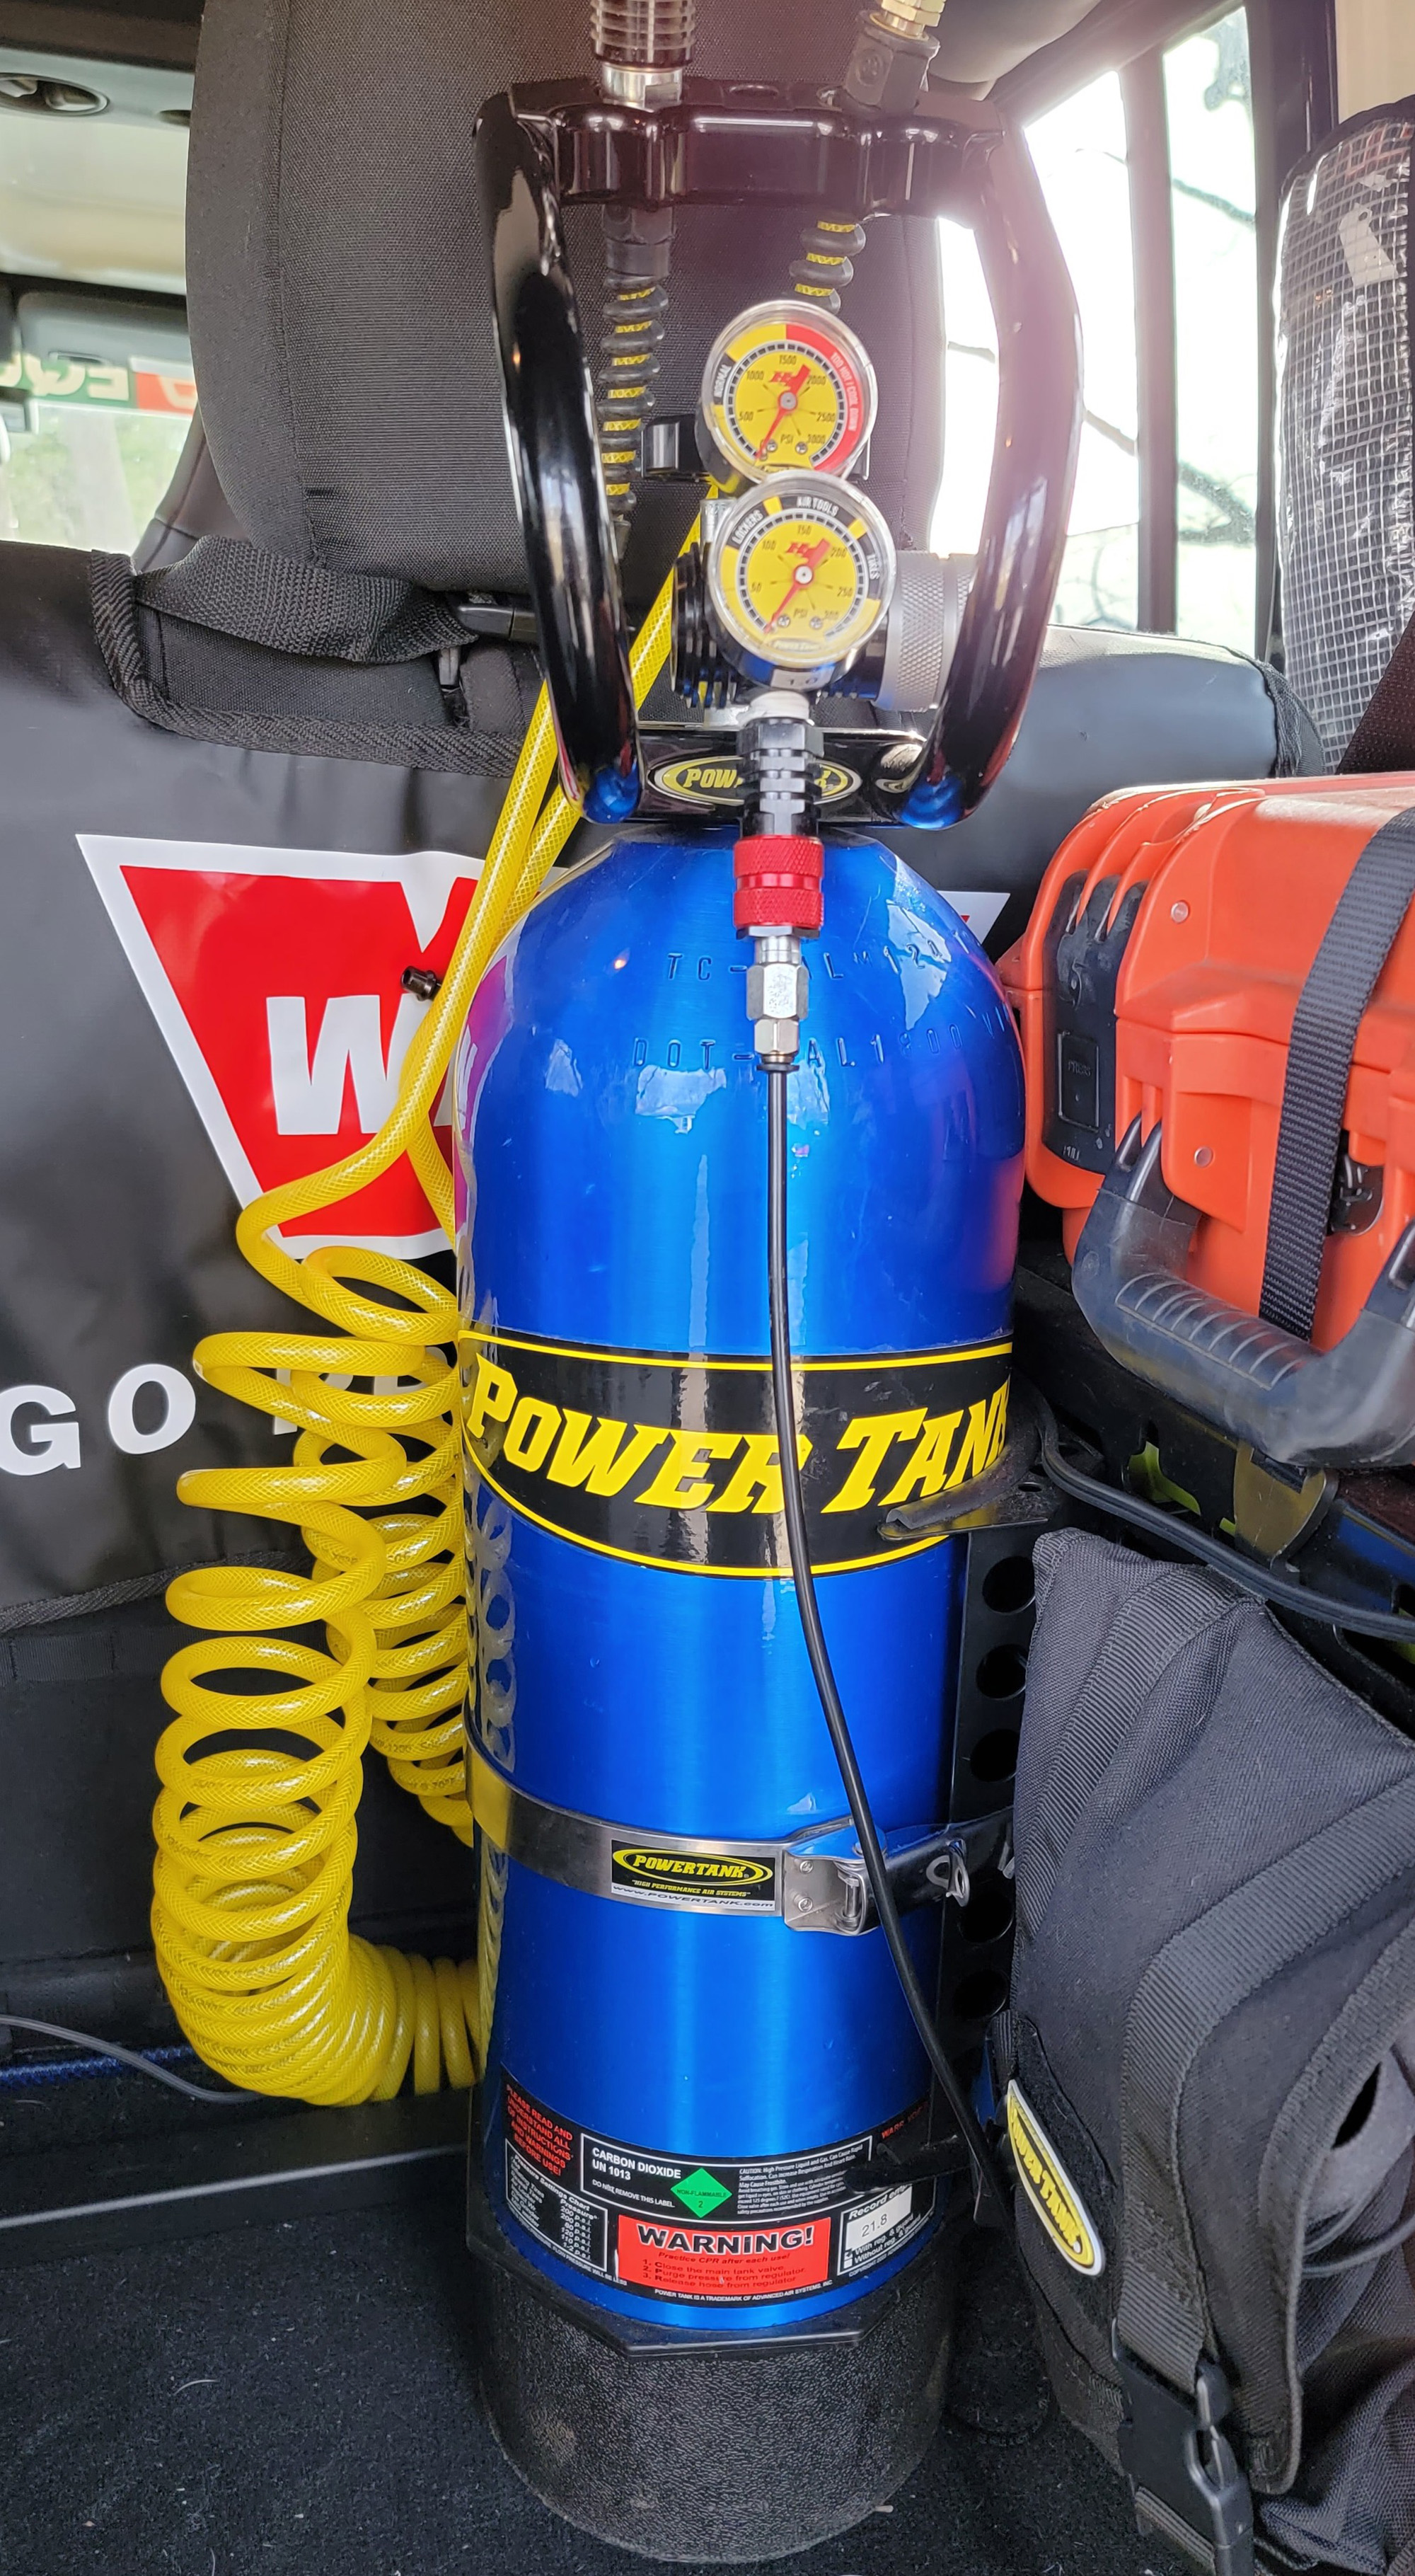
Now, since my on-board air system of choice is a Power Tank CO2 system, I opted to adapt that to work with the G2 rather than installing their Mini Compressor as in the above video. I spoke with the folks at Power Tank to make sure what I wanted to accomplish was feasible, and although they said nobody to their knowledge had installed a G2 sway bar this way, they did have all the parts on hand to run ARB air lockers — and they use a nearly identical solenoid for actuation.
It's a common misconception that you need an on board compressor and air tank to operate solenoids of this type. But in reality, all you need is supply pressure over 40 psi with enough volume on hand. Actual volume used in operation is so minimal, that you could run them all day, off and on, without putting much of a dent in your Power Tank’s CO2 supply.
And the best part? It does it silently.
No more compressor vibrating under your seat in the middle of an off-camber technical crawl, or kicking on during a water crossing in the engine compartment when you really don’t want moisture anywhere near its intake.
Minimum pressure for ARB air locker solenoids is 70 psi, although they suggest 100 psi for faster activation. This pressure is easily set at your Power Tank regulator, and it will hold steady as long as you need.
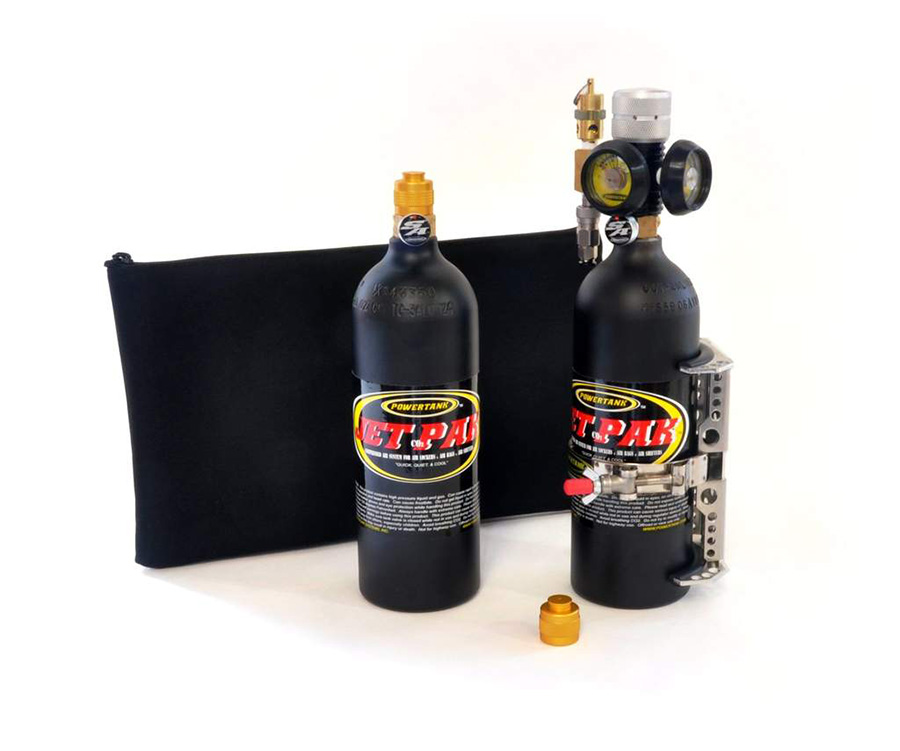
If you want to make them even more reliable, they offer a toggle setup that does not require power of any sort to engage your lockers. This makes operation on a buggy or race vehicle even quicker, and their small form factor Jet Pak systems take up so little space that you’d hardly notice them strapped to the roll bar.
Since the Core DRS installation was covered in the above video above, there is no need for me to go over every step. However, I will show you the additional parts and steps required to run either the Core DRS solenoid, or ARB Locker solenoids from a Power Tank, as well as replacing a Rubicon SmartBar. I will split the requirements into three phases:
Pneumatic, electrical and mechanical.
Parts Required for PNEUMATIC install — Power Tank air supply of the G2 Core DRS or ARB Lockers:
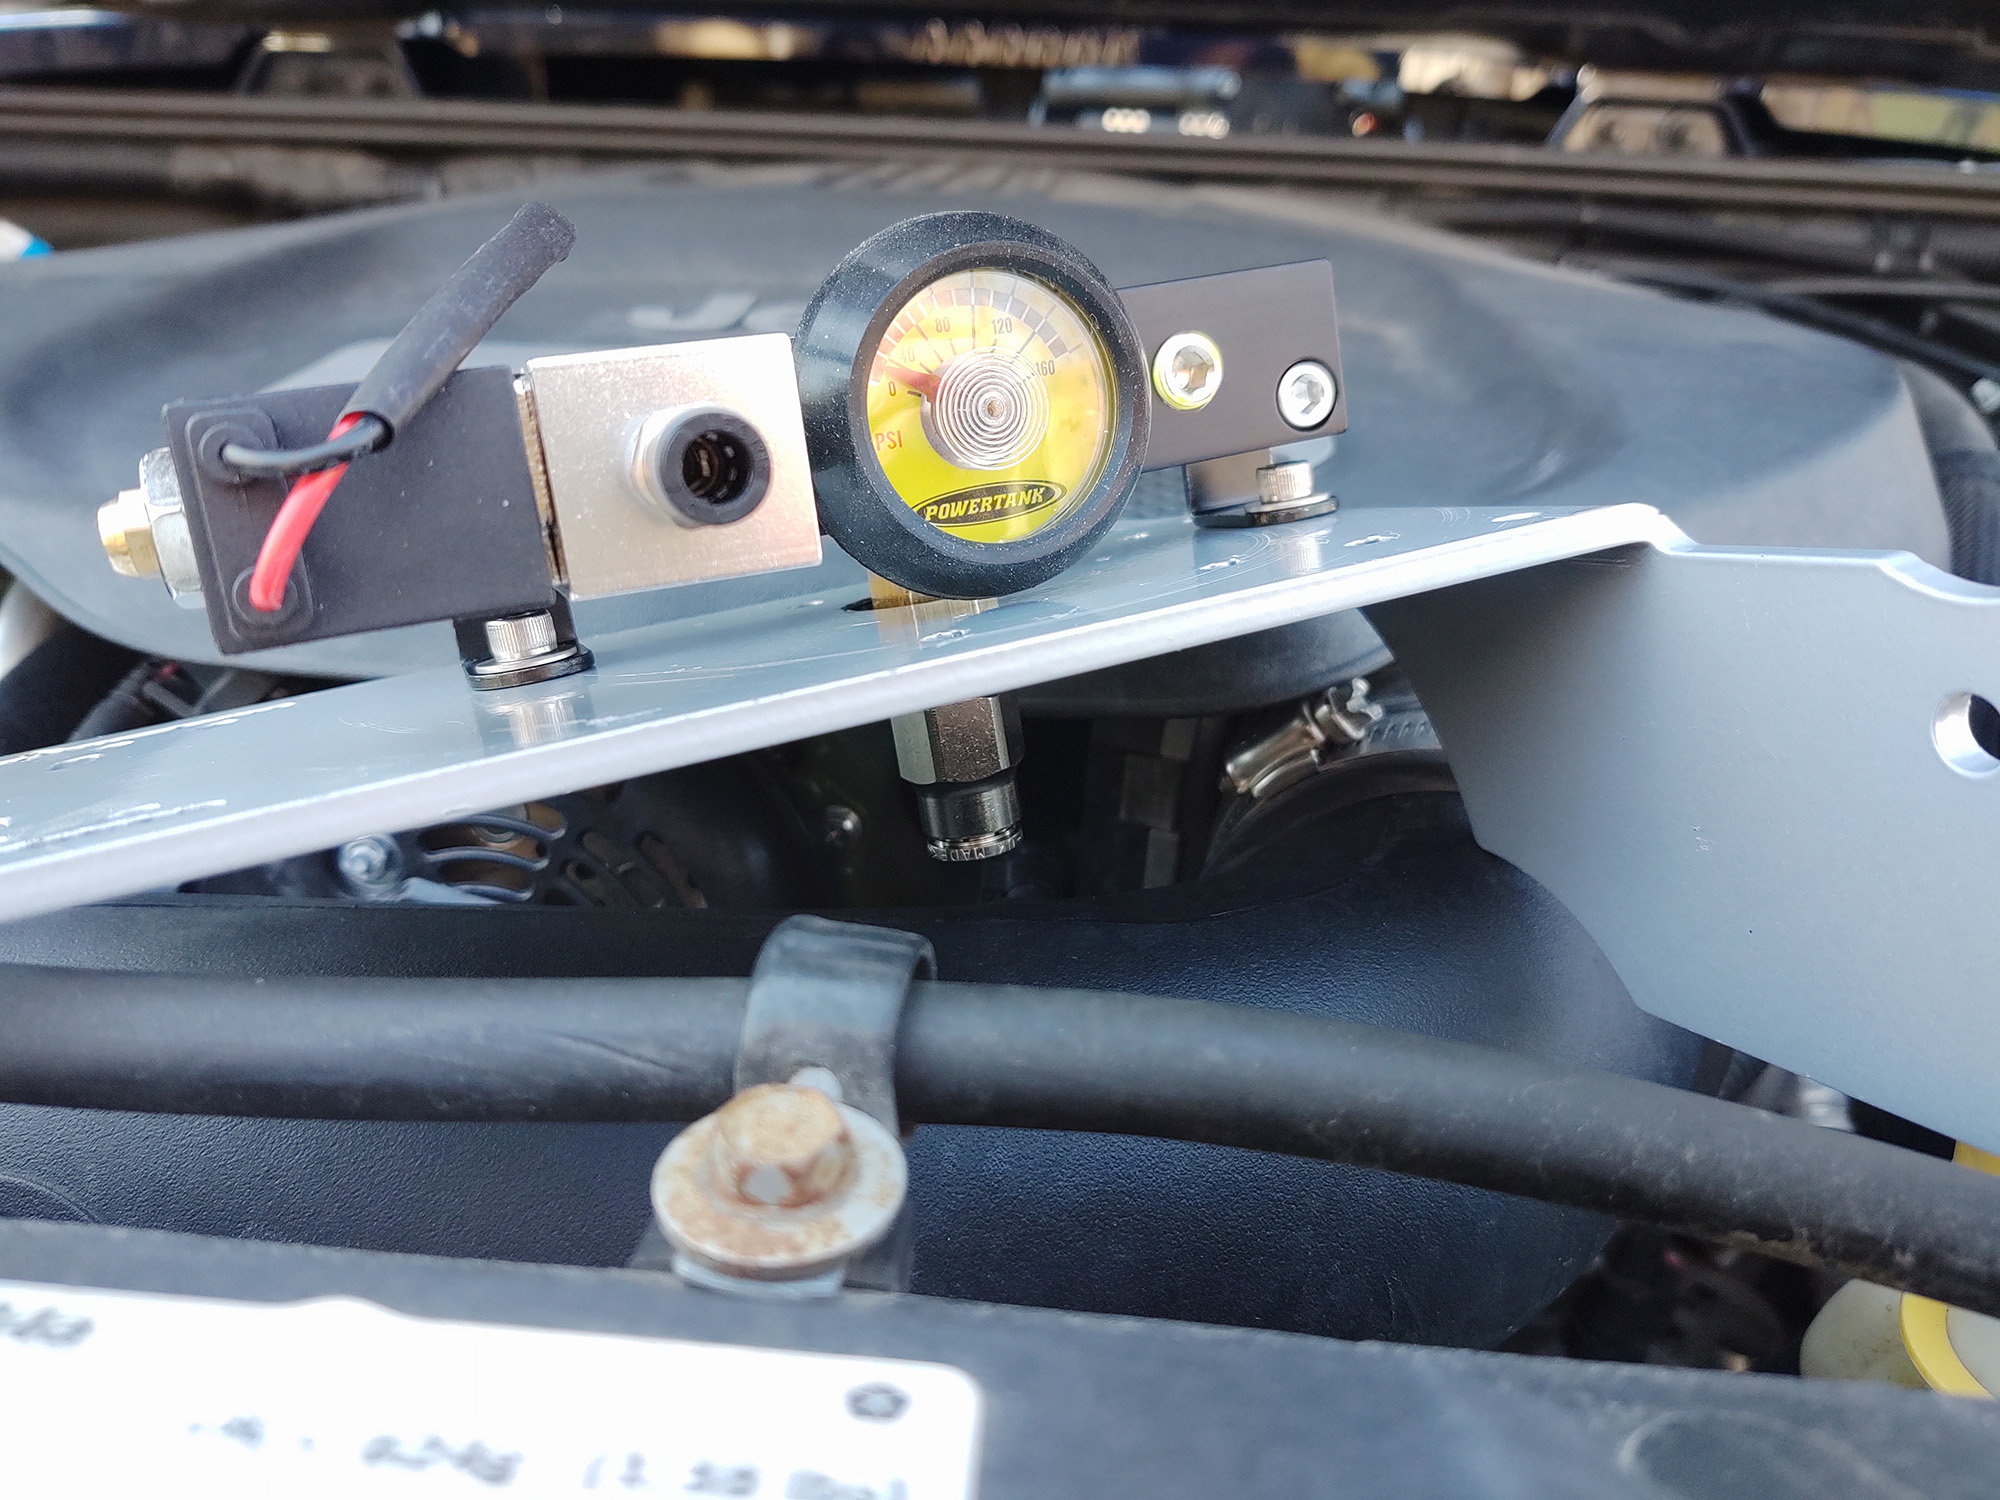
Power Tank ARB Manifold Install Kit
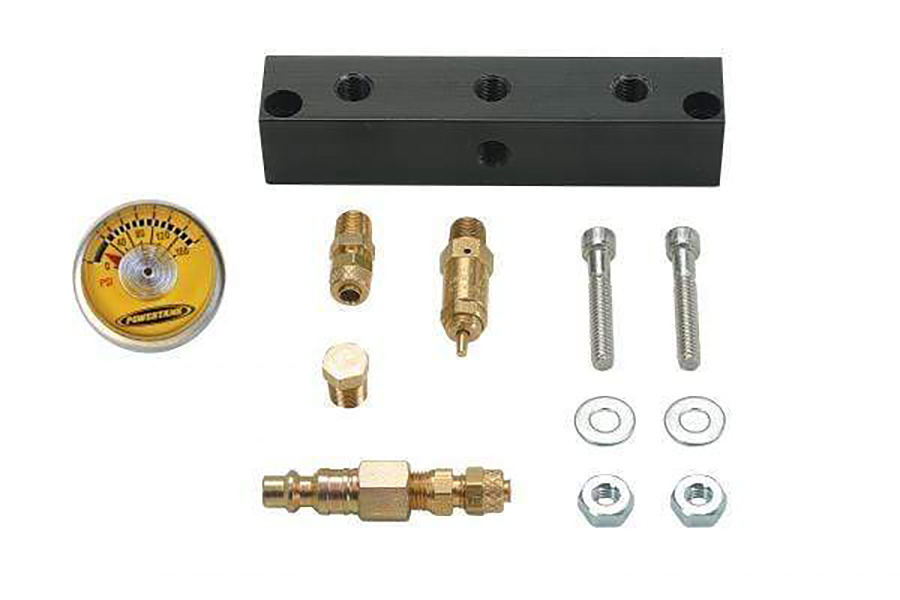
This manifold lives under the hood in my installation, close to the brake master cylinder. The included hex head shoulder bolts are for mounting, and could be used to do this a little differently than I did if you have more space. My engine bay is getting kind of crowded.
PowerTank 1/4 MPT x 1/4 FPT 90° Elbow
This is only required if you want to orient the gauge towards you in the engine bay with an installation like mine.
Synergy Manufacturing Air Compressor Bracket
This is the mount I used to mount the manifold under the hood, secured to the brake booster.
Yellow PFTE plumber’s tape.
This is like teflon tape, but more resistant to degradation in contact with CO2. Most hardware stores will have this available.
Other Parts Required for MECHANICAL Core DRS installation (Rubicon models):
Replacement Mopar Swaybar Bushing Retainer (1 for passenger side)
Mopar Non-Disconnect Stabilizer Bar Bushing (2 required)
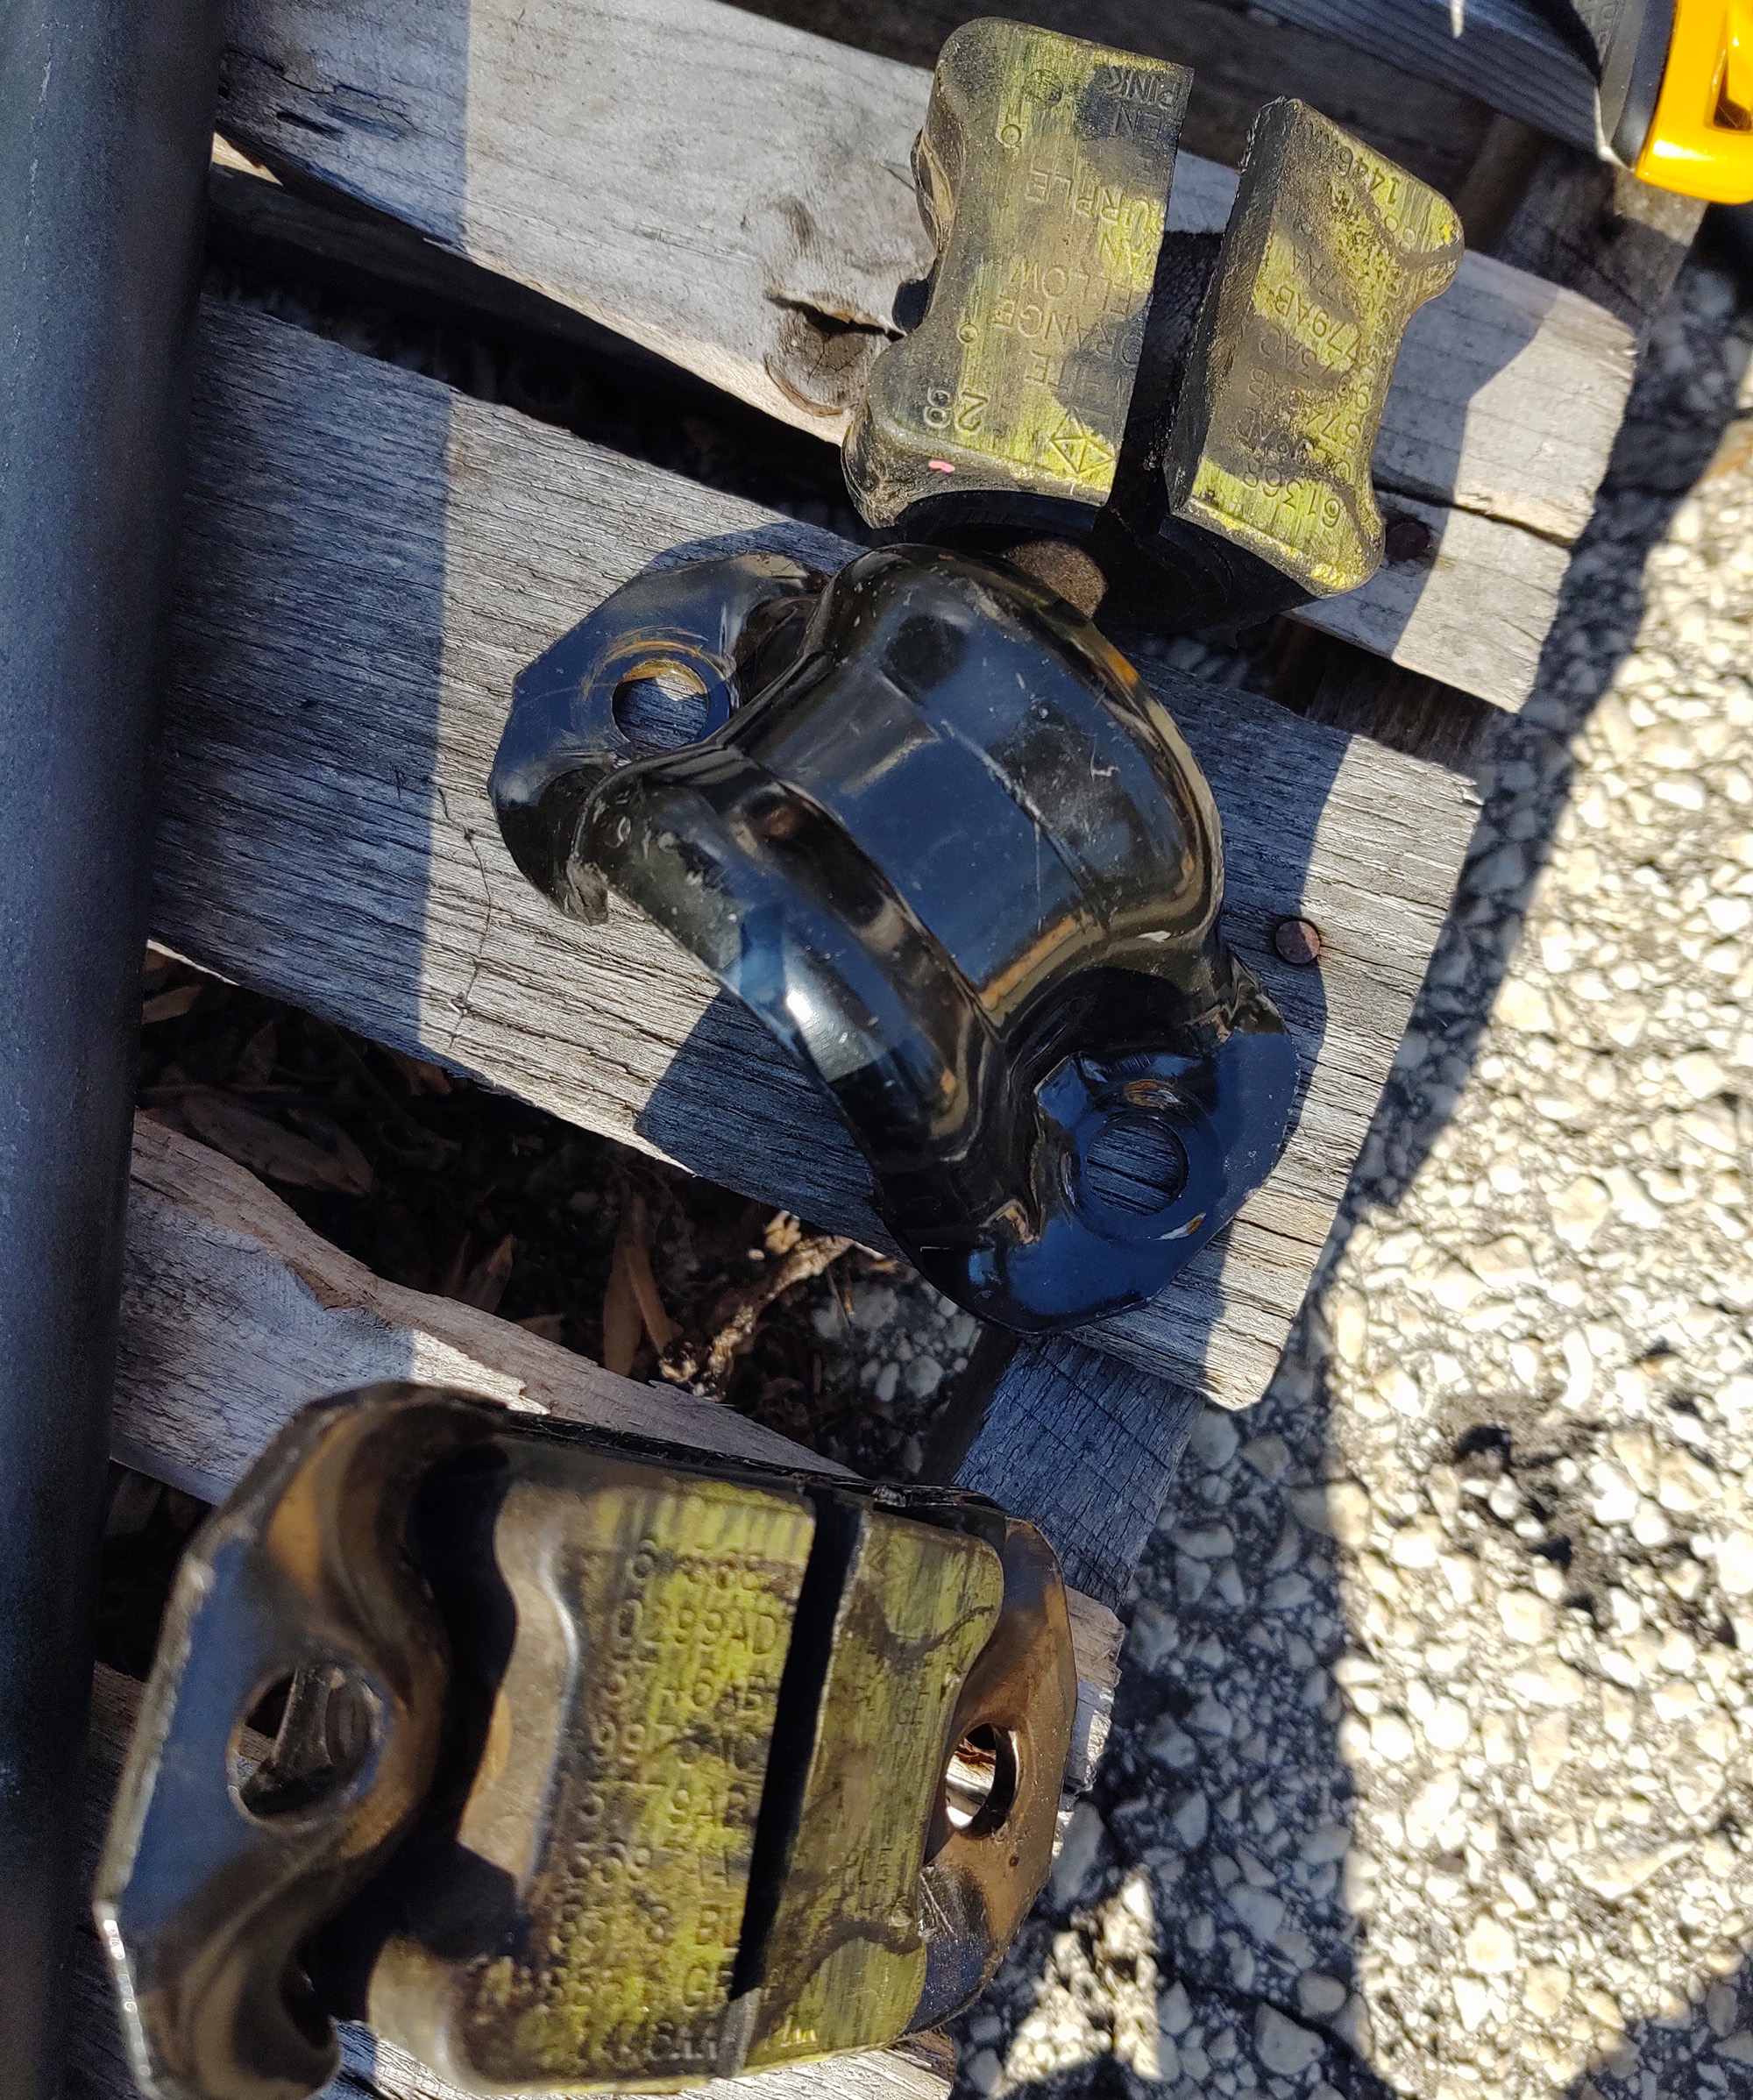
These are required because the diameter of the Rubicon SmartBar is not the same as the factory non-disconnect sway bar, and the G2 unit requires those bushings from the non-disconnect bar.
These are the replacements, and they have yellow paint on them rather than the Rubicon model’s pink, so you can’t get them mixed up. The passenger side Rubicon bushing retainer has an arm coming off of it for the isolator, which you don’t need any longer.
I ordered a replacement retainer because they are cheap, but I suppose you could cut the arm off the factory one if it interferes with the installation. I was selling my used parts, so I left it with the SmartBar for the next person.
Pneumatic phase:
The Power Tank kit plus the Core DRS parts stash leaves you with a lot of parts and fittings to sort through, but the actual pneumatic installation is just air plumbing, for the most part.
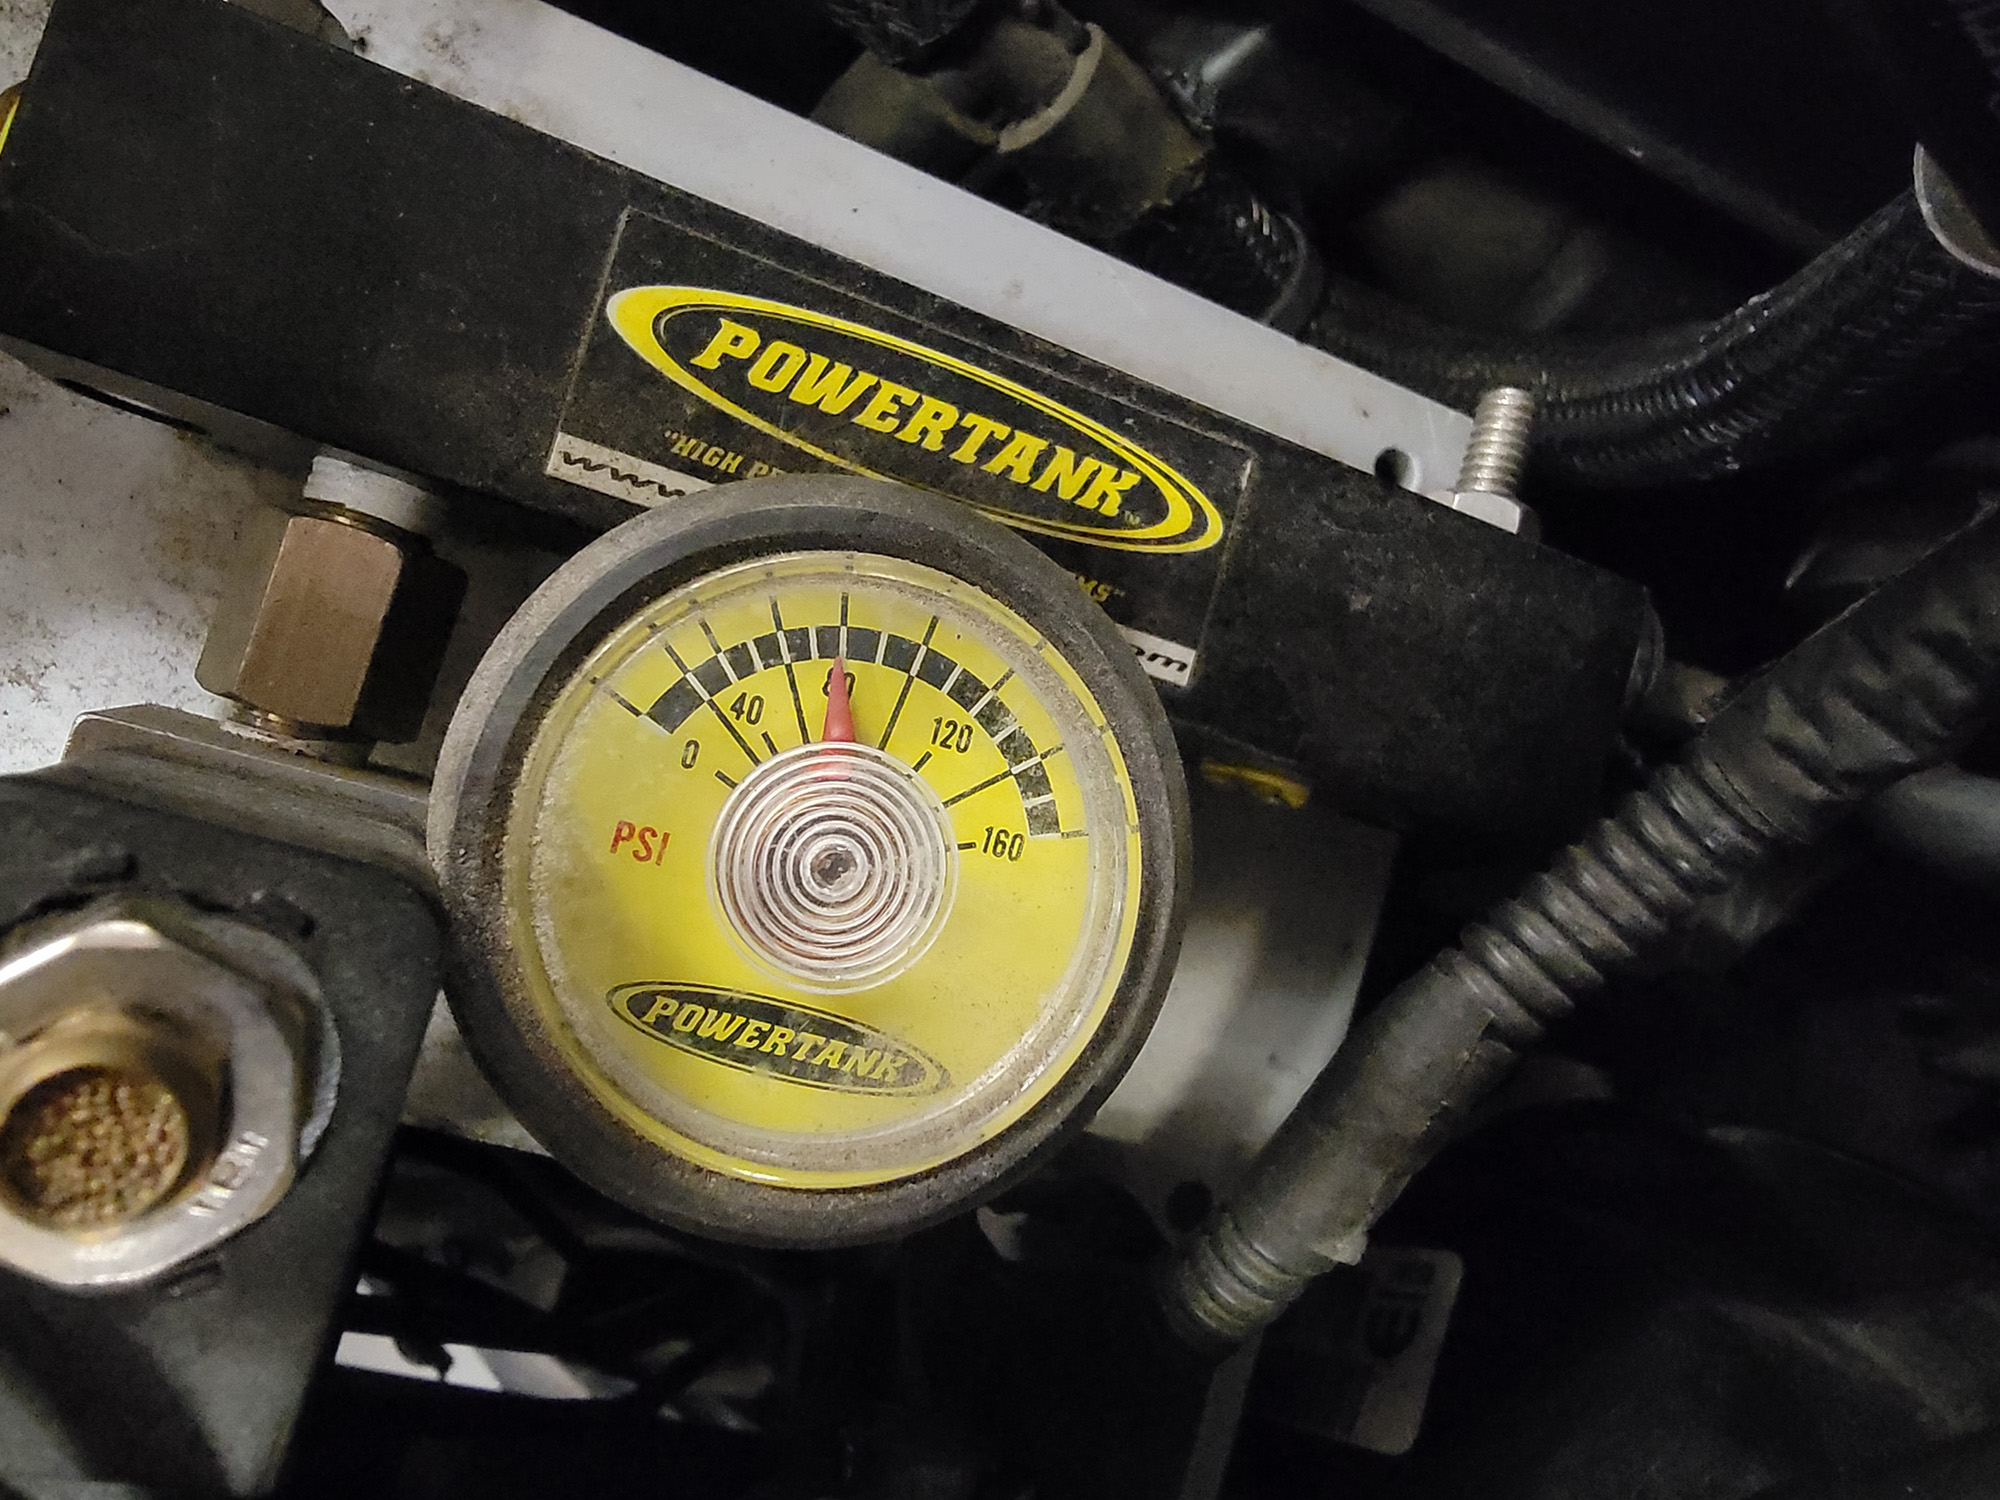
Where the tank mounts you use the kit with the safety valve, assembled like this:
From there, rigid 5mm tubing travels to the front — through the firewall above the pedals and out to the manifold.
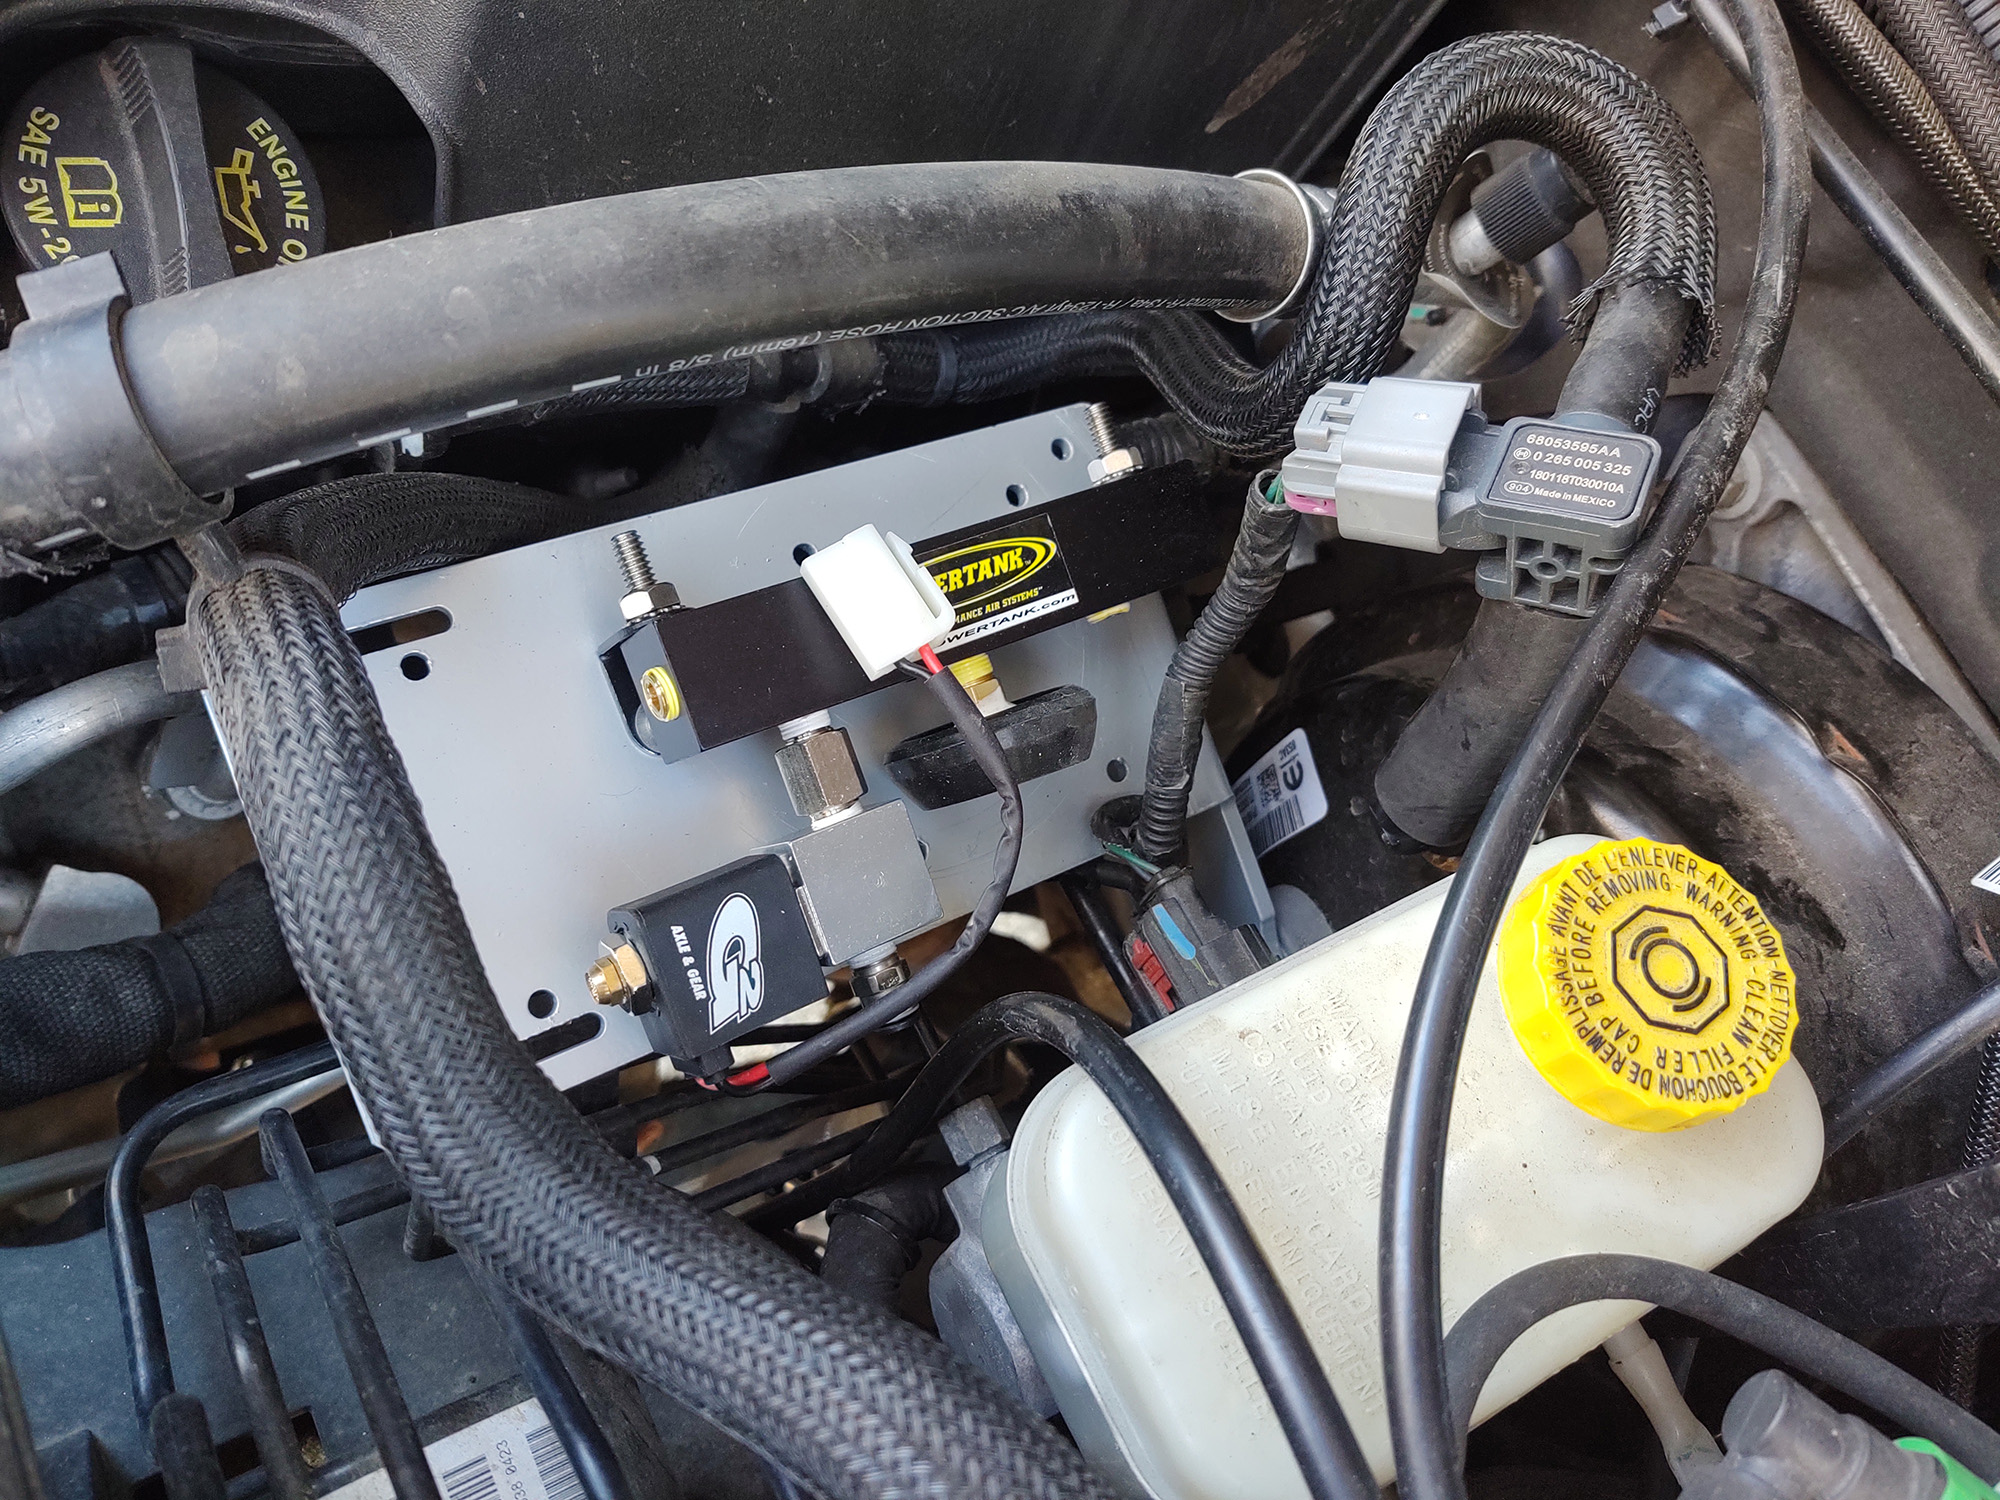
I did change things around a bit. The pressure side goes in through the bottom and some small stainless steel right angle brackets reposition the manifold. The right angle brass fitting in the parts list repositions the gauge so you can see it if you move it this way.
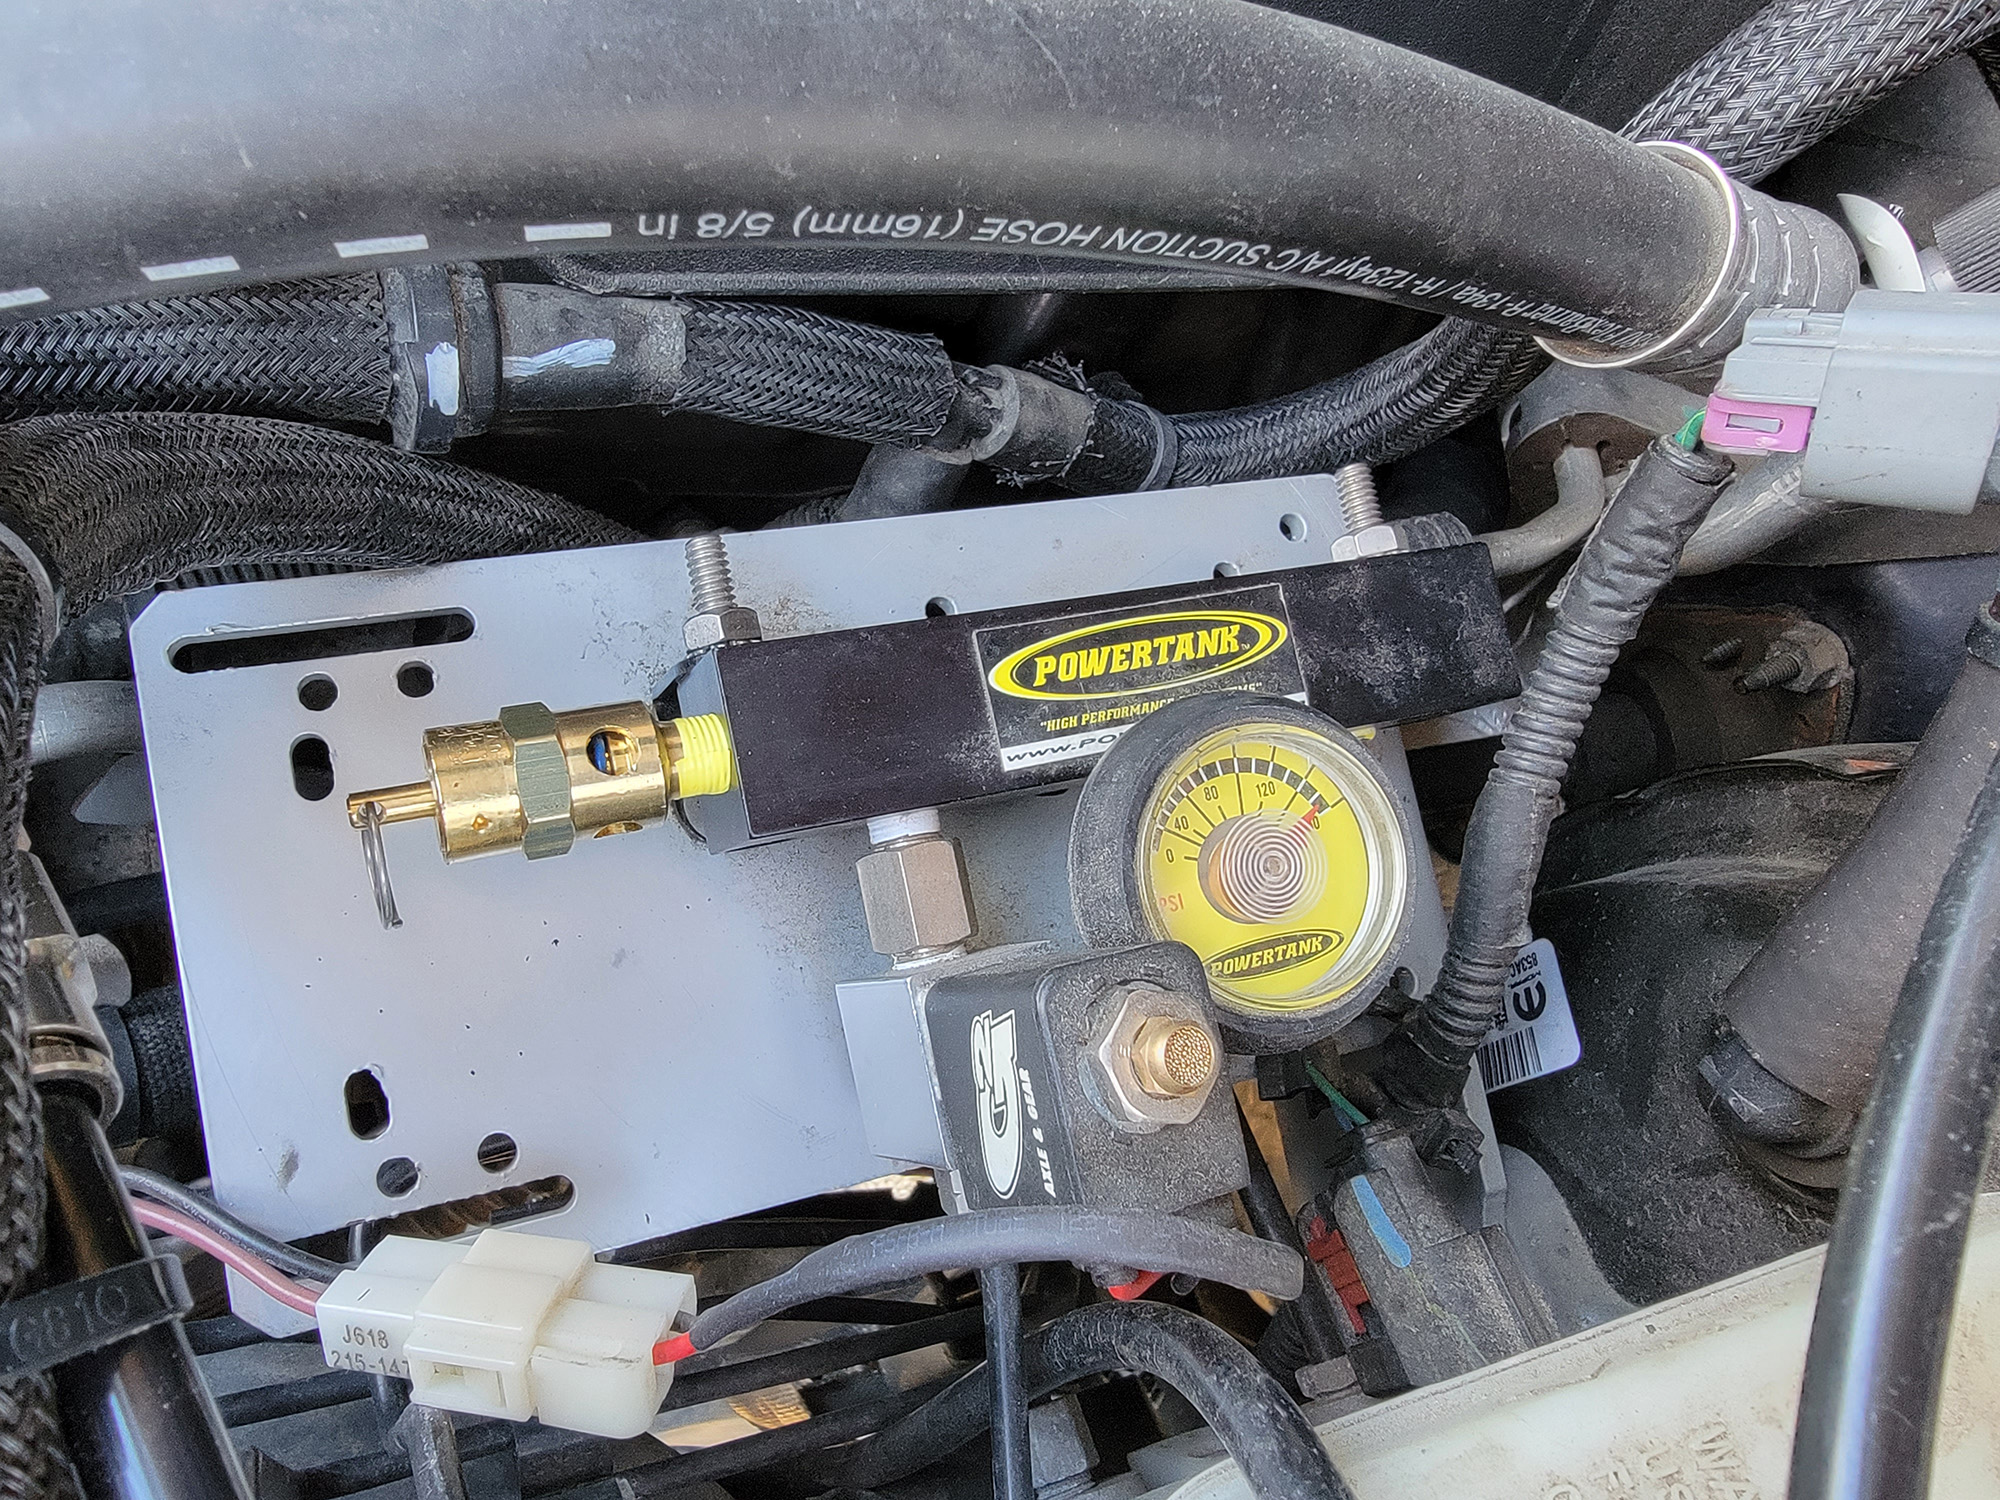
The final 5mm line goes out of the solenoid down to the front of your Wrangler for the Core DRS actuator.
Electrical Phase:
The two wires coming out of the solenoid go to your switch. A wiring loom is included in the kit, along with a switch. The original switch lights up blue, but is a CONTURA-V style switch. This works with my switch pod, so I pulled the face off and used it with my existing switch. This allowed me to have it light up green and match the rest of the switches on the panel.
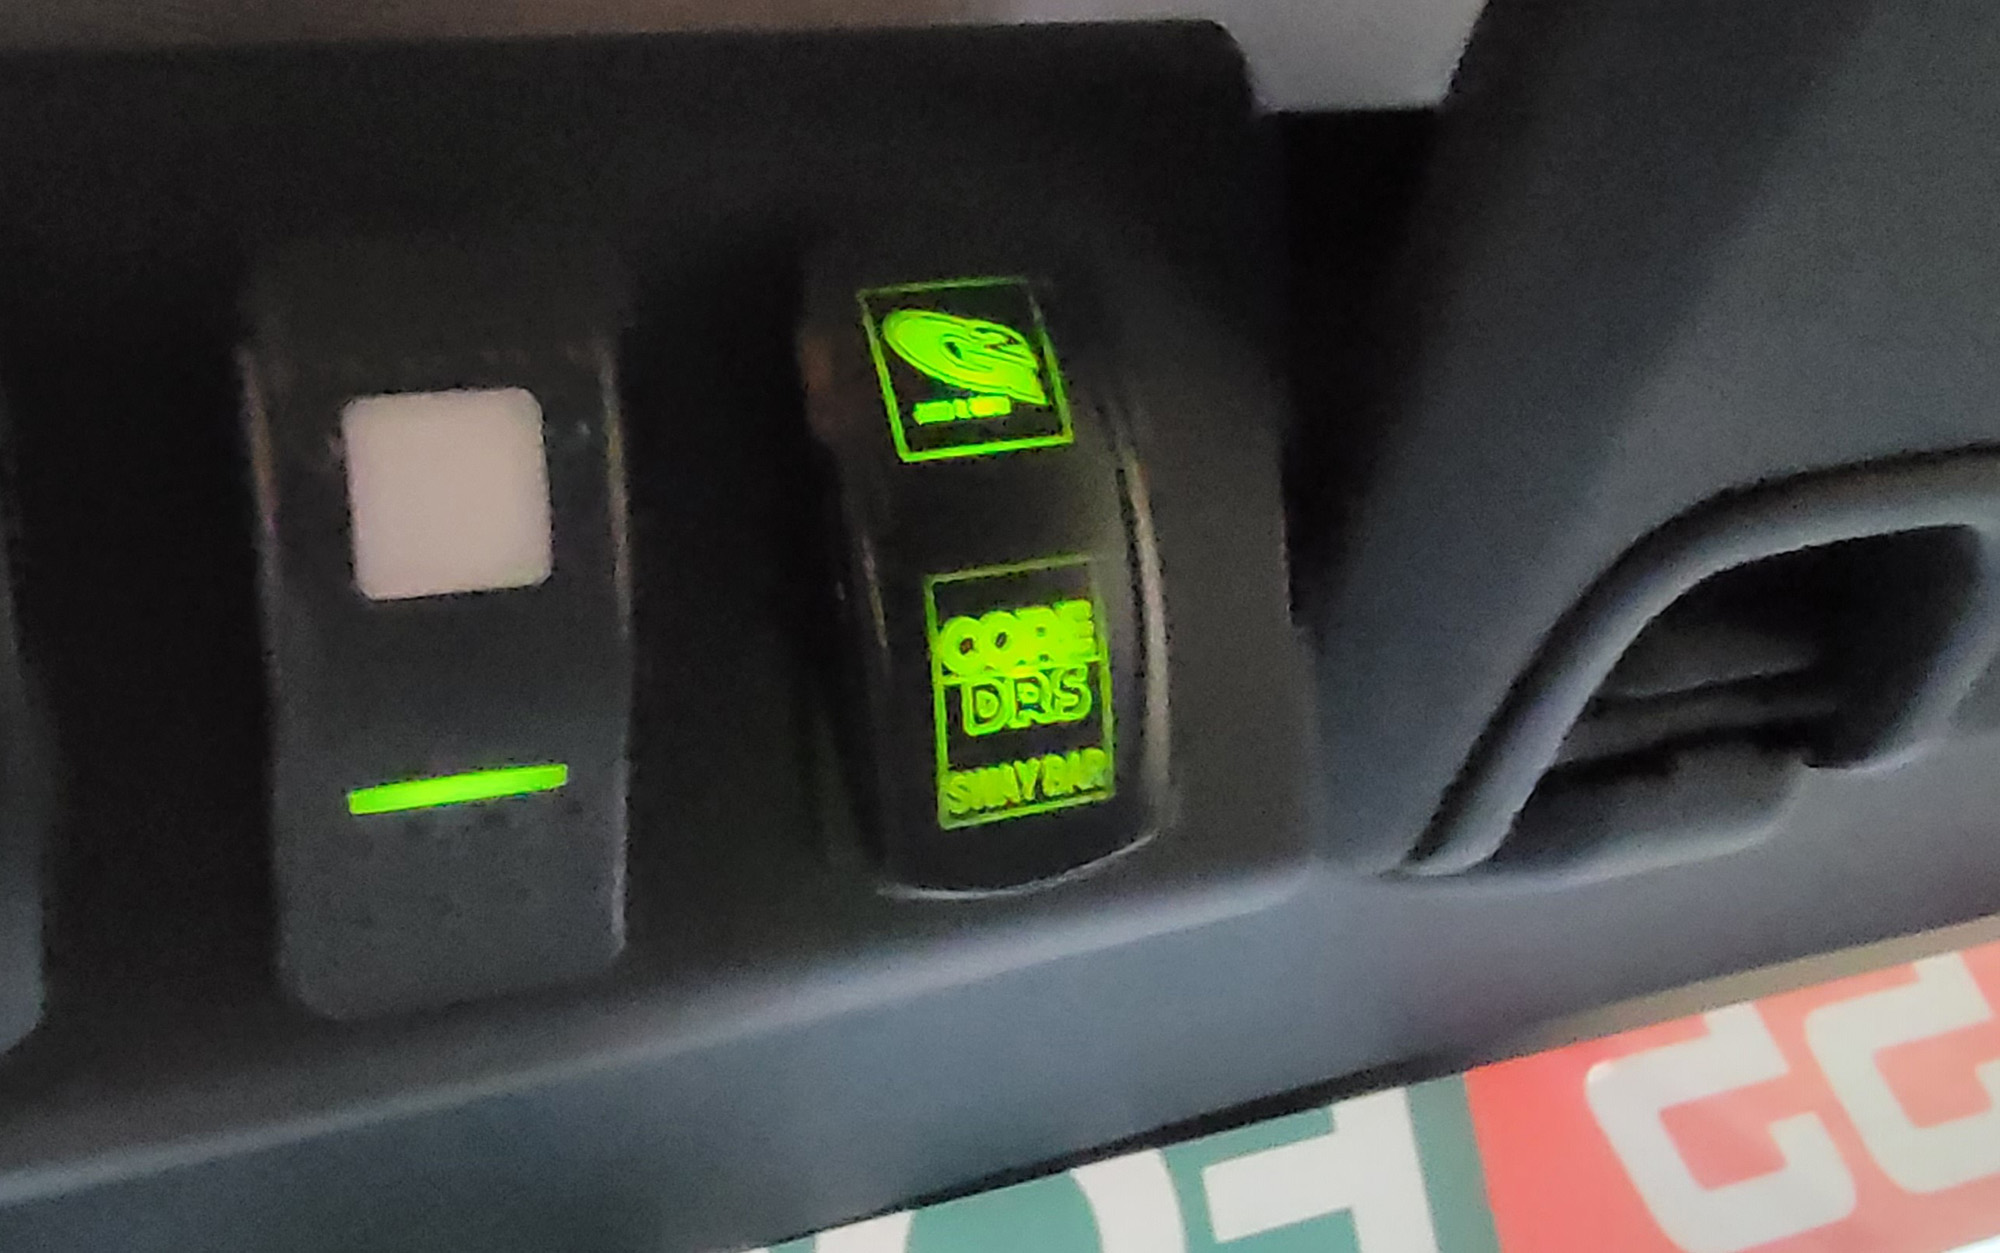
For other installations, they include a template to cut a flat panel, or use the standard sized rocker in an existing panel if you have one. The electrical installation is simplified if you have something that allows you to control electrical accessories.
I have a Trail Dash 2 as well as an Alpine X209-WRA, both of which could be used to actuate this simple two wire solenoid with upgrade kits.
Mechanical Phase:
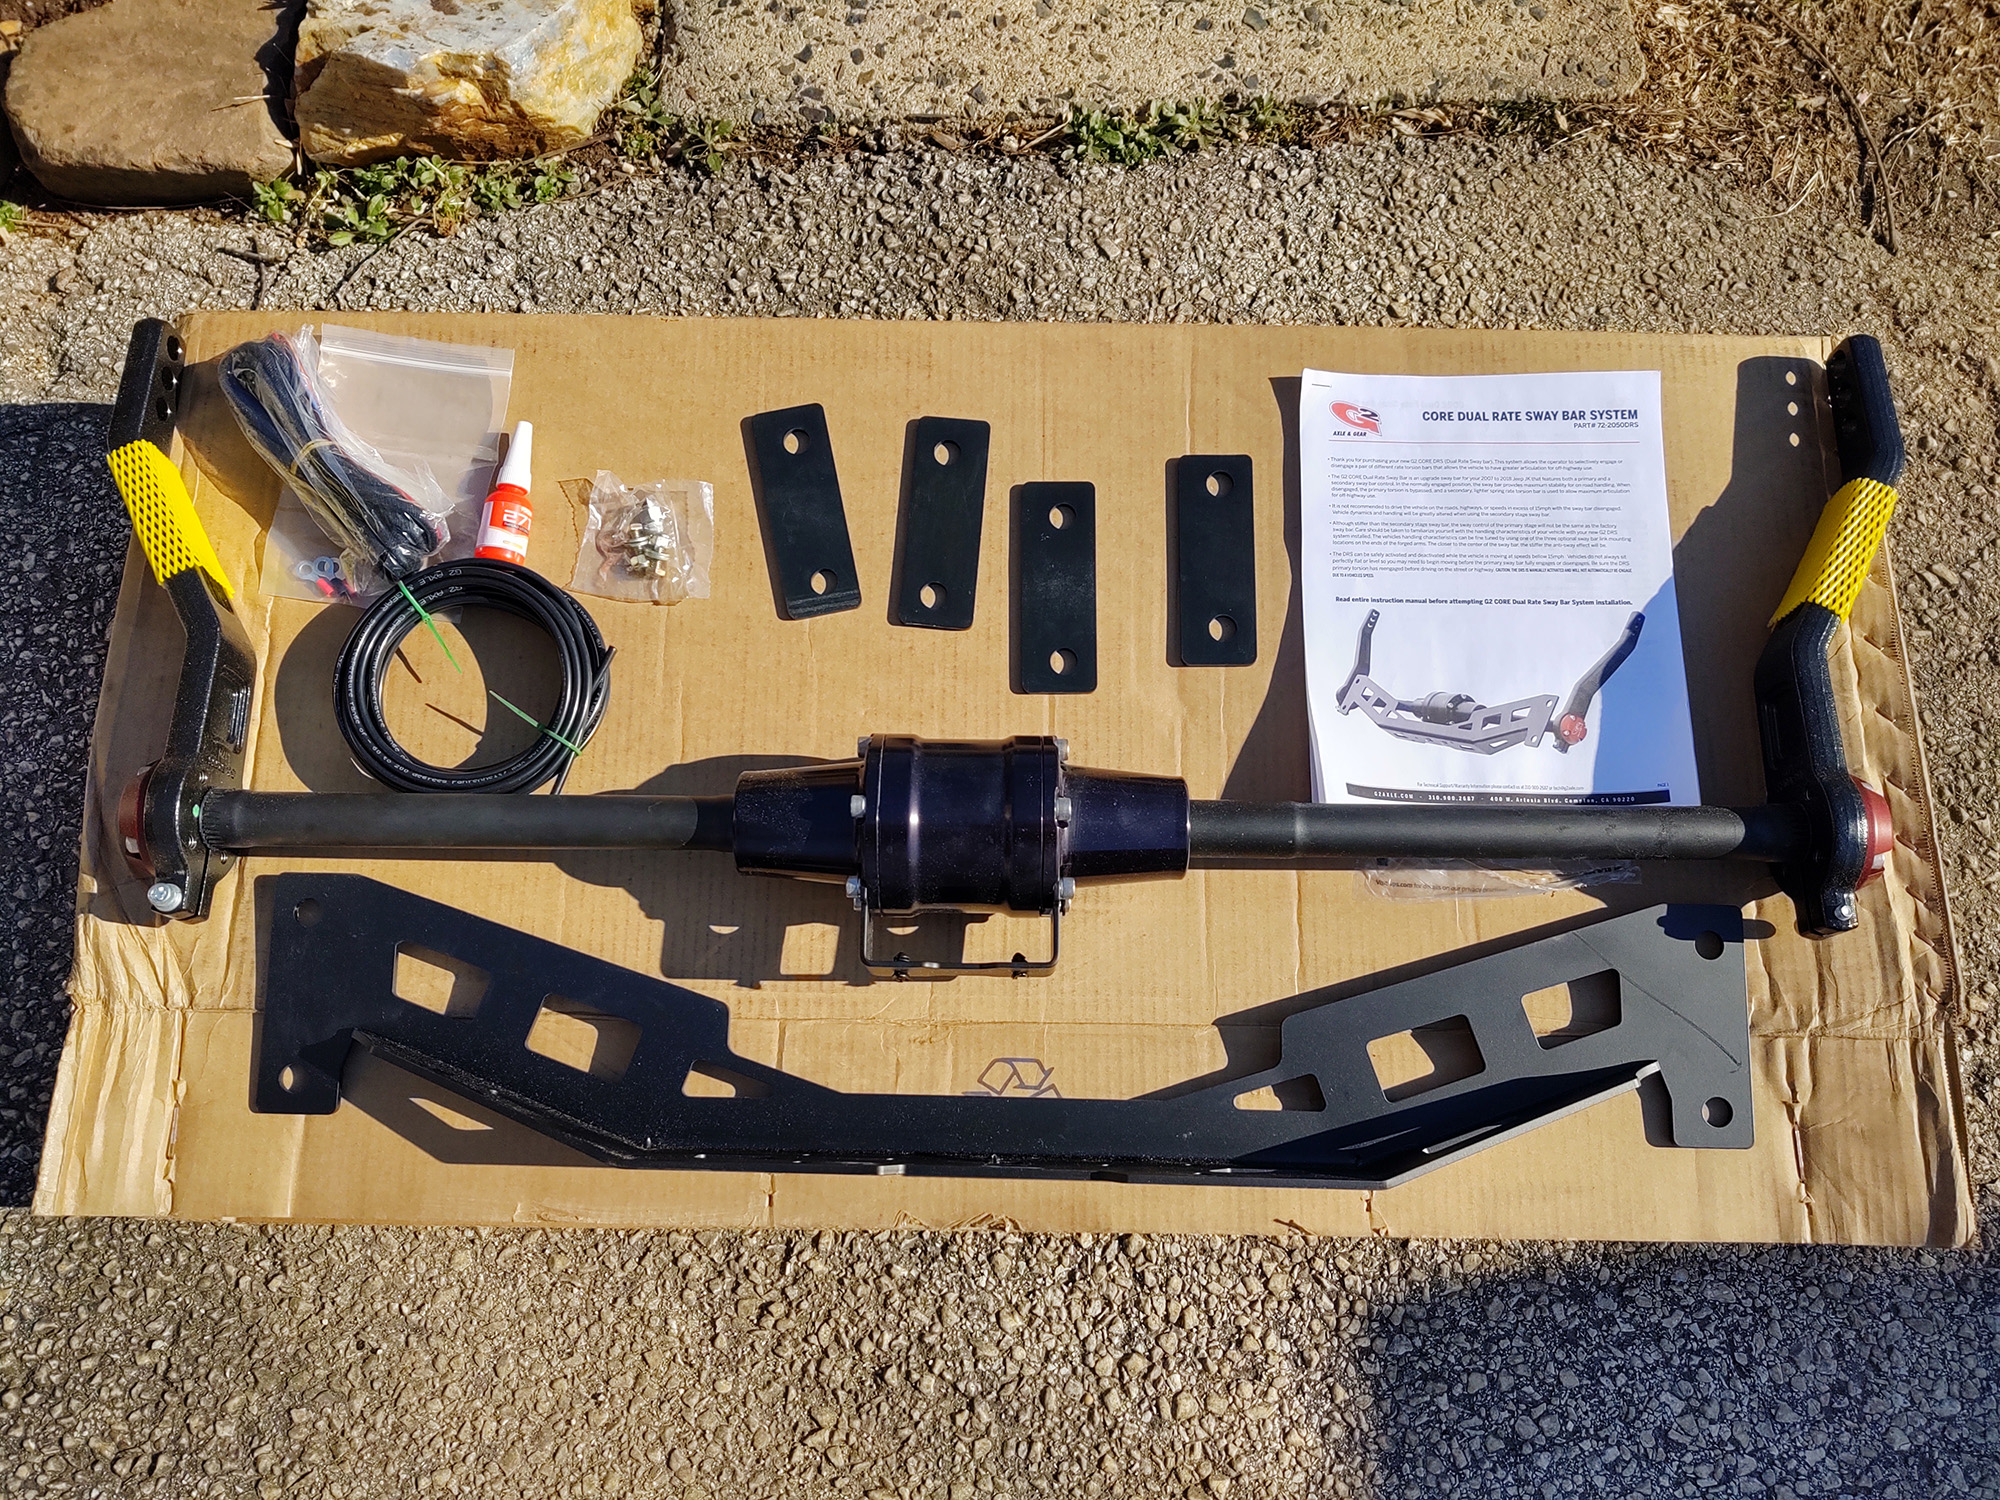
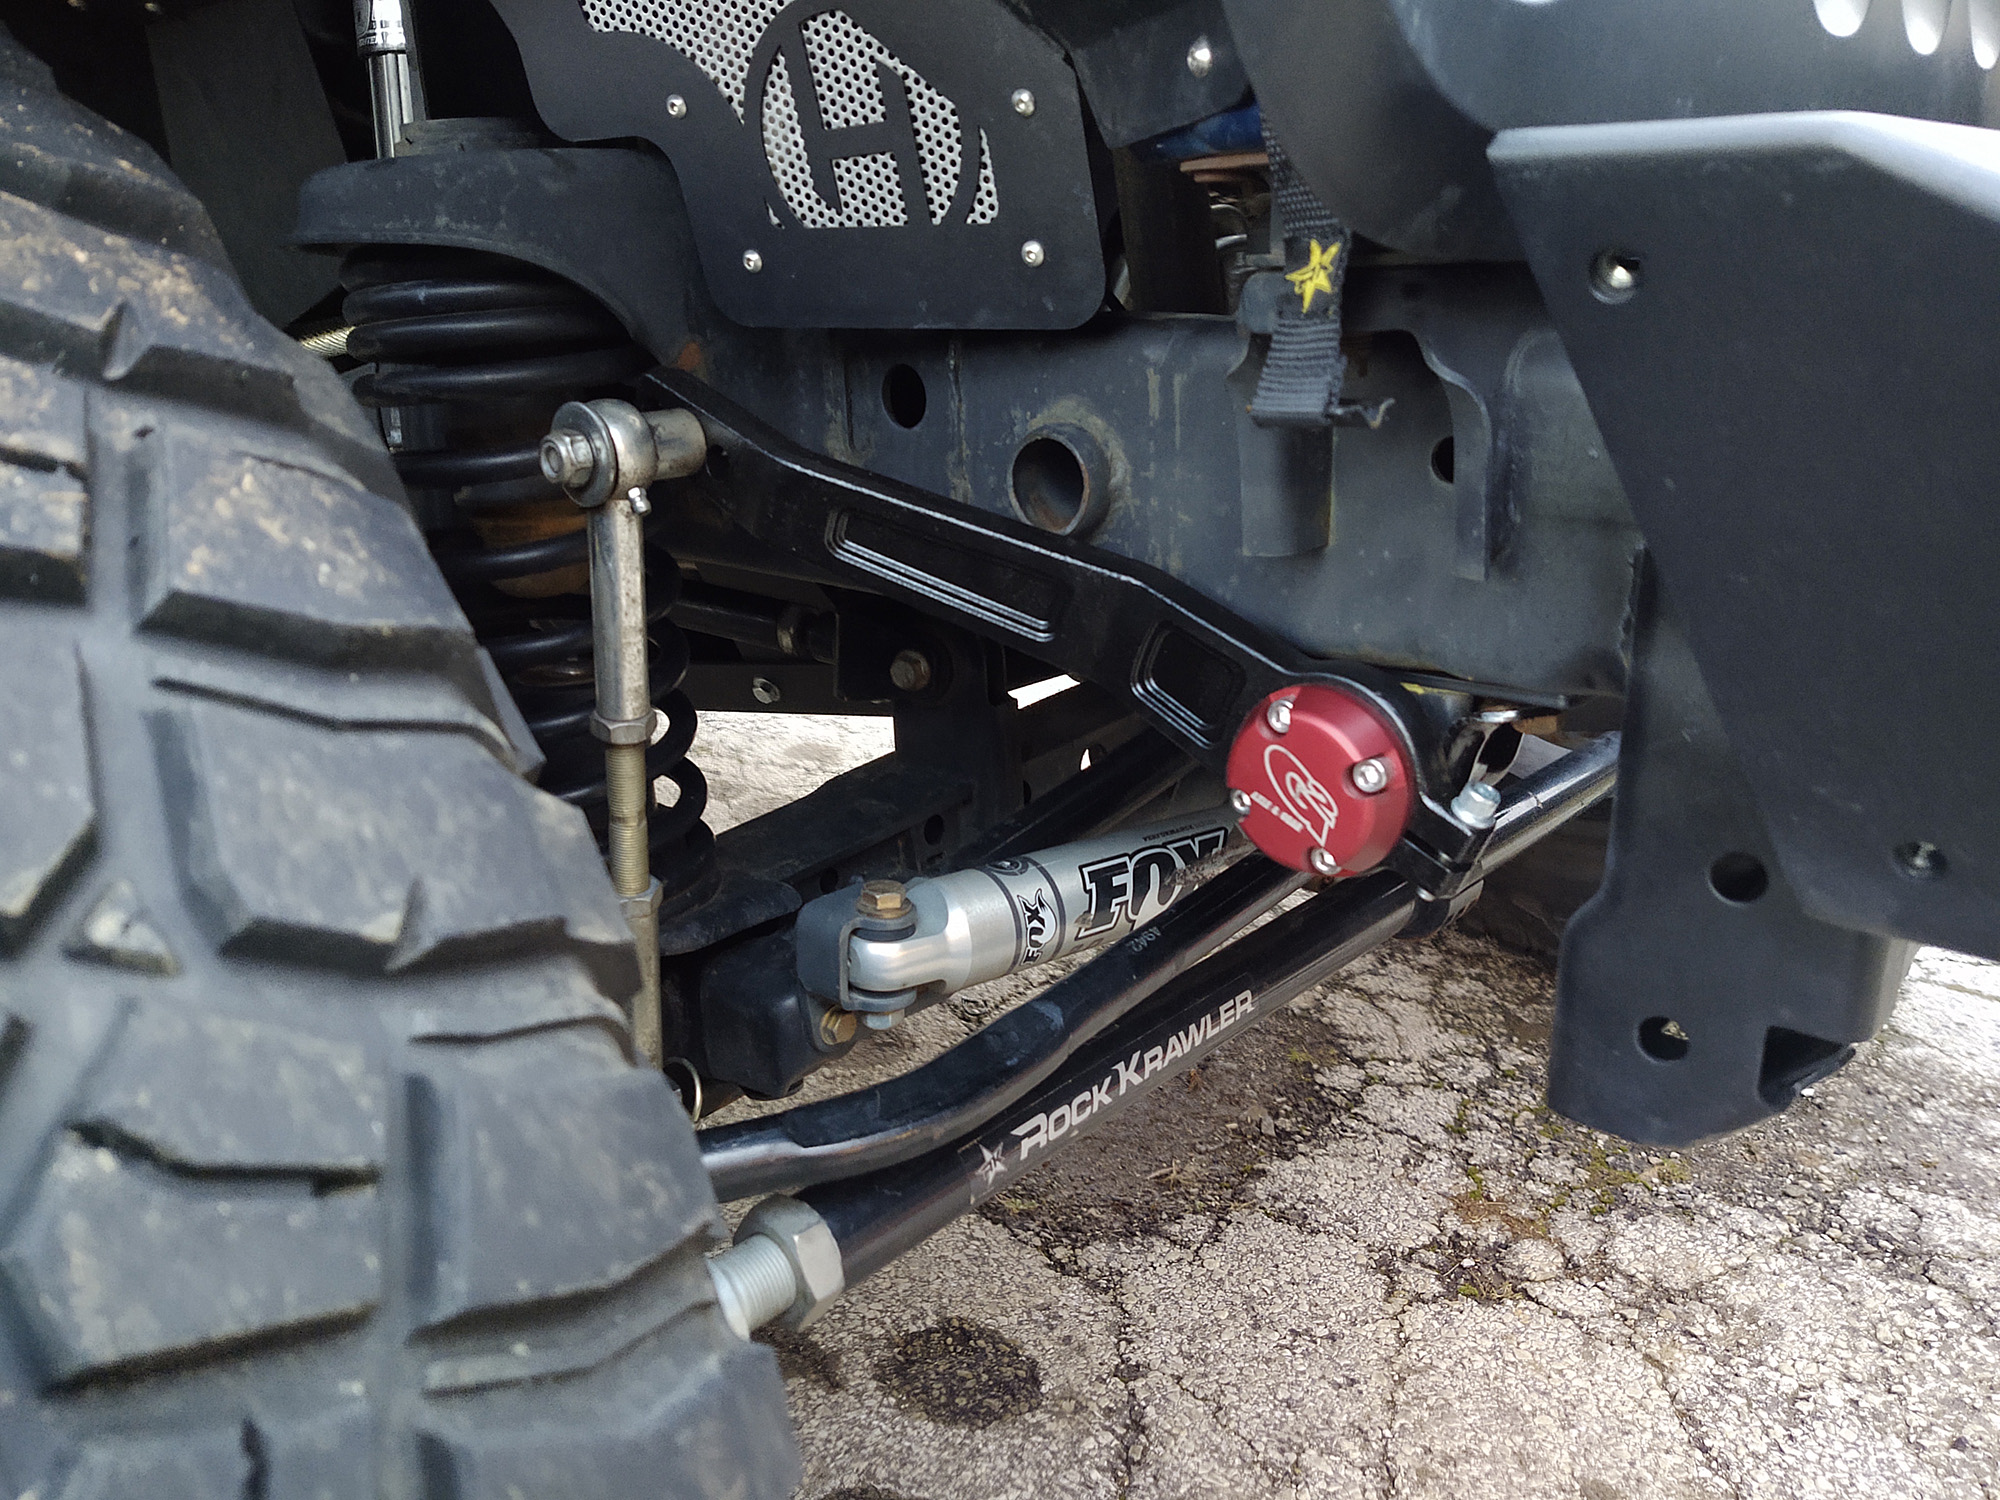
Most of this is covered in the video up higher in the article, so I won’t go into a ton of detail here. There are some rectangular shims included (top center) that I did not need in my installation. The bolts in the bag to the left are to hold the center section to the Core DRS disconnect crossmember.
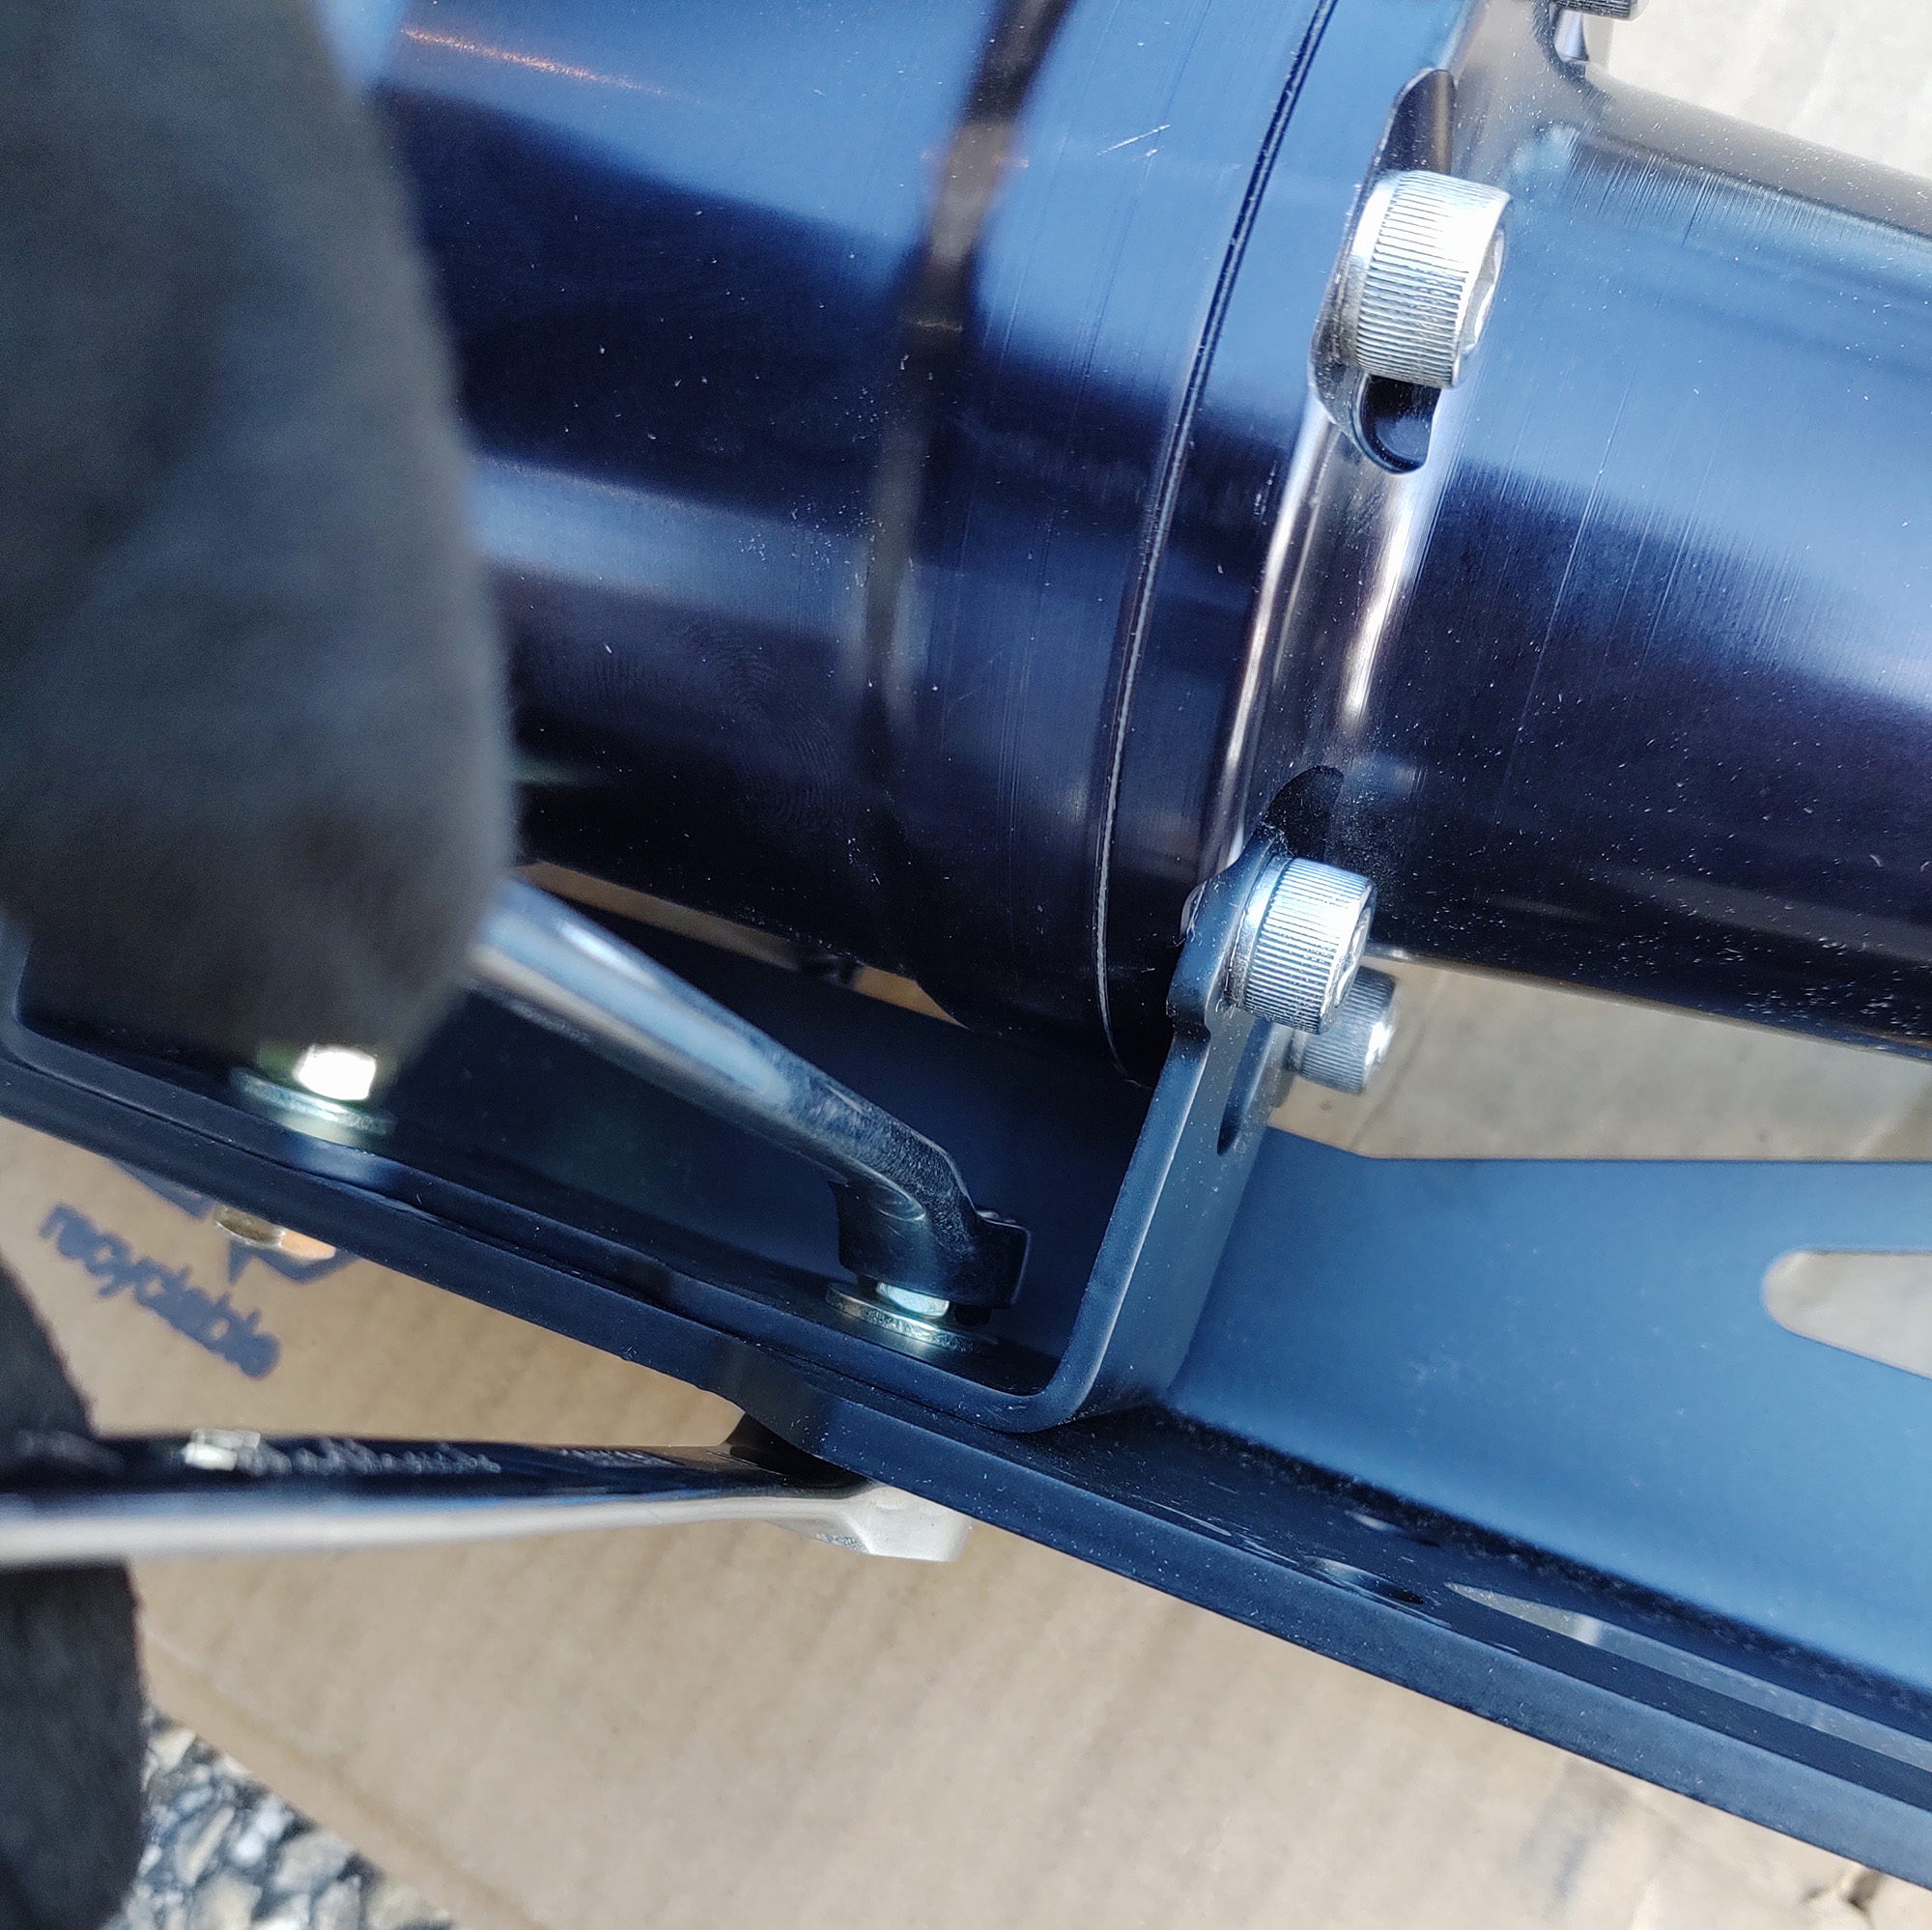
Assemble the entire arrangement out of the vehicle as detailed in the G2 instructions, and if you have adjustable length sway bar end links you can most likely leave them alone.
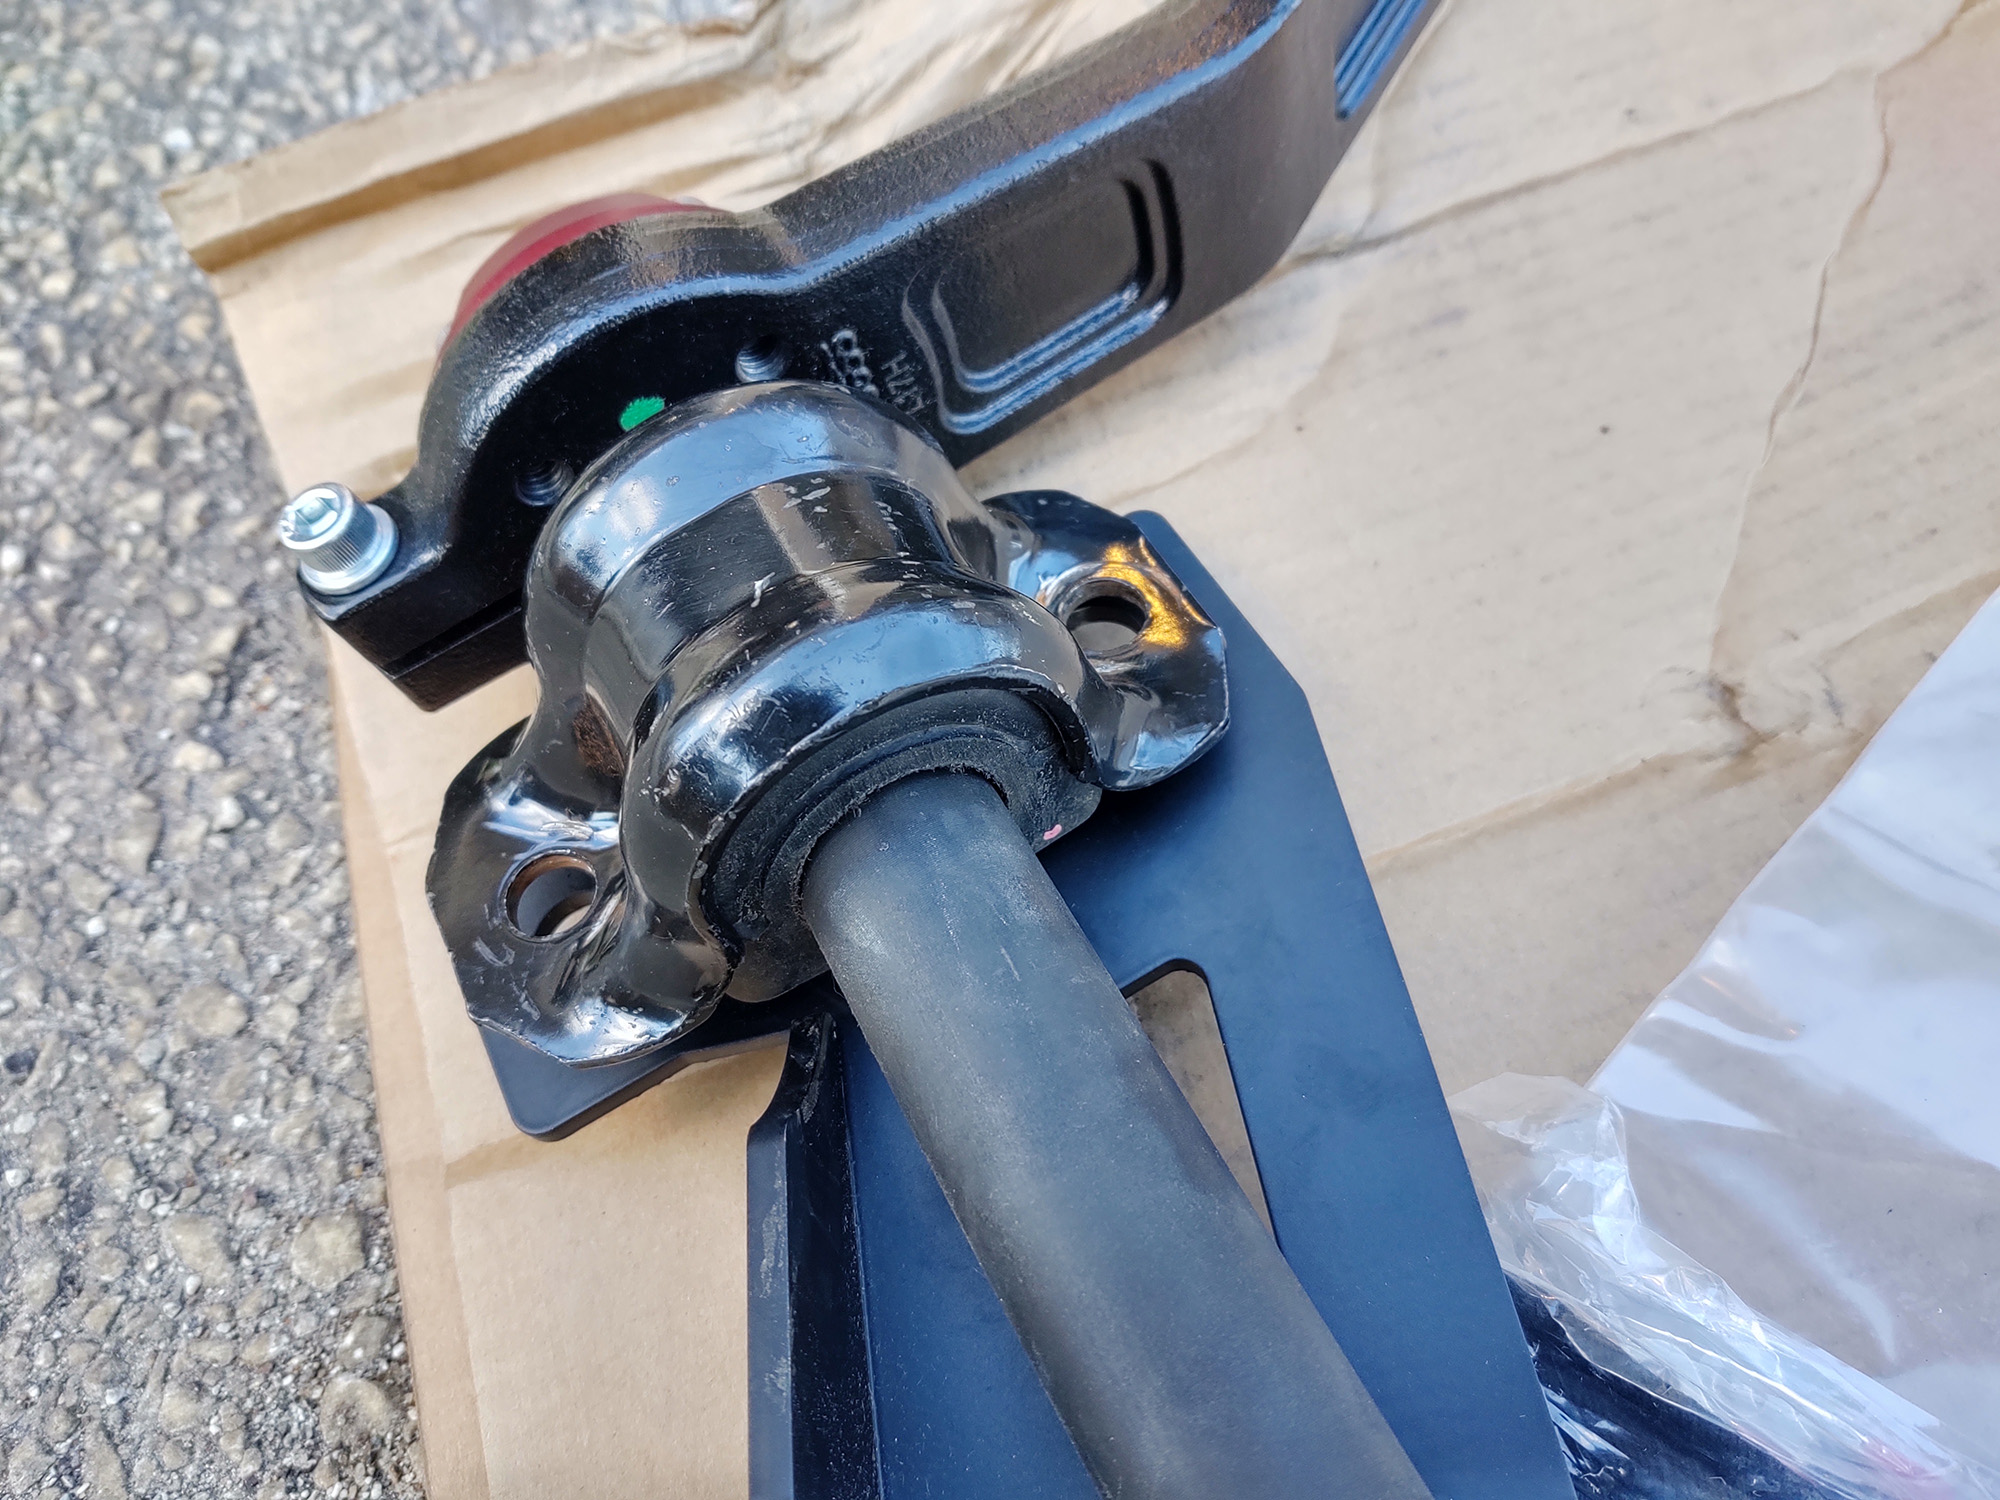
Reinstall in the vehicle using the four factory bolts that held the original sway bar in place on the frame, and reattach your sway bar end links. Make sure there is not excessive play in the connection between the sway bar arms and upper end link bolts — this was a clunk with my installation and had to be corrected by going up a bolt size and drilling out the Rock Krawler steel upper bushings that go through the bearing to accommodate. Leave one end link disconnected to test operation.
When successfully installed and torqued, route and connect the final 5mm line from the solenoid down to the actuator push fitting, and check that the sway bar is engaged by moving the disconnected arm end up and down.
Turn the regulator down to zero on the Power Tank and close the tank valve. Plug the air fitting with the safety valve into the Power Tank regulator and open the tank valve once again.
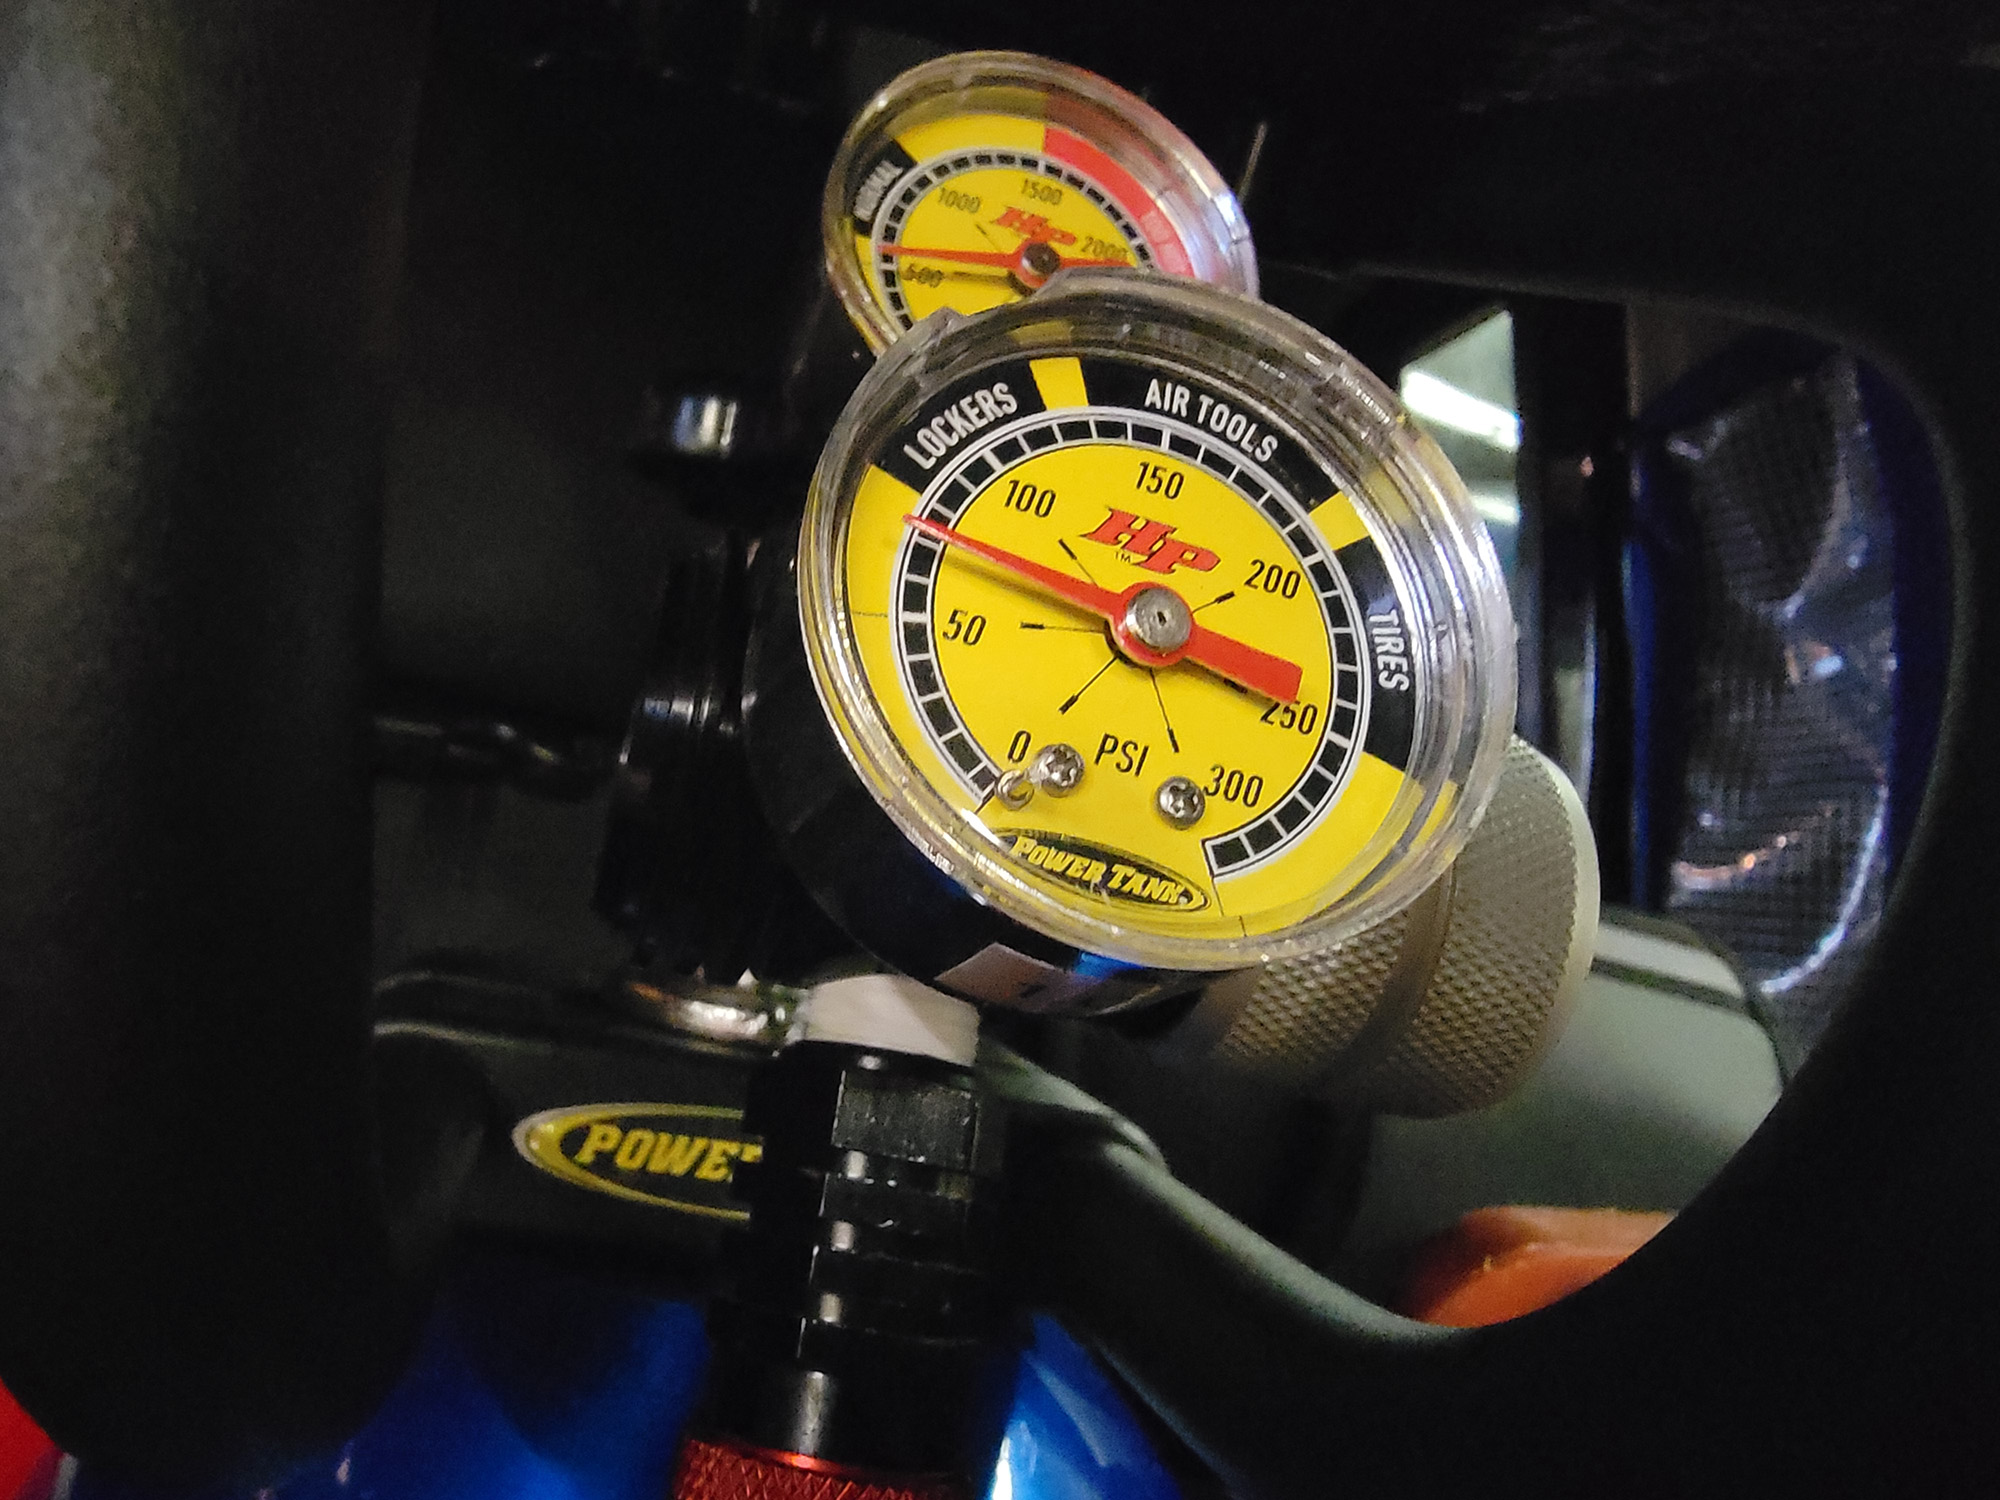
Slowly turn the knob only up to 50-60 psi. I have noticed when going above 100 psi, the vent on the bottom of the solenoid seems to leak pressure slowly — even while disengaged. This is likely why many small compressors cycle on and off while on the trail, trying to keep ARB air lockers fed. Minimum pressure to actuate the Core DRS is 40 psi.
Check for any air leaks in your fittings and correct if needed. Check that your gauge at the remote manifold is showing pressure.
If all systems are “go”, flip your switch — listen for an audible click in the solenoid. Additionally, check that your sway bar is disconnected by moving the same arm up and down.
If that seems to be operational, the you are good to go. Turn the switch back off, connect your final end link and go hit the trails.
If you would like to test for slower leaks that you might not be able to hear, turn the bottle valve and switch off, and check the manifold gauge. If you lose manifold pressure within an hour or so, test with a spray bottle containing a few drops of soapy water. Spray your fittings and watch for bubbles.
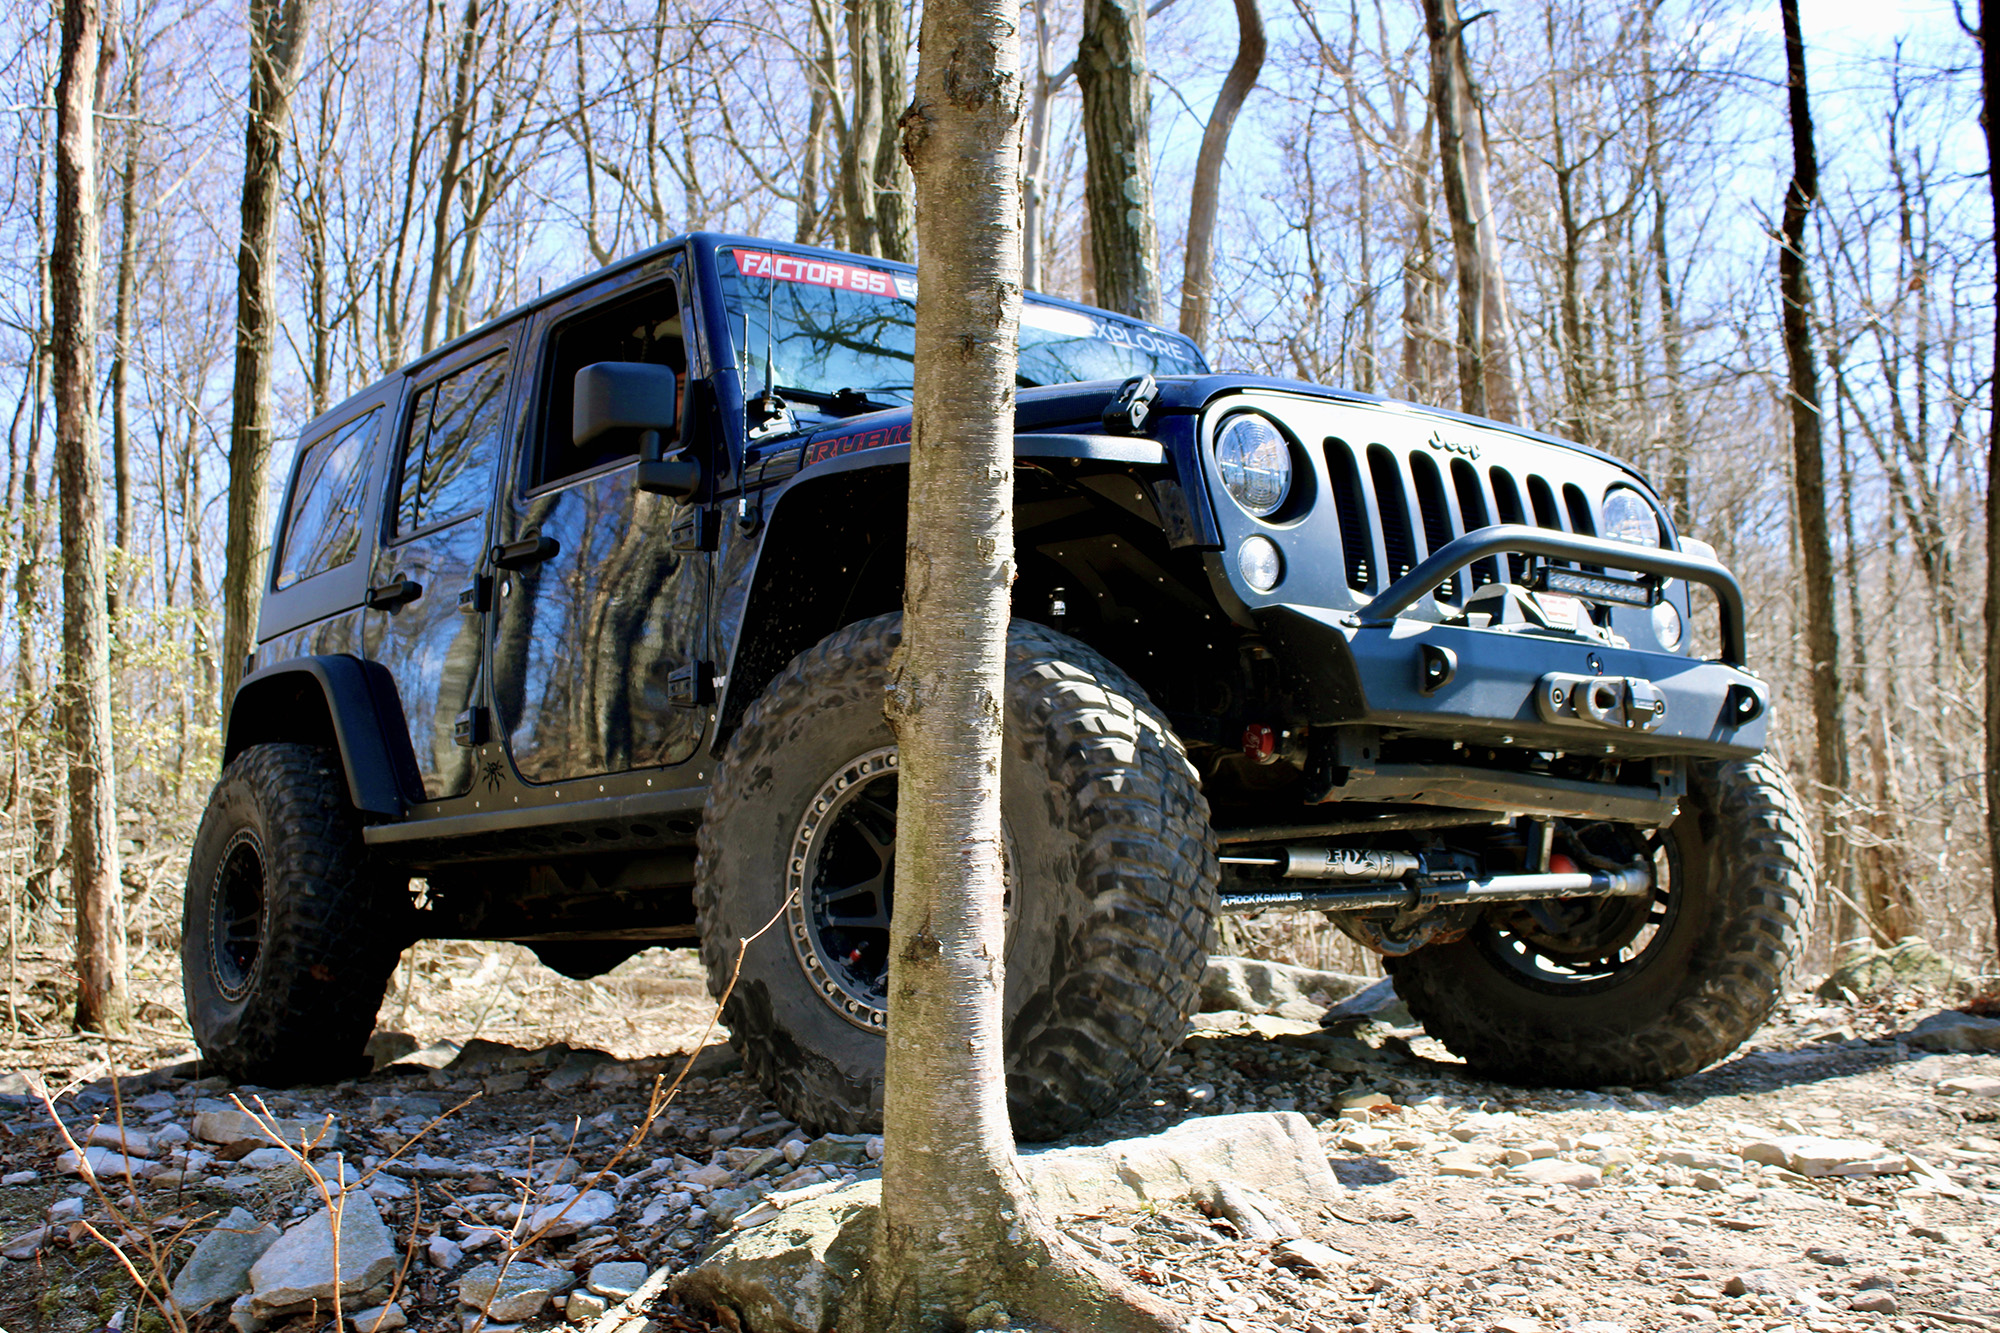
Photo Credit Alexia Pritchard of the Jeep Life Podcast Crew
Since I’ve had about a year to test this system, I’ve really been blown away by its performance. It actually controls body roll on a lifted Jeep better than the factory sway bar while engaged, and has not restricted downtravel of the suspension in the slightest while disengaged on the trail.
Supplying pressure with my Power Tank is just the icing on the cake. I couldn’t be happier and this continues to be one of my favorite upgrades on my latest project. Most modifications require some type of concession or compromise, but this one is just all around stellar.