Featuring Premium Parts from
Today's Mod Monday Upgrades a Factory Front Bumper with Heavy Duty Hyline Offroad Products.
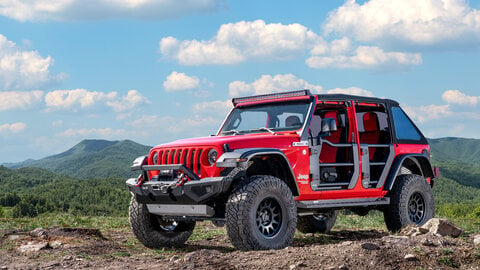
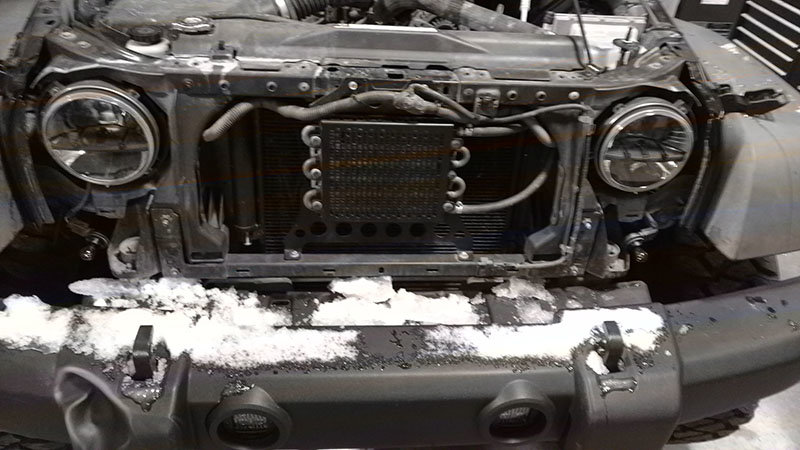
Plastic factory Jeep bumpers are definitely not designed for the rigors of off-road use. When contending with the impact of six-inch thick ice at Anthracite Outdoor Adventure Area in Coal Township, PA. earlier this year, several dents formed in my original bumper and left it looking pretty haggard.
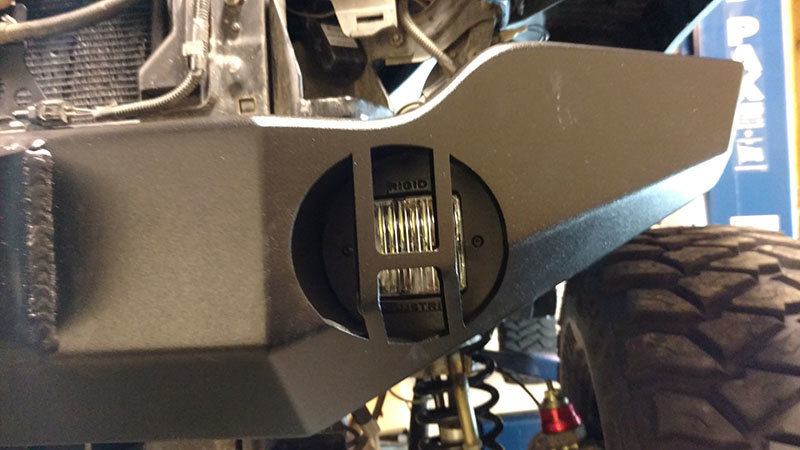
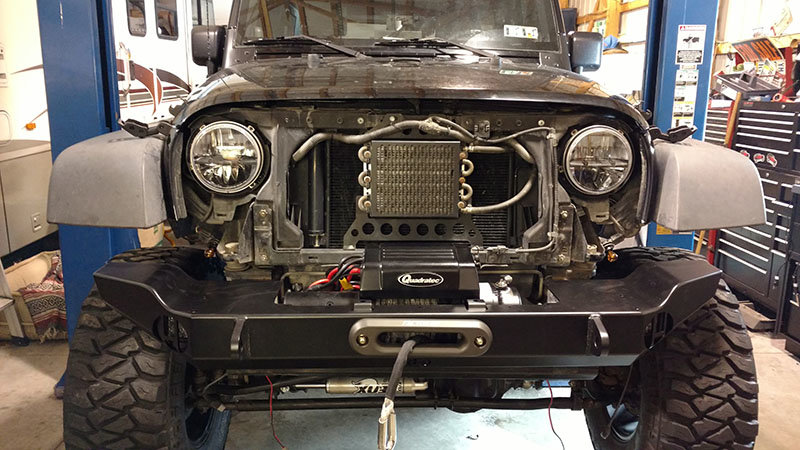
Project Snake Eyes has been deserving of a bumper upgrade for quite some time, but I was looking for a very specific set of qualities. I wanted the ability to mount a winch, but wanted it low enough in the bumper that it would not impede airflow to the Flex-A-Lite Translife Cooler I already installed. Also, since I recently added Rigid SAE Fog Lights with factory fog light adapters, I wanted to be able to use them with this new bumper as well.
I was interested in something mid-width, so the front corners would still be adequately protected, but also would gain better approach angles for obstacles. I want it to be compatible with a lower bumper skid, to protect the frame and crossmember (which was bent back an inch already so more on that later) from impacts as well as the ability to easily mount a 10” off-road light bar soon, so a grille guard bar was on the list.
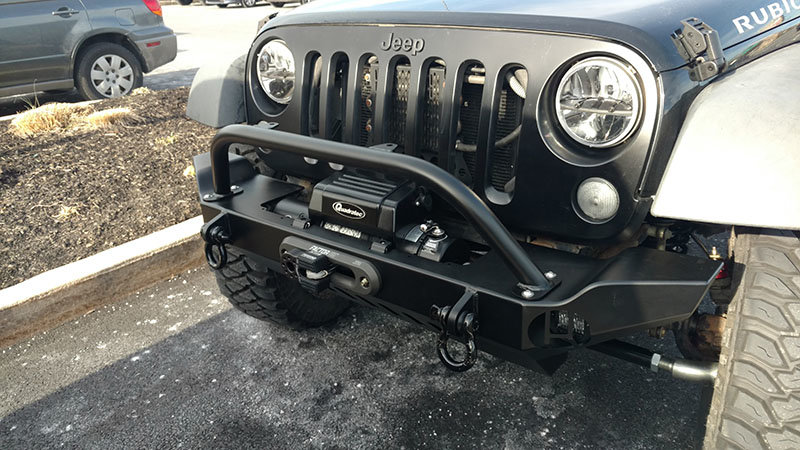
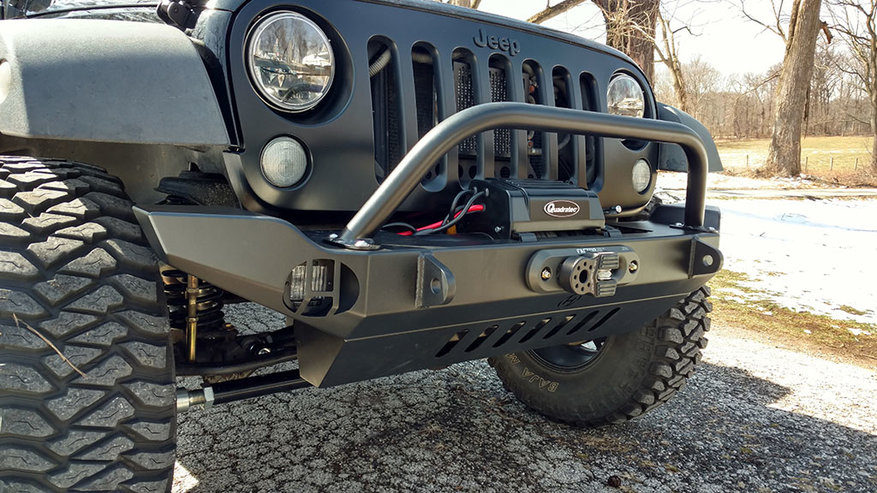
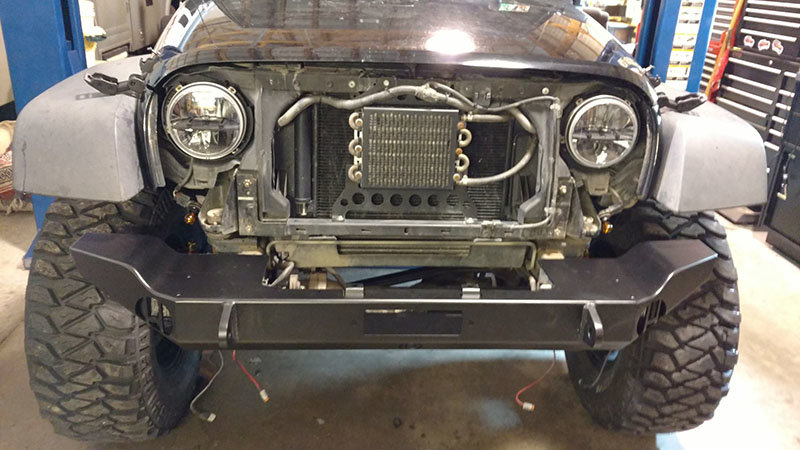
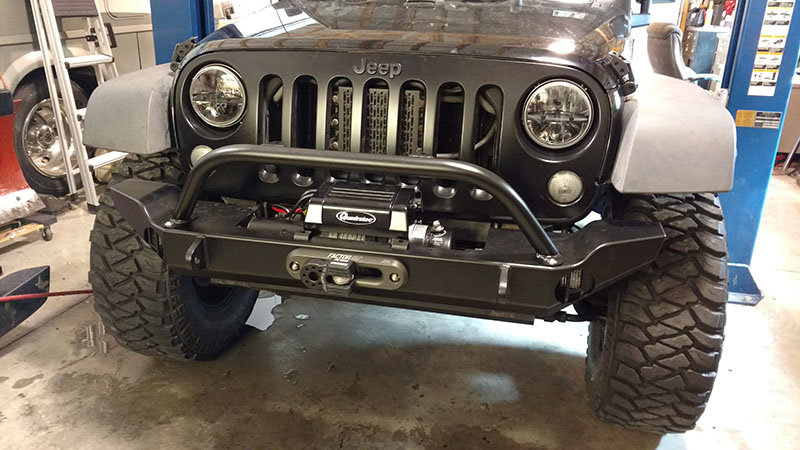
After doing a lot of research, the front bumper that best matched my requirements was the Hyline Mid Width Recessed Winch Bumper, which has the flexibility to be upgraded with their Winch Guard Light Bar and Air Dam Skid Plate.
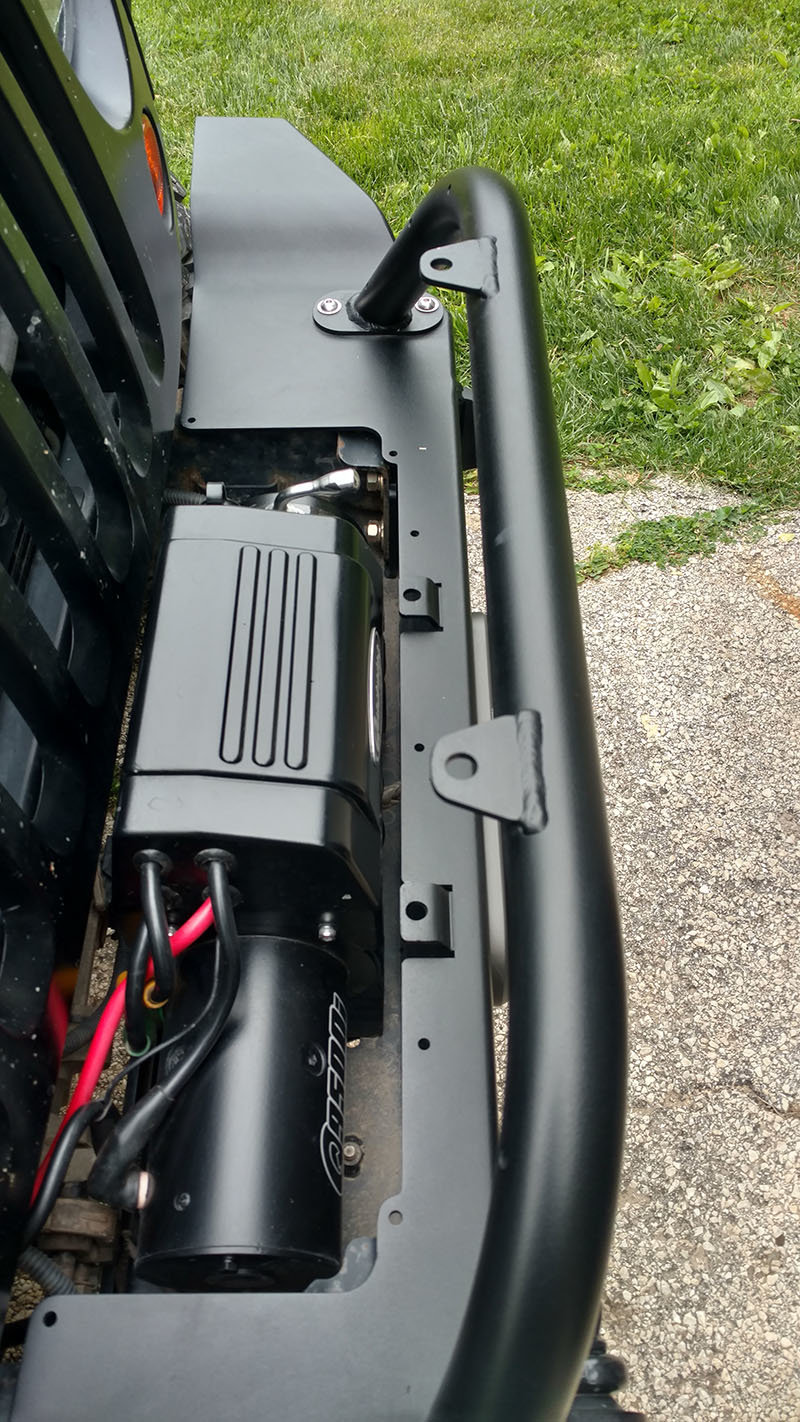
One of the biggest advantages to this bumper is the ability to install (or remove) a winch with the bumper already on your Jeep. In fact, if you aren’t adding a winch at first, this bumper even comes with a winch delete plate and stainless hardware to cover the winch tray.
Hyline Offroad’s products are 100 percent USA made, with the company’s factory based in Perkasie, PA. I took a tour recently of Hyline Offroad’s facility, and was very impressed with the quality and attention to detail of their manufacturing process. The pieces of each bumper are laser cut, and then formed by precision CNC press brakes before being welded together.
One of the biggest advantages to Hyline’s products is the care they take with the coating process.
When steel parts are cut with a laser, carbon deposits end up all over the cut surfaces. These need to be removed before coating is applied or adhesion to the edges will be poor, causing the layers of coating to (sometimes quickly) flake off. Hyline removes these deposits with an acid bath before the coating process begins, making sure the finish is as uniform and durable as possible.
After the products are thoroughly cleaned they go through a multiple stage rinse and E-Coating process. Once the E-Coat is fully baked and cured, the top coat of powder is applied to leave the bumpers with a very durable, long lasting finish. I’ve seen Hyline bumpers with five years of hard use on them that still look very new.
While the multiple stage cleaning, E-Coat and powder coat processes all increase production costs, the added coating durability in the long run is definitely well worth the additional investment. When you buy a Hyline product, you can be sure their industry leading coating process will protect it from the harsh environments of off-road use, as well as road salt used during the winter in many areas.
For an inside look on the whole 10 step cleaning and coating procedure, Quadratec produced a video on Hyline Offroad’s alternate mid-width front winch bumper, which uses a top mounted winch plate. You can see every step of their precision manufacturing process from start to finish.
In addition to this bumper, I am installing a Quadratec Q9500is Stealth Winch with Dyneema Synthetic Rope , Factor 55 Flatlink in black, and a Factor 55 Hawse Fairlead 1.0.
Required tools and supplies for Hyline Front Winch Bumper installation:
- 18mm Deep Socket
- 11/16” Deep Socket
- 11/32” Deep Socket
- 7/16” Socket
- 5/8” Socket
- Torque Wrench (for winch and bumper fastener installation)
- 10mm Socket (for winch mounting bolts)
- Tools in proper size for fairlead mounting bolts
- #2 Phillips head screwdriver
- Trim removal tool for wiring loom detachment
Note: on 2012 and up models, vacuum canister relocation may be necessary.
Required tools for Hyline Lower Air Dam Skid Plate and Winch Guard installation:
- 9/16” Socket
- 6” Extension
- 9/16” Wrench
- 7/32” Allen Wrench
- Drill with .397” or 13/32” bit
Optional or recommended:
Touch up paint spray in your Jeep’s body color
Procedure:
Start by removing the top frame cover, factory lower air dam and grille. The top fasteners of the grille are one of two types, with either a smooth plug in the center of the fastener or a phillips head screw type. Remove the centers first, and then pop the surrounding clip out of the hole with a trim tool. Turn your turn signal bulb sockets until they pop free from the lens.
The clips behind the grille in the square bar can be persuaded to release with a small pry bar if they’re stuck, but the whole grille should pop out easily with the upper fasteners removed by pulling the top towards you.
The frame cover comes off in a similar way, but the fasteners can be a bit tricky. Drill out the centers if you want to make quick work of it, this part will not be reused. Alternatively, you can use your trim tool on the underside of the frame cover by prying the entire cover up with the tool centered behind the fastener.
The air dam is simple to remove with a trim tool as well, but make sure you remove all the remnants of fasteners on the rear side, as they often break. The fit of the Hyline Offroad Air Dam Skid Plate is very precise, and these little scraps of plastic in the holes can trip you up.
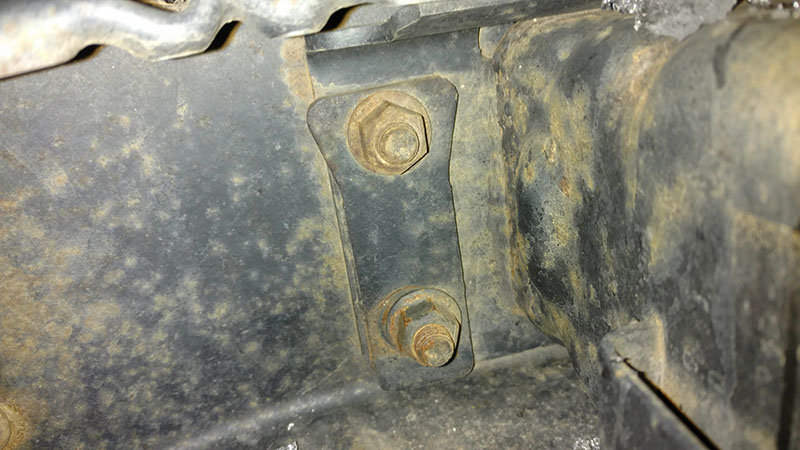
Your factory bumper is held on to the frame with four (4) 18mm nuts on both sides. These nuts can be tough to remove if they have never been off, so spraying them with penetrating oil first will save you some time.
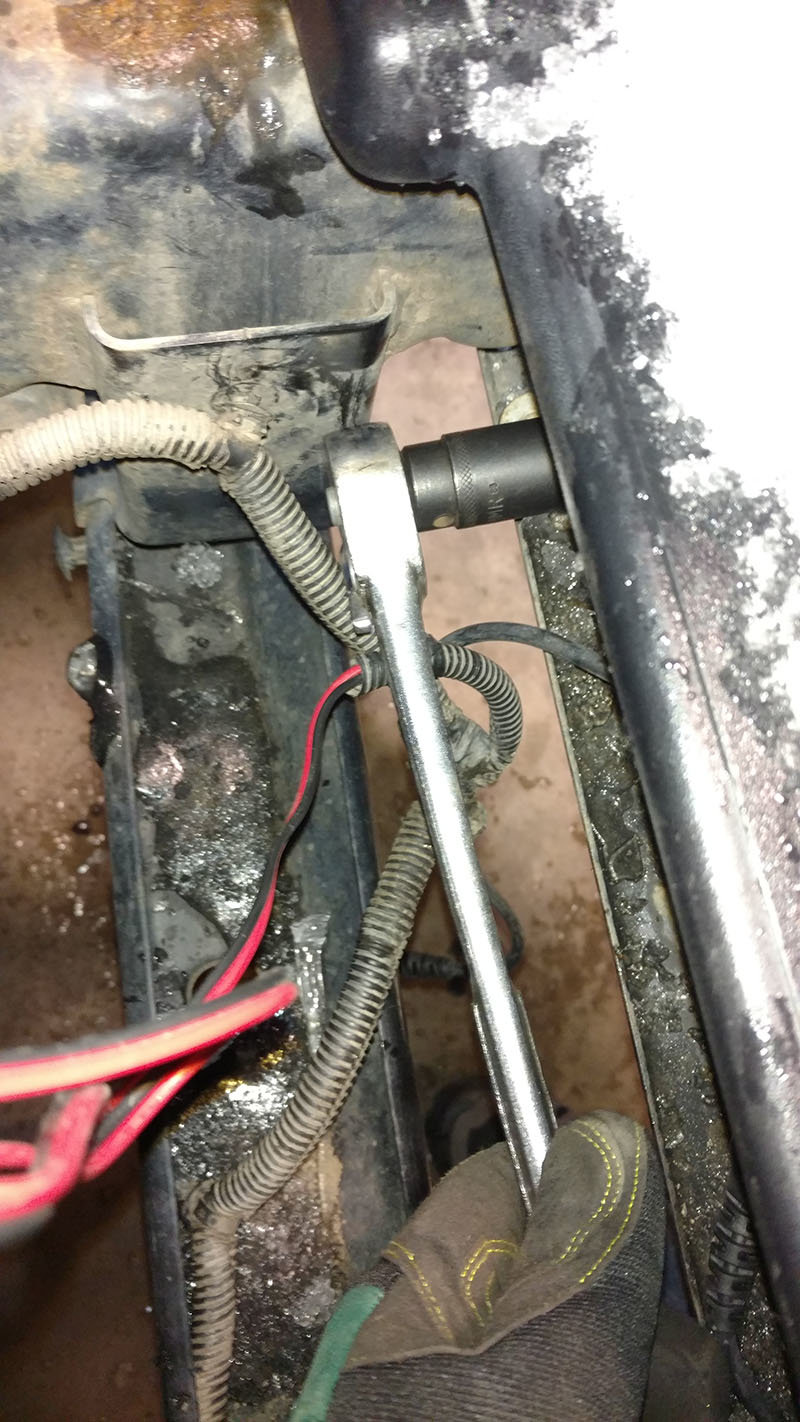
After all eight nuts and associated washers are removed, use your trim tool to separate the factory fog light harness from the rear of the bumper. Unplug your factory fog lights and make sure all wiring is clear.

Now, slide your factory bumper off the frame. Take a moment to marvel at how light the thing actually is before throwing it away for good. Remove your factory (or aftermarket) fog lights first, as you’re going to need them in a few minutes. The screws that hold the lights on will not be reused, so don’t worry about saving them.
Now is a good time to mask and paint the exposed parts of the frame, some of it will be visible with the new bumper installed. This will make your installation look much cleaner, especially on a brightly-colored Jeep with a lot of use under its belt,.
Of the many things that impress me about Hyline Offroad, one of my favorites is the care they take in packaging their products. By taking this extra care, you can trust these products will arrive in perfect condition. All parts are secured and well padded to minimize the risk of damage, and are not just banging around against each other in the box. When you think about the many hands, conveyor belts and machines used to get your heavy parts to you, this added effort is certainly appreciated.

Slide the bumper onto the frame horns while making sure nothing interferes with the fit. To keep aftermarket manufacturers on their toes, Jeep located a vacuum canister down low on 2012 and newer Wranglers.
Hyline's front bumpers are designed to work with this canister in its original location, so there won't be a clearance issue there. Depending on the winch you use, you may need a little more room in that area. With currently produced Quadratec winches, no modification should be necessary. If you are using a larger winch like a Warn Zeon, the canister may need to be relocated.
To summarize: 2012+ Wrangler, big winch, a relocation kit and some minor modification may be needed. Everyone else, no worries!
Note: During this initial test fit, verify that your fog light wiring will reach the new mounting location. This is also a good time to run additional aftermarket wiring for lighting upgrades.
One of the advantages this particular bumper provides is the ability to install a winch at a later time without having to remove the bumper from your Jeep. If you aren’t installing a winch today, a winch tray blockoff plate with stainless button head hardware is provided to cover the cavernous hole.
Remove the bumper and install your fog lights. Instead of screws, there are studs attached to the inside of the bumper that the fog light slides onto. Lock nuts and flat washers are also provided to complete the installation. To protect the finish of the bumper, I set it back down inside the shipping box while I completed these steps.
Slide the bumper back on, and install (but do not tighten) the supplied grade 8 nuts, lock washers and flat washers. You’re going to need a little wiggle room to install the rear bolts, so we will tighten these in a later step.
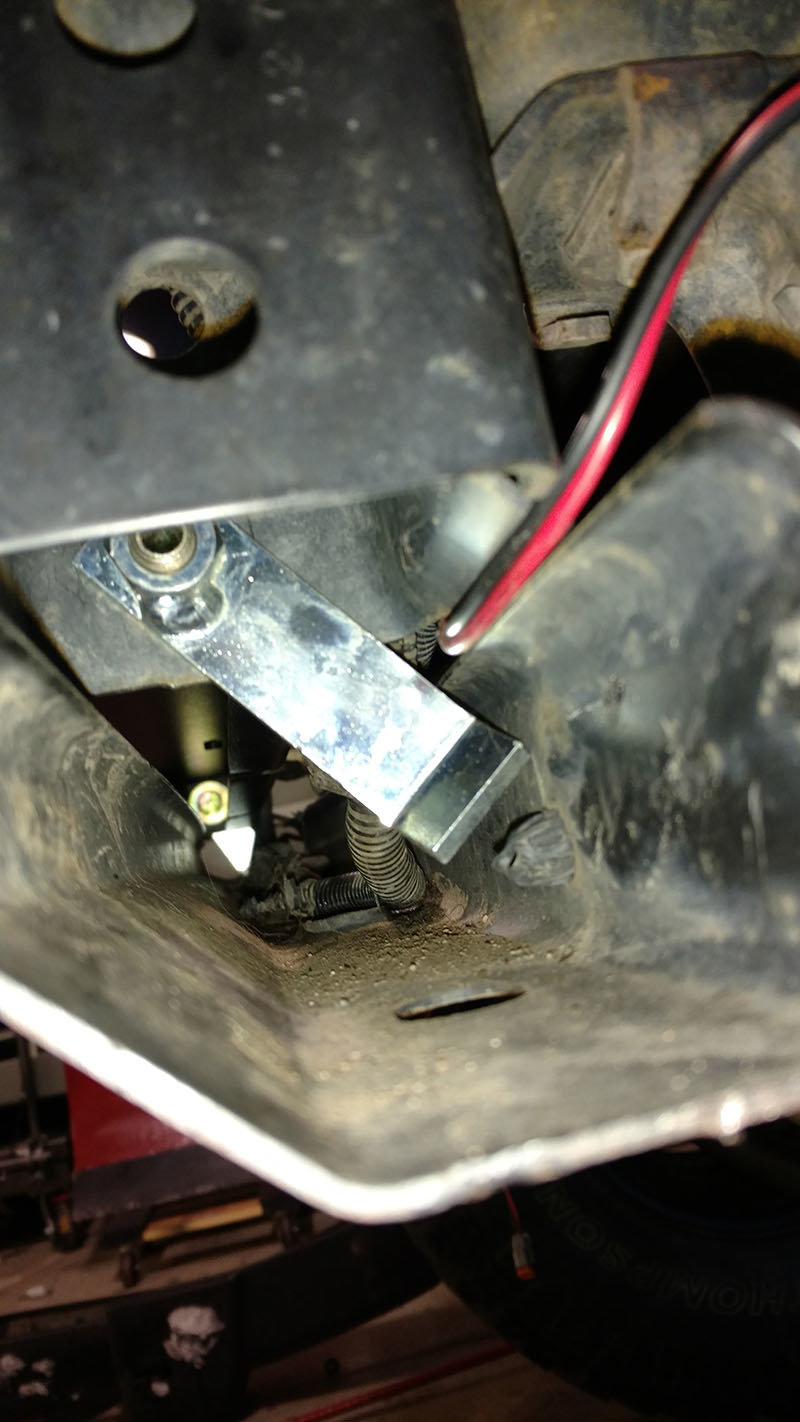

The back bolts that attach the winch plate to the frame are threaded into a weld nut tab, held inside the crash bar on the outside of the frame, and threaded in from the inside. The space is tight, but installation is a snap. A pair of needle nosed pliers to hold the tab and a second person makes this much easier. Lock and flat washers are supplied for this bolt installation as well.
Torque all mounting hardware to 78 ft/lbs using a torque wrench.
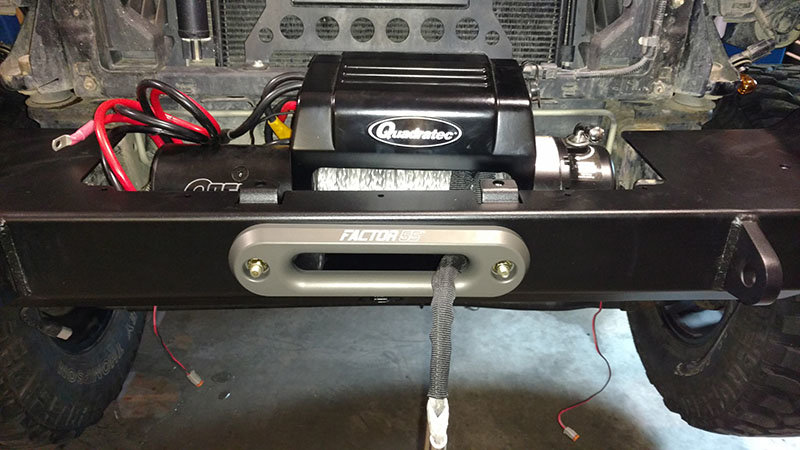
If installing a winch with the bumper, test fit to make sure no clearance issues exist. Remove winch from tray and install fairlead. Slide winch cable through fairlead and mount winch according to manufacturer’s instructions.
Hyline Offroad Winch Guard Light Bar installation:
Adding this upgrade is simple, but it has a few noteworthy features.
Four (4) included stainless steel 7/32 button head bolts and washers are all the hardware you need to install this winch guard.
In addition to the two light mounting locations on the bumper, this bar adds an additional two tabs, perfect for installing a 10” LED light bar, or individual lights.

Included in the kit are six (6) plastic wiring attachment points, to be installed in the pre-drilled holes in the bar. These allow you to run wiring behind the bar and attach it without having to run a cable tie around the bar itself, for a more hidden installation.

If you prefer a stealthy wiring installation, the bottom of the mounting plates are drilled to allow access to the inside of the bar. Drill a hole in the bar itself where the light is mounted, and another into the bumper below the mounting plate, and you can connect the wires with very low visibility from the outside. However, care should be taken to protect the edges of the drilled holes from the elements.
Hyline Offroad Air Dam Skid Plate installation:
This upgrade takes slightly longer than the winch guard light bar, but can also be added at a later time if you wish. Two bolts thread up from the underneath and are tightened using a 9/32” socket and 6” extension. Tighten them fully so you can finish the installation at the rear.
My crash bar had been bent backwards on the passenger side, most likely while off road at Rausch Creek in Tremont, PA. With a large pry bar, I was able to bend it forward enough to install the air dam skid. This also gives me a pretty good idea my offroad habits are going to put that crash bar in harm’s way, so this skid is a much-needed addition.
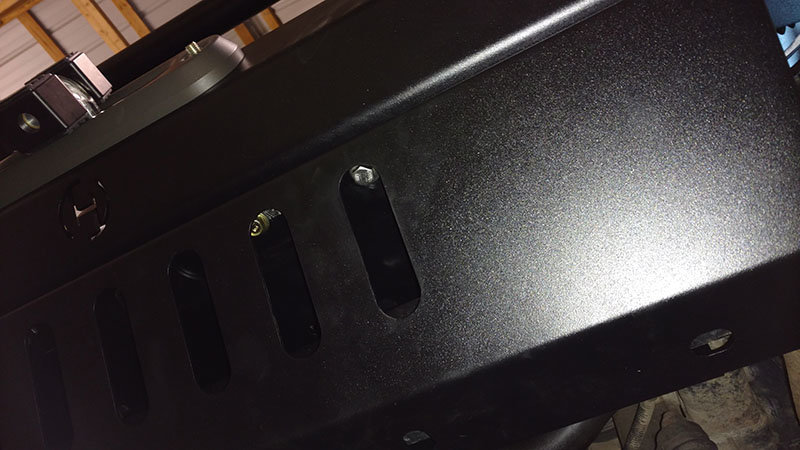
Since this part is also used with several other bumpers Hyline offers, there are two pairs of holes in the rear. The most outward holes are for mounting with non-recessed winch bumpers. Since the winch sits lower in this bumper, new holes will be drilled to add bolts and nuts to mount the rear of the air dam.
Using a drill with .397” or 13/32” bit, use the inner holes of the air dam skid as a guide.
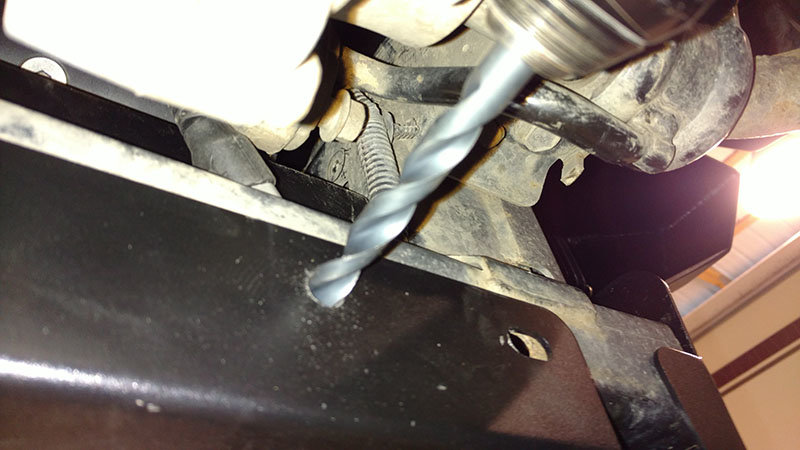
Once these are drilled, use the supplied nuts, bolts, flat and lock washers to complete the installation using a 9/16” wrench and socket. On Rubicon models, the swaybar motor needs to be pivoted out of the way by removing the 15mm bolt mounting it to the rubber hanger, to thread the passenger side bolt through the hole.
That’s it!
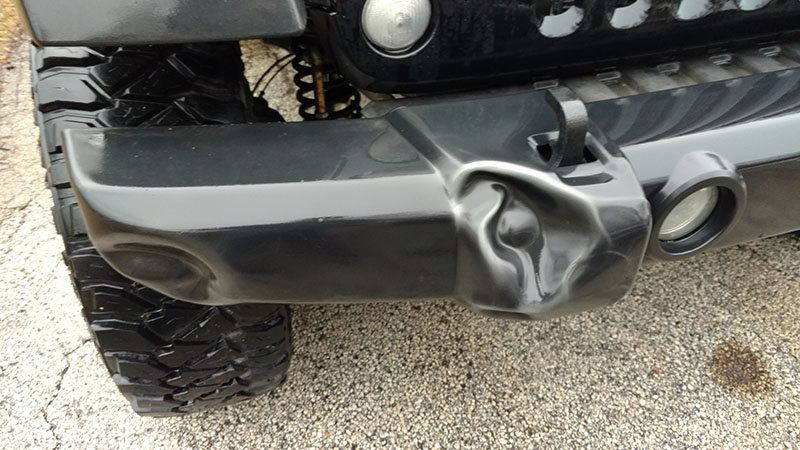
The recovery points on the front bumper are designed to accept ¾” D-rings, and Quadratec has many choices. I went with the Smittybilt black pair of D-rings, and added the Crown D-ring Spacer Isolator Bushings to keep them from moving around while I’m driving.
This bumper is extremely well made, and will absolutely hold up to the abuse I’m planning to throw at it. Stay tuned, a rear bumper upgrade and fender flares are in the works.